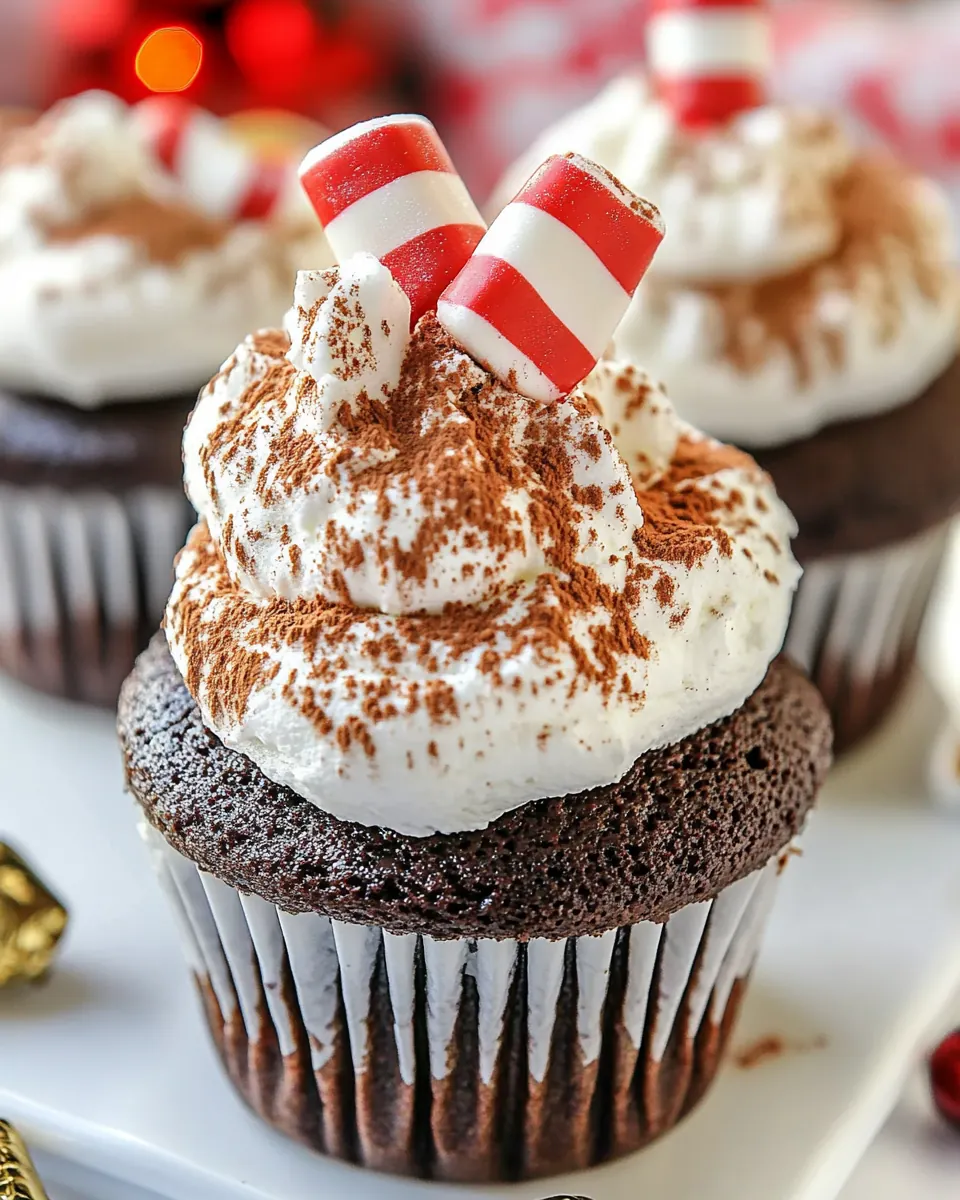
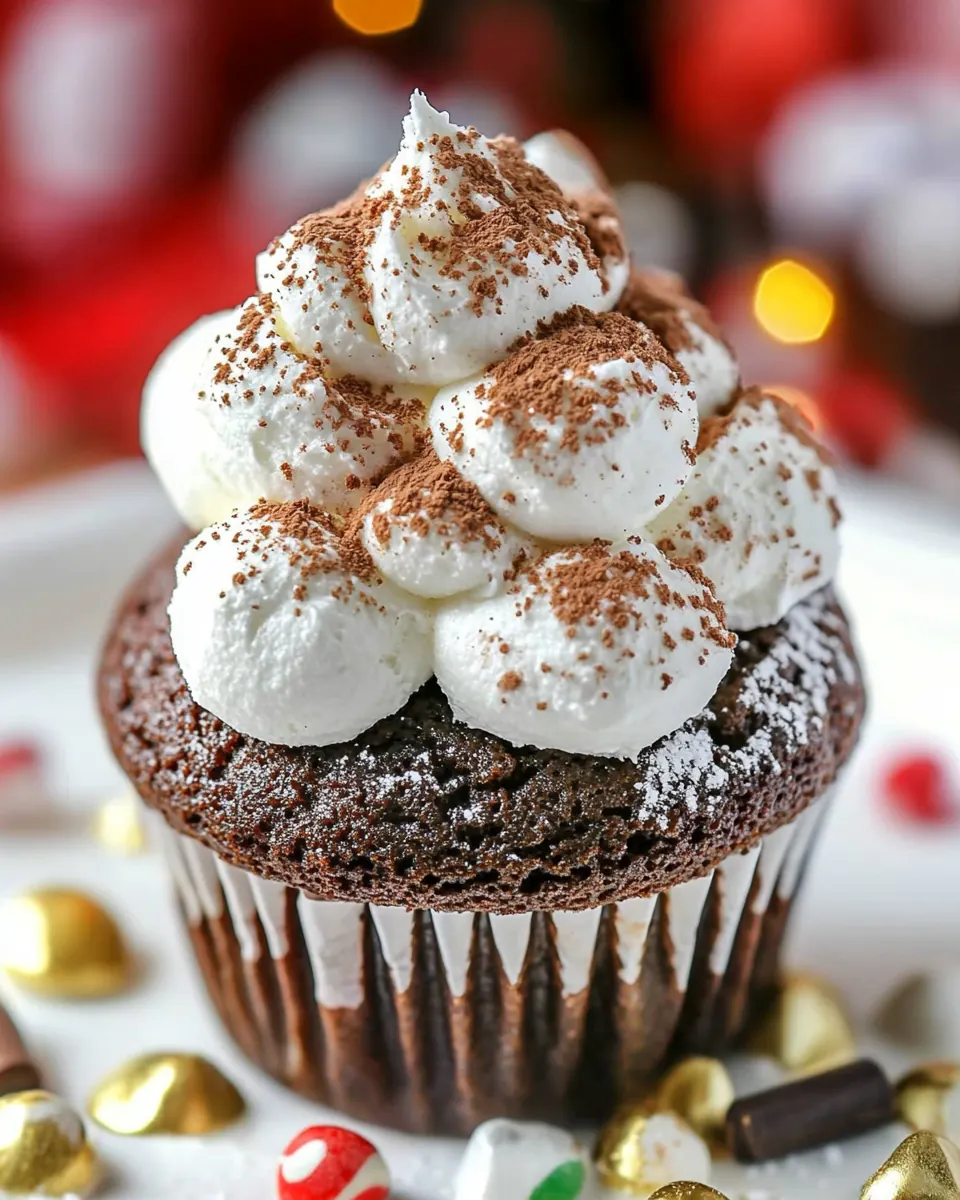
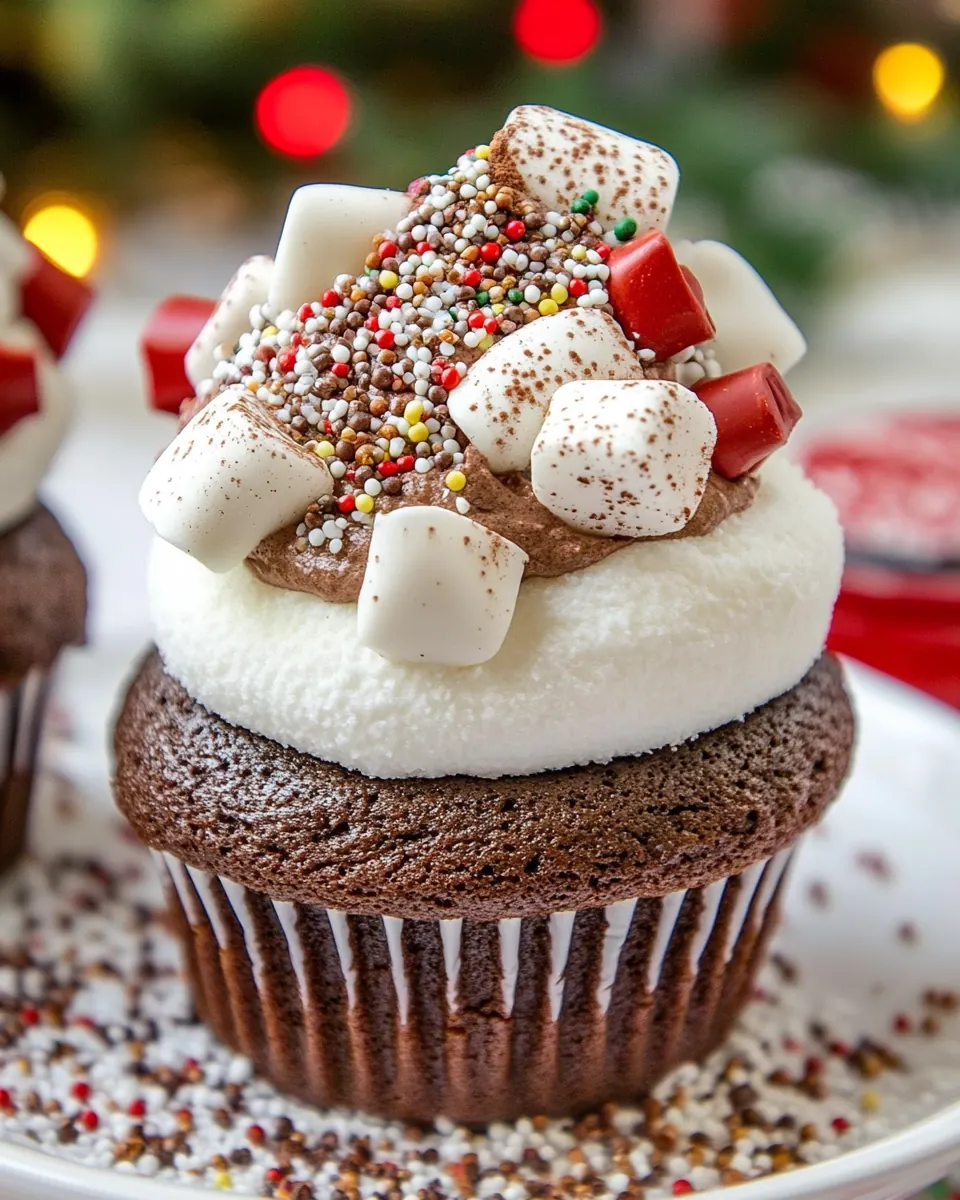
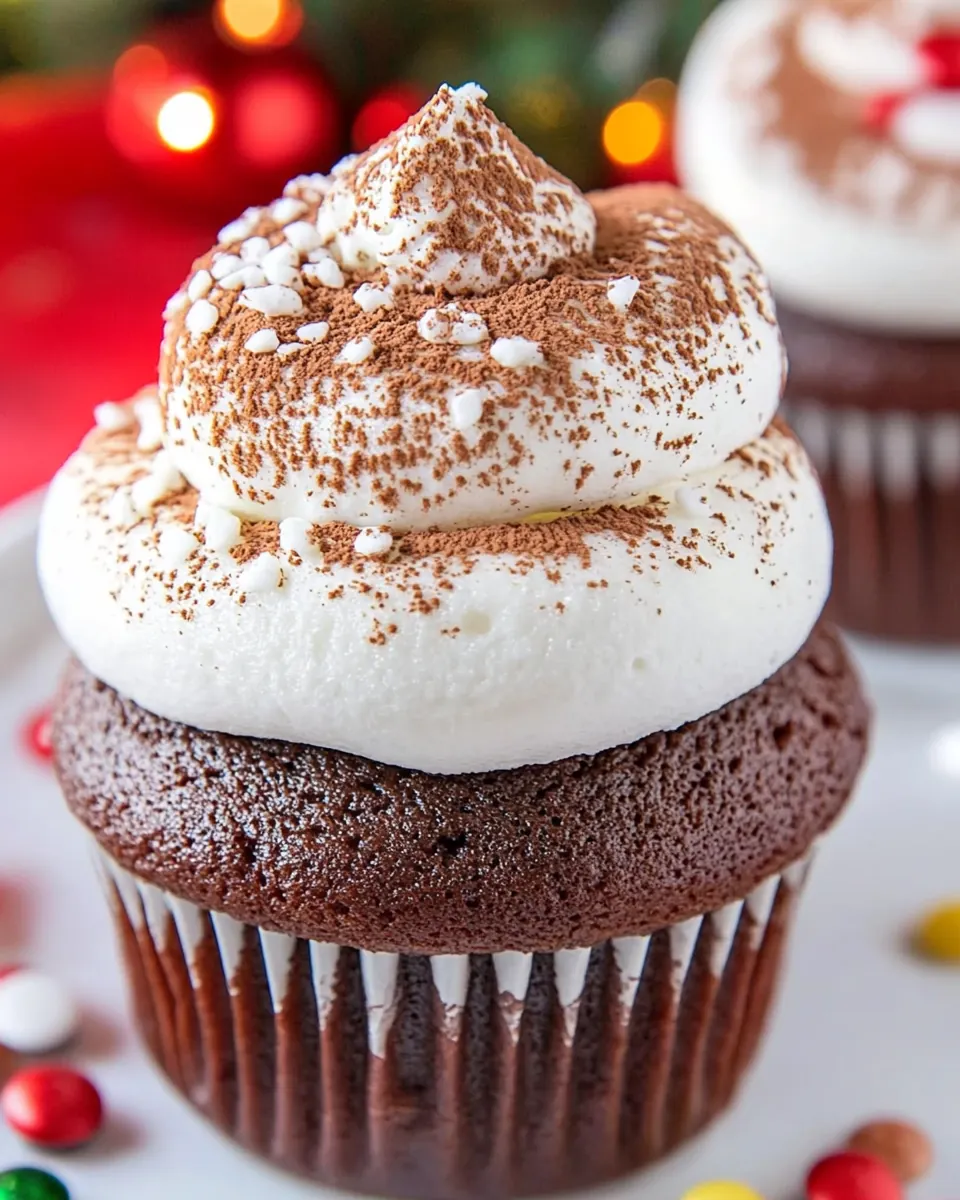
Hot Cocoa Cupcakes
Hot Cocoa Cupcakes are my favorite small indulgence when the house smells like cinnamon and a slow drizzle of cocoa hits the kitchen counter. The first time I baked these, a snowstorm trapped us indoors and I used the recipe as an excuse to experiment with layers of chocolate, coffee, and toasted marshmallow, turning an ordinary afternoon into a memorable, cozy ritual.
I remember stirring the batter while my partner stacked firewood, and how the tiny flecks of chocolate in the batter seemed to promise extra comfort. Each cupcake felt like a handcrafted mug of hot cocoa, complete with a plush frosting cloud and a warm, gooey center when you bite into it. I loved how the texture stayed tender even after chilling, and how the marshmallow topping, when toasted, added a playful crunch.
Over the years I tweaked measurements and timing so these cupcakes would be reliably moist and tall, yet not overly sweet. What started as a test batch became my go to for holiday parties, and I now make them whenever I want something that comforts like a blanket and tastes like nostalgia. You’ll notice the balance of cocoa, coffee, and sour cream gives depth, while the frosting and glaze create a layered finish that’s both elegant and approachable.
Recipe Snapshot
40 mins
20 mins
20 mins
Medium
250 kcal
American
Gluten-Free, Low FODMAP
Desserts
12-cup cupcake tin, cupcake liners, mixing bowls, handheld mixer or stand mixer, saucepan, heat proof bowl, whisk
Why This Hot Cocoa Cupcakes Is a Winner
Rich Chocolate Depth
I adore how Hot Cocoa Cupcakes deliver a deep chocolate punch without being cloying. The combination of unsweetened cocoa powder and melted semi sweet chocolate chips creates a chocolate base that tastes roasted and complex, not flat. I often tell friends that this level of chocolate comes from layering cocoa and real chopped chocolate instead of relying on a single source.
Balanced Moisture and Texture
These cupcakes stay tender because they use both oil and unsalted butter, plus sour cream, which keeps the crumb soft and slightly tangy. When I bake them, the crumb is resilient yet soft, so they hold frosting without collapsing. That texture makes them versatile for decorating, gifting, or slicing for a dessert plate.
Frosting and Finish That Elevate
I love the multi part finish on these Hot Cocoa Cupcakes. The buttercream offers creamy lift, while the quick chocolate glaze and toasted marshmallow add shine and show stopping contrast. I find guests pause at that first bite, savoring the cool frosting then the warm marshmallow top.
Easy Yet Impressive
Even though the recipe has a few components, it’s not fussy. I usually make the cupcake batter, bake, then prepare the frosting and glaze while they cool. That rhythm makes the process fun, not overwhelming. I also appreciate that the flavors are familiar, so everyone loves them, from kids to grown ups.
Holiday Friendly and Shareable
Because these cupcakes look festive with sprinkles and toasted marshmallow, they work beautifully for gatherings. I usually make a double batch for holiday parties, and they travel well in an airtight container. The balance of chocolate, coffee, and creamy frosting gives them broad appeal, so they’re frequently the first thing to disappear.
Hot Cocoa Cupcakes Shopping List
These ingredients are chosen to create a chocolate forward cupcake with a tender crumb and a creamy, stable frosting. The lineup mixes fats, leaveners, and both powdered and melted chocolate to build depth and texture. Key players like all purpose flour, unsweetened cocoa powder, and butter form the structural base, while hot coffee and sour cream add moisture and enhance chocolate flavor.
- 3 tablespoons canola oil: Provide lightness and help bind the batter while contributing a neutral fat that keeps cupcakes moist and tender during baking.
- 1 stick unsalted butter, melted and slightly cooled: Add rich buttery flavor and moisture while enriching the crumb; melted and slightly cooled to incorporate smoothly without cooking the eggs.
- 1/2 cups semi-sweet chocolate chips: Melt into the batter to create pockets of chocolate and deepen overall chocolate intensity when dispersed or partially melted during baking.
- 3/4 cup + 2 tablespoons all-purpose flour, not packed: Contribute structure and bulk to the cupcakes while providing gluten that supports rise; measured carefully to maintain proper texture.
- 1/2 teaspoon baking soda: React with acidic components to produce carbon dioxide for lift, helping cupcakes rise and become airy.
- 1 teaspoon baking powder: Offer additional leavening power to complement baking soda, ensuring an even, controlled rise and tender crumb.
- 1/2 cup unsweetened cocoa powder: Deliver concentrated chocolate flavor and dark color while intensifying cocoa essence without adding sugar.
- 1/2 teaspoons salt: Enhance overall flavor balance by amplifying sweetness and chocolate notes while controlling bitterness.
- 2 large eggs + 1 large egg yolk, at room temperature: Add richness and structure from the eggs, improving texture, stability, and emulsification for a smooth, cohesive batter.
- 1 cup granulated sugar: Provide sweetness and assist in tenderizing the crumb by interacting with fats and liquids for moist cupcakes.
- 1 teaspoon vanilla extract: Contribute aromatic depth and enhance the perception of chocolate notes while rounding out the flavor profile.
- 1/2 cup full fat sour cream: Introduce fat and tang that tenderize the crumb and react with leaveners for a moist, tender cupcake interior.
- 1/2 cup hot coffee: Supply hot liquid to bloom the cocoa, enhance chocolate flavor, and thin the batter for proper consistency.
- 3 cups confectioners sugar: Stabilize sweetness and bulk in the frosting, providing a smooth, spreadable texture and sweetness balance.
- 3/4 cup unsweetened cocoa powder: Supply deep chocolate flavor and color to the frosting while intensifying the cocoa profile for a rich topping.
- 1 stick unsalted butter, very soft: Add creamy fat that contributes to a smooth, spreadable frosting texture and helps stabilize whipped mixtures.
- 2 tablespoons sour cream: Introduce tang and a slight creaminess to the frosting, balancing sweetness and improving mouthfeel.
- 3 tablespoons whole milk or half and half: Loosen the frosting for pipeability and add dairy richness to create a silky finish.
- 1/4 teaspoons salt: Enhance and balance the frosting flavors by counteracting sweetness and rounding out the chocolate notes.
- 1 teaspoon vanilla extract: Bring aromatic complexity to the frosting and boost perceived sweetness through vanilla's flavor-enhancing properties.
- 4 ounces bittersweet chocolate, chopped into small pieces: Provide concentrated chocolate notes and a fudgy texture when melted into ganache or folded into frosting components.
- 1/2 cup heavy whipping cream: Enrich ganache with fat and create a smooth, glossy finish when heated and combined with chopped chocolate.
- 1/2 teaspoons vanilla extract: Add a delicate vanilla aroma to the ganache or frosting, rounding out chocolate flavors with floral-sweet notes.
- 1/4 cup holiday sprinkles ( but fun) (optional): Offer a festive crunchy color accent that enhances presentation and provides a playful textural contrast when sprinkled atop cupcakes.
- 12 marshmallows: Create a soft, sweet topping that melts slightly when warmed, adding nostalgic charm and extra chewiness to each cupcake.
Recipe Directions for Hot Cocoa Cupcakes
These directions guide you through each component with a calm, step by step rhythm. I like to work in series, batching tasks so the cupcakes, frosting, glaze, and final toast all come together while the previous element cools. Keep your workspace organized, and taste as you go when appropriate.
- Preheat the oven to 350 degrees (F). Line a 12-cup cupcake/muffin tin with cupcake liners and lightly spray the liners with non-stick spray (optional but it does help them peel right off).: The warm oven smell is the first signal that baking is starting, and you should notice the air filling with a faint toasty note as it reaches 350 degrees (F) . Properly prepared liners ensure the cupcakes release cleanly, and a light spray helps prevent tearing when peeling. Use this time to measure ingredients, because once the mixing starts it moves quickly. A common error is skipping liners which makes removal messy, so line and spray ahead of time.
- Melt the oil, butter, and chocolate together in the microwave, heating in 30 second increments, stirring between increments. You can also melt the oil, butter, and chocolate over very low heat on the stove top, but I find the microwave to be much easier. Whisk mixture until completely smooth and set aside to cool.: As you melt, observe how the mixture becomes glossy and velvety, with small chocolate ribbons dissolving into the melted unsalted butter and canola oil . Stirring between short bursts prevents scorching and promotes a satiny emulsion. Let it rest until it is warm rather than hot so it will blend with the eggs without cooking them. Avoid overheating which can cause graininess or separation; if that happens, whisk vigorously to reincorporate or rewarm gently.
- In a medium-sized bowl combine the flour, baking soda, baking powder, cocoa powder, and salt; stir together until thoroughly combined; set aside.: When dry ingredients are mixed, inhale the cocoa aroma and note the cocoa dust settling; this blend ensures even distribution of leaveners and salt throughout the batter. Sifting or whisking helps remove lumps and creates a uniform mixture. This step prevents pockets of rising agent which could make uneven domes. Mixing well now saves you from inconsistent crumb later.
- In a large bowl whisk together the eggs, yolk, sugar and vanilla extract; beat until smooth.: Whisking these eggs and granulated sugar creates a pale, slightly viscous base, and you will see the mixture lighten as air is incorporated. This aeration contributes to a tender crumb with gentle lift. Ensure your eggs are at room temperature for better emulsification; cold eggs inhibit volume. Over beating can make the batter too airy, which can collapse during baking.
- Add the cooled oil/butter/chocolate mixture and whisk until smooth. Add half of the flour mixture, then half of the sour cream. Repeat the process until everything is added, and be sure to mix until JUST combined. Quickly stir in the hot coffee – it's important not to over mix, here! Just stir until everything is evenly combined.: When the melted chocolate hits the egg base you will see a glossy ribbon forming, and the batter will smell profoundly of chocolate. Alternating dry ingredients with sour cream helps maintain tenderness and prevents overworking gluten. Adding the hot coffee at the end magnifies chocolate depth and thins the batter slightly, creating a silky consistency. The crucial mistake to avoid is over mixing which tightens the crumb, so stop as soon as the streaks disappear.
- Divide the batter among the 12 liners in your prepared pan. Bake for 16-18 minutes, or until a toothpick inserted in the center comes out clean. Cool completely before frosting.: As the cupcakes bake you will notice the kitchen filling with a warm, roasted chocolate scent and the cupcakes doming gently. Visual cues include set edges and a springy top when touched. Removing them too early yields a gummy center, while overbaking dries the crumb. Cool fully so the frosting does not melt into the cupcakes, which keeps the final presentation neat.
- Sift together the confectioners sugar and cocoa powder, whisking well to ensure it's bump and lump free!: Sifting creates a feather light base for the frosting, and when you whisk them together you should see a fine, even powder with a deep chocolate color. This prevents gritty frosting and ensures the cocoa integrates smoothly with softened butter . If lumps remain, press them through a fine sieve. A common mistake is skipping sifting and ending up with gritty texture.
- Using a handheld mixer OR a stand mixer fitted with the paddle attachment, beat the butter on medium-high speed until creamy; about 2 minutes. Reduce speed to low and slowly add the sifted sugar/cocoa powder, alternating with the sour cream and milk, then add the vanilla extract and salt. Once all of the ingredients have been added, increase speed to medium-high and beat the frosting until fluffy, about 2 minutes.: When properly beaten the butter will become pale and pillowy, and as you add the sifted sugar/cocoa blend it will transform into a glossy, pipe friendly frosting. Alternating in sour cream and milk ensures a silky texture without becoming runny. Beat at the end to introduce air for lightness. Avoid adding too much liquid at once, which can collapse the structure.
- Frost cooled cupcakes as desired, then top with chocolate drizzle, sprinkles, and a toasted marshmallow.: The contrast between cool, fluffy buttercream and warm, toasted marshmallow is delightful; you should hear a soft sigh when the marshmallow skin cracks and reveal a gooey inside. Apply the frosting with a spatula or piping bag for different looks, then spoon the glaze and add holiday sprinkles quickly before it sets. A frequent error is placing marshmallows too early which makes them soggy, so toast as the final step.
- Cupcakes stay fresh, stored in the fridge, in an airtight container, for up to 3 days. Bring to room temperature before serving.: Chilling firms the buttercream and helps set the glaze, and when you bring cupcakes back to room temperature the frosting softens and flavors bloom. Store them in a single layer to avoid damage to decorations. Do not leave them unrefrigerated for extended periods if the kitchen is warm, as the frosting can become unstable.
- Place chocolate in a medium-sized heat-proof bowl; set aside.: Preparing the bittersweet chocolate in a bowl readies it for a hot cream pour to create a smooth glaze. Chop chocolate uniformly so it melts at the same rate. Placing it aside allows time for the cream to reach the correct temperature. Skipping this prep can lead to uneven melting.
- In a small saucepan over medium heat, warm the heavy cream until very hot, but not boiling. Pour the hot cream over the chopped chocolate and set it aside for 2-3 minutes. Whisk the cream and chocolate completely smooth; whisk in vanilla. Allow the chocolate to cool for about 5 minutes before spooning the on the top of each frosted cupcake. Top the wet chocolate with sprinkles and a toasted marshmallow.: When you pour hot heavy whipping cream over the chopped chocolate, watch the surface become glossy as the heat melts the chocolate into a silky glaze. Waiting a few minutes before whisking prevents seizing, and whisking yields a shiny, smooth emulsion. Adding vanilla extract brightens aroma. If the glaze is too hot it can melt the frosting, so cool slightly before spooning.
- Place the marshmallows on a large baking sheet and set aside. Position one of your oven racks right below the broiler; preheat your oven to broil. Once the oven reaches the broiler setting, place marshmallows in the oven to toast.: Adding sprinkles to the wet glaze ensures they adhere and adds festive color. Toasted marshmallow placed after the glaze creates a striking focal point and delivers a warm bite above the cool frosting. Work quickly so the glaze remains tacky; if it sets too fast you may need to rewarm slightly.
- Warning: The marshmallows toast almost immediately – so stay right near the oven! Once browned, quickly remove the pan from the oven and let cool for a minute or two. Using a spatula remove the marshmallows from the pan and place one on top of each frosted cupcakes.: The broiler will brown the marshmallows in moments, producing a crackly, caramelized surface and a warm, slightly smoky aroma. Keep the oven door open a touch and stand watch because they can go from golden to burnt almost instantly. A safer alternative is a small handheld torch for direct control.
- Warning: The marshmallows toast almost immediately – so stay right near the oven! Once browned, quickly remove the pan from the oven and let cool for a minute or two. Using a spatula remove the marshmallows from the pan and place one on top of each frosted cupcakes : Listen for the faint rapid sizzling as the outer layer chars, and you will see a golden brown that signals readiness. Cool briefly so the marshmallows set but remain pliable for placing. A common mistake is leaving them under the broiler too long, producing bitter burnt edges, so watch closely.
Recipe Tips about Hot Cocoa Cupcakes
These tips come from repeated bakes and a few small disasters that taught me better technique. They will help you produce taller domes, smoother frosting, and perfectly toasted marshmallows.
- Temperature matters Ensure your eggs and butter components are at the recommended temperatures so ingredients emulsify and textures remain consistent.
- Measure carefully Spoon and level your flour, and weigh if possible, to avoid dense cupcakes; even small errors change texture dramatically.
- Alternate dry and wet When combining, alternate additions of the dry mix and sour cream to keep the batter smooth and prevent overmixing.
- Watch the broiler Toasting marshmallows is flashy but quick; stand right by the oven and use short bursts under the broiler, or use a torch for precision.
- Chill for clean slicing If you need perfectly neat cupcakes for gifting, chill briefly to firm the buttercream and glaze before transport.
- Glaze timing Spoon the chocolate glaze while still slightly warm and shiny, but not hot, so it sets glossy and does not melt the frosting.
What Complements This Hot Cocoa Cupcakes
These cupcakes are ideal for casual get togethers and holiday parties, and they pair with simple beverages and warm accompaniments. Their rich chocolate profile works with lighter sides and festive elements. Below are practical serving ideas, storage notes, and occasion suggestions to help you plan.
- Serve with warm drinks Pair the cupcakes with a mild hot tea or a decaffeinated coffee to match the chocolate without overwhelming it; the warm beverage echoes the toasty marshmallow top.
- Holiday centerpiece Arrange the cupcakes on a platter with seasonal sprinkles and extra toasted marshmallows for a festive dessert table during Christmas gatherings where they shine visually and flavor wise.
- Party portions Because the recipe yields 12 sizeable cupcakes, present them on tiered stands for buffet style service; guests can pick them up easily and they travel well in closed containers for short distances.
- Storage tips Refrigerate in an airtight container for up to three days; bring to room temperature before serving so the buttercream softens and flavors become vivid again.
- Make ahead strategy Bake the cupcakes and freeze unfrosted for up to one month, then thaw and frost on the day you plan to serve for fresher presentation and texture.
- Occasion ideas These are perfect for winter gatherings, cozy family nights, holiday cookie swaps, or as a festive treat during Christmas brunch when you want an indulgent but shareable dessert.
FAQ
Conclusion
These Hot Cocoa Cupcakes stand out because they layer deep chocolate, tender crumb, and a playful toasted marshmallow finish into a single festive treat. Try them when you want to bring warmth and a little theatrical charm to a holiday table or a cozy night in. I encourage you to experiment gently with presentation, but follow the key steps for mixing and timing to ensure consistent results. Share them with friends or keep a few for yourself, they are forgiving, crowd pleasing, and a wonderful reminder of how small rituals in the kitchen create lasting memories.

Hot Cocoa Cupcakes
Equipment
- 12-cup cupcake tin
- cupcake liners
- Mixing Bowls
- Handheld mixer or stand mixer
- Saucepan
- heat proof bowl
- Whisk
Ingredients
- 3 tablespoons canola oil Provide lightness and help bind the batter while contributing a neutral fat that keeps cupcakes moist and tender during baking.
- 1 stick unsalted butter, melted and slightly cooled Add rich buttery flavor and moisture while enriching the crumb; melted and slightly cooled to incorporate smoothly without cooking the eggs.
- 1/2 cups semi-sweet chocolate chips Melt into the batter to create pockets of chocolate and deepen overall chocolate intensity when dispersed or partially melted during baking.
- 3/4 cup + 2 tablespoons all-purpose flour, not packed Contribute structure and bulk to the cupcakes while providing gluten that supports rise; measured carefully to maintain proper texture.
- 1/2 teaspoon baking soda React with acidic components to produce carbon dioxide for lift, helping cupcakes rise and become airy.
- 1 teaspoon baking powder Offer additional leavening power to complement baking soda, ensuring an even, controlled rise and tender crumb.
- 1/2 cup unsweetened cocoa powder Deliver concentrated chocolate flavor and dark color while intensifying cocoa essence without adding sugar.
- 1/2 teaspoons salt Enhance overall flavor balance by amplifying sweetness and chocolate notes while controlling bitterness.
- 2 large eggs + 1 large egg yolk, at room temperature Add richness and structure from the eggs, improving texture, stability, and emulsification for a smooth, cohesive batter.
- 1 cup granulated sugar Provide sweetness and assist in tenderizing the crumb by interacting with fats and liquids for moist cupcakes.
- 1 teaspoon vanilla extract Contribute aromatic depth and enhance the perception of chocolate notes while rounding out the flavor profile.
- 1/2 cup full fat sour cream Introduce fat and tang that tenderize the crumb and react with leaveners for a moist, tender cupcake interior.
- 1/2 cup hot coffee Supply hot liquid to bloom the cocoa, enhance chocolate flavor, and thin the batter for proper consistency.
- 3 cups confectioners sugar Stabilize sweetness and bulk in the frosting, providing a smooth, spreadable texture and sweetness balance.
- 3/4 cup unsweetened cocoa powder Supply deep chocolate flavor and color to the frosting while intensifying the cocoa profile for a rich topping.
- 1 stick unsalted butter, very soft Add creamy fat that contributes to a smooth, spreadable frosting texture and helps stabilize whipped mixtures.
- 2 tablespoons sour cream Introduce tang and a slight creaminess to the frosting, balancing sweetness and improving mouthfeel.
- 3 tablespoons whole milk or half and half Loosen the frosting for pipeability and add dairy richness to create a silky finish.
- 1/4 teaspoons salt Enhance and balance the frosting flavors by counteracting sweetness and rounding out the chocolate notes.
- 1 teaspoon vanilla extract Bring aromatic complexity to the frosting and boost perceived sweetness through vanilla's flavor-enhancing properties.
- 4 ounces bittersweet chocolate, chopped into small pieces Provide concentrated chocolate notes and a fudgy texture when melted into ganache or folded into frosting components.
- 1/2 cup heavy whipping cream Enrich ganache with fat and create a smooth, glossy finish when heated and combined with chopped chocolate.
- 1/2 teaspoons vanilla extract Add a delicate vanilla aroma to the ganache or frosting, rounding out chocolate flavors with floral-sweet notes.
- 1/4 cup holiday sprinkles (optional but fun) Offer a festive crunchy color accent that enhances presentation and provides a playful textural contrast when sprinkled atop cupcakes.
- 12 marshmallows Create a soft, sweet topping that melts slightly when warmed, adding nostalgic charm and extra chewiness to each cupcake.
Instructions
- Preheat the oven to 350 degrees (F). Line a 12-cup cupcake/muffin tin with cupcake liners and lightly spray the liners with non-stick spray (optional but it does help them peel right off).: The warm oven smell is the first signal that baking is starting, and you should notice the air filling with a faint toasty note as it reaches 350 degrees (F) . Properly prepared liners ensure the cupcakes release cleanly, and a light spray helps prevent tearing when peeling. Use this time to measure ingredients, because once the mixing starts it moves quickly. A common error is skipping liners which makes removal messy, so line and spray ahead of time.
- Melt the oil, butter, and chocolate together in the microwave, heating in 30 second increments, stirring between increments. You can also melt the oil, butter, and chocolate over very low heat on the stove top, but I find the microwave to be much easier. Whisk mixture until completely smooth and set aside to cool.: As you melt, observe how the mixture becomes glossy and velvety, with small chocolate ribbons dissolving into the melted unsalted butter and canola oil . Stirring between short bursts prevents scorching and promotes a satiny emulsion. Let it rest until it is warm rather than hot so it will blend with the eggs without cooking them. Avoid overheating which can cause graininess or separation; if that happens, whisk vigorously to reincorporate or rewarm gently.
- In a medium-sized bowl combine the flour, baking soda, baking powder, cocoa powder, and salt; stir together until thoroughly combined; set aside.: When dry ingredients are mixed, inhale the cocoa aroma and note the cocoa dust settling; this blend ensures even distribution of leaveners and salt throughout the batter. Sifting or whisking helps remove lumps and creates a uniform mixture. This step prevents pockets of rising agent which could make uneven domes. Mixing well now saves you from inconsistent crumb later.
- In a large bowl whisk together the eggs, yolk, sugar and vanilla extract; beat until smooth.: Whisking these eggs and granulated sugar creates a pale, slightly viscous base, and you will see the mixture lighten as air is incorporated. This aeration contributes to a tender crumb with gentle lift. Ensure your eggs are at room temperature for better emulsification; cold eggs inhibit volume. Over beating can make the batter too airy, which can collapse during baking.
- Add the cooled oil/butter/chocolate mixture and whisk until smooth. Add half of the flour mixture, then half of the sour cream. Repeat the process until everything is added, and be sure to mix until JUST combined. Quickly stir in the hot coffee - it's important not to over mix, here! Just stir until everything is evenly combined.: When the melted chocolate hits the egg base you will see a glossy ribbon forming, and the batter will smell profoundly of chocolate. Alternating dry ingredients with sour cream helps maintain tenderness and prevents overworking gluten. Adding the hot coffee at the end magnifies chocolate depth and thins the batter slightly, creating a silky consistency. The crucial mistake to avoid is over mixing which tightens the crumb, so stop as soon as the streaks disappear.
- Divide the batter among the 12 liners in your prepared pan. Bake for 16-18 minutes, or until a toothpick inserted in the center comes out clean. Cool completely before frosting.: As the cupcakes bake you will notice the kitchen filling with a warm, roasted chocolate scent and the cupcakes doming gently. Visual cues include set edges and a springy top when touched. Removing them too early yields a gummy center, while overbaking dries the crumb. Cool fully so the frosting does not melt into the cupcakes, which keeps the final presentation neat.
- Sift together the confectioners sugar and cocoa powder, whisking well to ensure it's bump and lump free!: Sifting creates a feather light base for the frosting, and when you whisk them together you should see a fine, even powder with a deep chocolate color. This prevents gritty frosting and ensures the cocoa integrates smoothly with softened butter . If lumps remain, press them through a fine sieve. A common mistake is skipping sifting and ending up with gritty texture.
- Using a handheld mixer OR a stand mixer fitted with the paddle attachment, beat the butter on medium-high speed until creamy; about 2 minutes. Reduce speed to low and slowly add the sifted sugar/cocoa powder, alternating with the sour cream and milk, then add the vanilla extract and salt. Once all of the ingredients have been added, increase speed to medium-high and beat the frosting until fluffy, about 2 minutes.: When properly beaten the butter will become pale and pillowy, and as you add the sifted sugar/cocoa blend it will transform into a glossy, pipe friendly frosting. Alternating in sour cream and milk ensures a silky texture without becoming runny. Beat at the end to introduce air for lightness. Avoid adding too much liquid at once, which can collapse the structure.
- Frost cooled cupcakes as desired, then top with chocolate drizzle, sprinkles, and a toasted marshmallow.: The contrast between cool, fluffy buttercream and warm, toasted marshmallow is delightful; you should hear a soft sigh when the marshmallow skin cracks and reveal a gooey inside. Apply the frosting with a spatula or piping bag for different looks, then spoon the glaze and add holiday sprinkles quickly before it sets. A frequent error is placing marshmallows too early which makes them soggy, so toast as the final step.
- Cupcakes stay fresh, stored in the fridge, in an airtight container, for up to 3 days. Bring to room temperature before serving.: Chilling firms the buttercream and helps set the glaze, and when you bring cupcakes back to room temperature the frosting softens and flavors bloom. Store them in a single layer to avoid damage to decorations. Do not leave them unrefrigerated for extended periods if the kitchen is warm, as the frosting can become unstable.
- Place chocolate in a medium-sized heat-proof bowl; set aside.: Preparing the bittersweet chocolate in a bowl readies it for a hot cream pour to create a smooth glaze. Chop chocolate uniformly so it melts at the same rate. Placing it aside allows time for the cream to reach the correct temperature. Skipping this prep can lead to uneven melting.
- In a small saucepan over medium heat, warm the heavy cream until very hot, but not boiling. Pour the hot cream over the chopped chocolate and set it aside for 2-3 minutes. Whisk the cream and chocolate completely smooth; whisk in vanilla. Allow the chocolate to cool for about 5 minutes before spooning the on the top of each frosted cupcake. Top the wet chocolate with sprinkles and a toasted marshmallow.: When you pour hot heavy whipping cream over the chopped chocolate, watch the surface become glossy as the heat melts the chocolate into a silky glaze. Waiting a few minutes before whisking prevents seizing, and whisking yields a shiny, smooth emulsion. Adding vanilla extract brightens aroma. If the glaze is too hot it can melt the frosting, so cool slightly before spooning.
- Place the marshmallows on a large baking sheet and set aside. Position one of your oven racks right below the broiler; preheat your oven to broil. Once the oven reaches the broiler setting, place marshmallows in the oven to toast.: Adding sprinkles to the wet glaze ensures they adhere and adds festive color. Toasted marshmallow placed after the glaze creates a striking focal point and delivers a warm bite above the cool frosting. Work quickly so the glaze remains tacky; if it sets too fast you may need to rewarm slightly.
- Warning: The marshmallows toast almost immediately - so stay right near the oven! Once browned, quickly remove the pan from the oven and let cool for a minute or two. Using a spatula remove the marshmallows from the pan and place one on top of each frosted cupcakes.: The broiler will brown the marshmallows in moments, producing a crackly, caramelized surface and a warm, slightly smoky aroma. Keep the oven door open a touch and stand watch because they can go from golden to burnt almost instantly. A safer alternative is a small handheld torch for direct control.
- Warning: The marshmallows toast almost immediately - so stay right near the oven! Once browned, quickly remove the pan from the oven and let cool for a minute or two. Using a spatula remove the marshmallows from the pan and place one on top of each frosted cupcakes : Listen for the faint rapid sizzling as the outer layer chars, and you will see a golden brown that signals readiness. Cool briefly so the marshmallows set but remain pliable for placing. A common mistake is leaving them under the broiler too long, producing bitter burnt edges, so watch closely.
Notes
- Temperature matters Ensure your eggs and butter components are at the recommended temperatures so ingredients emulsify and textures remain consistent.
- Measure carefully Spoon and level your flour, and weigh if possible, to avoid dense cupcakes; even small errors change texture dramatically.
- Alternate dry and wet When combining, alternate additions of the dry mix and sour cream to keep the batter smooth and prevent overmixing.
- Watch the broiler Toasting marshmallows is flashy but quick; stand right by the oven and use short bursts under the broiler, or use a torch for precision.
- Chill for clean slicing If you need perfectly neat cupcakes for gifting, chill briefly to firm the buttercream and glaze before transport.
- Glaze timing Spoon the chocolate glaze while still slightly warm and shiny, but not hot, so it sets glossy and does not melt the frosting.