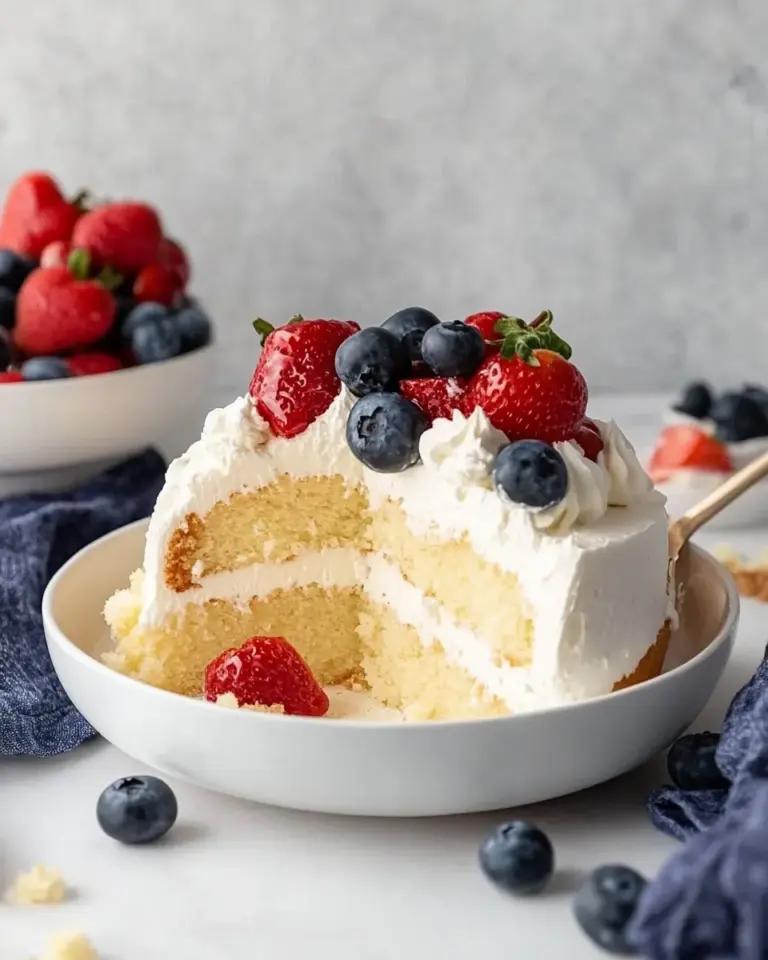
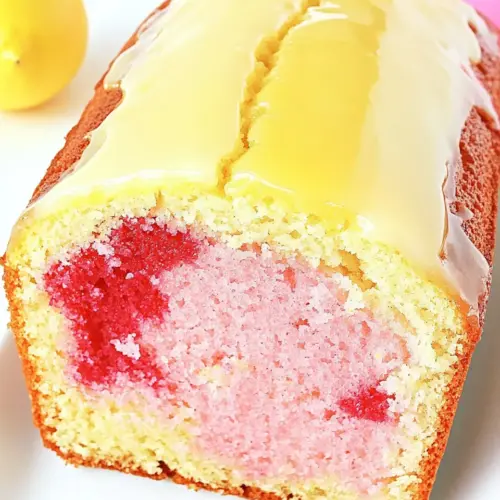
Glazed Lemon Easter Loaf Cake
Glazed Lemon Easter Loaf Cake has been my go to when I want something that looks festive without needing a pastry degree. The first time I baked this loaf I remember pulling it from the oven and feeling a rush of pride as the bright citrus scent filled the kitchen, carrying me back to a simple spring brunch with friends. I loved how easy it was to split the batter and tint two colors, it made the cake feel celebratory with very little fuss.
Over the years I’ve tweaked technique and timing, and every attempt taught me something new about texture and balance. I tend to use room temperature ingredients so the batter comes together silky smooth, and I always trust the toothpick test rather than the clock alone. Friends often ask for the recipe because the crumb stays tender and the glaze gives just the right kiss of sweetness, not cloying but lovely against the tart lemon notes.
Recipe Snapshot
1 hr 5 mins
15 mins
50 mins
Medium
300 kcal
American
Gluten-Free, Low FODMAP
Desserts
9 x 5 loaf pan, Electric mixer, Mixing bowls, Measuring cups and spoons, Spatula
Why This Glazed Lemon Easter Loaf Cake Works
Bright, approachable flavor
I adore how Glazed Lemon Easter Loaf Cake balances bright lemon with gentle sweetness. The lemon zest and fresh lemon juice give lift so the cake never tastes heavy, and the glaze deepens that citrus pop. When I serve this, guests always comment on the clean, refreshing flavor profile.
Pretty without fuss
What makes this recipe stand out is how photogenic it is with minimal effort. Coloring half the batter yellow and half pink produces a charming interior surprise. I like that you can create a festive loaf without elaborate decorating skills, just simple food coloring and a neat drizzle of glaze.
Reliable texture
I’ve found the combination of all purpose flour, baking agents, and buttermilk yields a tender, moist crumb that slices cleanly. The structure holds up to glazing and slicing, which makes serving easier, especially for gatherings where you want neat slices on a platter.
Quick to make
From mixing to the oven the process feels streamlined. I appreciate that most steps are hands on but straightforward, so you can chat with company as the loaf bakes. The glaze comes together in moments, and glazing is forgiving, which is great if you are multitasking.
Adaptable and festive
This loaf is a small canvas. I often nudge the color intensity, try different plating styles, or make single color versions for everyday tea. The basic method stays the same, so it’s a versatile recipe you’ll return to for spring gatherings and special mornings.
Main Ingredients for Glazed Lemon Easter Loaf Cake
These ingredients form a classic pound cake like base brightened with citrus. The interplay between the fats, dairy, and leaveners gives tenderness and lift, while the lemon components provide aromatic freshness. Below you’ll find each item from the recipe with a short note on its role and why I trust it here.
- 2 cup all-purpose flour: Provide structure and texture to the loaf by forming the bulk of the batter; sift or whisk to remove lumps and ensure even mixing for a tender crumb.
- 1 and 1/2 teaspoon baking powder: Leaven the cake by releasing gases during baking to help the loaf rise; measure accurately to maintain proper crumb and avoid collapse.
- 1/2 teaspoon baking soda: Tenderize and contribute to leavening by reacting with acidic components in the batter; distribute evenly to prevent pockets of flavor.
- 1/2 teaspoons salt: Enhance overall flavor balance and strengthen gluten control by moderating sweetness and boosting other flavors; dissolve thoroughly for uniform seasoning.
- 1/2 cup unsalted butter softened: Add richness and moisture while contributing to a soft, tender crumb; cream with sugar to incorporate air and improve rise and texture.
- 3/4 cup granulated sugar: Sweeten the cake while promoting browning and aiding in creaming for a lighter crumb; combine with butter until fluffy for better volume.
- 2 large eggs: Bind ingredients, add moisture, and provide structure through coagulation when heated; whisk or beat slightly before adding for even incorporation.
- 1/2 teaspoon pure vanilla extract: Impart subtle aromatic sweetness and deepen overall flavor; add to batter for complexity and to complement citrus notes.
- 3/4 cup buttermilk: Contribute moisture and a slight tang that reacts with leaveners to create lift; keep cold or room temperature as specified to maintain emulsion.
- 1 tablespoon lemon zest: Brighten the loaf with concentrated citrus oils for intense lemon aroma; finely grate to avoid bitter pith and sprinkle into batter for flavor bursts.
- 1 tablespoon freshly squeezed lemon juice: Provide fresh, bright acidity that enhances lemon flavor and reacts with baking soda; strain if desired to remove seeds before adding to batter.
- food coloring (yellow pink) (optional): Offer optional tinting for a festive appearance; add sparingly to avoid altering batter consistency while achieving desired pastel hues.
- 3 tablespoons powdered sugar divided: Sweeten and thicken glazes or finishes while bringing smoothness; divide as indicated to adjust consistency in multiple uses.
- 3 teaspoons milk divided: Adjust glaze or icing consistency and help dissolve powdered sugar; add gradually to reach a smooth, pourable texture for finishing.
- food coloring (optional): Allow for additional optional tinting of glaze or decoration to achieve precise color intensity; use very small amounts to avoid flavor alteration.
Making This Glazed Lemon Easter Loaf Cake

I like to approach the method calmly, setting ingredients and tools out before starting. The steps below recreate my usual workflow, with notes to help you sense when things are right and avoid common pitfalls. Keep your mixers and pans ready so the process flows without rush.
- Preheat oven to 350 degrees F.: The oven smell when it reaches 350 degrees F is the first cue that the bake will behave predictably. You'll notice a steady warm draft when you open the oven, and the air should feel dry and even. Preheating ensures the loaf begins to rise immediately, creating lift instead of a dense center. A common mistake is under-preheating, which can cause uneven rising and a gummy crumb. If your oven runs hot or cold, use an oven thermometer to confirm the temperature.
- Butter and flour 9" x 5" loaf pan. Set aside.: Rubbing softened butter around the pan and dusting with flour creates a release barrier and promotes even browning. You'll feel the pan turn slightly slick as you coat it, and visually you should see a thin, even dusting on the interior. This step matters because sticking can tear slices and wreck presentation. The usual slip up is using too much flour which leaves clumps, so tap out excess before filling.
- In a large mixing bowl, whisk together dry ingredients (flour, baking powder, baking soda and salt). Set aside.: As you whisk, you'll hear a light rustling and see the powders homogenize to a uniform color. This ensures the baking powder and baking soda are evenly distributed so the loaf rises consistently. It also prevents pockets of salt or leavener that could leave unpleasant tastes. A mistake here is skipping the whisk, which can cause uneven texture and lumpy pockets after baking.
- In a large mixing bowl, cream butter with electric mixer for 30 seconds. Gradually add sugar, beating for 3 to 4 minutes until light and fluffy.: When you cream butter and sugar , listen for a soft whir that turns into a smoother, higher pitched sound as air is incorporated. The mixture should lighten in color and become airy, which you can feel if you lift the paddle and see peaks that hold a loose shape. This aeration helps with a tender crumb and rise. A common error is undercreaming or using too-warm butter, which makes the batter greasy and prone to collapse.
- Add eggs, one at a time, mixing well after each addition. Add vanilla and mix well. Add lemon zest and mix well.: Adding eggs slowly helps the batter emulsify, creating a cohesive, smooth texture. You'll notice the batter go from grainy to silky as each egg incorporates. Stirring in vanilla and lemon zest releases aromatics that perfume the batter. If you add eggs too quickly or when butter is too cold, the mixture may curdle, leading to uneven crumb. If curdling occurs, a brief slow beat until smooth usually rescues it.
- Alternating with buttermilk and lemon juice, add the dry ingredients to butter mixture in 3 additions, mixing well after each.: Alternating allows the batter to accept liquids without overworking gluten. As you fold, the batter should look smooth and slightly thick, with ribbons that fall slowly. The buttermilk keeps the loaf tender while the lemon juice brightens the flavor and activates the leaveners. Overmixing at this stage develops gluten and makes the loaf tough, so mix just until combined after each addition.
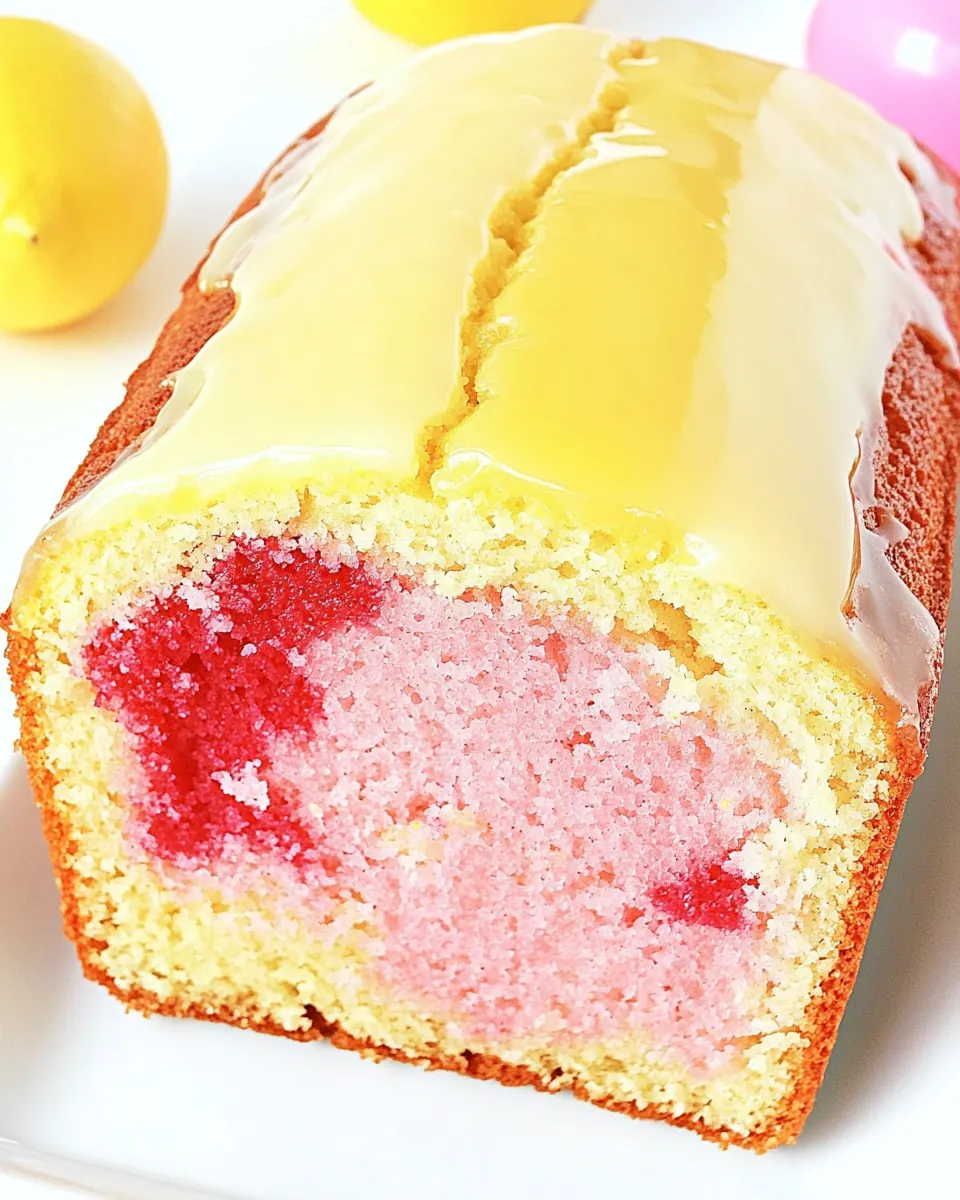
- Pour half of the batter into bowl you had flour mixture in (saving on dishes here). Add yellow food coloring, two drops at a time to get desired shade. Remember, the color will be stronger after baking.: The batter takes on a glossy sheen as you stir in the food coloring . Two drops at a time helps you dial in the hue so you do not oversaturate. Watch the texture remain smooth and creamy; if it appears watery you may have added color with a liquid base that thinned the batter, so proceed cautiously. Overcoloring can also stain utensils and hands, so gloves or careful wiping helps.
- Add pink food coloring to the second batter, repeat as with the yellow batter.: Mixing in the pink produces a soft pastel when done with restraint. Stir until evenly colored and check under warm light to see the true tone. The batter should keep the same viscosity as the yellow portion; if it gets too runny, pause and avoid adding more liquid coloring. A common oversight is assuming more color is better, which risks altering bake performance and final texture.
- Pour pink batter into prepared loaf pan. Spread evenly. Pour yellow batter over the top and spread evenly.: As you pour, you can hear a gentle thump when the batter lands, and you should see even layers without gaps. Spreading with a spatula smooths the top and helps avoid air pockets. This layering creates the surprised interior when sliced, so take care not to swirl excessively unless you want a marbled effect. Pressing too hard can compress the batter and reduce rise, so be gentle.
- Bake cake for 45 to 50 minutes OR until the top is golden brown and the toothpick inserted into few places comes out clean.: During baking, the kitchen will smell increasingly of lemon and butter as the crust browns. Look for a warm golden top and an even color across the loaf. The toothpick test is the most reliable cue, use it in a few places near the center to confirm doneness. Underbaking leaves a wet center, while overbaking dries the crumb, so start checking around 45 minutes to avoid going too far.
- Cool cake in pan for 15 minutes, then invert onto a cutting board. Cool completely.: The brief cooling period lets the loaf set so it holds shape when removed. You may feel slight steam release when inverting, and the loaf will continue to firm as it cools. Patience here prevents tearing when slicing. A common mistake is slicing too soon, which leads to a gummy center and messy cuts.
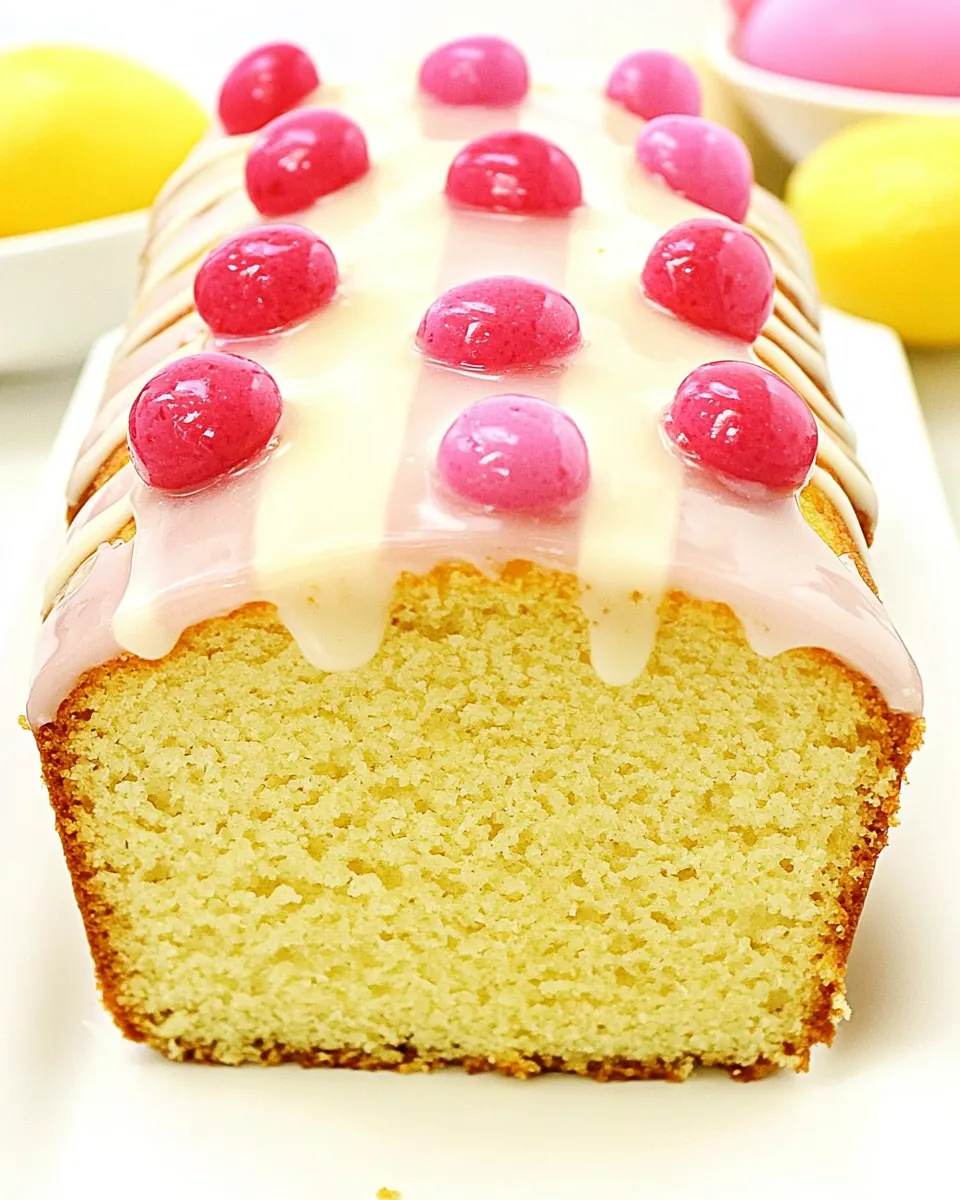
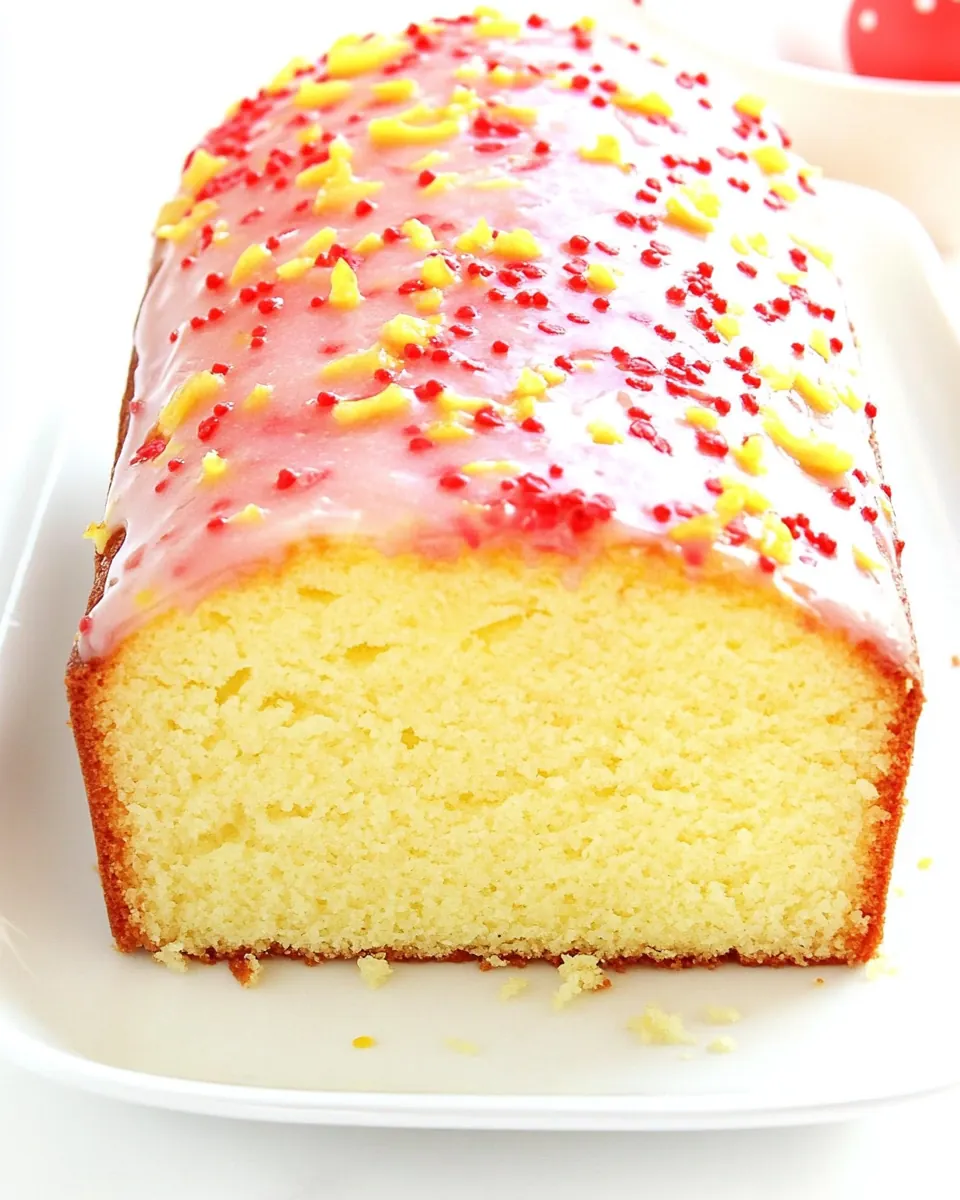
- To make the glaze, divide powdered sugar into two small bowls. Add one teaspoon of milk to each bowl until you reach drizzling consistency. Add food coloring if desired.: As you whisk powdered sugar with milk , the mixture will turn glossy and smooth, forming ribbons that slowly fall from the spoon. Adjusting quantity of milk one teaspoon at a time gives control, so you do not end up with a runny glaze. If the glaze is lumpy, sift the sugar first or whisk vigorously to smooth it out.
- Drizzle both glazes over cake.: When you drizzle, the glaze should form shiny, delicate streams that set with a slight crust on top. The contrast of colored glazes against the warm loaf makes the presentation pop. Work quickly while the glaze is fluid to get even coverage. A typical error is pouring too much glaze which can pool and make slices soggy, so use a light hand.
- Cut and serve.: As you slice, the loaf should yield clean, tender pieces with a soft crumb and a thin glaze shell. The aroma of lemon will be strongest at the cut edges, and the texture should be moist and springy. Use a serrated knife for the best slices and wipe the blade between cuts to keep presentation neat. Cutting while the glaze is still tacky can drag it, so allow it to set briefly if you want pristine tops.
Customization Ideas
If you want to personalize your Glazed Lemon Easter Loaf Cake, there are a few easy directions to explore. You can tweak colors, intensity of lemon, or plating for different occasions. Below are several ideas to inspire variations while keeping the core technique intact.
- Boost the lemon aroma by gently warming a little of the lemon zest with the sugar before creaming, which releases essential oils for an intensified citrus scent.
- Single color loaf keep the batter one color if you prefer a classic look, or tint only the glaze for a subtler festive touch.
- Glaze variations mix a tiny pinch of powdered zest into the glaze to add texture and a fresh burst of citrus with each bite.
- Make mini loaves divide batter into smaller pans for gifts or individual servings, reducing bake time accordingly and watching closely for doneness.
- Low color option skip the food coloring entirely for a natural appearance, letting the lemon and glaze provide visual charm.
Perfect Matches for Glazed Lemon Easter Loaf Cake
This loaf pairs beautifully with light accompaniments and fits many springtime settings. Below I describe serving ideas, timing, and seasonal pairings to make the loaf shine on your table.
- Afternoon tea pairing serve thin slices with a pot of herbal or green tea for a gentle, refreshing treat during a casual afternoon gathering.
- Brunch centerpiece present the loaf alongside fresh fruit and yogurt for a bright spring brunch where the lemon flavor complements lighter fare.
- Holiday platter include it on an Easter dessert board with small cookies and candied citrus to offer variety and color for a festive table.
- Storage advice keep leftover slices wrapped in plastic at room temperature for up to two days, or refrigerate for up to five days to maintain freshness while avoiding dryness.
- Seasonal pairing spring berries and light cream pair well with the loaf, enhancing the citrus notes without overpowering the cake.
FAQ
Conclusion
What makes this recipe special is its combination of bright lemon flavor, tender crumb, and festive presentation that feels elevated yet effortless. It’s the kind of loaf that brightens a morning, anchors a brunch, and doubles as a cheerful dessert for seasonal gatherings. I encourage you to try it exactly as written the first time, then play with colors or glaze variations once you’re comfortable. Enjoy the process, and remember that small personal touches make it your own.
Glazed Lemon Easter Loaf Cake
Equipment
- 9 x 5 loaf pan
- Electric Mixer
- Mixing Bowls
- Measuring Cups and Spoons
- Spatula
Ingredients
- 2 cup all-purpose flour Provide structure and texture to the loaf by forming the bulk of the batter; sift or whisk to remove lumps and ensure even mixing for a tender crumb.
- 1 and 1/2 teaspoon baking powder Leaven the cake by releasing gases during baking to help the loaf rise; measure accurately to maintain proper crumb and avoid collapse.
- 1/2 teaspoon baking soda Tenderize and contribute to leavening by reacting with acidic components in the batter; distribute evenly to prevent pockets of flavor.
- 1/2 teaspoons salt Enhance overall flavor balance and strengthen gluten control by moderating sweetness and boosting other flavors; dissolve thoroughly for uniform seasoning.
- 1/2 cup unsalted butter softened Add richness and moisture while contributing to a soft, tender crumb; cream with sugar to incorporate air and improve rise and texture.
- 3/4 cup granulated sugar Sweeten the cake while promoting browning and aiding in creaming for a lighter crumb; combine with butter until fluffy for better volume.
- 2 large eggs Bind ingredients, add moisture, and provide structure through coagulation when heated; whisk or beat slightly before adding for even incorporation.
- 1/2 teaspoon pure vanilla extract Impart subtle aromatic sweetness and deepen overall flavor; add to batter for complexity and to complement citrus notes.
- 3/4 cup buttermilk Contribute moisture and a slight tang that reacts with leaveners to create lift; keep cold or room temperature as specified to maintain emulsion.
- 1 tablespoon lemon zest Brighten the loaf with concentrated citrus oils for intense lemon aroma; finely grate to avoid bitter pith and sprinkle into batter for flavor bursts.
- 1 tablespoon freshly squeezed lemon juice Provide fresh, bright acidity that enhances lemon flavor and reacts with baking soda; strain if desired to remove seeds before adding to batter.
- food coloring (yellow pink), optional Offer optional tinting for a festive appearance; add sparingly to avoid altering batter consistency while achieving desired pastel hues.
- 3 tablespoons powdered sugar divided Sweeten and thicken glazes or finishes while bringing smoothness; divide as indicated to adjust consistency in multiple uses.
- 3 teaspoons milk divided Adjust glaze or icing consistency and help dissolve powdered sugar; add gradually to reach a smooth, pourable texture for finishing.
- food coloring optional Allow for additional optional tinting of glaze or decoration to achieve precise color intensity; use very small amounts to avoid flavor alteration.
Instructions
- Preheat oven to 350 degrees F.: The oven smell when it reaches 350 degrees F is the first cue that the bake will behave predictably. You'll notice a steady warm draft when you open the oven, and the air should feel dry and even. Preheating ensures the loaf begins to rise immediately, creating lift instead of a dense center. A common mistake is under-preheating, which can cause uneven rising and a gummy crumb. If your oven runs hot or cold, use an oven thermometer to confirm the temperature.
- Butter and flour 9" x 5" loaf pan. Set aside.: Rubbing softened butter around the pan and dusting with flour creates a release barrier and promotes even browning. You'll feel the pan turn slightly slick as you coat it, and visually you should see a thin, even dusting on the interior. This step matters because sticking can tear slices and wreck presentation. The usual slip up is using too much flour which leaves clumps, so tap out excess before filling.
- In a large mixing bowl, whisk together dry ingredients (flour, baking powder, baking soda and salt). Set aside.: As you whisk, you'll hear a light rustling and see the powders homogenize to a uniform color. This ensures the baking powder and baking soda are evenly distributed so the loaf rises consistently. It also prevents pockets of salt or leavener that could leave unpleasant tastes. A mistake here is skipping the whisk, which can cause uneven texture and lumpy pockets after baking.
- In a large mixing bowl, cream butter with electric mixer for 30 seconds. Gradually add sugar, beating for 3 to 4 minutes until light and fluffy.: When you cream butter and sugar , listen for a soft whir that turns into a smoother, higher pitched sound as air is incorporated. The mixture should lighten in color and become airy, which you can feel if you lift the paddle and see peaks that hold a loose shape. This aeration helps with a tender crumb and rise. A common error is undercreaming or using too-warm butter, which makes the batter greasy and prone to collapse.
- Add eggs, one at a time, mixing well after each addition. Add vanilla and mix well. Add lemon zest and mix well.: Adding eggs slowly helps the batter emulsify, creating a cohesive, smooth texture. You'll notice the batter go from grainy to silky as each egg incorporates. Stirring in vanilla and lemon zest releases aromatics that perfume the batter. If you add eggs too quickly or when butter is too cold, the mixture may curdle, leading to uneven crumb. If curdling occurs, a brief slow beat until smooth usually rescues it.
- Alternating with buttermilk and lemon juice, add the dry ingredients to butter mixture in 3 additions, mixing well after each.: Alternating allows the batter to accept liquids without overworking gluten. As you fold, the batter should look smooth and slightly thick, with ribbons that fall slowly. The buttermilk keeps the loaf tender while the lemon juice brightens the flavor and activates the leaveners. Overmixing at this stage develops gluten and makes the loaf tough, so mix just until combined after each addition.
- Pour half of the batter into bowl you had flour mixture in (saving on dishes here). Add yellow food coloring, two drops at a time to get desired shade. Remember, the color will be stronger after baking.: The batter takes on a glossy sheen as you stir in the food coloring . Two drops at a time helps you dial in the hue so you do not oversaturate. Watch the texture remain smooth and creamy; if it appears watery you may have added color with a liquid base that thinned the batter, so proceed cautiously. Overcoloring can also stain utensils and hands, so gloves or careful wiping helps.
- Add pink food coloring to the second batter, repeat as with the yellow batter.: Mixing in the pink produces a soft pastel when done with restraint. Stir until evenly colored and check under warm light to see the true tone. The batter should keep the same viscosity as the yellow portion; if it gets too runny, pause and avoid adding more liquid coloring. A common oversight is assuming more color is better, which risks altering bake performance and final texture.
- Pour pink batter into prepared loaf pan. Spread evenly. Pour yellow batter over the top and spread evenly.: As you pour, you can hear a gentle thump when the batter lands, and you should see even layers without gaps. Spreading with a spatula smooths the top and helps avoid air pockets. This layering creates the surprised interior when sliced, so take care not to swirl excessively unless you want a marbled effect. Pressing too hard can compress the batter and reduce rise, so be gentle.
- Bake cake for 45 to 50 minutes OR until the top is golden brown and the toothpick inserted into few places comes out clean.: During baking, the kitchen will smell increasingly of lemon and butter as the crust browns. Look for a warm golden top and an even color across the loaf. The toothpick test is the most reliable cue, use it in a few places near the center to confirm doneness. Underbaking leaves a wet center, while overbaking dries the crumb, so start checking around 45 minutes to avoid going too far.
- Cool cake in pan for 15 minutes, then invert onto a cutting board. Cool completely.: The brief cooling period lets the loaf set so it holds shape when removed. You may feel slight steam release when inverting, and the loaf will continue to firm as it cools. Patience here prevents tearing when slicing. A common mistake is slicing too soon, which leads to a gummy center and messy cuts.
- To make the glaze, divide powdered sugar into two small bowls. Add one teaspoon of milk to each bowl until you reach drizzling consistency. Add food coloring if desired.: As you whisk powdered sugar with milk , the mixture will turn glossy and smooth, forming ribbons that slowly fall from the spoon. Adjusting quantity of milk one teaspoon at a time gives control, so you do not end up with a runny glaze. If the glaze is lumpy, sift the sugar first or whisk vigorously to smooth it out.
- Drizzle both glazes over cake.: When you drizzle, the glaze should form shiny, delicate streams that set with a slight crust on top. The contrast of colored glazes against the warm loaf makes the presentation pop. Work quickly while the glaze is fluid to get even coverage. A typical error is pouring too much glaze which can pool and make slices soggy, so use a light hand.
- Cut and serve.: As you slice, the loaf should yield clean, tender pieces with a soft crumb and a thin glaze shell. The aroma of lemon will be strongest at the cut edges, and the texture should be moist and springy. Use a serrated knife for the best slices and wipe the blade between cuts to keep presentation neat. Cutting while the glaze is still tacky can drag it, so allow it to set briefly if you want pristine tops.
Notes
- Boost the lemon aroma by gently warming a little of the lemon zest with the sugar before creaming, which releases essential oils for an intensified citrus scent.
- Single color loaf keep the batter one color if you prefer a classic look, or tint only the glaze for a subtler festive touch.
- Glaze variations mix a tiny pinch of powdered zest into the glaze to add texture and a fresh burst of citrus with each bite.
- Make mini loaves divide batter into smaller pans for gifts or individual servings, reducing bake time accordingly and watching closely for doneness.
- Low color option skip the food coloring entirely for a natural appearance, letting the lemon and glaze provide visual charm.