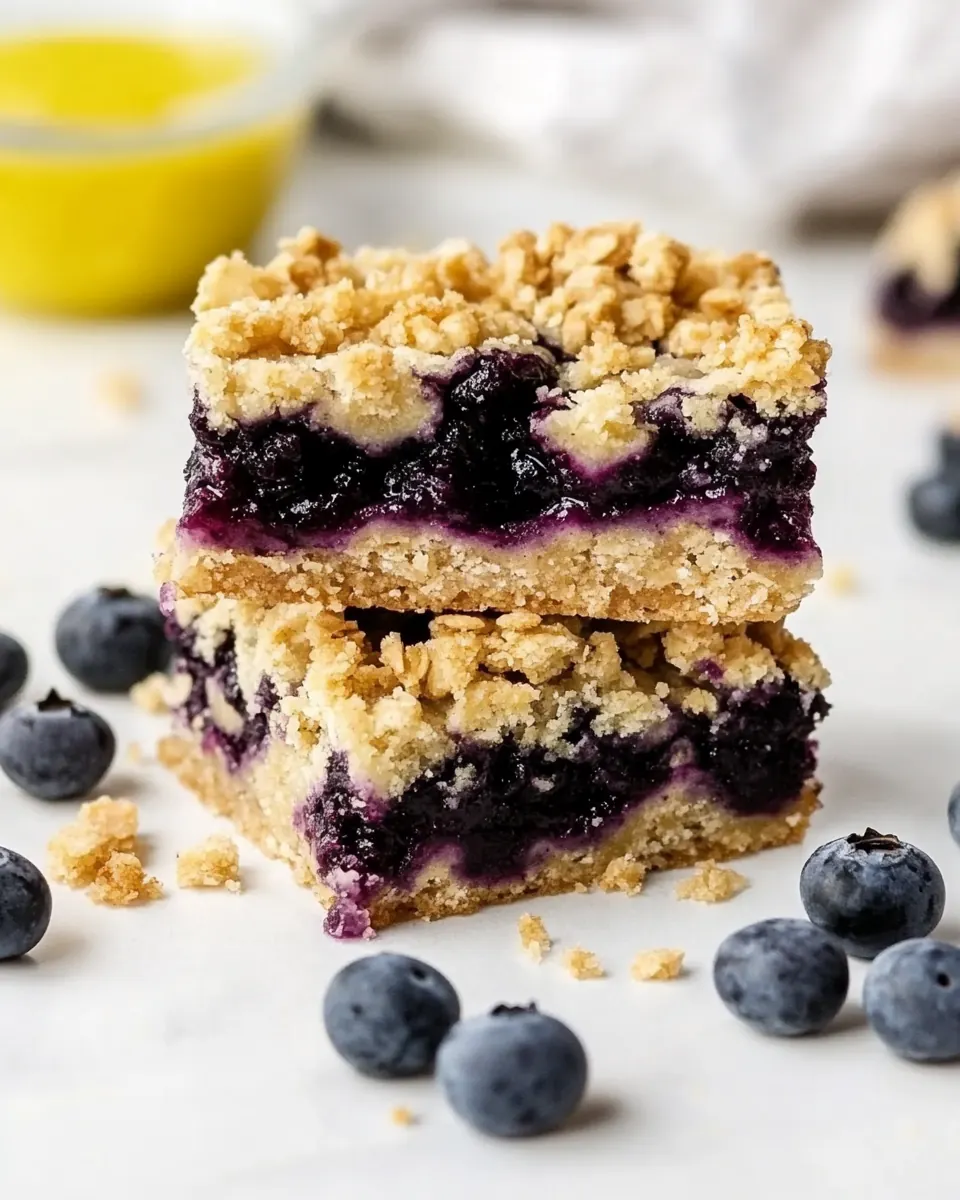
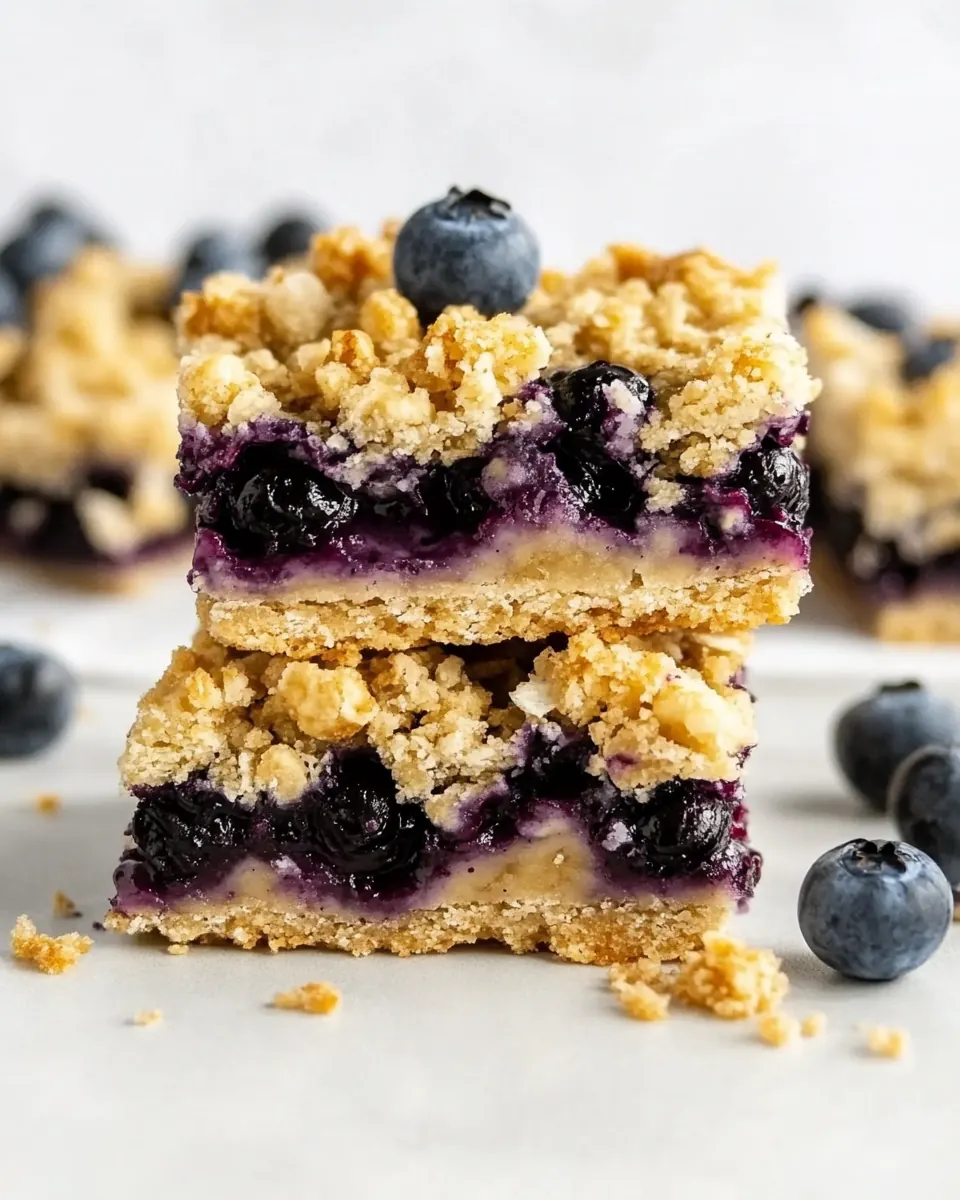
Blueberry Crumble Bars
Blueberry Crumble Bars have been my go to for summer gatherings ever since I discovered how a simple sheet pan of fruit and crumb can transform into something that tastes like sunshine and childhood at the same time. The first time I made these I remember the kitchen filling with the bright, citrusy perfume of lemon and the soft, toasty aroma of browned oats while blueberries bubbled gently in the center, and I knew this would become a repeat request from friends and family.
I made them for a neighborhood potluck on a humid July evening, and watching the way people gravitated toward the platter taught me a lot about what makes a recipe stick. There is the contrast between the slightly tart, juicy blueberries and the buttery, crisp crumble that gives each bite personality. I also learned that pressing the crust evenly and letting the bars cool fully changes the texture more than you would expect, so a little patience pays off. Over time I tuned the balance of sweetness and lemon brightness until it felt just right for warm afternoons and late night snacks alike.
Recipe Snapshot
1 hr 20 mins
15 mins
65 mins
Medium
250 kcal
American
Gluten-Free, Low FODMAP
Desserts
9 x 13 inch baking pan, Parchment paper, Mixing bowls, Measuring cups
Why This Blueberry Crumble Bars Shines
Perfect summer fruit celebration
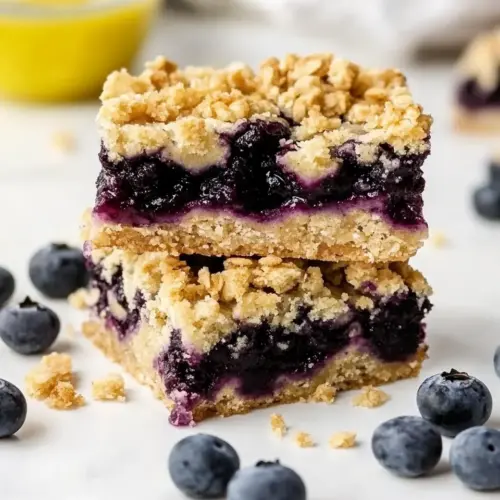
I love how Blueberry Crumble Bars showcase fresh fruit without fuss. When you use ripe blueberries, their juices concentrate under the crumble as they bake, giving a jammy center while still holding a lovely shape. I find this makes them ideal for backyard gatherings when fruit is at its peak.
Great textural contrast
What draws me back is the interplay between the crisp, buttery crumble and the tender, saucy fruit. The combination of old fashioned oats with all purpose flour creates a crumb that snaps slightly at the edges while staying tender inside. That contrast is addictive.
User friendly and forgiving
These bars are forgiving during assembly and baking, which I appreciate when I am juggling kids or guests. The recipe tolerates slight variations in pressing the crust, or small timing differences in the oven, and still turns out delicious. That makes them reliable when you need a dessert that won’t stress you out.
Transportable and crowd pleasing
Because they are baked in a pan and cut into bars, they travel well and are easy to portion for a crowd. I’ve brought them to potlucks, park picnics, and casual dinner parties, and they always disappear fast. They are both familiar and a little special.
Bright flavor balance
The little touches, like freshly squeezed lemon juice and lemon zest, lift the whole bar and prevent sweetness from becoming cloying. I appreciate recipes that pay attention to that kind of balance, and this one does it elegantly.
Essential Ingredients for Blueberry Crumble Bars
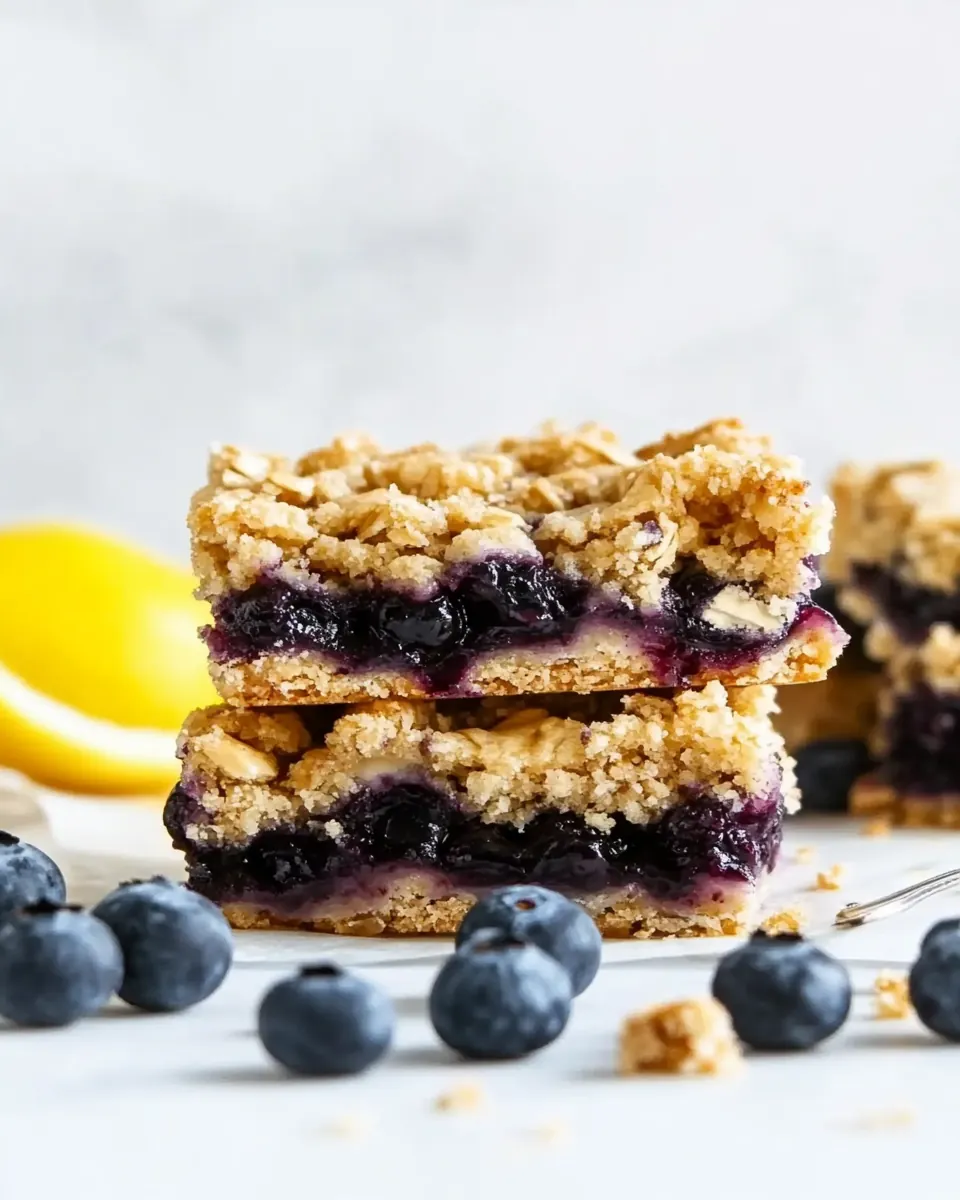
These components work together to create a bar that is crisp, buttery, and fruit forward. The crumble base combines starch and oats for structure and crunch, the butter provides richness, and the blueberry filling gives burst of juicy brightness. Each element plays a clear role, and the result is more than the sum of its parts.
- 2 cups all-purpose flour: Provide structure and bulk to the bars by forming the base and crumb topping; contributes gluten for chew and browning during baking while giving a neutral background for other flavors.
- 2 cups old fashioned oats: Add hearty texture and nutty flavor to the crust and crumble; helps absorb butter and creates a chewy, rustic bite that contrasts the fruit filling.
- 1/2 cup brown sugar: Bring a deep caramel-like sweetness and slight molasses complexity to the dough and topping; helps balance tartness from the fruit and enhances overall flavor depth.
- 1/2 teaspoon baking powder: Leaven lightly to prevent an overly dense crust; creates a small amount of lift and tenderness so the bars are not too compact.
- 1/4 teaspoon cinnamon: Offer warm aromatic notes that complement blueberries and lemon; subtly enhances overall flavor without overpowering the sweet and tart elements.
- 1 cup unsalted butter, melted: Bind the dry ingredients together and lend rich, buttery flavor; melted form simplifies mixing and helps create a tender, cohesive crumb that crisps as it bakes.
- 1/4 cup pure maple syrup: Provide additional sweetness with a hint of maple complexity and help moisten the crust; contributes a subtle flavor nuance distinct from granulated sugars.
- 3 cups fresh blueberries: Supply the primary fruity filling with fresh, juicy flavor and natural color; release juices during baking to form the characteristic fruity layer in the bars.
- 1/4 cup granulated sugar: Sweeten the blueberry filling to balance natural tartness; dissolve into the fruit juices to create a syrupy consistency when baked.
- 2 tablespoons cornstarch: Thicken the blueberry juices into a cohesive filling by absorbing excess liquid; helps the filling set so bars hold together when sliced.
- 2 tablespoons freshly squeezed lemon juice: Add bright acidity to enhance fruit flavor and balance sweetness; help macerate the berries slightly so they release juices and intensify their aroma.
- 1 teaspoon lemon zest: Contribute concentrated citrus aroma and a zesty brightness that lifts the entire bar; pairs with lemon juice to accentuate the fruit and cut through richness.
Recipe Directions for Blueberry Crumble Bars
These directions take you from mixing to a golden baked pan of bars in a straightforward way. Read each step fully and allow the sensory cues to guide you as much as the timings. I like to keep everything organized before I begin so the assembly flows.
- Preheat oven to 350℉. Line a 9"x 13” pan with parchment paper or spray it generously with nonstick cooking spray.: As the oven comes up to temperature you will notice a faint dry heat smell, which tells you the environment is ready to set the topping and fruit. Ensuring the pan is properly prepared prevents sticking and makes removal simple, which is especially helpful with a sticky fruit layer. A common mistake is not lining the pan fully, which can cause edges to adhere and crumble when you try to lift them out; avoid this by letting parchment overhang the sides for easy removal.
- In a medium bowl, stir together flour, oats, brown sugar, baking powder, and cinnamon. Add melted butter and maple syrup, and stir until clumps of dough begin to form.: When you add the warm unsalted butter and pure maple syrup , the dry mix will darken slightly and small clusters will appear, releasing a toasty, sweet aroma. This is the moment the mixture transitions from dusty to tactile, so mix just until clumps form to preserve the crumbly texture. Overmixing will yield a heavier, less crunchy topping, so stop as soon as you see uniform clumps.
- Press two thirds of the crumble mixture into the bottom of the pan and smooth it into an even layer. Set remaining crumble mixture aside. Bake crust for 10 minutes while you prepare the blueberry layer.: Pressing creates a compact base that will hold the fruit without sinking, and you should feel the resistance under your fingers as it firms. As the crust par-bakes the room will fill with a warm, oat forward scent and edges will start to pale golden. A common error is pressing unevenly which leads to thin spots that bubble during baking; take an extra moment to even it for consistent texture.
- In a medium bowl, stir blueberries, sugar, cornstarch, lemon juice, and lemon zest until evenly combined.: As you mix, the granulated sugar will begin to draw juice from the blueberries , and the cornstarch will cloak those juices so the filling becomes glossy rather than watery. The lemon components will introduce a bright citrus scent that balances sweetness. If you skip the cornstarch the filling may become too loose and make slicing messy, so be sure it is well incorporated.
- Spread blueberry mixture evenly over the par-baked crumble crust.: Gently distribute the filling so the berries are in an even layer, using the back of a spoon to guide any excess juices. You should hear a soft plop as berries settle and see an even, jewel toned blanket over the crust. Avoid pressing the fruit into the crust, which can compact it and prevent proper baking.
- Sprinkle the remaining crumble mixture over the top of the blueberries. Bake for 60-65 minutes, or until the crumble is golden brown and crisp.: Once the top is covered, the oven will coax the juices to bubble and the crumbs to brown to a deep golden color with nutty aromas. Listen for gentle bubbling around the edges as a sign the filling is set, and watch the top so it does not darken too quickly. A typical misstep is underbaking to preserve color, which leaves the center too loose; bake until you see steady bubbling and a deeply golden topping.
- Allow bars to cool completely in the pan. Then remove them from the pan using the parchment paper and cut into your desired size. You can also pop the bars in the fridge for an hour to make slicing even easier if needed.: Cooling is essential because it lets the cornstarch finish its thickening, turning the bubbling juices into a sliceable filling. You will notice the bars firming and the aroma mellowing into a concentrated fruit sweetness. Rushing to cut while warm often results in gooey, misshapen pieces, so be patient or chill briefly for neat slices.
Tips for Success
I like to think of these tips as small investments that pay big dividends in texture and flavor. A little attention at each stage will yield bars that look professional and taste balanced. Keep these practical notes close when you bake.
- Measure precisely: Use a dry measuring cup for all purpose flour and a liquid cup for unsalted butter if you are measuring melted butter to ensure the crumb has the right ratio of fat to dry ingredients.
- Press with purpose: When pressing the base, apply even pressure and check corners to make sure they are not thinner than the center, which avoids uneven baking and sinking.
- Watch the oven: Ovens vary, so begin checking for golden edges and bubbling fruit at the lower end of the baking window to prevent overbrowning the topping.
- Cool completely: Allow the pan to sit until the filling is set, or refrigerate briefly before slicing so you get clean bars rather than a sticky mess.
- Use fresh citrus: Fresh lemon juice and lemon zest provide bright aromatics that balance sweetness; bottled juice will not give the same lift.
What Complements This Blueberry Crumble Bars
These bars are versatile and work across casual gatherings and special occasions. They pair well with a simple beverage or a scoop of something cold, and they travel well for picnics or potlucks. Here are thoughtful serving ideas to elevate the experience.
- Casual backyard picnic: Serve slices at room temperature on a rustic platter, letting guests pick their own size. The bars hold up well outdoors.
- Brunch companion: Offer alongside coffee or iced tea for a late morning spread. The fruity brightness complements savory brunch items without overpowering them.
- After dinner treat: Present a slightly warmed bar with a small scoop of chilled vanilla gelato or cream substitute for contrast in temperature and texture.
- Holiday or celebration: These bars work on dessert tables, where small squares are convenient for guests to sample different dishes. Their jewel like filling is visually appealing.
- Storage tips: Keep leftovers in an airtight container in the fridge for up to four days, or freeze in a freezer safe container for up to three months. Thaw gently and warm briefly if desired.
- Seasonal pairing: Because they showcase fresh blueberries, these bars are best in summer, when berries are sweetest, but they also make a sunny counterpoint to later season desserts.
FAQ
Conclusion
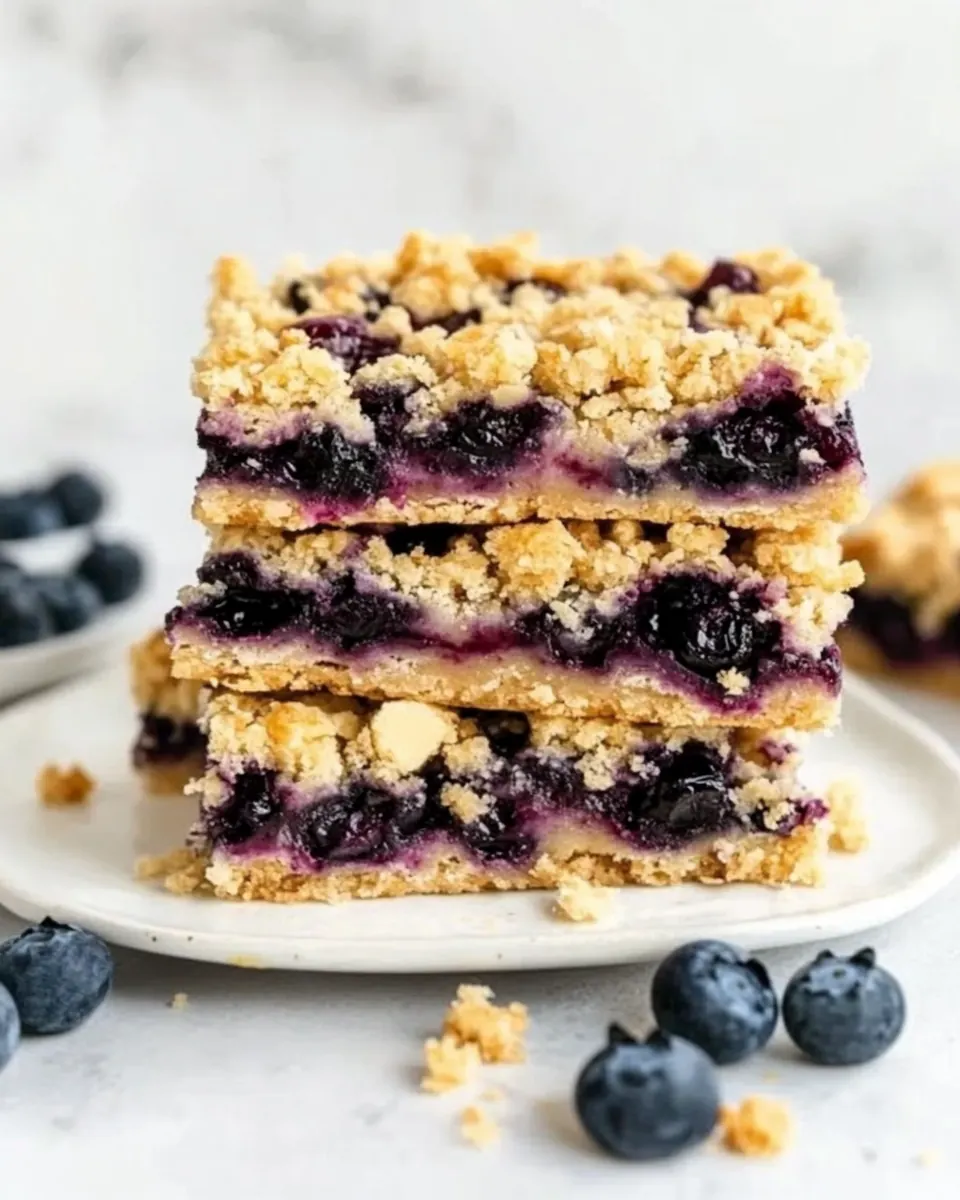
Blueberry Crumble Bars stand out because of their vivid fruit center paired with a buttery, oat studded crumble that delivers both texture and bright flavor. They are easy to make, forgiving enough for home bakers of all levels, and are excellent for sharing at gatherings. Give them a try when blueberries are in season, and enjoy how a few simple ingredients can create a dessert that feels both comforting and celebratory. I hope these bars bring you the same warm memories and satisfied smiles they have given me over the years.
Blueberry Crumble Bars
Equipment
- 9 x 13-inch baking pan
- Parchment Paper
- Mixing Bowls
- Measuring Cups
Ingredients
- 2 cups all-purpose flour Provide structure and bulk to the bars by forming the base and crumb topping; contributes gluten for chew and browning during baking while giving a neutral background for other flavors.
- 2 cups old fashioned oats Add hearty texture and nutty flavor to the crust and crumble; helps absorb butter and creates a chewy, rustic bite that contrasts the fruit filling.
- 1/2 cup brown sugar Bring a deep caramel-like sweetness and slight molasses complexity to the dough and topping; helps balance tartness from the fruit and enhances overall flavor depth.
- 1/2 teaspoon baking powder Leaven lightly to prevent an overly dense crust; creates a small amount of lift and tenderness so the bars are not too compact.
- 1/4 teaspoon cinnamon Offer warm aromatic notes that complement blueberries and lemon; subtly enhances overall flavor without overpowering the sweet and tart elements.
- 1 cup unsalted butter, melted Bind the dry ingredients together and lend rich, buttery flavor; melted form simplifies mixing and helps create a tender, cohesive crumb that crisps as it bakes.
- 1/4 cup pure maple syrup Provide additional sweetness with a hint of maple complexity and help moisten the crust; contributes a subtle flavor nuance distinct from granulated sugars.
- 3 cups fresh blueberries Supply the primary fruity filling with fresh, juicy flavor and natural color; release juices during baking to form the characteristic fruity layer in the bars.
- 1/4 cup granulated sugar Sweeten the blueberry filling to balance natural tartness; dissolve into the fruit juices to create a syrupy consistency when baked.
- 2 tablespoons cornstarch Thicken the blueberry juices into a cohesive filling by absorbing excess liquid; helps the filling set so bars hold together when sliced.
- 2 tablespoons freshly squeezed lemon juice Add bright acidity to enhance fruit flavor and balance sweetness; help macerate the berries slightly so they release juices and intensify their aroma.
- 1 teaspoon lemon zest Contribute concentrated citrus aroma and a zesty brightness that lifts the entire bar; pairs with lemon juice to accentuate the fruit and cut through richness.
Instructions
- Preheat oven to 350℉. Line a 9"x 13” pan with parchment paper or spray it generously with nonstick cooking spray.: As the oven comes up to temperature you will notice a faint dry heat smell, which tells you the environment is ready to set the topping and fruit. Ensuring the pan is properly prepared prevents sticking and makes removal simple, which is especially helpful with a sticky fruit layer. A common mistake is not lining the pan fully, which can cause edges to adhere and crumble when you try to lift them out; avoid this by letting parchment overhang the sides for easy removal.
- In a medium bowl, stir together flour, oats, brown sugar, baking powder, and cinnamon. Add melted butter and maple syrup, and stir until clumps of dough begin to form.: When you add the warm unsalted butter and pure maple syrup , the dry mix will darken slightly and small clusters will appear, releasing a toasty, sweet aroma. This is the moment the mixture transitions from dusty to tactile, so mix just until clumps form to preserve the crumbly texture. Overmixing will yield a heavier, less crunchy topping, so stop as soon as you see uniform clumps.
- Press two thirds of the crumble mixture into the bottom of the pan and smooth it into an even layer. Set remaining crumble mixture aside. Bake crust for 10 minutes while you prepare the blueberry layer.: Pressing creates a compact base that will hold the fruit without sinking, and you should feel the resistance under your fingers as it firms. As the crust par-bakes the room will fill with a warm, oat forward scent and edges will start to pale golden. A common error is pressing unevenly which leads to thin spots that bubble during baking; take an extra moment to even it for consistent texture.
- In a medium bowl, stir blueberries, sugar, cornstarch, lemon juice, and lemon zest until evenly combined.: As you mix, the granulated sugar will begin to draw juice from the blueberries , and the cornstarch will cloak those juices so the filling becomes glossy rather than watery. The lemon components will introduce a bright citrus scent that balances sweetness. If you skip the cornstarch the filling may become too loose and make slicing messy, so be sure it is well incorporated.
- Spread blueberry mixture evenly over the par-baked crumble crust.: Gently distribute the filling so the berries are in an even layer, using the back of a spoon to guide any excess juices. You should hear a soft plop as berries settle and see an even, jewel toned blanket over the crust. Avoid pressing the fruit into the crust, which can compact it and prevent proper baking.
- Sprinkle the remaining crumble mixture over the top of the blueberries. Bake for 60-65 minutes, or until the crumble is golden brown and crisp.: Once the top is covered, the oven will coax the juices to bubble and the crumbs to brown to a deep golden color with nutty aromas. Listen for gentle bubbling around the edges as a sign the filling is set, and watch the top so it does not darken too quickly. A typical misstep is underbaking to preserve color, which leaves the center too loose; bake until you see steady bubbling and a deeply golden topping.
- Allow bars to cool completely in the pan. Then remove them from the pan using the parchment paper and cut into your desired size. You can also pop the bars in the fridge for an hour to make slicing even easier if needed.: Cooling is essential because it lets the cornstarch finish its thickening, turning the bubbling juices into a sliceable filling. You will notice the bars firming and the aroma mellowing into a concentrated fruit sweetness. Rushing to cut while warm often results in gooey, misshapen pieces, so be patient or chill briefly for neat slices.
Notes
- Measure precisely: Use a dry measuring cup for all purpose flour and a liquid cup for unsalted butter if you are measuring melted butter to ensure the crumb has the right ratio of fat to dry ingredients.
- Press with purpose: When pressing the base, apply even pressure and check corners to make sure they are not thinner than the center, which avoids uneven baking and sinking.
- Watch the oven: Ovens vary, so begin checking for golden edges and bubbling fruit at the lower end of the baking window to prevent overbrowning the topping.
- Cool completely: Allow the pan to sit until the filling is set, or refrigerate briefly before slicing so you get clean bars rather than a sticky mess.
- Use fresh citrus: Fresh lemon juice and lemon zest provide bright aromatics that balance sweetness; bottled juice will not give the same lift.