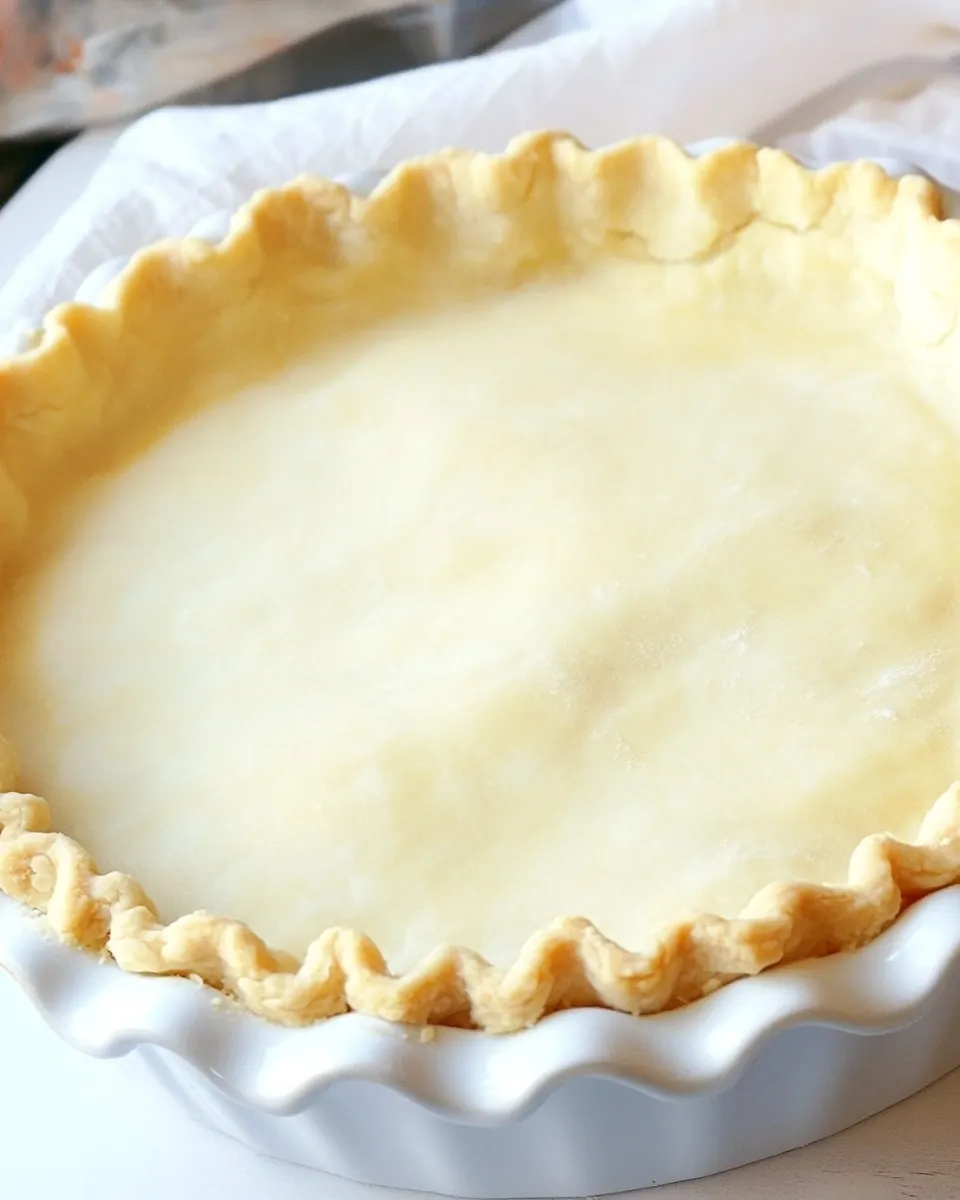
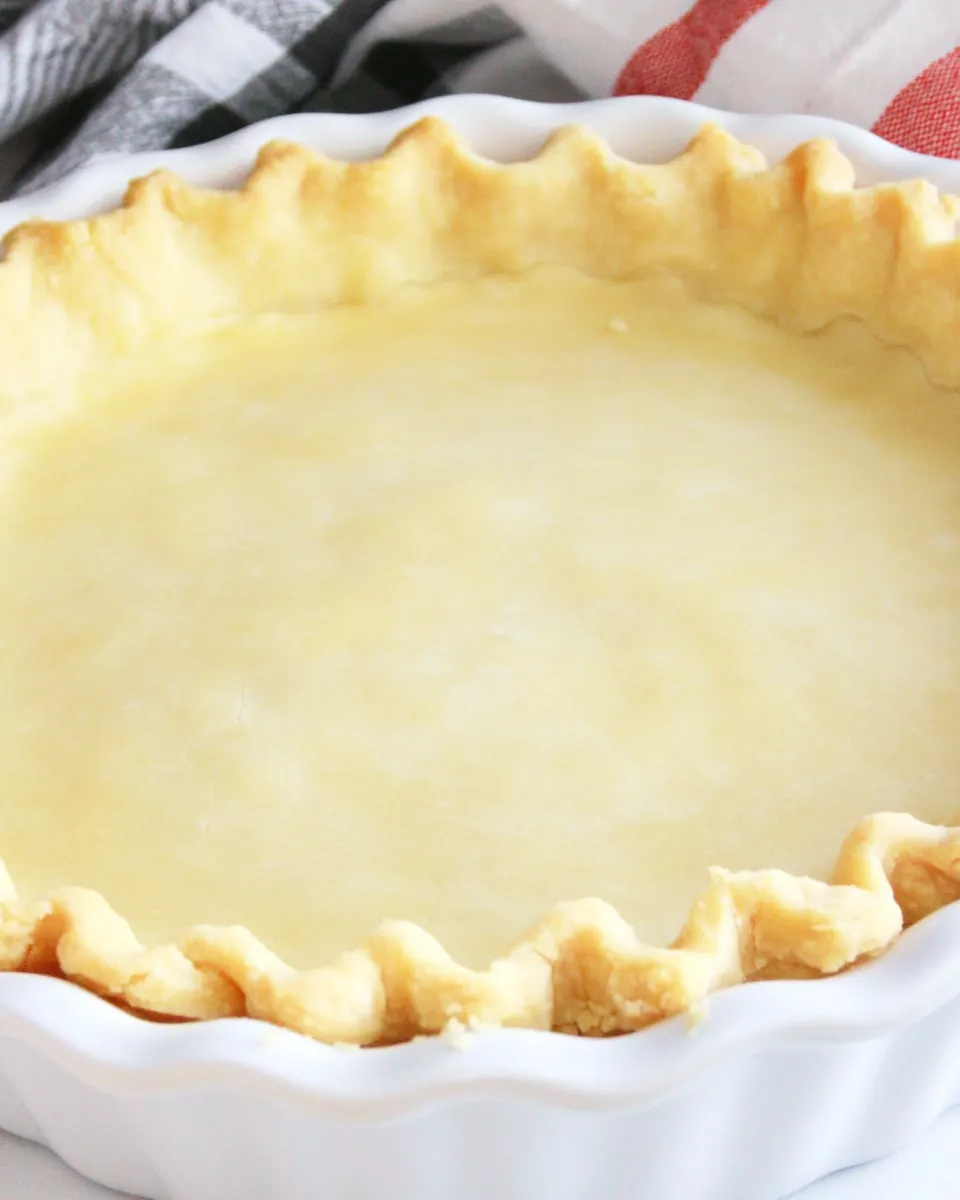
Amish Pie Crust
Amish Pie Crust has been my fall back when I want a reliable, flaky base that does not demand fuss. I grew up watching my neighbor Jane roll out dough on an old wooden board, her hands moving like a practiced musician, and that memory is why I keep this recipe in my back pocket. The first time I made Amish Pie Crust for a holiday gathering, I nervously carried the pie across the dining room, and the light crackle of the crust as guests sliced into it felt like applause.
There is something quietly satisfying about making Amish Pie Crust from scratch. I like the rhythm of measuring the all-purpose flour, cutting chilled vegetable shortening into the mix, and bringing everything together with a simple egg and a splash of vinegar. Those small acts feel grounding, and by the time the dough chills, the kitchen smells faintly of butterless pastry and anticipation. I often tell friends this crust is forgiving, and that steadiness has helped me fix a few last minute pies with confidence.
Over the years I have adapted small habits, like cubing the vegetable shortening and chilling the dough longer when I plan ahead, but the heart of the recipe stayed true to that neighborly approach: simple ingredients, straightforward technique, and a dependable, tender crust. When you make Amish Pie Crust you get a crust that browns evenly, holds fillings well, and flakes beautifully under the fork. I love serving pies with this crust because it elevates both sweet and savory fillings without stealing the show.
Recipe Snapshot
1 hr 2 mins
30 mins
32 mins
Medium
250 kcal
American
Gluten-Free, Low FODMAP
Desserts
Food processor, Mixing bowl, Wooden spoon, Plastic wrap, Rolling pin, 9-inch pie dish
Why This Amish Pie Crust Is a Winner
Reliable Flakiness Every Time
I love how Amish Pie Crust consistently yields a flaky texture without complicated techniques. Because the recipe centers on cold vegetable shortening and careful handling, the dough forms tiny pockets that puff in the oven, creating that sought after flake. I often tell friends this is the crust to choose when you want dependable structure for juicy fillings, since it crisps on the edges and stays tender underneath.
Minimal, Pantry Friendly Ingredients
One of the things that wins me over is how few ingredients you need. With just all-purpose flour, a bit of granulated sugar, salt, vegetable shortening, an egg, vinegar, and water, you can make enough dough for two pie shells. This simplicity makes it easy to prepare on a weeknight or pull out for holidays, because I rarely need a special trip to the store.
Forgiving and Kid Friendly
I appreciate that Amish Pie Crust forgives small mistakes. If you overwork the dough slightly it still turns out well if chilled properly, and the mixture tolerates some improvisation in water amounts depending on humidity. I often let my niece help with gentle stirring, and the results are cheerful and edible, which builds kitchen confidence in a way that complicated recipes do not.
Versatile Across Fillings
This crust acts like a neutral canvas, supporting sweet fruit pies as easily as savory quiches. The balance of fat from the vegetable shortening and the structure from the all-purpose flour means you can bake it blind, fill and finish, or top with lattices, and it will hold up. I use it for custard pies and for hearty vegetable tarts with equal satisfaction.
Quick to Make, Easy to Store
Time is often limited, and I value that the dough comes together fast and chills while I prep a filling. You can wrap leftover dough and keep it in the fridge for a couple of days, which makes it perfect for staggered baking. That practicality is why I reach for Amish Pie Crust when planning a menu with multiple components.
Shopping List for Amish Pie Crust
This list is built on the philosophy of fewer, well chosen ingredients. Each component plays a clear role: the all-purpose flour gives structure, the vegetable shortening provides tender flake, and the small additions like granulated sugar and salt fine tune flavor. The egg, vinegar, and water bind and create the right texture without overworking the dough. Together, they produce a sturdy yet tender crust that complements many fillings.
- 4 cups all-purpose flour: Provide structure and bulk to the dough; hydrates when mixed with liquid to form gluten that gives the crust strength. Measure accurately for consistent texture and avoid overworking to keep crust tender.
- 1 tablespoon granulated sugar: Add a touch of sweetness that balances savory notes and can help with browning; dissolves easily into the dry mix. Use sparingly to prevent altering the traditional savory-sweet balance of a classic pie crust.
- 1 teaspoon salt: Enhance overall flavor and control yeast or chemical reactions in the dough; sharpens taste and balances richness. Dissolve into the dry ingredients to ensure even distribution throughout the crust.
- 1 1/2 cups vegetable shortening cubed: Contribute flakiness and tenderness by coating flour particles, preventing excessive gluten formation; the cubed shape helps create pockets of fat that steam during baking. Keep chilled and handle minimally to maintain distinct layers and a flaky texture.
- 1 egg beaten: Introduce moisture and a small amount of fat and protein to bind dough components; beaten form mixes quickly into the liquid phase. Incorporate gently to avoid over-developing gluten while improving rollability and richness.
- 1 tablespoon vinegar: Provide acidity that helps tenderize the dough by slightly weakening gluten and enhancing flavor; balances the fat and flour interaction. Combine with the egg and water for even acid distribution without altering crust consistency.
- 1/2 cup water: Hydrate the dry ingredients to form a cohesive dough while tailoring the amount for desired tenderness; cold water helps keep fat solid until baking. Add gradually to achieve the proper dough consistency without making it sticky.
Recipe Steps for Amish Pie Crust
These steps are straightforward but worth reading fully before you start, because the rhythm of measuring, pulsing, and chilling makes all the difference. I want you to feel confident at the processor and when rolling the dough, so move at a steady pace and keep things cold. The following directions expand on the original sequence to give you sensory cues, troubleshooting tips, and the reasons behind each action.
- In the bowl of a food processor, pulse together all-purpose flour, sugar, and salt until combined.: The moment you pulse the dry mix you will see the ingredients come together into a uniform, pale mass, and the scent will be a clean, slightly sweet flour aroma. Pulsing rather than blending quickly helps avoid warming the flour and developing too much gluten, which keeps the crust tender. A common mistake is running the processor continuously, which creates heat and makes the final crust tougher. If you notice the bowl warming, stop and let it rest for a minute before continuing. Look for even distribution, with no streaks of salt or sugar left on the sides, and scrape the bowl once if needed to ensure consistency.
- Add the cubed shortening and pulse until pea-sized crumbs form.: As you add the cold, cubed vegetable shortening , pulses will create coarse crumbs that resemble tiny peas; this visual cue is important because those chunks of fat will melt in the oven and produce flake. You should hear short, staccato pulses rather than a constant whirl, and the sound will be rhythmic and light. If you over-process, the mixture will look pasty and the crumbs will be too small, which reduces flake. One way to troubleshoot is to chill the mixture briefly if it feels warm, then continue. Aim for a texture with a range of pea to cornmeal size pieces so you get a tender, layered result.
- Transfer the dough to a large bowl and using your hands or a wooden spoon bring the dough together.: When you move the crumbly mixture to a bowl, you should still see distinct pieces of fat, and the act of stirring brings them into closer contact with the flour. The dough at this stage feels dry and sandy, with the occasional larger piece of shortening visible. Use a gentle folding motion with your hands or a wooden spoon to avoid melting the fat; warmth from your palms can soften the shortening and change the texture. A common error is overworking the flour, which develops gluten, so keep movements light and intentional, combining until the mixture looks cohesive but not smooth.
- In a small bowl, whisk together the egg, vinegar, and water.: Whisking these liquids until uniform creates a pale, slightly frothy mixture that will hydrate the dough evenly. You should notice the vinegar blending seamlessly into the egg and water , and the aroma will be faintly acidic from the vinegar, which is normal. Mixing the liquids first prevents pockets of egg or vinegar in the dough that could affect texture. One tip is to use cold water to keep the overall dough temperature low. If you forget this step and add liquids separately, you might end up with uneven hydration, which can lead to sticky spots.
- Add the mixture to the dough and mix until combined, it will be sticky.: Once you pour the liquid into the bowl the mixture will transform from sandy to tacky, and you will see it start to clump. The dough should be slightly sticky but not wet, and it should hold together when pressed. This sticky stage means the ingredients have bound and are ready to shape. If the dough seems too wet, chill it for ten to twenty minutes to firm up; if it appears crumbly, add a teaspoon of water at a time until cohesive. Avoid adding large amounts of liquid at once, because overhydration is hard to reverse.
- Wrap the dough with plastic wrap and let it chill in the refrigerator for at least 1 hour before rolling.: Chilling is where patience pays off, because it firms the vegetable shortening and gives the gluten a chance to relax, resulting in a more tender crust and easier rolling. After wrapping, the dough will cool and the texture will become smooth and slightly firm; you might notice a faint condensation in the wrap, which is fine. A common mistake is skipping this rest and trying to roll warm dough, which tears and shrinks in the oven. I usually chill for longer if I have time, up to overnight, as deeper chilling improves handling and flavor melding.
- When ready to use, place the dough on a floured surface and divide it in half.: The chilled dough should feel firm but pliable when you press it with your fingers, and flouring the surface prevents sticking. Dividing it in half creates two workable portions for top and bottom shells. If the dough cracks at the edges when you press, let it warm for a few minutes; if it becomes too soft and sticky, pop it back to the fridge briefly. I separate and wrap the extra portion to avoid overhanding the piece I plan to roll, which preserves its cold temperature.
- If your pie has a top, keep both halves, if you only need the bottom part, wrap the remaining dough in plastic wrap and store it in the fridge.: Wrapping leftover dough tightly prevents drying and keeps it ready for later use, and storing in the fridge for up to two days is convenient. You will notice the wrapped dough is denser and quieter in the fridge compared to fresh dough on the counter. A mistake here is leaving it uncovered where it will form a skin. If you plan to freeze it, use airtight packaging to avoid freezer burn and thaw gently in the fridge before rolling.
- Roll half of the dough to 1/4-inch thick and transfer to a 9-inch pie dish.: Rolling to about a quarter inch gives a balanced crust that bakes evenly and supports fillings without being too thick. As you roll, the dough should glide smoothly, and you will see faint layers forming if the fat remains cold. Rotate and flour as needed to prevent tearing but do so sparingly to avoid incorporating too much extra flour. Hearing a soft, dry scraping noise as the pin crosses the board is normal. If the crust resists stretching into the dish, let it rest for a few minutes; forcing it can cause shrinking in the oven.
- Bake as instructed in the recipe you are using.: The final bake varies with your filling and temperature, but during baking you should watch for a golden edge and a gently browned surface, signals that the crust is done. The aroma will become toasty and slightly nutty, and you may hear a subtle crisping sound as steam escapes. Avoid opening the oven too often, since temperature swings can affect browning. If the edges brown too quickly, tent them with foil to prevent burning while the center finishes. Trust a visual and textural check rather than an exact minute count when working with different fillings.
Helpful Hints
I like to keep these hints handy whenever I make Amish Pie Crust. They focus on texture, temperature control, and small habits that improve consistency. Read them before you start, and you will avoid the most common pitfalls.
- Chill Everything: Always use cold vegetable shortening and cold water to prevent the fat from melting into the flour. This preserves those tiny pockets that create flakiness in the oven. If your kitchen is warm, briefly chill the processed crumbs before adding liquids.
- Accurate Measuring: Measure the all-purpose flour by spooning into the cup and leveling with a knife, rather than scooping from the bag, to avoid packing too much flour which yields a dry crust.
- Pulsing Technique: Use short pulses in the food processor instead of running it continuously, and stop when pea-sized crumbs form. Overprocessing produces a paste that diminishes flakiness, and the dough may become tough.
- Hydrate Slowly: Add the egg, vinegar, and water mixture gradually, using the minimum needed to bring the dough together. Too much liquid makes the dough sticky and harder to roll, while too little yields crumbly pastry.
- Rest Before Rolling: Chill the dough for at least one hour; this firms the fat and relaxes gluten. If you are short on time, a quick twenty to thirty minute chill helps, but longer is better for texture and flavor.
- Repair Tears Gently: If the dough tears while transferring, patch with small bits of leftover dough and chill briefly. Avoid stretching the dough to cover holes, as that causes shrinkage during baking.
What Complements This Amish Pie Crust
This crust pairs with a wide range of fillings and occasions. Whether you are making a fruit pie for a weekend dessert or a savory tart for a casual dinner, Amish Pie Crust adapts well. Below I outline serving ideas, storage tips, and seasonal pairings to help you plan menus around this reliable pastry.
- Fruit Pies: Use the crust for apple, berry, or stone fruit fillings for a classic dessert. The subtle sweetness of the dough enhances jammy fillings and allows fruit flavor to shine.
- Savory Tarts: This dough works well for quiches and vegetable tarts because it holds moist fillings without getting soggy. Blind bake if using a wet custard filling for best results.
- Holiday Centerpiece: Bring pies with this crust to gatherings during winter holidays or summer picnics. It travels well when cooled and kept in a rigid container to protect the edges.
- Storage Tips: Store wrapped dough in the refrigerator for up to two days or freeze for up to three months. Thaw in the fridge before rolling to maintain texture.
- Seasonal Pairings: Pair with fresh summer berries, autumn apples and spices, or spring fruit tarts for a versatile presence across the year. The neutral crust supports a variety of spices and toppings.
FAQ
Conclusion
Amish Pie Crust stands out because it combines simple pantry ingredients with straightforward technique to deliver a reliably flaky, tender pastry. It is forgiving enough for home bakers and versatile enough to pair with sweet and savory fillings, which makes it a staple I return to again and again. Give it a try the next time you need a dependable crust, and trust the small steps like cold fats and a good chill to do most of the work for you. Baking this dough becomes a small ritual that rewards patience with crisp edges and delicate layers.
Amish Pie Crust
Equipment
- Food Processor
- Mixing Bowl
- Wooden Spoon
- Plastic Wrap
- Rolling Pin
- 9-inch pie dish
Ingredients
- 4 cups all-purpose flour Provide structure and bulk to the dough; hydrates when mixed with liquid to form gluten that gives the crust strength. Measure accurately for consistent texture and avoid overworking to keep crust tender.
- 1 tablespoon granulated sugar Add a touch of sweetness that balances savory notes and can help with browning; dissolves easily into the dry mix. Use sparingly to prevent altering the traditional savory-sweet balance of a classic pie crust.
- 1 teaspoon salt Enhance overall flavor and control yeast or chemical reactions in the dough; sharpens taste and balances richness. Dissolve into the dry ingredients to ensure even distribution throughout the crust.
- 1 1/2 cups vegetable shortening cubed Contribute flakiness and tenderness by coating flour particles, preventing excessive gluten formation; the cubed shape helps create pockets of fat that steam during baking. Keep chilled and handle minimally to maintain distinct layers and a flaky texture.
- 1 egg beaten Introduce moisture and a small amount of fat and protein to bind dough components; beaten form mixes quickly into the liquid phase. Incorporate gently to avoid over-developing gluten while improving rollability and richness.
- 1 tablespoon vinegar Provide acidity that helps tenderize the dough by slightly weakening gluten and enhancing flavor; balances the fat and flour interaction. Combine with the egg and water for even acid distribution without altering crust consistency.
- 1/2 cup water Hydrate the dry ingredients to form a cohesive dough while tailoring the amount for desired tenderness; cold water helps keep fat solid until baking. Add gradually to achieve the proper dough consistency without making it sticky.
Instructions
- In the bowl of a food processor, pulse together all-purpose flour, sugar, and salt until combined.: The moment you pulse the dry mix you will see the ingredients come together into a uniform, pale mass, and the scent will be a clean, slightly sweet flour aroma. Pulsing rather than blending quickly helps avoid warming the flour and developing too much gluten, which keeps the crust tender. A common mistake is running the processor continuously, which creates heat and makes the final crust tougher. If you notice the bowl warming, stop and let it rest for a minute before continuing. Look for even distribution, with no streaks of salt or sugar left on the sides, and scrape the bowl once if needed to ensure consistency.
- Add the cubed shortening and pulse until pea-sized crumbs form.: As you add the cold, cubed vegetable shortening , pulses will create coarse crumbs that resemble tiny peas; this visual cue is important because those chunks of fat will melt in the oven and produce flake. You should hear short, staccato pulses rather than a constant whirl, and the sound will be rhythmic and light. If you over-process, the mixture will look pasty and the crumbs will be too small, which reduces flake. One way to troubleshoot is to chill the mixture briefly if it feels warm, then continue. Aim for a texture with a range of pea to cornmeal size pieces so you get a tender, layered result.
- Transfer the dough to a large bowl and using your hands or a wooden spoon bring the dough together.: When you move the crumbly mixture to a bowl, you should still see distinct pieces of fat, and the act of stirring brings them into closer contact with the flour. The dough at this stage feels dry and sandy, with the occasional larger piece of shortening visible. Use a gentle folding motion with your hands or a wooden spoon to avoid melting the fat; warmth from your palms can soften the shortening and change the texture. A common error is overworking the flour, which develops gluten, so keep movements light and intentional, combining until the mixture looks cohesive but not smooth.
- In a small bowl, whisk together the egg, vinegar, and water.: Whisking these liquids until uniform creates a pale, slightly frothy mixture that will hydrate the dough evenly. You should notice the vinegar blending seamlessly into the egg and water , and the aroma will be faintly acidic from the vinegar, which is normal. Mixing the liquids first prevents pockets of egg or vinegar in the dough that could affect texture. One tip is to use cold water to keep the overall dough temperature low. If you forget this step and add liquids separately, you might end up with uneven hydration, which can lead to sticky spots.
- Add the mixture to the dough and mix until combined, it will be sticky.: Once you pour the liquid into the bowl the mixture will transform from sandy to tacky, and you will see it start to clump. The dough should be slightly sticky but not wet, and it should hold together when pressed. This sticky stage means the ingredients have bound and are ready to shape. If the dough seems too wet, chill it for ten to twenty minutes to firm up; if it appears crumbly, add a teaspoon of water at a time until cohesive. Avoid adding large amounts of liquid at once, because overhydration is hard to reverse.
- Wrap the dough with plastic wrap and let it chill in the refrigerator for at least 1 hour before rolling.: Chilling is where patience pays off, because it firms the vegetable shortening and gives the gluten a chance to relax, resulting in a more tender crust and easier rolling. After wrapping, the dough will cool and the texture will become smooth and slightly firm; you might notice a faint condensation in the wrap, which is fine. A common mistake is skipping this rest and trying to roll warm dough, which tears and shrinks in the oven. I usually chill for longer if I have time, up to overnight, as deeper chilling improves handling and flavor melding.
- When ready to use, place the dough on a floured surface and divide it in half.: The chilled dough should feel firm but pliable when you press it with your fingers, and flouring the surface prevents sticking. Dividing it in half creates two workable portions for top and bottom shells. If the dough cracks at the edges when you press, let it warm for a few minutes; if it becomes too soft and sticky, pop it back to the fridge briefly. I separate and wrap the extra portion to avoid overhanding the piece I plan to roll, which preserves its cold temperature.
- If your pie has a top, keep both halves, if you only need the bottom part, wrap the remaining dough in plastic wrap and store it in the fridge.: Wrapping leftover dough tightly prevents drying and keeps it ready for later use, and storing in the fridge for up to two days is convenient. You will notice the wrapped dough is denser and quieter in the fridge compared to fresh dough on the counter. A mistake here is leaving it uncovered where it will form a skin. If you plan to freeze it, use airtight packaging to avoid freezer burn and thaw gently in the fridge before rolling.
- Roll half of the dough to 1/4-inch thick and transfer to a 9-inch pie dish.: Rolling to about a quarter inch gives a balanced crust that bakes evenly and supports fillings without being too thick. As you roll, the dough should glide smoothly, and you will see faint layers forming if the fat remains cold. Rotate and flour as needed to prevent tearing but do so sparingly to avoid incorporating too much extra flour. Hearing a soft, dry scraping noise as the pin crosses the board is normal. If the crust resists stretching into the dish, let it rest for a few minutes; forcing it can cause shrinking in the oven.
- Bake as instructed in the recipe you are using.: The final bake varies with your filling and temperature, but during baking you should watch for a golden edge and a gently browned surface, signals that the crust is done. The aroma will become toasty and slightly nutty, and you may hear a subtle crisping sound as steam escapes. Avoid opening the oven too often, since temperature swings can affect browning. If the edges brown too quickly, tent them with foil to prevent burning while the center finishes. Trust a visual and textural check rather than an exact minute count when working with different fillings.
Notes
- Chill Everything: Always use cold vegetable shortening and cold water to prevent the fat from melting into the flour. This preserves those tiny pockets that create flakiness in the oven. If your kitchen is warm, briefly chill the processed crumbs before adding liquids.
- Accurate Measuring: Measure the all-purpose flour by spooning into the cup and leveling with a knife, rather than scooping from the bag, to avoid packing too much flour which yields a dry crust.
- Pulsing Technique: Use short pulses in the food processor instead of running it continuously, and stop when pea-sized crumbs form. Overprocessing produces a paste that diminishes flakiness, and the dough may become tough.
- Hydrate Slowly: Add the egg, vinegar, and water mixture gradually, using the minimum needed to bring the dough together. Too much liquid makes the dough sticky and harder to roll, while too little yields crumbly pastry.
- Rest Before Rolling: Chill the dough for at least one hour; this firms the fat and relaxes gluten. If you are short on time, a quick twenty to thirty minute chill helps, but longer is better for texture and flavor.
- Repair Tears Gently: If the dough tears while transferring, patch with small bits of leftover dough and chill briefly. Avoid stretching the dough to cover holes, as that causes shrinkage during baking.