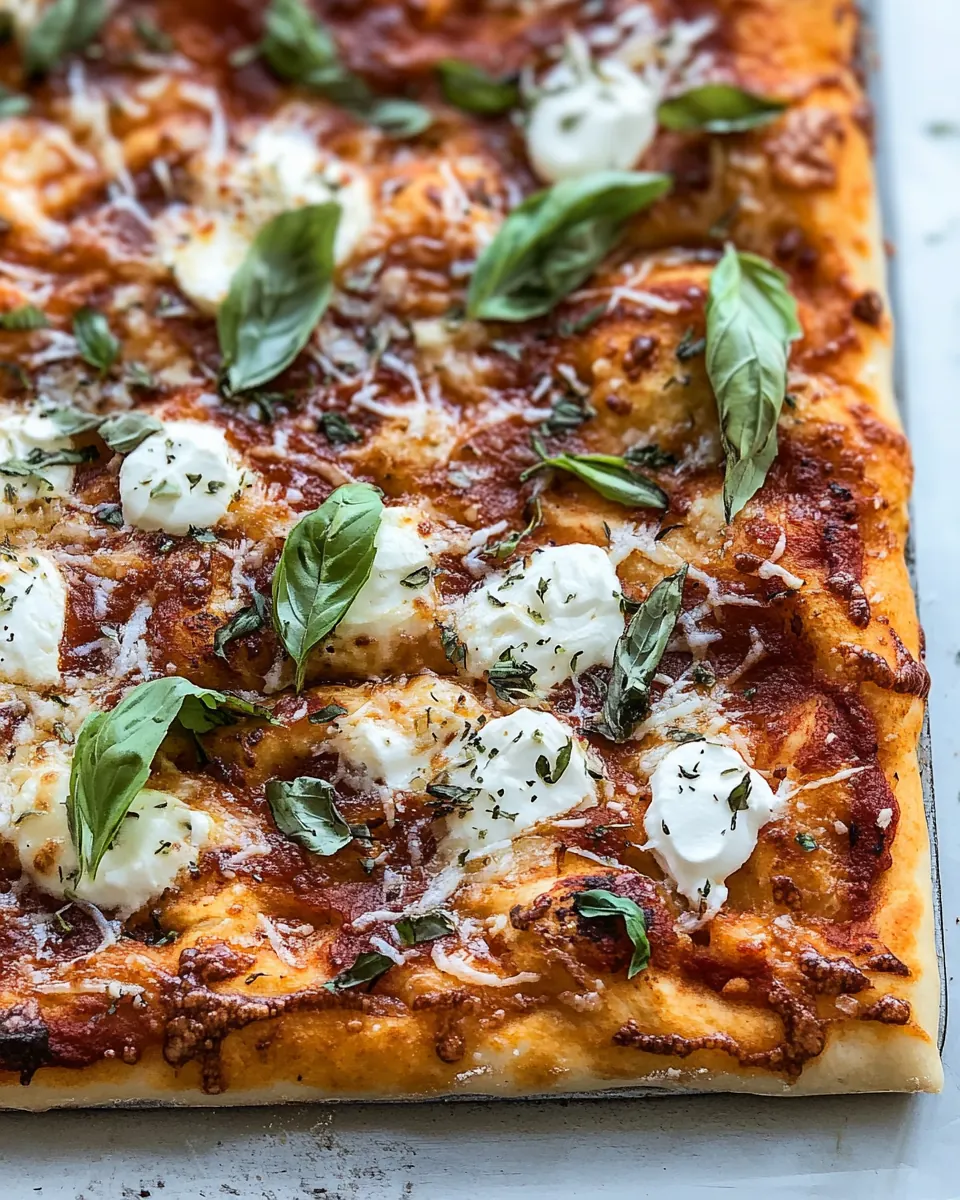
Focaccia Pizza
Focaccia Pizza is the kind of recipe I reach for when I want something cozy, rustic, and a little bit celebratory without a fuss. The first time I made this, I was trying to bridge two worlds I love, the soft, pillowy texture of focaccia and the melty, saucy charm of a classic pizza. I remember the dough bubbling as it rose on the counter, the scent of olive oil filling the kitchen, and the impatient tapping of fingers as I waited for the perfect moment to press dimples into the surface.
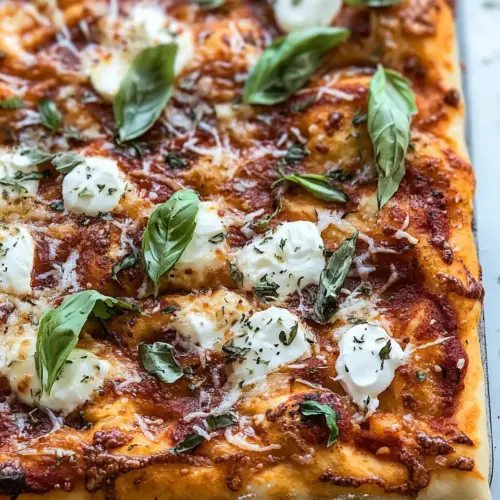
Over the years I tweaked this into a reliable favorite. I like the way the crust crisps at the edges while staying tender inside, and how the combination of pizza sauce, shredded mozzarella cheese, and grated parmesan cheese creates a layered, savory topping that feels familiar but special. I often make a double batch when guests are coming, because it disappears fast. There is something pleasantly hands on about stretching the dough, dotting the surface with olive oil, and arranging fresh basil leaves at the end.
I also appreciate that this recipe is forgiving. If the dough seems sticky, a light dusting of all purpose flour and a gentle hand will get you there. If you like a more pronounced herb aroma, a sprinkle of Italian seasoning and a touch of garlic powder on the crust elevates each bite. For weeknight dinners or casual weekend gatherings, Focaccia Pizza delivers comfort and flavor without requiring a lot of complicated steps.
Recipe Snapshot
2 hr 10 mins
90 mins
40 mins
Hard
250 kcal
Italian
Gluten-Free, Low FODMAP
Dinner
Stand mixer, Sheet pan, Mixing bowl
Why This Focaccia Pizza Hits Different
Rustic Texture Meets Familiar Flavor
I adore Focaccia Pizza because it balances a rustic, airy crumb with the comforting flavors of a favorite pizza. The dough’s olive oil richness yields a golden crust that is slightly crisp on the outside and soft within. That contrast makes each bite interesting, and I find people savor the mouthfeel as much as the toppings.
Highly Forgiving Dough
One big reason I reach for this recipe is how forgiving the dough is. With a little patience, the yeast will do most of the work. I’ve had batches that started stickier than intended turn out great after one gentle knead and a relaxed rise. That flexibility makes it perfect for cooks who are still getting comfortable with yeast baking.
Customizable and Crowd Friendly
I love that Focaccia Pizza scales effortlessly. Whether you are feeding a family of four or a crowd of eight, the sheet pan format means you can add simple toppings or go bold. The base is also friendly to different tastes, from the classic red pizza sauce and shredded mozzarella cheese to slices of fresh mozzarella rounds and a shower of grated parmesan cheese.
Great Aroma and Visual Appeal
From the moment the olive oil warms and the dough browns in the oven, the kitchen fills with a warm, yeasty scent that always gets compliments. Visually, the finger dimples and bubbling cheese create an inviting, homey look that makes people reach for a slice before it has even cooled.
Simple Ingredients, Big Impact
Part of what makes this recipe stand out is its straightforward ingredient list. Basic pantry staples like all purpose flour, active dry yeast, and salt form the backbone, while a handful of cheeses and a good pizza sauce deliver the flavor payoff. That simplicity makes it an easy recipe to keep in rotation.
Focaccia Pizza Shopping List
These ingredients form a simple, harmonious team. The dough ingredients create a tender, olive oil enriched base that holds up to bubbling cheeses and bright sauce. The cheeses and sauce provide the savory focal point, while the seasonings bring depth. Each player is intentionally humble, so the final bite feels balanced and comforting.
- 1 1/2 cups warm water: Provide warmth and hydration to activate yeast and form the dough; ensure water is around 105–115°F to properly bloom the yeast. Adjust amount slightly if measuring by weight and combine gradually with flour to control dough consistency.
- 1 package active dry yeast: Enable dough leavening by producing carbon dioxide that creates airy crumb and lift; sprinkle into warm water and let it dissolve and foam. Use within expiration for reliable rise and avoid direct contact with salt or hot liquids that can kill yeast.
- 1 teaspoon granulated sugar: Feed the yeast to help it bloom and accelerate fermentation; dissolve with yeast in warm water to ensure an active starter. Balance sweetness to encourage proper rise without flavoring the final bread overly sweet.
- 1/4 cup olive oil plus more for greasing the sheet pan: Provide fat for tenderness, flavor, and a crisp, golden crust; incorporate into dough and reserve a bit for greasing the sheet pan. Brush generously on top before baking to promote browning and add rich olive flavor.
- 2 teaspoons salt: Enhance dough flavor and strengthen gluten structure while regulating yeast activity; dissolve in the dough mix for even distribution. Adjust slightly to taste, but maintain enough salt to avoid bland bread and to improve crust color.
- 2 1/2 – 3 1/2 cups all purpose flour: Form the bulk of the dough's structure and texture; add gradually until the dough reaches a slightly tacky, smooth consistency. Use higher end of range for stiffer dough suitable for shaping and lower end for softer, stickier focaccia.
- 1 1/2 teaspoons Italian seasoning: Impart an herby, Mediterranean flavor profile throughout the dough or sprinkled on top; mix into dough or combine with oil for brushing. Choose a blend that balances oregano, basil, and thyme for a classic Italian aroma.
- 1 teaspoon garlic powder: Add mellow garlic flavor without moisture; blend into dry ingredients or oil to distribute garlicky notes evenly. Use as a convenient substitute for fresh garlic when a uniform, subtle garlic flavor is desired.
- 1 cup pizza sauce of choice I used classic red sauce: Provide savory tomato base and primary sauce layer for the pizza; spread evenly over shaped focaccia before adding cheeses. Select a sauce with a texture and seasoning you enjoy to control overall flavor intensity.
- 1/2 cups mozzarella cheese low moisture shredded: Melt into a stretchy, gooey topping that adds richness and classic pizza texture; sprinkle over sauce to achieve even coverage. Choose low-moisture shredded mozzarella for good melt and browning without excess water.
- Fresh mozzarella rounds: Create creamy pockets and fresh, milky bites when sliced and placed atop the pizza; dot the surface with rounds for a luxurious texture contrast. Pat dry if overly wet to prevent soggy spots and tear into smaller pieces if needed.
- 1/3 cup grated parmesan cheese: Provide sharp, salty umami and help with browning; sprinkle grated parmesan over cheese or edges for added depth. Use freshly grated for best melting and flavor contribution rather than pre-grated powders.
- Salt and pepper to taste: Season the finished pizza to taste and enhance overall flavors; sprinkle sparingly after baking to avoid over-salting. Use freshly ground pepper for aromatic spice and adjust salt according to the saltiness of cheeses used.
- Basil leaves for garnish: Finish with bright, herbal aroma and visual appeal by tearing leaves over the baked pizza; add right before serving to preserve freshness. Choose larger or smaller leaves based on desired garnish appearance and intensity.
How to Prepare Focaccia Pizza

We are about to walk through a relaxed, step by step approach to turn simple pantry ingredients into a rustic sheet pan meal. Expect tactile dough work, a satisfying rise, and a final bake that fills your kitchen with rich, savory smells. Keep your tools close and allow the yeast to work at its own pace.
- In a small bowl mix warm water, yeast, and sugar. Let sit until the yeast becomes foamy, about 5 minutes.: The first sensory cue you want is tiny bubbles and an earthy, yeasty aroma rising from the bowl, which tells you the active dry yeast is awake and ready. The water should feel warm but not hot on your wrist, and the mixture will thicken slightly as it foams. Why this matters, I tell myself, is that a lively yeast guarantees a good rise, which determines texture later. A common mistake is using water that is too hot, which will kill the yeast, or water that is too cold, which will delay activity. If the foam does not form in five to ten minutes, give the yeast a second chance with freshly measured warm water and granulated sugar .
- In the bowl of a stand mixer, fitted with the paddle, mix your yeast mixture, 1/4 cup olive oil, salt, and 2 cups of your flour.: At this stage you should notice the glossy sheen the olive oil brings to the mixture and the initial shaggy dough that forms as the all purpose flour hydrates. Using the mixer paddle creates a gentle, even mix, which helps hydrate the flour without overworking the gluten too early. I like to pause and scrape the bowl once or twice so everything comes together evenly. One trap is adding all the flour at once and ending up with a tough dough, so starting with two cups is a controlled way to monitor texture.
- Begin mixing and add additional flour (1/2 a cup at a time), and knead on low speed until all flour is incorporated. Add just enough flour so that you have a soft but not too sticky dough (I used 3.5 cups).: You will see the dough gradually clean the bowl and form a cohesive ball, and it will pull away from the sides when the hydration is right. The surface should be slightly tacky but not clingy. This tactile feedback is more important than exact measurements because flour brands absorb differently. The reason this measured adding prevents a dense crust is that it keeps the dough hydrated enough to allow an open crumb. Avoid adding too much flour out of habit, which leads to a dry, heavy result.
- Once your dough has come together mix for an additional 2 minutes on medium speed to help develop the gluten.: During these extra two minutes you will hear a steadier, more even sound from the mixer and notice the dough smoothing and becoming elastic. This short period of development creates structure, giving your Focaccia Pizza the ability to hold bubbles during the rise, contributing to that tender yet airy crumb. Over mixing can make the dough tough, so keep to the brief time. If the dough starts to feel stiff, reduce speed and time slightly.
- Remove dough from mixer and place in a bowl oiled with some olive oil. Cover with plastic wrap or a towel dampened with warm water.: The bowl will feel warm to the touch after handling, and the olive oil coating prevents sticking while allowing the dough to expand freely. Covering with a damp towel helps maintain a humid environment, so the surface does not form a dry skin. The reason we create this sheltered setting is to encourage an even rise. A common slip is leaving the dough uncovered, which can create a dry crust and uneven proofing.
- Let the dough sit until it has doubled in size, about an hour.: As the dough rests you will notice it inflate and develop a spongy, airy feel when gently pressed with a finger. The aroma will shift toward a slightly sweet, yeasty scent that promises a light texture. This doubling is important because it builds gas pockets that translate into a soft interior and a tender bite. Rushing this step will yield a denser crust, so give it the time it needs.
- Remove dough from bowl and place on an oiled sheet pan, be sure to degas and stretch the dough as far as it will go on the pan without tearing.: When you press and stretch, you will hear slight resistance and feel elasticity from the all purpose flour structure. Degassing gently redistributes air and makes the dough manageable for shaping, while stretching sets the stage for even baking across the sheet. If the dough resists tearing, let it relax for a few minutes; forcing it will create holes and uneven thickness.
- Cover and let the dough sit until it has relaxed enough to stretch to cover the pan entirely, about 20-30 minutes.: During this resting period the dough will relax and feel softer to the touch, which makes it easier to coax into the pan. The visual cue is a smoother surface and a slight increase in volume. This secondary rest is crucial because it prevents spring back while shaping. A common error is rushing this rest, which leads to a misshapen crust that pulls back in the oven.
- Use your fingers to create dimples in the dough, being sure to even the dough out on the pan as you do so.: Pressing in with your fingertips creates shallow wells that trap olive oil and prevent large air pockets, while also creating the classic focaccia texture. You should see little indentations that stay in place instead of springing back. Doing this also helps distribute heat evenly during baking. Avoid using your entire palm and pressing too hard, which can deflate the dough excessively.
- Preheat oven to 375 degrees fahrenheit.: As the oven warms you will hear its elements cycle and smell the faint metallic scent of heating. The chosen temperature is moderate so the crust browns slowly and the center cooks through without overbrowning the cheese. Preheating thoroughly ensures even oven spring and a consistent bake. Putting the pizza into a not fully preheated oven can result in a soggy interior and pale crust.
- At this point you are going to assemble your pizza. Spread your sauce of choice evenly over the surface of the dough, leaving some space for a crust if you would like.: As you spread the pizza sauce , watch for a smooth, even layer that covers the dimples without pooling too deeply in them. The aroma of the sauce will mingle with the warm dough, promising savory notes. Leaving a border gives a pleasant contrast between crisp edge and soft center. One pitfall is overloading the sauce which can seep into the dough and create a soggy center.
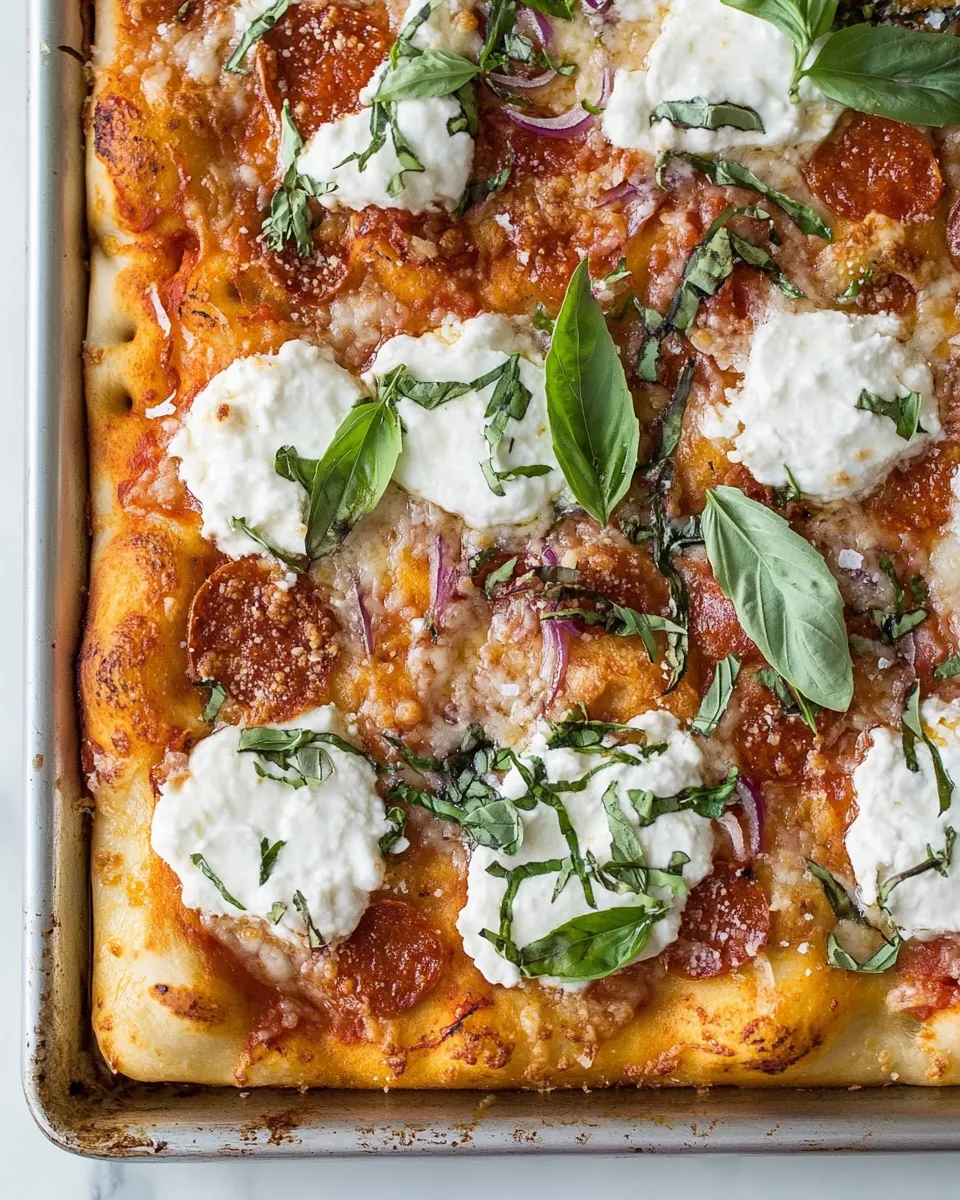
- In a small bowl mix together your mozzarella and parmesan cheeses and spread them evenly over the sauced dough. If you want additional toppings such as pepperoni, mushrooms, sliced bell pepper, onions, olives, etc. now is the time to put them on.: The blend of shredded mozzarella cheese and parmesan cheese will melt into a cohesive, golden topping that bubbles and browns attractively. Fresh mozzarella rounds produce creamy pockets when used alongside shredded cheese. When arranging toppings, distribute them so no area is overloaded, which can hinder baking and cause uneven melting. Beware of toppings with high moisture content; pat them dry first to prevent sogginess.
- Sprinkle some salt and pepper over the top of it all and place the assembled pizza into your preheated oven, bake for 35-45 minutes.: In the oven you will hear faint bubbling and see the cheese begin to bubble and take on a golden hue. The edges should darken slightly while the center sets but remains tender. This bake window lets the crust develop color and the cheeses fully melt. A typical misstep is pulling the pizza out too early, when the center still appears underbaked; it will firm up as it rests but needs that full time to finish.
- Remove from oven when the crust is cooked and all the cheese has melted. Enjoy fresh after allowing the pizza to cool for a few minutes.: After removing the pan you will notice a warm, inviting scent and a crackle from the cooling crust. Allowing a short rest helps the toppings set so slices hold together beautifully, and the basil leaves placed at the end will release a fresh herbal perfume. Cutting while piping hot can cause the cheese to slide, so wait a few minutes before serving. The most common mistake here is rushing to eat immediately, which can result in sliding toppings and scalded fingers.
Ways to Customize
There are many ways to make Focaccia Pizza your own. You can tweak textures, swap cheeses, or play with herbs to match the mood of the meal. Below are thoughtful customizations that keep the core recipe intact while opening up fresh possibilities.
- Herb boost: Increase the amount of Italian seasoning and a light dusting of garlic powder on the crust edge before baking to deepen the aromatic profile.
- Cheese blend: Combine shredded mozzarella cheese with a small amount of grated parmesan cheese for a balance of gooey melt and nutty flavor.
- Cheese placement: Dot with fresh mozzarella rounds after spreading sauce for pockets of creamy texture that contrast with shredded cheese.
- Oil finish: Brush the crust rim with extra olive oil before baking for a golden, slightly crisp edge and glossy finish.
- Basil finish: Add torn basil leaves only after baking to preserve their bright color and fragrance as a finishing touch.
- Flour control: Start with 2 1/2 cups of all purpose flour and add up to the indicated amount by feel to prevent a dry dough.
Serve This Focaccia Pizza With
Focaccia Pizza is versatile at the table, working well for casual lunch, family dinner, or a relaxed gathering with friends. It pairs beautifully with light salads, simple sides, or even as the centerpiece of a buffet style meal. Below are ways to present and pair this dish for different occasions.
- Simple green salad: A crisp green salad tossed with a light vinaigrette complements the rich cheeses and olive oil crust.
- Seasonal roasted vegetables: Serve with roasted vegetables that mirror the herbs in the pizza, for a balanced plate.
- Family dinner style: Present the sheet pan on the table so guests can slice pieces themselves for a relaxed, communal meal.
- Weeknight pairing: Pair with a quick bowl of soup or light antipasto for an easy weeknight dinner with minimal fuss.
- Storage tips: Keep leftovers in an airtight container in the refrigerator for up to three days, and reheat in a warm oven to refresh the crust crispness.
- Occasion friendly: This works for casual get togethers, weekend lunches, or anytime you want a hearty, shareable dish that is both simple and satisfying.
FAQ
Conclusion
What makes this recipe special is the way it combines a tender, olive oil enriched focaccia style crust with familiar pizza toppings for a satisfying, shareable meal. Give it a try when you want something that feels both homey and a little elevated, whether for a casual family dinner or feeding friends. I hope it becomes a go to when you want a simple, crowd pleasing dish that brings warmth and flavor to the table.
Focaccia Pizza
Equipment
- Stand mixer
- Sheet Pan
- Mixing Bowl
Ingredients
- 1 1/2 cups warm water Provide warmth and hydration to activate yeast and form the dough; ensure water is around 105–115°F to properly bloom the yeast. Adjust amount slightly if measuring by weight and combine gradually with flour to control dough consistency.
- 1 package active dry yeast Enable dough leavening by producing carbon dioxide that creates airy crumb and lift; sprinkle into warm water and let it dissolve and foam. Use within expiration for reliable rise and avoid direct contact with salt or hot liquids that can kill yeast.
- 1 teaspoon granulated sugar Feed the yeast to help it bloom and accelerate fermentation; dissolve with yeast in warm water to ensure an active starter. Balance sweetness to encourage proper rise without flavoring the final bread overly sweet.
- 1/4 cup olive oil plus more for greasing the sheet pan Provide fat for tenderness, flavor, and a crisp, golden crust; incorporate into dough and reserve a bit for greasing the sheet pan. Brush generously on top before baking to promote browning and add rich olive flavor.
- 2 teaspoons salt Enhance dough flavor and strengthen gluten structure while regulating yeast activity; dissolve in the dough mix for even distribution. Adjust slightly to taste, but maintain enough salt to avoid bland bread and to improve crust color.
- 2 1/2 – 3 1/2 cups all purpose flour Form the bulk of the dough's structure and texture; add gradually until the dough reaches a slightly tacky, smooth consistency. Use higher end of range for stiffer dough suitable for shaping and lower end for softer, stickier focaccia.
- 1 1/2 teaspoons Italian seasoning Impart an herby, Mediterranean flavor profile throughout the dough or sprinkled on top; mix into dough or combine with oil for brushing. Choose a blend that balances oregano, basil, and thyme for a classic Italian aroma.
- 1 teaspoon garlic powder Add mellow garlic flavor without moisture; blend into dry ingredients or oil to distribute garlicky notes evenly. Use as a convenient substitute for fresh garlic when a uniform, subtle garlic flavor is desired.
- 1 cup pizza sauce of choice I used classic red sauce Provide savory tomato base and primary sauce layer for the pizza; spread evenly over shaped focaccia before adding cheeses. Select a sauce with a texture and seasoning you enjoy to control overall flavor intensity.
- 1/2 cups mozzarella cheese low moisture shredded Melt into a stretchy, gooey topping that adds richness and classic pizza texture; sprinkle over sauce to achieve even coverage. Choose low-moisture shredded mozzarella for good melt and browning without excess water.
- Fresh mozzarella rounds Create creamy pockets and fresh, milky bites when sliced and placed atop the pizza; dot the surface with rounds for a luxurious texture contrast. Pat dry if overly wet to prevent soggy spots and tear into smaller pieces if needed.
- 1/3 cup grated parmesan cheese Provide sharp, salty umami and help with browning; sprinkle grated parmesan over cheese or edges for added depth. Use freshly grated for best melting and flavor contribution rather than pre-grated powders.
- Salt and pepper to taste Season the finished pizza to taste and enhance overall flavors; sprinkle sparingly after baking to avoid over-salting. Use freshly ground pepper for aromatic spice and adjust salt according to the saltiness of cheeses used.
- Basil leaves for garnish Finish with bright, herbal aroma and visual appeal by tearing leaves over the baked pizza; add right before serving to preserve freshness. Choose larger or smaller leaves based on desired garnish appearance and intensity.
Instructions
- In a small bowl mix warm water, yeast, and sugar. Let sit until the yeast becomes foamy, about 5 minutes.: The first sensory cue you want is tiny bubbles and an earthy, yeasty aroma rising from the bowl, which tells you the active dry yeast is awake and ready. The water should feel warm but not hot on your wrist, and the mixture will thicken slightly as it foams. Why this matters, I tell myself, is that a lively yeast guarantees a good rise, which determines texture later. A common mistake is using water that is too hot, which will kill the yeast, or water that is too cold, which will delay activity. If the foam does not form in five to ten minutes, give the yeast a second chance with freshly measured warm water and granulated sugar .
- In the bowl of a stand mixer, fitted with the paddle, mix your yeast mixture, 1/4 cup olive oil, salt, and 2 cups of your flour.: At this stage you should notice the glossy sheen the olive oil brings to the mixture and the initial shaggy dough that forms as the all purpose flour hydrates. Using the mixer paddle creates a gentle, even mix, which helps hydrate the flour without overworking the gluten too early. I like to pause and scrape the bowl once or twice so everything comes together evenly. One trap is adding all the flour at once and ending up with a tough dough, so starting with two cups is a controlled way to monitor texture.
- Begin mixing and add additional flour (1/2 a cup at a time), and knead on low speed until all flour is incorporated. Add just enough flour so that you have a soft but not too sticky dough (I used 3.5 cups).: You will see the dough gradually clean the bowl and form a cohesive ball, and it will pull away from the sides when the hydration is right. The surface should be slightly tacky but not clingy. This tactile feedback is more important than exact measurements because flour brands absorb differently. The reason this measured adding prevents a dense crust is that it keeps the dough hydrated enough to allow an open crumb. Avoid adding too much flour out of habit, which leads to a dry, heavy result.
- Once your dough has come together mix for an additional 2 minutes on medium speed to help develop the gluten.: During these extra two minutes you will hear a steadier, more even sound from the mixer and notice the dough smoothing and becoming elastic. This short period of development creates structure, giving your Focaccia Pizza the ability to hold bubbles during the rise, contributing to that tender yet airy crumb. Over mixing can make the dough tough, so keep to the brief time. If the dough starts to feel stiff, reduce speed and time slightly.
- Remove dough from mixer and place in a bowl oiled with some olive oil. Cover with plastic wrap or a towel dampened with warm water.: The bowl will feel warm to the touch after handling, and the olive oil coating prevents sticking while allowing the dough to expand freely. Covering with a damp towel helps maintain a humid environment, so the surface does not form a dry skin. The reason we create this sheltered setting is to encourage an even rise. A common slip is leaving the dough uncovered, which can create a dry crust and uneven proofing.
- Let the dough sit until it has doubled in size, about an hour.: As the dough rests you will notice it inflate and develop a spongy, airy feel when gently pressed with a finger. The aroma will shift toward a slightly sweet, yeasty scent that promises a light texture. This doubling is important because it builds gas pockets that translate into a soft interior and a tender bite. Rushing this step will yield a denser crust, so give it the time it needs.
- Remove dough from bowl and place on an oiled sheet pan, be sure to degas and stretch the dough as far as it will go on the pan without tearing.: When you press and stretch, you will hear slight resistance and feel elasticity from the all purpose flour structure. Degassing gently redistributes air and makes the dough manageable for shaping, while stretching sets the stage for even baking across the sheet. If the dough resists tearing, let it relax for a few minutes; forcing it will create holes and uneven thickness.
- Cover and let the dough sit until it has relaxed enough to stretch to cover the pan entirely, about 20-30 minutes.: During this resting period the dough will relax and feel softer to the touch, which makes it easier to coax into the pan. The visual cue is a smoother surface and a slight increase in volume. This secondary rest is crucial because it prevents spring back while shaping. A common error is rushing this rest, which leads to a misshapen crust that pulls back in the oven.
- Use your fingers to create dimples in the dough, being sure to even the dough out on the pan as you do so.: Pressing in with your fingertips creates shallow wells that trap olive oil and prevent large air pockets, while also creating the classic focaccia texture. You should see little indentations that stay in place instead of springing back. Doing this also helps distribute heat evenly during baking. Avoid using your entire palm and pressing too hard, which can deflate the dough excessively.
- Preheat oven to 375 degrees fahrenheit.: As the oven warms you will hear its elements cycle and smell the faint metallic scent of heating. The chosen temperature is moderate so the crust browns slowly and the center cooks through without overbrowning the cheese. Preheating thoroughly ensures even oven spring and a consistent bake. Putting the pizza into a not fully preheated oven can result in a soggy interior and pale crust.
- At this point you are going to assemble your pizza. Spread your sauce of choice evenly over the surface of the dough, leaving some space for a crust if you would like.: As you spread the pizza sauce , watch for a smooth, even layer that covers the dimples without pooling too deeply in them. The aroma of the sauce will mingle with the warm dough, promising savory notes. Leaving a border gives a pleasant contrast between crisp edge and soft center. One pitfall is overloading the sauce which can seep into the dough and create a soggy center.
- In a small bowl mix together your mozzarella and parmesan cheeses and spread them evenly over the sauced dough. If you want additional toppings such as pepperoni, mushrooms, sliced bell pepper, onions, olives, etc. now is the time to put them on.: The blend of shredded mozzarella cheese and parmesan cheese will melt into a cohesive, golden topping that bubbles and browns attractively. Fresh mozzarella rounds produce creamy pockets when used alongside shredded cheese. When arranging toppings, distribute them so no area is overloaded, which can hinder baking and cause uneven melting. Beware of toppings with high moisture content; pat them dry first to prevent sogginess.
- Sprinkle some salt and pepper over the top of it all and place the assembled pizza into your preheated oven, bake for 35-45 minutes.: In the oven you will hear faint bubbling and see the cheese begin to bubble and take on a golden hue. The edges should darken slightly while the center sets but remains tender. This bake window lets the crust develop color and the cheeses fully melt. A typical misstep is pulling the pizza out too early, when the center still appears underbaked; it will firm up as it rests but needs that full time to finish.
- Remove from oven when the crust is cooked and all the cheese has melted. Enjoy fresh after allowing the pizza to cool for a few minutes.: After removing the pan you will notice a warm, inviting scent and a crackle from the cooling crust. Allowing a short rest helps the toppings set so slices hold together beautifully, and the basil leaves placed at the end will release a fresh herbal perfume. Cutting while piping hot can cause the cheese to slide, so wait a few minutes before serving. The most common mistake here is rushing to eat immediately, which can result in sliding toppings and scalded fingers.
Notes
- Herb boost: Increase the amount of Italian seasoning and a light dusting of garlic powder on the crust edge before baking to deepen the aromatic profile.
- Cheese blend: Combine shredded mozzarella cheese with a small amount of grated parmesan cheese for a balance of gooey melt and nutty flavor.
- Cheese placement: Dot with fresh mozzarella rounds after spreading sauce for pockets of creamy texture that contrast with shredded cheese.
- Oil finish: Brush the crust rim with extra olive oil before baking for a golden, slightly crisp edge and glossy finish.
- Basil finish: Add torn basil leaves only after baking to preserve their bright color and fragrance as a finishing touch.
- Flour control: Start with 2 1/2 cups of all purpose flour and add up to the indicated amount by feel to prevent a dry dough.