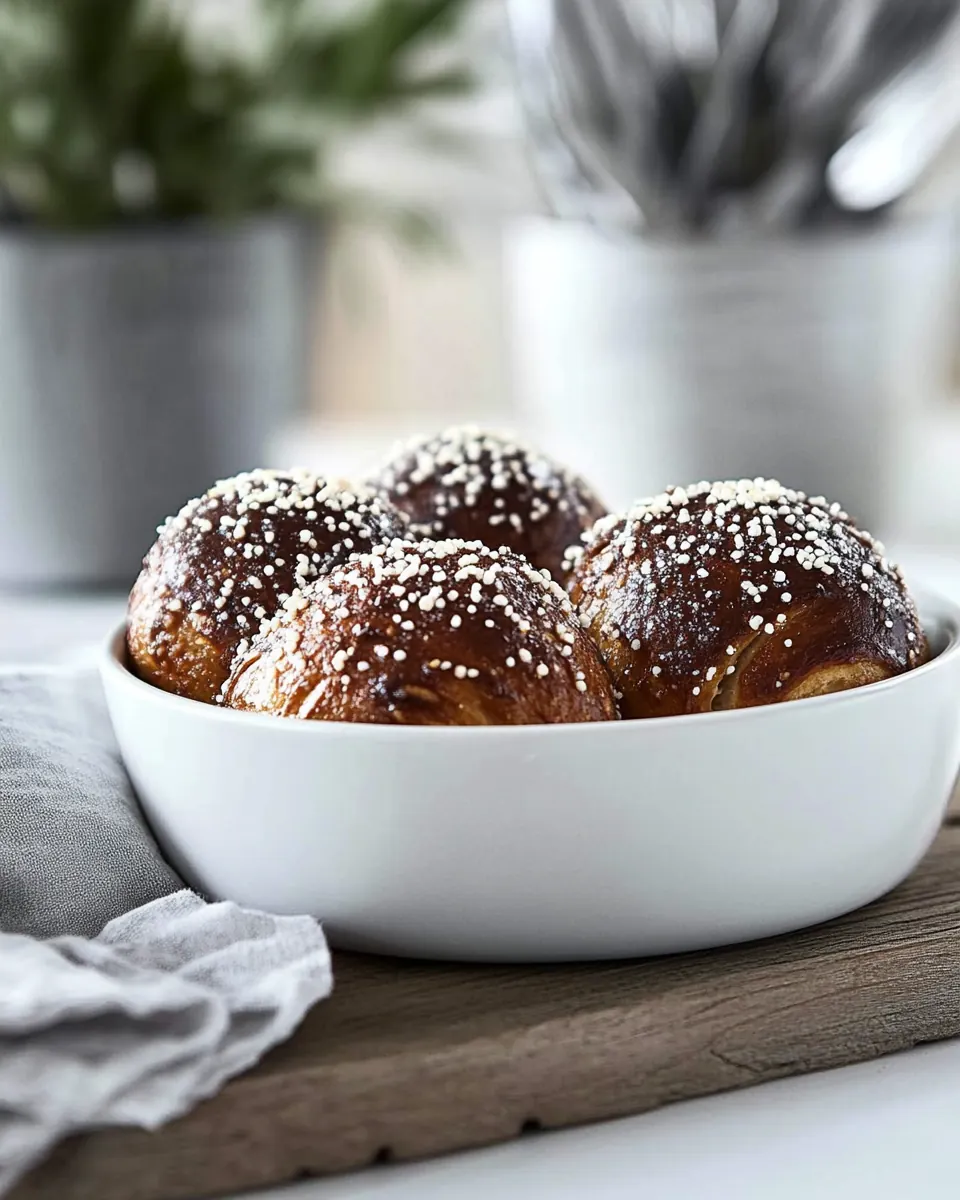
Pretzel Rolls
Pretzel Rolls are a cozy, tactile bread I reach for whenever I want something with a golden crust and that signature salty finish. The first time I shaped these into tight, smooth balls, I remember the dough giving a gentle, springy resistance under my fingertips, and the aroma of warm milk and butter felt instantly comforting. It felt like a small, delicious ritual that turned simple pantry staples into something worth lingering over.
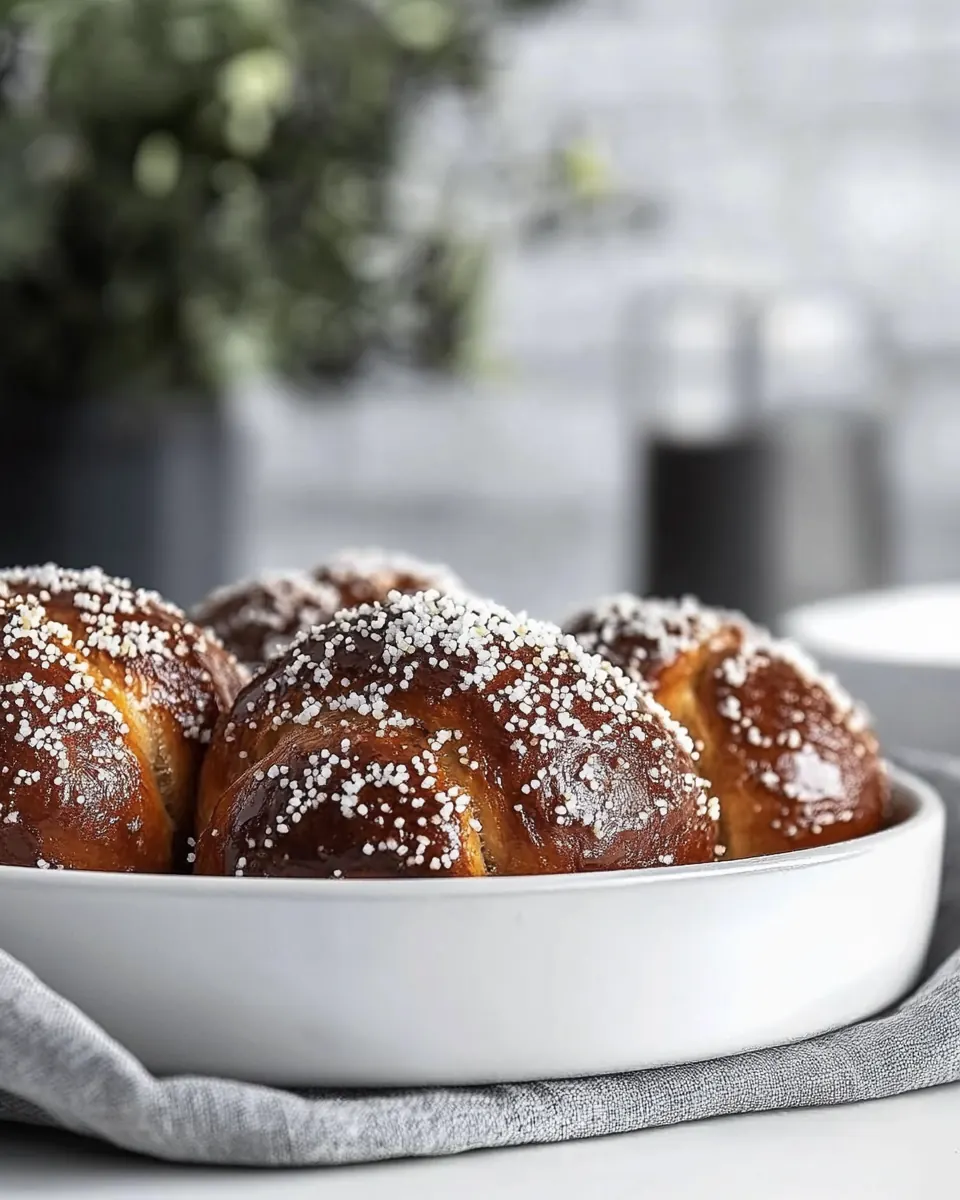
Over the years I have made these Pretzel Rolls for casual weeknight dinners, for a potluck, and for a weekend baking day. Each time I knead the dough, I notice subtle differences in texture depending on humidity and how much flour I use, so I listen to the dough as much as I watch it. Boiling the rolls in a baking soda bath is the moment the crust promise is locked in, the surface tightening and smelling faintly of toasted flour. Brushing with melted butter before serving makes them glow, and the coarse salt on top provides that irresistible contrast to the soft interior.
Recipe Snapshot
47 mins
20 mins
27 mins
Medium
200 kcal
American
Gluten-Free, Low FODMAP
Appetizers
Mixer, Large pot, Slotted spoon, Baking sheet, Wire rack
What Makes This Pretzel Rolls Special
Comfortingly Familiar Texture
I love how Pretzel Rolls deliver a soft, pillowy interior with a slightly chewy crust. When you tear one open, you should see soft strands of crumb, and that tactile contrast makes every bite satisfying. I’ve learned to trust the dough’s spring-back to know when it is kneaded enough.
Simple Staples, Big Flavor
This recipe uses pantry basics like milk, butter, flour, and brown sugar, and still produces a bakery-worthy result. I appreciate recipes that don’t demand rare ingredients, because it means I can bake spontaneously, even on a busy afternoon when I crave something warm from the oven.
Showstopper Technique
The boiling step is what elevates these rolls into true pretzel territory. I love the theatricality of lowering dough into bubbling water, hearing a soft hiss as the surface firms up. That brief bath gives the crust a deep color and a unique chewiness, and it’s a trick I use for any pretzel-style bread I make.
Adaptable and Shareable
Pretzel Rolls are perfect for gatherings because they hold up well and travel easily. You can brush them with melted butter and sprinkle with coarse salt right before serving to keep them looking fresh. I often bring a basket to friends and it becomes a small, instantly appreciated gesture.
Great for Learning Baking Basics
This recipe is forgiving, so it’s a great practice for learning yeast dough handling, shaping, and baking timing. I remember teaching a friend to shape rolls with me, and the first time their roll browned evenly, they beamed. That moment of success is why I return to this recipe whenever I want to build confidence in the kitchen.
What You’ll Need for Pretzel Rolls

These ingredients come together in a way that balances richness, structure, and that signature pretzel crust. The dairy adds tenderness and flavor, the yeast provides lift and airiness, and the baking soda bath transforms the surface into a deep brown, chewy shell. I treat the list like a team, where each player has a clear job to do.
- 1 cup milk: Warm gently and provide moisture and richness to the dough while activating yeast when combined with other wet ingredients.
- 2 tablespoons butter OR margarine: Melt for fat content that tenderizes the crumb and contributes to flavor; use as an alternative to margarine without changing texture significantly.
- 2 tablespoons brown sugar: Sweeten mildly to enhance browning and flavor, and feed yeast slightly to encourage fermentation and color development during baking.
- 2 1/4 teaspoons Fleischmann's® RapidRise Yeast1 envelope: Leaven rapidly to create rise and aeration in the dough; sprinkle or dissolve before mixing to ensure consistent fermentation and volume.
- 2 teaspoons salt: Season the dough to balance flavor and control yeast activity by regulating osmotic conditions within the mixture.
- 3 to 3-1/2 cups all purpose flour: Build structure and absorb liquids to form a pliable dough; add gradually until the correct consistency and elasticity are achieved.
- 3 quarts water: Boil for the alkaline bath that gives pretzels their characteristic chewy crust and deep brown color when combined with baking soda.
- 3/4 cup baking soda: Create an alkaline solution when dissolved in the boiling water bath to promote Maillard reaction and glossy, dark crust formation.
- 1 egg: Brush on the surface to help egg wash bind salts and promote deep golden sheen and attractive finish after baking.
- 1 teaspoon water: Thin as needed to adjust the egg wash consistency so it spreads evenly and helps toppings adhere during baking.
- 2 tablespoons butter melted: Brush melted on top to add shine and extra buttery flavor after baking, enhancing crust richness and mouthfeel.
- pretzel salt or kosher salt: Sprinkle coarse crystals on the surface to provide crunchy, salty bursts that define pretzel flavor and contrast the soft crumb.
Cooking Method for Pretzel Rolls
These directions take you from warming the milk to the final buttery glaze. Follow sensory cues and timing closely, and you will be rewarded with evenly browned, chewy rolls. I find it helpful to prepare the baking soda bath and egg wash before shaping so the workflow is smooth.
- Heat milk and butter until warm (120° to 130°F); the butter will not completely melt. Combine with undissolved yeast and brown sugar in a large mixer bowl. Stir in salt and 2 cups flour, beat for 3 minutes. Gradually add enough remaining flour to make a soft dough.: You will feel the warmth first, and a faint buttery aroma will rise as you heat the mixture, signaling the correct temperature range. Using a thermometer is the safest way to land between 120° to 130°F , because if it is cooler the yeast will be sluggish, and if it is hotter you risk killing the yeast. Stir gently until the butter is mostly incorporated, leaving small bits is fine. A common mistake is overheating, which leaves the yeast lifeless and the dough refusing to rise, so always test the liquid on your wrist if you lack a thermometer.
- Knead on a floured surface until smooth and elastic, about 8 to 10 minutes. Place in a greased bowl, cover and let rise for 1 hour, or until doubled in size.: When you sprinkle the yeast and brown sugar into the warm milk, you should notice the sugar dissolving and a slight yeasty scent developing after a few minutes, suggesting the yeast is waking up. Stir briefly to combine, creating a uniform, glossy mixture. If there is no activity or no faint yeasty smell within ten minutes, the yeast might be expired, which will prevent a proper rise.
- Preheat oven to 400°F. Grease a baking sheet or line with parchment paper.: As you add the first portion of flour and the salt , the batter will thicken and start to pull away from the bowl edges. Beat vigorously for the full three minutes to build initial gluten structure, which helps the dough become elastic later. Overmixing can make the dough tough, while undermixing leaves it slack and sticky, so aim for a smooth, slightly tacky texture.
- Combine water and baking soda and bring to a boil.: You will see the dough transform from sticky to cohesive as you add more flour . Use gentle folds and a scraper to incorporate the flour gradually, feeling for a soft dough that still yields slightly to your touch. If you add too much flour you will end up with dry, heavy rolls, and if you add too little the dough will be too sticky to handle easily.
- Punch dough down and divide dough into 8 pieces and roll each piece into a tight, smooth ball.: The sound of the dough changes as you knead, becoming quieter and more uniform, while its texture shifts to a satiny sheen that springs back when pressed. This is where gluten develops, creating the structure that traps gases for a good rise. If you skimp on kneading, the crumb will be dense; if you overwork it, the dough can become tight and resist rising.
- Boil each roll in the solution for 2 minutes, turning after 1 minute. Remove rolls from pot using a slotted spoon and place on prepared baking sheet.: As the dough rests, you will see it puff and become aerated, and the surface may show small bubbles. The room temperature affects how quickly this happens, so check for a clear doubling rather than strictly timing if your kitchen is cool or warm. A common pitfall is underproofing, which yields small, heavy rolls, so give the dough the visual check for doubling.
- Brush with egg wash and cut a cross in the top.: You should notice the oven coming to temperature steadily, and a hot oven is crucial to set the crust quickly. Preheating ensures that when the rolls go in they begin browning immediately. Avoid placing dough into a cool oven, as it will disrupt the bake and produce pale, underdeveloped crust.
- Bake for 15 minutes then reduce the temperature to 350°F and bake an additional 10 to 12 minutes until the rolls are evenly browned. Remove from pan and cool on a wire rack.: A greased or lined sheet provides a nonstick surface and helps the bottoms brown evenly, producing a clean release. I prefer parchment for easier cleanup, and you will also see the rolls sit neatly instead of spreading. Forgetting this step can mean sticky bottoms that tear when removed.
- Before serving, brush with melted butter and sprinkle with pretzel salt.: When the water reaches a rolling boil, add the baking soda carefully, because it will bubble and steam as it reacts. The solution should be at a steady boil to firm the dough surface during the dip. If the boil is too gentle, the surface reaction will be uneven; if it is too vigorous, the rolls may knock together and lose shape.
- Punch dough down and divide dough into 8 pieces and roll each piece into a tight, smooth ball: Pushing the air out gives the rolls a uniform crumb, and rolling into tight balls builds surface tension, which helps them rise upward rather than spreading out. You will feel the dough tighten as you roll, and the surface should be seamless and smooth. If the balls are not tight, the rolls can flatten during baking and lose their height.
- Boil each roll in the solution for 2 minutes, turning after 1 minute: As you lower a roll into the boiling bath, listen for a soft hiss and watch the surface firm. Turning after one minute ensures even exposure and consistent browning later on. Remove carefully with a slotted spoon so excess liquid drains; letting them sit wet on the sheet can prevent proper crust formation. A common error is overcrowding the pot, which cools the bath and prevents the chemical reaction.
- Remove rolls from pot using a slotted spoon and place on prepared baking sheet: The rolls should glisten slightly and feel firmer to the touch after their dip, and spacing them with a small gap allows hot air to circulate for even browning. If you place them too close, sides may stick and the bottoms may not crisp properly. Use a slotted spoon to minimize carrying too much liquid.
- Brush with egg wash and cut a cross in the top: The egg wash gives a glossy, deep brown finish and helps the salt adhere, while the cross invites controlled expansion in the oven. When you slice, you should see the surface part cleanly rather than tear. Cutting too deeply can deflate the rolls, so keep the incision shallow.
- Bake for 15 minutes then reduce the temperature to 350°F and bake an additional 10 to 12 minutes until the rolls are evenly browned: Initially baking at the higher temperature sets the crust, and lowering it finishes the interior without overbrowning. Watch for an even, deep golden color across the tops, and listen for a faint hollow sound when tapped on the bottom as a doneness cue. If you remove them too early they will finish gummy inside, and if you leave them too long they can become overly hard.
- Remove from pan and cool on a wire rack: Cooling on a rack prevents the bottoms from steaming and softening, maintaining the crispness of the crust. You will notice a continued faint aroma of baked dough as they cool. Serving while too hot can cause the crumb to be gummy, so allow a brief rest to set the interior.
- Before serving, brush with melted butter and sprinkle with pretzel salt: The final brush adds a soft sheen and extra flavor, and the coarse pretzel salt gives that classic crunchy finish. Apply the butter lightly so it soaks in without making the crust limp. Waiting too long to add the salt can cause it to fall off when the rolls are handled.
Ways to Adapt This Recipe
These suggestions help you adapt Pretzel Rolls while staying true to the original technique. I include practical options that keep the essential steps intact, so your results remain reliably pretzel like.
- Make ahead: Prepare the dough up to the first rise, refrigerate overnight, then shape and continue the recipe the next day for fresher flavor and convenience.
- Smaller rolls: Divide the dough into more pieces for slider sized Pretzel Rolls, adjusting boiling and baking time slightly to avoid overbrowning.
- Egg wash alternative: Use a beaten egg with a teaspoon of water for a glossy finish, or skip it for a more matte appearance if preferred.
- Baking soda bath care: Use a wide, deep pot with ample water so each roll floats freely during the 2 minute bath, ensuring even crust development.
- Salt choice: Opt for coarse pretzel salt or kosher salt right after the final butter brush for the classic crunchy top that defines pretzel rolls.
Serving Suggestions
These serving ideas will help you present Pretzel Rolls in ways that match different occasions and meals. They can be a centerpiece, a side, or a snack depending on how you dress them up.
- Casual dinner side: Serve warm rolls alongside a hearty stew or soup for a comforting, homestyle meal perfect for weeknights.
- Party basket: Arrange several warm rolls in a lined basket with a small dish of melted butter for dipping, making them easy to share at a gathering.
- Sandwich base: Use cooled rolls as a handheld sandwich bread for deli fillings, their dense crumb and chewy crust stand up well to moist fillings.
- Brunch plate: Pair warm rolls with soft cheeses and preserves for a relaxed brunch spread where guests can build small bites.
- Storage tip: Store cooled rolls in an airtight container at room temperature for up to two days, or freeze individually wrapped for longer storage and reheat in a warm oven.
- Occasion match: These rolls are great for holiday dinners, family gatherings, or Ramadan if you need a simple, shareable bread that complements many mains.
- Seasonal pairing: In cooler months I like to serve them with savory braises, while in milder weather they work well with picnic style fare and fresh salads.
FAQ
Conclusion
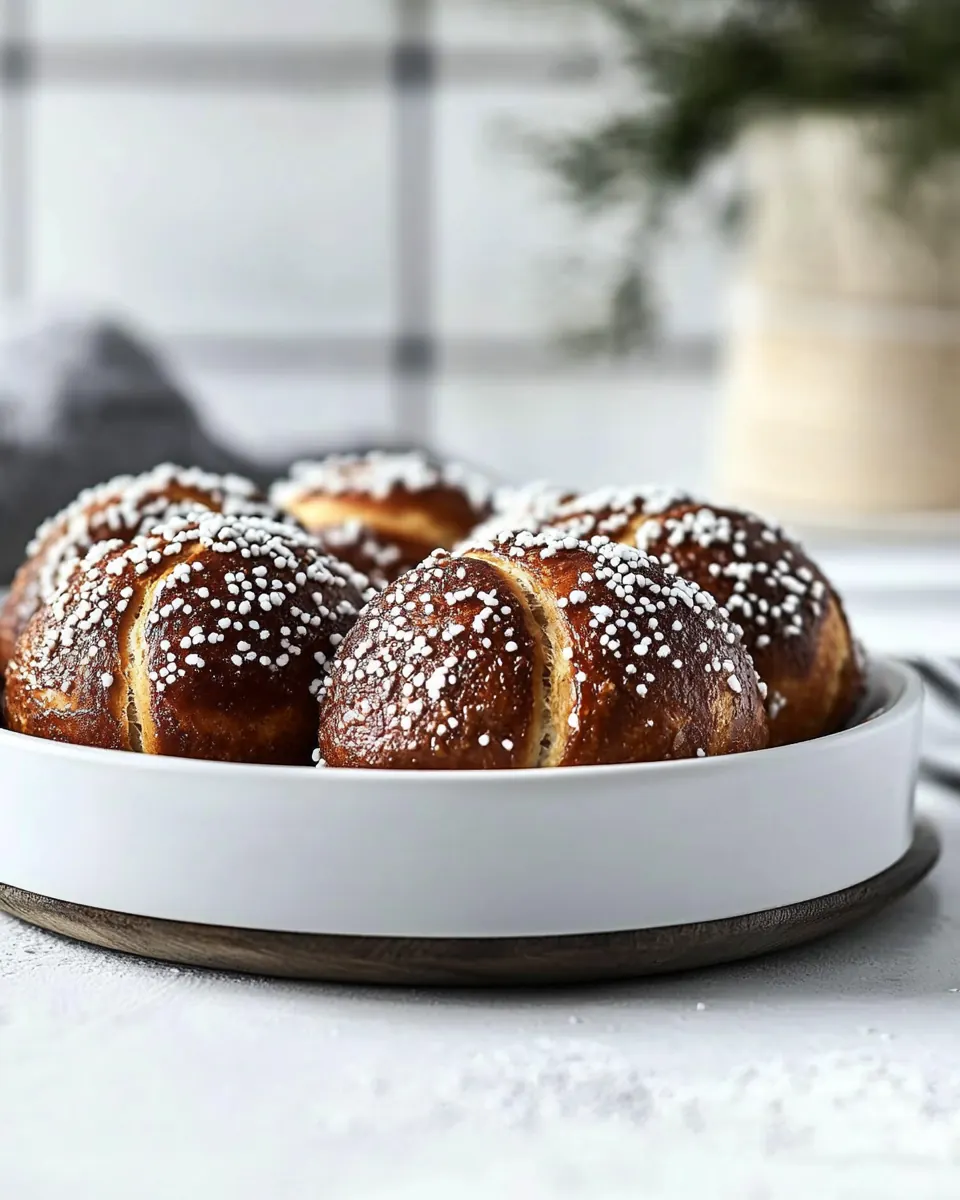
These Pretzel Rolls stand out for their chewy, golden crust and soft, tender interior, a combination that keeps people coming back for more. The simple ingredients and the baking soda bath create a classic pretzel character that is both satisfying and approachable. Give them a try on a weekend baking day or for a special dinner, because the small extra steps are worth the reward. I hope you enjoy the tactile joy of shaping, the warm aroma while they bake, and the perfect balance of salt and butter when you bite in.
Pretzel Rolls
Equipment
- Mixer
- Large Pot
- Slotted Spoon
- Baking Sheet
- Wire Rack
Ingredients
- 1 cup milk Warm gently and provide moisture and richness to the dough while activating yeast when combined with other wet ingredients.
- 2 tablespoons butter OR margarine Melt for fat content that tenderizes the crumb and contributes to flavor; use as an alternative to margarine without changing texture significantly.
- 2 tablespoons brown sugar Sweeten mildly to enhance browning and flavor, and feed yeast slightly to encourage fermentation and color development during baking.
- 2 1/4 teaspoons Fleischmann's® RapidRise Yeast1 envelope Leaven rapidly to create rise and aeration in the dough; sprinkle or dissolve before mixing to ensure consistent fermentation and volume.
- 2 teaspoons salt Season the dough to balance flavor and control yeast activity by regulating osmotic conditions within the mixture.
- 3 to 3-1/2 cups all purpose flour Build structure and absorb liquids to form a pliable dough; add gradually until the correct consistency and elasticity are achieved.
- 3 quarts water Boil for the alkaline bath that gives pretzels their characteristic chewy crust and deep brown color when combined with baking soda.
- 3/4 cup baking soda Create an alkaline solution when dissolved in the boiling water bath to promote Maillard reaction and glossy, dark crust formation.
- 1 egg Brush on the surface to help egg wash bind salts and promote deep golden sheen and attractive finish after baking.
- 1 teaspoon water Thin as needed to adjust the egg wash consistency so it spreads evenly and helps toppings adhere during baking.
- 2 tablespoons butter melted Brush melted on top to add shine and extra buttery flavor after baking, enhancing crust richness and mouthfeel.
- pretzel salt or kosher salt Sprinkle coarse crystals on the surface to provide crunchy, salty bursts that define pretzel flavor and contrast the soft crumb.
Instructions
- Heat milk and butter until warm (120° to 130°F); the butter will not completely melt. Combine with undissolved yeast and brown sugar in a large mixer bowl. Stir in salt and 2 cups flour, beat for 3 minutes. Gradually add enough remaining flour to make a soft dough.: You will feel the warmth first, and a faint buttery aroma will rise as you heat the mixture, signaling the correct temperature range. Using a thermometer is the safest way to land between 120° to 130°F , because if it is cooler the yeast will be sluggish, and if it is hotter you risk killing the yeast. Stir gently until the butter is mostly incorporated, leaving small bits is fine. A common mistake is overheating, which leaves the yeast lifeless and the dough refusing to rise, so always test the liquid on your wrist if you lack a thermometer.
- Knead on a floured surface until smooth and elastic, about 8 to 10 minutes. Place in a greased bowl, cover and let rise for 1 hour, or until doubled in size.: When you sprinkle the yeast and brown sugar into the warm milk, you should notice the sugar dissolving and a slight yeasty scent developing after a few minutes, suggesting the yeast is waking up. Stir briefly to combine, creating a uniform, glossy mixture. If there is no activity or no faint yeasty smell within ten minutes, the yeast might be expired, which will prevent a proper rise.
- Preheat oven to 400°F. Grease a baking sheet or line with parchment paper.: As you add the first portion of flour and the salt , the batter will thicken and start to pull away from the bowl edges. Beat vigorously for the full three minutes to build initial gluten structure, which helps the dough become elastic later. Overmixing can make the dough tough, while undermixing leaves it slack and sticky, so aim for a smooth, slightly tacky texture.
- Combine water and baking soda and bring to a boil.: You will see the dough transform from sticky to cohesive as you add more flour . Use gentle folds and a scraper to incorporate the flour gradually, feeling for a soft dough that still yields slightly to your touch. If you add too much flour you will end up with dry, heavy rolls, and if you add too little the dough will be too sticky to handle easily.
- Punch dough down and divide dough into 8 pieces and roll each piece into a tight, smooth ball.: The sound of the dough changes as you knead, becoming quieter and more uniform, while its texture shifts to a satiny sheen that springs back when pressed. This is where gluten develops, creating the structure that traps gases for a good rise. If you skimp on kneading, the crumb will be dense; if you overwork it, the dough can become tight and resist rising.
- Boil each roll in the solution for 2 minutes, turning after 1 minute. Remove rolls from pot using a slotted spoon and place on prepared baking sheet.: As the dough rests, you will see it puff and become aerated, and the surface may show small bubbles. The room temperature affects how quickly this happens, so check for a clear doubling rather than strictly timing if your kitchen is cool or warm. A common pitfall is underproofing, which yields small, heavy rolls, so give the dough the visual check for doubling.
- Brush with egg wash and cut a cross in the top.: You should notice the oven coming to temperature steadily, and a hot oven is crucial to set the crust quickly. Preheating ensures that when the rolls go in they begin browning immediately. Avoid placing dough into a cool oven, as it will disrupt the bake and produce pale, underdeveloped crust.
- Bake for 15 minutes then reduce the temperature to 350°F and bake an additional 10 to 12 minutes until the rolls are evenly browned. Remove from pan and cool on a wire rack.: A greased or lined sheet provides a nonstick surface and helps the bottoms brown evenly, producing a clean release. I prefer parchment for easier cleanup, and you will also see the rolls sit neatly instead of spreading. Forgetting this step can mean sticky bottoms that tear when removed.
- Before serving, brush with melted butter and sprinkle with pretzel salt.: When the water reaches a rolling boil, add the baking soda carefully, because it will bubble and steam as it reacts. The solution should be at a steady boil to firm the dough surface during the dip. If the boil is too gentle, the surface reaction will be uneven; if it is too vigorous, the rolls may knock together and lose shape.
- Punch dough down and divide dough into 8 pieces and roll each piece into a tight, smooth ball: Pushing the air out gives the rolls a uniform crumb, and rolling into tight balls builds surface tension, which helps them rise upward rather than spreading out. You will feel the dough tighten as you roll, and the surface should be seamless and smooth. If the balls are not tight, the rolls can flatten during baking and lose their height.
- Boil each roll in the solution for 2 minutes, turning after 1 minute: As you lower a roll into the boiling bath, listen for a soft hiss and watch the surface firm. Turning after one minute ensures even exposure and consistent browning later on. Remove carefully with a slotted spoon so excess liquid drains; letting them sit wet on the sheet can prevent proper crust formation. A common error is overcrowding the pot, which cools the bath and prevents the chemical reaction.
- Remove rolls from pot using a slotted spoon and place on prepared baking sheet: The rolls should glisten slightly and feel firmer to the touch after their dip, and spacing them with a small gap allows hot air to circulate for even browning. If you place them too close, sides may stick and the bottoms may not crisp properly. Use a slotted spoon to minimize carrying too much liquid.
- Brush with egg wash and cut a cross in the top: The egg wash gives a glossy, deep brown finish and helps the salt adhere, while the cross invites controlled expansion in the oven. When you slice, you should see the surface part cleanly rather than tear. Cutting too deeply can deflate the rolls, so keep the incision shallow.
- Bake for 15 minutes then reduce the temperature to 350°F and bake an additional 10 to 12 minutes until the rolls are evenly browned: Initially baking at the higher temperature sets the crust, and lowering it finishes the interior without overbrowning. Watch for an even, deep golden color across the tops, and listen for a faint hollow sound when tapped on the bottom as a doneness cue. If you remove them too early they will finish gummy inside, and if you leave them too long they can become overly hard.
- Remove from pan and cool on a wire rack: Cooling on a rack prevents the bottoms from steaming and softening, maintaining the crispness of the crust. You will notice a continued faint aroma of baked dough as they cool. Serving while too hot can cause the crumb to be gummy, so allow a brief rest to set the interior.
- Before serving, brush with melted butter and sprinkle with pretzel salt: The final brush adds a soft sheen and extra flavor, and the coarse pretzel salt gives that classic crunchy finish. Apply the butter lightly so it soaks in without making the crust limp. Waiting too long to add the salt can cause it to fall off when the rolls are handled.
Notes
- Make ahead: Prepare the dough up to the first rise, refrigerate overnight, then shape and continue the recipe the next day for fresher flavor and convenience.
- Smaller rolls: Divide the dough into more pieces for slider sized Pretzel Rolls, adjusting boiling and baking time slightly to avoid overbrowning.
- Egg wash alternative: Use a beaten egg with a teaspoon of water for a glossy finish, or skip it for a more matte appearance if preferred.
- Baking soda bath care: Use a wide, deep pot with ample water so each roll floats freely during the 2 minute bath, ensuring even crust development.
- Salt choice: Opt for coarse pretzel salt or kosher salt right after the final butter brush for the classic crunchy top that defines pretzel rolls.