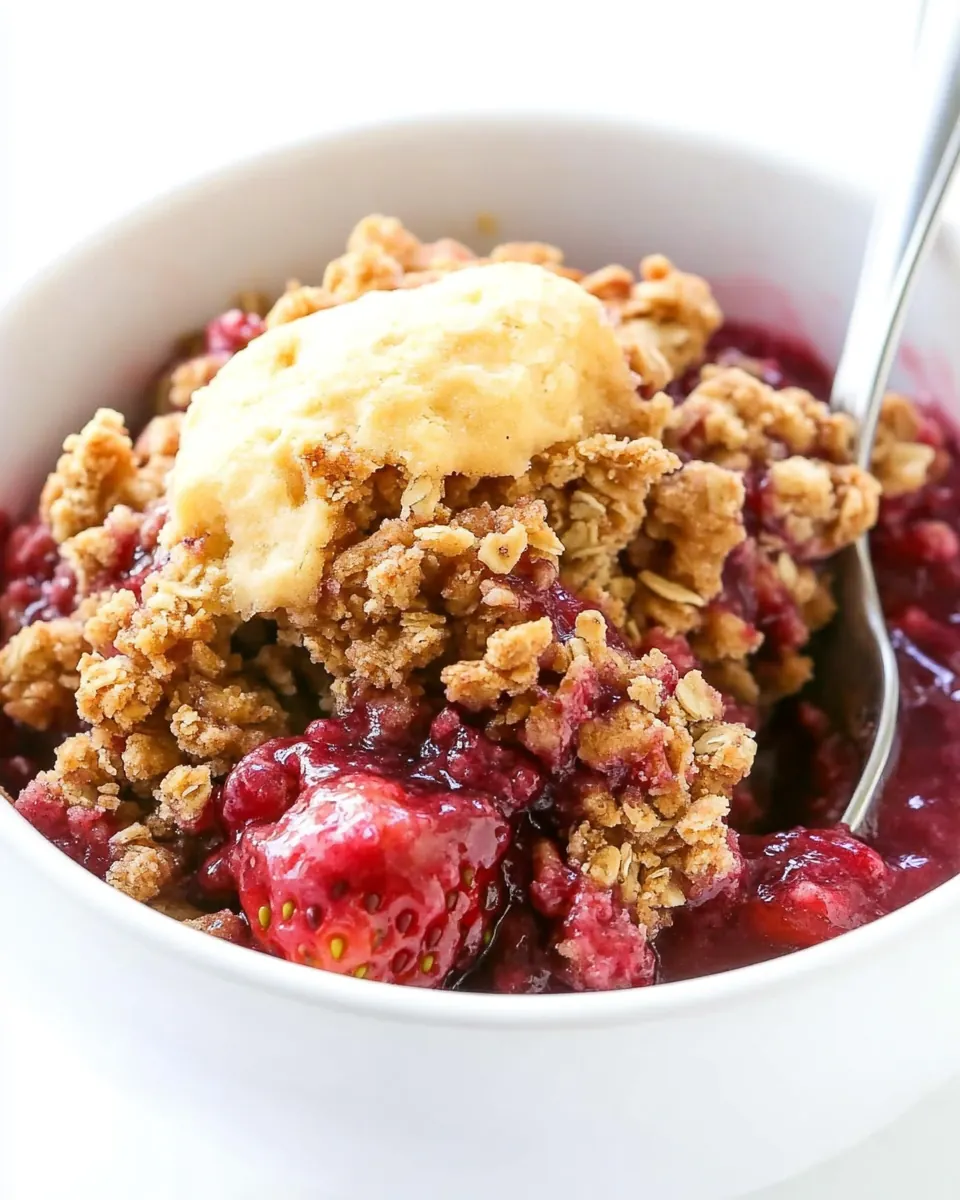
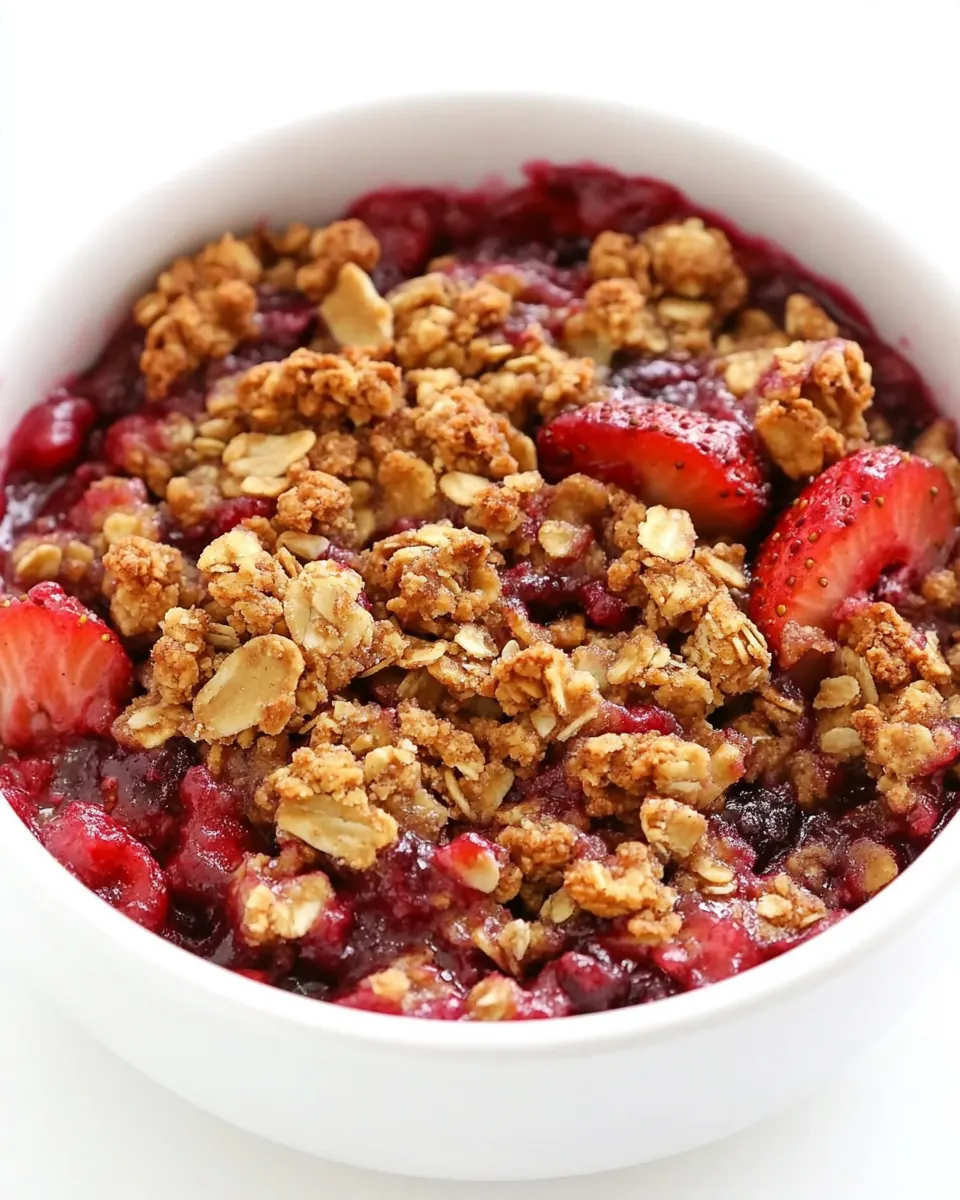
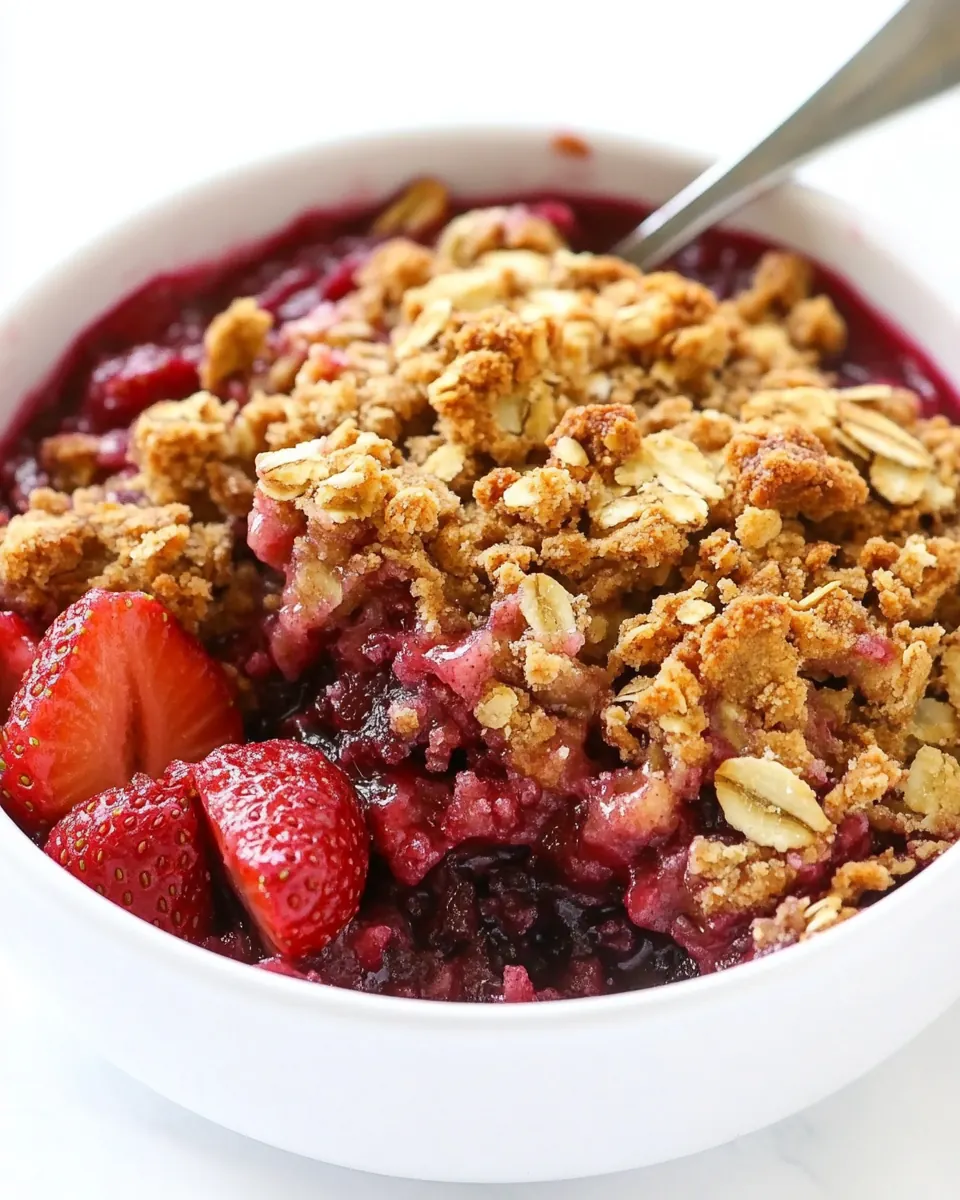
Easy Strawberry Crisp
Easy Strawberry Crisp has been one of my happiest, most requested desserts since the first time I tossed berries and oat crumble together on a warm Saturday afternoon.
I remember grabbing a bowl of ripe, fragrant strawberries from the farmers market, the sun still low and the vendors friendly, and deciding to make something that felt like summer in a spoon. I wanted a dessert that was approachable, not fussy, something you could pull together between errands yet impressive enough to bring to a friends dinner. The combination of juicy strawberries and a buttery, oat-packed topping always wins. Over time I tuned the sugar and lemon so the fruit shines through, while the topping stays crisp and satisfying.
Theres comfort in the crackle of a fresh-out-of-oven crumble and the steam rising as you slice into bubbling berries. When I serve Easy Strawberry Crisp I often watch people close their eyes at first bite, a tiny ritual that tells me I did something right. This recipe is perfect for when you want a homey dessert with minimal fuss, and its forgiving enough to adapt to the ripeness of your strawberries. Whether youre a novice or a confident baker, this crisp gives you a lot of joy for very little effort.
Recipe Snapshot
55 mins
10 mins
45 mins
Medium
250 kcal
American
Gluten-Free, Low FODMAP
Desserts
Oven, 12-inch cast iron skillet or 9-inch baking dish, Food processor, Large bowl
The Magic of This Easy Strawberry Crisp
Bright fresh fruit
I love that strawberries are the star here, offering juicy, fragrant sweetness that carries through every spoonful. When the fruit cooks, the aroma fills the kitchen and the natural juices concentrate, creating a syrup that balances the crunchy topping. I always pick the ripest strawberries I can find, because they yield the best texture and flavor.
Buttery crisp topping
The topping combines all purpose flour, brown sugar, unsalted butter, and rolled oats, which gives it a wonderful contrast of textures. I like how the oats add chew and the butter makes everything golden and fragrant. Its simple, yet it transforms the dish from jammy fruit to a satisfying dessert that begs for seconds.
Easy and approachable
I make Easy Strawberry Crisp when I want maximum impact with minimal fuss. The technique is straightforward, so it’s great for new bakers. I appreciate that its forgiving; a little extra sugar or a touch more flour in the fruit wont ruin the final result. That flexibility is one reason I turn to this recipe again and again.
Versatile for seasons and occasions
Even though I usually make this in spring when strawberries are at their best, the recipe travels well to picnics, potlucks, and weeknight desserts. Its lovely warm with a scoop of something creamy on top, or at room temperature if youre bringing it to a gathering. I find it pairs beautifully with coffee or tea, and its an easy way to celebrate simple moments.
Comforting memories
For me, the crisp evokes family kitchens and slow weekend afternoons. Because its so straightforward, I can focus on the people Im serving rather than the technicalities of a fancy pastry. I like how the dish bridges casual and special; its homey but memorable, and that is truly why I keep this recipe in heavy rotation.
Ingredients You’ll Need for Easy Strawberry Crisp

These ingredients are intentionally simple, aimed at letting the fruit sing while the topping provides texture and richness. The key players are the juicy strawberries for brightness, the small amount of lemon juice and granulated sugar to balance acidity and sweetness, and a classic oat and butter topping built from all purpose flour, brown sugar, unsalted butter, and rolled oats. Together they create a satisfying contrast of warm, bubbling fruit and a crisp, golden crust.
- 5 cups chopped strawberries: Provides bright, juicy fruitiness and natural sweetness; chopped to release juices that meld with the filling and create a soft, luscious texture when baked. Balances tartness and adds volume to the crisp, serving as the primary flavor component that contrasts the crunchy topping. Helps create a saucy base as the strawberries cook down, absorbing sugar and lemon for a vibrant, jam-like consistency.
- 1 tablespoon lemon juice: Adds fresh acidity and brightness to balance the fruit's sweetness and enhance overall flavor clarity. Helps prevent the strawberries from tasting flat by lifting their natural flavors and accentuating fruity notes. Contributes a subtle tart counterpoint that keeps the filling lively and well-rounded.
- 3 tablespoons granulated sugar: Sweetens the strawberry mixture and helps draw out additional juice from the fruit through osmosis, enhancing sauce formation. Blends with the flour and lemon to create a well-seasoned filling that caramelizes slightly during baking. Adjusts overall sweetness to taste while supporting the strawberries' natural flavors.
- 3 tablespoons all-purpose flour: Thickens the filling by absorbing excess liquid released by the strawberries and stabilizing the sauce as it bakes. Binds the fruit juices into a cohesive filling so it isn’t overly runny, resulting in a pleasantly saucy but set texture. Works with sugar to slightly coat the fruit pieces for even cooking.
- 1 cup all-purpose flour: Forms the base of the crisp topping, providing structure and a tender crumb when combined with butter and sugars. Acts as the primary dry ingredient that browns and crisps in the oven, creating the characteristic crunchy contrast to the soft fruit. Helps soak up some juices while maintaining a flaky, satisfying texture.
- 3/4 cup brown sugar: Imparts deep caramel notes and moistness to the topping, enhancing flavor complexity and tenderness. Binds with flour and butter to create crumbly clusters that brown evenly and deliver a rich, slightly chewy contrast. Balances sweetness while contributing a warm, molasses-like aroma to the crisp.
- 10 tablespoons unsalted butter, chilled and cut into cubes: Adds fat that creates flakiness and rich flavor in the topping; chilled and cubed butter helps form pea-sized pieces that melt and produce crisp, golden clusters. Provides moisture and promotes browning through fat content, resulting in a tender, brittle streusel texture. Should be worked into the dry ingredients until coarse crumbs form for optimal crispiness.
- 3/4 cup rolled oats: Contributes hearty texture and a toasty, nutty flavor to the topping while adding chewiness and structure. Mixes with flour, butter, and sugar to create crunchy clusters that contrast the soft strawberry filling. Helps absorb excess moisture and maintain a satisfying mouthfeel throughout the dessert.
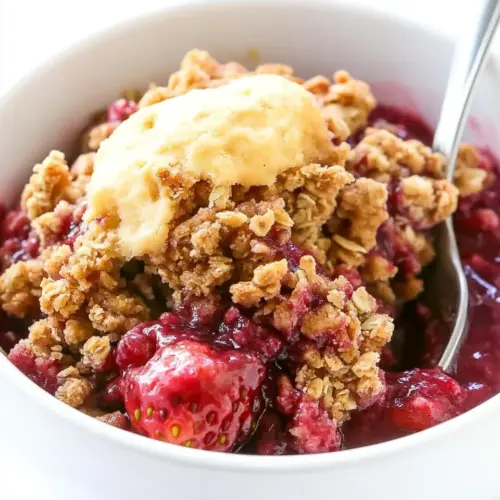
- whipped cream or ice cream, if desired: Adds a cool, creamy finish and optional serving enhancement that complements the warm, tart-sweet fruit and crunchy topping. Provides temperature contrast and extra richness, elevating each spoonful into a more decadent dessert experience. Can be dolloped or scooped to taste for added indulgence.
Instructions for Easy Strawberry Crisp
These steps guide you through assembling a bubbling, golden crisp from fresh strawberries and a crunchy oat topping. Read each moment, and trust your senses as you bake this comforting dessert.
- Preheat the oven to 350 degrees Fahrenheit and grease a 12-inch cast iron skillet or a 9-inch baking dish with non-stick cooking spray.: As the oven warms you ll start to feel the anticipation build, and the gentle hum of the oven fan is a reassuring cue that the kitchen is ready. Greasing the pan prevents sticking and helps the bottom edges of the crisp brown evenly, which gives you that pretty, caramelized border. If your skillet is cold, the topping might take longer to crisp, so ensure the pan is at room temperature. A frequent mistake is skipping the grease, which can make serving messy when the fruit clings to the pan.
- In a large bowl combine 5 cups chopped strawberries, 1 tablespoon lemon juice, 3 tablespoons granulated sugar, and 3 tablespoons all-purpose flour. Spoon the strawberry mixture into the prepared skillet.: The moment you toss the strawberries with the lemon juice and granulated sugar , their fragrance intensifies and a glossy layer of juice begins to surface, signaling that the fruit will break down into a syrup. The all purpose flour binds that syrup so the filling is thick rather than watery, and stirring gently ensures all pieces are coated without crushing the berries. Watch for a uniform sheen on the fruit as your cue that everything is incorporated. Avoid overmixing, which can turn the berries mushy.
- In a food processor, add 1 cup all-purpose flour, 3/4 cup brown sugar, and 10 tablespoons unsalted butter. Pulse until the mixture is crumbly then stir in 3/4 cup rolled oats.: As you spoon the fruit into the pan, the berries should nestle and spread into an even layer, with the juices pooling but not spilling. The visual you want is a cohesive bed of fruit with a glossy, slightly thickened liquid. Pressing too hard can burst the berries and create an overly soupy filling, so distribute gently for the best texture.
- Crumble the oat mixture on top of the strawberry mixture.: When you pulse these ingredients, you ll hear a rhythmic chopping that transforms the butter into pea sized pieces coated with flour and sugar. The sound changes from distinct clunks to a softer crumble when the mixture is ready, and the aroma of brown sugar and unsalted butter becomes warm and inviting. Cold unsalted butter is crucial for creating a flaky topping, so if it softens too much, chill the bowl briefly. A mistake is warming the butter, which leads to a greasy, dense topping instead of a crisp one.
- Bake for 40-45 minutes or until the top is golden brown and the berries are soft and bubbly.: The crumbly texture should resemble coarse sand with small butter bits visible, and that s what creates pockets of crispiness as it bakes. Folding in the rolled oats by hand keeps their texture intact so they toast rather than dissolve. The oats lend a nutty aroma as they heat, and you want them evenly distributed. If the dough looks too wet, chill it for a few minutes to firm the butter back up.
- Serve immediately with whipped cream or ice cream, if desired.: As you scatter the topping, you ll notice a pleasing contrast of textures, raw oats against glossy fruit. Aim for an even layer that still shows some fruit peeking through so the juices can bubble up and caramelize at the edges. Gently pat larger pieces so they stay intact, creating a varied, rustic surface. Avoid packing the topping too densely, which prevents it from crisping through.
- Bake for 40 to 45 minutes or until the top is golden brown and the berries are soft and bubbly: The oven will fill with a warm, sweet scent and you ll hear gentle bubbling as the fruit simmers. Look for a deeply golden topping and bubbling juices around the edges as signs of doneness. If the topping browns too quickly, lower the oven by 10 degrees and tent with foil so the filling finishes cooking without burning the crust. Underbaking leaves the center runny, while overbaking dries the fruit, so aim for a balance.
- Serve immediately with whipped cream or ice cream, if desired: When you remove the crisp, the contrast of hot filling and cold topping is irresistible the steam will rise and the aroma will make everyone gather. A scoop of cold ice cream melts into the bubbles, creating ribbons of cream that play against the crunchy topping. Serve straight from the skillet or transfer to a platter, but be mindful that the fruit will be very hot. A common error is waiting too long to serve, which softens the topping as it soaks up juices.
Tips and Tricks about Easy Strawberry Crisp
I like to keep these tips handy whenever I make Easy Strawberry Crisp, since small details can really lift the final dish. Below are practical pointers that will help the topping crisp perfectly and the filling to set just right.
- Choose ripe strawberries Ripe berries have the most fragrance and natural sugars, which means a more flavorful filling and less need for extra sugar. When strawberries are underripe, they remain firmer and release less juice, so taste them first and adjust slightly if needed.
- Measure flour carefully Both the flour in the filling and the flour in the topping affect texture. Spoon and level your all purpose flour rather than scooping directly from the bag to avoid packing, which can dry out the topping and alter the thickening power in the filling.
- Keep butter chilled Cold unsalted butter in small cubes creates the best crumbly topping. If the butter becomes too soft while you work, return the bowl to the refrigerator for five to ten minutes to chill, then continue mixing.
- Watch the baking time Oven temperatures vary, so start checking at 35 minutes. The visual cues to look for are a deep golden topping and bubbling juices at the edges. If the center still seems too loose, give it a few extra minutes, tenting with foil if the top is already well browned.
- Serve promptly A crisp is at its best right out of the oven while the topping is crunchy and the filling is warm. If you must make it ahead, reheat briefly in a 325 degree oven to refresh the crispness before serving.
Perfect Matches for Easy Strawberry Crisp
Easy Strawberry Crisp pairs beautifully with a handful of simple accompaniments and occasions. Below I outline serving ideas, storage tips, and the best moments to share this dessert.
- Serve with cold ice cream A scoop of vanilla or cream flavored ice cream softens into the hot fruit, creating a creamy contrast to the crisp topping, perfect for casual dinners and celebrations alike.
- Add whipped cream for a lighter touch Whipped cream is an elegant pairing that keeps the dessert airy and less rich than ice cream, ideal for brunches or afternoon gatherings.
- Plate for gatherings For potlucks or family meals, bring the crisp in the skillet so guests can serve themselves; the rustic presentation feels warm and inviting at any table.
- Seasonal occasions This dish shines in spring when strawberries are abundant, but it also works for summer picnics and relaxed holiday desserts when you want something unfussy but special.
- Storage tips Leftovers keep in the refrigerator for up to three days covered tightly; reheat in a 325 degree oven for about 10 minutes to restore some crispness before serving.
- Make ahead option You can prepare the fruit and topping separately and store them chilled; assemble and bake just before serving to ensure the topping is at its crispiest.
FAQ
Conclusion
What makes this recipe special is its effortless combination of juicy fruit and a buttery, oat rich topping that crisps up beautifully. I always reach for Easy Strawberry Crisp when I want a dessert that feels homemade and comforting without taking over the afternoon. Give it a try the next time you find sweet strawberries, and enjoy the warm, bubbly filling alongside a cool scoop of something creamy. Its an easy pleasure to share, and I hope it becomes a staple in your kitchen as it is in mine.
Easy Strawberry Crisp
Equipment
- Oven
- 12-inch cast iron skillet or 9-inch baking dish
- Food Processor
- Large Bowl
Ingredients
- 5 cups chopped strawberries Provides bright, juicy fruitiness and natural sweetness; chopped to release juices that meld with the filling and create a soft, luscious texture when baked. Balances tartness and adds volume to the crisp, serving as the primary flavor component that contrasts the crunchy topping. Helps create a saucy base as the strawberries cook down, absorbing sugar and lemon for a vibrant, jam-like consistency.
- 1 tablespoon lemon juice Adds fresh acidity and brightness to balance the fruit's sweetness and enhance overall flavor clarity. Helps prevent the strawberries from tasting flat by lifting their natural flavors and accentuating fruity notes. Contributes a subtle tart counterpoint that keeps the filling lively and well-rounded.
- 3 tablespoons granulated sugar Sweetens the strawberry mixture and helps draw out additional juice from the fruit through osmosis, enhancing sauce formation. Blends with the flour and lemon to create a well-seasoned filling that caramelizes slightly during baking. Adjusts overall sweetness to taste while supporting the strawberries' natural flavors.
- 3 tablespoons all-purpose flour Thickens the filling by absorbing excess liquid released by the strawberries and stabilizing the sauce as it bakes. Binds the fruit juices into a cohesive filling so it isn’t overly runny, resulting in a pleasantly saucy but set texture. Works with sugar to slightly coat the fruit pieces for even cooking.
- 1 cup all-purpose flour Forms the base of the crisp topping, providing structure and a tender crumb when combined with butter and sugars. Acts as the primary dry ingredient that browns and crisps in the oven, creating the characteristic crunchy contrast to the soft fruit. Helps soak up some juices while maintaining a flaky, satisfying texture.
- 3/4 cup brown sugar Imparts deep caramel notes and moistness to the topping, enhancing flavor complexity and tenderness. Binds with flour and butter to create crumbly clusters that brown evenly and deliver a rich, slightly chewy contrast. Balances sweetness while contributing a warm, molasses-like aroma to the crisp.
- 10 tablespoons unsalted butter, chilled and cut into cubes Adds fat that creates flakiness and rich flavor in the topping; chilled and cubed butter helps form pea-sized pieces that melt and produce crisp, golden clusters. Provides moisture and promotes browning through fat content, resulting in a tender, brittle streusel texture. Should be worked into the dry ingredients until coarse crumbs form for optimal crispiness.
- 3/4 cup rolled oats Contributes hearty texture and a toasty, nutty flavor to the topping while adding chewiness and structure. Mixes with flour, butter, and sugar to create crunchy clusters that contrast the soft strawberry filling. Helps absorb excess moisture and maintain a satisfying mouthfeel throughout the dessert.
- whipped cream or ice cream, if desired Adds a cool, creamy finish and optional serving enhancement that complements the warm, tart-sweet fruit and crunchy topping. Provides temperature contrast and extra richness, elevating each spoonful into a more decadent dessert experience. Can be dolloped or scooped to taste for added indulgence.
Instructions
- Preheat the oven to 350 degrees Fahrenheit and grease a 12-inch cast iron skillet or a 9-inch baking dish with non-stick cooking spray.: As the oven warms you ll start to feel the anticipation build, and the gentle hum of the oven fan is a reassuring cue that the kitchen is ready. Greasing the pan prevents sticking and helps the bottom edges of the crisp brown evenly, which gives you that pretty, caramelized border. If your skillet is cold, the topping might take longer to crisp, so ensure the pan is at room temperature. A frequent mistake is skipping the grease, which can make serving messy when the fruit clings to the pan.
- In a large bowl combine 5 cups chopped strawberries, 1 tablespoon lemon juice, 3 tablespoons granulated sugar, and 3 tablespoons all-purpose flour. Spoon the strawberry mixture into the prepared skillet.: The moment you toss the strawberries with the lemon juice and granulated sugar , their fragrance intensifies and a glossy layer of juice begins to surface, signaling that the fruit will break down into a syrup. The all purpose flour binds that syrup so the filling is thick rather than watery, and stirring gently ensures all pieces are coated without crushing the berries. Watch for a uniform sheen on the fruit as your cue that everything is incorporated. Avoid overmixing, which can turn the berries mushy.
- In a food processor, add 1 cup all-purpose flour, 3/4 cup brown sugar, and 10 tablespoons unsalted butter. Pulse until the mixture is crumbly then stir in 3/4 cup rolled oats.: As you spoon the fruit into the pan, the berries should nestle and spread into an even layer, with the juices pooling but not spilling. The visual you want is a cohesive bed of fruit with a glossy, slightly thickened liquid. Pressing too hard can burst the berries and create an overly soupy filling, so distribute gently for the best texture.
- Crumble the oat mixture on top of the strawberry mixture.: When you pulse these ingredients, you ll hear a rhythmic chopping that transforms the butter into pea sized pieces coated with flour and sugar. The sound changes from distinct clunks to a softer crumble when the mixture is ready, and the aroma of brown sugar and unsalted butter becomes warm and inviting. Cold unsalted butter is crucial for creating a flaky topping, so if it softens too much, chill the bowl briefly. A mistake is warming the butter, which leads to a greasy, dense topping instead of a crisp one.
- Bake for 40-45 minutes or until the top is golden brown and the berries are soft and bubbly.: The crumbly texture should resemble coarse sand with small butter bits visible, and that s what creates pockets of crispiness as it bakes. Folding in the rolled oats by hand keeps their texture intact so they toast rather than dissolve. The oats lend a nutty aroma as they heat, and you want them evenly distributed. If the dough looks too wet, chill it for a few minutes to firm the butter back up.
- Serve immediately with whipped cream or ice cream, if desired.: As you scatter the topping, you ll notice a pleasing contrast of textures, raw oats against glossy fruit. Aim for an even layer that still shows some fruit peeking through so the juices can bubble up and caramelize at the edges. Gently pat larger pieces so they stay intact, creating a varied, rustic surface. Avoid packing the topping too densely, which prevents it from crisping through.
- Bake for 40 to 45 minutes or until the top is golden brown and the berries are soft and bubbly: The oven will fill with a warm, sweet scent and you ll hear gentle bubbling as the fruit simmers. Look for a deeply golden topping and bubbling juices around the edges as signs of doneness. If the topping browns too quickly, lower the oven by 10 degrees and tent with foil so the filling finishes cooking without burning the crust. Underbaking leaves the center runny, while overbaking dries the fruit, so aim for a balance.
- Serve immediately with whipped cream or ice cream, if desired: When you remove the crisp, the contrast of hot filling and cold topping is irresistible the steam will rise and the aroma will make everyone gather. A scoop of cold ice cream melts into the bubbles, creating ribbons of cream that play against the crunchy topping. Serve straight from the skillet or transfer to a platter, but be mindful that the fruit will be very hot. A common error is waiting too long to serve, which softens the topping as it soaks up juices.
Notes
- Choose ripe strawberries Ripe berries have the most fragrance and natural sugars, which means a more flavorful filling and less need for extra sugar. When strawberries are underripe, they remain firmer and release less juice, so taste them first and adjust slightly if needed.
- Measure flour carefully Both the flour in the filling and the flour in the topping affect texture. Spoon and level your all purpose flour rather than scooping directly from the bag to avoid packing, which can dry out the topping and alter the thickening power in the filling.
- Keep butter chilled Cold unsalted butter in small cubes creates the best crumbly topping. If the butter becomes too soft while you work, return the bowl to the refrigerator for five to ten minutes to chill, then continue mixing.
- Watch the baking time Oven temperatures vary, so start checking at 35 minutes. The visual cues to look for are a deep golden topping and bubbling juices at the edges. If the center still seems too loose, give it a few extra minutes, tenting with foil if the top is already well browned.
- Serve promptly A crisp is at its best right out of the oven while the topping is crunchy and the filling is warm. If you must make it ahead, reheat briefly in a 325 degree oven to refresh the crispness before serving.