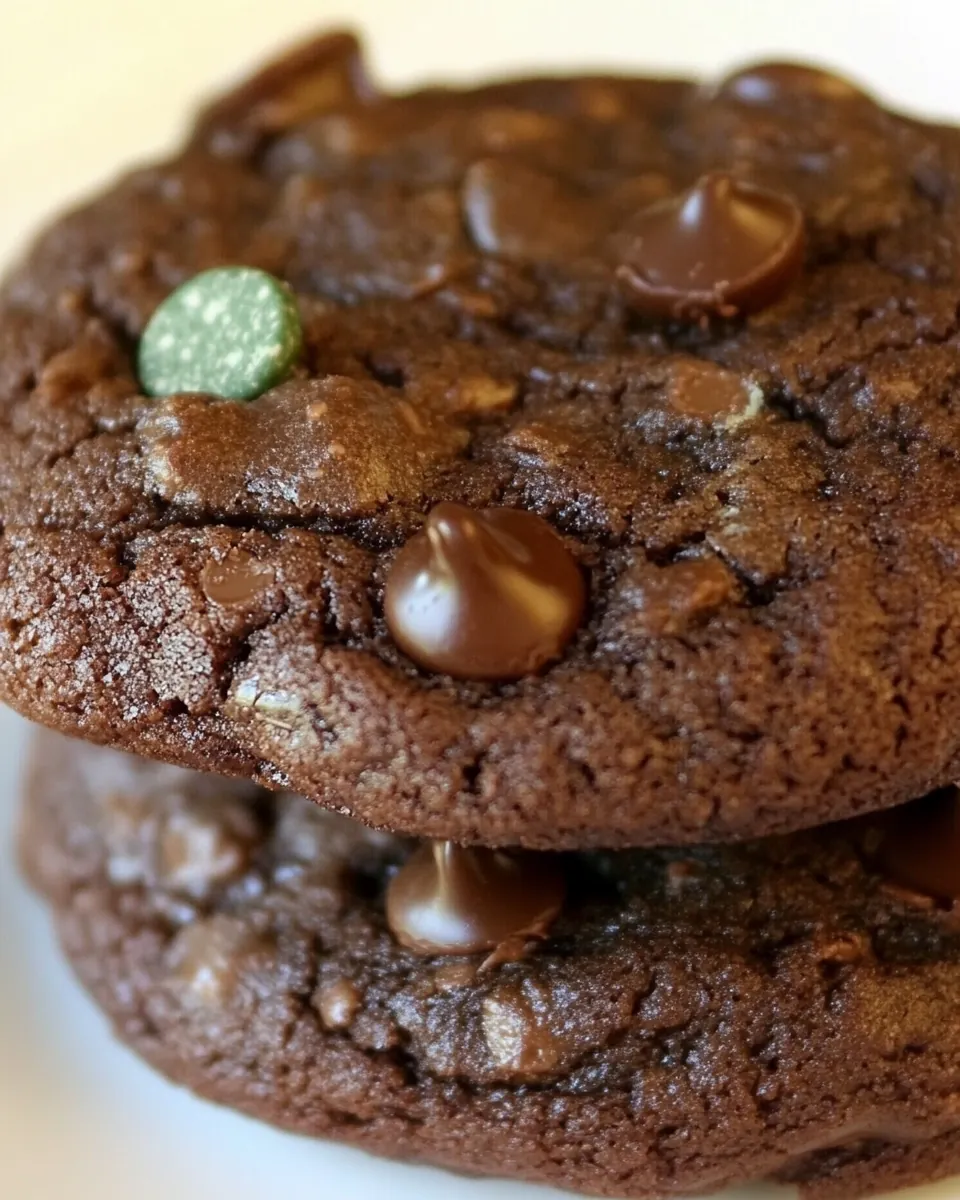
Chocolate Mint Cookies
Chocolate Mint Cookies feel like the kind of treat I reach for when I need a tiny celebration in the kitchen. The first time I made them I remember the way the house filled with a warm, cocoa aroma that curled around the corners, while a cool minty scent teased from the open bag of chips. I was experimenting with flavors one rainy afternoon, fed up with store bought sweets, and decided to pair rich all-purpose flour cookie structure with the brisk lift of mint in the mix. That combination immediately felt comforting and lively at once.
Every batch since has been a small ritual. I like to put on a playlist, let the butter soften while I sift the baking cocoa powder into the bowl, and watch the dough change from pale to deeply chocolate. Guests always ask if I bought them, and I confess that seeing their surprised faces is part of the joy. These cookies travel well to potlucks, sit happily in a cookie tin, and are oddly restorative with a mug of tea when life feels busy.
Recipe Snapshot
27 mins
15 mins
12 mins
Medium
150 kcal
American
Gluten-Free, Low FODMAP
Desserts
Mixer, Mixing bowls, Baking sheets, Wire rack
Why This Chocolate Mint Cookies Shines
1. Balanced Flavor Harmony
I love how Chocolate Mint Cookies marry deep, bittersweet baking cocoa powder with the bright lift of peppermint extract. The result is not cloying, and each bite carries a clear chocolate backbone with a cool finish. That contrast keeps the cookie from feeling one dimensional, and I find it irresistible when the mint arrives just as the chocolate melts on the tongue.
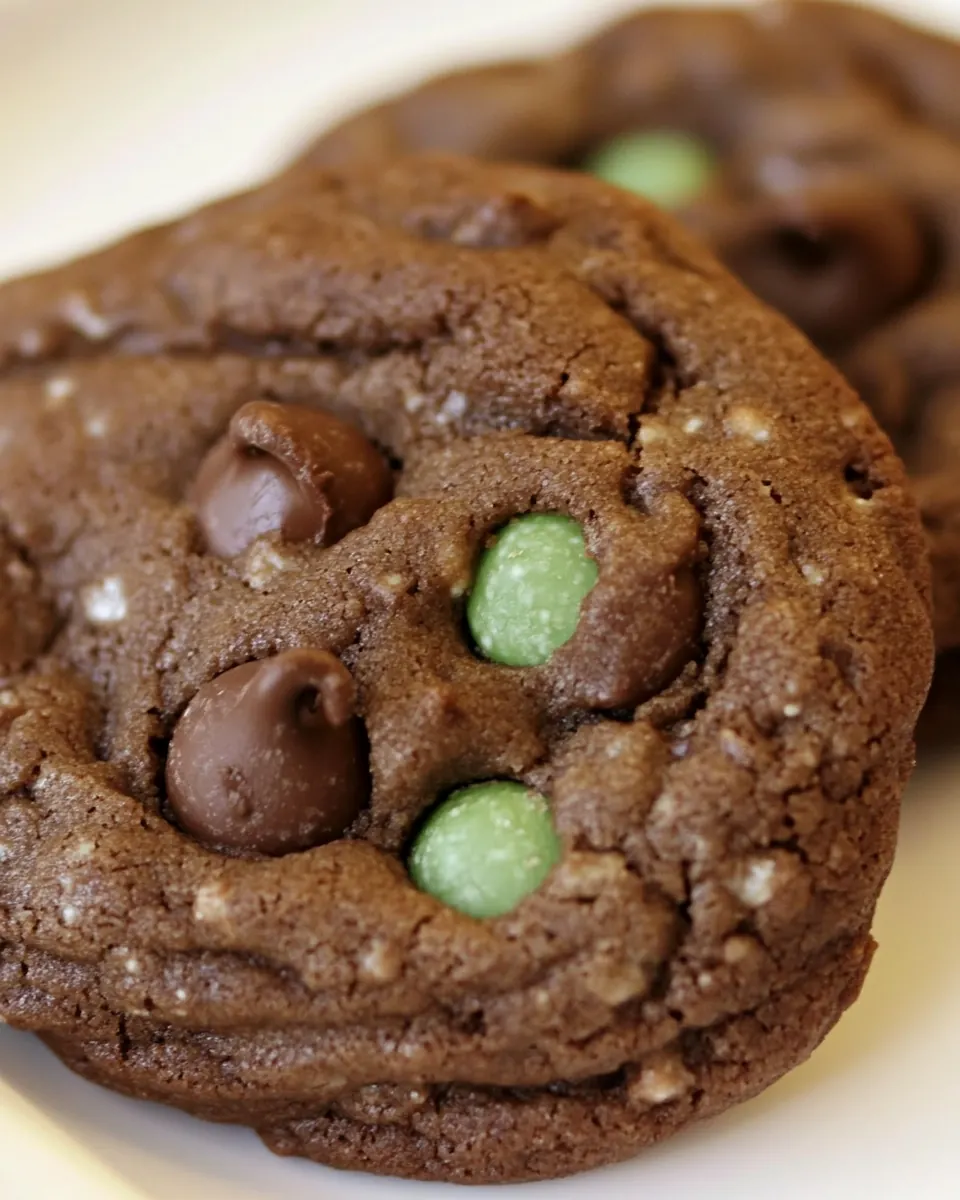
2. Textural Pleasure
These cookies come out with a tender crumb from the combination of butter and the right balance of all-purpose flour. When I press the dough, it holds shape but yields as it bakes, producing edges that are slightly crisp and centers that stay soft. The Dark Chocolate & Mint Morsels add pockets of gooeyness, creating a satisfying contrast that I always look forward to.
3. Reliable Technique
I appreciate that the method is straightforward, which means consistent results even on busy evenings. The mixing order, creaming the butter with the sugar before adding eggs, is forgiving yet effective. That predictability has made this my go to when I want a fail safe treat to bring along to gatherings.
4. Crowd Friendly and Versatile
We can make a big batch without fuss, and people of all ages seem to enjoy the combo of chocolate and mint. I often bring these to holiday tables, neighborhood swaps, or quiet weekends. Because the cookies keep their texture well, they are great for prepping in advance and stress free entertaining.
5. Simple, Feel Good Ingredients
There is comfort in recipes that use pantry staples like flour, baking soda, and sugar, with a single special ingredient to lift everything. The morsels feel like the finishing flourish but the fundamentals are what make these cookies sturdy and satisfying.
Ingredient List for Chocolate Mint Cookies

These ingredients form a classic, no fuss cookie base with a minty twist. The philosophy is simple: a sturdy, slightly tender foundation from all-purpose flour and butter, lift from baking soda, and flavor depth from baking cocoa powder and morsels. Each component plays a role, whether providing structure, sweetness, or that cool finishing note.
- 2 cups all-purpose flour, 2/3 cup baking cocoa powder, 1 teaspoon baking soda, 1/2 teaspoon salt, 1 cup (2 sticks) butter, room temperature, 2/3 cup sugar, 2/3 cup packed brown sugar, 1 teaspoon vanilla extract, 1/2 teaspoon peppermint extract, 2 large eggs, 1 10-oz. package Nestle Toll House Dark Chocolate & Mint Morsels: Provide structure and bulk to the cookie dough by forming the gluten network when hydrated; combine with fats and leaveners to create the desired crumb and chewiness, and sift or whisk with other dry ingredients to ensure even distribution and a tender texture.
Step by Step Instructions for Chocolate Mint Cookies
Below you’ll find a detailed walkthrough that I use every time I bake these cookies. The steps are straightforward, and I include sensory cues and troubleshooting so you can get consistent results. Keep an eye on texture and scent as you move through each stage.
- Preheat oven to 325° F.: You should smell the faint warmth of the oven even before the cookies go in, and the steady ambient heat is crucial for even baking. Preheating ensures the first burst of oven heat helps the edges set while the centers puff. A common mistake is skipping full preheat, which leads to uneven spread and underbaked middles, so wait until the oven signals it has reached temperature.
- Combine flour, cocoa, baking soda and salt in small bowl.: As you whisk these dry elements together, take note of the uniform dark color and fine texture, which indicates good sifting. This dry blend ensures every bite has even chocolate flavor and proper leavening. If you skip thorough mixing, you may find pockets of baking soda that leave metallic or bitter tastes in individual cookies.
- Beat butter, granulated sugar, brown sugar and vanilla extract in large mixer bowl until creamy.: When creaming, watch for the mixture to go from grainy to glossy and lighter in color, a visual cue that air has been incorporated. The sound shifts from sticky to more fluid as the sugars dissolve into the butter . If your butter is too cold, it will not cream properly and you'll end up with a dense dough; if too warm, the mixture will be oily and the cookies may spread excessively.
- Add eggs, one at a time, beating well after each addition.: Adding each egg separately helps emulsify the mixture, creating a smooth, homogenous batter with a slight sheen. You should notice the mixture thicken and become silkier with each addition. A common error is adding eggs when the butter is too cool, which can cause curdling; if that happens, let the bowl warm slightly and continue beating slowly.
- Gradually beat in flour mixture. Stir in morsels.: As you incorporate the dry mix, the dough will darken and turn from glossy to more cohesive, with enough body to hold a scoop. Stop mixing when the flour has just disappeared to avoid overworking gluten, which would produce a tougher cookie. Overmixing is the typical pitfall here, resulting in a chewier, less tender cookie.
- Drop by well-rounded tablespoon onto ungreased baking sheets.: Folding in the morsels should be done gently so they remain intact and evenly distributed. You will see little pockets of dark sheen dot the dough, promising bursts of flavor. If you over stir, the chips can break and bleed, changing the texture and appearance; fold until you no longer see unmixed streaks of flour.
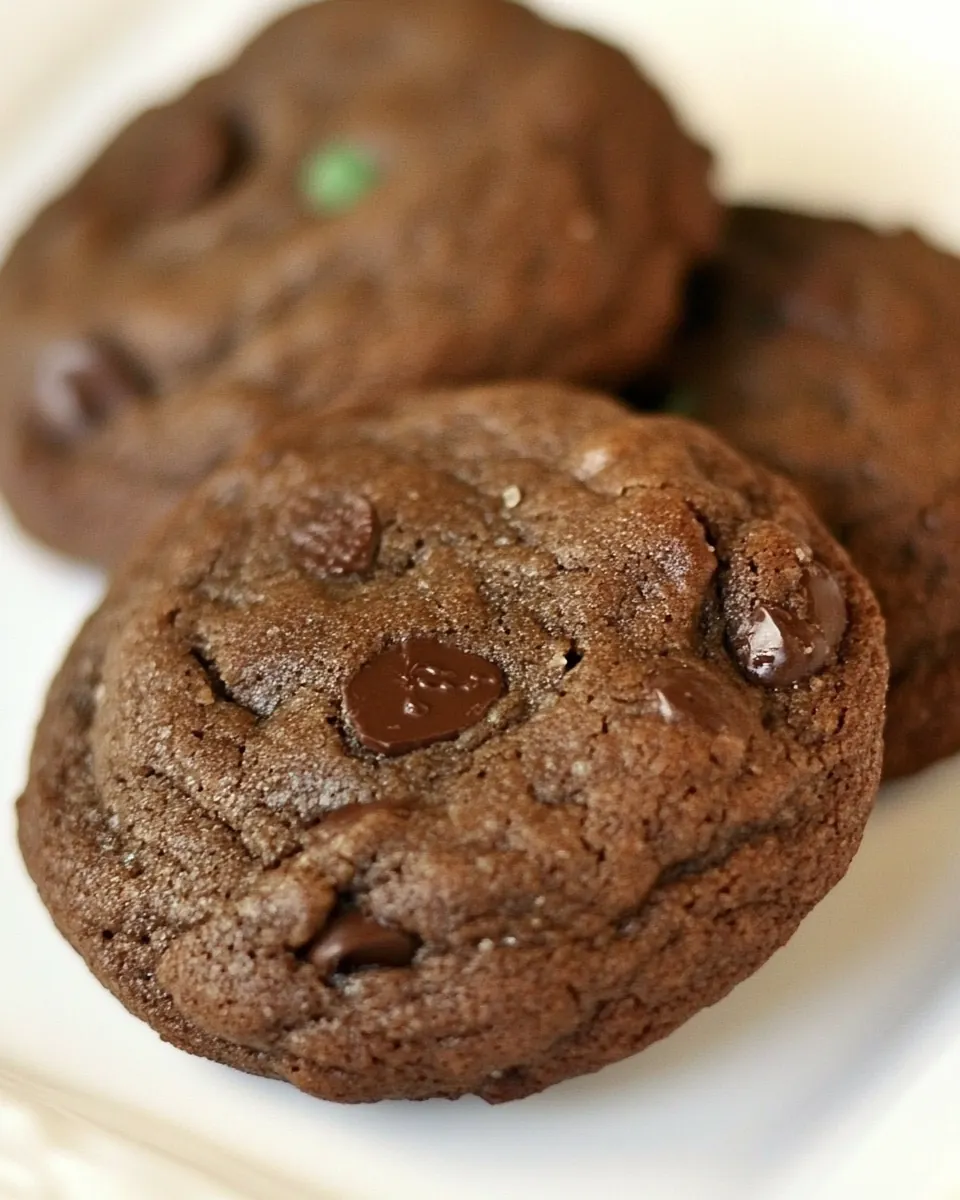
- Bake for 11 to 13 minutes or until cookies are puffed and centers are set. Cool on baking sheets for 2 minutes; remove to wire racks to cool completely.: The dough should hold its shape as you scoop, with slightly rounded domes. Placing them evenly spaced allows warm air to circulate so edges caramelize evenly. If you make scoops too large the centers may stay underdone, and not spacing them properly leads to merged cookies that lose their neat shape.
- Bake for 11 to 13 minutes or until cookies are puffed and centers are set.: Listen for faint signs of doneness like a softer sound when you tap the sheet and look for edges that have a subtle sheen and centers that look set but not dry. The smell will change to a roasted chocolate aroma with a hint of mint. Leaving them in too long will dry them out, while removing them too early can yield raw centers that collapse once cooled.
- Cool on baking sheets for 2 minutes; remove to wire racks to cool completely.: Allowing the cookies to rest briefly on the hot sheet lets them finish setting while retaining moisture. When you transfer to a wire rack , the bottoms stop steaming and crisp slightly while the centers remain tender. If you move them too soon they can fall apart, and if you leave them too long they will continue to brown on the hot sheet.
Helpful Hints
I like to keep my tips practical and hands on, things I learned the hard way so you do not have to. Below are focused notes that will help you get the best texture and flavor from your batch.
- Measure precisely: Accurate measurements of all-purpose flour and cocoa powder are essential for consistent texture, so spoon and level rather than scooping directly from the bag.
- Room temperature butter: Using softened butter ensures it creams properly with the sugars, creating a lighter dough and better rise in the oven.
- Control the mint: Add peppermint extract sparingly, as its flavor is concentrated and can become overpowering if over measured.
- Watch bake time closely: The window between underbaked and overbaked is narrow, so check at the earlier end and use visual cues like puffing and set centers.
- Use quality morsels: The Dark Chocolate & Mint Morsels carry both chocolate intensity and mint clarity, so choose a good brand to elevate the final cookie.
What to Pair With Chocolate Mint Cookies
These cookies are versatile and can be enjoyed in many settings, from a casual snack to a special dessert offset on a coffee table. Think about contrasting textures and temperatures when pairing, and consider the occasion to choose the right accompaniments.
- Afternoon tea pairing: Serve with a small pot of tea or a mint forward herbal infusion to echo the cool notes in the cookie, creating a calming snack break for guests or yourself.
- Holiday cookie trays: Arrange alongside other baked goods, using the minty darkness as a visual and flavor contrast to lighter, spiced cookies for festive gatherings.
- Gift giving: Pack in a tin with parchment between layers, and label with ingredients for neighbors, perfect for celebrations and casual drop offs.
- Serving temperature: Offer them at room temperature so the chips are slightly soft, but not melty, which highlights the chocolate pockets without becoming messy.
- Storage tips: Keep in an airtight container at room temperature for up to five days, or freeze in a single layer then stack with parchment to maintain shape and freshness.
- Occasions: Great for school events, bake sales, tea time, or as a finish to a casual dinner where a relaxed, familiar dessert fits the mood.
FAQ
Conclusion
These Chocolate Mint Cookies stand out for their rich chocolate backbone balanced by a clear mint lift, creating cookies that are both comforting and bright. Give them a try the next time you want a simple, impressive bake that travels well and pleases a crowd. I hope this recipe becomes one of your go to treats, bringing small moments of joy whether you share them or keep them all to yourself.

Chocolate Mint Cookies
Equipment
- Mixer
- Mixing Bowls
- Baking Sheets
- Wire Rack
Ingredients
- 2 cups all-purpose flour, 2/3 cup baking cocoa powder, 1 teaspoon baking soda, 1/2 teaspoon salt, 1 cup (2 sticks) butter, room temperature, 2/3 cup sugar, 2/3 cup packed brown sugar, 1 teaspoon vanilla extract, 1/2 teaspoon peppermint extract, 2 large eggs, 1 10-oz. package Nestle Toll House Dark Chocolate & Mint Morsels Provide structure and bulk to the cookie dough by forming the gluten network when hydrated; combine with fats and leaveners to create the desired crumb and chewiness, and sift or whisk with other dry ingredients to ensure even distribution and a tender texture.
Instructions
- Preheat oven to 325° F.: You should smell the faint warmth of the oven even before the cookies go in, and the steady ambient heat is crucial for even baking. Preheating ensures the first burst of oven heat helps the edges set while the centers puff. A common mistake is skipping full preheat, which leads to uneven spread and underbaked middles, so wait until the oven signals it has reached temperature.
- Combine flour, cocoa, baking soda and salt in small bowl.: As you whisk these dry elements together, take note of the uniform dark color and fine texture, which indicates good sifting. This dry blend ensures every bite has even chocolate flavor and proper leavening. If you skip thorough mixing, you may find pockets of baking soda that leave metallic or bitter tastes in individual cookies.
- Beat butter, granulated sugar, brown sugar and vanilla extract in large mixer bowl until creamy.: When creaming, watch for the mixture to go from grainy to glossy and lighter in color, a visual cue that air has been incorporated. The sound shifts from sticky to more fluid as the sugars dissolve into the butter . If your butter is too cold, it will not cream properly and you'll end up with a dense dough; if too warm, the mixture will be oily and the cookies may spread excessively.
- Add eggs, one at a time, beating well after each addition.: Adding each egg separately helps emulsify the mixture, creating a smooth, homogenous batter with a slight sheen. You should notice the mixture thicken and become silkier with each addition. A common error is adding eggs when the butter is too cool, which can cause curdling; if that happens, let the bowl warm slightly and continue beating slowly.
- Gradually beat in flour mixture. Stir in morsels.: As you incorporate the dry mix, the dough will darken and turn from glossy to more cohesive, with enough body to hold a scoop. Stop mixing when the flour has just disappeared to avoid overworking gluten, which would produce a tougher cookie. Overmixing is the typical pitfall here, resulting in a chewier, less tender cookie.
- Drop by well-rounded tablespoon onto ungreased baking sheets.: Folding in the morsels should be done gently so they remain intact and evenly distributed. You will see little pockets of dark sheen dot the dough, promising bursts of flavor. If you over stir, the chips can break and bleed, changing the texture and appearance; fold until you no longer see unmixed streaks of flour.
- Bake for 11 to 13 minutes or until cookies are puffed and centers are set. Cool on baking sheets for 2 minutes; remove to wire racks to cool completely.: The dough should hold its shape as you scoop, with slightly rounded domes. Placing them evenly spaced allows warm air to circulate so edges caramelize evenly. If you make scoops too large the centers may stay underdone, and not spacing them properly leads to merged cookies that lose their neat shape.
- Bake for 11 to 13 minutes or until cookies are puffed and centers are set.: Listen for faint signs of doneness like a softer sound when you tap the sheet and look for edges that have a subtle sheen and centers that look set but not dry. The smell will change to a roasted chocolate aroma with a hint of mint. Leaving them in too long will dry them out, while removing them too early can yield raw centers that collapse once cooled.
- Cool on baking sheets for 2 minutes; remove to wire racks to cool completely.: Allowing the cookies to rest briefly on the hot sheet lets them finish setting while retaining moisture. When you transfer to a wire rack , the bottoms stop steaming and crisp slightly while the centers remain tender. If you move them too soon they can fall apart, and if you leave them too long they will continue to brown on the hot sheet.
Notes
- Measure precisely: Accurate measurements of all-purpose flour and cocoa powder are essential for consistent texture, so spoon and level rather than scooping directly from the bag.
- Room temperature butter: Using softened butter ensures it creams properly with the sugars, creating a lighter dough and better rise in the oven.
- Control the mint: Add peppermint extract sparingly, as its flavor is concentrated and can become overpowering if over measured.
- Watch bake time closely: The window between underbaked and overbaked is narrow, so check at the earlier end and use visual cues like puffing and set centers.
- Use quality morsels: The Dark Chocolate & Mint Morsels carry both chocolate intensity and mint clarity, so choose a good brand to elevate the final cookie.