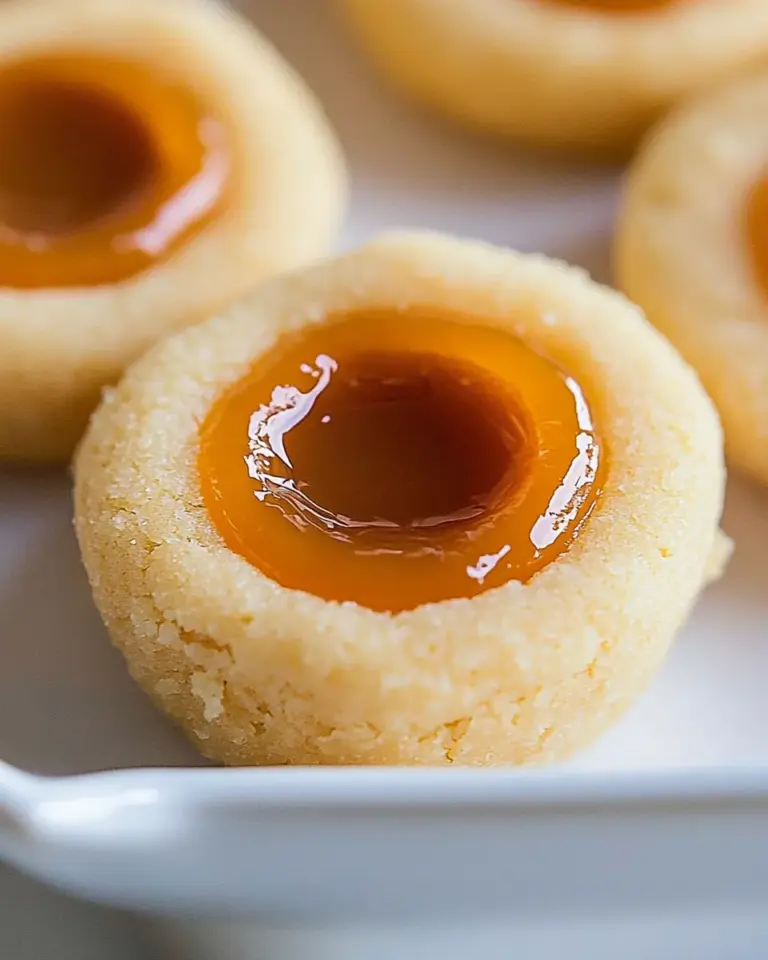
Easy Key Lime Pie Recipe
Easy Key Lime Pie Recipe has been a summer staple in my kitchen for years, the one dessert I bring when friends ask me to contribute something bright and nostalgic. I still remember the time I baked this pie for a backyard gathering, juggling a toddler on my hip while zesting limes, and the way the room went quiet the moment someone took the first bite. That tart, citrusy lift balanced by creamy, sweet condensed milk felt like sunshine in a forkful, and it became an instant request for every warm weather get together.
I grew up with pies that were hearty and deep, but this pie taught me the power of simplicity. You do not need a long list of ingredients to get a memorable result, just a few key players handled with care. I often riff on texture, sometimes pressing the crust a hair thinner for a more delicate bite, other times making it a touch thicker when I know people want that buttery crunch. The aroma of toasted graham and fresh lime zest while the pie cools is one of those small rewards that keeps me coming back to this recipe again and again.
Recipe Snapshot
1 hr 9 mins
45 mins
24 mins
Medium
300 kcal
American
Gluten-Free, Low FODMAP
Desserts
Kitchen Scale(optional), Pie Pan, Stand Mixer
Why Try This Easy Key Lime Pie Recipe
Bright and Balanced Flavor
One reason I adore this pie is how the flavors sing together. The tartness of the lime cuts through the sweetness of the sweetened condensed milk, producing a lively, balanced filling that never feels cloying. I find that the lime zest adds an aromatic lift that keeps each bite interesting, and that contrast is what makes this dessert feel fresh not heavy.
Comfortingly Simple Technique
I love that this recipe does not hide behind complicated steps. With a few straightforward actions you get reliable results, which is great when you want to bake but do not have a full afternoon. The steps are forgiving, and as someone who often bakes while juggling other tasks, I appreciate how resilient the method is.
Texture Contrast That Delights
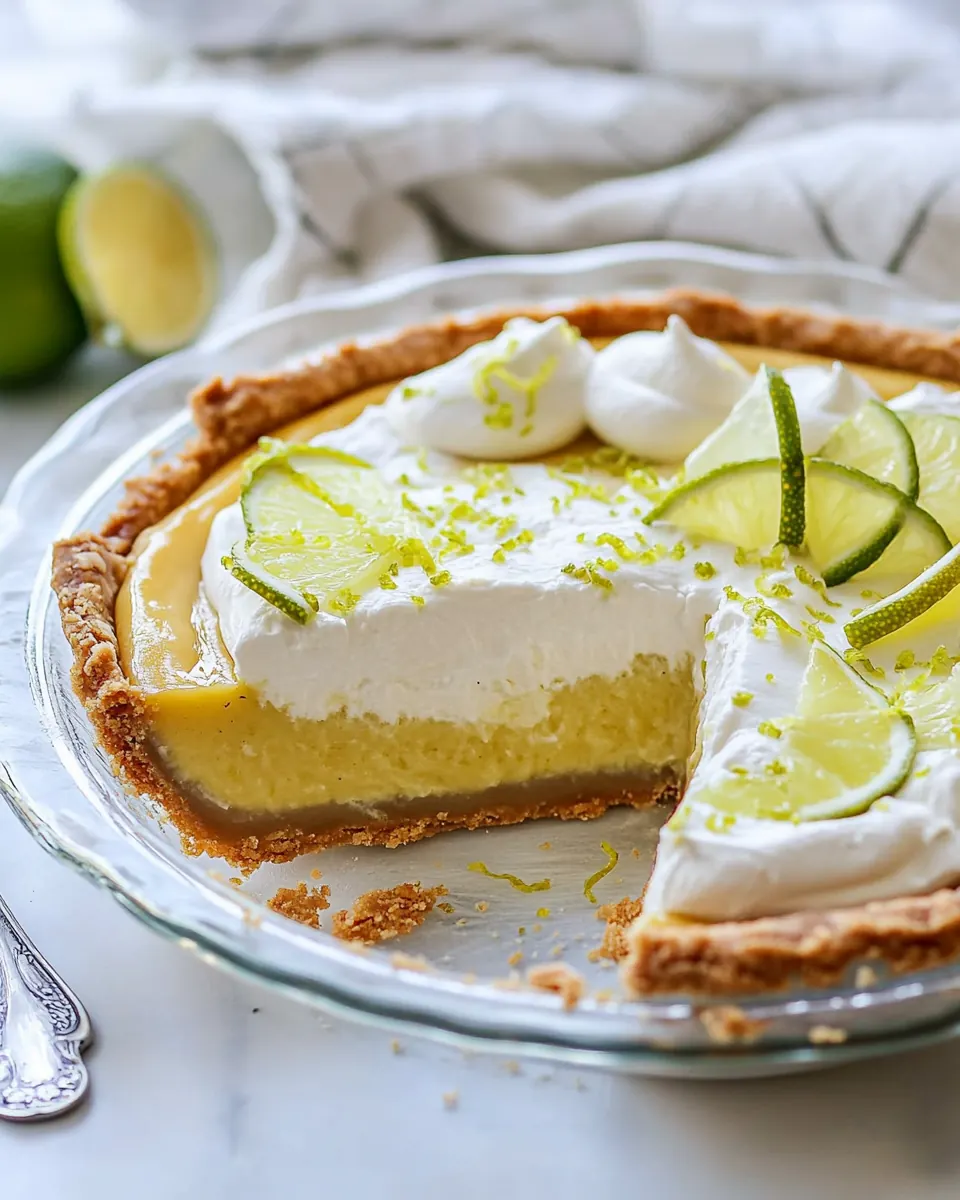
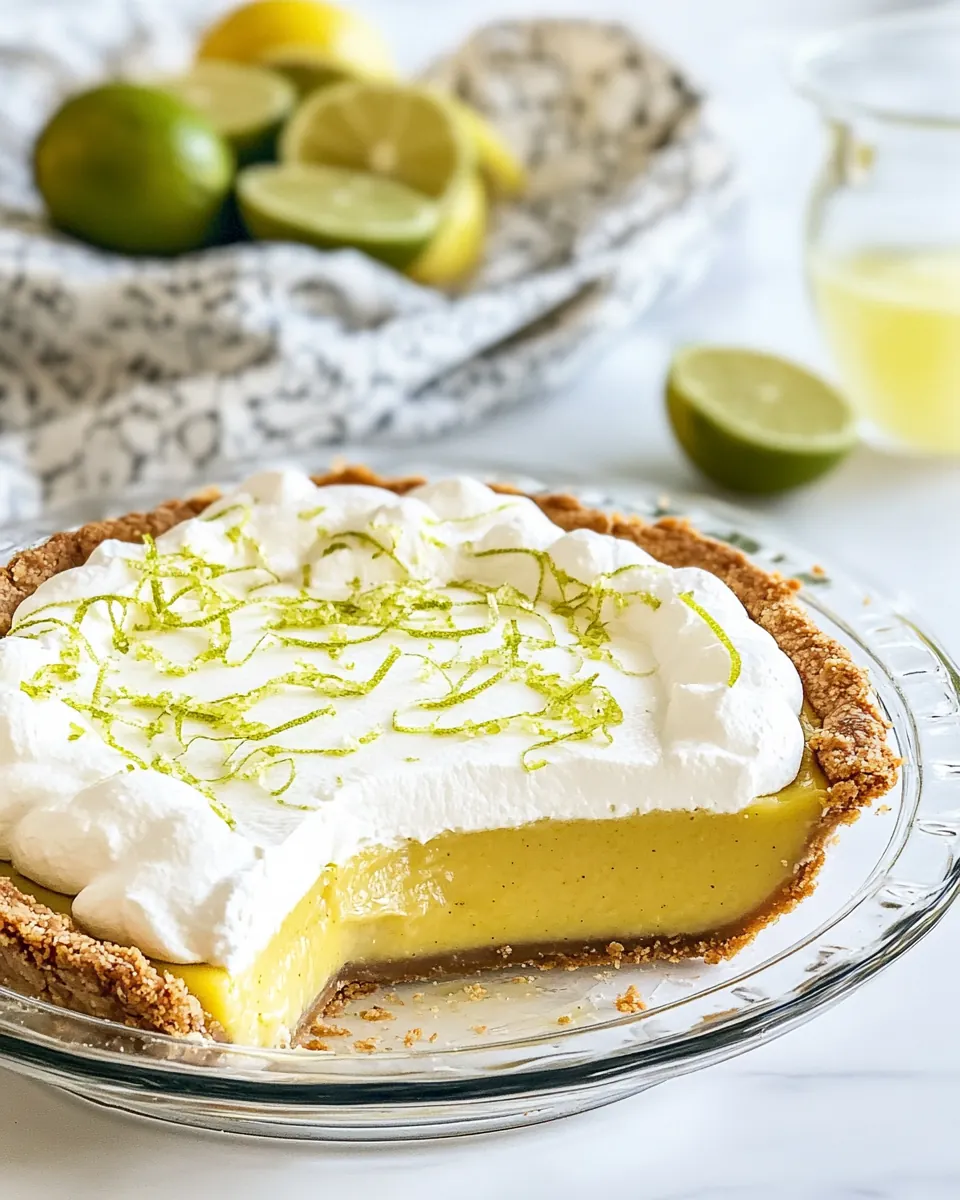
The butter toasted graham cracker crumbs create a crunchy base that plays perfectly against the silken filling. Pressing the crumbs firmly yields a crust that holds together when sliced, but still gives way with a pleasant snap. That contrast between crisp base and creamy center is what keeps people going back for another piece.
Make Ahead Friendly
This pie benefits from chilling, so it is ideal for preparing in advance. I often make it the day before a gathering, which frees me up to focus on other details closer to serving time. The resting period deepens and harmonizes the flavors, so you get an even better result than if you rushed it straight from the oven.
Versatile Presentation
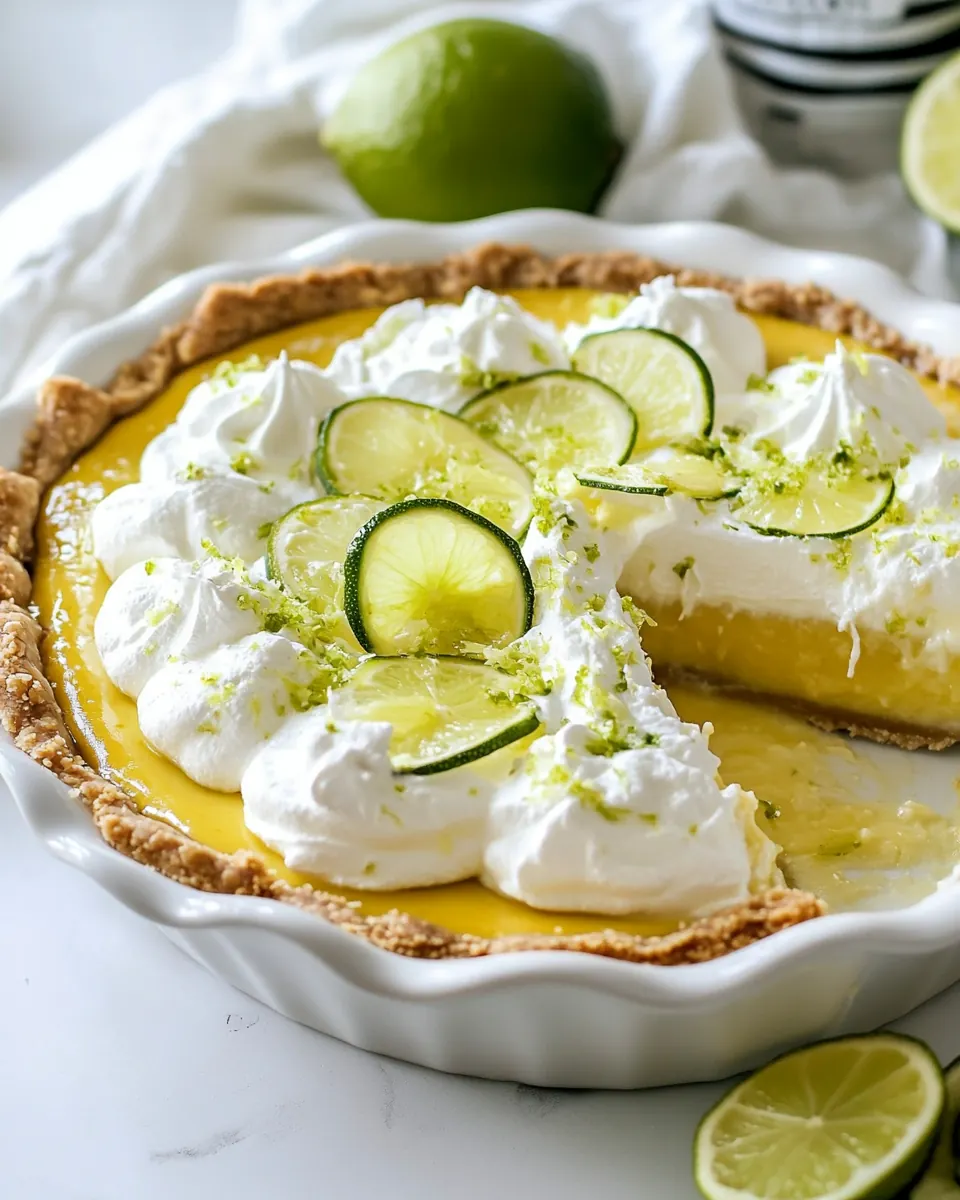
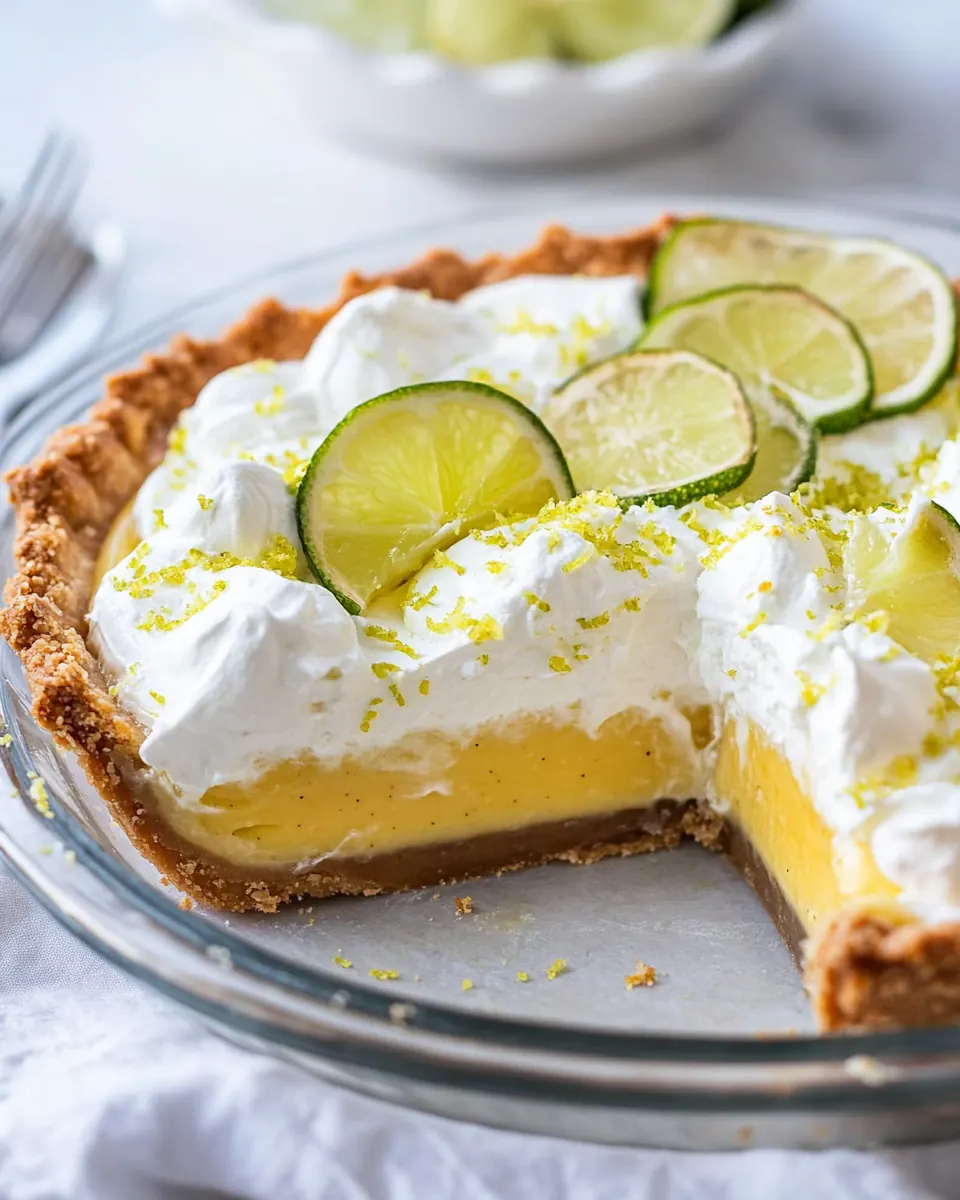
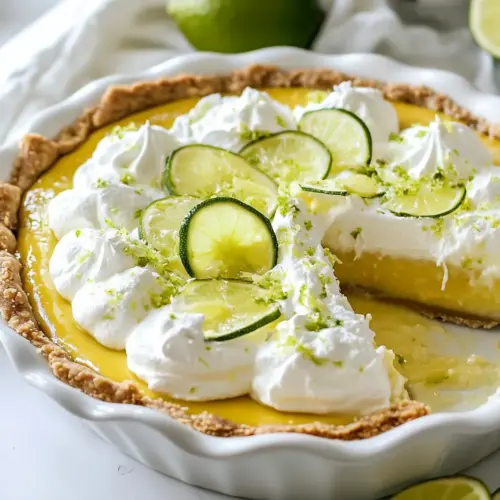
You can dress it up simply with a cloud of stabilized Whipped Cream and lime wheels, or serve it plain for a casual afternoon treat. I like that it works for picnics, dinner parties, and holiday meals, because people of all ages tend to enjoy that bright, creamy profile.
Ingredients You’ll Need for Easy Key Lime Pie Recipe
I believe great baking starts with a clear ingredient philosophy. For this Easy Key Lime Pie Recipe, each element plays a precise role. The crust delivers texture and buttery depth, the egg yolks provide structure and silkiness, the sweetened condensed milk supplies sweetness and body, and the lime juice and zest give the pie its signature tang. Together they create a balanced dessert that is bright, creamy, and reliably satisfying.
- 1 1/2 cups graham cracker crumbs 213 grams (about 12 cracker sheets): Provide a crunchy, mellow base for the pie crust when combined with melted butter, offering structure and a toasty flavor that contrasts the filling.
- 6 tablespoons unsalted butter 85 grams, melted (3/4 stick): Bind the graham cracker crumbs together and add richness to the crust by melting into the crumbs and setting firm as it cools.
- 1/3 cup granulated sugar 67 grams: Add a touch of sweetness to the crust mixture to balance the tang of the filling while helping to enhance overall flavor depth.
- 1/4 teaspoons ea salt (optional): Season the crust or filling lightly to brighten flavors; optional inclusion ensures a balanced sweet-tart profile without overpowering citrus.
- 4 teaspoons grated lime zest 8 grams, from 2 Persian limes: Deliver concentrated lime aroma and bright citrus oils that intensify the fresh lime flavor throughout the filling without extra juice.
- 4 large egg yolks 56 grams: Contribute richness, silky texture, and natural thickening to the custard-style filling while helping it set once baked or chilled.
- 14 ounces sweetened condensed milk 396 grams (1 can): Provide the primary sweet, creamy body of the filling and react with egg yolks to create a dense, smooth, custard-like texture.
- 1/2 cup freshly squeezed lime juice 114 grams, from 10-12 key limes or 4 Persian limes: Introduce vibrant acidity and the primary tart flavor that sets key lime pie apart, balancing sweetness and helping the filling firm.
- stabilized Whipped Cream (or cool whip) – click for recipe: Offer a light, airy topping with stabilized structure that complements the dense filling and keeps decorative peaks intact for serving.
- lime slices/wheels: Serve as a fresh, decorative garnish that reinforces lime flavor and adds visual appeal to each slice when placed on top.
Cooking Method for Easy Key Lime Pie Recipe
This recipe is straightforward, but each step rewards attention to sensory cues and technique. I like to move deliberately, noting textures and smells to know when things are right. Below, you will find each instruction expanded into detailed, personal guidance so you can master the process confidently.
- Preheat oven to 350°F.: You will notice a faint warmth in the air as the oven comes to temperature, and preheating is crucial so the crust begins baking immediately and does not absorb excess butter. A properly preheated oven ensures even browning and consistent bake times. Avoid the mistake of placing the pie into a cold oven, which can create a soggy base and uneven set. If your oven runs hot or cool, use an oven thermometer to verify accuracy.
- In a medium bowl, mix the graham cracker crumbs, melted butter, sugar and salt until well combined. The mixture will resemble wet sand.: Feel the texture shift as the crumbs absorb the butter; you want a cohesion that still looks granular rather than paste like. The sugar and salt dissolve slightly into the butter, giving the crumbs a glossy sheen. If your crumbs clump into large wet pockets, you likely used too much butter; add a tablespoon of extra crumbs to rebalance. Mixing by hand allows you to gauge texture, while a quick pulse in a food processor can help if the crumbs are uneven.
- Press the crust mixture evenly and firmly into the bottom and (almost all of the way) up the sides of the pie dish. (Do NOT cover the pans lip with crumbs.) Use the bottom of a measuring cup or of a flat-bottomed glass to press the crumbs into a crust, if desired.: As you press, you will hear the compacting of crumbs and feel the crust firm under your palm. The surface should be smooth and even, with slightly higher walls to contain the filling. Avoid pressing all the way to the rim; leaving the lip clear prevents overflow and allows the crust to adhere properly during baking. A common error is uneven pressing, which leads to thin spots that collapse when sliced, so take the time to make the thickness uniform.
- Bake the crust for 9 minutes. Transfer the cooked crust to a cooling rack and cool it completely before adding the pie filling.: During baking you will smell a toasty, buttery aroma as the crumbs set and brown slightly. The brief bake helps the crust lock together, preventing a soggy bottom once filled. Allowing the crust to cool fully is essential because a hot crust can melt the filling and ruin the set. Do not rush this step; if the crust remains warm, place it on a wire rack until it reaches room temperature. A pitfall is adding filling to a hot crust, which causes seepage and a soft center.
- In a medium-sized mixing bowl, whisk together the zest and yolks for 2 minutes. Whisk in the condensed milk and then add the juice and beat well. While the crust cooks and cools, set the lime pie filling aside at room temperature to thicken.: As you whisk, notice the change from glossy yolks to a pale, creamy mixture kissed by fragrant lime oils. The condensation like sheen of the sweetened condensed milk will make the mixture smooth and velvety. When you add the lime juice , the mixture will emit a bright citrus scent and begin to tone down in viscosity as the acid interacts with the yolks. Letting it rest at room temperature allows the filling to relax and slightly thicken, aligning the texture for baking. A common mistake is overbeating, which can incorporate too much air and create small surface bubbles during baking, so whisk steadily but not aggressively.
- Pour the filling into the cooled crust and bake until the center is just set, but it still a little wiggly, 15-17 minutes.: When the pie bakes, you will see the edges firm before the center; the look you are aiming for is a gently trembling center like gelatin that will set as it cools. The oven will return a warm citrus scent, and the filling should not brown deeply. This gentle set ensures a silky, custard like texture rather than a cakey result. A common error is overbaking for a fully firm center, which yields a crumbly, rubbery filling. Check at the lower end of the timing window and resist the urge to bake until fully solid.
- Transfer the pie to a cooling rack and let cool completely.: Cooling on a rack allows air to circulate and prevents condensation that can waterlog the crust. As the pie cools, you may notice the filling tightening from slightly jiggly to a firm, sliceable custard. This gradual transition improves texture and flavor melding. Avoid refrigerating immediately while piping hot as that can cause sweat and weeping; let it reach room temperature first.
- Cover the pie, tightly, with plastic wrap and refrigerate at least 3 hours and up to 24 hours, before serving.: Chilling deepens the flavors and gives the filling a clean, sliceable firmness. The wait also lets the zesty oils and sweet milk harmonize, producing a more cohesive, balanced bite. Refrigeration for the full three hours is the minimum to achieve proper texture; cutting it too early will produce a soft slice that may slide. Do not freeze the pie as the texture will degrade and separate upon thawing.
- Up to 2 hours before serving, top the pie with sweetened, freshly whipped cream. Garnish with twisted lime wheels or thin lime slices.: As you whip the cream, watch it transform from liquid to soft peaks, smelling fresh and slightly sweet. Folding in a touch of sugar and spreading it gently over the chilled pie creates a cloud like cap that complements the tart filling. Garnishing with lime wheels adds a zesty perfume at the table and a polished look. Be careful not to overwhip the cream into butter, and avoid adding the topping too soon, which can soften the cream and cause it to weep on the plate.
Helpful Notes about Easy Key Lime Pie Recipe
This recipe shines when you pay attention to small technique choices. Below are expanded tips, each starting with a bolded phrase to make the suggestion easy to scan and implement. These notes reflect my go to adjustments and tricks that yield consistently great pies.
- Pan size matters, I use a 9 inch pie pan for this pie because it yields a classic depth and slice count; using an 8 inch will deepen the filling, while a 9 inch tart pan may spread the depth a bit more broadly. Adjust chilling time accordingly, because a deeper pie can need a little extra refrigeration to firm up fully.
- Warm the butter carefully, let melted unsalted butter cool slightly before combining with the crumbs so it does not liquefy them into paste. If the butter is too hot it can change the crumb texture and make pressing difficult, so aim for warm to the touch, not steaming.
- Measure citrus by weight, squeezing 10 to 12 small limes versus 4 larger Persian limes can vary the acid level a touch; weighing or measuring the lime juice helps maintain consistent tartness. Taste the mixture before baking if you are uncertain; it should be bright but not overpowering.
- Stabilize whipped cream for make ahead, if you want perfect peaks that hold for hours, add a small amount of powdered sugar or a stabilizer when whipping. This prevents weeping and keeps the topping attractive for serving, especially in warm environments.
- Loosen stuck crusts gently, if the pie clings to the pan when serving, dip the bottom of the pie pan briefly in warm water to release the crust. Do not submerge the pie, apply heat only to the plate bottom for a few seconds, then run a thin knife around the edge to loosen.
What Goes Well With This Easy Key Lime Pie Recipe
This pie is naturally refreshing and pairs well with light accompaniments and warm weather occasions. Below I outline several serving ideas and contexts, each one designed to elevate the citrus creaminess with complementary textures and settings.
- Summer picnics and barbecues, serve chilled slices right from the fridge as a bright finish to grilled mains. The pie acts as a palate cleanser after smoky flavors, making it a popular choice for outdoor gatherings.
- Holiday light dessert, for spring and summer celebrations like graduations or garden parties, offer this pie as a refreshing alternative to heavier desserts. Its cool, creamy profile is especially welcome on warm afternoons.
- Afternoon tea or coffee, pair a modest slice with a cup of lightly roasted coffee or a fragrant herbal tea. The acidity of the lime balances the bitterness of coffee and the floral notes of tea, creating a pleasant contrast.
- Make ahead hosting, since the pie requires chilling, make it the day before a dinner to free up time on the event day. Store it in the refrigerator tightly wrapped and bring out only when ready to top and serve.
- Seasonal pairings, spring and summer citrus produce accentuate the pie’s bright character, but it also brings welcome lightness to late summer menus when heavy meals feel too much. Serve with a small scoop of sorbet for a festive plated dessert.
- Storage tips, keep covered in the refrigerator for up to 24 hours for best texture and flavor. Do not freeze if you want to maintain the silky filling, as freezing changes the custard structure and can create a watery texture upon thawing.
FAQ
Conclusion
This pie stands out for its bright, balanced flavor and the satisfying contrast between a buttery graham crust and a silky, tangy filling. It is a graceful combination of simple ingredients that yield reliably impressive results, whether you are hosting a crowd or craving a citrusy treat at home. I encourage you to give it a try, make it ahead to free up your hosting time, and enjoy the way a small number of quality steps can produce a dessert that feels both fresh and indulgent.
Easy Key Lime Pie Recipe
Equipment
- Kitchen Scale(optional)
- Pie Pan
- Stand mixer
Ingredients
- 1 1/2 cups graham cracker crumbs 213 grams (about 12 cracker sheets) Provide a crunchy, mellow base for the pie crust when combined with melted butter, offering structure and a toasty flavor that contrasts the filling.
- 6 tablespoons unsalted butter 85 grams, melted (3/4 stick) Bind the graham cracker crumbs together and add richness to the crust by melting into the crumbs and setting firm as it cools.
- 1/3 cup granulated sugar 67 grams Add a touch of sweetness to the crust mixture to balance the tang of the filling while helping to enhance overall flavor depth.
- 1/4 teaspoons ea salt optional Season the crust or filling lightly to brighten flavors; optional inclusion ensures a balanced sweet-tart profile without overpowering citrus.
- 4 teaspoons grated lime zest 8 grams, from 2 Persian limes Deliver concentrated lime aroma and bright citrus oils that intensify the fresh lime flavor throughout the filling without extra juice.
- 4 large egg yolks 56 grams Contribute richness, silky texture, and natural thickening to the custard-style filling while helping it set once baked or chilled.
- 14 ounces sweetened condensed milk 396 grams (1 can) Provide the primary sweet, creamy body of the filling and react with egg yolks to create a dense, smooth, custard-like texture.
- 1/2 cup freshly squeezed lime juice 114 grams, from 10-12 key limes or 4 Persian limes Introduce vibrant acidity and the primary tart flavor that sets key lime pie apart, balancing sweetness and helping the filling firm.
- stabilized Whipped Cream (or cool whip) - click for recipe Offer a light, airy topping with stabilized structure that complements the dense filling and keeps decorative peaks intact for serving.
- lime slices/wheels Serve as a fresh, decorative garnish that reinforces lime flavor and adds visual appeal to each slice when placed on top.
Instructions
- Preheat oven to 350°F.: You will notice a faint warmth in the air as the oven comes to temperature, and preheating is crucial so the crust begins baking immediately and does not absorb excess butter. A properly preheated oven ensures even browning and consistent bake times. Avoid the mistake of placing the pie into a cold oven, which can create a soggy base and uneven set. If your oven runs hot or cool, use an oven thermometer to verify accuracy.
- In a medium bowl, mix the graham cracker crumbs, melted butter, sugar and salt until well combined. The mixture will resemble wet sand.: Feel the texture shift as the crumbs absorb the butter; you want a cohesion that still looks granular rather than paste like. The sugar and salt dissolve slightly into the butter, giving the crumbs a glossy sheen. If your crumbs clump into large wet pockets, you likely used too much butter; add a tablespoon of extra crumbs to rebalance. Mixing by hand allows you to gauge texture, while a quick pulse in a food processor can help if the crumbs are uneven.
- Press the crust mixture evenly and firmly into the bottom and (almost all of the way) up the sides of the pie dish. (Do NOT cover the pans lip with crumbs.) Use the bottom of a measuring cup or of a flat-bottomed glass to press the crumbs into a crust, if desired.: As you press, you will hear the compacting of crumbs and feel the crust firm under your palm. The surface should be smooth and even, with slightly higher walls to contain the filling. Avoid pressing all the way to the rim; leaving the lip clear prevents overflow and allows the crust to adhere properly during baking. A common error is uneven pressing, which leads to thin spots that collapse when sliced, so take the time to make the thickness uniform.
- Bake the crust for 9 minutes. Transfer the cooked crust to a cooling rack and cool it completely before adding the pie filling.: During baking you will smell a toasty, buttery aroma as the crumbs set and brown slightly. The brief bake helps the crust lock together, preventing a soggy bottom once filled. Allowing the crust to cool fully is essential because a hot crust can melt the filling and ruin the set. Do not rush this step; if the crust remains warm, place it on a wire rack until it reaches room temperature. A pitfall is adding filling to a hot crust, which causes seepage and a soft center.
- In a medium-sized mixing bowl, whisk together the zest and yolks for 2 minutes. Whisk in the condensed milk and then add the juice and beat well. While the crust cooks and cools, set the lime pie filling aside at room temperature to thicken.: As you whisk, notice the change from glossy yolks to a pale, creamy mixture kissed by fragrant lime oils. The condensation like sheen of the sweetened condensed milk will make the mixture smooth and velvety. When you add the lime juice , the mixture will emit a bright citrus scent and begin to tone down in viscosity as the acid interacts with the yolks. Letting it rest at room temperature allows the filling to relax and slightly thicken, aligning the texture for baking. A common mistake is overbeating, which can incorporate too much air and create small surface bubbles during baking, so whisk steadily but not aggressively.
- Pour the filling into the cooled crust and bake until the center is just set, but it still a little wiggly, 15-17 minutes.: When the pie bakes, you will see the edges firm before the center; the look you are aiming for is a gently trembling center like gelatin that will set as it cools. The oven will return a warm citrus scent, and the filling should not brown deeply. This gentle set ensures a silky, custard like texture rather than a cakey result. A common error is overbaking for a fully firm center, which yields a crumbly, rubbery filling. Check at the lower end of the timing window and resist the urge to bake until fully solid.
- Transfer the pie to a cooling rack and let cool completely.: Cooling on a rack allows air to circulate and prevents condensation that can waterlog the crust. As the pie cools, you may notice the filling tightening from slightly jiggly to a firm, sliceable custard. This gradual transition improves texture and flavor melding. Avoid refrigerating immediately while piping hot as that can cause sweat and weeping; let it reach room temperature first.
- Cover the pie, tightly, with plastic wrap and refrigerate at least 3 hours and up to 24 hours, before serving.: Chilling deepens the flavors and gives the filling a clean, sliceable firmness. The wait also lets the zesty oils and sweet milk harmonize, producing a more cohesive, balanced bite. Refrigeration for the full three hours is the minimum to achieve proper texture; cutting it too early will produce a soft slice that may slide. Do not freeze the pie as the texture will degrade and separate upon thawing.
- Up to 2 hours before serving, top the pie with sweetened, freshly whipped cream. Garnish with twisted lime wheels or thin lime slices.: As you whip the cream, watch it transform from liquid to soft peaks, smelling fresh and slightly sweet. Folding in a touch of sugar and spreading it gently over the chilled pie creates a cloud like cap that complements the tart filling. Garnishing with lime wheels adds a zesty perfume at the table and a polished look. Be careful not to overwhip the cream into butter, and avoid adding the topping too soon, which can soften the cream and cause it to weep on the plate.
Notes
- Pan size matters, I use a 9 inch pie pan for this pie because it yields a classic depth and slice count; using an 8 inch will deepen the filling, while a 9 inch tart pan may spread the depth a bit more broadly. Adjust chilling time accordingly, because a deeper pie can need a little extra refrigeration to firm up fully.
- Warm the butter carefully, let melted unsalted butter cool slightly before combining with the crumbs so it does not liquefy them into paste. If the butter is too hot it can change the crumb texture and make pressing difficult, so aim for warm to the touch, not steaming.
- Measure citrus by weight, squeezing 10 to 12 small limes versus 4 larger Persian limes can vary the acid level a touch; weighing or measuring the lime juice helps maintain consistent tartness. Taste the mixture before baking if you are uncertain; it should be bright but not overpowering.
- Stabilize whipped cream for make ahead, if you want perfect peaks that hold for hours, add a small amount of powdered sugar or a stabilizer when whipping. This prevents weeping and keeps the topping attractive for serving, especially in warm environments.
- Loosen stuck crusts gently, if the pie clings to the pan when serving, dip the bottom of the pie pan briefly in warm water to release the crust. Do not submerge the pie, apply heat only to the plate bottom for a few seconds, then run a thin knife around the edge to loosen.