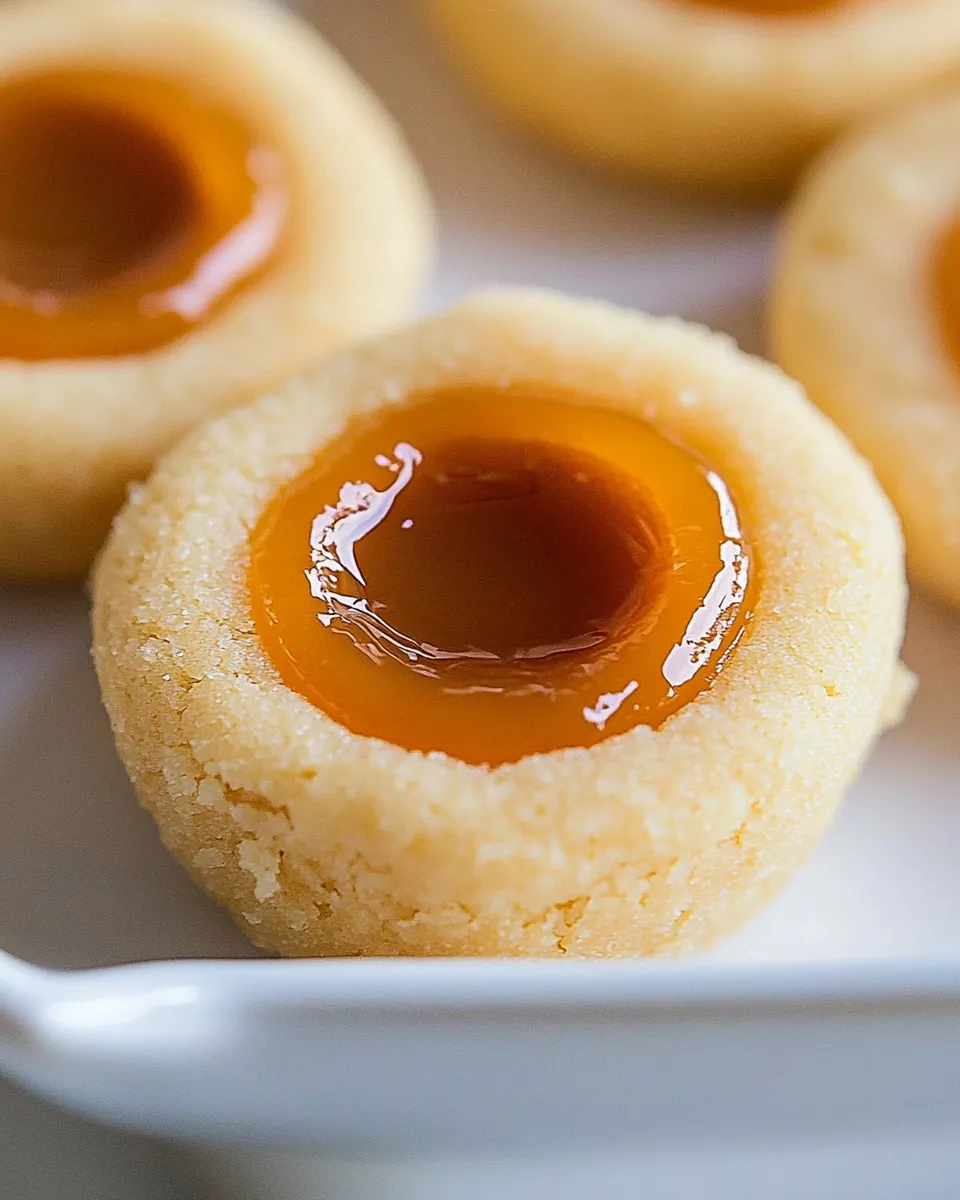
Butterscotch Shortbread Thumbprint Cookies
Butterscotch Shortbread Thumbprint Cookies have been my go to when I want a cookie that feels both nostalgic and a little bit grown up. The first time I made them was for a neighbor who brought over a jar of homemade jam, and I wanted to return the kindness with something that tasted like careful hands and cozy afternoons. From the very first bite, the contrast between the crumbly shortbread and the glossy butterscotch filled a corner of my kitchen with warm, buttery notes that felt like a small holiday.
I remember shaping the dough at the kitchen island while my dog circled my feet, hopeful for a fallen crumb. There is something almost meditative about pressing a shallow well into each round, watching the cookie respond, slightly cracking at the edge in the most charming way. The filling step, when the pan releases the scent of caramelized brown sugar and butter, always makes me stop and breathe a second. It is one of those recipes that rewards patience, and I have learned a few tricks along the way that keep the cookies tender yet sturdy enough to hold that glossy butterscotch.
Recipe Snapshot
42 mins
30 mins
12 mins
Medium
150 kcal
American
Gluten-Free, Vegan
Desserts
Large bowl, Mixer or spoon, Parchment paper, Baking sheet, Small heavy bottomed saucepan, Teaspoon
The Best Thing About This Butterscotch Shortbread Thumbprint Cookies
Buttery Comfort in Every Bite
I love how Butterscotch Shortbread Thumbprint Cookies start with butter as the star, which gives them an unmistakable, comforting richness. When the shortbread bakes, it releases an aroma that makes the whole house feel cozy and indulged. I often tell friends this cookie is an embrace in pastry form.
Textural Contrast That Wins
The crisp yet tender shortbread paired with a silky butterscotch filling is why I keep making these. The textural play is what people remark on first, that delightful meeting of crumb and sticky sauce. I think this contrast is what elevates a simple cookie into something memorable.
Reliable and Approachable Technique
I appreciate recipes that are forgiving, and this one is exactly that. From chilling the dough to creating the thumbprint, the steps are straightforward, and small adjustments usually yield great results. I often share it with newer bakers because it builds confidence without demanding perfection.
Great for Gifting and Gatherings
These cookies travel well and look lovely in a tin, which is why I make them around gatherings or to give as a neighborly treat. The glossy butterscotch centers give a polished finish, and they slice through a cookie box with style. I always feel proud handing them over at holiday swaps or tea dates.
Room for Personal Touches
Even though the base formula is simple, there is room to make it yours. I like to sprinkle sanding sugar for extra sparkle when hosting, but the core recipe stands strong on its own. It invites small experiments, and I enjoy hearing how others make it their own.
Main Ingredients for Butterscotch Shortbread Thumbprint Cookies
The philosophy behind these ingredients is simple, faithful, and focused on texture. The dough relies on a high proportion of butter to achieve that tender, melt in your mouth shortbread structure, while the flour and a pinch of salt balance richness and add structure. The butterscotch filling uses a small amount of additional butter, brown sugar, and cream to create a glossy, scoopable sauce that contrasts beautifully with the dry, crumbly cookie.
- 1 cup (8 oz) unsalted butter room temperature: Creamy and softened to room temperature, provides the rich fat that binds the dough, contributes tenderness, and delivers a buttery flavor that defines shortbread.
- 1/2 cup (60 g) powdered sugar sifted: Sifted into a fine powder to remove lumps, adds a delicate sweetness and aeration that keeps the shortbread light while preventing grittiness.
- 2 cups (280 g) all-purpose flour: Whisked together to form the structure, supplies the bulk of the dough and develops minimal gluten for a tender, crumbly texture when measured accurately.
- 1/8 teaspoons salt: Lightly balanced into the dry mixture, enhances and balances sweetness while strengthening gluten slightly and highlighting the buttery notes.
- 1/4 cups sanding sugar (optional): Sprinkled on the exterior for optional sparkle and crunch, offers a decorative shimmer and a slight textural contrast to the soft shortbread surface.
- 2 tablespoons (1 oz) unsalted butter: Melted or softened for the butterscotch filling, contributes extra richness and helps create a smooth, creamy texture when combined with sugars and cream.
- 1/4 cup (50 g) packed brown sugar: Packed to provide depth and moist caramel flavor, adds molasses notes and chewiness that form the base sweetness of the butterscotch center.
- 1/4 cup heavy cream: Heated with sugars to create a silky caramelized filling, supplies liquid for texture and helps dissolve sugars to form a glossy, cohesive butterscotch.
- 1/4 teaspoons salt: Added sparingly to the filling to enhance flavors, balances sweetness and intensifies the butterscotch and butter notes without making it salty.
- 3/4 teaspoons vanilla: Used to flavor both dough and filling subtly, offers warm, sweet aromatic notes that round out the cookie’s overall profile and complement caramel flavors.
Making This Butterscotch Shortbread Thumbprint Cookies
These directions guide you from creaming the dough to filling glossy centers in the final cookies. I like to work steadily and keep my workspace tidy so each step feels calm. Below, I expand every direction into detailed, sensory rich guidance so you can replicate the same perfect balance of tender shortbread and warm butterscotch.
- In a large bowl, cream together the butter and sugar. Stir in flour and salt, mixing until just combined, making sure to scrape the sides and bottom of your bowl.: The bowl will fill with a pale, billowy mixture as you beat softened butter and powdered sugar , smelling warm dairy and gentle sweetness. Use a paddle or sturdy spoon to mix until the texture becomes light and slightly fluffy, scraping down the sides so all butter is incorporated. This aeration helps the shortbread feel less dense, creating a tender crumb. If you under cream, the cookies may be heavy; if you over cream until greasy, the dough may spread in the oven. A common mistake is using melted butter , which prevents proper aeration and leads to flat cookies.
- Cover and chill the dough in the refrigerator until it is firm enough to handle, about 15-30 minutes. You should be able to shape scoops of it into a ball without it being too sticky or cracking. If it is over-chilled and difficult to work with, leave it out on the counter for a few minutes.: As you fold in the flour and salt , the mixture will go from glossy to a cohesive, slightly shaggy dough that holds together when pressed. You should hear a soft clump sound as the dough gathers, and visually it will be matte rather than shiny. Mixing just until combined preserves tenderness; overmixing builds gluten and makes the shortbread tougher. Watch for any streaks of dry flour and stop as soon as they disappear. A usual error is vigorous mixing at this stage which tightens the dough.
- Preheat the oven to 350°F and line a baking sheet with parchment paper.: Cooling the dough firms the butter and makes scooping easier, resulting in cleaner rounds and less spreading when baked. The chilled dough will feel cool to the touch and hold its shape when scooped. If you chill too long and it is rock hard, let it rest at room temperature a few minutes so it is workable. One mistake is skipping this chill, which can cause misshapen, overly thin cookies.
- Using a tablespoon, scoop dough and roll into balls (slightly under 1 ounce each). If desired, roll balls in sanding sugar until completely covered. Place dough on cookie sheet, 2 inches apart.: When the dough reaches the right chill, it should roll smoothly into a ball with a supple surface and no tackiness. The tactile cue is soft resistance, not stickiness. If it cracks, it is too cold; let it soften briefly. If it clings to your hands, it needs a little longer in the fridge. Working with dough that is too warm will cause the balls to flatten in the oven.
- Bake for 10 to 12 minutes. The cookies are done when their bottoms are lightly browned.: The kitchen will warm with the faint scent of heating metal as you bring the oven up to temperature. A consistent, accurate oven is essential so cookies bake evenly and develop a light golden bottom. Lining with parchment paper ensures easy release and prevents overbrowning on the pan side. A common oversight is not allowing the oven to fully reach temperature, which yields underbaked centers.
- As soon as they come out of the oven, use a round teaspoon or the back of a wooden spoon to create shallow wells in the center of each cookie. Be careful not to press too hard or you can cause the cookies to crack. Set aside.: As you form the balls, the dough should feel pliable and smooth. Rolling gently between your palms creates a uniform surface that browns evenly. If desired, roll balls in sanding sugar to add sparkle and a crisp bite. Space them about 2 inches apart so air can circulate, and watch for sticky spots when scooping. Pressing too firmly while rolling will create dense centers, so handle lightly.
- Melt butter in a small, heavy-bottomed saucepan. Add brown sugar, salt, and cream. Stir to combine. Bring to a simmer and, stirring occasionally, cook on medium for 5 minutes.: The spacing allows cookies to bloom slightly without touching neighbors, ensuring neat thumbprints later. On the sheet, the rounds will look plump and slightly domed ready to flatten partly in the oven. If placed too close, edges will fuse and the wells will be harder to shape. A frequent error is overcrowding the pan which prevents even browning.
- Remove pot from heat and stir in the vanilla. Use a teaspoon to spoon butterscotch into the thumbprints. Allow the butterscotch to cool slightly before serving.: During baking, the kitchen will fill with a warm, buttery aroma, and the cookies will set with gently golden bottoms. The tops remain pale but firm. This window ensures shortbread is cooked through without overbrowning; watch for lightly browned undersides as your visual cue. If left too long, the texture will move from tender to crisp and dry. Opening the oven door repeatedly can cause uneven baking, so try to peek quickly.
- The cookies are done when their bottoms are lightly browned: Carefully slide a spatula under a cookie to check the bottom color when close to the end time. The contrast between a pale top and a faintly golden base signals readiness. Removing them at the right moment preserves a tender center while delivering a slight structural crisp at the base. Forgetting this check risks under or overbaking, altering the ideal crumb.
- As soon as they come out of the oven, use a round teaspoon or the back of a wooden spoon to create shallow wells in the center of each cookie: When the cookies are warm, their surface gives a little under gentle pressure, allowing you to press a thumbprint that keeps its shape as it cools. The sound is a soft pop, and the visual cue is a neat, shallow well. Do not press too hard or the cookie can crack outward; a light steady pressure is best. Waiting until completely cool will make forming wells much harder and may crack the cookie.
- Be careful not to press too hard or you can cause the cookies to crack: The fragile edge is a reminder to be gentle, you should feel slight resistance but not snapping. If a crack appears, you can gently press the edges back together while warm, but deep fractures may split during filling. Overpressing is the most common reason for broken cookies, so control your pressure.
- Set aside: Allowing the crisped edges to firm while still warm helps the wells hold sauce without bleeding into the cookie body. The set feeling is a slight loss of tackiness on the surface. Do not stack cookies while warm, as the filling step will come next and stacking can mar surfaces.
- Melt butter in a small, heavy-bottomed saucepan: As the butter melts it will smell rich and creamy, and the pan should be stable to prevent hot spots. Use medium heat and watch for foaming which signals the start of the browning process. A light nutty aroma may develop if left longer, but be vigilant to avoid burning. Using a thin pan causes uneven heat and possible scorching.
- Add brown sugar, salt, and cream: When you stir these into the melted butter , the mixture will hurry from glossy to slightly grainy before smoothing into a pooled golden mass. The cream contributes silkiness while brown sugar brings deep caramel notes. Stir constantly at first to dissolve the sugar, then maintain an even simmer. Adding cold cream too quickly can momentarily seize the sauce, so add slowly and stir.
- Stir to combine: The action quiets the pot and transforms ingredients into a unified sauce, with steam rising and a rich, toasty scent. Combine thoroughly so the sugar dissolves and salt distributes. Gaps in stirring create hot pockets that can burn, so keep the mixture moving. Leaving it unattended at this stage often ends in burnt sugar.
- Bring to a simmer and, stirring occasionally, cook on medium for 5 minutes: You will see tiny bubbles appear around the edges as the sugar melds with the cream and butter , thickening into that desirable butterscotch body. This brief simmer concentrates flavor and helps the sauce set once cooled. Cooking too vigorously will darken the sauce and introduce bitterness, so maintain a gentle simmer. Under cooking gives a runny filling that will not hold.
- Remove pot from heat and stir in the vanilla: Off the stove, the fragrance of vanilla blooms and rounds the caramel notes into a comforting finish. Stirring here integrates aroma without risking evaporation of delicate notes. If you add vanilla to a boiling pot, the flavor can become muted or cooked off, so always add after removing heat.
- Use a teaspoon to spoon butterscotch into the thumbprints: The glossy filling should pour slowly, settling into each well and creating a shiny dome. Work while the sauce is warm so it nests smoothly, and wipe drips quickly to keep edges clean. If the butterscotch cools too much, it will thicken and be hard to portion. A typical misstep is overfilling which causes filling to spill over during final cooling.
- Allow the butterscotch to cool slightly before serving: As the filling cools, it will take on a slightly firmer texture but remain pleasantly soft when bitten. This brief rest helps the sauce set so it stays in the well instead of running. Serve at room temperature for best mouthfeel, and store any leftovers appropriately. If you serve them piping hot, the sauce will be very runny and less neat to eat.
Tips for Success
I like to think of baking as controlled patience, and these tips reflect that. Small tweaks in temperature, timing, and handling make a big difference. Below are expanded, practical pointers that have saved me from countless batches gone wrong.
- Measure flour correctly by spooning into your measuring cup and leveling with a flat edge to avoid dense cookies from too much flour.
- Keep butter cool yet pliable, not melted, so you get the right creaming texture and avoid spreading during baking.
- Sift powdered sugar to ensure a smooth, lump free dough that bakes into tender shortbread.
- Monitor the butterscotch simmer closely, maintain a gentle bubble to concentrate flavor without burning the sugar.
- Use a consistent scoop size so cookies bake evenly and fill easily with the butterscotch.
- Allow cookies to cool slightly before stacking to prevent the filling from sticking and smudging the tops.
- Store in an airtight container at room temperature for up to three days to keep the shortbread tender and the filling stable.
What Goes Well With This Butterscotch Shortbread Thumbprint Cookies
These cookies pair well with simple, comforting accompaniments and are suited for many occasions. Whether you are gifting, serving at a tea, or packing for a picnic, there are straightforward ways to present and store them to their best advantage.
- Serve with a warm beverage, such as tea or coffee, which complements the buttery sweetness and enhances the aroma of the butterscotch.
- Plate for gatherings on a decorative platter, spacing the cookies to show off the glossy centers so guests can admire them before eating.
- Gift in a tin for holidays or neighborly treats, layering sheets of parchment between the cookies to prevent sticking and preserve the finish.
- Store leftovers properly in an airtight container at room temperature for up to three days, and chill the filling separately if you need it to keep longer.
- Pair for seasonal events like winter gatherings or cookie exchanges, where their nostalgic flavor and polished look make them standouts.
- Use extra filling creatively warmed over ice cream or as a drizzle on desserts for a second life beyond the cookie tin.
FAQ
Conclusion
These cookies shine because they combine melt in your mouth shortbread with a glossy, deeply flavored butterscotch that balances texture and taste beautifully. Try them for your next gathering or baking day, they are forgiving, crowd pleasing, and quick to make. Enjoy the ritual of shaping each thumbprint, the warm caramel scent while you cook the filling, and the pleasure of serving a cookie that looks as thoughtful as it tastes.
Butterscotch Shortbread Thumbprint Cookies
Equipment
- Large Bowl
- Mixer or spoon
- Parchment Paper
- Baking Sheet
- Small heavy bottomed saucepan
- Teaspoon
Ingredients
- 1 cup (8 oz) unsalted butter room temperature Creamy and softened to room temperature, provides the rich fat that binds the dough, contributes tenderness, and delivers a buttery flavor that defines shortbread.
- 1/2 cup (60 g) powdered sugar sifted Sifted into a fine powder to remove lumps, adds a delicate sweetness and aeration that keeps the shortbread light while preventing grittiness.
- 2 cups (280 g) all-purpose flour Whisked together to form the structure, supplies the bulk of the dough and develops minimal gluten for a tender, crumbly texture when measured accurately.
- 1/8 teaspoons salt Lightly balanced into the dry mixture, enhances and balances sweetness while strengthening gluten slightly and highlighting the buttery notes.
- 1/4 cups sanding sugar optional Sprinkled on the exterior for optional sparkle and crunch, offers a decorative shimmer and a slight textural contrast to the soft shortbread surface.
- 2 tablespoons (1 oz) unsalted butter Melted or softened for the butterscotch filling, contributes extra richness and helps create a smooth, creamy texture when combined with sugars and cream.
- 1/4 cup (50 g) packed brown sugar Packed to provide depth and moist caramel flavor, adds molasses notes and chewiness that form the base sweetness of the butterscotch center.
- 1/4 cup heavy cream Heated with sugars to create a silky caramelized filling, supplies liquid for texture and helps dissolve sugars to form a glossy, cohesive butterscotch.
- 1/4 teaspoons salt Added sparingly to the filling to enhance flavors, balances sweetness and intensifies the butterscotch and butter notes without making it salty.
- 3/4 teaspoons vanilla Used to flavor both dough and filling subtly, offers warm, sweet aromatic notes that round out the cookie’s overall profile and complement caramel flavors.
Instructions
- In a large bowl, cream together the butter and sugar. Stir in flour and salt, mixing until just combined, making sure to scrape the sides and bottom of your bowl.: The bowl will fill with a pale, billowy mixture as you beat softened butter and powdered sugar , smelling warm dairy and gentle sweetness. Use a paddle or sturdy spoon to mix until the texture becomes light and slightly fluffy, scraping down the sides so all butter is incorporated. This aeration helps the shortbread feel less dense, creating a tender crumb. If you under cream, the cookies may be heavy; if you over cream until greasy, the dough may spread in the oven. A common mistake is using melted butter , which prevents proper aeration and leads to flat cookies.
- Cover and chill the dough in the refrigerator until it is firm enough to handle, about 15-30 minutes. You should be able to shape scoops of it into a ball without it being too sticky or cracking. If it is over-chilled and difficult to work with, leave it out on the counter for a few minutes.: As you fold in the flour and salt , the mixture will go from glossy to a cohesive, slightly shaggy dough that holds together when pressed. You should hear a soft clump sound as the dough gathers, and visually it will be matte rather than shiny. Mixing just until combined preserves tenderness; overmixing builds gluten and makes the shortbread tougher. Watch for any streaks of dry flour and stop as soon as they disappear. A usual error is vigorous mixing at this stage which tightens the dough.
- Preheat the oven to 350°F and line a baking sheet with parchment paper.: Cooling the dough firms the butter and makes scooping easier, resulting in cleaner rounds and less spreading when baked. The chilled dough will feel cool to the touch and hold its shape when scooped. If you chill too long and it is rock hard, let it rest at room temperature a few minutes so it is workable. One mistake is skipping this chill, which can cause misshapen, overly thin cookies.
- Using a tablespoon, scoop dough and roll into balls (slightly under 1 ounce each). If desired, roll balls in sanding sugar until completely covered. Place dough on cookie sheet, 2 inches apart.: When the dough reaches the right chill, it should roll smoothly into a ball with a supple surface and no tackiness. The tactile cue is soft resistance, not stickiness. If it cracks, it is too cold; let it soften briefly. If it clings to your hands, it needs a little longer in the fridge. Working with dough that is too warm will cause the balls to flatten in the oven.
- Bake for 10 to 12 minutes. The cookies are done when their bottoms are lightly browned.: The kitchen will warm with the faint scent of heating metal as you bring the oven up to temperature. A consistent, accurate oven is essential so cookies bake evenly and develop a light golden bottom. Lining with parchment paper ensures easy release and prevents overbrowning on the pan side. A common oversight is not allowing the oven to fully reach temperature, which yields underbaked centers.
- As soon as they come out of the oven, use a round teaspoon or the back of a wooden spoon to create shallow wells in the center of each cookie. Be careful not to press too hard or you can cause the cookies to crack. Set aside.: As you form the balls, the dough should feel pliable and smooth. Rolling gently between your palms creates a uniform surface that browns evenly. If desired, roll balls in sanding sugar to add sparkle and a crisp bite. Space them about 2 inches apart so air can circulate, and watch for sticky spots when scooping. Pressing too firmly while rolling will create dense centers, so handle lightly.
- Melt butter in a small, heavy-bottomed saucepan. Add brown sugar, salt, and cream. Stir to combine. Bring to a simmer and, stirring occasionally, cook on medium for 5 minutes.: The spacing allows cookies to bloom slightly without touching neighbors, ensuring neat thumbprints later. On the sheet, the rounds will look plump and slightly domed ready to flatten partly in the oven. If placed too close, edges will fuse and the wells will be harder to shape. A frequent error is overcrowding the pan which prevents even browning.
- Remove pot from heat and stir in the vanilla. Use a teaspoon to spoon butterscotch into the thumbprints. Allow the butterscotch to cool slightly before serving.: During baking, the kitchen will fill with a warm, buttery aroma, and the cookies will set with gently golden bottoms. The tops remain pale but firm. This window ensures shortbread is cooked through without overbrowning; watch for lightly browned undersides as your visual cue. If left too long, the texture will move from tender to crisp and dry. Opening the oven door repeatedly can cause uneven baking, so try to peek quickly.
- The cookies are done when their bottoms are lightly browned: Carefully slide a spatula under a cookie to check the bottom color when close to the end time. The contrast between a pale top and a faintly golden base signals readiness. Removing them at the right moment preserves a tender center while delivering a slight structural crisp at the base. Forgetting this check risks under or overbaking, altering the ideal crumb.
- As soon as they come out of the oven, use a round teaspoon or the back of a wooden spoon to create shallow wells in the center of each cookie: When the cookies are warm, their surface gives a little under gentle pressure, allowing you to press a thumbprint that keeps its shape as it cools. The sound is a soft pop, and the visual cue is a neat, shallow well. Do not press too hard or the cookie can crack outward; a light steady pressure is best. Waiting until completely cool will make forming wells much harder and may crack the cookie.
- Be careful not to press too hard or you can cause the cookies to crack: The fragile edge is a reminder to be gentle, you should feel slight resistance but not snapping. If a crack appears, you can gently press the edges back together while warm, but deep fractures may split during filling. Overpressing is the most common reason for broken cookies, so control your pressure.
- Set aside: Allowing the crisped edges to firm while still warm helps the wells hold sauce without bleeding into the cookie body. The set feeling is a slight loss of tackiness on the surface. Do not stack cookies while warm, as the filling step will come next and stacking can mar surfaces.
- Melt butter in a small, heavy-bottomed saucepan: As the butter melts it will smell rich and creamy, and the pan should be stable to prevent hot spots. Use medium heat and watch for foaming which signals the start of the browning process. A light nutty aroma may develop if left longer, but be vigilant to avoid burning. Using a thin pan causes uneven heat and possible scorching.
- Add brown sugar, salt, and cream: When you stir these into the melted butter , the mixture will hurry from glossy to slightly grainy before smoothing into a pooled golden mass. The cream contributes silkiness while brown sugar brings deep caramel notes. Stir constantly at first to dissolve the sugar, then maintain an even simmer. Adding cold cream too quickly can momentarily seize the sauce, so add slowly and stir.
- Stir to combine: The action quiets the pot and transforms ingredients into a unified sauce, with steam rising and a rich, toasty scent. Combine thoroughly so the sugar dissolves and salt distributes. Gaps in stirring create hot pockets that can burn, so keep the mixture moving. Leaving it unattended at this stage often ends in burnt sugar.
- Bring to a simmer and, stirring occasionally, cook on medium for 5 minutes: You will see tiny bubbles appear around the edges as the sugar melds with the cream and butter , thickening into that desirable butterscotch body. This brief simmer concentrates flavor and helps the sauce set once cooled. Cooking too vigorously will darken the sauce and introduce bitterness, so maintain a gentle simmer. Under cooking gives a runny filling that will not hold.
- Remove pot from heat and stir in the vanilla: Off the stove, the fragrance of vanilla blooms and rounds the caramel notes into a comforting finish. Stirring here integrates aroma without risking evaporation of delicate notes. If you add vanilla to a boiling pot, the flavor can become muted or cooked off, so always add after removing heat.
- Use a teaspoon to spoon butterscotch into the thumbprints: The glossy filling should pour slowly, settling into each well and creating a shiny dome. Work while the sauce is warm so it nests smoothly, and wipe drips quickly to keep edges clean. If the butterscotch cools too much, it will thicken and be hard to portion. A typical misstep is overfilling which causes filling to spill over during final cooling.
- Allow the butterscotch to cool slightly before serving: As the filling cools, it will take on a slightly firmer texture but remain pleasantly soft when bitten. This brief rest helps the sauce set so it stays in the well instead of running. Serve at room temperature for best mouthfeel, and store any leftovers appropriately. If you serve them piping hot, the sauce will be very runny and less neat to eat.
Notes
- Measure flour correctly by spooning into your measuring cup and leveling with a flat edge to avoid dense cookies from too much flour.
- Keep butter cool yet pliable, not melted, so you get the right creaming texture and avoid spreading during baking.
- Sift powdered sugar to ensure a smooth, lump free dough that bakes into tender shortbread.
- Monitor the butterscotch simmer closely, maintain a gentle bubble to concentrate flavor without burning the sugar.
- Use a consistent scoop size so cookies bake evenly and fill easily with the butterscotch.
- Allow cookies to cool slightly before stacking to prevent the filling from sticking and smudging the tops.
- Store in an airtight container at room temperature for up to three days to keep the shortbread tender and the filling stable.