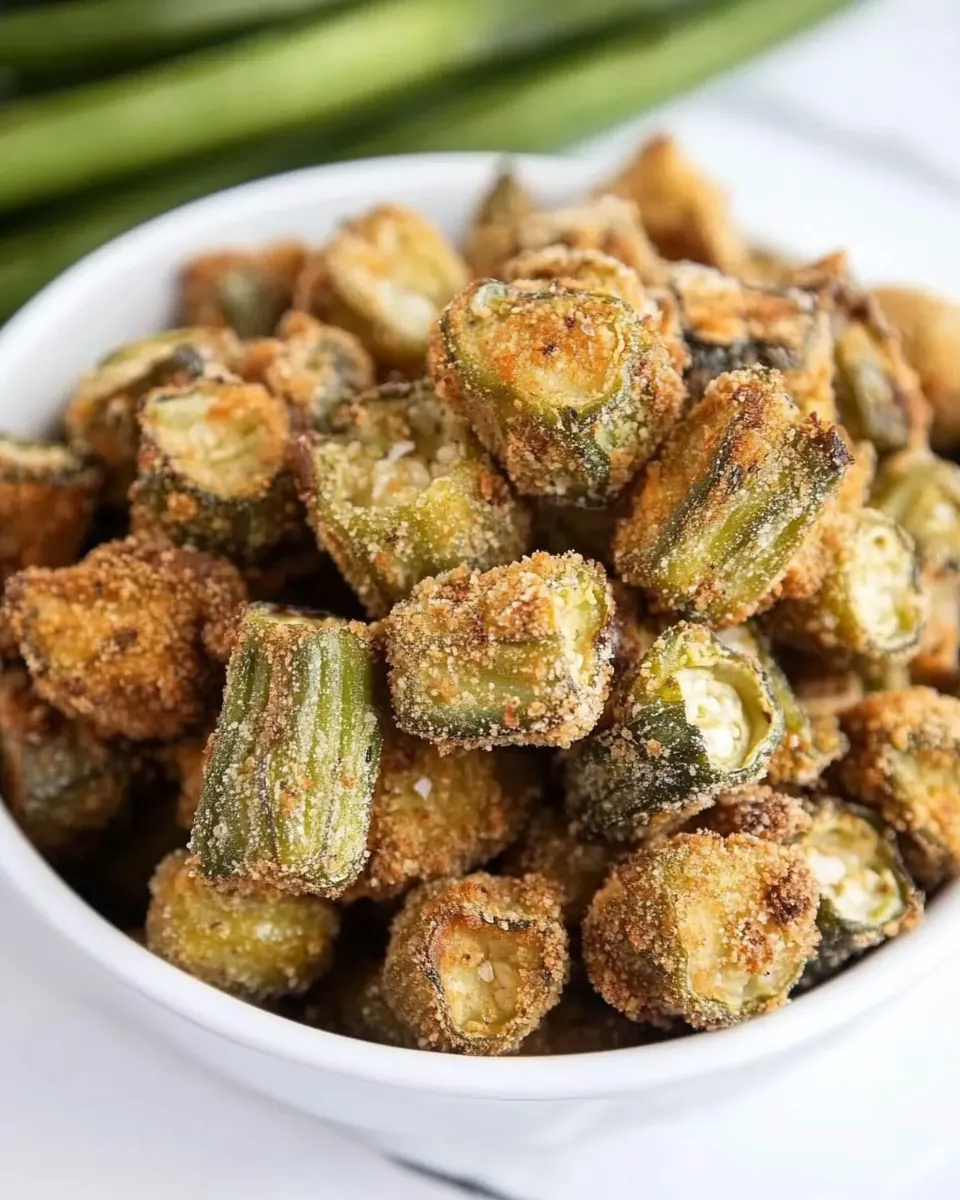
Fried Okra
Fried Okra has been a summer staple in my kitchen for years, a simple comfort that always brings back backyard lunches and the hum of conversation. I remember the first time I fried a pan of okra for neighbors after a garden swap, watching the bright green slices turn golden and crisp while the house filled with that warm, toasty aroma. That first batch disappeared in minutes, and the friendly chatter around the table convinced me I had a new go to side to bring to every casual gathering from then on.
Over time I learned small tricks that make a big difference, like letting the okra sit in the egg mixture so each piece soaks up flavor and the coating sticks better. I also started using a fine yellow cornmeal that gives the exterior a delicate crunch, rather than a heavy, gritty crust. Each time I fry up a batch I find myself smiling at how a handful of pantry staples can transform into something so crave worthy, and how easy it is to customize with what you already have on hand.
Recipe Snapshot
15 mins
5 mins
10 mins
Easy
180 kcal
American
Gluten-Free, Low FODMAP
Side Dishes
Skillet or Dutch oven, Wire baking rack, Mesh strainer, Zip-top bag, Slotted spoon, Thermometer
Why This Fried Okra Stands Out
Perfect summer side
I love Fried Okra because it celebrates simple ingredients at their peak. When okra is fresh and in season, the texture is tender inside and crisps beautifully outside. This dish feels right for backyard meals, potlucks, and quick dinners, it’s honest cooking that doesn’t try to be anything more than tasty and comforting.
Quick and approachable
One of the things that wins me over every time is speed. From the bowl to the skillet this recipe moves fast, so you can get a hot batch on the table in the same time it takes to steam a vegetable or toss a salad. I appreciate that you don’t need specialized tools or advanced skills, and that the technique scales easily for a crowd.
Textures that sing
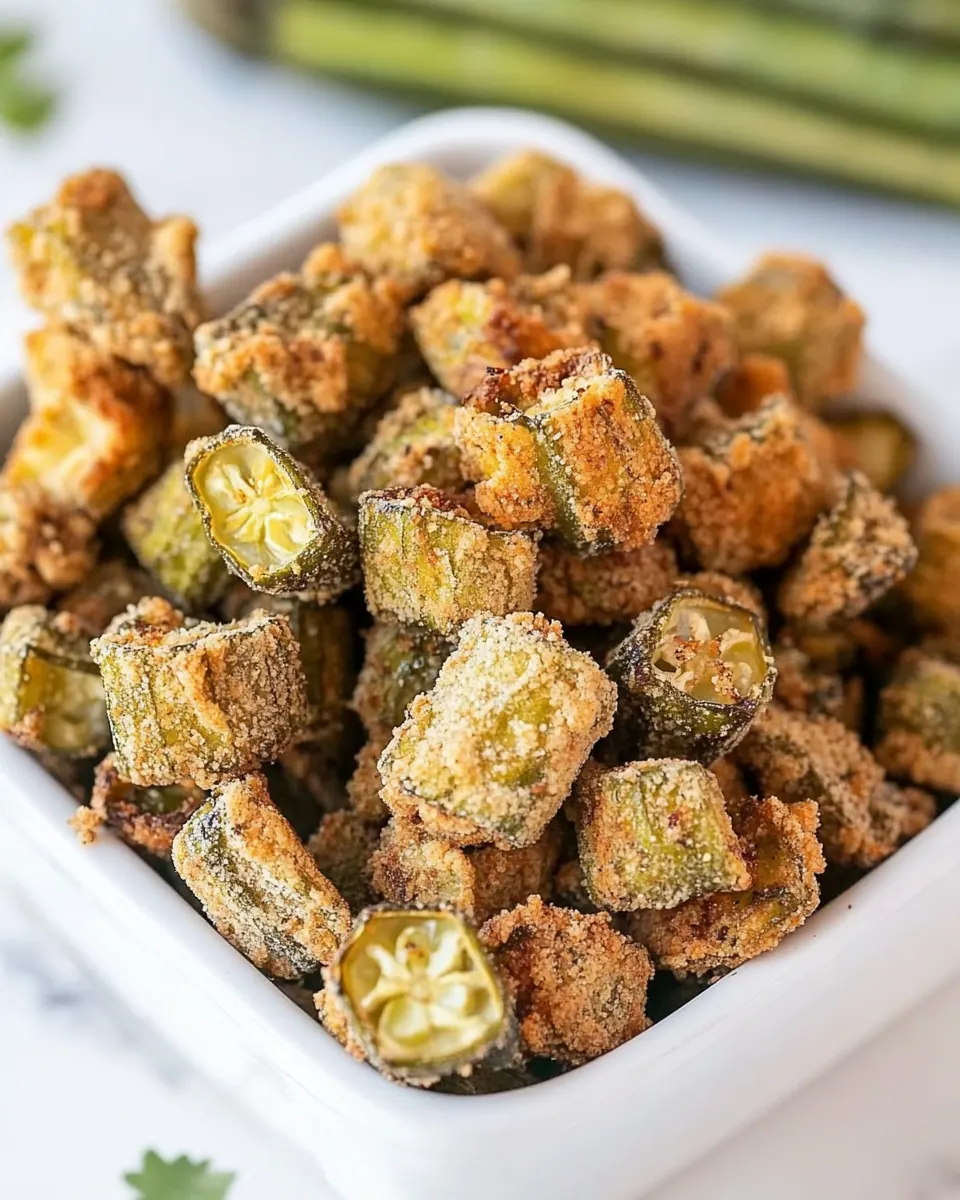
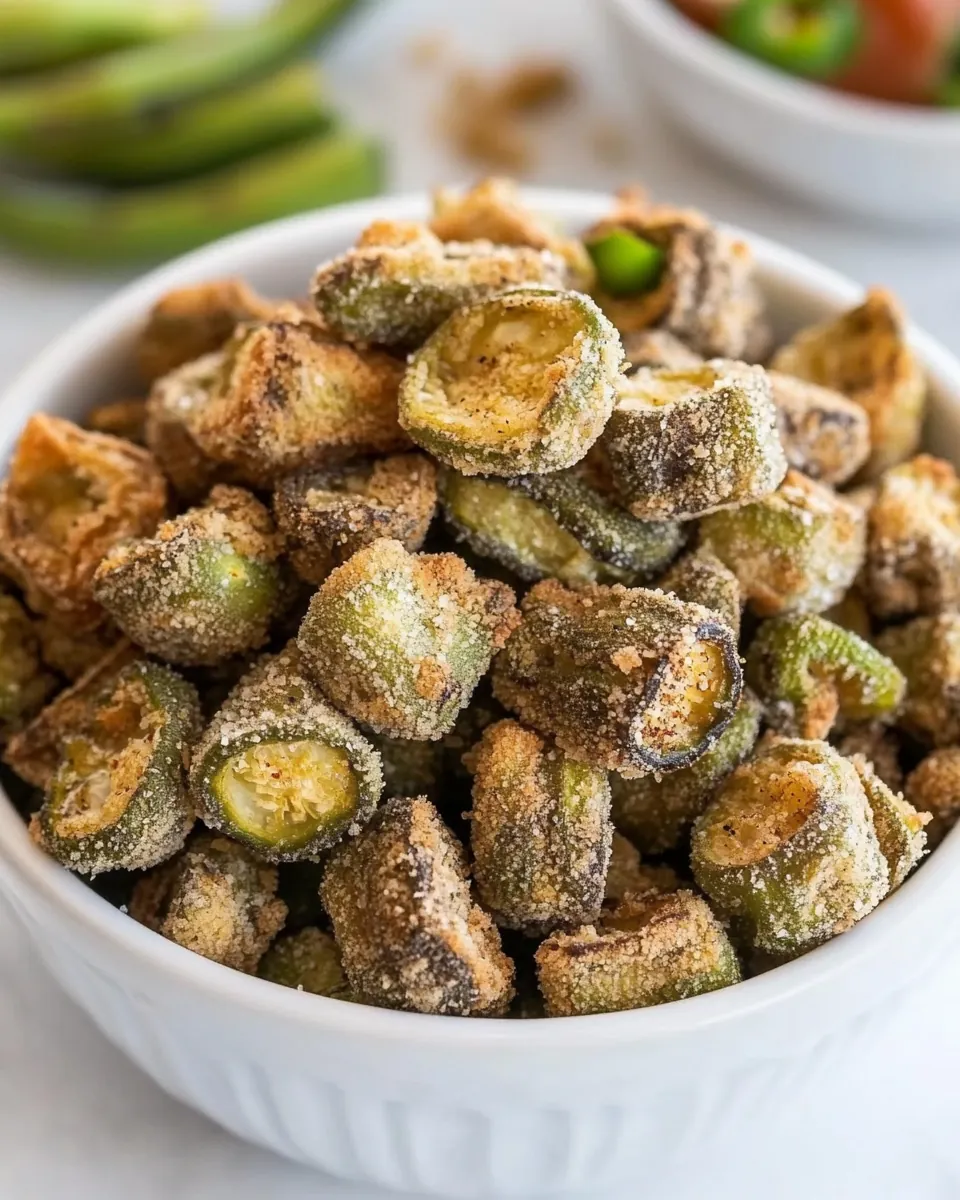
The contrast between the crunchy exterior from the cornmeal and the pillowy inside of the okra is why I keep coming back to this recipe. The coating toasts and cracks under your teeth, while the center stays soft and slightly sweet. That interplay makes it addictive, and a great counterpoint to softer dishes like stews or grain bowls.
Friendly to pantry staples
This recipe relies on common pantry items like all-purpose flour, cornmeal, and eggs, so it’s one of those last minute rescues when unexpected guests arrive. I also love the forgiving nature of the technique, you can tweak the amount of salt or the crisping time to match your taste and oil temperature without breaking the recipe.
Great for reheating and sharing
Leftovers keep well in the refrigerator and come back to life when warmed in an oven or air fryer. That flexibility makes Fried Okra a reliable choice for meal prep or for bringing to a friend’s house. It’s sociable food, meant to be eaten with hands and passed around, and I always enjoy how it sparks conversation at the table.
What to Gather for Fried Okra
These ingredients work together to highlight the sweet, grassy flavor of fresh okra while delivering a crisp, golden exterior. The key players are the wet dip that helps the coating stick, the fine yellow cornmeal that provides crunch, and a touch of all-purpose flour to bind the coating. A little baking powder helps lighten the crust, and finishing with salt brings everything into focus.
- 2 eggs: Beat together to create an egg wash that helps the coating adhere and provides moisture and richness to the fried okra.
- 1/4 cup milk or buttermilk (see note 1): Whisk in to thin the eggs and add tenderness; buttermilk will add a slight tang that brightens the batter and helps crisping.
- 1 pound fresh okra stems and tips removed, cut into 1/2-inch slices (see note 2): Slice and prepare as the main vegetable component, yielding tender pieces that fry quickly; removing stems and tips prevents toughness.
- 2/3 cup fine yellow cornmeal: Provide a gritty, crunchy coating and authentic corn flavor; the fine texture ensures even coverage and a crisp exterior when fried.
- 1/3 cup all-purpose flour: Lightly combine to give structure to the dredge and help bind the cornmeal; all-purpose flour contributes gluten for cohesion.
- 1 teaspoon baking powder: Leaven to give a touch of lightness to the coating so it isn't too dense; baking powder also aids crisping during frying.
- 1/2 teaspoons salt: Season to enhance overall flavor balance; salt draws out subtle sweetness in the okra and seasons the coating evenly.
- vegetable oil for frying: Heat to shallow- or deep-fry the coated okra, transferring intense heat for rapid cooking and creating a golden, crispy crust.
Directions for Fried Okra
These steps will guide you from prepping the okra to frying golden, crunchy pieces. Read through once, then move confidently, keeping an eye on oil temperature and batch sizes to get that perfect crisp without overcrowding the pan.
- Prepare a baking sheet with a wire baking rack. In a medium bowl, whisk together eggs and milk. Add okra and allow to sit for 10 minutes.: The moment you pull fried pieces from the oil you want them to rest on a surface that lets air circulate, so they stay crisp instead of steaming and going soggy, this setup keeps the bottoms dry and the texture intact. You should hear a faint crackle when the first pieces touch the rack, and they should glisten but not sit in oil, which would make them limp. A common mistake is placing them on paper directly, which traps steam and ruins the crunch.
- In a zip-top bag, combine cornmeal, flour, baking powder, and salt. Shake well to combine.: After whisking, the mixture should look homogenous and slightly frothy, indicating air has been incorporated which helps the coating adhere more evenly, you will notice the color lighten and the surface become smooth. This step matters because the binding ensures the dry mix clings to each slice, if you rush this the coating may fall off during frying. Avoid over whisking to the point of incorporating too much air, which can lead to splattering in hot oil.
- Using a mesh strainer, drain okra. With a slotted spoon and working in small batches, add okra to cornmeal mixture. Shake gently to coat and place on prepared baking sheet. Repeat with remaining okra.: As the okra soaks, it takes on moisture and flavor from the egg and milk , softening slightly and becoming ready to accept the cornmeal coating, you may smell a fresh vegetal note and see the slices glisten. This resting time encourages adhesion and reduces surface dryness, improving frying results. If you skip the rest, the coating may not stick uniformly and can fall away in the oil.
- In a large skillet or Dutch oven over medium-high heat, add 3/4-inch oil and heat to 375 degrees. Add okra in batches, and cook until brown on all sides, about 2-3 minutes. Remove from oil and place on a paper towel-lined plate. Season to taste with salt and serve.: Shake until the mixture is fully combined and you see a uniform color and texture, this ensures every piece gets a balanced coating. The dry blend should smell faintly toasty from the cornmeal and have no lumps of baking powder. If the dry mix is not well combined some pieces may taste salty while others will be bland, so take a moment to shake thoroughly.
- Using a mesh strainer, drain okra: Let excess liquid fall away so the coating can cling rather than slide off, you want just enough moisture to make the dry mix stick but not so much that it becomes soggy. The sound here is subtle, a brief drip and then a quieter, less wet surface. If you don’t drain well the coating will form clumps and fall off during frying.
- Add okra to cornmeal mixture: Work in small batches, using a slotted spoon to transfer pieces into the bag or bowl so each slice gets evenly coated, you should see a light, even dusting of the dry mix that clings to the surface. Gently shake or toss to set the coating without crushing the slices, and place them on the prepared baking rack to rest briefly. Overcrowding the bag or piling coated pieces together will cause the coating to rub off, so keep batches small.
- Repeat with remaining okra: Keep the workflow steady, coating and resting each batch to maintain consistent texture across the whole recipe, visual cues include a uniform golden dusting across each slice and no large clumps of dry mix. This repeatable rhythm helps you manage temperature and keeps the oil from cooling down when frying begins. Rushing to coat everything at once can cause uneven results and long delays before frying.
- Add 3/4-inch oil and heat to 375 degrees: Heat until the oil reaches a steady 375 degrees, you will see a faint shimmer on the surface and the aroma of hot oil without smoke, this temperature crisps the exterior quickly and cooks the interior without soaking up excess oil. Use a thermometer for accuracy because oil that is too cool makes greasy results and oil that is too hot will burn the coating before the inside cooks. A common error is guessing the temperature, which leads to inconsistent frying.
- Add okra in batches, and cook until brown on all sides: When the pieces hit the oil they should sizzle immediately, and within a minute you will hear a lively crackle, then watch the edges color to a deep golden brown over about 2 to 3 minutes per batch, turning as needed so all sides finish evenly. The smell will shift from neutral to nutty and toasty, a good sign you are on the right track. Avoid crowding the pan because that drops the oil temperature and leads to pale, oily pieces.
- Remove from oil and place on a paper towel-lined plate: The first seconds out of the oil are crucial, let excess oil drain so the coating remains thin and crisp, you might see tiny bubbles on the surface settle as the pieces rest. Season with an extra pinch of salt while still warm to help it stick and heighten the flavors. If you skip resting on paper or a rack, the underside will pool oil and lose texture.
Tips and Tricks about Fried Okra

This section dives into practical, hands on tips that I use every time I make Fried Okra. Read these to avoid common pitfalls and to get consistently crispy, flavorful results.
- Temperature matters: Maintain oil at a steady 375 degrees for a crisp exterior and a tender interior, using a thermometer avoids guesswork and reduces the chance of greasy pieces.
- Small batches for success: Fry in modest amounts so the oil temperature recovers quickly and pieces brown evenly, overcrowding cools the oil and yields soggy results.
- Dry before coating: Drain okra thoroughly after the egg and milk bath so the coating adheres instead of sliding off, excess moisture creates clumps and uneven coverage.
- Use fine cornmeal: Choose fine yellow cornmeal for a light, delicate crunch, coarse cornmeal can feel gritty and heavy on the palate.
- Rest on a rack: After frying place pieces on a wire rack over a baking sheet to keep air flowing and preserve crispness, paper alone can trap steam and make them limp.
- Season while hot: Sprinkle salt immediately after frying so it adheres and enhances the flavor, waiting until cool will leave the crust underseasoned.
What to Serve With Fried Okra
Fried Okra pairs beautifully with hearty mains and light, bright sides. It works well as an appetizer or as a crunchy side to balance creamy or saucy dishes. Consider the temperature and texture of the rest of your meal when planning accompaniments.
- Classic pairing: Serve with a bowl of tangy dipping sauce on the side for contrast, the crisp texture is perfect for dunking and brings a lively mouthfeel to the meal.
- Summer picnic: Offer alongside chilled salads and sandwiches so the warm, crunchy okra becomes a standout textural element at outdoor gatherings.
- Weeknight dinners: Plate with roasted or grilled mains for a quick, satisfying side that adds crispness to the plate and keeps dinner feeling casual.
- Storage and reheating: Keep leftovers chilled and reheat in an oven or air fryer to restore crispness, avoid microwaving which makes them soft and chewy.
- Seasonal note: In summer, when okra is sweetest, serve simply with salt and maybe a squeeze of lemon to highlight its natural flavor.
FAQ
Conclusion
Fried Okra stands out for its effortless combination of crisp texture and straightforward ingredients. It turns fresh okra into crunchy, golden bites that work for casual meals and gatherings alike. Give this recipe a try to experience how a few pantry staples and a careful frying technique transform summer produce into a crowd pleasing side. You will likely find it becomes a repeat order at your table, delivered with minimal fuss and maximum satisfaction.

Fried Okra
Equipment
- Skillet or Dutch oven
- Wire baking rack
- Mesh strainer
- Zip-top Bag
- Slotted Spoon
- Thermometer
Ingredients
- 2 eggs Beat together to create an egg wash that helps the coating adhere and provides moisture and richness to the fried okra.
- 1/4 cup milk or buttermilk (see note 1) Whisk in to thin the eggs and add tenderness; buttermilk will add a slight tang that brightens the batter and helps crisping.
- 1 pound fresh okra stems and tips removed, cut into 1/2-inch slices (see note 2) Slice and prepare as the main vegetable component, yielding tender pieces that fry quickly; removing stems and tips prevents toughness.
- 2/3 cup fine yellow cornmeal Provide a gritty, crunchy coating and authentic corn flavor; the fine texture ensures even coverage and a crisp exterior when fried.
- 1/3 cup all-purpose flour Lightly combine to give structure to the dredge and help bind the cornmeal; all-purpose flour contributes gluten for cohesion.
- 1 teaspoon baking powder Leaven to give a touch of lightness to the coating so it isn't too dense; baking powder also aids crisping during frying.
- 1/2 teaspoons salt Season to enhance overall flavor balance; salt draws out subtle sweetness in the okra and seasons the coating evenly.
- vegetable oil for frying Heat to shallow- or deep-fry the coated okra, transferring intense heat for rapid cooking and creating a golden, crispy crust.
Instructions
- Prepare a baking sheet with a wire baking rack. In a medium bowl, whisk together eggs and milk. Add okra and allow to sit for 10 minutes.: The moment you pull fried pieces from the oil you want them to rest on a surface that lets air circulate, so they stay crisp instead of steaming and going soggy, this setup keeps the bottoms dry and the texture intact. You should hear a faint crackle when the first pieces touch the rack, and they should glisten but not sit in oil, which would make them limp. A common mistake is placing them on paper directly, which traps steam and ruins the crunch.
- In a zip-top bag, combine cornmeal, flour, baking powder, and salt. Shake well to combine.: After whisking, the mixture should look homogenous and slightly frothy, indicating air has been incorporated which helps the coating adhere more evenly, you will notice the color lighten and the surface become smooth. This step matters because the binding ensures the dry mix clings to each slice, if you rush this the coating may fall off during frying. Avoid over whisking to the point of incorporating too much air, which can lead to splattering in hot oil.
- Using a mesh strainer, drain okra. With a slotted spoon and working in small batches, add okra to cornmeal mixture. Shake gently to coat and place on prepared baking sheet. Repeat with remaining okra.: As the okra soaks, it takes on moisture and flavor from the egg and milk , softening slightly and becoming ready to accept the cornmeal coating, you may smell a fresh vegetal note and see the slices glisten. This resting time encourages adhesion and reduces surface dryness, improving frying results. If you skip the rest, the coating may not stick uniformly and can fall away in the oil.
- In a large skillet or Dutch oven over medium-high heat, add 3/4-inch oil and heat to 375 degrees. Add okra in batches, and cook until brown on all sides, about 2-3 minutes. Remove from oil and place on a paper towel-lined plate. Season to taste with salt and serve.: Shake until the mixture is fully combined and you see a uniform color and texture, this ensures every piece gets a balanced coating. The dry blend should smell faintly toasty from the cornmeal and have no lumps of baking powder. If the dry mix is not well combined some pieces may taste salty while others will be bland, so take a moment to shake thoroughly.
- Using a mesh strainer, drain okra: Let excess liquid fall away so the coating can cling rather than slide off, you want just enough moisture to make the dry mix stick but not so much that it becomes soggy. The sound here is subtle, a brief drip and then a quieter, less wet surface. If you don’t drain well the coating will form clumps and fall off during frying.
- Add okra to cornmeal mixture: Work in small batches, using a slotted spoon to transfer pieces into the bag or bowl so each slice gets evenly coated, you should see a light, even dusting of the dry mix that clings to the surface. Gently shake or toss to set the coating without crushing the slices, and place them on the prepared baking rack to rest briefly. Overcrowding the bag or piling coated pieces together will cause the coating to rub off, so keep batches small.
- Repeat with remaining okra: Keep the workflow steady, coating and resting each batch to maintain consistent texture across the whole recipe, visual cues include a uniform golden dusting across each slice and no large clumps of dry mix. This repeatable rhythm helps you manage temperature and keeps the oil from cooling down when frying begins. Rushing to coat everything at once can cause uneven results and long delays before frying.
- Add 3/4-inch oil and heat to 375 degrees: Heat until the oil reaches a steady 375 degrees, you will see a faint shimmer on the surface and the aroma of hot oil without smoke, this temperature crisps the exterior quickly and cooks the interior without soaking up excess oil. Use a thermometer for accuracy because oil that is too cool makes greasy results and oil that is too hot will burn the coating before the inside cooks. A common error is guessing the temperature, which leads to inconsistent frying.
- Add okra in batches, and cook until brown on all sides: When the pieces hit the oil they should sizzle immediately, and within a minute you will hear a lively crackle, then watch the edges color to a deep golden brown over about 2 to 3 minutes per batch, turning as needed so all sides finish evenly. The smell will shift from neutral to nutty and toasty, a good sign you are on the right track. Avoid crowding the pan because that drops the oil temperature and leads to pale, oily pieces.
- Remove from oil and place on a paper towel-lined plate: The first seconds out of the oil are crucial, let excess oil drain so the coating remains thin and crisp, you might see tiny bubbles on the surface settle as the pieces rest. Season with an extra pinch of salt while still warm to help it stick and heighten the flavors. If you skip resting on paper or a rack, the underside will pool oil and lose texture.
Notes
- Temperature matters: Maintain oil at a steady 375 degrees for a crisp exterior and a tender interior, using a thermometer avoids guesswork and reduces the chance of greasy pieces.
- Small batches for success: Fry in modest amounts so the oil temperature recovers quickly and pieces brown evenly, overcrowding cools the oil and yields soggy results.
- Dry before coating: Drain okra thoroughly after the egg and milk bath so the coating adheres instead of sliding off, excess moisture creates clumps and uneven coverage.
- Use fine cornmeal: Choose fine yellow cornmeal for a light, delicate crunch, coarse cornmeal can feel gritty and heavy on the palate.
- Rest on a rack: After frying place pieces on a wire rack over a baking sheet to keep air flowing and preserve crispness, paper alone can trap steam and make them limp.
- Season while hot: Sprinkle salt immediately after frying so it adheres and enhances the flavor, waiting until cool will leave the crust underseasoned.