Molasses Cookies
Molasses Cookies have been my cozy baking fallback since I first learned to measure by sight rather than strict teaspoons, and they always show up when the house needs a warm, spiced hug. The first sentence reminds you that this cookie is about texture and aroma, not fuss, and I still remember sneaking a warm one from the cooling rack while the kitchen smelled of cloves and cinnamon. Over the years I refined the way I chill the dough and press the tops, and those small changes mean the difference between a flat cracker and a chewy, slightly crackled cookie that holds an impressive dome.
One late autumn afternoon I baked a double batch to take to a neighbor who had just moved in. She asked for the recipe between bites, and I realized these simple cookies carry stories, the kind that travel better than casseroles. I tend to swap the topping depending on the season, but the heart of the cookie, the blend of molasses and warming spices, stays the same. You will notice how the first bite releases a depth that plain sugar cookies can’t match, and how the granulated sugar crust adds a playful crunch around the edges.
Recipe Snapshot
35 mins
20 mins
15 mins
Medium
150 kcal
American
Gluten-Free, Low FODMAP
Desserts
Stand mixer or hand mixer, Mixing bowls, Baking sheet, Parchment paper or silicone baking mat, Measuring cups and spoons
The Beauty of This Molasses Cookies
Deep Spiced Flavor That Feels Homemade
I love that Molasses Cookies deliver a warm, layered spice profile from just a few pantry staples. The combination of molasses, cinnamon, ginger, and cloves gives a complex, cozy flavor without needing specialty extracts or long infusions. This is comfort baking in its purest form, and I find that the aroma alone can lift a cloudy afternoon.
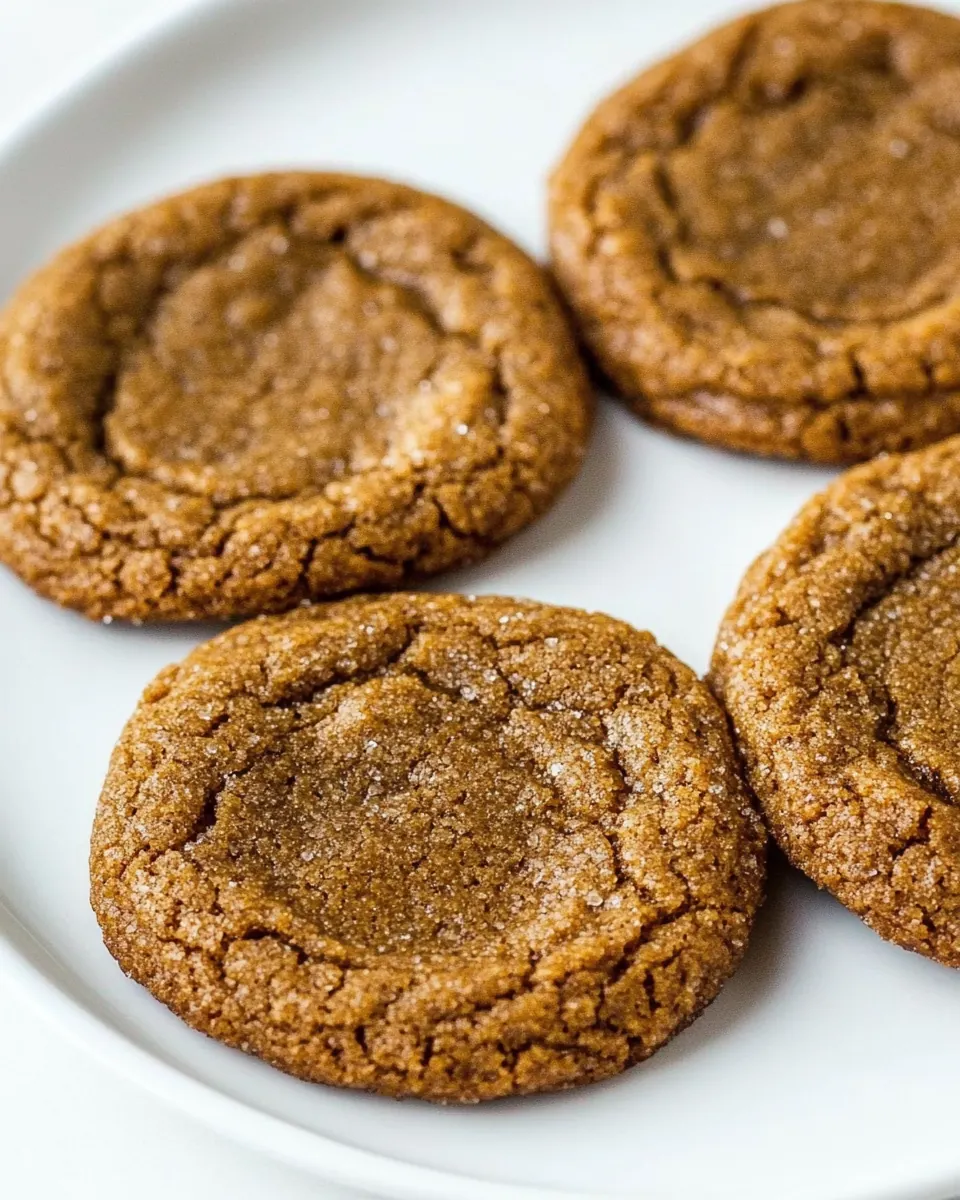
Chewy Interior with a Sugary Crust
These cookies manage the perfect contrast, soft and chewy inside, with a slightly crisp, crackly exterior thanks to rolling in granulated sugar. I cherish how the texture evolves as the cookie cools, and that little crunch makes every bite interesting. With the right chill time, you get an interior that holds moisture, while the outside gets a gentle caramelized finish.
Flexible Prep and Make Ahead Friendly
One of the reasons I keep this recipe in regular rotation is because the dough loves the fridge. You can chill for an hour, up to a day, or freeze the scooped balls to bake later. That flexibility means you can plan ahead for holiday trays or last minute guests, and I often bake a few straight from the freezer for an impromptu treat.
Kid Friendly and Festive
Adding colorful candies on top turns a rustic cookie into a party piece, which makes these perfect for holiday cookie exchanges. I adore how the little pops of color look against the dark cookie tops. Kids love helping roll the dough in the cinnamon sugar and pressing the candies in place, which transforms baking time into shared memory making.
Minimal Equipment, Maximum Reward
There is something satisfying about making a cookie that does not demand expensive tools. A simple mixer, bowl, and sheet pan are all you need, and yet the result tastes like you spent the afternoon crafting something special. That efficient payoff keeps me coming back to this recipe again and again.
What to Buy for Molasses Cookies
These ingredients feel like a stroll through a well stocked pantry. Each item plays a clear role: the unsalted butter provides richness and tenderness, molasses brings deep flavor and color, and the spice trio creates that classic warm profile. The flour builds structure so the cookies hold their shape while the sugars create both chew and a pretty crust.
- 1/2 cup (113 g) unsalted butter softened: Soften to room temperature so it creams smoothly with sugar and provides tender, rich texture and flavor to the dough; helps create a tender crumb and aids in spreading during baking.
- 3/4 cup (150 g) packed brown sugar: Sweeten and add deep caramel notes when creamed with butter; packed brown sugar contributes moisture and chewiness while enhancing the cookie’s rich molasses profile.
- 1/3 cup (79 ml) molasses: Contribute robust, slightly bitter-sweet flavor that defines the cookie’s signature taste; provides moisture and dark color while balancing the warm spices.
- 1 large egg: Bind the ingredients together while adding structure and moisture; enrich the dough for a soft interior and help with leavening when combined with baking soda.
- 1 teaspoon vanilla extract: Add fragrant sweetness and depth of flavor to complement molasses and spices; enhance overall aroma and rounded taste in the cookie batter.
- 1 teaspoon baking soda: React with acidic components to produce carbon dioxide, helping the cookies spread and rise slightly; essential for achieving a light, tender texture and proper lift.
- 1/4 teaspoon salt: Enhance and balance sweetness while highlighting spice flavors; control sodium to improve overall taste and strengthen gluten slightly for structure.
- 2 teaspoons ground cinnamon divided: Impart warm, aromatic cinnamon flavor; divided use allows some to be mixed into the dough for internal spice and some to season the exterior for visual appeal and immediate scent.
- 1 teaspoon ground ginger: Provide bright, peppery warmth that complements molasses and cinnamon; concentrate spice character and contribute to the classic ginger cookie flavor profile.
- 1/2 teaspoon ground cloves: Deliver aromatic, slightly sweet and pungent notes that deepen the spice blend; help create complexity and a warm finish in each bite.
- 1/2 teaspoon ground nutmeg: Add sweet, nutty perfume and depth to the spice mixture; small amount enhances overall aromatic complexity without overpowering other spices.
- 2 cups (248 g) all purpose flour: Supply structure and bulk as the primary dry ingredient; all purpose flour forms the dough matrix, trapping gases from leavening to create proper texture.
- 1/4 cup (50 g) granulated sugar: Offer a crunchy, sweet exterior when rolled or sprinkled, balancing the darker flavors; granulated sugar can also add a subtle crackle and extra sweetness on top.
- Christmas M&Ms for topping (optional): Provide colorful, festive topping and crunchy texture when used; optional candies add visual appeal and a burst of chocolatey sweetness on each cookie.
The Method for Molasses Cookies
I like to approach baking with patience and a sense of curiosity, and this recipe rewards both. Follow the steps in order, pay attention to how the dough feels, and you will end up with cookies that are chewy inside and lightly crackled on top. Take your time chilling the dough because that stage controls spread and texture, and enjoy the way the kitchen fills with spice.
- Note: this dough requires chilling.: this dough requires chilling. : The moment you smell the spice and molasses blending, you know the dough is on its way to developing complexity, because chilling allows the butter to firm and the flavors to meld slowly, preventing excessive spreading while deepening the aromatic profile. Expect a firmer, more manageable dough after refrigeration, and remember not to skip this step if you want controlled, tall cookies. A typical mistake is rushing to bake without chilling, which leads to thin, flat cookies that lack the desired chew.
- Using a stand or a hand mixer, beat butter, brown sugar, and molasses until the butter is broken up (the mixture will be lumpy). Mix in egg and vanilla, then add baking soda, salt, 1 teaspoon of cinnamon, and the ginger, cloves, and nutmeg. Mix until smooth, then slowly mix in the flour until the cookie dough forms.: When you start mixing, listen for the change from a dull, dense sound to a lighter, more aerated texture, and notice that the molasses tints the mixture a deep brown; that color is a good visual cue. The lumps at this stage are normal because the butter and molasses take time to fully integrate, but continue until the mixture looks cohesive, aiming for a softened, pillowy consistency. Overbeating at high speed can warm the mixture too much, so keep the speed moderate to avoid greasy dough and excessive spread later.
- Scoop 2 tablespoon sized balls of dough onto a cookie sheet covered with parchment paper or a silicone baking mat. No need to space them out; you’re going to chill them.: Right after adding the egg and vanilla , you will notice the batter smooth out and take on a glossy sheen, which indicates proper emulsion. Adding the leavener and spices next ensures they distribute evenly; the baking soda will react with the molasses to create gentle lift and a tender crumb. A common oversight is not fully incorporating the baking soda, leaving pockets that affect rise, so scrape the bowl and mix until even.
- Chill the dough for at least one hour, but you can also cover and chill up to one full day (or freeze the balls of dough for later baking).: As you add the all purpose flour , watch for the dough to come together around the paddle or beaters, forming a slightly tacky mass that holds shape when scooped. The tactile shift from sticky batter to cohesive dough is your cue that gluten development is minimal and acceptable here; overmixing will toughen the cookies, so stop as soon as the flour disappears. If the dough feels overly dry, you likely overmeasured the flour, and a small splash of milk can rescue it, but try to measure accurately to avoid that fix.
- Preheat oven to 350°F. Line two cookie sheets with silicone baking mats or parchment paper.: The dough should feel cool to the touch and slightly dense while you scoop, and using a consistent scoop ensures even baking time and uniform cookies. Arrange them without worrying about spacing since they will be chilled first; the goal here is uniformity rather than immediate bake spacing. Mistake to avoid, scoop sizes that vary wildly, which creates inconsistent bake results.
- Stir together the granulated sugar and remaining 1 teaspoon of cinnamon in a small bowl. Roll each cookie dough ball in the cinnamon sugar and then place on the cookie sheet. These do spread, so leave room. Top each ball with 5-6 M&Ms.: Placing dough balls close together for chilling is practical because the dough firms up uniformly, and after refrigeration you can move them to proper spacing for baking. Chilling concentrates flavors while the butter solidifies, which reduces spread and promotes a soft interior. A pitfall is skipping the chill, which leads to thin, over spread cookies with diminished chew.
- Bake for about 10-15 minutes, or until they’re no longer glossy. Store in an airtight container for up to 3 days or freeze for up to one month.: During this resting period the butter solidifies and the flavors continue to meld, giving a deeper, more cohesive flavor and ensuring controlled spread in the oven; the dough will be noticeably firmer to the touch after chilling. Freezing scooped balls is an excellent make ahead move, and you can bake from frozen by adding a couple of minutes to the bake time. Common mistake, not thawing slightly if baking from frozen, which can affect color and surface cracking.
- Preheat oven to 350°F.: Proper oven temperature is critical because it sets the initial burst of heat that creates lift while the edges set, giving you a tender middle and slightly crisp exterior; 350°F is the sweet spot for achieving that balance. Allow the oven to reach temperature fully before inserting pans, and rotate pans halfway through the bake if your oven has hot spots. A frequent error is placing cold dough into a barely warm oven, resulting in uneven texture and underbaked centers.
- Line two cookie sheets with silicone baking mats or parchment paper.: Lined pans promote even baking and easy release, and you will notice less browning on the bottoms while still achieving a golden edge. Using the same type of sheet for both batches helps maintain consistent results. Avoid greasing lined pans, which can lead to overbrowning and a greasy mouthfeel.
- Stir together the granulated sugar and remaining 1 teaspoon of cinnamon in a small bowl.: This simple coating provides a sparkling, slightly crunchy finish that contrasts perfectly with the chewy interior; the extra cinnamon enhances the aroma as soon as the cookies hit the oven. Roll each chilled dough ball in the mixture to coat thoroughly, which gives a uniform crust and a pretty cracked appearance after baking. Skipping the roll step removes that textural contrast and lessens visual appeal.
- Roll each cookie dough ball in the cinnamon sugar and then place on the cookie sheet.: After rolling, the dough will glisten and feel slightly tacky from the sugar, and as they bake the sugar will caramelize lightly, forming a delicate crust. Leave room for spreading if you did not chill long enough, but if properly chilled moderate spacing is fine. A typical error is placing too many on one sheet, which reduces air circulation and causes uneven baking.
- These do spread, so leave room.: As the cookies warm in the oven, the butter softens and the dough flattens slightly, so spacing prevents them from joining into a single large cookie; watch for a gentle dome that becomes crackled on top. The visual of the little fissures forming is your cue that they are nearing doneness, and the edges should look set while the centers remain soft. Overcrowding will yield a single sheet of joined cookies and a loss of the crackled finish.
- Top each ball with 5-6 M&Ms.: Pressing candies gently into the tops before baking creates a festive look and a contrast of textures, and the candies will soften but generally hold shape if added before baking. Space them so they do not overlap the edges, or the candy may run over the sides slightly. Avoid pressing too deep, which embeds them leading to uneven color and texture.
- Bake for about 10 to 15 minutes, or until they’re no longer glossy.: During baking you will hear a soft whisper of oven air and see the cookies expand, darken, and lose their glossy sheen, which signals they are done; the edges should be set and the centers slightly soft. Let them rest on the pan for a few minutes, as carryover heat finishes the cooking while the cookies stabilize. A common misstep is overbaking to the point of dryness, so remove them when the centers still yield slightly to a gentle touch.
- Store in an airtight container for up to 3 days or freeze for up to one month.: Once cooled, these cookies keep their texture best in an airtight container at room temperature for a few days, and freezing preserves freshness when planned ahead. Thaw frozen cookies at room temperature, and if you want that just baked warmth, pop them in a low oven for a few minutes. Putting warm cookies straight into a sealed container traps steam and softens the crust, so always cool fully first.
Making Adjustments

Tweaking this recipe is mostly about texture and flavor balance. Small changes in chilling time, scoop size, or spice ratios will shift the result, and below are practical adjustments I use when I want chewier, thicker, or more festive cookies. Each tip opens with a bolded key idea to help you scan quickly.
- For chewier cookies: Increase the brown sugar slightly while keeping the rest of the recipe the same, because brown sugar retains moisture and builds chew, but avoid adding more liquid which would cause excess spread.
- To make thicker cookies: Chill the scooped dough for a longer period or freeze balls before baking, the colder dough spreads less and retains more height in the oven, yielding a more substantial cookie.
- If you want crisper edges: Flatten the dough balls slightly before baking and bake on a darker sheet to encourage more browning at the edges, but watch closely to prevent overbaking.
- For more intense spice: Increase the ginger or cinnamon by a quarter teaspoon, tasting your spice blend first, because a touch more will amplify warmth without overwhelming the molasses base.
- Make ahead strategy: Scoop the dough and freeze the balls on a tray, then transfer to a bag; bake from frozen adding a few minutes to the bake time for fresh cookies on demand.
Best Served With
These cookies are versatile on the table, whether you are gifting them, serving at a party, or enjoying a quiet afternoon. I like to present them on a platter with little labels, and they pair well with warm drinks or as a sweet bite after a savory meal. Here are thoughtful serving suggestions and storage notes written as quick options.
- Holiday cookie tray: Arrange Molasses Cookies with other spiced and buttery cookies for a visually appealing platter that invites guests to graze during holiday gatherings.
- Afternoon tea or coffee: Serve slightly warm alongside a cup of tea or coffee; the spices complement hot beverages and the sugar crust gives a pleasant contrast to a smooth drink.
- Gift packaging: Stack cooled cookies in a tin or box with parchment layers and tie with ribbon for a homemade gift that travels well for a few days.
- Storage for later: Keep cookies in an airtight container at room temperature for up to three days, or freeze in a single layer then bag for longer storage up to one month.
- Occasions: These cookies work for cookie swaps, school parties, or as a sweet finish to a casual dinner throughout the fall and winter seasons.
FAQ
Conclusion
These Molasses Cookies stand out for their deep, spiced flavor and chewy, crackled texture that feels both comforting and festive. Give them a try when you want a cookie that carries warmth and personality, whether for a holiday tray or a simple afternoon treat. I hope you enjoy the ritual of mixing, chilling, and baking them as much as I do, and that they become a dependable go to for cozy baking moments.
Molasses Cookies
Equipment
- Stand mixer or hand mixer
- Mixing Bowls
- Baking Sheet
- Parchment paper or silicone baking mat
- Measuring Cups and Spoons
Ingredients
- 1/2 cup (113 g) unsalted butter softened Soften to room temperature so it creams smoothly with sugar and provides tender, rich texture and flavor to the dough; helps create a tender crumb and aids in spreading during baking.
- 3/4 cup (150 g) packed brown sugar Sweeten and add deep caramel notes when creamed with butter; packed brown sugar contributes moisture and chewiness while enhancing the cookie’s rich molasses profile.
- 1/3 cup (79 ml) molasses Contribute robust, slightly bitter-sweet flavor that defines the cookie’s signature taste; provides moisture and dark color while balancing the warm spices.
- 1 large egg Bind the ingredients together while adding structure and moisture; enrich the dough for a soft interior and help with leavening when combined with baking soda.
- 1 teaspoon vanilla extract Add fragrant sweetness and depth of flavor to complement molasses and spices; enhance overall aroma and rounded taste in the cookie batter.
- 1 teaspoon baking soda React with acidic components to produce carbon dioxide, helping the cookies spread and rise slightly; essential for achieving a light, tender texture and proper lift.
- 1/4 teaspoon salt Enhance and balance sweetness while highlighting spice flavors; control sodium to improve overall taste and strengthen gluten slightly for structure.
- 2 teaspoons ground cinnamon divided Impart warm, aromatic cinnamon flavor; divided use allows some to be mixed into the dough for internal spice and some to season the exterior for visual appeal and immediate scent.
- 1 teaspoon ground ginger Provide bright, peppery warmth that complements molasses and cinnamon; concentrate spice character and contribute to the classic ginger cookie flavor profile.
- 1/2 teaspoon ground cloves Deliver aromatic, slightly sweet and pungent notes that deepen the spice blend; help create complexity and a warm finish in each bite.
- 1/2 teaspoon ground nutmeg Add sweet, nutty perfume and depth to the spice mixture; small amount enhances overall aromatic complexity without overpowering other spices.
- 2 cups (248 g) all purpose flour Supply structure and bulk as the primary dry ingredient; all purpose flour forms the dough matrix, trapping gases from leavening to create proper texture.
- 1/4 cup (50 g) granulated sugar Offer a crunchy, sweet exterior when rolled or sprinkled, balancing the darker flavors; granulated sugar can also add a subtle crackle and extra sweetness on top.
- Christmas M&Ms for topping, optional Provide colorful, festive topping and crunchy texture when used; optional candies add visual appeal and a burst of chocolatey sweetness on each cookie.
Instructions
- Note: this dough requires chilling.: this dough requires chilling. : The moment you smell the spice and molasses blending, you know the dough is on its way to developing complexity, because chilling allows the butter to firm and the flavors to meld slowly, preventing excessive spreading while deepening the aromatic profile. Expect a firmer, more manageable dough after refrigeration, and remember not to skip this step if you want controlled, tall cookies. A typical mistake is rushing to bake without chilling, which leads to thin, flat cookies that lack the desired chew.
- Using a stand or a hand mixer, beat butter, brown sugar, and molasses until the butter is broken up (the mixture will be lumpy). Mix in egg and vanilla, then add baking soda, salt, 1 teaspoon of cinnamon, and the ginger, cloves, and nutmeg. Mix until smooth, then slowly mix in the flour until the cookie dough forms.: When you start mixing, listen for the change from a dull, dense sound to a lighter, more aerated texture, and notice that the molasses tints the mixture a deep brown; that color is a good visual cue. The lumps at this stage are normal because the butter and molasses take time to fully integrate, but continue until the mixture looks cohesive, aiming for a softened, pillowy consistency. Overbeating at high speed can warm the mixture too much, so keep the speed moderate to avoid greasy dough and excessive spread later.
- Scoop 2 tablespoon sized balls of dough onto a cookie sheet covered with parchment paper or a silicone baking mat. No need to space them out; you’re going to chill them.: Right after adding the egg and vanilla , you will notice the batter smooth out and take on a glossy sheen, which indicates proper emulsion. Adding the leavener and spices next ensures they distribute evenly; the baking soda will react with the molasses to create gentle lift and a tender crumb. A common oversight is not fully incorporating the baking soda, leaving pockets that affect rise, so scrape the bowl and mix until even.
- Chill the dough for at least one hour, but you can also cover and chill up to one full day (or freeze the balls of dough for later baking).: As you add the all purpose flour , watch for the dough to come together around the paddle or beaters, forming a slightly tacky mass that holds shape when scooped. The tactile shift from sticky batter to cohesive dough is your cue that gluten development is minimal and acceptable here; overmixing will toughen the cookies, so stop as soon as the flour disappears. If the dough feels overly dry, you likely overmeasured the flour, and a small splash of milk can rescue it, but try to measure accurately to avoid that fix.
- Preheat oven to 350°F. Line two cookie sheets with silicone baking mats or parchment paper.: The dough should feel cool to the touch and slightly dense while you scoop, and using a consistent scoop ensures even baking time and uniform cookies. Arrange them without worrying about spacing since they will be chilled first; the goal here is uniformity rather than immediate bake spacing. Mistake to avoid, scoop sizes that vary wildly, which creates inconsistent bake results.
- Stir together the granulated sugar and remaining 1 teaspoon of cinnamon in a small bowl. Roll each cookie dough ball in the cinnamon sugar and then place on the cookie sheet. These do spread, so leave room. Top each ball with 5-6 M&Ms.: Placing dough balls close together for chilling is practical because the dough firms up uniformly, and after refrigeration you can move them to proper spacing for baking. Chilling concentrates flavors while the butter solidifies, which reduces spread and promotes a soft interior. A pitfall is skipping the chill, which leads to thin, over spread cookies with diminished chew.
- Bake for about 10-15 minutes, or until they’re no longer glossy. Store in an airtight container for up to 3 days or freeze for up to one month.: During this resting period the butter solidifies and the flavors continue to meld, giving a deeper, more cohesive flavor and ensuring controlled spread in the oven; the dough will be noticeably firmer to the touch after chilling. Freezing scooped balls is an excellent make ahead move, and you can bake from frozen by adding a couple of minutes to the bake time. Common mistake, not thawing slightly if baking from frozen, which can affect color and surface cracking.
- Preheat oven to 350°F.: Proper oven temperature is critical because it sets the initial burst of heat that creates lift while the edges set, giving you a tender middle and slightly crisp exterior; 350°F is the sweet spot for achieving that balance. Allow the oven to reach temperature fully before inserting pans, and rotate pans halfway through the bake if your oven has hot spots. A frequent error is placing cold dough into a barely warm oven, resulting in uneven texture and underbaked centers.
- Line two cookie sheets with silicone baking mats or parchment paper.: Lined pans promote even baking and easy release, and you will notice less browning on the bottoms while still achieving a golden edge. Using the same type of sheet for both batches helps maintain consistent results. Avoid greasing lined pans, which can lead to overbrowning and a greasy mouthfeel.
- Stir together the granulated sugar and remaining 1 teaspoon of cinnamon in a small bowl.: This simple coating provides a sparkling, slightly crunchy finish that contrasts perfectly with the chewy interior; the extra cinnamon enhances the aroma as soon as the cookies hit the oven. Roll each chilled dough ball in the mixture to coat thoroughly, which gives a uniform crust and a pretty cracked appearance after baking. Skipping the roll step removes that textural contrast and lessens visual appeal.
- Roll each cookie dough ball in the cinnamon sugar and then place on the cookie sheet.: After rolling, the dough will glisten and feel slightly tacky from the sugar, and as they bake the sugar will caramelize lightly, forming a delicate crust. Leave room for spreading if you did not chill long enough, but if properly chilled moderate spacing is fine. A typical error is placing too many on one sheet, which reduces air circulation and causes uneven baking.
- These do spread, so leave room.: As the cookies warm in the oven, the butter softens and the dough flattens slightly, so spacing prevents them from joining into a single large cookie; watch for a gentle dome that becomes crackled on top. The visual of the little fissures forming is your cue that they are nearing doneness, and the edges should look set while the centers remain soft. Overcrowding will yield a single sheet of joined cookies and a loss of the crackled finish.
- Top each ball with 5-6 M&Ms.: Pressing candies gently into the tops before baking creates a festive look and a contrast of textures, and the candies will soften but generally hold shape if added before baking. Space them so they do not overlap the edges, or the candy may run over the sides slightly. Avoid pressing too deep, which embeds them leading to uneven color and texture.
- Bake for about 10 to 15 minutes, or until they’re no longer glossy.: During baking you will hear a soft whisper of oven air and see the cookies expand, darken, and lose their glossy sheen, which signals they are done; the edges should be set and the centers slightly soft. Let them rest on the pan for a few minutes, as carryover heat finishes the cooking while the cookies stabilize. A common misstep is overbaking to the point of dryness, so remove them when the centers still yield slightly to a gentle touch.
- Store in an airtight container for up to 3 days or freeze for up to one month.: Once cooled, these cookies keep their texture best in an airtight container at room temperature for a few days, and freezing preserves freshness when planned ahead. Thaw frozen cookies at room temperature, and if you want that just baked warmth, pop them in a low oven for a few minutes. Putting warm cookies straight into a sealed container traps steam and softens the crust, so always cool fully first.
Notes
- For chewier cookies: Increase the brown sugar slightly while keeping the rest of the recipe the same, because brown sugar retains moisture and builds chew, but avoid adding more liquid which would cause excess spread.
- To make thicker cookies: Chill the scooped dough for a longer period or freeze balls before baking, the colder dough spreads less and retains more height in the oven, yielding a more substantial cookie.
- If you want crisper edges: Flatten the dough balls slightly before baking and bake on a darker sheet to encourage more browning at the edges, but watch closely to prevent overbaking.
- For more intense spice: Increase the ginger or cinnamon by a quarter teaspoon, tasting your spice blend first, because a touch more will amplify warmth without overwhelming the molasses base.
- Make ahead strategy: Scoop the dough and freeze the balls on a tray, then transfer to a bag; bake from frozen adding a few minutes to the bake time for fresh cookies on demand.