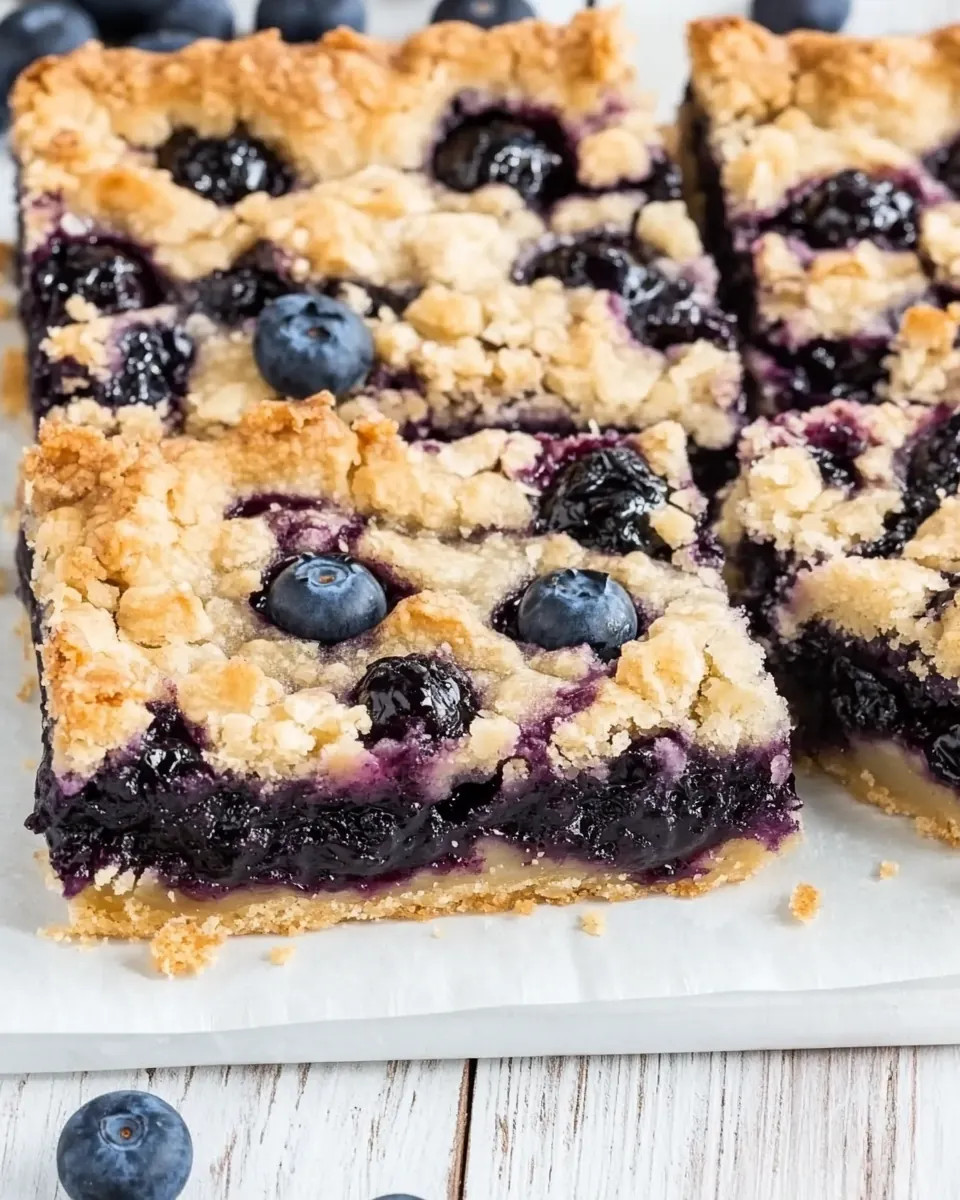
Blueberry Pie Bars
Blueberry Pie Bars have been a neighborhood favorite for as long as I can remember, and the first time I made them I learned something about comfort baking and approachable desserts that stuck with me.
That afternoon I had a bowl of fresh blueberry pie filling open on the counter and two boxes of vanilla cake mix tucked in the pantry. I wanted something warm, simple, and shareable that would travel well to a potluck, so I adapted what I had into a tray of bars. The result was a sweet, slightly tangy filling encased in a tender, crumbly cake mix crust that everyone devoured.
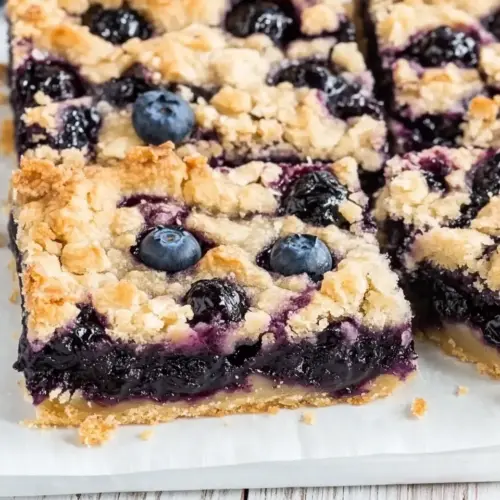
Over the years I started making these for summer gatherings, because the syrupy blueberry pie filling pairs beautifully with a dusting of powdered sugar glaze, and they slice neatly so you can hand out perfect little squares without fuss. I also learned to trust the rhythm of pressing the dough into the pan, briefly baking it before adding the filling, and finishing with more crumbs on top for texture. That contrast between a baked base and a bubbled, jewel like filling is what keeps people reaching for seconds.
Recipe Snapshot
45 mins
15 mins
30 mins
Medium
220 kcal
American
Gluten-Free, Low FODMAP
Desserts
Mixing bowl, Hand mixer, 9×13 baking dish, Spatula, Whisk, Knife
Why You Need This Blueberry Pie Bars
They are impossibly easy
I love that Blueberry Pie Bars require no complicated dough turning or chilling. With only a few pantry staples like vanilla cake mix, eggs, and vegetable oil, you can get a dessert in the oven fast, which is perfect when plans change at the last minute.
Perfect for feeding a crowd
I make these when I need to bring dessert to gatherings because a 9 by 13 pan yields many tidy pieces. The bars slice well, and they travel with minimal fuss, so they are a practical party dessert that still feels homemade.
Textural bliss
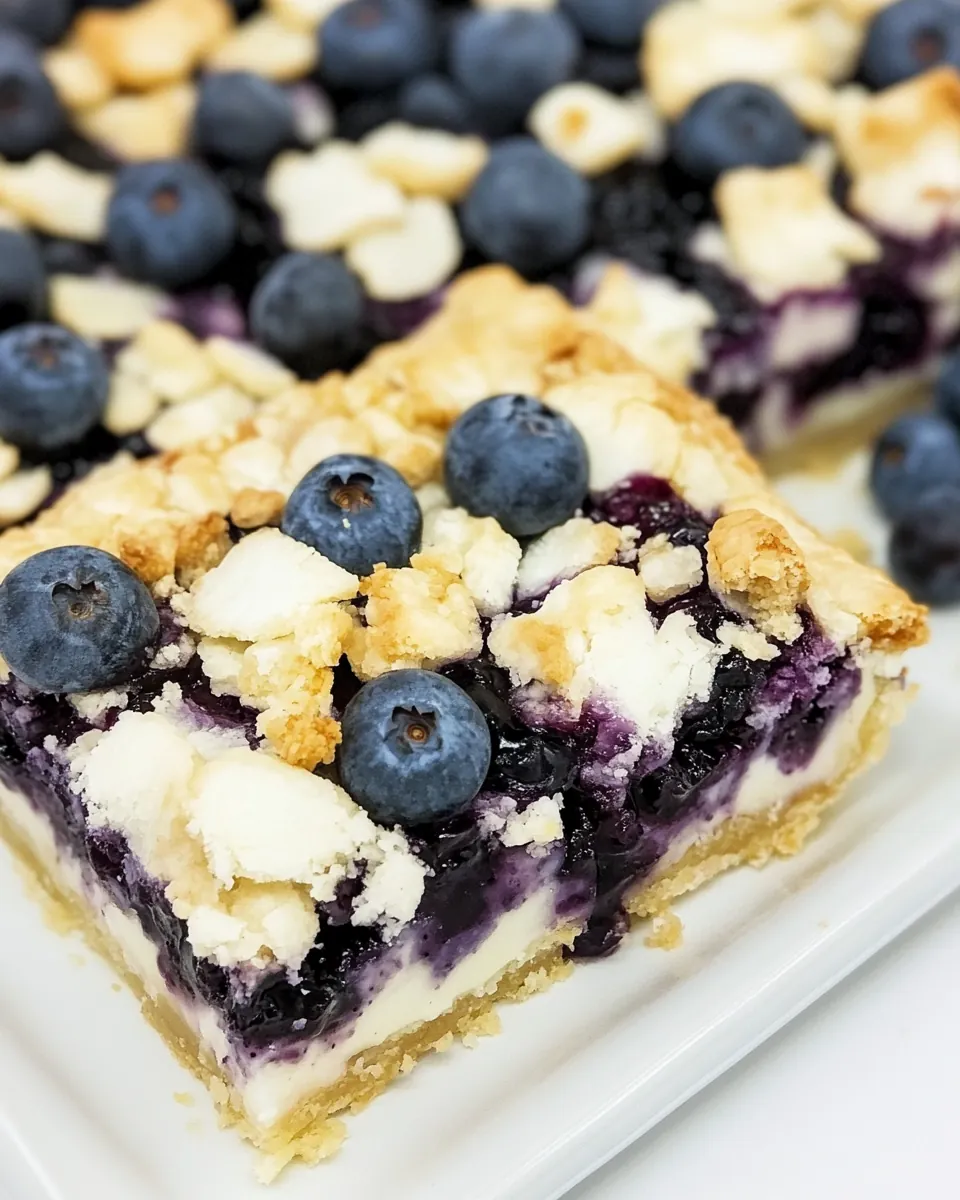
What stands out to me is the contrast between the tender, slightly cakey base and the glossy, spoonable blueberry pie filling. The reserved crumbs baked on top get just enough color to add crunch without drying out the filling.
Flexible finishing touches
While the recipe is straightforward, the finishing glaze made from powdered sugar and a splash of whole milk or cream adds a sweet, silky note that balances the fruit. I often vary the thickness of the glaze to suit the occasion, from thin and drippy to a thicker, decorative drizzle.
Reliable and forgiving
I’ve learned that small variations in oven temperature or slight differences in mixing will not ruin these bars. Because the filling is pre prepared and the crust is sturdy, you get consistent results even when you are in a hurry or juggling other dishes.
Everything You Need for Blueberry Pie Bars

These ingredients are deliberately simple, leaning on pantry staples and one canned component to deliver a dessert that is approachable and dependable. The key players are the vanilla cake mix which provides structure and sweetness, the blueberry pie filling that supplies bright flavor and moisture, and the small finishing touches like powdered sugar and whole milk which balance texture and gloss. Together they produce bars that are sturdy enough to hold their shape, but tender inside.
- 2 packages vanilla cake mix: Provide structure and sweetness to form the base and crust when combined with eggs and oil; helps the batter set during baking and contributes a tender, cake-like texture while supplying vanilla flavor for aroma.
- 2 large eggs: Bind the dry and wet ingredients together, creating emulsification that holds the crust and crumb; help leaven slightly and add richness to the bars for a moist, cohesive texture.
- 2/3 cup vegetable oil: Add necessary fat to create a tender, moist crust and crumb while facilitating even baking; contributes to richness and helps dissolve the cake mix for a uniform batter.
- 21 ounces blueberry pie filling: Supply the fruity filling and moisture, delivering concentrated blueberry flavor and jam-like texture; creates the sweet, juicy layer that contrasts with the tender cake base and adds visual appeal.
- 1/2 cup powdered sugar: Provide a light dusting of sweetness and a fine finish to balance the filling’s tartness; helps slightly thicken if sprinkled over warm bars and offers a delicate, powdered texture on top.
- 1 to 2 tablespoons whole milk (or cream): Adjust the consistency of the powdered sugar into a smooth glaze or drizzle, adding creaminess and sheen; small amounts enhance mouthfeel and allow controlled sweetness and spreadability.
Preparation Steps for Blueberry Pie Bars
These directions are straightforward, but treating each stage with care yields the best texture and appearance. I like to organize my workspace so the components are ready, because the dough mixes quickly and you want to press it into the pan before it firms up. Below I expand each provided direction into a rich, sensory focused step by step guide.
- Preheat the oven to 350°F. Grease a 9×13 baking dish or line it with parchment paper.: When the oven warms to 350°F you will notice the air in the kitchen become cozy and slightly fragrant, which signals the beginning of the transformation. Greasing the 9×13 baking dish or lining it with parchment prevents the bars from sticking and makes removal effortless; the parchment will also give you tidy edges when you lift the whole slab out to slice. A common mistake is skipping parchment, which can cause the bars to tear when you remove them. Ensure the pan sits on a level rack so the filling bakes evenly and does not pool to one side.
- In a medium mixing bowl, beat together the cake mix, eggs, and vegetable oil. Beat with a hand (or stand) mixer until combined. The mixture will be thick and crumbly.: As you combine the vanilla cake mix , eggs , and vegetable oil , you will feel the texture change from powder to a cohesive, slightly sticky mass. The beaters pick up the batter and make a low, rhythmic whirring noise; you might see small clumps breaking up into a pebbled mixture. This step is about marrying moisture and dry ingredients so the dough can be pressed; over beating will hydrate too much and make the dough gummy, so stop as soon as the ingredients are just incorporated. If the mixture seems overly dry, a quick pulse with a tiny splash of milk can help, but usually the measured oil and eggs are enough.
- Remove half of the mixture and set it aside. Press the remaining dough into the bottom of the prepared baking dish.: After you scoop away half the dough, press the remaining portion firmly and evenly into the bottom of the prepared pan. You should feel gentle resistance under your fingers as the dough compacts, and visually the surface will smooth into a matte, even layer that fills corners. This compression creates a sturdy base that will hold the blueberry pie filling without sinking. Avoid pressing too thin, which can cause the base to overbrown, or leaving it uneven, which can make the filling collect in low spots.
- Bake for 15 minutes, then remove from the oven.: When the base goes into the oven it will begin to emit a warm, bready aroma, and after about 15 minutes the surface should look set and slightly paler than the final golden tone you want. This preliminary bake gives the crust structure so the filling does not soak through. A common error is baking for too little time, which leaves the base underdone; conversely, baking too long will dry it out. Take it out when it is firm to the touch but not deeply browned.
- Spread blueberry pie filling over the top of the baked base. One can of pie filling will cover the pie bars nicely.: Spoon the blueberry pie filling evenly over the warm base, letting it settle into a glossy layer. The fruit will be syrupy and fragrant, and spreading it while the base is warm helps the filling adhere. If you pile it too thick in one spot, you risk an uneven bake or leaking over the edges, so distribute gently and smoothly for consistent slices. Use a spatula to nudge any thicker clumps into place, creating an even sheen across the pan.
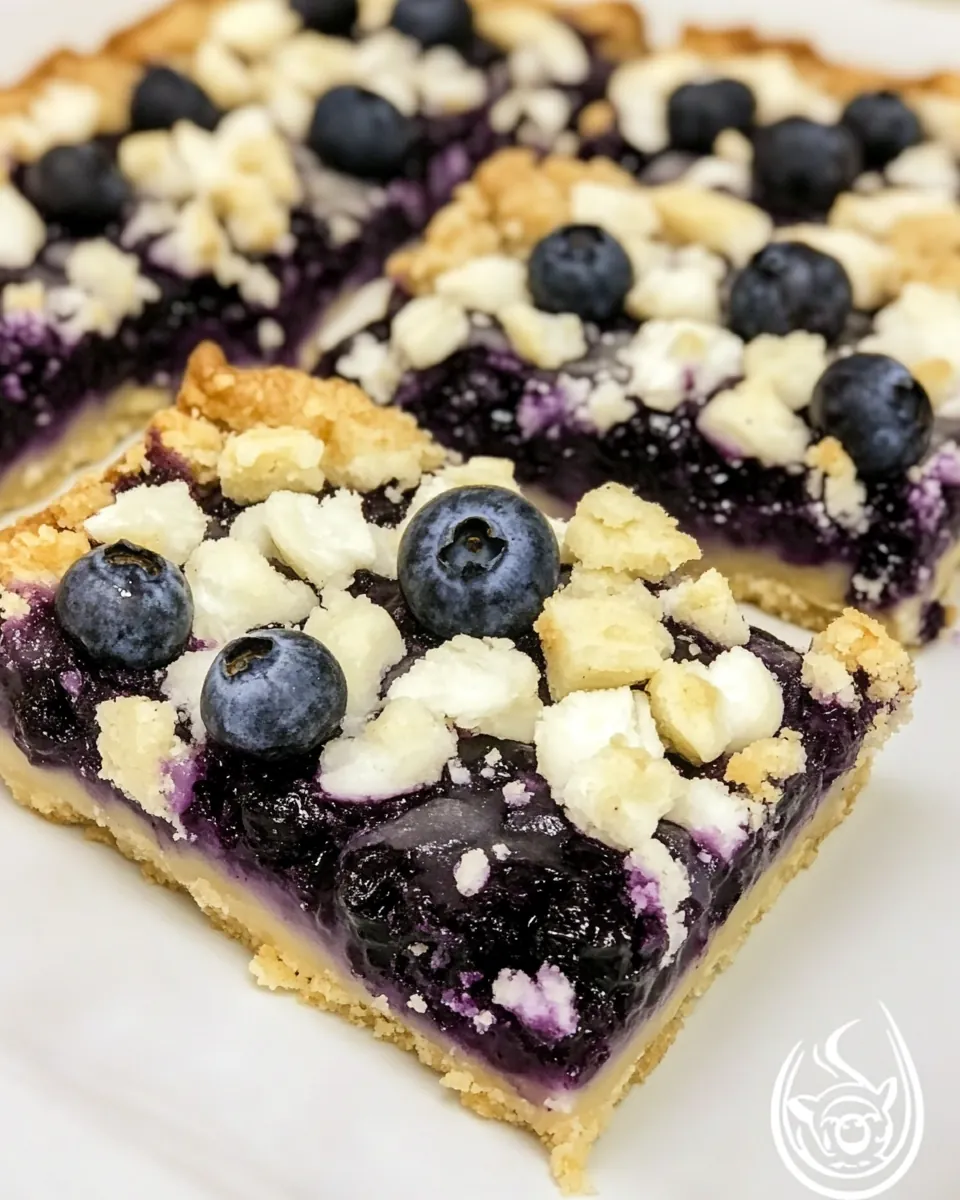
- Sprinkle the reserved dough in clumps over the top of the blueberry pie filling.: Crumble the reserved dough across the fruit in irregular clumps so the bars get a lovely textured top that bakes into crisp bits. The contrast of smooth fruit and coarse crumbs gives each bite an appealing mix of soft and crunchy. Avoid pressing the crumbs down into the filling, which can sink them and reduce the top crunch. Leave them loose so they bake to a golden brown peak.
- Return the baking dish to the oven and bake for 15 to 20 minutes longer until the top of the bars is just beginning to brown.: As the bars return to heat, the filling will begin to bubble softly, sending a gentle pop of steam that carries a sugared berry scent. Watch for the crumbs to take on a light golden hue at the edges, usually within 15 to 20 minutes . That slight browning is the cue that sugars have caramelized enough for a toasty flavor. If you leave them in too long they will dry out, so remove when they look set and lightly browned on top.
- Cool bars completely.: Cooling is crucial because the blueberry pie filling needs time to firm up, which makes slicing clean pieces possible. As they cool you will notice the filling thicken and the steam will subside, leaving a glossy surface. Cutting too soon will cause the filling to run and the bars to crumble. Allow the pan to rest at room temperature until it reaches a stable, sliceable texture.
- Whisk together powdered sugar and enough cream to make a sugar glaze. Drizzle over the top of the cooled bars.: Combine powdered sugar with whole milk or cream to a consistency that will hold a drizzle but still flow slowly. As you whisk you will see the glaze become silky and reflective; spoon it into a narrow spout or piping bag for control. A very thin glaze will run off the bars, while a very thick one will sit in clumps, so aim for a ribbon like pour. If the glaze is too thin add more powdered sugar , if too thick add tiny amounts of liquid.
- Cut and serve.: When it is time to serve, use a sharp knife warmed briefly under hot water and wiped dry to make clean cuts; the warmed blade will slice through the glaze and filling with less drag. Each piece should have a balance of base, filling, and crumb topping. A common serving mistake is using a dull knife, which drags the filling and ruins neat edges. Arrange the bars on a tray and enjoy how the glossy berry filling and powdered glaze catch the light.
Recipe Notes about Blueberry Pie Bars
These notes expand on little techniques and variations that I have found helpful. They cover texture control, timing, and presentation to make sure your bars come out consistently great every time.
- Make ahead: You can bake the bars a day in advance and store them covered at room temperature; the flavors meld and the texture remains pleasant for serving the next day.
- Glaze consistency: Start with one tablespoon of whole milk for the powdered sugar glaze and add more only as needed, whisking to a smooth, glossy ribbon that drizzles slowly.
- Baking evenness: If your oven has hot spots, rotate the pan halfway through the final bake to promote uniform browning on the crumb topping.
- Cutting tips: Use a long, sharp knife and clean the blade between slices to maintain tidy squares with visible layers of base, filling, and crumb.
- Storage: Store leftovers in an airtight container; they keep well for 2 to 3 days at room temperature, or longer refrigerated for up to 5 days.
How to Serve Blueberry Pie Bars
These bars are versatile and suit many occasions, from casual picnics to holiday dessert tables. Serve them at room temperature with a simple presentation to highlight the glossy fruit and crumbly top.
- Casual gatherings: Arrange squares on a platter for backyard parties or potlucks, where guests can grab a piece without utensils.
- Tea time: Pair a small bar with a cup of tea or coffee for a delightful afternoon treat.
- Brunch add on: Include the bars on a brunch spread alongside yogurt and fruit, letting the sweet bars act as the dessert component.
- Seasonal serving: These are especially fitting for summer events when berries are in the spotlight, but they work year round because of their pantry friendly ingredients.
- Storage and reheating: Store in an airtight container. For a warm bite, reheat individual squares briefly in a low oven until just warmed through.
- Presentation tip: Drizzle the glaze just before serving so the bars keep their fresh, shiny appearance on the plate.
FAQ
Conclusion
Blueberry Pie Bars stand out for their simplicity, dependable texture, and crowd pleasing flavor. They combine an easy to make vanilla cake mix base with glossy blueberry pie filling and a sweet glaze, making them ideal for potlucks, casual gatherings, or weeknight desserts. I encourage you to give them a try the next time you need a dessert that looks impressive but does not demand a lot of labor. Once you bake a pan you will see why they become a recurring favorite for summer get togethers and quick celebrations.
Blueberry Pie Bars
Equipment
- Mixing Bowl
- Hand Mixer
- 9×13 baking dish
- Spatula
- Whisk
- Knife
Ingredients
- 2 packages vanilla cake mix Provide structure and sweetness to form the base and crust when combined with eggs and oil; helps the batter set during baking and contributes a tender, cake-like texture while supplying vanilla flavor for aroma.
- 2 large eggs Bind the dry and wet ingredients together, creating emulsification that holds the crust and crumb; help leaven slightly and add richness to the bars for a moist, cohesive texture.
- 2/3 cup vegetable oil Add necessary fat to create a tender, moist crust and crumb while facilitating even baking; contributes to richness and helps dissolve the cake mix for a uniform batter.
- 21 ounces blueberry pie filling Supply the fruity filling and moisture, delivering concentrated blueberry flavor and jam-like texture; creates the sweet, juicy layer that contrasts with the tender cake base and adds visual appeal.
- 1/2 cup powdered sugar Provide a light dusting of sweetness and a fine finish to balance the filling’s tartness; helps slightly thicken if sprinkled over warm bars and offers a delicate, powdered texture on top.
- 1 to 2 tablespoons whole milk (or cream) Adjust the consistency of the powdered sugar into a smooth glaze or drizzle, adding creaminess and sheen; small amounts enhance mouthfeel and allow controlled sweetness and spreadability.
Instructions
- Preheat the oven to 350°F. Grease a 9×13 baking dish or line it with parchment paper.: When the oven warms to 350°F you will notice the air in the kitchen become cozy and slightly fragrant, which signals the beginning of the transformation. Greasing the 9×13 baking dish or lining it with parchment prevents the bars from sticking and makes removal effortless; the parchment will also give you tidy edges when you lift the whole slab out to slice. A common mistake is skipping parchment, which can cause the bars to tear when you remove them. Ensure the pan sits on a level rack so the filling bakes evenly and does not pool to one side.
- In a medium mixing bowl, beat together the cake mix, eggs, and vegetable oil. Beat with a hand (or stand) mixer until combined. The mixture will be thick and crumbly.: As you combine the vanilla cake mix , eggs , and vegetable oil , you will feel the texture change from powder to a cohesive, slightly sticky mass. The beaters pick up the batter and make a low, rhythmic whirring noise; you might see small clumps breaking up into a pebbled mixture. This step is about marrying moisture and dry ingredients so the dough can be pressed; over beating will hydrate too much and make the dough gummy, so stop as soon as the ingredients are just incorporated. If the mixture seems overly dry, a quick pulse with a tiny splash of milk can help, but usually the measured oil and eggs are enough.
- Remove half of the mixture and set it aside. Press the remaining dough into the bottom of the prepared baking dish.: After you scoop away half the dough, press the remaining portion firmly and evenly into the bottom of the prepared pan. You should feel gentle resistance under your fingers as the dough compacts, and visually the surface will smooth into a matte, even layer that fills corners. This compression creates a sturdy base that will hold the blueberry pie filling without sinking. Avoid pressing too thin, which can cause the base to overbrown, or leaving it uneven, which can make the filling collect in low spots.
- Bake for 15 minutes, then remove from the oven.: When the base goes into the oven it will begin to emit a warm, bready aroma, and after about 15 minutes the surface should look set and slightly paler than the final golden tone you want. This preliminary bake gives the crust structure so the filling does not soak through. A common error is baking for too little time, which leaves the base underdone; conversely, baking too long will dry it out. Take it out when it is firm to the touch but not deeply browned.
- Spread blueberry pie filling over the top of the baked base. One can of pie filling will cover the pie bars nicely.: Spoon the blueberry pie filling evenly over the warm base, letting it settle into a glossy layer. The fruit will be syrupy and fragrant, and spreading it while the base is warm helps the filling adhere. If you pile it too thick in one spot, you risk an uneven bake or leaking over the edges, so distribute gently and smoothly for consistent slices. Use a spatula to nudge any thicker clumps into place, creating an even sheen across the pan.
- Sprinkle the reserved dough in clumps over the top of the blueberry pie filling.: Crumble the reserved dough across the fruit in irregular clumps so the bars get a lovely textured top that bakes into crisp bits. The contrast of smooth fruit and coarse crumbs gives each bite an appealing mix of soft and crunchy. Avoid pressing the crumbs down into the filling, which can sink them and reduce the top crunch. Leave them loose so they bake to a golden brown peak.
- Return the baking dish to the oven and bake for 15 to 20 minutes longer until the top of the bars is just beginning to brown.: As the bars return to heat, the filling will begin to bubble softly, sending a gentle pop of steam that carries a sugared berry scent. Watch for the crumbs to take on a light golden hue at the edges, usually within 15 to 20 minutes . That slight browning is the cue that sugars have caramelized enough for a toasty flavor. If you leave them in too long they will dry out, so remove when they look set and lightly browned on top.
- Cool bars completely.: Cooling is crucial because the blueberry pie filling needs time to firm up, which makes slicing clean pieces possible. As they cool you will notice the filling thicken and the steam will subside, leaving a glossy surface. Cutting too soon will cause the filling to run and the bars to crumble. Allow the pan to rest at room temperature until it reaches a stable, sliceable texture.
- Whisk together powdered sugar and enough cream to make a sugar glaze. Drizzle over the top of the cooled bars.: Combine powdered sugar with whole milk or cream to a consistency that will hold a drizzle but still flow slowly. As you whisk you will see the glaze become silky and reflective; spoon it into a narrow spout or piping bag for control. A very thin glaze will run off the bars, while a very thick one will sit in clumps, so aim for a ribbon like pour. If the glaze is too thin add more powdered sugar , if too thick add tiny amounts of liquid.
- Cut and serve.: When it is time to serve, use a sharp knife warmed briefly under hot water and wiped dry to make clean cuts; the warmed blade will slice through the glaze and filling with less drag. Each piece should have a balance of base, filling, and crumb topping. A common serving mistake is using a dull knife, which drags the filling and ruins neat edges. Arrange the bars on a tray and enjoy how the glossy berry filling and powdered glaze catch the light.
Notes
- Make ahead: You can bake the bars a day in advance and store them covered at room temperature; the flavors meld and the texture remains pleasant for serving the next day.
- Glaze consistency: Start with one tablespoon of whole milk for the powdered sugar glaze and add more only as needed, whisking to a smooth, glossy ribbon that drizzles slowly.
- Baking evenness: If your oven has hot spots, rotate the pan halfway through the final bake to promote uniform browning on the crumb topping.
- Cutting tips: Use a long, sharp knife and clean the blade between slices to maintain tidy squares with visible layers of base, filling, and crumb.
- Storage: Store leftovers in an airtight container; they keep well for 2 to 3 days at room temperature, or longer refrigerated for up to 5 days.