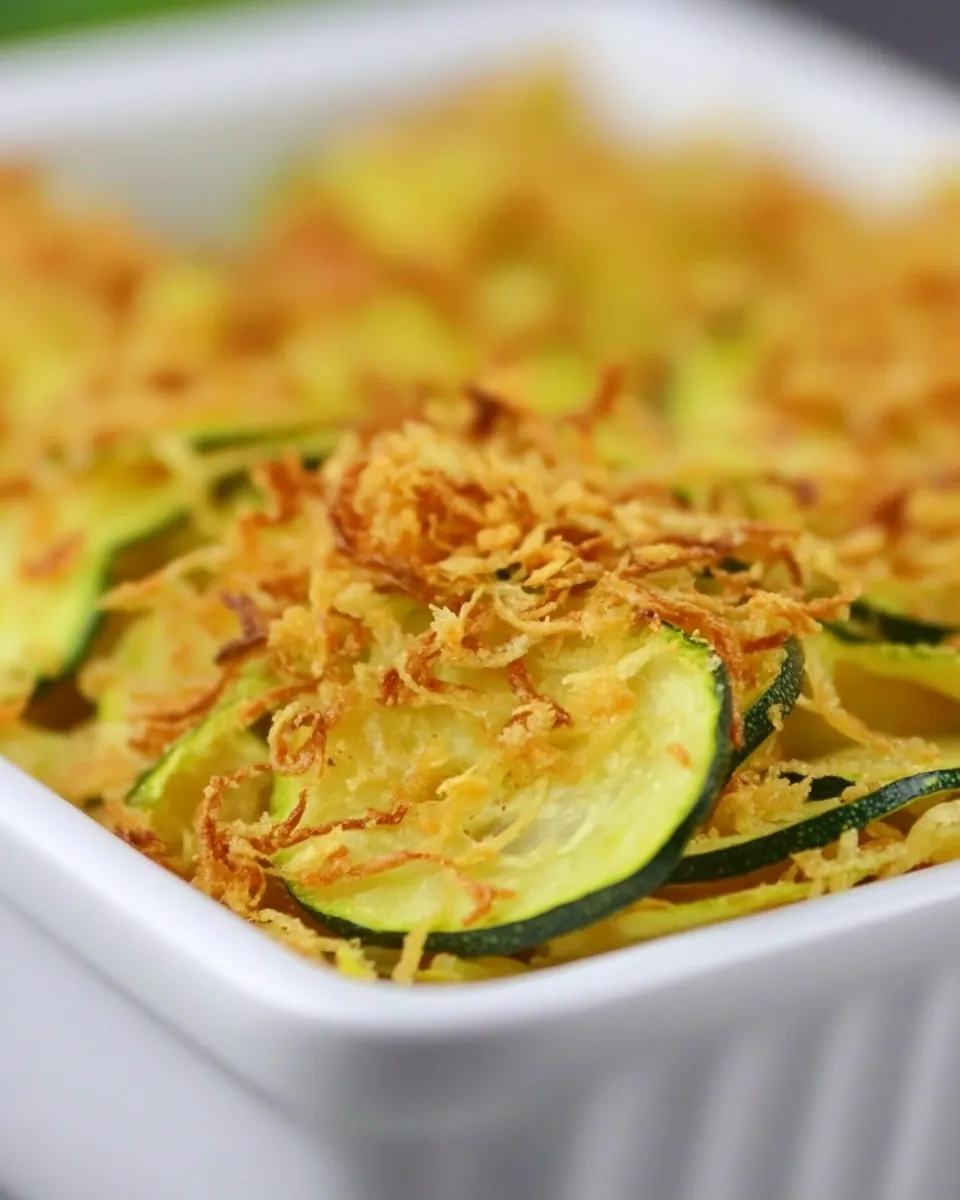
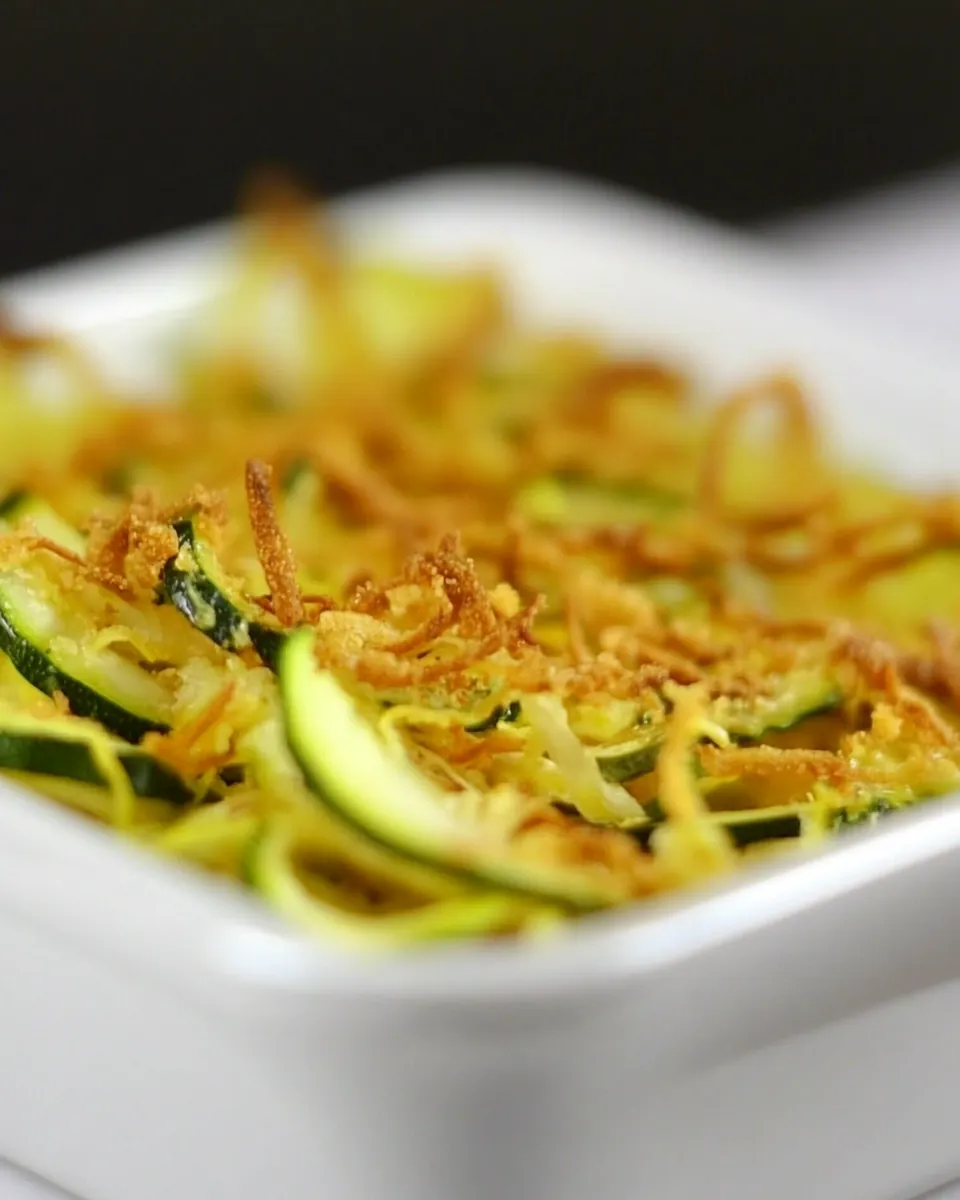
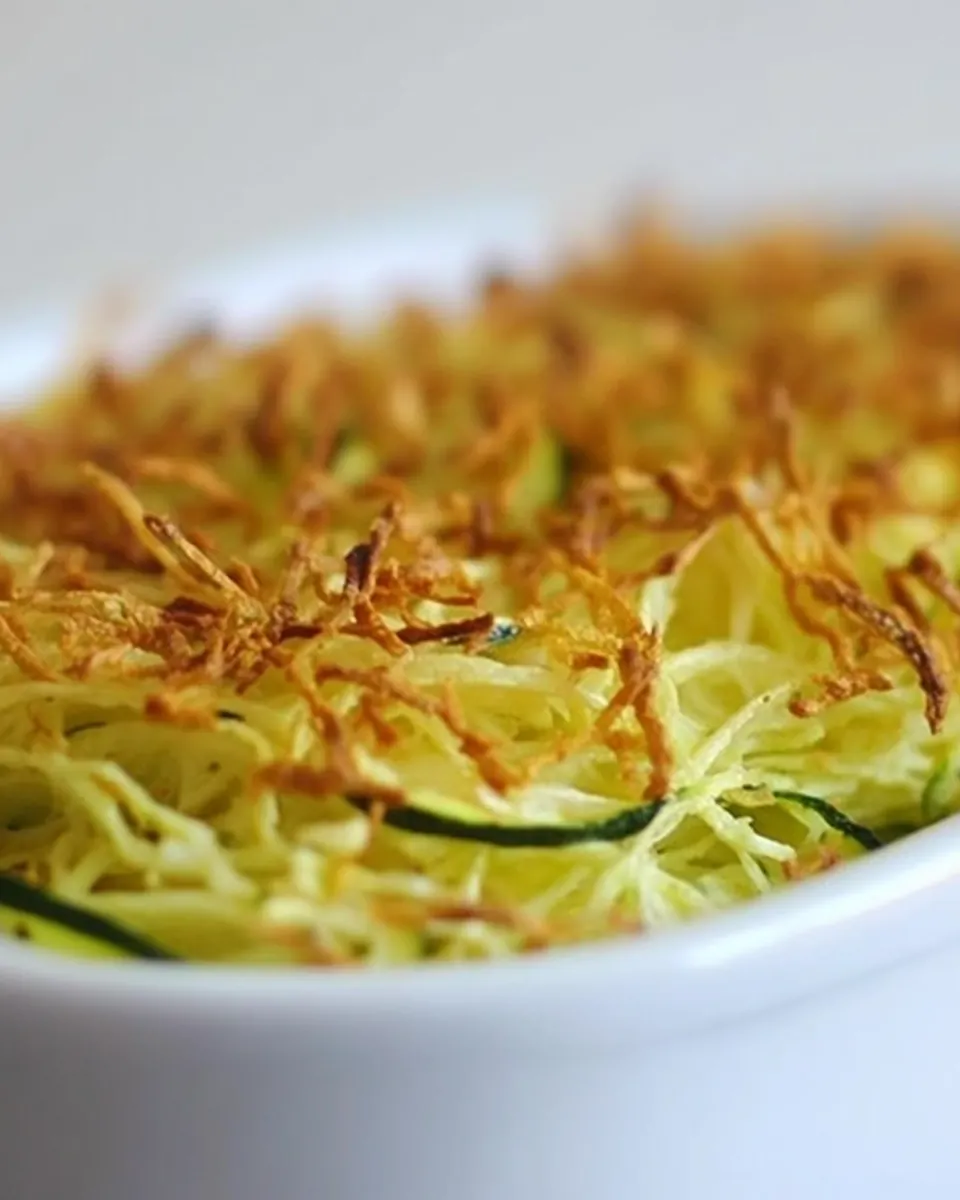
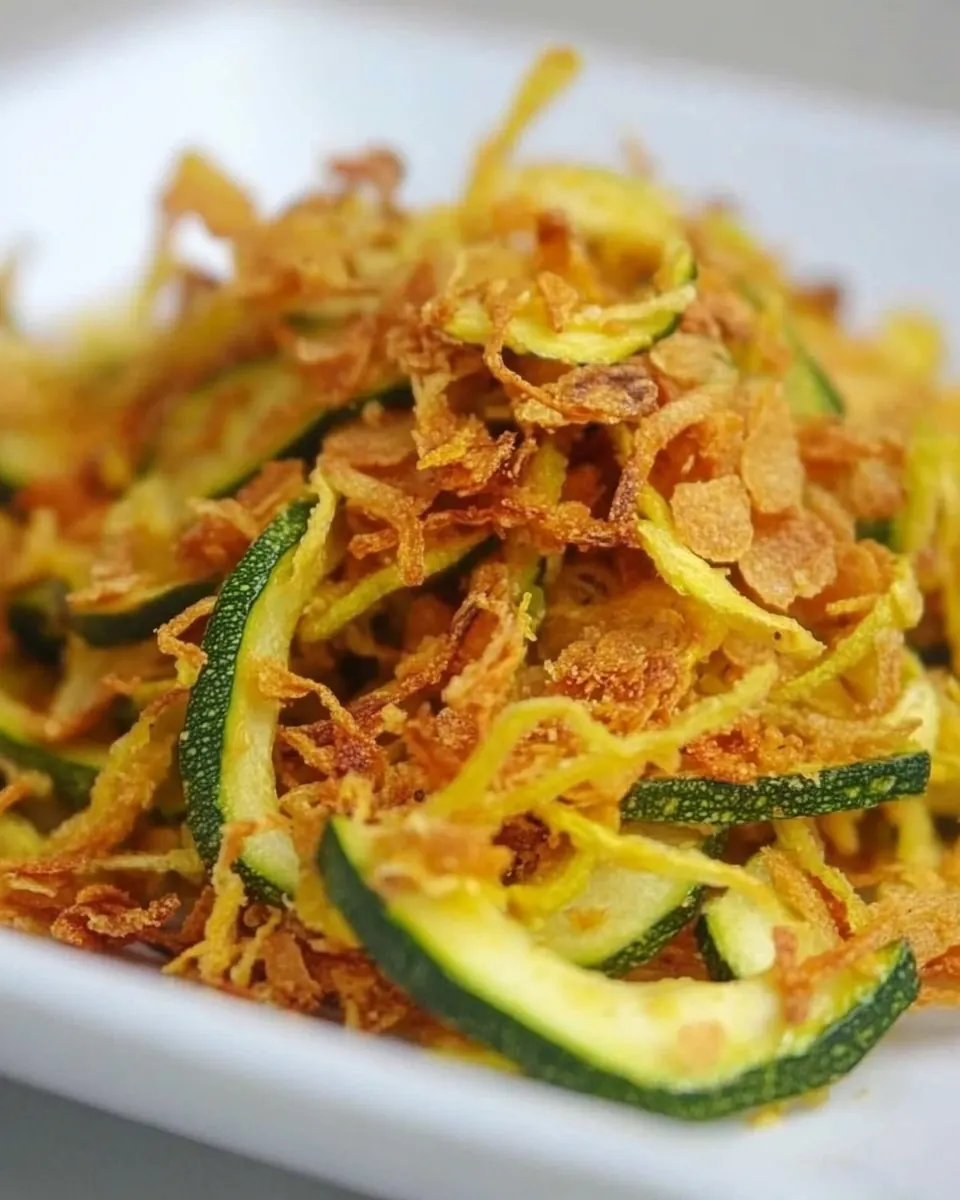
Crunchy Zucchini Topping
Crunchy Zucchini Topping is one of those small, satisfying recipes I return to when I want texture without fuss. The first time I made it I was trying to rescue a summer harvest of zucchini that was getting a little too abundant, and the result felt like a happy accident that turned every salad and soup into something special. I remember standing at the counter, the kitchen windows open, listening to the soft hum of the oven while the aroma of toasting cheese curled through the air.
I love how straightforward the process is, and how a handful of simple moves transforms a humble zucchini into crisp, golden strings that stay crunchy even after cooling. It became my go to when I wanted a crunchy garnish faster than I could fry anything, and it never fails to impress guests who ask how I made those delicate, crisp strands. Over time I learned a few small tricks that make the texture more reliably crisp, and I enjoy the ritual of salting, resting, and baking because it feels intentional and calming.
Recipe Snapshot
45 mins
15 mins
30 mins
Medium
150 kcal
American
Keto, Gluten-Free
Appetizers
Julienne peeler, Mixing bowl, Baking sheet, Parchment paper
What Sets This Crunchy Zucchini Topping Apart
1. Pure texture contrast
I love that Crunchy Zucchini Topping gives salads and soups an immediate textural lift. The strings bake into delicate, crisp pieces that crackle when you bite them, giving every mouthful a lively contrast to soft greens or warm broths. That crunch keeps things interesting, and I often find myself reaching for a pinch before every bite.
2. Minimal ingredients, maximum impact
With just zucchini, salt, extra virgin olive oil, and parmesan cheese, this recipe proves that you do not need a long shopping list to upgrade a dish. Each ingredient has a role, from drawing out moisture to adding healthy fat for crisping, to the savory, nutty finish of the cheese.
3. Flexible and versatile
I like that you can use this topping in many ways. Use it as a crunchy garnish for lunch salads, a finishing touch on warm grain bowls, or scattered over creamy soups. It’s small enough to store in an airtight bag, so I sometimes make a batch ahead and sprinkle it on food all week.
4. Great for summer produce
Since zucchini is abundant in summer, this recipe helps you celebrate peak produce without letting it go to waste. I especially appreciate how the simple salting step concentrates flavor and ensures crisping success. It feels seasonal, and it highlights the zucchini rather than masking it.
5. Low fuss, high reward
There is very little hands on time, and yet the payoff is immediate. If you enjoy small culinary wins that elevate everyday meals, Crunchy Zucchini Topping feels like a reliable ally in the kitchen.
Essential Ingredients for Crunchy Zucchini Topping
The philosophy here is simple, and I stay faithful to it: play to contrast and clarity. These elements work together to extract moisture, provide fat for crisping, and add a finishing savory lift. The key players are the zucchini for texture, the salt to draw out water, the extra virgin olive oil to coat and promote browning, and the parmesan cheese for umami and crisp top notes. Each ingredient is modest alone, but together they transform the vegetable into a crunchy garnish that keeps well.
- 1 medium zucchini, peeled: Provide moisture and mild vegetal flavor while contributing a tender texture when cooked; peeled to ensure a smoother mouthfeel and to allow other ingredients to crisp or brown against the surface.
- 1 teaspoon kosher or sea salt: Enhance overall seasoning balance by drawing out excess moisture from the zucchini and amplifying savory notes; use measured amounts to avoid oversalting and to help with texture contrast.
- 1 tablespoon extra virgin olive oil: Coat and promote even browning while adding a fruity, peppery richness; drizzle and toss to help crisp the zucchini edges and bind the topping components together during cooking.
- 1/4 cup freshly grated parmesan cheese: Add a nutty, savory finish and help create a golden, crunchy crust; grate freshly to maximize melting, flavor intensity, and a pleasant granular texture in the topping.
Putting Together Crunchy Zucchini Topping
This recipe is approachable and rhythmic, and I like to move through the steps with attention to texture. Below I expand each instruction into a long, sensory, and reassuring set of directions so you know what to expect at every stage.
- Use a Julienne Vegetable Peeler and cut zucchini into thin strings.: At this stage you will notice the soft, green flesh transforming into slender threads that feel cool and slightly moist in your hands. As you peel, listen for the faint whisper of the peeler across the skin, and enjoy the visual of uniform strings piling in the bowl. Thin strings dry and crisp more predictably than thick slices, which is why the julienne action matters. If your strings are thick the topping will be chewier rather than crisp, so take a bit more time to aim for uniform thickness. A common mistake here is rushing and producing uneven pieces, which bake at different rates. Keep the strings similar in size so they finish together.
- Add strings to a mixing bowl and sprinkle with salt, gently tossing to combine. Place double paper towels on a large baking sheet, spread out strings, and let set for 15 minutes. This will remove some of the excess water.: As the salt touches the strands, you will see tiny beads of moisture form, and there is a faint briny scent that signals water release. Gently tossing prevents bruising while ensuring all surfaces contact the salt. Spreading the strings on paper towels lets gravity and absorbent cloth pull moisture away, so after 15 minutes they will look less glossy and feel drier to the touch. This step is critical because retained water prevents crisping in the oven. One pitfall is skipping the rest or crowding the strings, which traps moisture and produces limp results. Change the towels if they become very wet to keep the drying effective.
- Preheat oven to 375 degrees.: Preheating brings the oven to an even, reliable temperature so the strings start crisping immediately once they go in. You should feel a warm wave of air when you open the oven and, as it heats, the oven will smell neutral or faintly warm. A stable temperature is important because a cold oven will dry the strands slowly, making them rubbery before they brown, while an oven set too high can brown too quickly without fully drying. One common mistake is not allowing the oven enough time to reach the correct temperature, which affects texture and timing.
- Return strings to mixing bowl, drizzle with olive oil, and toss to coat. Spread strings evenly over a nonstick or parchment-lined baking sheet. Stir every 10 minutes and continue to bake until crispy, approximately 30 minutes.: After tossing with extra virgin olive oil the strands will take on a subtle sheen, and as they heat the oil will sizzle softly and carry the scent of toasted green vegetable. Spreading the strands in a single layer ensures hot air can circulate and evaporate moisture, so use a wide sheet and avoid clumping. Stirring every 10 minutes helps the strings brown evenly and prevents sticking, revealing golden edges and a light crisp. The sound of gentle crackling as moisture leaves the strands is a satisfying cue they are drying. Watch closely in the final minutes because thin edges can go from golden to overly brown quickly. A typical error is piling the strings too close together, which traps steam and prevents the crisp texture you want.
- Sprinkle parmesan cheese over strings and bake 1-2 more minutes. Discard any strings that are overly brown. Allow to cool at room temperature. Store in an airtight container or ziplock bag.: Sprinkling the parmesan cheese near the end lets it toast without burning, producing a nutty, savory scent that deepens the overall aroma. In the oven the cheese will melt slightly and then firm into crisp, irregular bits that cling to the strands. The visual cue to stop baking is golden edges and lightly toasted cheese, with no active bubbling. If some strings look too dark, remove them to prevent bitterness, then let the rest cool on a rack or paper towel so steam does not make them soggy. Cooling fully ensures they retain crispness, and storing in an airtight container keeps them crunchy for several days. A common mistake is packing them away while still warm, which creates condensation and ruins the texture.
- Enjoy as a snack or add to salads and soups.: These final crunchy strands provide an immediate sensory lift when you sprinkle them on a bowl. They add a satisfying crackle and a savory note that complements leafy greens and brothy soups, and when you bite into them the contrast is lovely. I often test a few as they cool, enjoying the toasty aroma and crisp mouthfeel. One mistake to avoid is adding them too far in advance to wet dishes, because they will soften; add them right before serving for maximum crunch.
Pro Tips and Tweaks
I like to keep these pro tips practical so you can make the best crunchy topping every time. Below are careful, experience based suggestions that address technique, timing, and storage, expanded into helpful, usable items.
- Drying is everything: Make sure the zucchini strings lose their surface moisture on paper towels before baking, or they will steam rather than crisp.
- Uniform strands: Use a julienne peeler or mandoline to create consistent thickness so all strands bake evenly and finish at the same time.
- Oil sparingly: Toss with just enough extra virgin olive oil to coat, too much oil prevents crisping and can make the strands greasy.
- Parmesan timing: Add the parmesan cheese near the end so it toasts gently without burning, giving a nutty flavor and crunchy flecks.
- Watch the oven: Stir every 10 minutes and monitor closely in the final minutes, because thin edges can go from golden to burned very quickly.
- Storage care: Cool fully and store in a sealed container at room temperature; refrigerating can introduce moisture and soften the topping.
Serving This Crunchy Zucchini Topping
This topping is all about finishing and contrast, and I find it suits a wide range of meals. Below are ideas for occasions, pairings, and practical serving tips to make the most of each batch.
- As a salad topper: Sprinkle a generous pinch over mixed greens for immediate crunch and a savory hit that makes simple salads feel composed.
- On soups: Add right before serving to keep the strands crisp against creamy or brothy bases, enhancing texture with each spoonful.
- For grain bowls: Use as a finishing touch for rice or quinoa bowls to introduce contrast and a toasty note that complements roasted vegetables.
- Snack style: Enjoy a small bowl of the topping on its own as a light, crunchy snack that feels indulgent but simple.
- Occasions: Great for casual lunches, summer dinners, or when you want an easy garnish for Ramadan if you are preparing iftar bowls, or any communal meal where a crunchy element is welcome.
- Storage tips: Keep in an airtight container or ziplock bag at room temperature and add to dishes just before serving to maintain crunch.
- Seasonal pairing: This topping shines in summer when zucchini is fresh, and pairs well with light, bright ingredients that benefit from texture contrast.
FAQ
Conclusion
Crunchy Zucchini Topping stands out because it turns a simple summer vegetable into a versatile, crunchy garnish with minimal work. It brings satisfying texture and savory parmesan notes to salads, soups, and bowls, and it celebrates zucchini rather than masking it. Give it a try when you want a small, reliable upgrade to everyday meals, and enjoy the way a few toasted strands can change the whole experience. I hope this becomes one of your go to garnishes for adding crunch and brightness to dishes.

Crunchy Zucchini Topping
Equipment
- Julienne peeler
- Mixing Bowl
- Baking Sheet
- Parchment Paper
Ingredients
- 1 medium zucchini, peeled Provide moisture and mild vegetal flavor while contributing a tender texture when cooked; peeled to ensure a smoother mouthfeel and to allow other ingredients to crisp or brown against the surface.
- 1 teaspoon kosher or sea salt Enhance overall seasoning balance by drawing out excess moisture from the zucchini and amplifying savory notes; use measured amounts to avoid oversalting and to help with texture contrast.
- 1 tablespoon extra virgin olive oil Coat and promote even browning while adding a fruity, peppery richness; drizzle and toss to help crisp the zucchini edges and bind the topping components together during cooking.
- 1/4 cup freshly grated parmesan cheese Add a nutty, savory finish and help create a golden, crunchy crust; grate freshly to maximize melting, flavor intensity, and a pleasant granular texture in the topping.
Instructions
- Use a Julienne Vegetable Peeler and cut zucchini into thin strings.: At this stage you will notice the soft, green flesh transforming into slender threads that feel cool and slightly moist in your hands. As you peel, listen for the faint whisper of the peeler across the skin, and enjoy the visual of uniform strings piling in the bowl. Thin strings dry and crisp more predictably than thick slices, which is why the julienne action matters. If your strings are thick the topping will be chewier rather than crisp, so take a bit more time to aim for uniform thickness. A common mistake here is rushing and producing uneven pieces, which bake at different rates. Keep the strings similar in size so they finish together.
- Add strings to a mixing bowl and sprinkle with salt, gently tossing to combine. Place double paper towels on a large baking sheet, spread out strings, and let set for 15 minutes. This will remove some of the excess water.: As the salt touches the strands, you will see tiny beads of moisture form, and there is a faint briny scent that signals water release. Gently tossing prevents bruising while ensuring all surfaces contact the salt. Spreading the strings on paper towels lets gravity and absorbent cloth pull moisture away, so after 15 minutes they will look less glossy and feel drier to the touch. This step is critical because retained water prevents crisping in the oven. One pitfall is skipping the rest or crowding the strings, which traps moisture and produces limp results. Change the towels if they become very wet to keep the drying effective.
- Preheat oven to 375 degrees.: Preheating brings the oven to an even, reliable temperature so the strings start crisping immediately once they go in. You should feel a warm wave of air when you open the oven and, as it heats, the oven will smell neutral or faintly warm. A stable temperature is important because a cold oven will dry the strands slowly, making them rubbery before they brown, while an oven set too high can brown too quickly without fully drying. One common mistake is not allowing the oven enough time to reach the correct temperature, which affects texture and timing.
- Return strings to mixing bowl, drizzle with olive oil, and toss to coat. Spread strings evenly over a nonstick or parchment-lined baking sheet. Stir every 10 minutes and continue to bake until crispy, approximately 30 minutes.: After tossing with extra virgin olive oil the strands will take on a subtle sheen, and as they heat the oil will sizzle softly and carry the scent of toasted green vegetable. Spreading the strands in a single layer ensures hot air can circulate and evaporate moisture, so use a wide sheet and avoid clumping. Stirring every 10 minutes helps the strings brown evenly and prevents sticking, revealing golden edges and a light crisp. The sound of gentle crackling as moisture leaves the strands is a satisfying cue they are drying. Watch closely in the final minutes because thin edges can go from golden to overly brown quickly. A typical error is piling the strings too close together, which traps steam and prevents the crisp texture you want.
- Sprinkle parmesan cheese over strings and bake 1-2 more minutes. Discard any strings that are overly brown. Allow to cool at room temperature. Store in an airtight container or ziplock bag.: Sprinkling the parmesan cheese near the end lets it toast without burning, producing a nutty, savory scent that deepens the overall aroma. In the oven the cheese will melt slightly and then firm into crisp, irregular bits that cling to the strands. The visual cue to stop baking is golden edges and lightly toasted cheese, with no active bubbling. If some strings look too dark, remove them to prevent bitterness, then let the rest cool on a rack or paper towel so steam does not make them soggy. Cooling fully ensures they retain crispness, and storing in an airtight container keeps them crunchy for several days. A common mistake is packing them away while still warm, which creates condensation and ruins the texture.
- Enjoy as a snack or add to salads and soups.: These final crunchy strands provide an immediate sensory lift when you sprinkle them on a bowl. They add a satisfying crackle and a savory note that complements leafy greens and brothy soups, and when you bite into them the contrast is lovely. I often test a few as they cool, enjoying the toasty aroma and crisp mouthfeel. One mistake to avoid is adding them too far in advance to wet dishes, because they will soften; add them right before serving for maximum crunch.
Notes
- Drying is everything: Make sure the zucchini strings lose their surface moisture on paper towels before baking, or they will steam rather than crisp.
- Uniform strands: Use a julienne peeler or mandoline to create consistent thickness so all strands bake evenly and finish at the same time.
- Oil sparingly: Toss with just enough extra virgin olive oil to coat, too much oil prevents crisping and can make the strands greasy.
- Parmesan timing: Add the parmesan cheese near the end so it toasts gently without burning, giving a nutty flavor and crunchy flecks.
- Watch the oven: Stir every 10 minutes and monitor closely in the final minutes, because thin edges can go from golden to burned very quickly.
- Storage care: Cool fully and store in a sealed container at room temperature; refrigerating can introduce moisture and soften the topping.