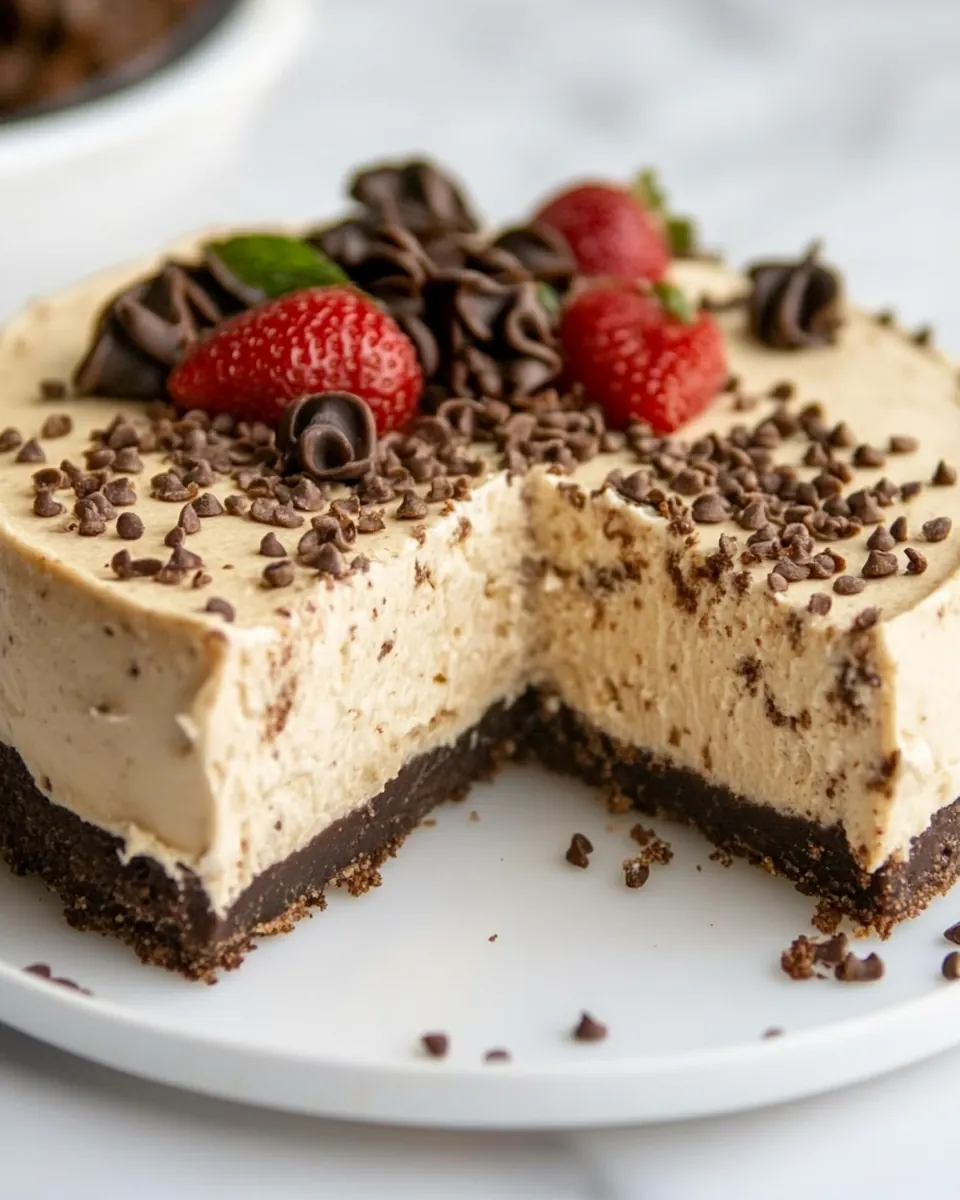
Protein Cheesecake
Protein Cheesecake has been my go to when I want dessert that feels indulgent but keeps me on track. The first time I made it I was juggling a busy week of workouts and late meetings, and I wanted something creamy that would satisfy my sweet tooth without derailing my protein goals. I remember the quiet of the kitchen that night, the soft hum of the mixer, and the gentle steam as the cheesecake cooled, promising a slice that tasted like a treat but carried purpose.
Over months I refined the balance of textures and the mix of ingredients. I started with a classic base, then experimented with Greek yogurt and protein powder to lift the filling and add structure. Each iteration taught me how critical small choices are, like bringing the cream cheese to room temperature and using a water bath to prevent cracks. Those tiny rituals transformed the result from decent to reliably smooth, and I now make this for friends who ask for a lighter dessert that still looks and tastes special.
Recipe Snapshot
7 hr
390 mins
30 mins
Hard
200 kcal
American
Keto, Gluten-Free
Desserts
9 inch springform pan, Oven, Mixer or food processor, Baking pan for water bath
Why This Protein Cheesecake Stands Out
Rich and Protein Packed
I love that this Protein Cheesecake manages to be both rich and higher in protein than a typical cheesecake. The mix of cream cheese, Greek yogurt, and protein powder creates a velvety mouthfeel while giving each slice a substantial protein boost. I often reach for it after a long training day, because it satisfies hunger and cravings in one go.
Simple, Flexible Ingredients
This recipe is forgiving. You can swap dairy for alternatives if you need to, and the sweetness level is adjustable. I appreciate recipes that let me adapt based on what I have in the fridge, and this one rewards thoughtful swaps without losing character. The ingredient list keeps things focused, so you can tinker without getting lost.
Reliable Texture Every Time
One reason I make this frequently is the dependable result. The technique of using a water pan and gradual cooling reduces cracks and gives a smooth surface. I learned that patience in cooling pays dividends, and that knowledge makes the difference between a decent slice and one you want to photograph and share.
Approachable for Home Bakers
You do not need fancy equipment to succeed. A mixer, a springform pan, and a bit of attention are enough. I find this comforting, because not everyone has a long list of gadgets. It’s a recipe that builds confidence, step by step.
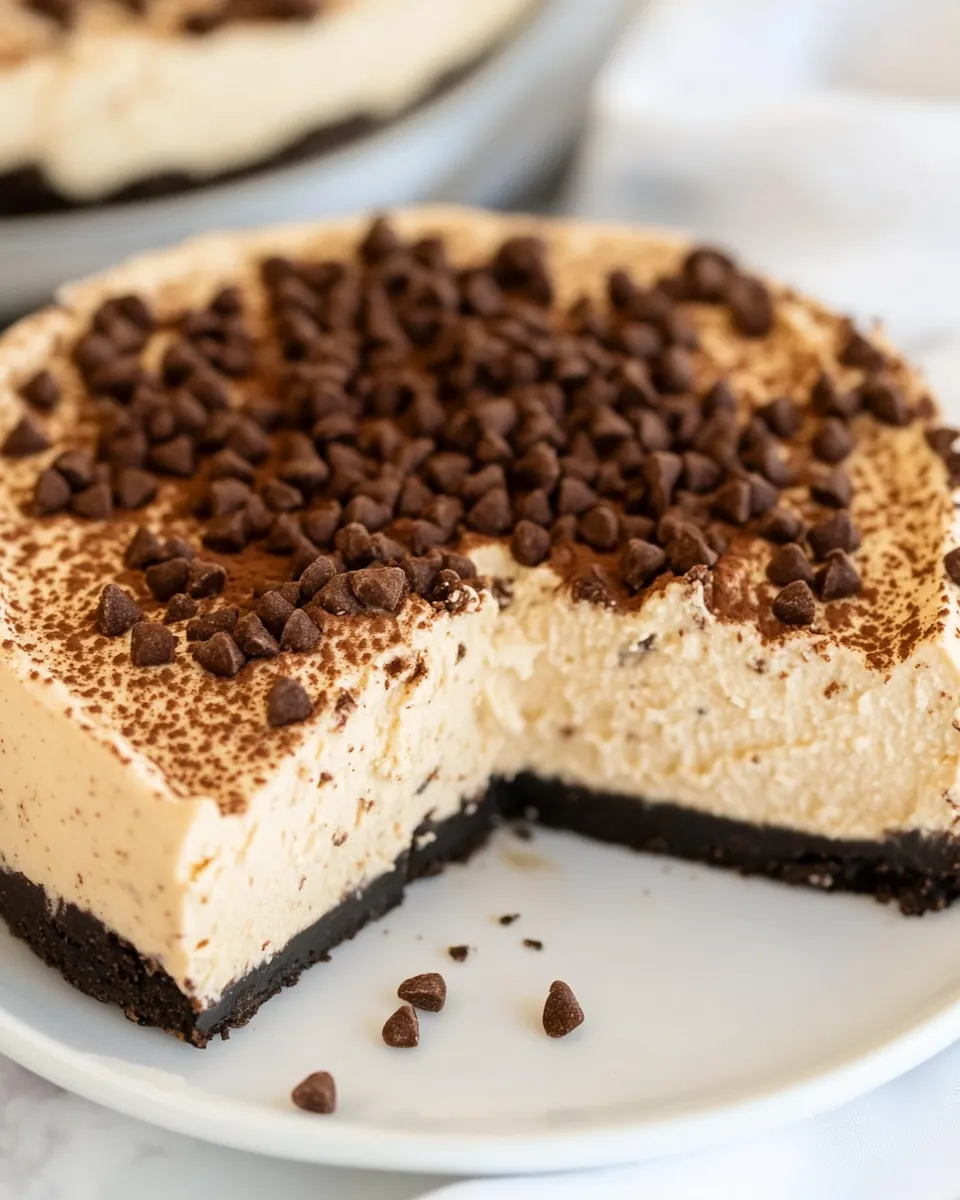
Versatile Serving Options
This Protein Cheesecake adapts to many occasions, from a post workout treat to a weekend dessert for guests. It looks elegant on a plate and slices cleanly when chilled properly. I love serving it with simple fresh fruit or a light drizzle of whatever sweetener I have on hand, and guests always comment on its creamy texture and balanced flavor.
What Goes Into Protein Cheesecake
These ingredients are chosen to create a lush, creamy filling that sets up firmly while delivering extra protein. The key players are the tangy cream cheese and creamy Greek yogurt, which give structure and richness. Protein powder lifts the texture and increases satiety, while the sweetener and vanilla extract round out the flavor. Together they form a balanced custard that firms in the fridge and slices neatly.
- 24 oz cream cheese or vegan cream cheese: Provide rich, creamy body and structure to the cheesecake while contributing tang and richness; soften at room temperature for easier mixing and ensure smooth consistency by beating until lump-free.
- 2 cups Greek yogurt or dairy free alternative: Add tangy moisture and lightness to the filling while balancing richness; opt for full-fat Greek yogurt for creaminess or a dairy–free alternative for vegan versions and fold in gently to maintain texture.
- 1/2 cup protein powder: Supply concentrated protein and help thicken the batter while enhancing nutritional value; choose a neutral or vanilla-flavored protein powder and sift or blend to avoid graininess.
- 2/3 cups sweetener of choice: Sweeten and balance the tartness of the dairy components while controlling final sweetness level; use granular or liquid sweeteners to taste and dissolve well to prevent grittiness in the filling.
- 2 1/2 tsp pure vanilla extract: Impart warm, aromatic sweetness and enhance other flavors in the cheesecake; measure precisely and stir in to distribute subtle vanilla notes evenly throughout the batter.
- crust ideas are listed above: Offer a complementary base that anchors the filling and adds texture; select from options like graham cracker, nut-based, or cookie crusts and press firmly to create an even foundation before baking or chilling.
Instructions for Protein Cheesecake

I like to approach the baking step calmly because cheesecake rewards patience. Read through your steps, assemble the ingredients, and set up a water pan before you start. The method centers on gentle heat and gradual cooling to keep the surface smooth and crack free.
- To make the protein cheesecake recipe, preheat your oven to 350 F. Fill any baking pan around two thirds up with water. Place this pan on the oven's lower rack. Bring cream cheese to room temperature. Prepare your crust of choice, if using, in a 9-inch springform pan. Beat all ingredients in a food processor or with beaters or a blender just until smooth. Spread filling into the springform, then place on the center rack of the oven (above the rack with the water pan). Bake 30 minutes, then turn off the heat without ever opening the oven. Let sit inside the oven an additional five minutes. Remove and let cool on the counter before placing the still-underbaked cheesecake into the fridge for at least six hours, during which time it will firm up considerably. The gradual cooling steps (no sudden temperature changes) and water pan step (adding moisture to the oven) are tricks to help the finished cheesecake not crack.: The kitchen will smell faintly sweet and dairy rich as you begin, a comforting cue that you are building flavor. Use room temperature cream cheese to avoid lumps and to ensure the batter becomes glossy when beaten. You will notice a smoother texture and less aeration if you scrape the bowl often, which helps prevent large air pockets that could cause cracking. A common mistake is rushing this step, which traps air and leads to bubbles that expand during baking.
- preheat your oven to 350 F: Heat sets the custard gently, and you will feel a steady warm breeze from the oven when it reaches temperature. Preheating ensures even baking from the start, so your center and edges cook uniformly. If your oven is cooler than indicated, the center may remain underdone, so use an oven thermometer if you suspect temperature variance. Avoid opening the door frequently during preheating, which lets heat escape and lengthens bake time.
- Fill any baking pan around two thirds up with water: The hiss of water entering a hot oven is a small but reassuring sound, and the added moisture prevents the cheesecake surface from drying and cracking. The water bath creates a gentle, humid environment that moderates oven heat around the springform pan. Be careful not to spill water into the cheesecake pan, as wet crusts or batter contamination can occur. A common oversight is not wrapping the springform base, which allows water in; secure the pan to avoid leaks.
- Place this pan on the oven's lower rack: Positioning the water pan low creates an even steam envelope around the cheesecake. You may notice a subtle rise in oven humidity as steam forms, which is ideal. Keep the water level consistent so it does not evaporate completely during longer bakes. A pitfall is placing the water pan too close to the heat source which can create localized hot spots.
- Bring cream cheese to room temperature: The texture change is tactile, the cream cheese softens to press easily with your finger, which makes for a lump free batter. Warmer cheese blends seamlessly with the Greek yogurt and protein powder , producing a silkier mouthfeel. Cold cheese forces extended mixing and invites aeration, so plan ahead to allow adequate warming time.
- Prepare your crust of choice, if using, in a 9-inch springform pan: A crisp crust offers contrast to the creamy filling, and you will hear a satisfying press as crumbs are packed into the pan. Chill the crust briefly before adding the filling to help it set and avoid becoming soggy. A classic misstep is over pressing the crust which can make the edges too dense; aim for firm but not rock solid.
- Beat all ingredients in a food processor or with beaters or a blender just until smooth: As the motor hums you will see the batter become glossy and cohesive, without streaks of cream cheese . Stop when smooth to avoid incorporating too much air which can lift and then collapse. If you beat too long you risk a texture that is cakey rather than custardy, so watch the consistency and test by tilting the bowl to observe flow.
- Spread filling into the springform, then place on the center rack of the oven: The filling should glide into the crust and level itself slightly. Center rack placement ensures balanced exposure to heat, while keeping the springform above the water pan prevents splashes. Smooth the top with a spatula for an even finish but avoid aggressive smoothing that forces air to the surface. A mistake at this stage is creating peaks that brown unevenly.
- Bake 30 minutes, then turn off the heat without ever opening the oven: During baking the edges will set and the center will still wobble like thick custard; that wobble is a good sign. Turning the oven off and leaving the cheesecake inside lets residual heat finish the setting gently. Opening the oven at this moment causes a sudden temperature change, often resulting in cracks, so resist temptation to peek.
- Let sit inside the oven an additional five minutes: That brief wait continues the gentle finish, smoothing the surface as the temperature drops. You might notice a subtle settling and the cheesecake will appear more cohesive. This pause reduces the shock of going from hot to cool, which protects the structure. A common error is removing it immediately which increases the chance of surface fissures.
- Remove and let cool on the counter before placing the still-underbaked cheesecake into the fridge for at least six hours: Cooling on the counter prevents condensation forming on the surface, and moving it to the fridge while still slightly warm encourages even firming without cracking. Six hours ensures the custard fully sets, delivering clean slices with a creamy interior. Cutting too soon yields a runny center, and storing warm can cause sweating and texture loss, so patience is key.
- The gradual cooling steps and water pan step are tricks to help the finished cheesecake not crack: These techniques create a stable environment that limits rapid contraction, which is what causes cracks. The tiny differences in temperature and humidity you control here add up to a smooth top and even bake. Skipping these will increase the chance of imperfections, so follow them closely for the best visual and textural outcome.
Tips and Tricks about Protein Cheesecake
I keep these tips close by whenever I make this Protein Cheesecake. They help avoid the small errors that ruin texture or appearance, and they make the process smoother. Here are practical notes I use after many bakes.
- Room temperature ingredients: Let the cream cheese and Greek yogurt warm to room temperature so the batter blends without lumps and you avoid overbeating.
- Measure protein powder carefully: Sift the protein powder if it clumps, and stick to the amount listed to keep the texture balanced rather than gummy.
- Water bath setup: Place the springform in a shallow pan and add hot water to the bath pan in the oven to reduce cracking and promote even baking.
- Avoid overmixing: Stop as soon as the batter is smooth to prevent adding excess air which leads to peaks and cracks as it cools.
- Chill fully: Refrigerate the cheesecake for at least six hours, or overnight, to allow the filling to firm and develop its final texture before slicing.
Great Combinations for Protein Cheesecake
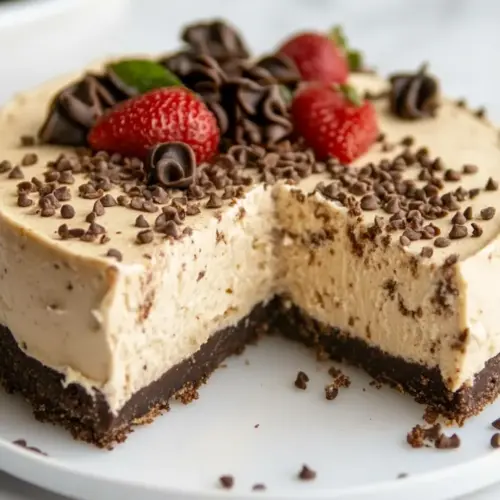
This Protein Cheesecake pairs beautifully with light, fresh accents and simple accompaniments. It works well for post workout treats, casual dessert plates, and special occasions where you want something elegant but not overly rich. Below are thoughtful serving ideas and storage notes to help you present it at its best.
- Fresh berries on top: A handful of fresh strawberries or raspberries adds brightness and a contrasting burst that complements the creamy filling.
- Light fruit compote: Warm a small amount of berries with a touch of sweetener for a spoonable compote that adds moisture and color to each slice.
- Simple whipped topping: A dollop of lightly sweetened whipped cream or a stabilized dairy free alternative keeps the plate elegant without overpowering texture.
- Sliced and served chilled: For clean slices, chill overnight and run a warm knife under hot water then wipe between cuts to maintain neat edges.
- Storage tips: Cover tightly and store in the refrigerator for up to five days, or slice and freeze for longer storage, thawing slowly in the fridge to preserve texture.
- Occasions: Serve this for casual family dinners, post workout gatherings, or when you want a dessert that feels special but still aligned with higher protein goals.
FAQ
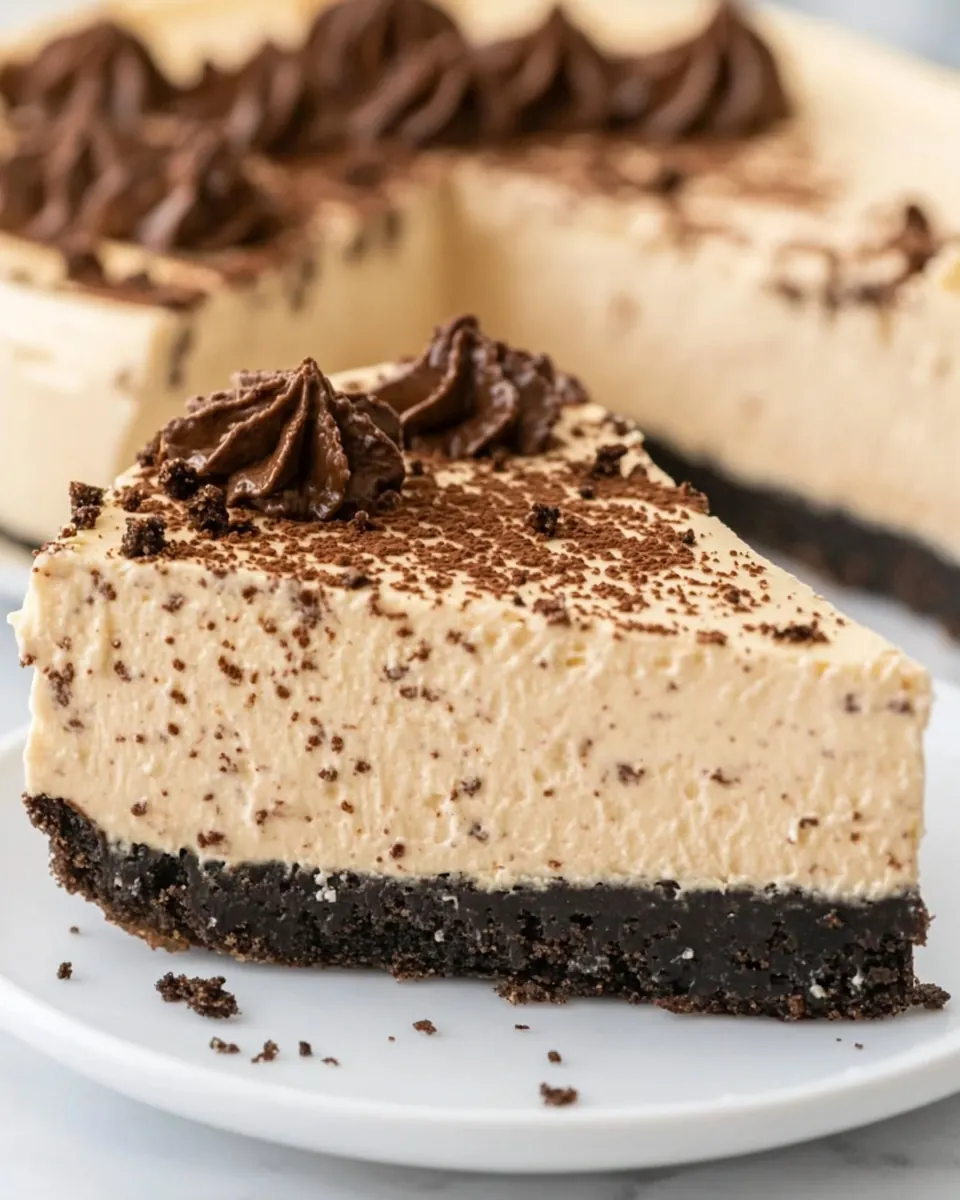
Conclusion
This Protein Cheesecake stands out because it combines the lush creaminess of traditional cheesecake with a thoughtful protein boost. The blend of cream cheese, Greek yogurt, and protein powder creates a dessert that feels indulgent yet purposeful. Give it a try when you want something that satisfies both cravings and nutrition goals, and take your time with the cooling steps for the best texture. I hope this becomes a go to in your recipe collection, offering a reliable, slice worthy finish that friends and family will enjoy.
Protein Cheesecake
Equipment
- 9-inch Springform Pan
- Oven
- Mixer or food processor
- Baking pan for water bath
Ingredients
- 24 oz cream cheese or vegan cream cheese Provide rich, creamy body and structure to the cheesecake while contributing tang and richness; soften at room temperature for easier mixing and ensure smooth consistency by beating until lump-free.
- 2 cups Greek yogurt or dairy free alternative Add tangy moisture and lightness to the filling while balancing richness; opt for full-fat Greek yogurt for creaminess or a dairy-free alternative for vegan versions and fold in gently to maintain texture.
- 1/2 cup protein powder Supply concentrated protein and help thicken the batter while enhancing nutritional value; choose a neutral or vanilla-flavored protein powder and sift or blend to avoid graininess.
- 2/3 cups sweetener of choice Sweeten and balance the tartness of the dairy components while controlling final sweetness level; use granular or liquid sweeteners to taste and dissolve well to prevent grittiness in the filling.
- 2 1/2 tsp pure vanilla extract Impart warm, aromatic sweetness and enhance other flavors in the cheesecake; measure precisely and stir in to distribute subtle vanilla notes evenly throughout the batter.
- crust ideas are listed above Offer a complementary base that anchors the filling and adds texture; select from options like graham cracker, nut-based, or cookie crusts and press firmly to create an even foundation before baking or chilling.
Instructions
- To make the protein cheesecake recipe, preheat your oven to 350 F. Fill any baking pan around two thirds up with water. Place this pan on the oven's lower rack. Bring cream cheese to room temperature. Prepare your crust of choice, if using, in a 9-inch springform pan. Beat all ingredients in a food processor or with beaters or a blender just until smooth. Spread filling into the springform, then place on the center rack of the oven (above the rack with the water pan). Bake 30 minutes, then turn off the heat without ever opening the oven. Let sit inside the oven an additional five minutes. Remove and let cool on the counter before placing the still-underbaked cheesecake into the fridge for at least six hours, during which time it will firm up considerably. The gradual cooling steps (no sudden temperature changes) and water pan step (adding moisture to the oven) are tricks to help the finished cheesecake not crack.: The kitchen will smell faintly sweet and dairy rich as you begin, a comforting cue that you are building flavor. Use room temperature cream cheese to avoid lumps and to ensure the batter becomes glossy when beaten. You will notice a smoother texture and less aeration if you scrape the bowl often, which helps prevent large air pockets that could cause cracking. A common mistake is rushing this step, which traps air and leads to bubbles that expand during baking.
- preheat your oven to 350 F: Heat sets the custard gently, and you will feel a steady warm breeze from the oven when it reaches temperature. Preheating ensures even baking from the start, so your center and edges cook uniformly. If your oven is cooler than indicated, the center may remain underdone, so use an oven thermometer if you suspect temperature variance. Avoid opening the door frequently during preheating, which lets heat escape and lengthens bake time.
- Fill any baking pan around two thirds up with water: The hiss of water entering a hot oven is a small but reassuring sound, and the added moisture prevents the cheesecake surface from drying and cracking. The water bath creates a gentle, humid environment that moderates oven heat around the springform pan. Be careful not to spill water into the cheesecake pan, as wet crusts or batter contamination can occur. A common oversight is not wrapping the springform base, which allows water in; secure the pan to avoid leaks.
- Place this pan on the oven's lower rack: Positioning the water pan low creates an even steam envelope around the cheesecake. You may notice a subtle rise in oven humidity as steam forms, which is ideal. Keep the water level consistent so it does not evaporate completely during longer bakes. A pitfall is placing the water pan too close to the heat source which can create localized hot spots.
- Bring cream cheese to room temperature: The texture change is tactile, the cream cheese softens to press easily with your finger, which makes for a lump free batter. Warmer cheese blends seamlessly with the Greek yogurt and protein powder , producing a silkier mouthfeel. Cold cheese forces extended mixing and invites aeration, so plan ahead to allow adequate warming time.
- Prepare your crust of choice, if using, in a 9-inch springform pan: A crisp crust offers contrast to the creamy filling, and you will hear a satisfying press as crumbs are packed into the pan. Chill the crust briefly before adding the filling to help it set and avoid becoming soggy. A classic misstep is over pressing the crust which can make the edges too dense; aim for firm but not rock solid.
- Beat all ingredients in a food processor or with beaters or a blender just until smooth: As the motor hums you will see the batter become glossy and cohesive, without streaks of cream cheese . Stop when smooth to avoid incorporating too much air which can lift and then collapse. If you beat too long you risk a texture that is cakey rather than custardy, so watch the consistency and test by tilting the bowl to observe flow.
- Spread filling into the springform, then place on the center rack of the oven: The filling should glide into the crust and level itself slightly. Center rack placement ensures balanced exposure to heat, while keeping the springform above the water pan prevents splashes. Smooth the top with a spatula for an even finish but avoid aggressive smoothing that forces air to the surface. A mistake at this stage is creating peaks that brown unevenly.
- Bake 30 minutes, then turn off the heat without ever opening the oven: During baking the edges will set and the center will still wobble like thick custard; that wobble is a good sign. Turning the oven off and leaving the cheesecake inside lets residual heat finish the setting gently. Opening the oven at this moment causes a sudden temperature change, often resulting in cracks, so resist temptation to peek.
- Let sit inside the oven an additional five minutes: That brief wait continues the gentle finish, smoothing the surface as the temperature drops. You might notice a subtle settling and the cheesecake will appear more cohesive. This pause reduces the shock of going from hot to cool, which protects the structure. A common error is removing it immediately which increases the chance of surface fissures.
- Remove and let cool on the counter before placing the still-underbaked cheesecake into the fridge for at least six hours: Cooling on the counter prevents condensation forming on the surface, and moving it to the fridge while still slightly warm encourages even firming without cracking. Six hours ensures the custard fully sets, delivering clean slices with a creamy interior. Cutting too soon yields a runny center, and storing warm can cause sweating and texture loss, so patience is key.
- The gradual cooling steps and water pan step are tricks to help the finished cheesecake not crack: These techniques create a stable environment that limits rapid contraction, which is what causes cracks. The tiny differences in temperature and humidity you control here add up to a smooth top and even bake. Skipping these will increase the chance of imperfections, so follow them closely for the best visual and textural outcome.
Notes
- Room temperature ingredients: Let the cream cheese and Greek yogurt warm to room temperature so the batter blends without lumps and you avoid overbeating.
- Measure protein powder carefully: Sift the protein powder if it clumps, and stick to the amount listed to keep the texture balanced rather than gummy.
- Water bath setup: Place the springform in a shallow pan and add hot water to the bath pan in the oven to reduce cracking and promote even baking.
- Avoid overmixing: Stop as soon as the batter is smooth to prevent adding excess air which leads to peaks and cracks as it cools.
- Chill fully: Refrigerate the cheesecake for at least six hours, or overnight, to allow the filling to firm and develop its final texture before slicing.