Christmas Rice Krispie Treats
Christmas Rice Krispie Treats began as a sticky, joyful mess in my kitchen one December afternoon when I wanted a simple activity to keep the kids busy while I wrapped gifts. I remember the way the butter bubbled and smelled nutty as it browned, and how the marshmallows turned glossy and smooth, creating that irresistible, pillowy glue that binds the cereal into those iconic, chewy bars. That first batch became an annual tradition, and every year I tweak the decorations so each piece looks like a tiny holiday character.
Over the years, I learned small tricks that make a big difference: browning the butter just enough for toffee notes, stirring the marshmallows gently so they melt without scorching, and pressing the cereal into the pan with a light touch so the treats stay airy. Friends started requesting my version for parties, and I loved how these little treats became a way to share warmth and creativity. I often make a double batch and set up a decorating station with colored frosting and candies, then sit back and watch the smiles as everyone crafts their edible ornaments.
Recipe Snapshot
20 mins
10 mins
10 mins
Easy
180 kcal
American
Gluten-Free, Low FODMAP
Desserts
Large stockpot or Dutch oven, 9 by 13 inch baking dish, Large spatula, Piping bags
Why This Christmas Rice Krispie Treats Hits Different
Comforting holiday nostalgia
I adore how Christmas Rice Krispie Treats transport me back to childhood cookie exchanges. The blend of marshmallows and Rice Krispies cereal creates a soft crunch that feels like a cozy tradition, and I love handing them out at neighborhood gatherings.
Quick to make when time is tight
One reason I keep this recipe on call is its speed. With only a few active minutes and pantry staples like butter and vanilla extract, you can have a tray ready to decorate, which makes it perfect for last minute parties or when guests arrive unexpectedly.
Customizable and playful
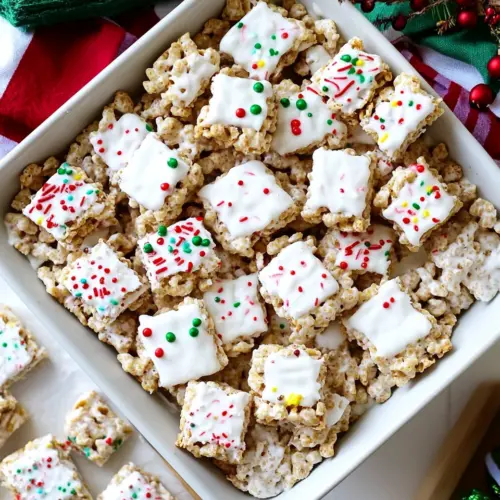
I enjoy how you can turn one basic batch into reindeer, trees, or Santa hats with a little frosting and candy. That playfulness keeps kids invested and gives adults a reason to get creative too.
Reliable texture every time
When I brown the butter just right and melt the marshmallows slowly, the result is consistently chewy but not gummy. That technique preserves the delicate crispness of the cereal while delivering a satisfying chew.
Great for sharing and gifting
I find these treats ideal for packaging and giving away. They travel well at room temperature, and the colorful decorations make them look special without fuss. They are a small, homemade gift that people actually eat right away.
Everything You Need for Christmas Rice Krispie Treats
These ingredients are simple, classic, and work together like a tiny orchestra. The butter contributes toasty, rich notes when browned, the marshmallows supply the sweet, gooey binder, and the Rice Krispies cereal gives the crisp lift that defines the texture. The frostings and candies let you personalize each piece, turning a humble tray into festive characters.
- 1 cup butter (2 sticks) plus more for buttering the pan: Melt to provide rich fat and help bind the cereal and marshmallows into a cohesive, chewy treat; use the specified amount for correct texture and add a little extra for greasing the pan to prevent sticking. Melt gently to avoid separating the butter and ensure even distribution throughout the mixture. Adjust temperature carefully while combining with marshmallows to maintain a glossy, pliable consistency.
- 2 (12 ounce) bags marshmallows (see note 1): Melt thoroughly to act as the primary sweet binder that creates the classic sticky, gooey texture of rice krispie treats; using two bags ensures enough volume for the 12 cups of cereal. Choose fresh marshmallows for best melting performance and smoothness. Monitor heat closely to prevent scorching and to achieve a uniform mixture.
- 2 teaspoons vanilla extract: Flavor to add warm, aromatic vanilla notes that enhance the overall sweetness and round out the dessert profile; stir in after removing the marshmallow mixture from heat to preserve volatile flavor compounds. Use a quality extract for the best aroma impact. Avoid adding too early to prevent loss of delicate flavors from high heat.
- 12 cups Rice Krispies cereal: Provide the crisp, airy base that gives the treats their signature crunch and structure; measure carefully to maintain proper cereal-to-binder ratio for ideal chewiness. Fold gently to avoid crushing the cereal and retain lightness. Use fresh cereal for maximum texture and longevity of the finished bars.
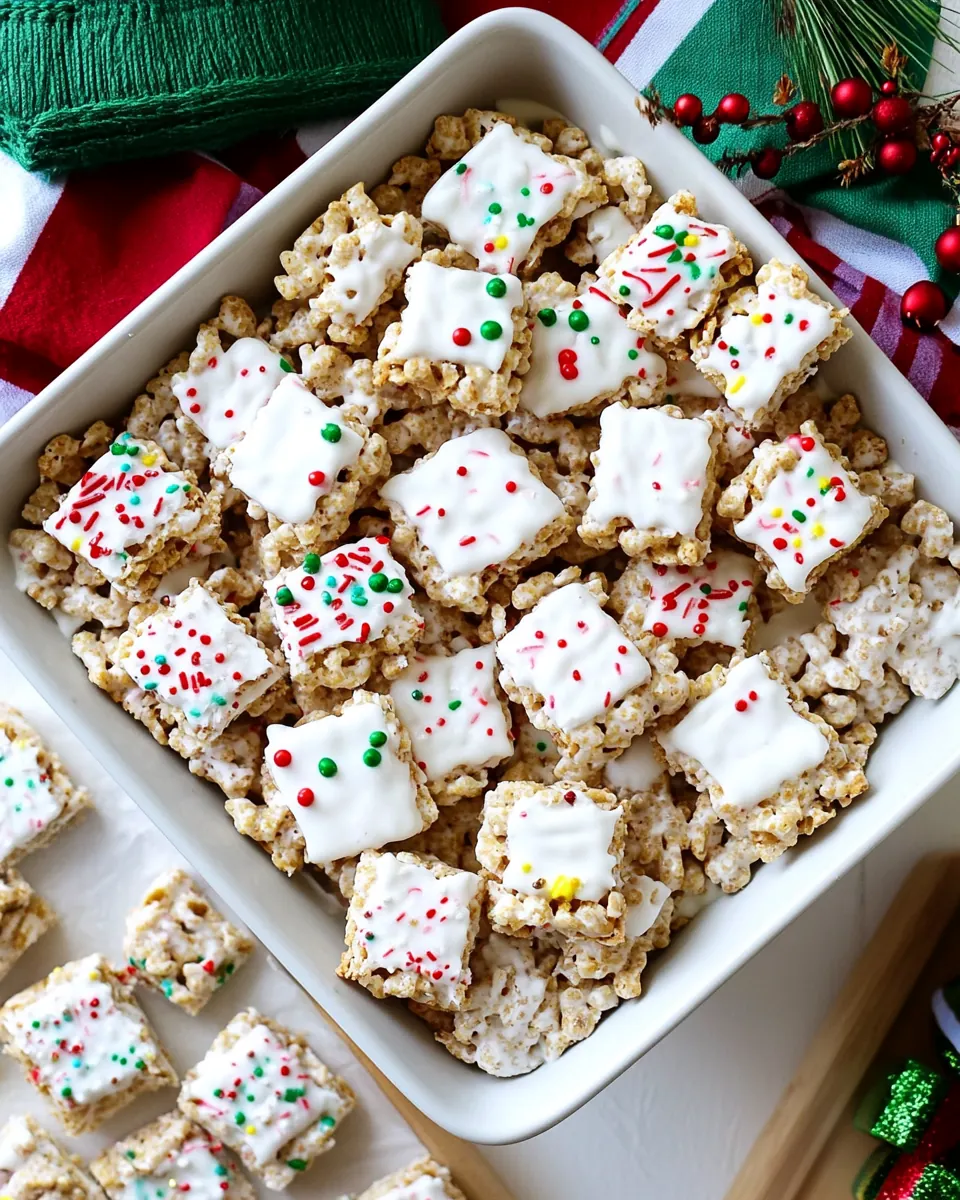
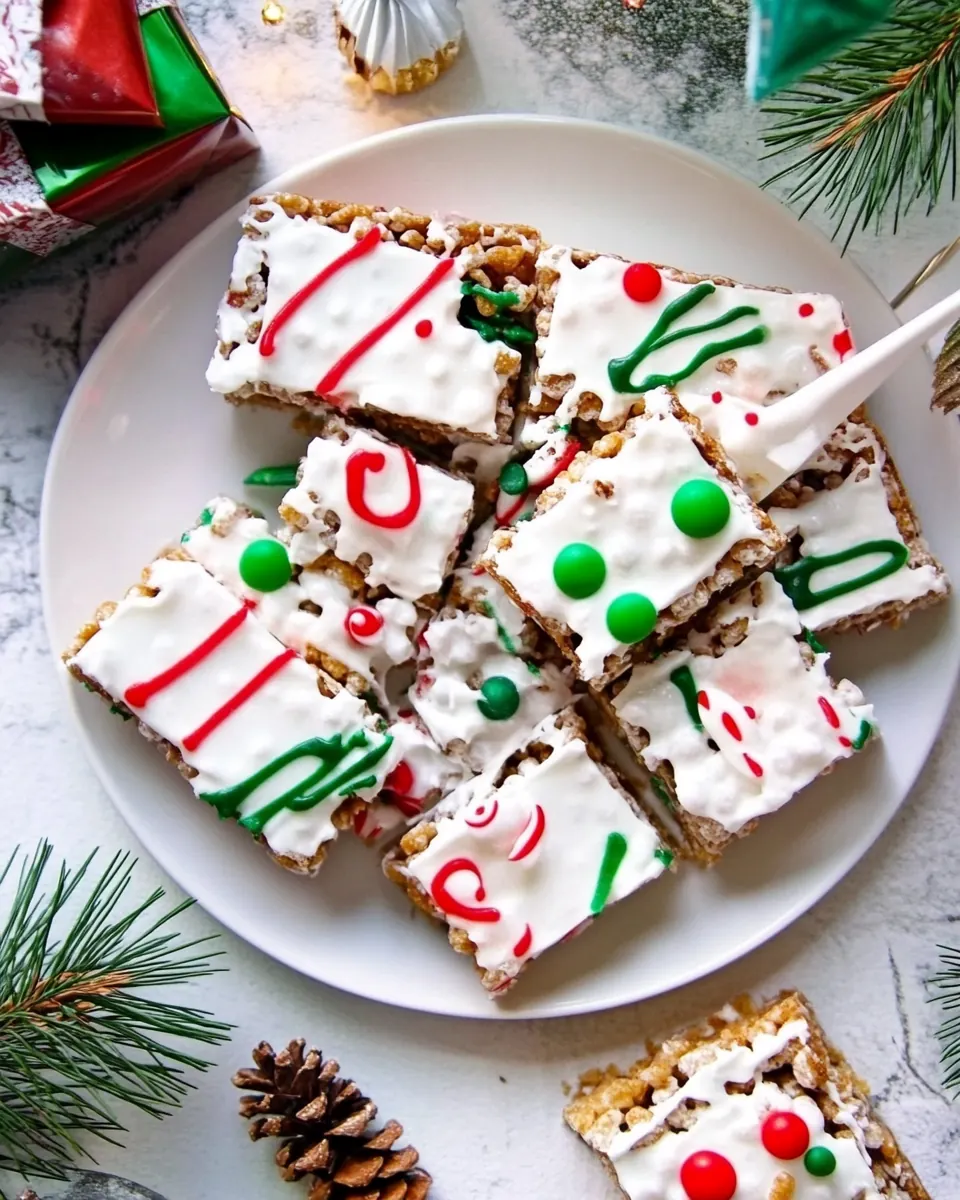
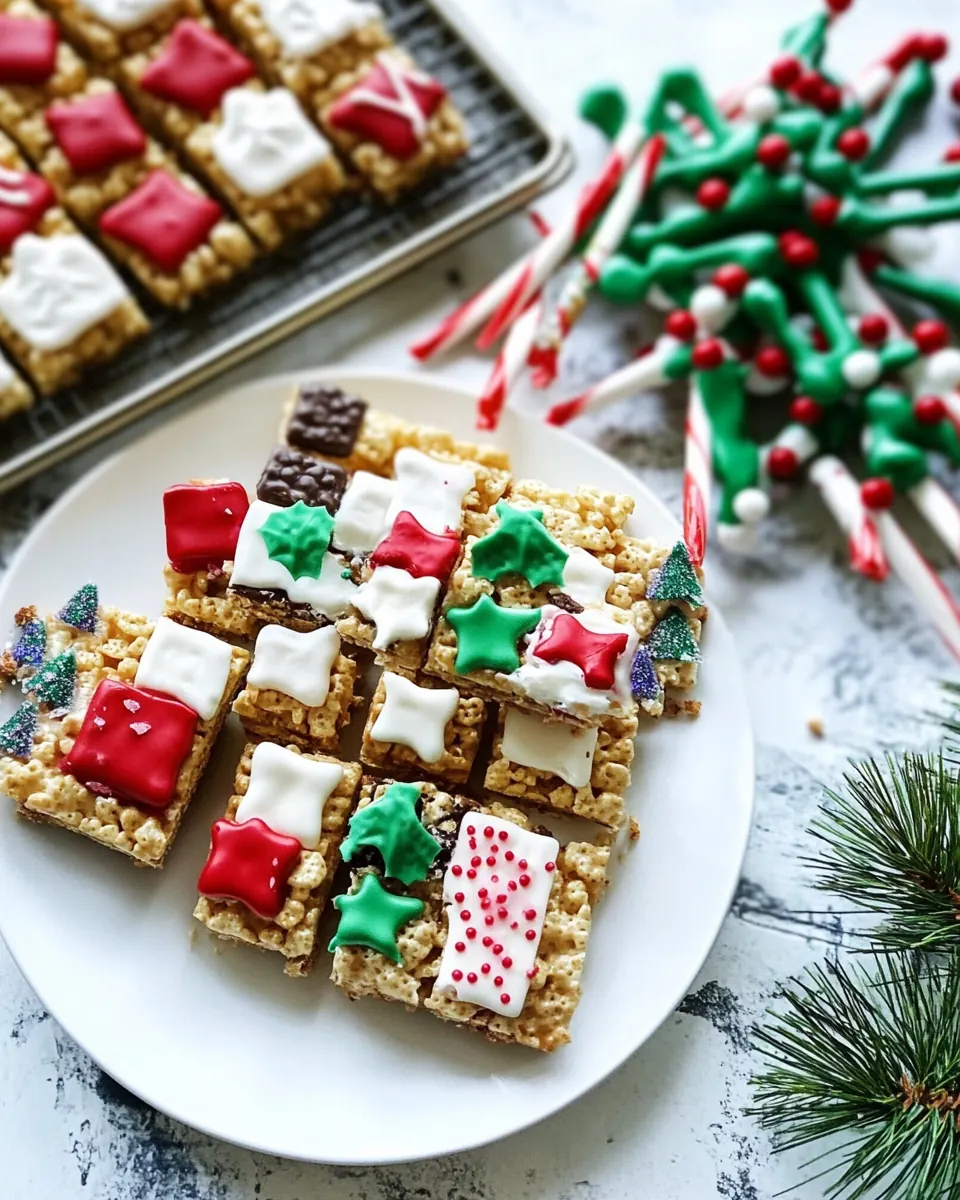
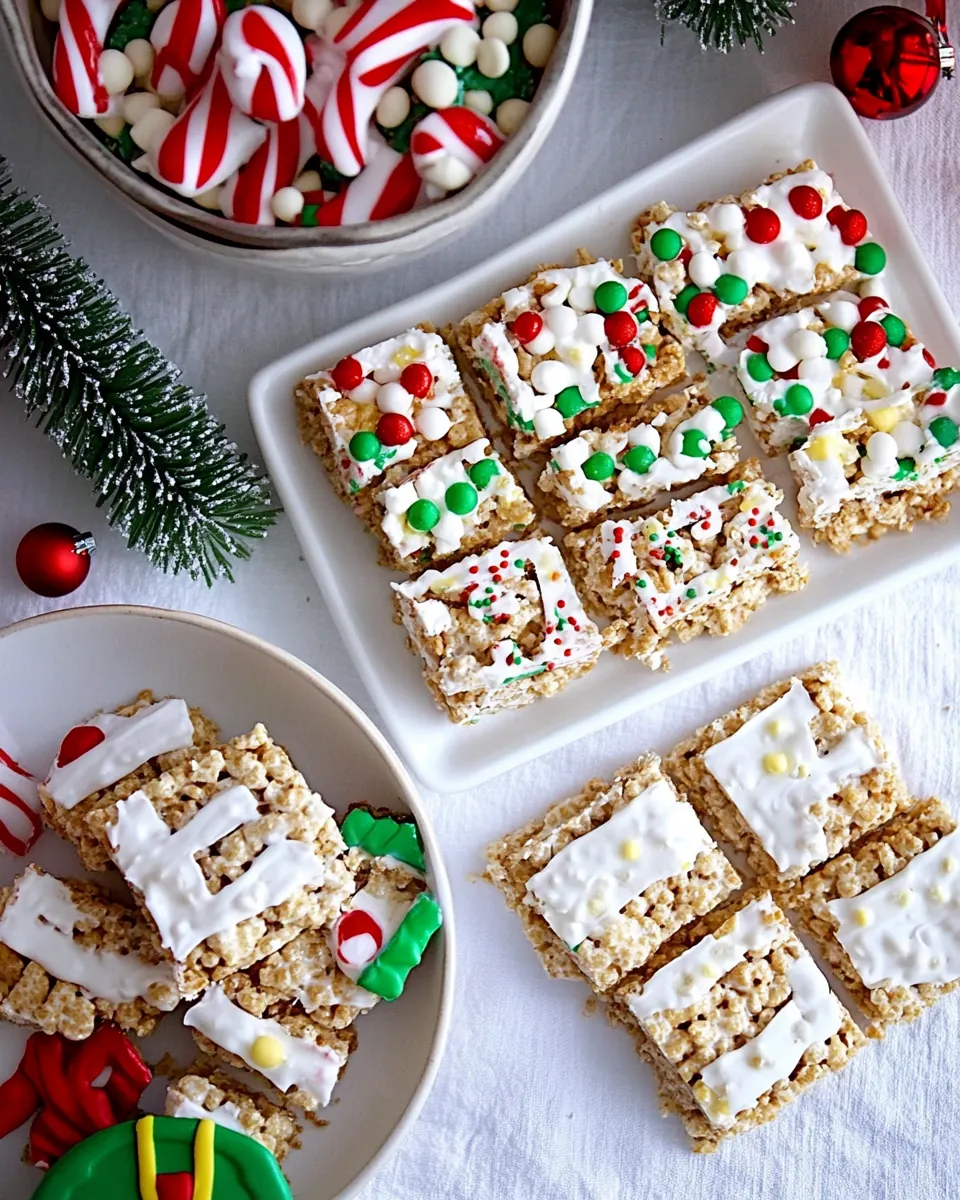
- Chocolate frosting (see note 2): Decorate to create a chocolate-coated layer or accents that add richness and visual contrast; use to create tree trunks, borders, or chocolate-dipped sections on the treats. Choose a spreadable frosting for easy application and smooth finish. Warm slightly if needed for easier spreading without becoming runny.
- Green frosting: Decorate to add vivid green color suitable for foliage or tree-like accents, bringing seasonal visual appeal to the treats; pipe or spread to create consistent green areas. Select a frosting with stable color and texture for detailed decorations. Chill briefly after decorating to set the frosting properly.
- Red frosting: Decorate to provide bright red accents that evoke festive ornaments or berries on the treats; apply in small dots or lines for pop of color. Use a frosting that holds shape well for precise embellishments. Combine with other colors thoughtfully for balanced decoration.
- White frosting: Decorate to supply neutral white highlights and backgrounds that balance other colored frostings; use for snow-like effects or to outline shapes. Choose a smooth, opaque white frosting for clean detailing. Apply with steady pressure and allow to set to avoid smudging.
- Candy eyeballs: Embellish to create playful, animated faces or focal points with small, edible details that bring treats to life; press gently into frosting so they adhere securely. Select appropriately sized eyeballs to match treat proportions. Store in cool, dry place before decorating to prevent melting.
- M&M candies: Garnish to add colorful, crunchy candy accents resembling ornaments or festive sprinkles that enhance visual appeal and texture; press into frosting or marshmallow surface. Use a variety of sizes and colors for an eye-catching finish. Keep candies dry until use to maintain crispness.
- Pretzel sticks: Assemble to serve as structural supports or whimsical branches that can mimic tree trunks or antlers; insert pretzel sticks into treats to add salty crunch and decorative shape. Break to desired lengths for proportional placement. Avoid over-inserting to prevent splitting the bars.
Cooking Method for Christmas Rice Krispie Treats
These directions are approachable yet specific, guiding you from butter browning to decorated pieces. Follow the sequence and sensory cues to get consistent results, and take your time with the melting so the texture stays perfect for shaping and decorating.
- Butter a 9-inch by 13-inch baking dish. In a large stockpot or Dutch oven (at least 5 quarts) over medium heat, add butter and cook until melted, about 3 minutes.: The pan should be greased lightly with butter so the treats release cleanly and maintain their shape when you cut them. You should notice a thin sheen across the bottom of the dish that prevents sticking. If you skip greasing, the edges will adhere and tear when removed, so do not be tempted to skip this basic step.
- Continue cooking butter, stirring constantly, until the milk solids turn golden and the butter darkens slightly, about 5 to 7 minutes longer. Do not walk away as you want the butter to brown, not burn and turn black.: As the butter melts, listen for a gentle simmer and watch for the foam to subside, indicating the water content is evaporating. The aroma will begin to shift from cold dairy to warm, nutty notes. Avoid using too high heat or you will accelerate browning and risk uneven results.
- Reduce heat to medium low and add marshmallows to the pot. Stir until the marshmallows have melted into the butter completely and the mixture is smooth, about 5 to 7 minutes (aim for a gentle melting and softening process).: You want visual cues here, the tiny solids will change from pale to golden and the scent will become toasted and toffee like. Stirring constantly ensures even browning and prevents hot spots. A common mistake is walking away, which can quickly turn golden to burnt, leaving an acrid taste.
- Turn off heat and stir in vanilla. Add the cereal and use a large spatula to stir gently until the cereal is evenly coated.: When you add the marshmallows , lower heat so they melt gently and turn glossy. The surface will soften and the mixture becomes smooth rather than clumpy. If you add them to too hot a pan, they may seize and become grainy, so patience matters here.
- Pour into the prepared pan and press down gently (but don't try to pack them in too tightly). Cool at least 30 minutes, then cut into triangles. Decorate with frosting and candy to create Christmas trees, reindeer faces, and Santa hats.: You should see a viscous, shiny mass that flows slowly from your spatula, and the scent will be sweet with browned butter notes. Use a heat resistant spatula and scrape the pot sides to prevent pockets of unmelted marshmallow. A mistake at this stage is rushing with high heat, which creates scorching and uneven texture.
- Turn off heat and stir in vanilla: Adding vanilla extract off heat preserves its aroma, which will bloom in the warm mixture and lift the overall flavor. Stir briefly so the vanilla disperses evenly. If you add the extract while boiling, the delicate aromatics will dissipate and you will lose that fragrant layer.
- Add the cereal and use a large spatula to stir gently until the cereal is evenly coated: Pour in the Rice Krispies cereal and fold gently to keep the pieces airy. The mixture should look uniformly glossy with each crisp grain lightly trussed in marshmallow. Overmixing presses air out and yields dense bars, so stir just until even.
- Pour into the prepared pan and press down gently (but don't try to pack them in too tightly): Transfer the mixture and distribute it evenly using a buttered spatula or parchment. Pressing should be firm but gentle, leaving some loft. If you press too hard, the treats will be heavy and lose their pleasant chew, so aim for light even pressure.
- Cool at least 30 minutes, then cut into triangles: Allow the tray to cool until the texture sets but still yields slightly under pressure, which helps produce clean cuts. You will hear a faint crisp snap when slicing if they are set correctly. Cutting too soon leads to misshapen pieces and sticking, so patience pays off here.
- Decorate with frosting and candy to create Christmas trees, reindeer faces, and Santa hats: Work on a flat, cool surface and apply frosting after the treats are fully cool to avoid melting decorations. Use piping bags for precision and press candies very lightly into the frosting so they adhere. A common mistake is decorating while warm, which causes colors to bleed and candies to slip off.
Recipe Tips about Christmas Rice Krispie Treats
These tips will help you get consistently delightful results, whether you are making a single tray for family or a dozen for a holiday bake sale. I include practical advice on texture, timing, and decoration so you can focus on fun rather than fixes.
- Choose the right marshmallows — Use standard large marshmallows to achieve a smooth, glossy binder that melts evenly; mini marshmallows can scorch faster and create uneven texture.
- Control the heat — Melt and brown butter on medium to medium low to develop toasty notes without burning, stirring constantly to prevent hot spots.
- Work quickly when mixing — Once marshmallows are ready, fold in the cereal promptly to ensure an even coat before the mixture firms up.
- Lightly butter tools — Coat spatulas and your hands with a bit of butter to prevent sticking while pressing the mixture into the pan and shaping pieces.
- Let them cool fully before decorating — Cooling prevents frosting from melting and candies from sliding, preserving crisp designs and clean edges.
What Complements This Christmas Rice Krispie Treats
These treats pair well with festive beverages and make excellent party snacks or gifts. Here are ideas for serving, occasions, and storage so your tray looks great and tastes fresh.
- Serve at holiday parties — Arrange pieces on a platter with spacing so each decorated design is visible, and place small tongs for easy grabbing.
- Pack as gifts — Wrap individual pieces in cellophane with a ribbon for a homemade holiday favor that travels well at room temperature.
- Pair with warm drinks — Offer alongside hot cocoa or warm milk to balance the sweet chew with a comforting sip.
- Use as a dessert table centerpiece — Create tiers of decorated pieces mixed with cookies for a colorful seasonal display that people will gravitate toward.
- Store properly — Keep in an airtight container at room temperature for up to five days to preserve texture and prevent frosting from drying out.
- Occasion versatility — While perfect for Christmas, these also suit school parties, bake sales, or any gathering where portable, handcrafted sweets are welcome.
FAQ
Conclusion
What makes this recipe special is its combination of buttery depth, gooey marshmallow texture, and playful holiday decorations. The method is straightforward, yet those small techniques like browning the butter and melting the marshmallows slowly create a reliably excellent result. Give this version a try for your next gathering, and involve family or friends in the decorating to make it a shared, festive activity. You will end up with colorful, homemade treats that taste like holiday memories and travel well as gifts or party snacks.
Christmas Rice Krispie Treats
Equipment
- Large stockpot or Dutch oven
- 9 by 13 inch baking dish
- Large spatula
- Piping bags
Ingredients
- 1 cup butter (2 sticks) plus more for buttering the pan Melt to provide rich fat and help bind the cereal and marshmallows into a cohesive, chewy treat; use the specified amount for correct texture and add a little extra for greasing the pan to prevent sticking. Melt gently to avoid separating the butter and ensure even distribution throughout the mixture. Adjust temperature carefully while combining with marshmallows to maintain a glossy, pliable consistency.
- 2 (12 ounce) bags marshmallows (see note 1) Melt thoroughly to act as the primary sweet binder that creates the classic sticky, gooey texture of rice krispie treats; using two bags ensures enough volume for the 12 cups of cereal. Choose fresh marshmallows for best melting performance and smoothness. Monitor heat closely to prevent scorching and to achieve a uniform mixture.
- 2 teaspoons vanilla extract Flavor to add warm, aromatic vanilla notes that enhance the overall sweetness and round out the dessert profile; stir in after removing the marshmallow mixture from heat to preserve volatile flavor compounds. Use a quality extract for the best aroma impact. Avoid adding too early to prevent loss of delicate flavors from high heat.
- 12 cups Rice Krispies cereal Provide the crisp, airy base that gives the treats their signature crunch and structure; measure carefully to maintain proper cereal-to-binder ratio for ideal chewiness. Fold gently to avoid crushing the cereal and retain lightness. Use fresh cereal for maximum texture and longevity of the finished bars.
- Chocolate frosting (see note 2) Decorate to create a chocolate-coated layer or accents that add richness and visual contrast; use to create tree trunks, borders, or chocolate-dipped sections on the treats. Choose a spreadable frosting for easy application and smooth finish. Warm slightly if needed for easier spreading without becoming runny.
- Green frosting Decorate to add vivid green color suitable for foliage or tree-like accents, bringing seasonal visual appeal to the treats; pipe or spread to create consistent green areas. Select a frosting with stable color and texture for detailed decorations. Chill briefly after decorating to set the frosting properly.
- Red frosting Decorate to provide bright red accents that evoke festive ornaments or berries on the treats; apply in small dots or lines for pop of color. Use a frosting that holds shape well for precise embellishments. Combine with other colors thoughtfully for balanced decoration.
- White frosting Decorate to supply neutral white highlights and backgrounds that balance other colored frostings; use for snow-like effects or to outline shapes. Choose a smooth, opaque white frosting for clean detailing. Apply with steady pressure and allow to set to avoid smudging.
- Candy eyeballs Embellish to create playful, animated faces or focal points with small, edible details that bring treats to life; press gently into frosting so they adhere securely. Select appropriately sized eyeballs to match treat proportions. Store in cool, dry place before decorating to prevent melting.
- M&M candies Garnish to add colorful, crunchy candy accents resembling ornaments or festive sprinkles that enhance visual appeal and texture; press into frosting or marshmallow surface. Use a variety of sizes and colors for an eye-catching finish. Keep candies dry until use to maintain crispness.
- Pretzel sticks Assemble to serve as structural supports or whimsical branches that can mimic tree trunks or antlers; insert pretzel sticks into treats to add salty crunch and decorative shape. Break to desired lengths for proportional placement. Avoid over-inserting to prevent splitting the bars.
Instructions
- Butter a 9-inch by 13-inch baking dish. In a large stockpot or Dutch oven (at least 5 quarts) over medium heat, add butter and cook until melted, about 3 minutes.: The pan should be greased lightly with butter so the treats release cleanly and maintain their shape when you cut them. You should notice a thin sheen across the bottom of the dish that prevents sticking. If you skip greasing, the edges will adhere and tear when removed, so do not be tempted to skip this basic step.
- Continue cooking butter, stirring constantly, until the milk solids turn golden and the butter darkens slightly, about 5 to 7 minutes longer. Do not walk away as you want the butter to brown, not burn and turn black.: As the butter melts, listen for a gentle simmer and watch for the foam to subside, indicating the water content is evaporating. The aroma will begin to shift from cold dairy to warm, nutty notes. Avoid using too high heat or you will accelerate browning and risk uneven results.
- Reduce heat to medium low and add marshmallows to the pot. Stir until the marshmallows have melted into the butter completely and the mixture is smooth, about 5 to 7 minutes (aim for a gentle melting and softening process).: You want visual cues here, the tiny solids will change from pale to golden and the scent will become toasted and toffee like. Stirring constantly ensures even browning and prevents hot spots. A common mistake is walking away, which can quickly turn golden to burnt, leaving an acrid taste.
- Turn off heat and stir in vanilla. Add the cereal and use a large spatula to stir gently until the cereal is evenly coated.: When you add the marshmallows , lower heat so they melt gently and turn glossy. The surface will soften and the mixture becomes smooth rather than clumpy. If you add them to too hot a pan, they may seize and become grainy, so patience matters here.
- Pour into the prepared pan and press down gently (but don't try to pack them in too tightly). Cool at least 30 minutes, then cut into triangles. Decorate with frosting and candy to create Christmas trees, reindeer faces, and Santa hats.: You should see a viscous, shiny mass that flows slowly from your spatula, and the scent will be sweet with browned butter notes. Use a heat resistant spatula and scrape the pot sides to prevent pockets of unmelted marshmallow. A mistake at this stage is rushing with high heat, which creates scorching and uneven texture.
- Turn off heat and stir in vanilla: Adding vanilla extract off heat preserves its aroma, which will bloom in the warm mixture and lift the overall flavor. Stir briefly so the vanilla disperses evenly. If you add the extract while boiling, the delicate aromatics will dissipate and you will lose that fragrant layer.
- Add the cereal and use a large spatula to stir gently until the cereal is evenly coated: Pour in the Rice Krispies cereal and fold gently to keep the pieces airy. The mixture should look uniformly glossy with each crisp grain lightly trussed in marshmallow. Overmixing presses air out and yields dense bars, so stir just until even.
- Pour into the prepared pan and press down gently (but don't try to pack them in too tightly): Transfer the mixture and distribute it evenly using a buttered spatula or parchment. Pressing should be firm but gentle, leaving some loft. If you press too hard, the treats will be heavy and lose their pleasant chew, so aim for light even pressure.
- Cool at least 30 minutes, then cut into triangles: Allow the tray to cool until the texture sets but still yields slightly under pressure, which helps produce clean cuts. You will hear a faint crisp snap when slicing if they are set correctly. Cutting too soon leads to misshapen pieces and sticking, so patience pays off here.
- Decorate with frosting and candy to create Christmas trees, reindeer faces, and Santa hats: Work on a flat, cool surface and apply frosting after the treats are fully cool to avoid melting decorations. Use piping bags for precision and press candies very lightly into the frosting so they adhere. A common mistake is decorating while warm, which causes colors to bleed and candies to slip off.
Notes
- Choose the right marshmallows — Use standard large marshmallows to achieve a smooth, glossy binder that melts evenly; mini marshmallows can scorch faster and create uneven texture.
- Control the heat — Melt and brown butter on medium to medium low to develop toasty notes without burning, stirring constantly to prevent hot spots.
- Work quickly when mixing — Once marshmallows are ready, fold in the cereal promptly to ensure an even coat before the mixture firms up.
- Lightly butter tools — Coat spatulas and your hands with a bit of butter to prevent sticking while pressing the mixture into the pan and shaping pieces.
- Let them cool fully before decorating — Cooling prevents frosting from melting and candies from sliding, preserving crisp designs and clean edges.