Christmas Dessert Charcuterie Board
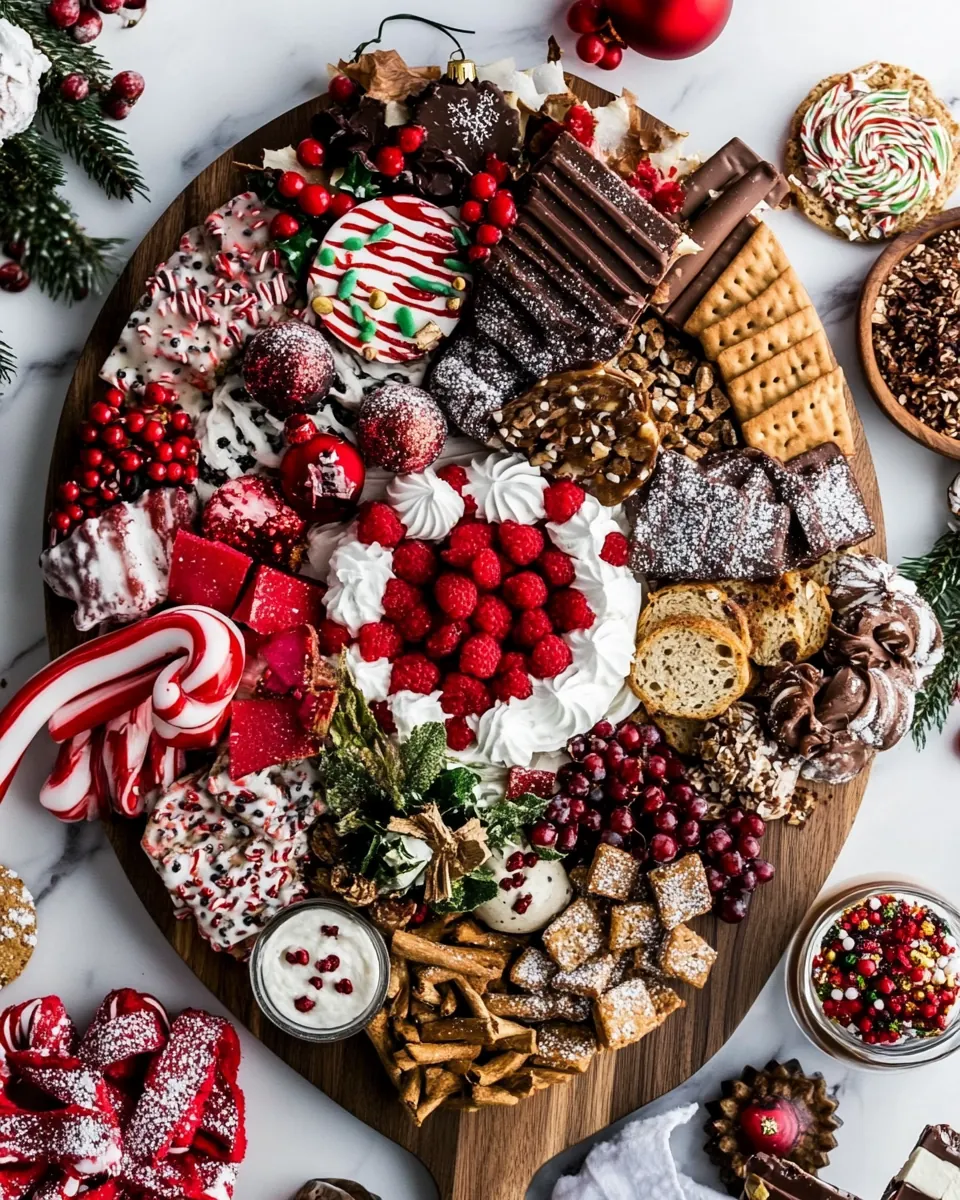
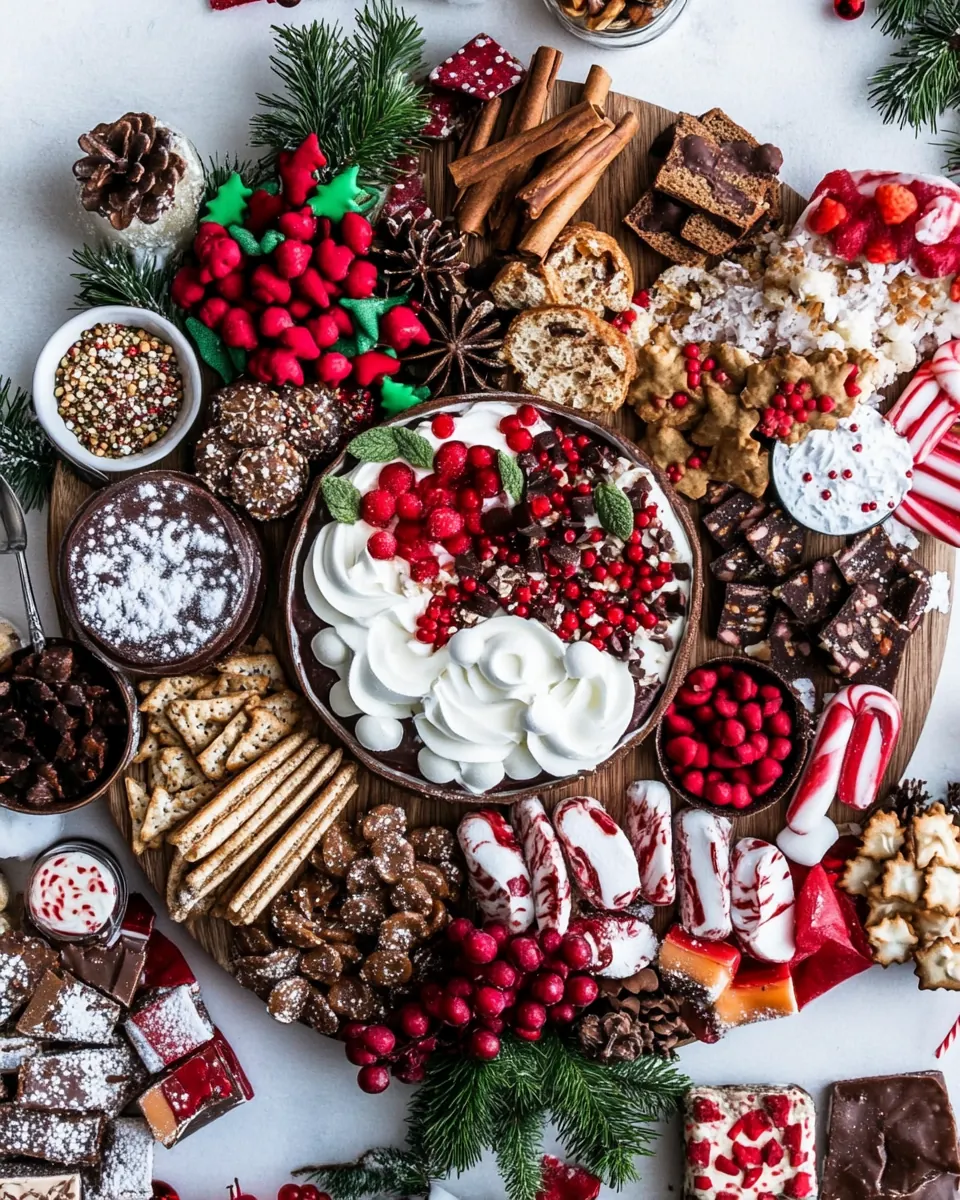
Christmas Dessert Charcuterie Board is the kind of festive spread I love to pull together when friends stop by during the holidays, because it lets me arrange a little edible story across a board while everyone grazes and chats. The first time I assembled one I remember juggling colors and textures, and how the scatter of shiny wrapped candies and glossy strawberries felt like ornaments on a tiny edible tree. I liked that the board invited people to linger, to pick and pair, and to make their own tiny dessert moments.
Over the years I learned that a great Christmas Dessert Charcuterie Board is more than a collection of sweets, it is choreography. I place the biggest items first, tuck small crunchy bits into crevices, and always leave a bowl of warm dip or sauce for dunking. When guests arrive they immediately start making combinations, and that social, exploratory energy is what keeps me making these boards again and again. I also enjoy how simple swaps of one or two items completely change the mood of the spread, making it either elegant, playful, or nostalgic.
Recipe Snapshot
21 mins
20 mins
1 mins
Easy
250 kcal
American
Paleo, Vegan
Desserts
Large platter or cutting board, Small bowl for sauce
What Makes This Christmas Dessert Charcuterie Board Special
Variety that sparks conversation
I love how a Christmas Dessert Charcuterie Board brings together many tastes and textures, so every guest discovers something new. A mix of chewy, crunchy, fruity, and chocolatey items keeps the board interesting, and I often watch people trade pieces to build their favorite bites. It becomes an interactive centerpiece that keeps the gathering lively.
Easy to scale for any crowd
One reason I make this board for parties is that it scales effortlessly. You can expand the layout to cover a whole table or keep it cozy on a single platter. When hosting, I spread items in clusters so refilling is quick, and it never feels like a lot of work to make something that looks abundant and festive.
Visually festive without fuss
I appreciate that the board looks holiday ready with minimal effort. Festive colors like deep pomegranates, bright strawberries, and shiny wrappers create instant cheer. Simple placement rules produce a polished look, so I don’t have to stress about perfect symmetry to achieve impact.
Playful textures and pairings
This board celebrates contrast, which is why I include crunchy wafers next to soft brownies and fruity elements beside minty chocolates. The interplay of textures makes each bite memorable, and I enjoy guiding guests to try surprising combinations, like dipping a strawberry into warm homemade chocolate sauce or pairing a molasses cookies with a mint square.
Simple prep with big payoff
What really wins me over is how little hands on time is required. Most components are ready to serve, so the creative work is arranging rather than cooking. That means I get the joy of presenting something beautiful, while spending more time with my guests.
Ingredients to Make Christmas Dessert Charcuterie Board
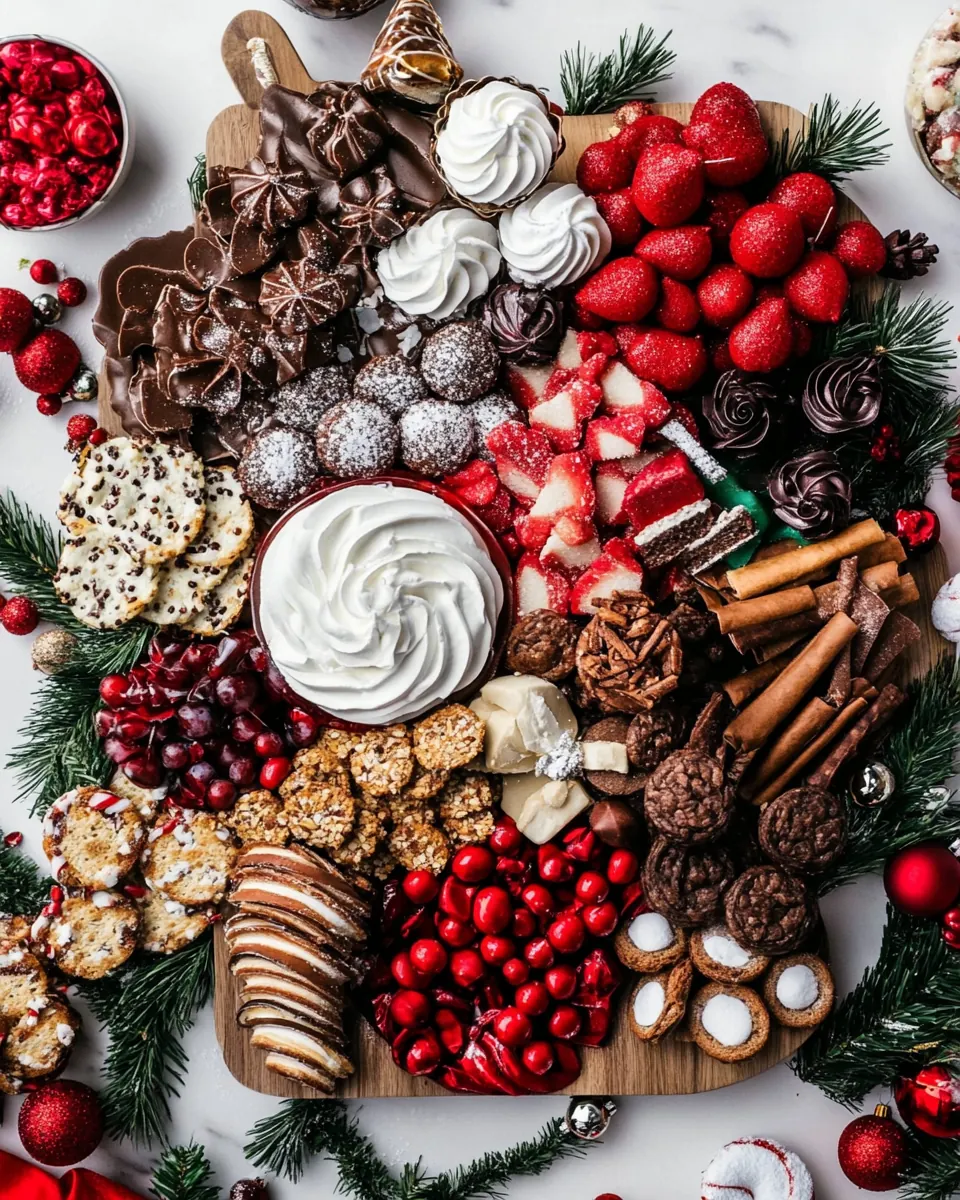
For a dessert board like this I focus on contrast and convenience. The philosophy is simple: combine fresh fruit, cookies, chocolates, and a few homemade touches to create an inviting spread. Key players like pomegranates and strawberries bring brightness and acidity, while the assortment of cookies and chocolates supplies crunch and richness. A bowl of warm homemade chocolate sauce offers a luscious element for dipping.
- Pomegranates split into fourths: Adds bright, tart bursts of flavor and a festive jewel-like appearance when arranged in fourths; seeds provide pleasant textural contrast against softer sweets. Enhances visual color palette and balances richness from chocolates and baked goods. Works well scattered or clustered to create focal points on the board.
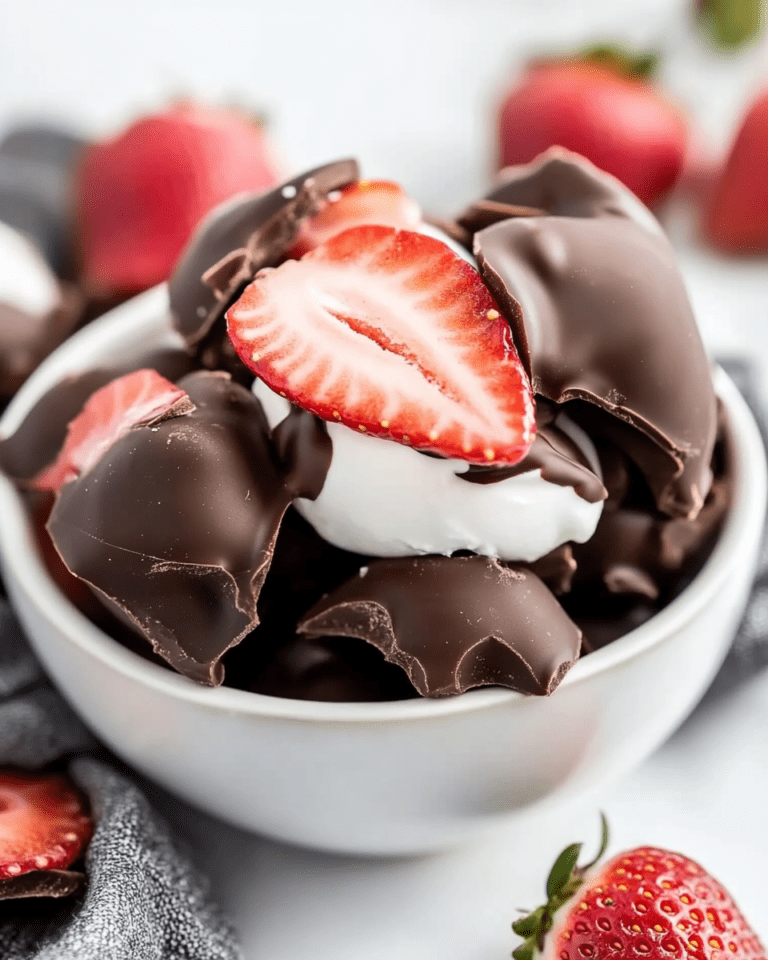
- Strawberries: Provides juicy, sweet notes and vibrant red color that complement richer dessert items; can be left whole or hulled for easier eating. Offers a fresh contrast to dense cookies and chocolates, adding natural acidity and color variety. Ideal for filling gaps and bringing seasonal freshness to the layout.
- Orange cranberry scones: Contributes tender, slightly crumbly texture with citrusy cranberry pockets for a sweet-tart element; scones introduce a bakery-style component to the board. Pairs nicely with spreads, clotted cream, or alongside chocolates to create diverse bite options. Slices can be fanned or stacked for visual interest.
- Molasses cookies: Provides deep, spiced sweetness and chewy texture that evokes classic holiday flavors; molasses brings warmth to the assortment. Complements milder cookies and balances bright fruits, adding rustic variety. Works well grouped together for a cohesive spiced-cookie section.
- Large dark chocolate candy cane pretzels: Offers crunchy, chocolate-coated saltiness with a whimsical candy–cane twist that amplifies holiday charm; sizable pieces serve as statement items. Balances sweet elements with salty crunch and visually signals seasonal treats. Can be placed upright or layered to create height.
- Waffle cookies: Adds light, crisp texture with subtle vanilla or caramel notes and elegant waffle patterning; wafer cookies bring delicate crunch. Complements heavier chocolates and dense brownies by providing an airy bite. Useful for scooping sauces or pairing with spreads.
- Biscotti cookies: Provides firm, twice-baked crunch and rich coffee or almond flavors that add European patisserie flair; biscotti are sturdy and biteable. Creates contrast with softer sweets and can be paired with sauces or chocolate for dipping. Excellent for adding structure and sophistication to the spread.
- Baton wafer cookies: Delivers thin, crispy rolled layers with a subtle sweet cream filling and decorative appearance; baton wafers add a refined texture. Enhances variety among cookies and pairs well with chocolate or creams. Helpful for creating linear visual elements on the board.
- Chocolate covered peppermint cookies: Brings minty, chocolate-coated crunch combining holiday peppermint notes with sweet biscuit centers; these cookies brighten heavier items. Offers refreshing palate cleanses between rich bites and complements chocolate pairings. Ideal for grouping with other peppermint-themed treats.
- Christmas tree cookies: Provides festive shapes and buttery cookie base decorated with colorful icing to reinforce holiday visuals; tree-shaped cookies create a thematic centerpiece. Adds nostalgic, decorative appeal and mild sweetness that balances richer components. Useful for layering and creating silhouette arrangements.
- Mini present brownies: Contributes dense, fudgy brownie bites wrapped or decorated as mini presents for playful presentation; adds substantial chocolate richness. Serves as indulgent focal points and pairs well with fruit or cream to vary textures. Perfect for creating gift-like clusters on the board.
- Gingerbread men: Delivers spiced, molasses-sweet character with soft chew and classic holiday form; gingerbread men add homemade charm. Adds aromatic warmth and pairs well with sweet creams, chocolate, or citrus. Useful for vertical placement or hanging off edges for whimsy.
- Mint chocolate squares: Offers cool mint and rich cocoa in concentrated square servings that provide upscale chocolatey bites; mint chocolate squares add both flavor contrast and visual green accents. Cuts richness of other sweets while reinforcing holiday flavor profile. Works well interspersed to refresh the palate.
- White chocolate peppermint kisses: Provides creamy white chocolate with peppermint flavor in kiss-shaped pieces that add festive color and minty brightness; texture is smooth and melt-in-mouth. Complements darker chocolates and deep baked items with a sweet, cooling finish. Useful for sprinkling around clusters for small pops of flavor.
- Wrapped chocolate balls: Adds individually wrapped, shiny-surfaced chocolates that create instant festive sparkle and easy portioning; wrapped balls offer convenient grab-and-go bites. Contributes visual texture and variety in shape, suitable for filling gaps or building small piles. Wrappings can tie into color scheme and decor.
- Chocolate orange: Contributes orange-infused chocolate segments that combine citrus brightness with creamy chocolate; chocolate orange provides zesty lift among richer sweets. Adds aromatic citrus notes and a slightly lighter chocolate option to the board. Works well sliced or separated into individual segments for serving.
- Mini peppermint meringue: Provides tiny, crunchy, mint-flavored meringue bites that offer airy sweetness and delicate texture; they add a light, crisp counterpoint to dense items. Creates visual interest with white and red flecking and serves as a refreshing palate interlude. Best used sparingly to maintain textural balance.
- White chocolate peppermint bark: Delivers slabs of white chocolate studded with crushed peppermint for creamy, minty shards that are visually striking and easy to break apart. Adds sweet, cooling flavor and contrasting color to darker confections. Ideal for scattering pieces to create festive accents across the board.
- Red chocolate covered cherries: Provides glossy red, chocolate-coated cherries that add jewel-like color and a chewy, fruit-centered bite; their bright hue enhances visual appeal. Balances pure chocolate richness with fruity acidity and chewy texture. Useful for accenting clusters and creating color contrast zones.
- Wrapped Caramels: Adds individually wrapped soft caramels that bring buttery, chewy sweetness and a rich mouthfeel; wrapping maintains freshness and easy handling. Complements chocolate and fruit elements by contributing deeper, milky sugar notes. Great for filling spaces and offering a variety of chewiness.
- Chocolate nut clusters: Contributes clusters of nuts and chocolate that offer crunchy, irregular shapes with nutty depth and sweet coating; these add hearty texture and savory balance. Provides bite-sized contrast to smoother treats and pairs well with fruit and softer cookies. Useful for creating rustic piles or accenting platters.
- Homemade chocolate sauce: Provides warm, drizzleable chocolate sauce for dipping fruits, cookies, and baked goods, enhancing decadence across the board. Allows guests to customize bites and ties together disparate flavors with a unifying chocolate note. Can be presented in a small bowl for communal use.
The Method for Christmas Dessert Charcuterie Board
Arranging a dessert charcuterie board is a relaxed, creative process that benefits from a little planning. I like to gather all the components first, then place the largest items and bowls before filling in with smaller pieces. The following steps mirror how I build the board, with sensory cues and troubleshooting guidance to help you achieve a stunning presentation.
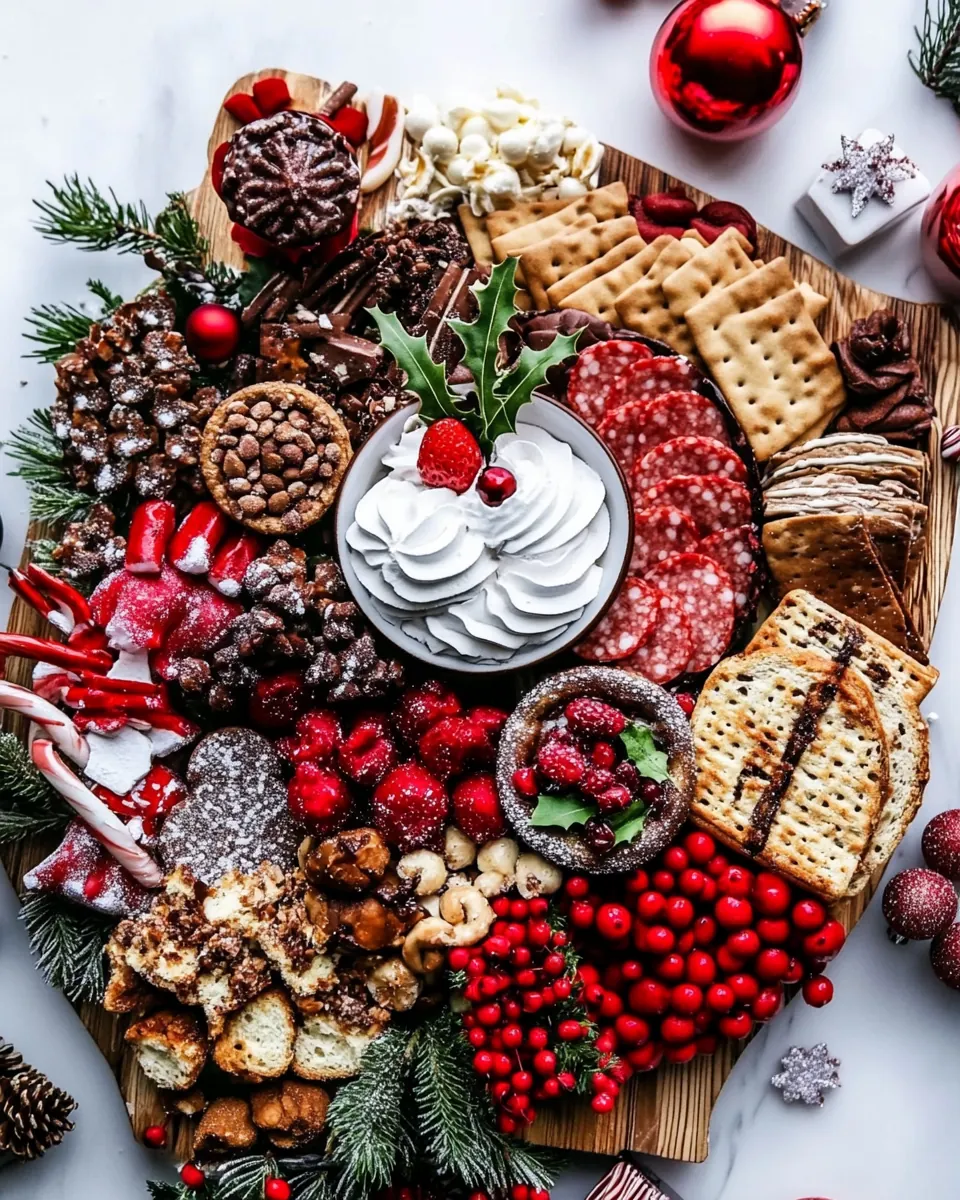
- On a large platter or cutting board, lay down the largest items first. I started with setting a bowl down for the chocolate syrup, then pomegranate, orange cranberry scones, molasses cookies, waffle cookies, Christmas tree cookies, brownie presents, and the chocolate orange.: The first things I notice are the shapes and colors as I set down the big pieces, like bowls, pomegranates split into fourths , and orange cranberry scones . You should hear a soft thud as heavier items find their place, and visually the board starts to anchor. This matters because the large items serve as visual anchors and help balance the composition, preventing smaller pieces from getting lost. A common mistake is crowding too many big pieces together which creates lopsided weight, so step back to check balance as you place each item.
- Make a couple of clusters of the items spaced across the board. Then fill in the open space with the next largest items. I added chocolate-covered pretzels, strawberries, white chocolate peppermint bark, nut clusters, and mint chocolate squares.: As you position these anchors, pay attention to textures — the glossy bowl contrasts with matte cookies and fruit. Smell the citrus from the scones and molasses spice as you work, which gives you immediate feedback that you are assembling seasonal flavors. The reason for this sequencing is it creates pockets of interest across the board for the eye to travel. Avoid placing wet fruit directly next to delicate cookies, because moisture can soften them.
- Use the rest of the items to fill in the empty spaces until the board is completely covered. Pour the chocolate sauce into the bowl for dipping the fruit. Serve in 1-2 hours.: When I form clusters, I aim for groups of three to five items so each cluster feels abundant without overwhelming. The sound is subtle, a light shuffle as you nestle items together, while visually clusters create rhythm. This technique matters because clusters create variety and make the board more inviting to explore. Common trouble comes from making clusters too uniform, which looks staged, so vary heights and sizes within each cluster.
- Then fill in the open space with the next largest items: Filling gaps with medium sized cookies and treats evens the visual weight and prevents empty spots, and you will notice the board becoming fuller and more textured. This step is important to create continuity between anchors and smaller bits. One mistake to avoid is forcing items into tiny gaps where they may break or crush, so select pieces that naturally fit the space.
- I added chocolate covered pretzels, strawberries, white chocolate peppermint bark, nut clusters, and mint chocolate squares: Adding these mid sized elements introduces contrast in color and texture, and the mint and peppermint notes give a cool counterpoint to richer chocolates. Touch the pretzels to feel their crispness and lift a strawberry to check firmness, because freshness affects the final experience. The why here is balance, both in flavor and form. Avoid placing sticky candies near powdered meringues which can make them soggy.
- Use the rest of the items to fill in the empty spaces until the board is completely covered: Tucking in the smaller pieces like white chocolate peppermint kisses and wrapped chocolates is where the board comes alive; the visual chatter of small shiny bits makes it irresistible. Listen for the faint clinks as you nestle metallic wrapped items, and look for harmony in color and texture distribution. This matters because even spacing prevents one corner from becoming too heavy. A common error is overfilling the board to the point pieces spill off, so leave a small border for handling.
- Pour the chocolate sauce into the bowl for dipping the fruit: Warm homemade chocolate sauce glistens as it pours, releasing a rich chocolate aroma that signals indulgence and invites dipping. The reason to serve sauce in a bowl is practical, keeping it contained and warm for a while. Monitor temperature and stir if it thickens; reheating gently prevents scorching. Avoid boiling the sauce which can separate the chocolate, and use a thermometer if you need precision.
- Serve in 1 to 2 hours: Serving within this window ensures fresh fruit still has good texture and cookies remain crisp; the board will look and taste its best when presented soon after assembly. During that time you can top off any items that settle and refresh the sauce if it cools. The sensory cue is the maintained crispness and vibrant color across elements. Do not leave the board out for a prolonged period which could lead to softness or melting, especially for chocolate candies.
Recipe Tips about Christmas Dessert Charcuterie Board
These tips will help you assemble a picture perfect board, keep components fresh, and make setup speedy so you can enjoy the party. I include ideas for storage, arrangement, and simple substitutions that preserve the board’s balance. Read through and pick a few approaches that fit your style and the time you have.
- Assemble close to serving time — Arrange most of the board within 30 to 60 minutes of serving to maintain the best texture for fruits and cookies, and to prevent chocolates from softening under warm lights.
- Use small bowls for sauces — Bowls contain warm homemade chocolate sauce and any sticky items, help with height variation, and keep the board tidy while guests dip and return items.
- Create color distribution — Scatter bright items like pomegranates and red chocolate covered cherries across the board so color is balanced and draws the eye around the platter.
- Protect fragile pieces — Place delicate items such as mini peppermint meringue in quieter corners or on raised bowls so they do not get crushed during refills.
- Label allergen items — If you have nuts in clusters or other allergens, put a small sign or note so guests can avoid them easily and enjoy the rest of the spread safely.
Perfect Pairings for Christmas Dessert Charcuterie Board
This board is ideal for holiday gatherings and can be adapted for different occasions by tweaking a couple of items. Below I describe pairing ideas, serving styles, storage guidance, and occasions that fit this dessert centerpiece.
- Casual holiday gatherings — Place the board on a central coffee table for a relaxed party atmosphere where guests can graze between conversations, offering a communal, interactive dessert option.
- After dinner dessert table — Use the board as part of a dessert spread following a sit down meal, combining it with coffee and tea for a leisurely finish to the evening, and replenish with fresh items as needed.
- Family friendly events — This board works well for family celebrations where kids and adults both enjoy choosing favorites, so include easy to unwrap options like wrapped chocolate balls and small brownies.
- Office holiday parties — Transport components separately then assemble on site for a fresh look, and provide napkins and small plates so guests can carry bites while they mingle.
- Storage tips — Keep perishable items like strawberries and red chocolate covered cherries refrigerated until just before serving, and store baked goods covered to prevent drying out; rewarm the homemade chocolate sauce gently if needed.
- Seasonal pairings — Lean into seasonal flavors by emphasizing spices and citrus notes, for example serve with warm spiced scones to bring comforting holiday aromas to the table.
FAQ
Conclusion
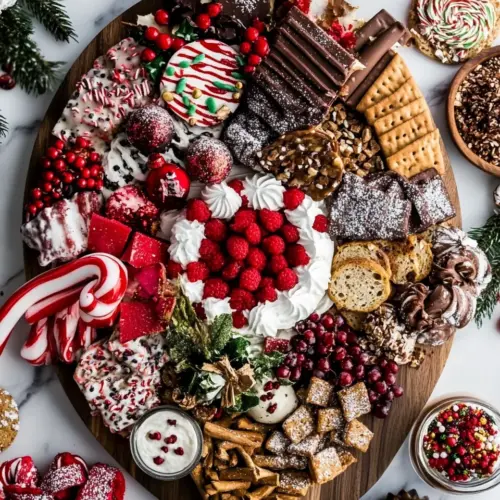
This Christmas Dessert Charcuterie Board stands out because it combines bold holiday flavors, varied textures, and a playful presentation that invites guests to sample and pair as they please. Give it a try at your next gathering, and enjoy the relaxed hosting that comes with a mostly no cook, high impact dessert centerpiece. I hope it brings the kind of shared moments and simple joy that make holiday celebrations memorable.
Christmas Dessert Charcuterie Board
Equipment
- Large platter or cutting board
- Small bowl for sauce
Ingredients
- Pomegranates split into fourths Adds bright, tart bursts of flavor and a festive jewel-like appearance when arranged in fourths; seeds provide pleasant textural contrast against softer sweets. Enhances visual color palette and balances richness from chocolates and baked goods. Works well scattered or clustered to create focal points on the board.
- Strawberries Provides juicy, sweet notes and vibrant red color that complement richer dessert items; can be left whole or hulled for easier eating. Offers a fresh contrast to dense cookies and chocolates, adding natural acidity and color variety. Ideal for filling gaps and bringing seasonal freshness to the layout.
- Orange cranberry scones Contributes tender, slightly crumbly texture with citrusy cranberry pockets for a sweet-tart element; scones introduce a bakery-style component to the board. Pairs nicely with spreads, clotted cream, or alongside chocolates to create diverse bite options. Slices can be fanned or stacked for visual interest.
- Molasses cookies Provides deep, spiced sweetness and chewy texture that evokes classic holiday flavors; molasses brings warmth to the assortment. Complements milder cookies and balances bright fruits, adding rustic variety. Works well grouped together for a cohesive spiced-cookie section.
- Large dark chocolate candy cane pretzels Offers crunchy, chocolate-coated saltiness with a whimsical candy-cane twist that amplifies holiday charm; sizable pieces serve as statement items. Balances sweet elements with salty crunch and visually signals seasonal treats. Can be placed upright or layered to create height.
- Waffle cookies Adds light, crisp texture with subtle vanilla or caramel notes and elegant waffle patterning; wafer cookies bring delicate crunch. Complements heavier chocolates and dense brownies by providing an airy bite. Useful for scooping sauces or pairing with spreads.
- Biscotti cookies Provides firm, twice-baked crunch and rich coffee or almond flavors that add European patisserie flair; biscotti are sturdy and biteable. Creates contrast with softer sweets and can be paired with sauces or chocolate for dipping. Excellent for adding structure and sophistication to the spread.
- Baton wafer cookies Delivers thin, crispy rolled layers with a subtle sweet cream filling and decorative appearance; baton wafers add a refined texture. Enhances variety among cookies and pairs well with chocolate or creams. Helpful for creating linear visual elements on the board.
- Chocolate covered peppermint cookies Brings minty, chocolate-coated crunch combining holiday peppermint notes with sweet biscuit centers; these cookies brighten heavier items. Offers refreshing palate cleanses between rich bites and complements chocolate pairings. Ideal for grouping with other peppermint-themed treats.
- Christmas tree cookies Provides festive shapes and buttery cookie base decorated with colorful icing to reinforce holiday visuals; tree-shaped cookies create a thematic centerpiece. Adds nostalgic, decorative appeal and mild sweetness that balances richer components. Useful for layering and creating silhouette arrangements.
- Mini present brownies Contributes dense, fudgy brownie bites wrapped or decorated as mini presents for playful presentation; adds substantial chocolate richness. Serves as indulgent focal points and pairs well with fruit or cream to vary textures. Perfect for creating gift-like clusters on the board.
- Gingerbread men Delivers spiced, molasses-sweet character with soft chew and classic holiday form; gingerbread men add homemade charm. Adds aromatic warmth and pairs well with sweet creams, chocolate, or citrus. Useful for vertical placement or hanging off edges for whimsy.
- Mint chocolate squares Offers cool mint and rich cocoa in concentrated square servings that provide upscale chocolatey bites; mint chocolate squares add both flavor contrast and visual green accents. Cuts richness of other sweets while reinforcing holiday flavor profile. Works well interspersed to refresh the palate.
- White chocolate peppermint kisses Provides creamy white chocolate with peppermint flavor in kiss-shaped pieces that add festive color and minty brightness; texture is smooth and melt-in-mouth. Complements darker chocolates and deep baked items with a sweet, cooling finish. Useful for sprinkling around clusters for small pops of flavor.
- Wrapped chocolate balls Adds individually wrapped, shiny-surfaced chocolates that create instant festive sparkle and easy portioning; wrapped balls offer convenient grab-and-go bites. Contributes visual texture and variety in shape, suitable for filling gaps or building small piles. Wrappings can tie into color scheme and decor.
- Chocolate orange Contributes orange-infused chocolate segments that combine citrus brightness with creamy chocolate; chocolate orange provides zesty lift among richer sweets. Adds aromatic citrus notes and a slightly lighter chocolate option to the board. Works well sliced or separated into individual segments for serving.
- Mini peppermint meringue Provides tiny, crunchy, mint-flavored meringue bites that offer airy sweetness and delicate texture; they add a light, crisp counterpoint to dense items. Creates visual interest with white and red flecking and serves as a refreshing palate interlude. Best used sparingly to maintain textural balance.
- White chocolate peppermint bark Delivers slabs of white chocolate studded with crushed peppermint for creamy, minty shards that are visually striking and easy to break apart. Adds sweet, cooling flavor and contrasting color to darker confections. Ideal for scattering pieces to create festive accents across the board.
- Red chocolate covered cherries Provides glossy red, chocolate-coated cherries that add jewel-like color and a chewy, fruit-centered bite; their bright hue enhances visual appeal. Balances pure chocolate richness with fruity acidity and chewy texture. Useful for accenting clusters and creating color contrast zones.
- Wrapped Caramels Adds individually wrapped soft caramels that bring buttery, chewy sweetness and a rich mouthfeel; wrapping maintains freshness and easy handling. Complements chocolate and fruit elements by contributing deeper, milky sugar notes. Great for filling spaces and offering a variety of chewiness.
- Chocolate nut clusters Contributes clusters of nuts and chocolate that offer crunchy, irregular shapes with nutty depth and sweet coating; these add hearty texture and savory balance. Provides bite-sized contrast to smoother treats and pairs well with fruit and softer cookies. Useful for creating rustic piles or accenting platters.
- Homemade chocolate sauce Provides warm, drizzleable chocolate sauce for dipping fruits, cookies, and baked goods, enhancing decadence across the board. Allows guests to customize bites and ties together disparate flavors with a unifying chocolate note. Can be presented in a small bowl for communal use.
Instructions
- On a large platter or cutting board, lay down the largest items first. I started with setting a bowl down for the chocolate syrup, then pomegranate, orange cranberry scones, molasses cookies, waffle cookies, Christmas tree cookies, brownie presents, and the chocolate orange.: The first things I notice are the shapes and colors as I set down the big pieces, like bowls, pomegranates split into fourths , and orange cranberry scones . You should hear a soft thud as heavier items find their place, and visually the board starts to anchor. This matters because the large items serve as visual anchors and help balance the composition, preventing smaller pieces from getting lost. A common mistake is crowding too many big pieces together which creates lopsided weight, so step back to check balance as you place each item.
- Make a couple of clusters of the items spaced across the board. Then fill in the open space with the next largest items. I added chocolate-covered pretzels, strawberries, white chocolate peppermint bark, nut clusters, and mint chocolate squares.: As you position these anchors, pay attention to textures — the glossy bowl contrasts with matte cookies and fruit. Smell the citrus from the scones and molasses spice as you work, which gives you immediate feedback that you are assembling seasonal flavors. The reason for this sequencing is it creates pockets of interest across the board for the eye to travel. Avoid placing wet fruit directly next to delicate cookies, because moisture can soften them.
- Use the rest of the items to fill in the empty spaces until the board is completely covered. Pour the chocolate sauce into the bowl for dipping the fruit. Serve in 1-2 hours.: When I form clusters, I aim for groups of three to five items so each cluster feels abundant without overwhelming. The sound is subtle, a light shuffle as you nestle items together, while visually clusters create rhythm. This technique matters because clusters create variety and make the board more inviting to explore. Common trouble comes from making clusters too uniform, which looks staged, so vary heights and sizes within each cluster.
- Then fill in the open space with the next largest items: Filling gaps with medium sized cookies and treats evens the visual weight and prevents empty spots, and you will notice the board becoming fuller and more textured. This step is important to create continuity between anchors and smaller bits. One mistake to avoid is forcing items into tiny gaps where they may break or crush, so select pieces that naturally fit the space.
- I added chocolate covered pretzels, strawberries, white chocolate peppermint bark, nut clusters, and mint chocolate squares: Adding these mid sized elements introduces contrast in color and texture, and the mint and peppermint notes give a cool counterpoint to richer chocolates. Touch the pretzels to feel their crispness and lift a strawberry to check firmness, because freshness affects the final experience. The why here is balance, both in flavor and form. Avoid placing sticky candies near powdered meringues which can make them soggy.
- Use the rest of the items to fill in the empty spaces until the board is completely covered: Tucking in the smaller pieces like white chocolate peppermint kisses and wrapped chocolates is where the board comes alive; the visual chatter of small shiny bits makes it irresistible. Listen for the faint clinks as you nestle metallic wrapped items, and look for harmony in color and texture distribution. This matters because even spacing prevents one corner from becoming too heavy. A common error is overfilling the board to the point pieces spill off, so leave a small border for handling.
- Pour the chocolate sauce into the bowl for dipping the fruit: Warm homemade chocolate sauce glistens as it pours, releasing a rich chocolate aroma that signals indulgence and invites dipping. The reason to serve sauce in a bowl is practical, keeping it contained and warm for a while. Monitor temperature and stir if it thickens; reheating gently prevents scorching. Avoid boiling the sauce which can separate the chocolate, and use a thermometer if you need precision.
- Serve in 1 to 2 hours: Serving within this window ensures fresh fruit still has good texture and cookies remain crisp; the board will look and taste its best when presented soon after assembly. During that time you can top off any items that settle and refresh the sauce if it cools. The sensory cue is the maintained crispness and vibrant color across elements. Do not leave the board out for a prolonged period which could lead to softness or melting, especially for chocolate candies.
Notes
- Assemble close to serving time — Arrange most of the board within 30 to 60 minutes of serving to maintain the best texture for fruits and cookies, and to prevent chocolates from softening under warm lights.
- Use small bowls for sauces — Bowls contain warm homemade chocolate sauce and any sticky items, help with height variation, and keep the board tidy while guests dip and return items.
- Create color distribution — Scatter bright items like pomegranates and red chocolate covered cherries across the board so color is balanced and draws the eye around the platter.
- Protect fragile pieces — Place delicate items such as mini peppermint meringue in quieter corners or on raised bowls so they do not get crushed during refills.
- Label allergen items — If you have nuts in clusters or other allergens, put a small sign or note so guests can avoid them easily and enjoy the rest of the spread safely.