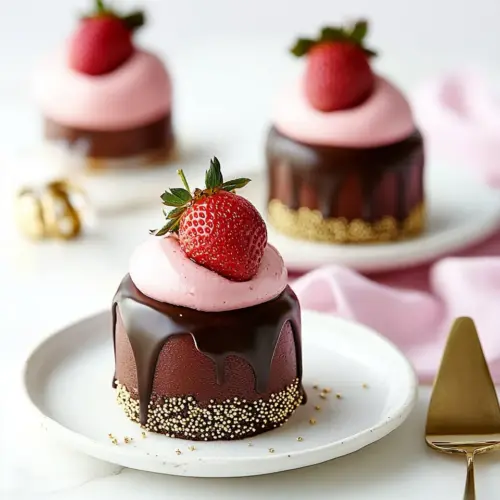
Chocolate Covered Strawberry Mousse Cakes
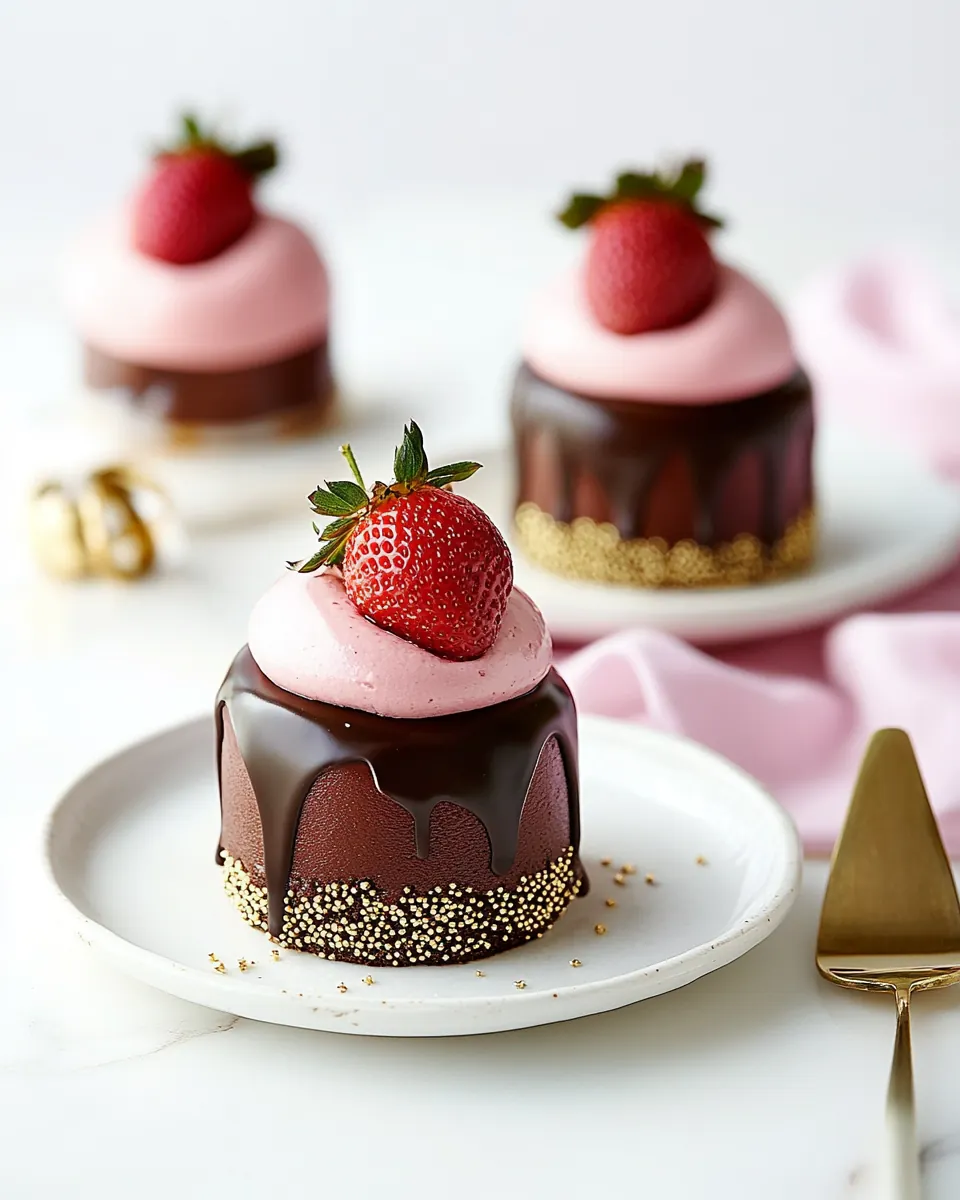
Chocolate Covered Strawberry Mousse Cakes are one of those desserts I return to when I want something that feels both elegant and a little playful. The first time I made them I was hosting a small spring brunch, and I recall standing in the kitchen with strawberry juice on my fingers and chocolate on my cheek, feeling like the whole thing was somehow edible confetti. I remember the hush that fell over the table when my guests took their first bites, the soft mousse giving way to a tender brownie center, and the glossy glaze catching the light as if it were jewelry.
Over the years I have tweaked the recipe in quiet ways that make a big difference, like chilling the mousse just long enough so it holds its shape but still feels pillowy on the tongue, or letting the glaze cool slightly so it drapes rather than slides off. I love how the textures play together, and how a few simple, high quality components can feel luxurious without requiring a pastry degree. When I bring these Chocolate Covered Strawberry Mousse Cakes to a gathering people ask if I bought them, which is my favorite compliment.
Recipe Snapshot
1 hr 20 mins
60 mins
20 mins
Hard
350 kcal
American
Gluten-Free, Low FODMAP
Desserts
9 by 5 inch loaf pan, Parchment paper, Medium saucepan, Whisk, Spatula, Wire rack, Blender or food processor, Stand mixer or hand mixer, Silicone molds, Offset spatula, Cookie sheet, Heat proof bowl
Why Try This Chocolate Covered Strawberry Mousse Cakes
Textural Contrast
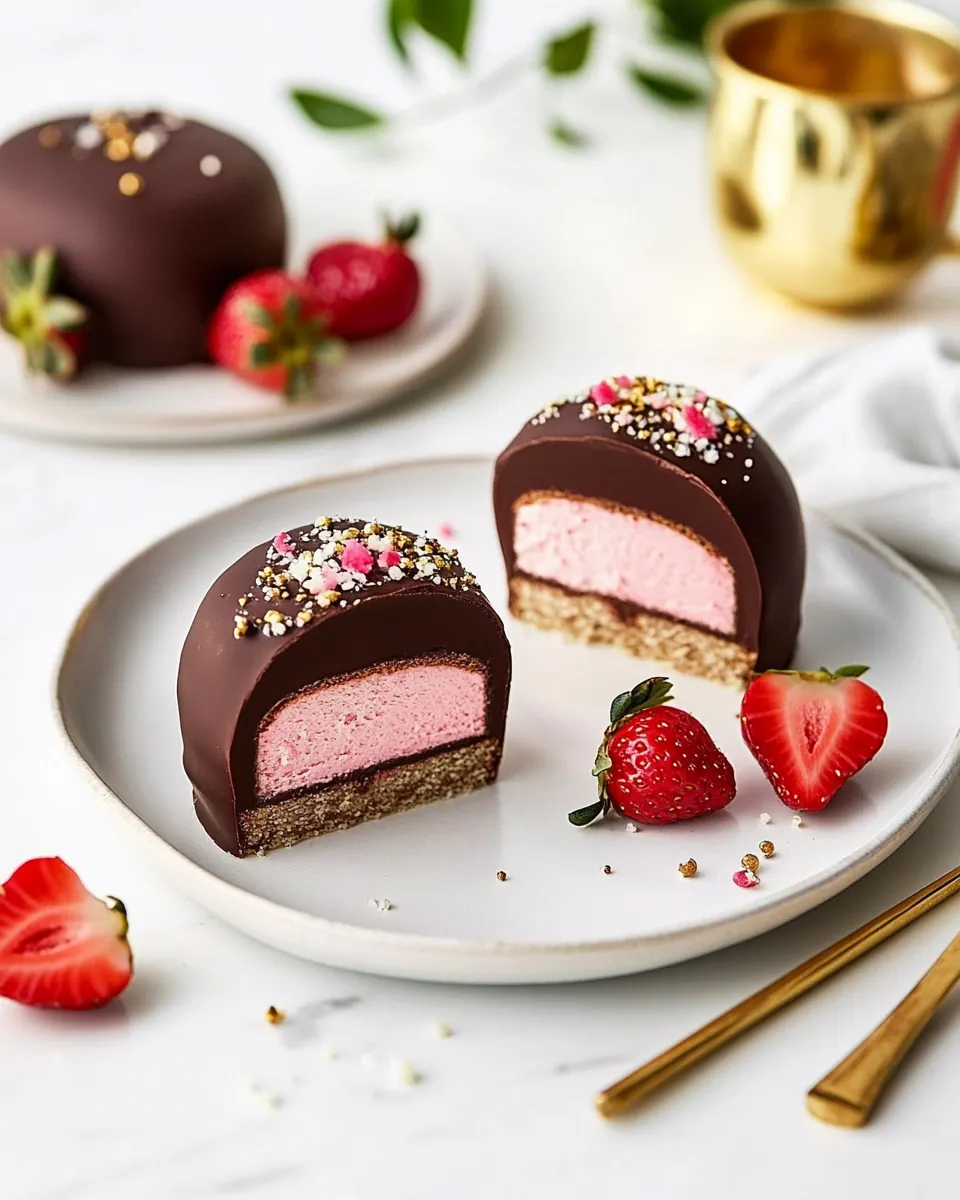
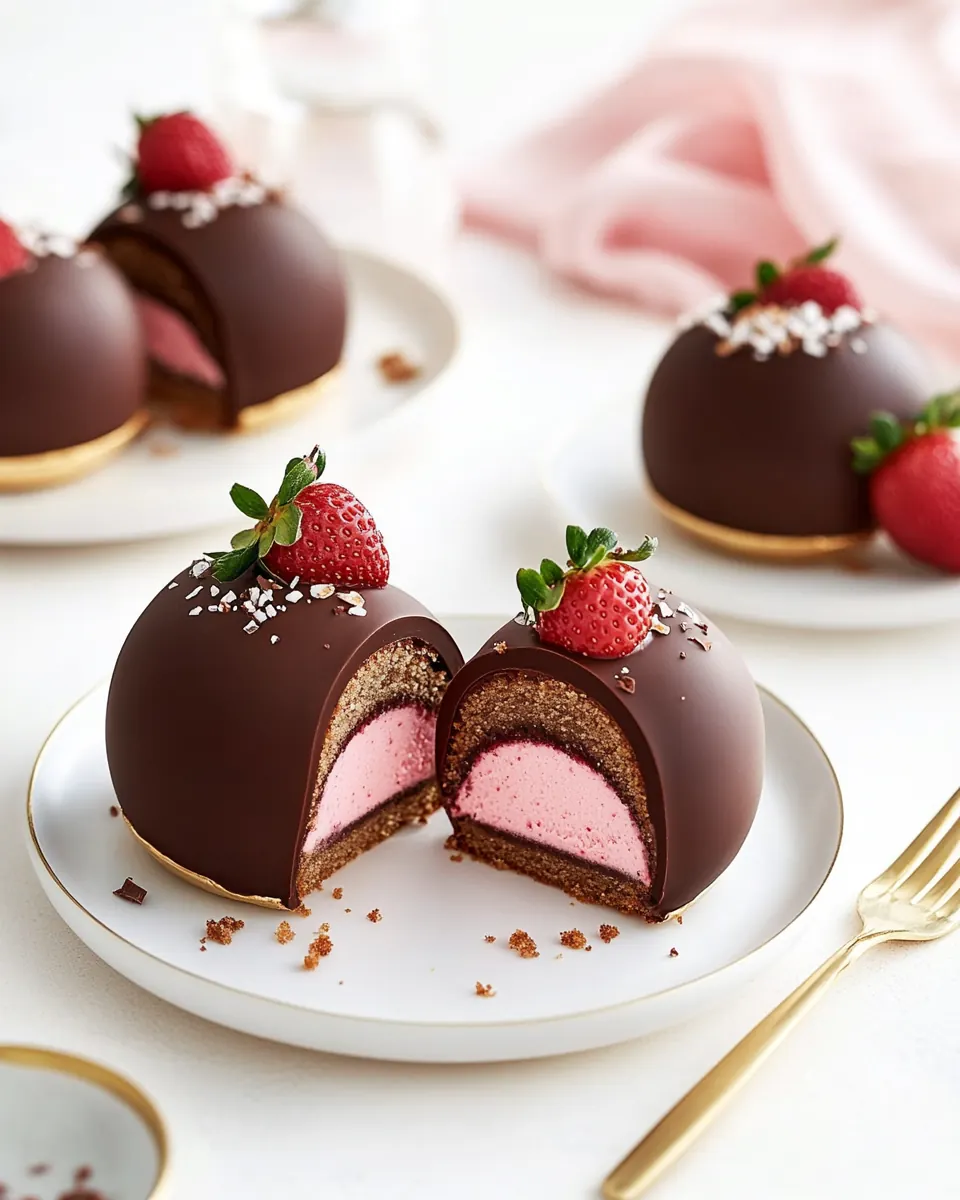
I adore how Chocolate Covered Strawberry Mousse Cakes combine a dense, fudgy brownie base with an ethereal strawberry mousse and a silky chocolate glaze. The crunch from the cooled glaze edge and the soft mousse center give each bite a layered experience, and I find that contrast keeps everyone coming back for one more forkful. It is the kind of dessert that reads complex, while remaining approachable to make.
Fresh, Bright Flavor
Using real strawberries and a touch of lemon juice brightens the custard so the chocolate does not overwhelm. I prefer this balance because the fruitiness lifts the richer chocolate notes and keeps the palate refreshed. If I want to lean into the season, I double the purée to deepen the strawberry presence and the result sings of late spring markets.
Make Ahead Friendly
One of the best reasons I make these is that many components can be done in advance. The brownie layer can be baked a day early, the mousse frozen in molds overnight, and the glaze prepared ahead and gently reheated. This makes entertaining calm and manageable, so you can focus on guests rather than last minute assembly.
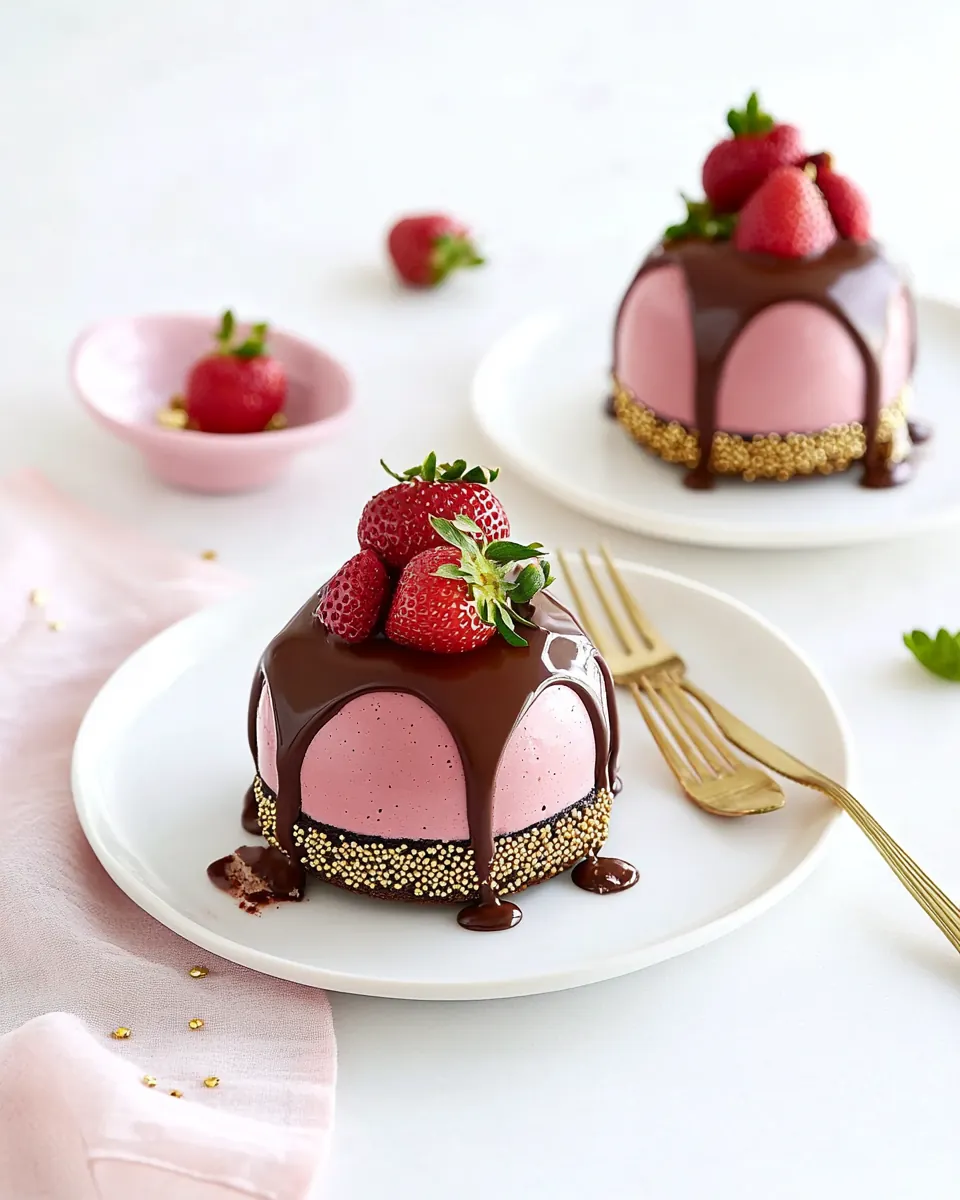
Showstopper Presentation
The glossy chocolate glaze takes these mini cakes from homemade to bakery level. I love elevating them on small cardboard rounds and arranging them on a platter with a few fresh strawberries for color. The mirror finish always draws oohs and ahhs, and it is a small technique that yields big visual payoff.
Flexible and Forgiving
While the recipe has multiple parts, each step is forgiving if you pay attention to temperature and texture. I often remind myself that patience with cooling and gentle folding will reward me with a mousse that is light and stable. Even if one element is slightly off, the glaze and assembly mask small imperfections, and the dessert still delights.
What You Need for Chocolate Covered Strawberry Mousse Cakes
I think of the ingredient list as a small orchestra where each player has a clear role. The chocolate and butter form the rich brownie base, the eggs and flour give structure, while the custard stage uses tempered milk and egg yolk to build flavor and body. The strawberries and lemon juice bring brightness, and cold heavy cream aerates the mousse for that melt in your mouth texture. The glaze, made with extra chocolate, cream, and a touch of corn syrup, gives a shiny, professional finish.
- 3 tablespoons unsalted butter: Melted and rich, provides fat that helps create tender crumb and glossy finish while carrying flavor through the cake layers and chocolate coating.
- 2 oz 50-60% semisweet chocolate, chopped: Chopped and melted, supplies deep cocoa flavor and structure to the cake, contributing to the chocolate intensity and smooth texture when combined with butter.
- 1/2 cup granulated sugar: Granulated and sweet, dissolves into the batter to balance bitterness from cocoa and chocolate while helping with browning and moistness.
- 1 large egg: Beaten and aerated, adds lift and protein structure to the cake, helping set the crumb and enrich flavor when properly incorporated.
- 1/2 teaspoon vanilla extract: Aromatic and sweet, enhances overall flavor profile by adding a warm, familiar note that rounds out chocolate and fruit components.
- 1/4 cup all-purpose flour: Powdered and structural, provides the backbone of the cake by supplying starches that form the crumb and absorb liquids for stability.
- 2 tablespoons dark or Dutch process cocoa powder, sifted: Cocoa and bitter, intensifies chocolate flavor while contributing color and a dry component that balances the batter’s moisture for richer taste.
- 1/4 teaspoon baking powder: Leavening and reactive, creates small gas bubbles in the batter to lighten texture and ensure a delicate, tender cake rise.
- 1/8 teaspoon kosher salt: Salty and mineral, balances sweetness and enhances other flavors while strengthening gluten structure slightly for better crumb formation.
- 1 1/4 teaspoon unflavored powdered gelatin: Bloomed and setting, acts as a gelling agent to stabilize mousses and fillings so the layers hold shape without collapsing.
- 2 tablespoons cold water: Hydrating and cool, provides the medium to bloom gelatin, allowing it to dissolve smoothly and set reliably when warmed and mixed in.
- 1/4 cup whole milk: Warm and milky, contributes creaminess and moisture to custard components while helping dissolve sugar and gelatin for a silky texture.
- 1 large egg yolk: Thick and emulsifying, enriches custards or creams with fat and protein, aiding texture and adding richness to mousses.
- 1/3 cup granulated sugar: Sweet and thick, helps stabilize custards and sweeten fillings while assisting in achieving the desired texture and consistency.
- 1 cup fresh strawberries, washed and hulled: Fruity and acidic, pureed or chopped to add fresh strawberry flavor, color, and natural sweetness that complements chocolate.
- 1 tablespoon freshly squeezed lemon juice: Tangy and bright, adds acidity to balance richness, lift fruit flavors, and preserve the fresh strawberry brightness in fillings.
- 2/3 cup heavy cream, cold: Cold and airy, when whipped provides volume and lightness to mousses, contributing a smooth, creamy mouthfeel to the dessert.
- 1 cup heavy cream: Whipping and rich, offers additional fat and stability when whipped to firm peaks, creating a sturdy yet light mousse layer.
- 1 tablespoon corn syrup: Syrupy and glossy, improves shine and mouthfeel of glazes or chocolate coatings while preventing crystallization for a smooth finish.
- 8 oz 50-70% dark chocolate, very finely chopped: Finely chopped and intense, supplies concentrated dark chocolate flavor for coating and ganache, melting smoothly for a glossy shell.
How to Prepare Chocolate Covered Strawberry Mousse Cakes
These cakes come together in stages, and I like to move through them methodically so each element gets the attention it deserves. Start with the brownie base, then make the custard and mousse, assemble into molds, freeze, and finish with the glaze. Pace yourself, and enjoy the rhythm of each part.
- Preheat oven to 350 degrees F. Lightly butter a 9-by-5-inch loaf pan and line with a 9-inch strip of parchment paper (the two short ends will be uncovered); lightly butter parchment.: The scent of warm butter in the oven sets a comforting tone and signals the start of the bake. As the oven approaches 350 degrees F you should feel a steady warmth and notice the metal rack slightly glowing as it stabilizes, which helps the pan heat evenly. I make sure the parchment overhang is long enough to act as handles so I can lift the cooled brownie out without touching the sides, this prevents breaking the set edges. A common mistake here is skipping the parchment or not buttering it, which makes it hard to remove the baked layer cleanly. Visually, the prepared pan should look glossy with a thin sheen of butter so the batter slides easily when poured.
- Melt butter in a medium saucepan. Remove from heat and add chopped chocolate, stirring until smooth (the residual heat from the pan should be plenty to melt the chocolate.): You will smell warm, nutty butter as it melts, then a deeper cocoa aroma as the chopped chocolate softens. Residual heat melts the chocolate gently, preserving that smooth, glossy texture without risk of scorching. Stir patiently in slow circles until the mixture is homogenous and shiny. If you notice lumps, let it rest off heat for a short moment and stir again rather than applying direct heat. A common error is overheating, which can cause the chocolate to seize and grain, so trust the residual warmth.
- Stir in sugar; mixture should be lukewarm, no longer hot to the touch. If it's still pretty warm, let it cool for a minute or two.: The sugar dissolves and the mixture cools to a temperature that will not scramble the eggs when they are added. The texture becomes glossy and slightly thickened, and the aroma mellows from intense heat to a comforting chocolate note. Touch the bowl to ensure it feels lukewarm, if it is hot the eggs will cook on contact and yield curdles. Patience here prevents a broken batter and ensures a silky finish.
- Whisk in eggs until batter is smooth and shiny.: When you whisk the eggs in, the batter takes on a satin sheen and a slightly lighter body. You may hear a faint soft whipping sound as air is incorporated; this is fine but avoid vigorous beating which would create bubbles that bake into a cakier crumb. A common mistake is rushing the whisking and ending with a lumpy mixture; whisk until seamless and glossy. The resulting batter should flow slowly off the whisk in ribbon like trails.
- Sift together flour, cocoa powder, baking powder and salt in a small bowl. Sprinkle over chocolate mixture and fold with a spatula until just incorporated.: You will notice a darker, velvety dusting when you sprinkle the sifted dry ingredients, and folding brings the batter from shiny to slightly denser as the dry elements hydrate. Use gentle turns to preserve the batter's sheen, folding until no streaks of flour remain. Overmixing will develop gluten and yield a tougher texture, so stop as soon as the batter looks uniform. A good visual cue is when the batter settles evenly and the surface becomes smooth.
- Pour batter into prepared pan and spread into an even layer. Bake for about 20 minutes or until top is set and a toothpick inserted near the middle comes out with moist crumbs (not gooey batter). Set pan on a wire rack and let cool completely. The brownie layer can be made a day ahead of time; once cool, cover pan tightly and refrigerate overnight until ready to use.: As the batter bakes you will start to smell warm cocoa and butter, and the top will matte slightly when set. The oven's ambient sound shifts to a steady low hum, and when you test with a toothpick you want moist crumbs clinging, not raw batter, which indicates the right fudgy texture. Cooling completely is essential so the layer firms and is easier to cut into neat squares. A common misstep is underbaking slightly which leaves the center too soft to handle, so aim for that moist crumb cue.
- Lift the cooled brownie out of the pan using the parchment overhang as handles. Cut off the edges, then cut into six 2-inch squares. The scraps and the sixth square make a lovely chef's snack.: When you lift the brownie by the parchment you should feel it come away cleanly, with the edges holding their shape. Trim for neat sides and cut gently with a sharp knife in a single steady motion to avoid crumbling. The aroma of compacted chocolate will be rich and inviting, and sampling a scrap is practically a kitchen ritual. Avoid using a serrated blade as it can tear the crumb rather than slice smoothly.
- Place water in a small dish; sprinkle gelatin over top and set aside to bloom for at least 5 minutes.: The gelatin will swell and turn from powder to a slightly glossy gel, an indicator it has fully absorbed the water. This step is quiet and low aroma, but crucial for stable mousse. If you skip blooming, the gelatin may not dissolve properly in the warm custard, leaving grainy bits. Let it rest undisturbed until plump and slightly translucent.
- Heat milk in a small saucepan set over low heat until it just starts to steam (try not to let it boil).: Look for tiny wisps of steam and a shimmer on the surface, a gentle visual cue that the milk is ready. The smell will be faintly milky and warm, not browned. Heating slowly preserves the milk's delicate proteins so it blends smoothly with the egg yolk when tempered. Boiling risks scalding and creating off flavors, so keep the heat low and constant.
- Mix together egg yolk and sugar in a bowl until it forms a thick paste. Slowly spoon some of the hot milk into the yolk mixture, whisking constantly until the paste thins out a bit. Drizzle in the remaining milk and whisk until smooth.: The paste will lighten in color and feel satiny under the whisk, and tempering with a spoonful of hot milk prevents the yolk from curdling. Whisking constantly creates a silky emulsion and the aroma becomes richer and custardy. If you rush or add hot liquid too quickly, you risk scrambled yolks and a lumpy custard, which is hard to fix at this stage.
- Return mixture to the saucepan and return to low heat and cook, stirring and scraping the bottom of the pan consistently, until the mixture thickens slightly to coat the back of a spoon (it should measure about 175 degrees F on an instant read thermometer.: You will notice the custard taking on a thicker coat like a curtain when dragged across the spoon, and a warm, custardy scent develops. Constant stirring prevents the yolk from sticking to the pan and curdling, while scraping ensures even heat distribution. Use an instant read thermometer for accuracy, and remove at about 175 degrees F to avoid overcooking and graininess. A common problem is cooking too quickly, which can cause a grainy rather than smooth texture.
- Remove from heat and whisk in gelatin until smooth. Transfer to a medium-large bowl and set aside.: As you whisk in the bloomed gelatin it dissolves and the custard becomes glossy and uniform, with a subtle elasticity building as it cools. Transfer to a bowl to speed cooling and to make room for the fruit purée, keeping the custard from continuing to thicken in the warm pan. If the gelatin does not dissolve fully, whisk gently over a warm water bath; avoid aggressive reheating which can affect the custard's texture.
- Meanwhile, purée strawberries and lemon juice in a blender or food processor until smooth. Transfer to a liquid measuring cup (you should have about 1/2 cup purée, if you have more than that save the excess for another use). Whisk strawberry purée into lukewarm custard mixture, then place bowl in refrigerator while you whip the cream.: The purée will smell bright and fruity, and when whisked into the lukewarm custard it tints the mixture a pale pink. Cooling briefly in the refrigerator helps the mixture reach a temperature suitable for folding with whipped cream without melting it. If your purée is too watery, strain briefly to maintain mousse body; too thick and you can thin slightly with a teaspoon of milk.
- In a clean bowl or the bowl of a stand mixer, beat heavy cream until it holds soft peaks. Add 1/3 of cream to the cooled strawberry mixture and fold to lighten, then add remaining cream and fold until fully incorporated and no white streaks or lumps remain.: You will see the cream become billowy and glossy as it approaches soft peaks, and its coldness provides lift to the warm custard. Folding in thirds prevents deflating the whipped cream, preserving air for a light mousse. Stop folding once streaks vanish to avoid overmixing which can collapse the mousse. A common mistake is rushing and whisking instead of folding, which breaks down the aeration.
- To assemble your cakes, spoon or pipe the mousse into silicone molds, about 2/3 of the way full. Gently press a brownie square into the top of each mousse-filled mold. Scrape with an offset spatula to make the top perfectly level with the top of the mold. Freeze at least 3 hours or overnight until completely firm.: When you press the brownie into the mousse you will feel a satisfying resistance followed by a soft give as it seats into place. Leveling the tops creates neat edges for glazing and a professional look. Freeze solid so the mousse firms completely; insufficient freezing risks deformation when glazing. Avoid filling molds to the brim, which can cause spillage during freezing and glazing.
- Before you make the glaze, remove cakes from molds and place on a frozen cookie sheet lined with parchment paper. Return to freezer until just before glazing.: Handling frozen cakes is cool to the touch and they should feel rock solid when you transfer them. Keeping them on a frozen surface maintains their temperature so the glaze sets on contact instead of melting the mousse. A pitfall is letting them sit at room temperature too long before glazing, which can cause the glaze to run off unevenly.
- Place chopped chocolate in a medium-sized, heat-proof bowl and set aside.: The finely chopped chocolate should look glossy and uniform in the bowl, ready to be transformed by hot cream. Having it prepped means you can pour the cream immediately to form a smooth emulsion. If chocolate is not finely chopped it may take longer to melt and you risk uneven texture.
- Heat cream and corn syrup in a small saucepan until it just starts to bubble (do not let it boil).: Small bubbles forming around the edge and a gentle aroma of warm cream indicate readiness. The corn syrup helps the glaze achieve a glossy sheen and pliable set. Avoid a rolling boil which can separate the emulsion; remove as soon as you see the first bubbles.
- Pour over chopped chocolate and let sit for 30 seconds, then gently whisk, starting in the center and moving in gentle concentric circles until an emulsion forms, then working your way out to the edges until the entire mixture is smooth and emulsified.: After pouring, the chocolate will begin to soften and the center will look glossy. Whisking in concentric circles helps the fats emulsify with the hot cream into a silky ganache like glaze. If it looks split, continue whisking gently and allow it to come together; aggressive reheating can change texture. The final glaze should be smooth, glossy, and pourable.
- Remove cakes from freezer and place on a cookie sheet, elevated off the sheet using small jars or cookie cutters (ideally something smaller in diameter than the cake itself so the glaze can drip off). You may also want to cut out small rounds of parchment to place under each cake to make them easier to transfer.: Elevating lets the glaze flow freely and creates a clean drip around the base. The frozen surface makes the glaze set quickly, producing a crisp sheen. Cut small parchment rounds to aid transferring to cardboard rounds without touching the glazed surface. A mistake is placing cakes flat on the sheet which traps excess glaze and ruins the finish.
- Pour glaze generously over cakes, taking care to ensure there are no bare spots left. Gently scrape the edges to remove any remaining drops, then carefully transfer cakes using a small offset spatula to cardboard cake rounds or small pieces of cardboard for easy movement. Any leftover glaze can be scraped up and refrigerated in an airtight container for another use.: As you pour the glaze it should cascade smoothly and create a mirror surface. The sound is a soft, satisfying patter as it coats each cake, and visually the cakes will gleam. Use the offset spatula to tidy edges and move cakes with care to preserve the finish. Store leftover glaze chilled and gently warm before reuse to restore pourability.
- Glazed cakes will keep in the refrigerator for up to 3 days. Let come to room temperature before serving.: Chilling firms the mousse and keeps the glaze shiny, while letting them sit a short time before serving restores the melt in mouth texture and releases the aromas. The cakes will feel cool and dense when chilled, and slightly softer and fragrant as they approach room temperature. Avoid leaving them out too long or the mousse will lose its intended texture.
Recipe Variations about Chocolate Covered Strawberry Mousse Cakes
These variations let you personalize texture and intensity while staying true to the heart of the recipe. I often play with chocolate percentages and plating styles to match the occasion, and each small change results in a distinct final expression.
- Use different chocolate percentages to shift the balance between bitter and sweet. Choosing a 50 percent chocolate yields a milder glaze, while a 70 percent gives a deeper, slightly bitter finish that pairs beautifully with the bright strawberries.
- Adjust mousse intensity by increasing or decreasing the amount of strawberry purée. For a more pronounced fruit flavor, add a bit more purée and reduce custard liquid slightly to maintain structure.
- Alternate the brownie base by making it slightly thinner for delicate presentation or a touch thicker for more chew and chocolate heft. Just watch bake time as thickness affects setting.
- Refine glaze shine by heating the cream just to bubbling and allowing the emulsion to rest briefly before pouring. A well emulsified glaze yields a mirror finish that makes these cakes look professional.
- Presentation swaps include serving mini cakes on decorative paper rounds, or arranging them on a long platter with a few fresh strawberries to echo the mousse flavor.
- Storage tweak is to keep glazed cakes refrigerated on a flat surface in an airtight container and remove them thirty to forty five minutes before serving to let flavors open up.
Best Served With
I like pairing these cakes with simple accompaniments that highlight their textures and flavors without competing. A light brewed tea or a cup of coffee complements the chocolate, and a few extra fresh strawberries on the side reinforce the mousse note. For gatherings I arrange them on a decorative platter, spacing the cakes so each guest can admire the glaze before diving in.
- Serving temperature Serve slightly chilled, allowing them to rest at room temperature for about thirty to forty five minutes to reach ideal texture and aroma.
- Occasions These mini cakes shine at spring brunches, intimate dinners, and special celebrations like Valentine’s Day when the combination of chocolate and strawberry feels particularly fitting.
- Storage Store in an airtight container in the refrigerator for up to three days; place them on a flat surface to preserve the glaze and bring to room temperature before serving.
- Plating Place each cake on a small cardboard round or dessert plate, add a few halved strawberries and a delicate dusting of cocoa powder if desired for contrast.
- Portioning These are already portion friendly as six individual cakes, but for larger gatherings you can double the recipe and arrange them in rows for a striking dessert table display.
- Seasonal pairing In spring I enhance the plate with a few edible flowers and a light green garnish to echo the season and add visual brightness to the dark glaze.
FAQ
Conclusion
What makes these Chocolate Covered Strawberry Mousse Cakes special is the interplay of textures and flavors, from the fudgy brownie base to the airy strawberry mousse and the glossy chocolate glaze. The recipe rewards patience and a few thoughtful techniques, and the final result looks and tastes like something you might find in a patisserie. I hope you give this recipe a try for a spring gathering or a small celebration, and enjoy the little moments of satisfaction that come with each polished slice.
Chocolate Covered Strawberry Mousse Cakes
Equipment
- 9 by 5 inch loaf pan
- Parchment Paper
- Medium Saucepan
- Whisk
- Spatula
- Wire Rack
- Blender or food processor
- Stand mixer or hand mixer
- Silicone molds
- Offset Spatula
- Cookie Sheet
- heat proof bowl
Ingredients
- 3 tablespoons unsalted butter Melted and rich, provides fat that helps create tender crumb and glossy finish while carrying flavor through the cake layers and chocolate coating.
- 2 oz 50-60% semisweet chocolate, chopped Chopped and melted, supplies deep cocoa flavor and structure to the cake, contributing to the chocolate intensity and smooth texture when combined with butter.
- 1/2 cup granulated sugar Granulated and sweet, dissolves into the batter to balance bitterness from cocoa and chocolate while helping with browning and moistness.
- 1 large egg Beaten and aerated, adds lift and protein structure to the cake, helping set the crumb and enrich flavor when properly incorporated.
- 1/2 teaspoon vanilla extract Aromatic and sweet, enhances overall flavor profile by adding a warm, familiar note that rounds out chocolate and fruit components.
- 1/4 cup all-purpose flour Powdered and structural, provides the backbone of the cake by supplying starches that form the crumb and absorb liquids for stability.
- 2 tablespoons dark or Dutch process cocoa powder, sifted Cocoa and bitter, intensifies chocolate flavor while contributing color and a dry component that balances the batter’s moisture for richer taste.
- 1/4 teaspoon baking powder Leavening and reactive, creates small gas bubbles in the batter to lighten texture and ensure a delicate, tender cake rise.
- 1/8 teaspoon kosher salt Salty and mineral, balances sweetness and enhances other flavors while strengthening gluten structure slightly for better crumb formation.
- 1 1/4 teaspoon unflavored powdered gelatin Bloomed and setting, acts as a gelling agent to stabilize mousses and fillings so the layers hold shape without collapsing.
- 2 tablespoons cold water Hydrating and cool, provides the medium to bloom gelatin, allowing it to dissolve smoothly and set reliably when warmed and mixed in.
- 1/4 cup whole milk Warm and milky, contributes creaminess and moisture to custard components while helping dissolve sugar and gelatin for a silky texture.
- 1 large egg yolk Thick and emulsifying, enriches custards or creams with fat and protein, aiding texture and adding richness to mousses.
- 1/3 cup granulated sugar Sweet and thick, helps stabilize custards and sweeten fillings while assisting in achieving the desired texture and consistency.
- 1 cup fresh strawberries, washed and hulled Fruity and acidic, pureed or chopped to add fresh strawberry flavor, color, and natural sweetness that complements chocolate.
- 1 tablespoon freshly squeezed lemon juice Tangy and bright, adds acidity to balance richness, lift fruit flavors, and preserve the fresh strawberry brightness in fillings.
- 2/3 cup heavy cream, cold Cold and airy, when whipped provides volume and lightness to mousses, contributing a smooth, creamy mouthfeel to the dessert.
- 1 cup heavy cream Whipping and rich, offers additional fat and stability when whipped to firm peaks, creating a sturdy yet light mousse layer.
- 1 tablespoon corn syrup Syrupy and glossy, improves shine and mouthfeel of glazes or chocolate coatings while preventing crystallization for a smooth finish.
- 8 oz 50-70% dark chocolate, very finely chopped Finely chopped and intense, supplies concentrated dark chocolate flavor for coating and ganache, melting smoothly for a glossy shell.
Instructions
- Preheat oven to 350 degrees F. Lightly butter a 9-by-5-inch loaf pan and line with a 9-inch strip of parchment paper (the two short ends will be uncovered); lightly butter parchment.: The scent of warm butter in the oven sets a comforting tone and signals the start of the bake. As the oven approaches 350 degrees F you should feel a steady warmth and notice the metal rack slightly glowing as it stabilizes, which helps the pan heat evenly. I make sure the parchment overhang is long enough to act as handles so I can lift the cooled brownie out without touching the sides, this prevents breaking the set edges. A common mistake here is skipping the parchment or not buttering it, which makes it hard to remove the baked layer cleanly. Visually, the prepared pan should look glossy with a thin sheen of butter so the batter slides easily when poured.
- Melt butter in a medium saucepan. Remove from heat and add chopped chocolate, stirring until smooth (the residual heat from the pan should be plenty to melt the chocolate.): You will smell warm, nutty butter as it melts, then a deeper cocoa aroma as the chopped chocolate softens. Residual heat melts the chocolate gently, preserving that smooth, glossy texture without risk of scorching. Stir patiently in slow circles until the mixture is homogenous and shiny. If you notice lumps, let it rest off heat for a short moment and stir again rather than applying direct heat. A common error is overheating, which can cause the chocolate to seize and grain, so trust the residual warmth.
- Stir in sugar; mixture should be lukewarm, no longer hot to the touch. If it's still pretty warm, let it cool for a minute or two.: The sugar dissolves and the mixture cools to a temperature that will not scramble the eggs when they are added. The texture becomes glossy and slightly thickened, and the aroma mellows from intense heat to a comforting chocolate note. Touch the bowl to ensure it feels lukewarm, if it is hot the eggs will cook on contact and yield curdles. Patience here prevents a broken batter and ensures a silky finish.
- Whisk in eggs until batter is smooth and shiny.: When you whisk the eggs in, the batter takes on a satin sheen and a slightly lighter body. You may hear a faint soft whipping sound as air is incorporated; this is fine but avoid vigorous beating which would create bubbles that bake into a cakier crumb. A common mistake is rushing the whisking and ending with a lumpy mixture; whisk until seamless and glossy. The resulting batter should flow slowly off the whisk in ribbon like trails.
- Sift together flour, cocoa powder, baking powder and salt in a small bowl. Sprinkle over chocolate mixture and fold with a spatula until just incorporated.: You will notice a darker, velvety dusting when you sprinkle the sifted dry ingredients, and folding brings the batter from shiny to slightly denser as the dry elements hydrate. Use gentle turns to preserve the batter's sheen, folding until no streaks of flour remain. Overmixing will develop gluten and yield a tougher texture, so stop as soon as the batter looks uniform. A good visual cue is when the batter settles evenly and the surface becomes smooth.
- Pour batter into prepared pan and spread into an even layer. Bake for about 20 minutes or until top is set and a toothpick inserted near the middle comes out with moist crumbs (not gooey batter). Set pan on a wire rack and let cool completely. The brownie layer can be made a day ahead of time; once cool, cover pan tightly and refrigerate overnight until ready to use.: As the batter bakes you will start to smell warm cocoa and butter, and the top will matte slightly when set. The oven's ambient sound shifts to a steady low hum, and when you test with a toothpick you want moist crumbs clinging, not raw batter, which indicates the right fudgy texture. Cooling completely is essential so the layer firms and is easier to cut into neat squares. A common misstep is underbaking slightly which leaves the center too soft to handle, so aim for that moist crumb cue.
- Lift the cooled brownie out of the pan using the parchment overhang as handles. Cut off the edges, then cut into six 2-inch squares. The scraps and the sixth square make a lovely chef's snack.: When you lift the brownie by the parchment you should feel it come away cleanly, with the edges holding their shape. Trim for neat sides and cut gently with a sharp knife in a single steady motion to avoid crumbling. The aroma of compacted chocolate will be rich and inviting, and sampling a scrap is practically a kitchen ritual. Avoid using a serrated blade as it can tear the crumb rather than slice smoothly.
- Place water in a small dish; sprinkle gelatin over top and set aside to bloom for at least 5 minutes.: The gelatin will swell and turn from powder to a slightly glossy gel, an indicator it has fully absorbed the water. This step is quiet and low aroma, but crucial for stable mousse. If you skip blooming, the gelatin may not dissolve properly in the warm custard, leaving grainy bits. Let it rest undisturbed until plump and slightly translucent.
- Heat milk in a small saucepan set over low heat until it just starts to steam (try not to let it boil).: Look for tiny wisps of steam and a shimmer on the surface, a gentle visual cue that the milk is ready. The smell will be faintly milky and warm, not browned. Heating slowly preserves the milk's delicate proteins so it blends smoothly with the egg yolk when tempered. Boiling risks scalding and creating off flavors, so keep the heat low and constant.
- Mix together egg yolk and sugar in a bowl until it forms a thick paste. Slowly spoon some of the hot milk into the yolk mixture, whisking constantly until the paste thins out a bit. Drizzle in the remaining milk and whisk until smooth.: The paste will lighten in color and feel satiny under the whisk, and tempering with a spoonful of hot milk prevents the yolk from curdling. Whisking constantly creates a silky emulsion and the aroma becomes richer and custardy. If you rush or add hot liquid too quickly, you risk scrambled yolks and a lumpy custard, which is hard to fix at this stage.
- Return mixture to the saucepan and return to low heat and cook, stirring and scraping the bottom of the pan consistently, until the mixture thickens slightly to coat the back of a spoon (it should measure about 175 degrees F on an instant read thermometer.: You will notice the custard taking on a thicker coat like a curtain when dragged across the spoon, and a warm, custardy scent develops. Constant stirring prevents the yolk from sticking to the pan and curdling, while scraping ensures even heat distribution. Use an instant read thermometer for accuracy, and remove at about 175 degrees F to avoid overcooking and graininess. A common problem is cooking too quickly, which can cause a grainy rather than smooth texture.
- Remove from heat and whisk in gelatin until smooth. Transfer to a medium-large bowl and set aside.: As you whisk in the bloomed gelatin it dissolves and the custard becomes glossy and uniform, with a subtle elasticity building as it cools. Transfer to a bowl to speed cooling and to make room for the fruit purée, keeping the custard from continuing to thicken in the warm pan. If the gelatin does not dissolve fully, whisk gently over a warm water bath; avoid aggressive reheating which can affect the custard's texture.
- Meanwhile, purée strawberries and lemon juice in a blender or food processor until smooth. Transfer to a liquid measuring cup (you should have about 1/2 cup purée, if you have more than that save the excess for another use). Whisk strawberry purée into lukewarm custard mixture, then place bowl in refrigerator while you whip the cream.: The purée will smell bright and fruity, and when whisked into the lukewarm custard it tints the mixture a pale pink. Cooling briefly in the refrigerator helps the mixture reach a temperature suitable for folding with whipped cream without melting it. If your purée is too watery, strain briefly to maintain mousse body; too thick and you can thin slightly with a teaspoon of milk.
- In a clean bowl or the bowl of a stand mixer, beat heavy cream until it holds soft peaks. Add 1/3 of cream to the cooled strawberry mixture and fold to lighten, then add remaining cream and fold until fully incorporated and no white streaks or lumps remain.: You will see the cream become billowy and glossy as it approaches soft peaks, and its coldness provides lift to the warm custard. Folding in thirds prevents deflating the whipped cream, preserving air for a light mousse. Stop folding once streaks vanish to avoid overmixing which can collapse the mousse. A common mistake is rushing and whisking instead of folding, which breaks down the aeration.
- To assemble your cakes, spoon or pipe the mousse into silicone molds, about 2/3 of the way full. Gently press a brownie square into the top of each mousse-filled mold. Scrape with an offset spatula to make the top perfectly level with the top of the mold. Freeze at least 3 hours or overnight until completely firm.: When you press the brownie into the mousse you will feel a satisfying resistance followed by a soft give as it seats into place. Leveling the tops creates neat edges for glazing and a professional look. Freeze solid so the mousse firms completely; insufficient freezing risks deformation when glazing. Avoid filling molds to the brim, which can cause spillage during freezing and glazing.
- Before you make the glaze, remove cakes from molds and place on a frozen cookie sheet lined with parchment paper. Return to freezer until just before glazing.: Handling frozen cakes is cool to the touch and they should feel rock solid when you transfer them. Keeping them on a frozen surface maintains their temperature so the glaze sets on contact instead of melting the mousse. A pitfall is letting them sit at room temperature too long before glazing, which can cause the glaze to run off unevenly.
- Place chopped chocolate in a medium-sized, heat-proof bowl and set aside.: The finely chopped chocolate should look glossy and uniform in the bowl, ready to be transformed by hot cream. Having it prepped means you can pour the cream immediately to form a smooth emulsion. If chocolate is not finely chopped it may take longer to melt and you risk uneven texture.
- Heat cream and corn syrup in a small saucepan until it just starts to bubble (do not let it boil).: Small bubbles forming around the edge and a gentle aroma of warm cream indicate readiness. The corn syrup helps the glaze achieve a glossy sheen and pliable set. Avoid a rolling boil which can separate the emulsion; remove as soon as you see the first bubbles.
- Pour over chopped chocolate and let sit for 30 seconds, then gently whisk, starting in the center and moving in gentle concentric circles until an emulsion forms, then working your way out to the edges until the entire mixture is smooth and emulsified.: After pouring, the chocolate will begin to soften and the center will look glossy. Whisking in concentric circles helps the fats emulsify with the hot cream into a silky ganache like glaze. If it looks split, continue whisking gently and allow it to come together; aggressive reheating can change texture. The final glaze should be smooth, glossy, and pourable.
- Remove cakes from freezer and place on a cookie sheet, elevated off the sheet using small jars or cookie cutters (ideally something smaller in diameter than the cake itself so the glaze can drip off). You may also want to cut out small rounds of parchment to place under each cake to make them easier to transfer.: Elevating lets the glaze flow freely and creates a clean drip around the base. The frozen surface makes the glaze set quickly, producing a crisp sheen. Cut small parchment rounds to aid transferring to cardboard rounds without touching the glazed surface. A mistake is placing cakes flat on the sheet which traps excess glaze and ruins the finish.
- Pour glaze generously over cakes, taking care to ensure there are no bare spots left. Gently scrape the edges to remove any remaining drops, then carefully transfer cakes using a small offset spatula to cardboard cake rounds or small pieces of cardboard for easy movement. Any leftover glaze can be scraped up and refrigerated in an airtight container for another use.: As you pour the glaze it should cascade smoothly and create a mirror surface. The sound is a soft, satisfying patter as it coats each cake, and visually the cakes will gleam. Use the offset spatula to tidy edges and move cakes with care to preserve the finish. Store leftover glaze chilled and gently warm before reuse to restore pourability.
- Glazed cakes will keep in the refrigerator for up to 3 days. Let come to room temperature before serving.: Chilling firms the mousse and keeps the glaze shiny, while letting them sit a short time before serving restores the melt in mouth texture and releases the aromas. The cakes will feel cool and dense when chilled, and slightly softer and fragrant as they approach room temperature. Avoid leaving them out too long or the mousse will lose its intended texture.
Notes
- Use different chocolate percentages to shift the balance between bitter and sweet. Choosing a 50 percent chocolate yields a milder glaze, while a 70 percent gives a deeper, slightly bitter finish that pairs beautifully with the bright strawberries.
- Adjust mousse intensity by increasing or decreasing the amount of strawberry purée. For a more pronounced fruit flavor, add a bit more purée and reduce custard liquid slightly to maintain structure.
- Alternate the brownie base by making it slightly thinner for delicate presentation or a touch thicker for more chew and chocolate heft. Just watch bake time as thickness affects setting.
- Refine glaze shine by heating the cream just to bubbling and allowing the emulsion to rest briefly before pouring. A well emulsified glaze yields a mirror finish that makes these cakes look professional.
- Presentation swaps include serving mini cakes on decorative paper rounds, or arranging them on a long platter with a few fresh strawberries to echo the mousse flavor.
- Storage tweak is to keep glazed cakes refrigerated on a flat surface in an airtight container and remove them thirty to forty five minutes before serving to let flavors open up.