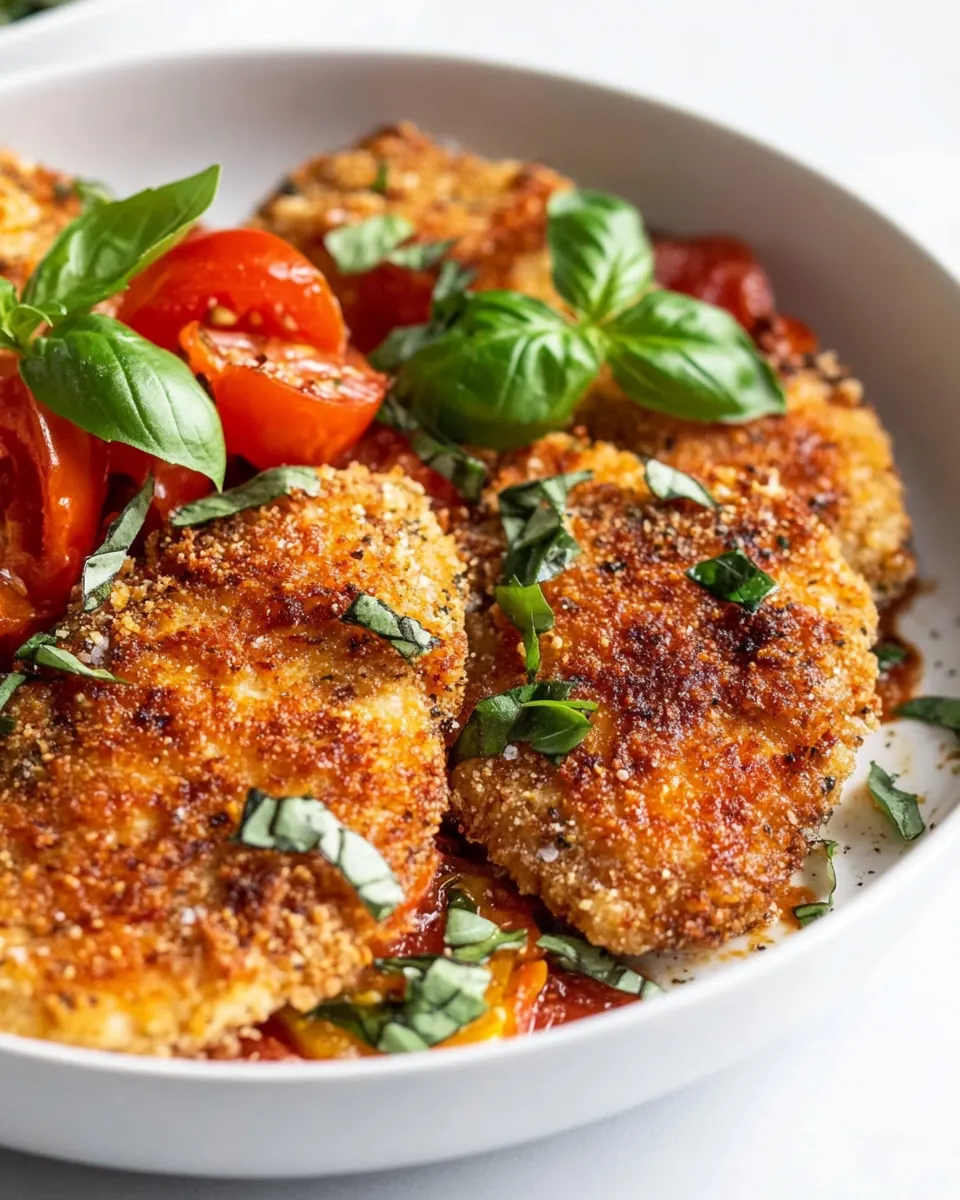
Italian Chicken Cutlets
Italian Chicken Cutlets have been my go to on nights when I want something that feels special but comes together without drama.
Years ago I learned this recipe from a friend who insisted that a simple coat of panko bread crumbs and parmesan cheese could transform plain chicken into a meal that everyone raved about. I still remember the first time I heard that sizzling sound as the cutlets hit the hot pan, and how the aroma of browned crumbs and melted cheese filled my kitchen and drew the whole family in. That evening turned into a ritual, where I would toss together a quick egg wash, shake the cutlets in a bag, and let the skillet do the rest.
I love how flexible Italian Chicken Cutlets are. Some nights I pan fry them in olive oil for the crispest crust, other nights I choose the oven for a no fuss sheet pan dinner. The seasoning is deliberately simple, so the texture and the balance of salt, herb, and crispy coating shine through. I often make an extra batch and store them for lunches, because they reheat well and keep that comforting crunch when warmed carefully.
One of my favorite memories with this recipe is serving it at a spur of the moment dinner party. The cutlets were the easiest thing on the menu, but they became the centerpiece, paired with bright salads and crusty bread. Over time I’ve tightened the technique, learned when the oil is just right, and what visual cues to look for, so now I can reliably produce golden, crunchy cutlets that stay juicy inside. If you like hands on, satisfying cooking, you are going to enjoy every step of making these.
Recipe Snapshot
25 mins
10 mins
15 mins
Easy
350 kcal
Italian
Gluten-Free, Paleo
Dinner
Gallon zip bag, Pie pan, 14 inch cast iron skillet, Rimmed baking sheet, Tongs
The Beauty of This Italian Chicken Cutlets
Comfort Without Fuss
I love that Italian Chicken Cutlets deliver a classic comfort food vibe without a lot of babysitting. The recipe is approachable, and you can be confident it will come out crispy and flavorful even if you are juggling other dishes.
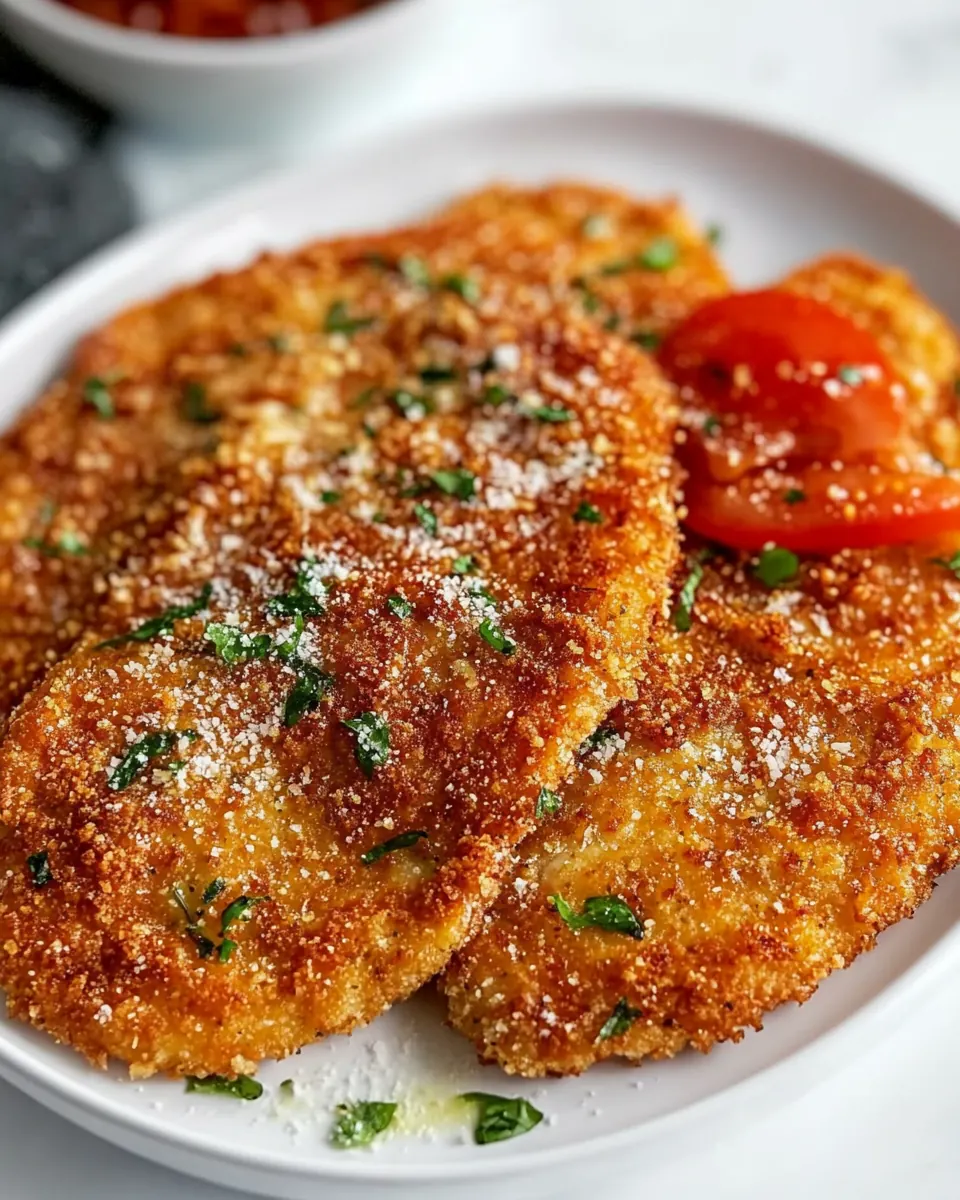
Textural Magic
The contrast between the crunchy panko bread crumbs and the tender chicken is the real showstopper. I pay attention to how the crumbs blister and brown, because that texture makes each bite interesting.
Fast Weeknight Winner
This dish fits into busy evenings, it cooks quickly and scales easily. I often make it when time is short, because the prep is straightforward and the cooking time is minimal.
Flexible Cooking Methods
You can pan fry for deep crispiness, or finish in the oven for hands off convenience. I appreciate that the same set of ingredients suits multiple techniques, so I pick the method to match my energy level that day.
Family Friendly Flavors
The seasoning is simple and broadly appealing, so the cutlets are perfect for picky eaters and adventurous diners alike. I like that everyone can enjoy the same plate, and you can adapt sides without changing the core recipe.
Ingredients You’ll Need for Italian Chicken Cutlets
These ingredients are chosen to build a crispy, savory crust and juicy interior. The star is the chicken, while the panko bread crumbs and parmesan cheese do the heavy lifting for texture and flavor. The egg acts as the adhesive, and the seasonings are there to lift the profile without overpowering the meat. Together they produce a crunchy exterior and tender center that cooks quickly and reliably.
- 1 pounds chicken cutletsthinly sliced chicken breasts: Pound and flatten to uniform thickness so chicken cooks evenly; provides the main protein and base of the cutlets, absorbing flavors from coatings and seasonings during cooking.
- 2/3 cup panko bread crumbs: Crisp to create a crunchy exterior when fried or baked; panko offers a light, airy texture that yields a superior crunch compared with regular breadcrumbs and helps the coating adhere to the chicken.
- 1/3 cup grated parmesan cheese: Grate finely to add a nutty, savory umami depth to the breading; parmesan also contributes saltiness that enhances overall flavor and helps create a golden-brown crust.
- 1 teaspoon Italian seasoning: Season generously to impart a classic Italian herb profile; Italian seasoning blends oregano, basil, thyme, and other herbs that complement the chicken and cheese in the coating.
- 1/2 teaspoon garlic powder: Sprinkle for subtle savory garlic notes without moisture; garlic powder distributes evenly in the breading mix and intensifies overall flavor without overpowering the herbs and cheese.
- 1 large egg: Whisk to bind the breadcrumb mixture to the chicken; the egg creates a sticky layer that helps the panko and parmesan adhere, ensuring an even, cohesive crust after cooking.
- 3 tablespoons olive oil: Heat to cook the cutlets and develop a golden crust; olive oil adds flavor and helps transfer heat for frying or sautéing, while contributing healthy monounsaturated fats.
- Salt and pepper: Season to taste at multiple stages, enhancing and balancing flavors; salt and pepper brighten the chicken and breading, with salt bringing out savory notes and pepper adding subtle heat.
Preparation Steps for Italian Chicken Cutlets
These directions give you two reliable paths to crisp, golden cutlets. I like to walk through the pan fry method first, then offer the oven approach so you can pick what fits your evening. Follow the cues for color, sound, and texture, and you will know when each cutlet is done.
- In a gallon zip bag, combined the egg, Italian seasoning, garlic powder, 1 teaspoon of salt, and 1/4 teaspoon of black pepper. Shake the bag to mix the seasoning into the egg. Then add the chicken cutlets to the bag. Zip closed and shake to coat the chicken. Use immediately, or refrigerate and allow the chicken to marinate for several hours.: The moment you shake the bag and smell the herby egg mixture you will notice a bright, savory aroma that hints at the final dish. This mixture seasons the entire surface of the chicken , which is why I always mix thoroughly until the spices are evenly suspended. If the egg is cold, let it sit a minute at room temperature to mix more smoothly, because a well blended wash coats the cutlets uniformly. A common mistake here is under seasoning the wash, which leads to blandness in the finished crust. Avoid adding too much salt at once, taste the panko mixture later and adjust. When you zip the bag, press out excess air so the mixture contacts the meat closely, creating even coverage.
- When ready to cook, set out a pie pan. Mix the Panko breadcrumbs with the Parmesan cheese. One at a time, dip the chicken cutlets into the Panko mixture and coat well on both sides.: As you shake, listen for the gentle sloshing and notice the egg turning pale and speckled with herbs, a small signal that everything is incorporated. Once the chicken hits the bag, the egg mixture clings and begins to moisten the surface, which helps the crumbs adhere. Massage the bag lightly so the wash contacts every inch of the cutlets, this ensures consistent crust formation during cooking. One mistake people make is leaving too much excess wash on the cutlets, which can cause clumping of the crumbs. Shake off a touch before dredging to keep the coating light and crisp.
- Set a large 14 inch cast-iron skillet over medium heat. Place the olive oil in the skillet. Once the oil is hot, gently lower the chicken cutlets into the skillet. Pan fry for 4 to 5 minutes per side, until the exterior is golden brown. Once fully cooked, move to a paper towel lined plate to drain. Serve warm.: You will see the cutlets take on a glossy sheen as the egg penetrates the surface, and letting them sit for a short time lets the seasonings penetrate slightly for more depth. Refrigerating the coated meat for up to a few hours tightens the proteins and can improve texture, but do not leave it too long or the crumbs will absorb moisture. If chilling, bring the cutlets back toward room temperature before cooking so they cook evenly. Over marinating in the egg can lead to soggy breading, that is the pitfall I warn friends about.
- Preheat the oven to 400°F. Set out a rimmed baking sheet. Pour the olive oil over the pan. Once the chicken cutlets are well coated in Panko, place them on a baking sheet. Then flip them over so that the Panko has been coated in oil on both sides.: The coarse panko and grated parmesan should be combined thoroughly so every bite has that nutty, crisp finish. As you press each piece into the mixture you will feel the crumbs adhere and see them texture the surface. Press gently to ensure contact but avoid compressing the crumbs flat which reduces the final crunch. If the crumbs start to clump, fluff them with a fork to restore their texture. A typical error is over pressing, which creates a dense coating that does not crisp properly in the pan or oven.
- Bake for 15 minutes. The top should brown, but if it doesn’t, you can place the cutlets under the broiler for one minute to reach your desired color. Serve warm.: When the oil shimmers and it breathes a faint fruity aroma you know it is ready, and lowering the cutlets in should produce a gentle sizzle. That sizzle is a reassuring sound that the crust is sealing and will become golden. Use tongs to place the meat individually to avoid splashes and to space them so they do not touch, which allows even browning. If the oil is not hot enough you will notice the cutlets absorb oil and the crust will be greasy, which is the usual misstep.
- Pan fry for 4 to 5 minutes per side until the exterior is golden brown: Listen for a steady, even sizzle and watch the edges for a deepening golden color, those cues indicate Maillard reactions are developing flavor. The crust should become crisp and firm under a spatula, and the internal juices will stay sealed. If you press and see clear juices, that suggests doneness; you can also use an instant read thermometer aiming for 165°F for safety. A common mistake is flipping too frequently, which prevents the crust from setting, so give it time to form before turning once.
- Once fully cooked move to a paper towel lined plate to drain Serve warm: The cutlets will emit a brief whisper of steam as they rest, and the paper towel absorbs any excess oil so the crust stays crisp rather than greasy. Serve immediately for the best contrast of crunchy exterior and succulent interior because standing too long will gradually soften the coating. If you must hold them, keep them on a rack in a low oven to maintain texture. Don’t stack pieces on top of each other, which traps steam and ruins the crust.
- Preheat the oven to 400°F Set out a rimmed baking sheet Pour the olive oil over the pan Once the chicken cutlets are well coated in Panko place them on a baking sheet Then flip them over so that the Panko has been coated in oil on both sides: When you brush or drizzle the olive oil over the crumbs you will see the coating take on a slight sheen, which encourages even browning. Spacing the cutlets apart and flipping them so both sides are oiled ensures that the oven can crisp both surfaces. You will notice as the oil warms the aroma of toasted crumbs begins to build, an encouraging sign you are on track. A common issue is using too little oil, resulting in pale, dry crusts, so be generous but even.
- Bake for 15 minutes The top should brown but if it doesn’t you can place the cutlets under the broiler for one minute to reach your desired color Serve warm: During baking the oven will coax the crumbs into a crunchy shell while the interior gently cooks to safe temperature. Keep an eye on color in the last minutes because ovens vary, and if the surface needs more color use the broiler briefly while watching closely to prevent burning. The finished cutlets should be golden and slightly crackly to the touch, with juices running clear. Overbaking dries the meat, that is the typical pitfall so remove when the cutlets are done and rest them briefly before serving.
Variations to Try
These variations let you tune the dish to your mood and kitchen setup. Try swapping cooking method or adjusting the cheese and crumbs for different textures and flavors. Below are expanded tips to inspire your next batch.
- Make it extra cheesy, fold in more parmesan cheese with the panko bread crumbs to create a richer, nuttier crust that browns beautifully and adds savory depth to each bite, perfect when you want a more pronounced umami note.
- Oven friendly approach, if you prefer hands off cooking, brush the cutlets generously with olive oil and bake at 400°F until golden, flipping once to encourage even color, which reduces splatter and keeps your stovetop clean.
- Crispier finish, for an especially crunchy exterior, briefly pan fry to set the crust and then finish in the oven to ensure the interior reaches a safe temperature without burning the coating.
- Lighten the crust, use a mix of panko bread crumbs and finely ground stale bread for a subtler crunch and a slightly denser texture that is still excellent when baked.
- Meal prep tip, cook an extra batch and refrigerate or freeze cooled cutlets for quick lunches, then reheat in a 350°F oven to preserve crunch while warming all the way through.
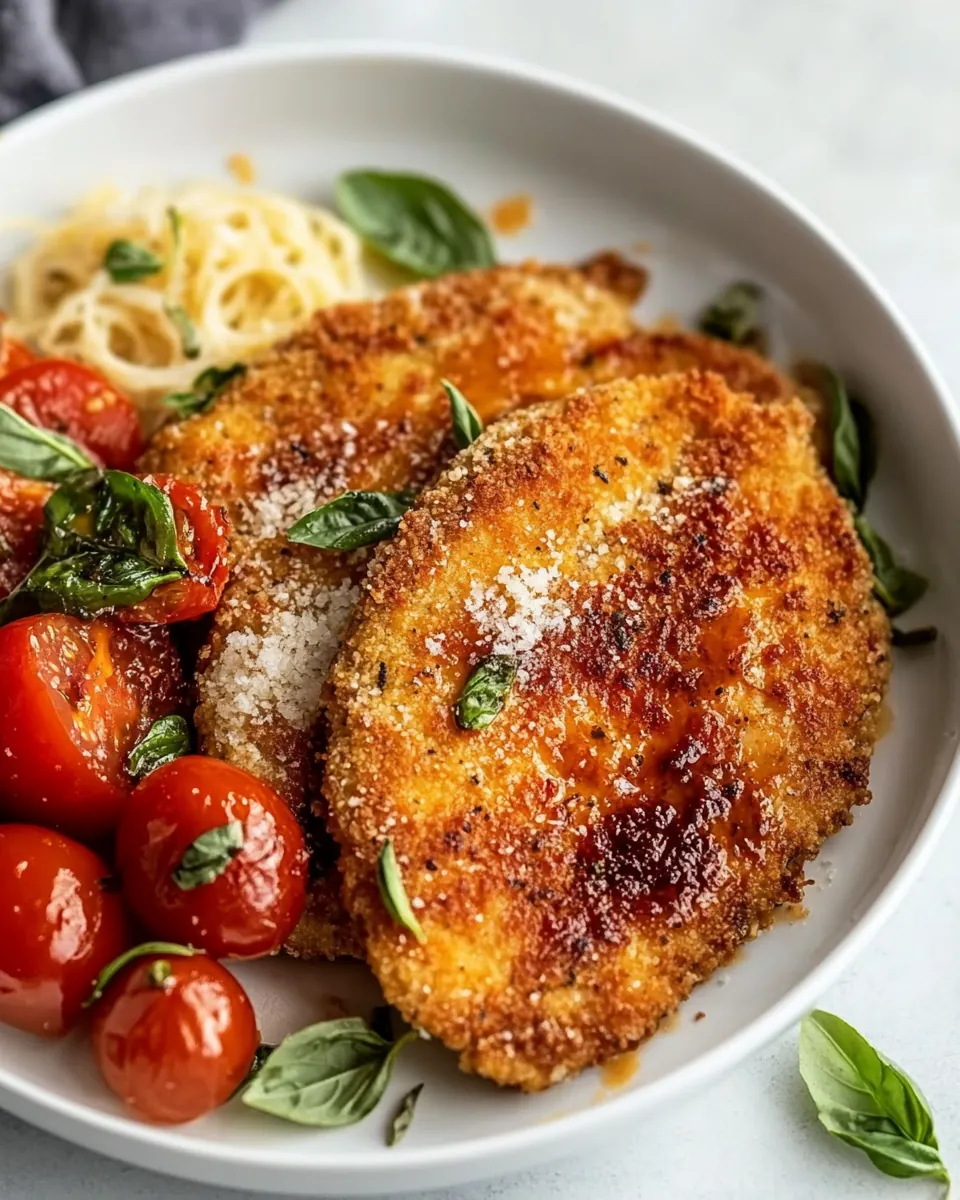
Serving This Italian Chicken Cutlets
I like to think about serving as part of the whole meal experience. These cutlets pair with bright salads, simple pastas, or roasted vegetables. They are versatile for casual family dinners or slightly elevated weekend meals. Below are detailed serving ideas and practical storage notes.
- Classic family dinner, serve the cutlets alongside a crisp green salad dressed with lemon and olive oil so the freshness contrasts with the crunchy coating, making a balanced plate that satisfies adults and children alike.
- Weeknight accompaniment, pair with steamed vegetables or a light pasta tossed in olive oil and garlic to create an easy weeknight dinner where the cutlets take center stage without much fuss.
- Meal prep and storage, refrigerate cooled cutlets in an airtight container for up to three days, and reheat in a 350°F oven for best texture, which keeps them crunchy compared to microwaving.
- Freezing guide, freeze cooled pieces in a sealed container for up to three months, thaw overnight in the fridge, then bake at 400°F for 10 to 15 minutes until hot to restore crispness.
- Occasion suggestions, these work well for casual dinners, buffet style gatherings, or Ramadan if you need a satisfying protein to break a fast, thanks to their approachable flavors and quick preparation.
FAQ
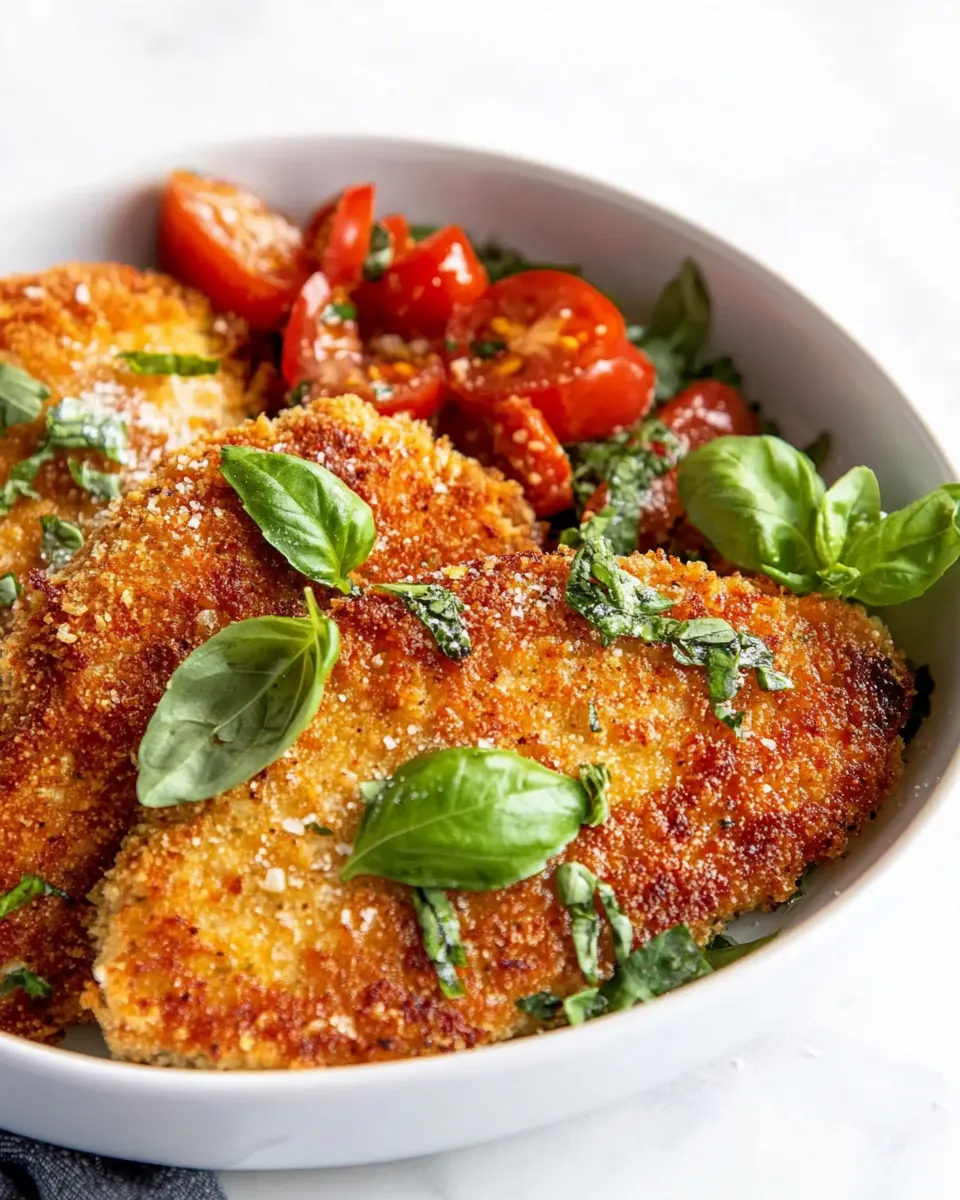
Conclusion
Italian Chicken Cutlets are special because they combine a crunchy, flavorful crust with juicy, tender chicken, giving you a satisfying meal with minimal fuss. Try them when you want an easy weeknight dinner that still impresses, whether you pan fry or bake. The recipe is forgiving, adaptable, and perfect for scaling up when friends show up unexpectedly. Give it a go, and you might find this becomes one of your most requested dishes.
Italian Chicken Cutlets
Equipment
- Gallon zip bag
- Pie Pan
- 14 inch cast iron skillet
- Rimmed Baking Sheet
- Tongs
Ingredients
- 1 pounds chicken cutletsthinly sliced chicken breasts Pound and flatten to uniform thickness so chicken cooks evenly; provides the main protein and base of the cutlets, absorbing flavors from coatings and seasonings during cooking.
- 2/3 cup panko bread crumbs Crisp to create a crunchy exterior when fried or baked; panko offers a light, airy texture that yields a superior crunch compared with regular breadcrumbs and helps the coating adhere to the chicken.
- 1/3 cup grated parmesan cheese Grate finely to add a nutty, savory umami depth to the breading; parmesan also contributes saltiness that enhances overall flavor and helps create a golden-brown crust.
- 1 teaspoon Italian seasoning Season generously to impart a classic Italian herb profile; Italian seasoning blends oregano, basil, thyme, and other herbs that complement the chicken and cheese in the coating.
- 1/2 teaspoon garlic powder Sprinkle for subtle savory garlic notes without moisture; garlic powder distributes evenly in the breading mix and intensifies overall flavor without overpowering the herbs and cheese.
- 1 large egg Whisk to bind the breadcrumb mixture to the chicken; the egg creates a sticky layer that helps the panko and parmesan adhere, ensuring an even, cohesive crust after cooking.
- 3 tablespoons olive oil Heat to cook the cutlets and develop a golden crust; olive oil adds flavor and helps transfer heat for frying or sautéing, while contributing healthy monounsaturated fats.
- Salt and pepper Season to taste at multiple stages, enhancing and balancing flavors; salt and pepper brighten the chicken and breading, with salt bringing out savory notes and pepper adding subtle heat.
Instructions
- In a gallon zip bag, combined the egg, Italian seasoning, garlic powder, 1 teaspoon of salt, and 1/4 teaspoon of black pepper. Shake the bag to mix the seasoning into the egg. Then add the chicken cutlets to the bag. Zip closed and shake to coat the chicken. Use immediately, or refrigerate and allow the chicken to marinate for several hours.: The moment you shake the bag and smell the herby egg mixture you will notice a bright, savory aroma that hints at the final dish. This mixture seasons the entire surface of the chicken , which is why I always mix thoroughly until the spices are evenly suspended. If the egg is cold, let it sit a minute at room temperature to mix more smoothly, because a well blended wash coats the cutlets uniformly. A common mistake here is under seasoning the wash, which leads to blandness in the finished crust. Avoid adding too much salt at once, taste the panko mixture later and adjust. When you zip the bag, press out excess air so the mixture contacts the meat closely, creating even coverage.
- When ready to cook, set out a pie pan. Mix the Panko breadcrumbs with the Parmesan cheese. One at a time, dip the chicken cutlets into the Panko mixture and coat well on both sides.: As you shake, listen for the gentle sloshing and notice the egg turning pale and speckled with herbs, a small signal that everything is incorporated. Once the chicken hits the bag, the egg mixture clings and begins to moisten the surface, which helps the crumbs adhere. Massage the bag lightly so the wash contacts every inch of the cutlets, this ensures consistent crust formation during cooking. One mistake people make is leaving too much excess wash on the cutlets, which can cause clumping of the crumbs. Shake off a touch before dredging to keep the coating light and crisp.
- Set a large 14 inch cast-iron skillet over medium heat. Place the olive oil in the skillet. Once the oil is hot, gently lower the chicken cutlets into the skillet. Pan fry for 4 to 5 minutes per side, until the exterior is golden brown. Once fully cooked, move to a paper towel lined plate to drain. Serve warm.: You will see the cutlets take on a glossy sheen as the egg penetrates the surface, and letting them sit for a short time lets the seasonings penetrate slightly for more depth. Refrigerating the coated meat for up to a few hours tightens the proteins and can improve texture, but do not leave it too long or the crumbs will absorb moisture. If chilling, bring the cutlets back toward room temperature before cooking so they cook evenly. Over marinating in the egg can lead to soggy breading, that is the pitfall I warn friends about.
- Preheat the oven to 400°F. Set out a rimmed baking sheet. Pour the olive oil over the pan. Once the chicken cutlets are well coated in Panko, place them on a baking sheet. Then flip them over so that the Panko has been coated in oil on both sides.: The coarse panko and grated parmesan should be combined thoroughly so every bite has that nutty, crisp finish. As you press each piece into the mixture you will feel the crumbs adhere and see them texture the surface. Press gently to ensure contact but avoid compressing the crumbs flat which reduces the final crunch. If the crumbs start to clump, fluff them with a fork to restore their texture. A typical error is over pressing, which creates a dense coating that does not crisp properly in the pan or oven.
- Bake for 15 minutes. The top should brown, but if it doesn’t, you can place the cutlets under the broiler for one minute to reach your desired color. Serve warm.: When the oil shimmers and it breathes a faint fruity aroma you know it is ready, and lowering the cutlets in should produce a gentle sizzle. That sizzle is a reassuring sound that the crust is sealing and will become golden. Use tongs to place the meat individually to avoid splashes and to space them so they do not touch, which allows even browning. If the oil is not hot enough you will notice the cutlets absorb oil and the crust will be greasy, which is the usual misstep.
- Pan fry for 4 to 5 minutes per side until the exterior is golden brown: Listen for a steady, even sizzle and watch the edges for a deepening golden color, those cues indicate Maillard reactions are developing flavor. The crust should become crisp and firm under a spatula, and the internal juices will stay sealed. If you press and see clear juices, that suggests doneness; you can also use an instant read thermometer aiming for 165°F for safety. A common mistake is flipping too frequently, which prevents the crust from setting, so give it time to form before turning once.
- Once fully cooked move to a paper towel lined plate to drain Serve warm: The cutlets will emit a brief whisper of steam as they rest, and the paper towel absorbs any excess oil so the crust stays crisp rather than greasy. Serve immediately for the best contrast of crunchy exterior and succulent interior because standing too long will gradually soften the coating. If you must hold them, keep them on a rack in a low oven to maintain texture. Don’t stack pieces on top of each other, which traps steam and ruins the crust.
- Preheat the oven to 400°F Set out a rimmed baking sheet Pour the olive oil over the pan Once the chicken cutlets are well coated in Panko place them on a baking sheet Then flip them over so that the Panko has been coated in oil on both sides: When you brush or drizzle the olive oil over the crumbs you will see the coating take on a slight sheen, which encourages even browning. Spacing the cutlets apart and flipping them so both sides are oiled ensures that the oven can crisp both surfaces. You will notice as the oil warms the aroma of toasted crumbs begins to build, an encouraging sign you are on track. A common issue is using too little oil, resulting in pale, dry crusts, so be generous but even.
- Bake for 15 minutes The top should brown but if it doesn’t you can place the cutlets under the broiler for one minute to reach your desired color Serve warm: During baking the oven will coax the crumbs into a crunchy shell while the interior gently cooks to safe temperature. Keep an eye on color in the last minutes because ovens vary, and if the surface needs more color use the broiler briefly while watching closely to prevent burning. The finished cutlets should be golden and slightly crackly to the touch, with juices running clear. Overbaking dries the meat, that is the typical pitfall so remove when the cutlets are done and rest them briefly before serving.
Notes
- Make it extra cheesy, fold in more parmesan cheese with the panko bread crumbs to create a richer, nuttier crust that browns beautifully and adds savory depth to each bite, perfect when you want a more pronounced umami note.
- Oven friendly approach, if you prefer hands off cooking, brush the cutlets generously with olive oil and bake at 400°F until golden, flipping once to encourage even color, which reduces splatter and keeps your stovetop clean.
- Crispier finish, for an especially crunchy exterior, briefly pan fry to set the crust and then finish in the oven to ensure the interior reaches a safe temperature without burning the coating.
- Lighten the crust, use a mix of panko bread crumbs and finely ground stale bread for a subtler crunch and a slightly denser texture that is still excellent when baked.
- Meal prep tip, cook an extra batch and refrigerate or freeze cooled cutlets for quick lunches, then reheat in a 350°F oven to preserve crunch while warming all the way through.