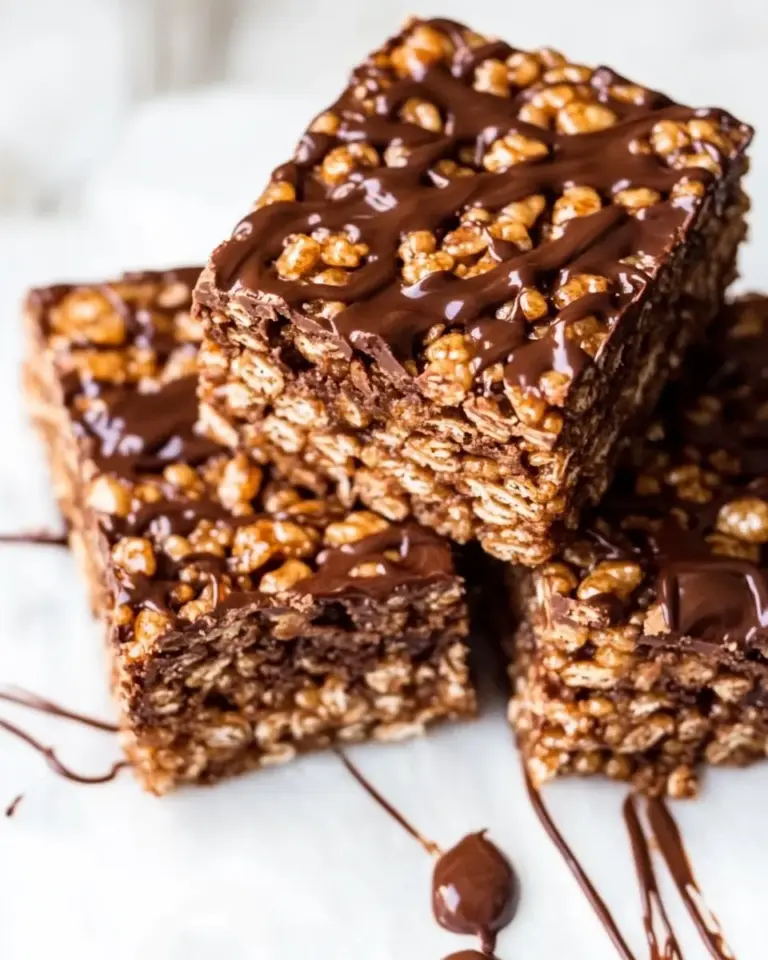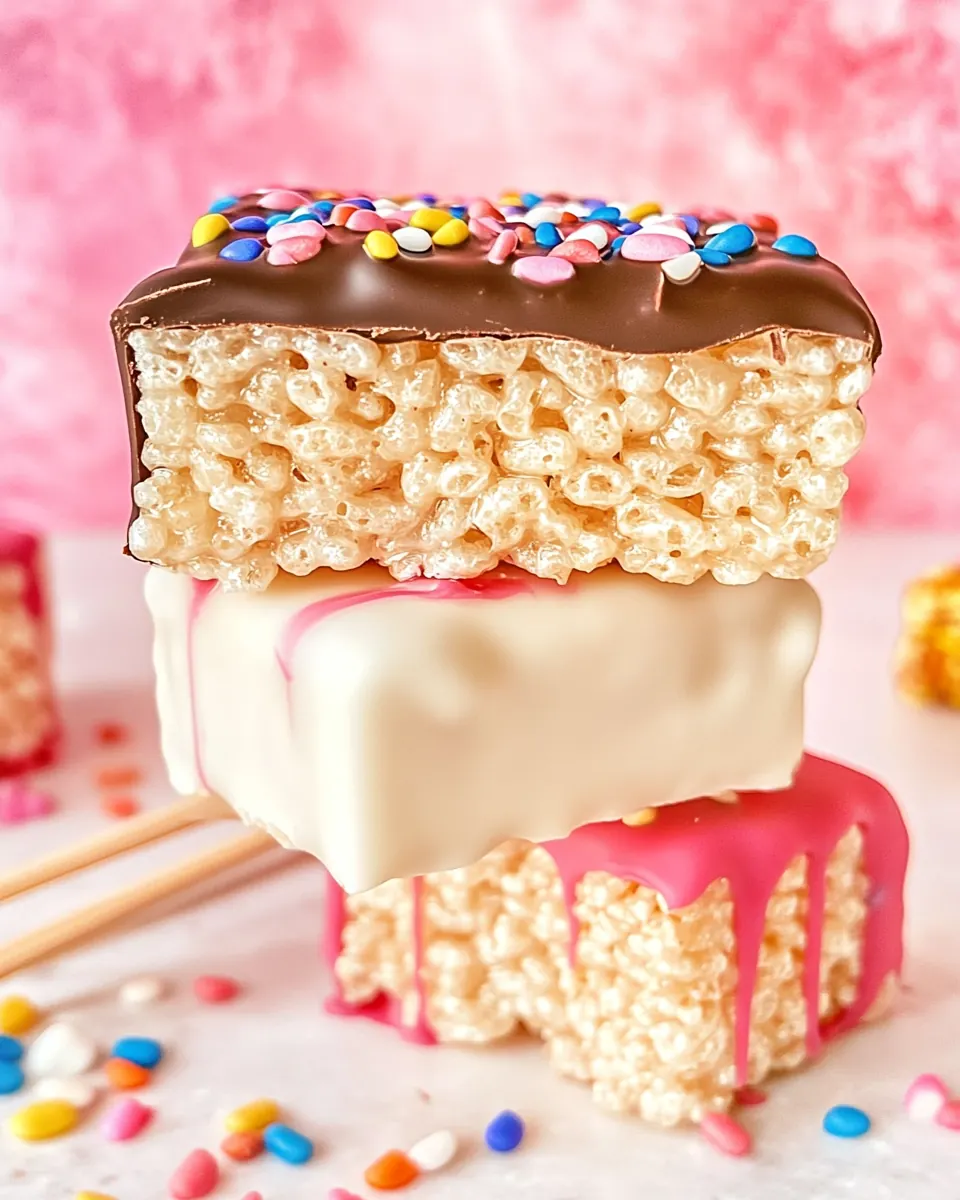
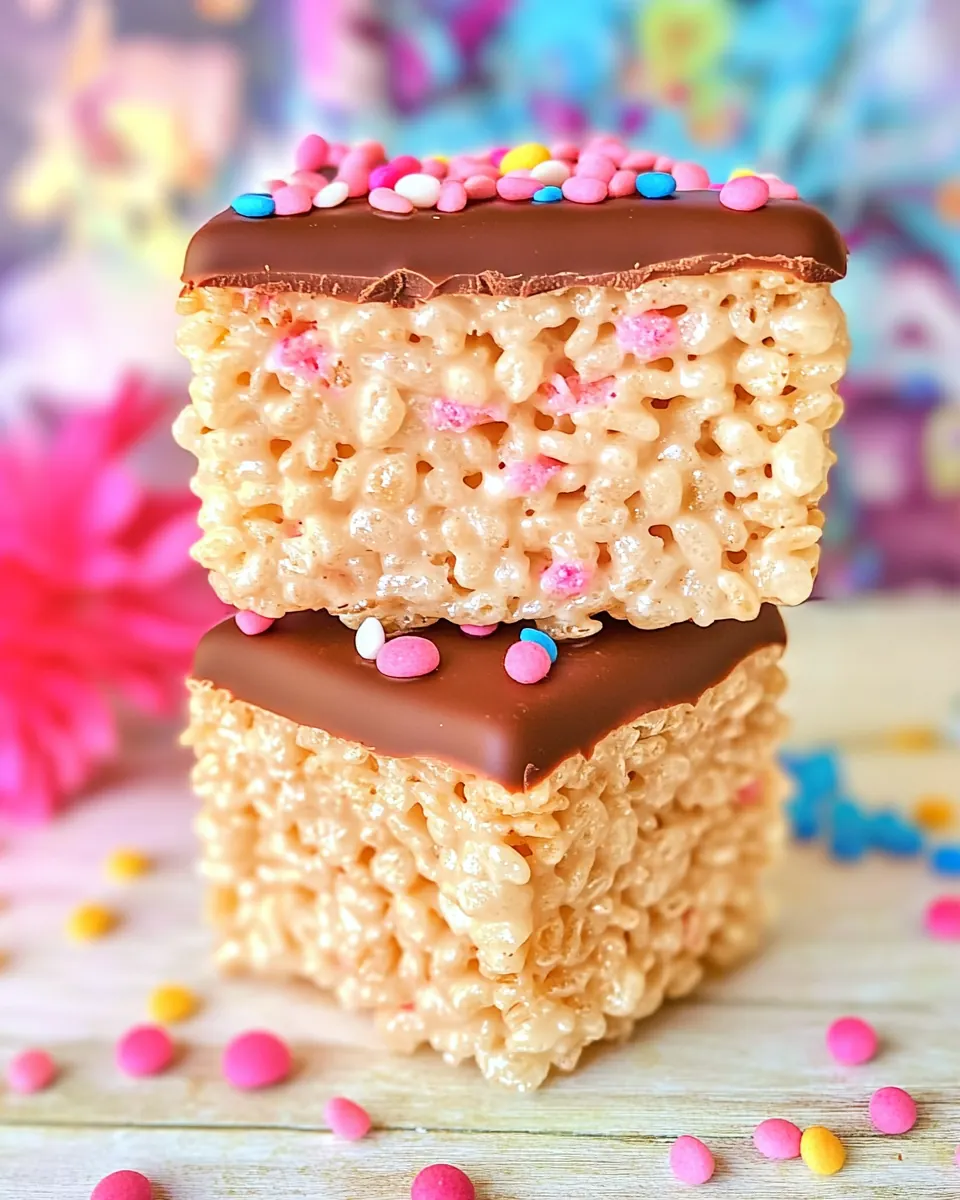
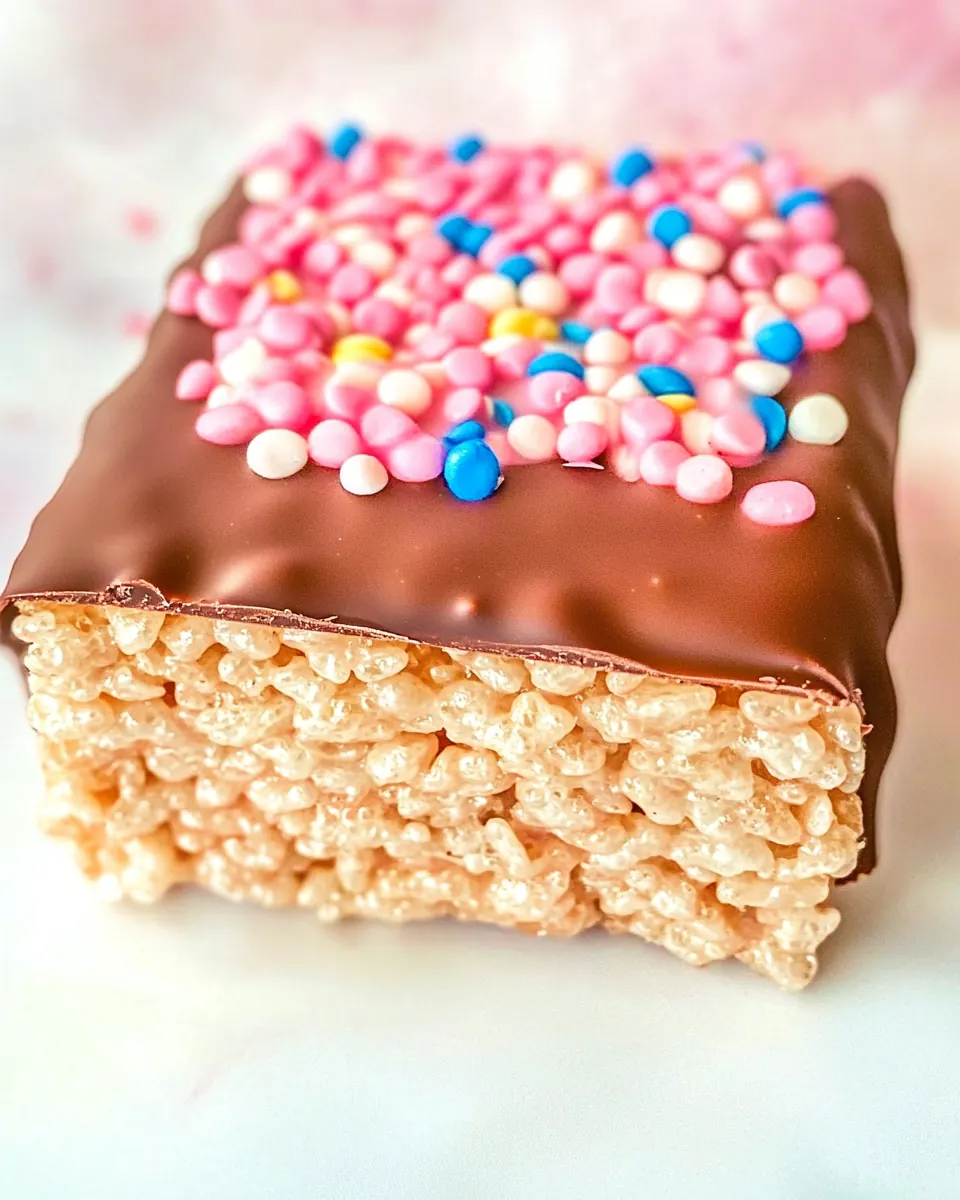
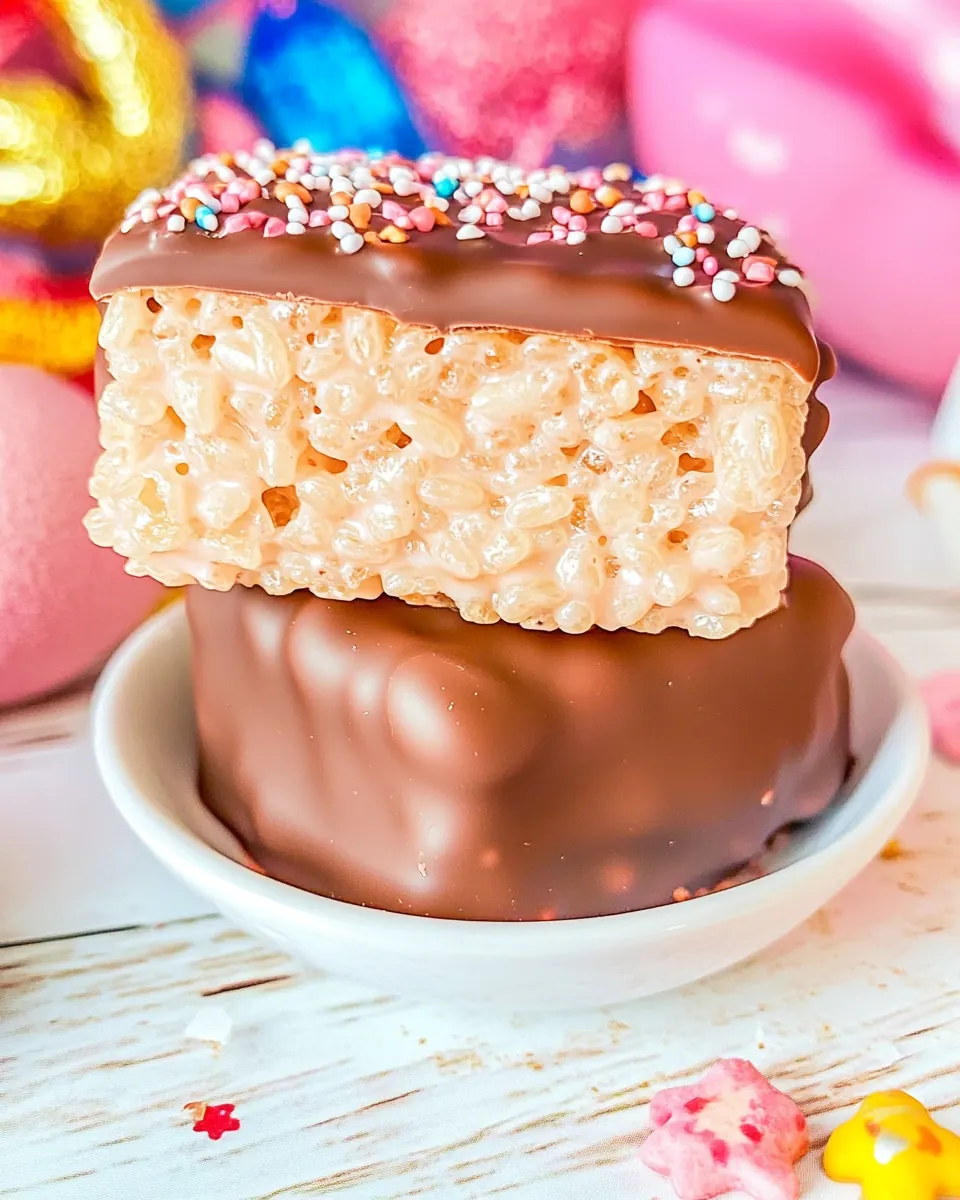
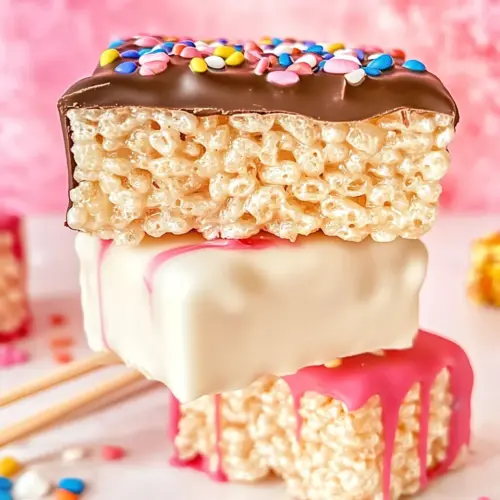
Chocolate Covered Rice Krispie Treats
Chocolate Covered Rice Krispie Treats are the kind of fun, nostalgic dessert I reach for when I want something playful yet impressive.
Growing up I loved helping in the kitchen by squishing warm, gooey squares into shapes, and these treats bring that childhood memory right back. I still remember the sticky fingers, the impatient tapping as we waited for the chocolate to set, and the tiny squeals when someone snagged the last heart shaped piece. Over the years I refined the technique so the coating is smooth and even, and the centers stay perfectly chewy without turning rock hard.
When I make Chocolate Covered Rice Krispie Treats for gatherings, people always comment on how professional they look even when they were so simple to pull together. I like to think it is the little rituals that elevate them, like pressing firmly with a cookie cutter and letting the dipped shapes rest on parchment so the chocolate forms a glossy shell. Once I started experimenting with different candy melt colors, these became my go to for themed parties, and I always keep a sheet on hand for last minute celebrations.
Recipe Snapshot
16 mins
15 mins
1 mins
Easy
200 kcal
American
Vegan, Gluten-Free
Desserts
Cookie cutter, Microwave safe bowl, Fork or chocolate dipping tool, Parchment lined baking sheet
What You’ll Enjoy About This Chocolate Covered Rice Krispie Treats
They are ridiculously easy to make
I love that Chocolate Covered Rice Krispie Treats require minimal technique, which means I can whip them up between errands or while entertaining. The simplicity lets me focus on little flourishes like shape and color, rather than fiddly steps. Because the process is straightforward I find it relaxing, and I often involve family members so it becomes a shared moment.
Textural contrast that wins every time
The combination of a crisp, candy shell and a tender, chewy center gives a satisfying contrast. I appreciate how the outer candy melts provide a clean snap, while the inside stays soft and nostalgic. That contrast makes them addictive, and it is why they stand out at any dessert table.
Highly flexible and festive
I can switch out colors to match a theme, which makes these treats perfect for seasonal gatherings and celebrations. The recipe is forgiving, so I can use store bought or homemade Rice Krispies Treats, and that versatility helps me adapt them to many occasions. When I need a last minute dessert, these always save the day.
Kid friendly and great for groups
Kids love decorating and dipping, and adults enjoy the polished result. I often make a double batch because they disappear fast. They are easy to portion and hand out, which makes them practical for parties or bake sales.
Visual appeal without fuss
With a little attention to dipping technique you get a glossy finish that looks bakery made. I enjoy how a simple fork or dipping tool gives a smooth coating, and how the use of parchment makes cleanup effortless. They photograph well too, which is handy when I share them online.
Shopping List for Chocolate Covered Rice Krispie Treats
These ingredients focus on a small set of high impact players that deliver texture, flavor, and visual appeal. The base provides chew and nostalgia, while the coating adds color and snap. Together they create a treat that feels elaborate but is actually straightforward to assemble.
- 32 ounce Rice Krispies Treats Sheet or homemade: Provide a soft, chewy base layer that sets the structure and texture of the treats; can be store-bought Rice Krispies Treats sheet or homemade for fresher flavor, and can be cut to size to fit your baking sheet or serving tray. Contribute caramel-like sweetness from marshmallows and toasted rice cereal, offering a neutral canvas that pairs well with any coating and adds nostalgic crunch and chew. Hold fillings or decorations in place when pressed gently, and withstand a light coating of melted candy without becoming soggy if chilled briefly before dipping.
- 24 ounces Pink Candy Melts any other color or flavor may be used as well: Melt into a smooth, pourable coating that creates a glossy, colorful shell over the rice krispie base; use pink candy melts for vibrant appearance, or substitute other colors or flavors for customization. Provide quick-setting structure when cooled, giving a firm yet bite-friendly outer layer that enhances presentation and keeps the interior sealed. Allow optional tempering for added shine and snap, and can be flavored or combined with oils for smoother melting and pouring consistency.
Cooking Instructions for Chocolate Covered Rice Krispie Treats
These steps are friendly and paced so you can enjoy the process. I like to lay out tools first, then work deliberately through cutting, melting, dipping, and cooling. With a little patience the results are consistent and fun to eat.
- Using a cookie cutter, press down firmly into the Rice Krispies Treat Sheet to cut out a shape.: The moment you press the cookie cutter into the sheet you will feel resistance as the compacted cereal gives way, and you should hear a soft compression sound. This compression ensures clean edges and helps the pieces hold together during dipping. If the sheet is too soft the shapes will smear, so gently chill the sheet for a few minutes before cutting to firm it up. A common mistake is pressing too lightly, which leaves ragged edges, or pressing too hard, which can cause the cutter to stick. Aim for steady, even pressure so the cutter slices through cleanly. Visually you want a defined outline and a uniform thickness so pieces cook and set evenly later.
- Gently remove the Rice Krispie shape from the cookie cutter and repeat the process.: As you pop the shape out you should notice the chewy texture holding together, and the small crackle of compacted cereal. Work gently to avoid stretching or tearing the piece, sliding a butter knife if needed to ease release. Repeating this process maintains consistent pieces, which melt and dip uniformly. One error to avoid is forcing the shape out quickly, which can distort the edges; instead, coax it free with a slow nudge. The goal is neat, intact centers that will be easy to dip without falling apart.
- In a medium sized microwave safe bowl, melt 24 ounces of Candy Melts according to the instructions on the package label.: When you heat the candy melts you will see them soften, glossy streaks forming, and finally a smooth, pourable texture. Stirring between short bursts is key to even melting and preventing grainy or scorched spots. The aroma will be sweet and slightly confectionary, and the smooth sheen signals readiness for dipping. Avoid overheating which causes seizing and thickening; follow the package guidance and stop when you have a silky consistency. A frequent slip is microwaving for too long without stirring, leading to clumps; short bursts and mixing fix that.
- Using a fork (or a chocolate dipping tool) dip the Rice Krispie shape into the melted chocolate and allow the excess to drip off.: As you lower the piece into the melted coating it will be enveloped in a glossy layer, and you may hear a faint slosh as chocolate moves around the edges. Lift it and tap gently to let excess fall back, watching for a smooth, even coating without air bubbles. The smooth finish is achieved by a steady lift and a gentle shake, and the tactile feel is slick and slightly warm. A common problem is cold centers causing the coating to harden too fast and crack, so keep the centers at room temperature. If the coating looks lumpy or dull, warm it gently and stir to restore silkiness.
- Place onto a parchment lined baking sheet to cool at room temperature for 10 minutes (or until the chocolate has hardened).: As the coated pieces rest you will notice the surface go from glossy to set, and a faint crisp snap will develop when you test one. Cooling on parchment prevents sticking and ensures easy removal, and the ambient air sets the coating without condensation. Watch for sweating if you refrigerate immediately, which can cloud the finish, so room temperature is best for that glossy look. A typical oversight is stacking pieces while they are still tacky, which ruins the finish, so space them apart for even airflow. After setting, the contrast between the snap and the chewy center will be apparent when you bite into one.
Helpful Notes about Chocolate Covered Rice Krispie Treats
These notes expand on small decisions that make big differences. I’ve included practical guidance and reminders that help the recipe look and taste its best, whether you are making a single batch or doubling for a crowd.
- Choose the right firmness When using a pre made sheet test a corner piece to ensure it is firm enough for clean cutting. If it seems too soft, chill for a few minutes in the fridge until it holds shape, but do not freeze.
- Heat in short bursts Melt the candy melts in 20 second increments, stirring between each burst to prevent overheating and to keep the finish smooth and glossy.
- Work in batches Dip a few pieces at a time rather than all at once, so the melted coating stays fluid and easy to work with, avoiding thick, clumpy shells.
- Use the right tools A fork or dipping tool gives control and helps excess chocolate drip off cleanly, producing a neater finish than hand dipping.
- Plan cooling space Arrange pieces on parchment with space between them so air can circulate and the coating sets uniformly without smudging.
Best Served With
These treats are playful and portable, making them ideal for many occasions. They work well for casual coffee breaks, dessert tables at parties, or sweet additions to a picnic box. Here are thoughtful serving suggestions and pairings to enhance the experience.
- Party platters Arrange Chocolate Covered Rice Krispie Treats on a colorful platter with complementary themed colors for birthdays or baby showers, spacing them so guests can easily pick them up.
- Picnic friendly Wrap individually in parchment or wax paper so they travel well, and keep them in a cool container to preserve the glossy coating during warm days.
- Kid friendly dessert Place a few on a small plate alongside plain fruit for school events, since they are easy for kids to hold and enjoy without utensils.
- Seasonal gifting Package in clear boxes with a ribbon in matching color for holidays or as a simple hostess gift, making the visual appeal part of the present.
- Storage tips Store in an airtight container at room temperature for up to three days, layering parchment between pieces to prevent sticking and preserve the crisp coating.
- Occasion flexibility Use different candy melts colors for themed events like Valentine s Day, Halloween, or graduation to make the treats match any celebration.
FAQ
Conclusion
These Chocolate Covered Rice Krispie Treats stand out because they combine nostalgic chew with a glossy, crisp coating that feels special yet is simple to achieve. I hope this encourages you to give them a try, whether for a quick dessert or a festive platter. They are forgiving, customizable, and fun to make with friends or family, so grab your cookie cutter and candy melts and enjoy the process.
Chocolate Covered Rice Krispie Treats
Equipment
- Cookie Cutter
- Microwave-safe Bowl
- Fork or chocolate dipping tool
- Parchment lined baking sheet
Ingredients
- 32 ounce Rice Krispies Treats Sheet or homemade Provide a soft, chewy base layer that sets the structure and texture of the treats; can be store-bought Rice Krispies Treats sheet or homemade for fresher flavor, and can be cut to size to fit your baking sheet or serving tray. Contribute caramel-like sweetness from marshmallows and toasted rice cereal, offering a neutral canvas that pairs well with any coating and adds nostalgic crunch and chew. Hold fillings or decorations in place when pressed gently, and withstand a light coating of melted candy without becoming soggy if chilled briefly before dipping.
- 24 ounces Pink Candy Melts any other color or flavor may be used as well Melt into a smooth, pourable coating that creates a glossy, colorful shell over the rice krispie base; use pink candy melts for vibrant appearance, or substitute other colors or flavors for customization. Provide quick-setting structure when cooled, giving a firm yet bite-friendly outer layer that enhances presentation and keeps the interior sealed. Allow optional tempering for added shine and snap, and can be flavored or combined with oils for smoother melting and pouring consistency.
Instructions
- Using a cookie cutter, press down firmly into the Rice Krispies Treat Sheet to cut out a shape.: The moment you press the cookie cutter into the sheet you will feel resistance as the compacted cereal gives way, and you should hear a soft compression sound. This compression ensures clean edges and helps the pieces hold together during dipping. If the sheet is too soft the shapes will smear, so gently chill the sheet for a few minutes before cutting to firm it up. A common mistake is pressing too lightly, which leaves ragged edges, or pressing too hard, which can cause the cutter to stick. Aim for steady, even pressure so the cutter slices through cleanly. Visually you want a defined outline and a uniform thickness so pieces cook and set evenly later.
- Gently remove the Rice Krispie shape from the cookie cutter and repeat the process.: As you pop the shape out you should notice the chewy texture holding together, and the small crackle of compacted cereal. Work gently to avoid stretching or tearing the piece, sliding a butter knife if needed to ease release. Repeating this process maintains consistent pieces, which melt and dip uniformly. One error to avoid is forcing the shape out quickly, which can distort the edges; instead, coax it free with a slow nudge. The goal is neat, intact centers that will be easy to dip without falling apart.
- In a medium sized microwave safe bowl, melt 24 ounces of Candy Melts according to the instructions on the package label.: When you heat the candy melts you will see them soften, glossy streaks forming, and finally a smooth, pourable texture. Stirring between short bursts is key to even melting and preventing grainy or scorched spots. The aroma will be sweet and slightly confectionary, and the smooth sheen signals readiness for dipping. Avoid overheating which causes seizing and thickening; follow the package guidance and stop when you have a silky consistency. A frequent slip is microwaving for too long without stirring, leading to clumps; short bursts and mixing fix that.
- Using a fork (or a chocolate dipping tool) dip the Rice Krispie shape into the melted chocolate and allow the excess to drip off.: As you lower the piece into the melted coating it will be enveloped in a glossy layer, and you may hear a faint slosh as chocolate moves around the edges. Lift it and tap gently to let excess fall back, watching for a smooth, even coating without air bubbles. The smooth finish is achieved by a steady lift and a gentle shake, and the tactile feel is slick and slightly warm. A common problem is cold centers causing the coating to harden too fast and crack, so keep the centers at room temperature. If the coating looks lumpy or dull, warm it gently and stir to restore silkiness.
- Place onto a parchment lined baking sheet to cool at room temperature for 10 minutes (or until the chocolate has hardened).: As the coated pieces rest you will notice the surface go from glossy to set, and a faint crisp snap will develop when you test one. Cooling on parchment prevents sticking and ensures easy removal, and the ambient air sets the coating without condensation. Watch for sweating if you refrigerate immediately, which can cloud the finish, so room temperature is best for that glossy look. A typical oversight is stacking pieces while they are still tacky, which ruins the finish, so space them apart for even airflow. After setting, the contrast between the snap and the chewy center will be apparent when you bite into one.
Notes
- Choose the right firmness When using a pre made sheet test a corner piece to ensure it is firm enough for clean cutting. If it seems too soft, chill for a few minutes in the fridge until it holds shape, but do not freeze.
- Heat in short bursts Melt the candy melts in 20 second increments, stirring between each burst to prevent overheating and to keep the finish smooth and glossy.
- Work in batches Dip a few pieces at a time rather than all at once, so the melted coating stays fluid and easy to work with, avoiding thick, clumpy shells.
- Use the right tools A fork or dipping tool gives control and helps excess chocolate drip off cleanly, producing a neater finish than hand dipping.
- Plan cooling space Arrange pieces on parchment with space between them so air can circulate and the coating sets uniformly without smudging.