Healthy Frosting
Healthy Frosting has been my secret weapon when I want a guilt free finish on brownies or a quick patch for a less than perfect cake. The very first time I mixed these few pantry items together I felt like I had cracked a code, because the texture was rich yet light, and the flavor reminded me of deep chocolate without the sugar overload.
I remember standing at the counter with a half melted jar of coconut oil and a spoonful of maple syrup, curious if something so simple could actually replace butter based icing. As I stirred in the cocoa powder the kitchen filled with a warm chocolate scent that felt indulgent and honest. Adding unsweetened applesauce rounded everything out, giving the frosting body and a silky mouthfeel.
Over the years I have adjusted ratios and learned how refrigeration and resting change the final spreadability, and now I reach for this version whenever I want a quick, cleaner topping that still satisfies a chocolate craving. It travels well to potlucks, and it shows up at birthdays when someone asks for something lighter. I love that it lets the base dessert shine while still feeling thoughtfully finished.
Recipe Snapshot
2 mins
2 mins
Easy
120 kcal
American
Paleo, Vegan
Desserts
Large mixing bowl, Whisk or spatula, Refrigerator
Why Try This Healthy Frosting
Simple pantry ingredients with big impact
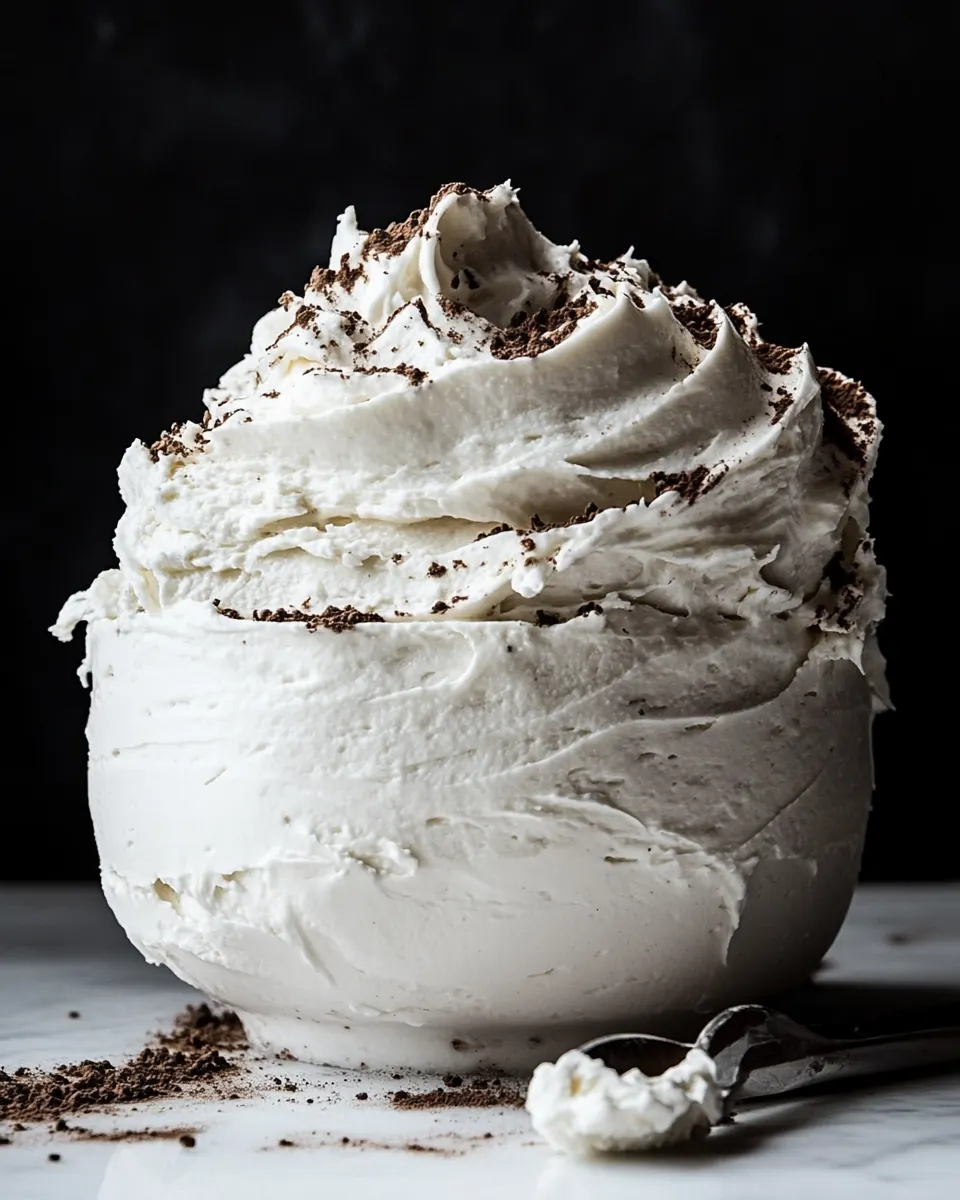
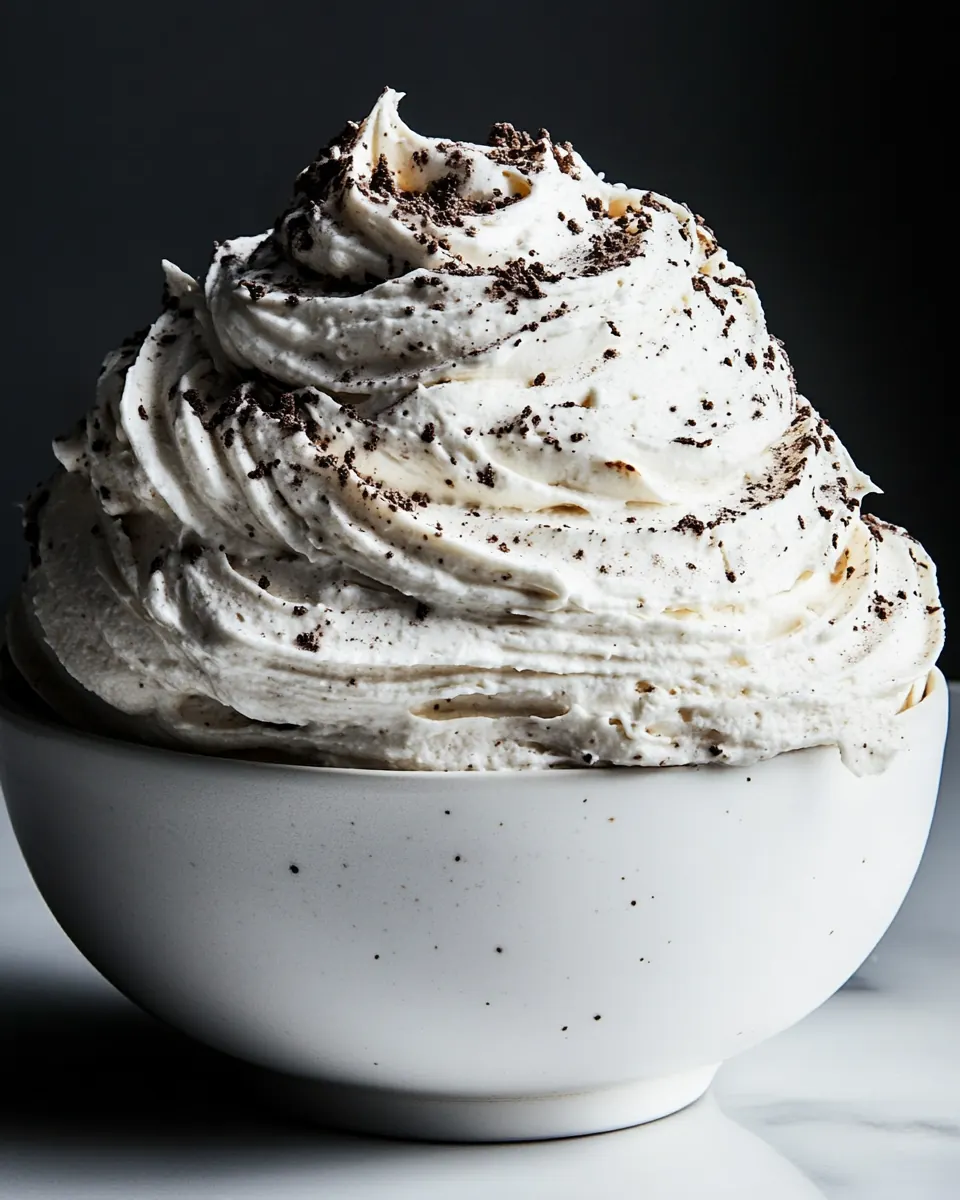
I love that Healthy Frosting is made from ingredients I usually already have on hand. With just coconut oil, maple syrup, cocoa powder, and unsweetened applesauce, it comes together quickly, and the result is surprisingly luxurious. The cocoa provides depth, the coconut oil brings a glossy finish, the maple syrup adds balanced sweetness, and the applesauce gives structure without heaviness.
Versatile texture control
One of my favorite things is how easy it is to tweak the texture. Chill it for a firmer spread, or add a touch more applesauce for a drippy glaze. I often adjust it mid use, tasting and feeling the consistency so it fits the dessert I am finishing.
Better for everyday indulgence
I make Healthy Frosting when I want to offer something indulgent yet more mindful. The swap from heavy butter to lighter components means I can top treats for family gatherings without that heavy post dessert slump. It still feels celebratory, but lighter at the end of the meal.
Kid friendly and party approved
Kids are honest critics, and they usually approve this version. I appreciate that it performs well on cupcakes and sheet cakes at parties, and it travels without melting into a puddle as quickly as buttercream would if refrigerated first.
Quick to make, easy to store
This frosting is fast to assemble, and it keeps well in the refrigerator or freezer, which makes it a practical choice for weekend baking. I often make a batch ahead and use it over several desserts during the week.
Shopping List for Healthy Frosting
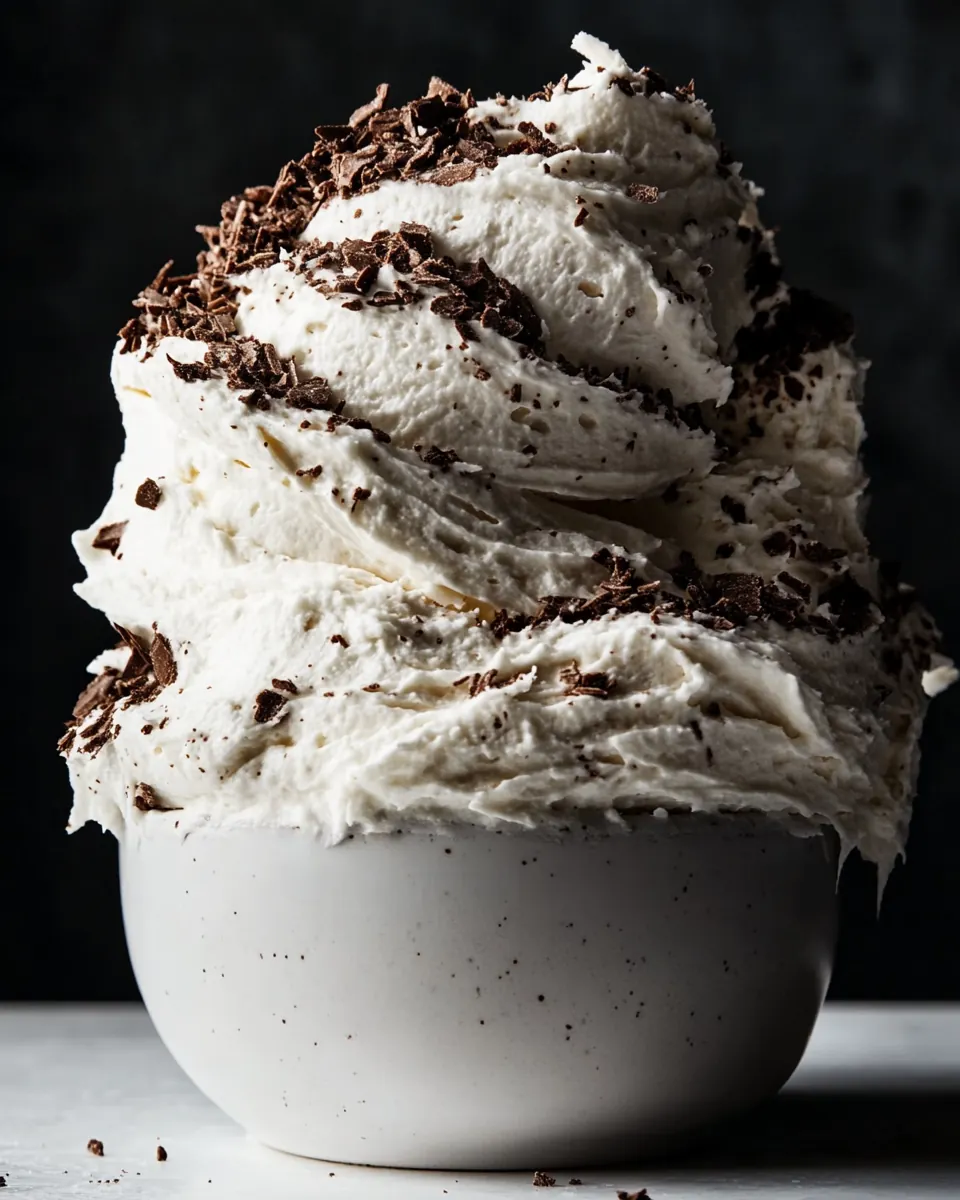
These ingredients reflect a philosophy of doing more with less. Each item plays a clear role in texture and flavor, so the combination is balanced. The coconut oil lends sheen and a soft set, the maple syrup supplies warmth and sweetness, the cocoa powder delivers chocolate intensity, and the unsweetened applesauce gives body while keeping the frosting lighter than traditional options.
- 1/2 cup coconut oil melted: Melted to provide a smooth, spreadable fat that helps create a glossy, creamy frosting texture and adds richness without dairy. It also firms up when chilled, giving the frosting structure and stability for piping or spreading.
- 3 tablespoons maple syrup: Sweetens naturally while contributing a subtle caramel complexity and liquid balance that helps dissolve cocoa and combine ingredients evenly. It also keeps the frosting softer and scoopable at cooler temperatures compared with granulated sugars.
- 1/2 cup cocoa powder I used dark cocoa powder: Adds deep chocolate flavor and intense color while keeping the frosting low in sugar and dense in cocoa solids for a rich taste. It also absorbs some liquid from the applesauce and maple syrup, helping to thicken the mixture to a cohesive spreadable consistency.
- 1 cup unsweetened applesauce * see notes: Provides bulk and moisture while supplying natural sweetness and a smoother mouthfeel that reduces the need for additional liquids. It helps create a creamy body for the frosting and contributes to a lighter texture compared with butter or cream bases.
How to Assemble Healthy Frosting
Putting this frosting together is straightforward, and the key is paying attention to texture and temperature. I like to work in a cool kitchen and taste as I go, because small adjustments can make a big difference. Below I expand the two main instructions into detailed, sensory driven steps so you know exactly what to watch for and why each choice matters.
- In a large mixing bowl, combine your coconut oil, maple syrup, and cocoa powder. Mix until a glossy liquid chocolate texture remains. Add your unsweetened applesauce. Start with 1 cup and, depending on what texture you are after, increase.: The bowl will smell faintly of coconut and cocoa as the ingredients come together, with the syrup adding a warming sweetness scent. Use a whisk or flexible spatula to break up any dry pockets of cocoa powder , and you should see a shiny, cohesive mixture that drapes off the whisk in ribbons. The glossy appearance indicates the oil is well emulsified with the syrup, which makes the frosting spreadable and visually appealing. If you hear scraping sounds as you whisk, that is normal; the mixture thickens slightly as you work. The purpose of this step is to fully hydrate the powder and integrate the sweetener so there are no gritty bits. One common misstep is adding the applesauce too early or mixing too aggressively, which can create a soupy texture. If the mixture seems grainy, let it rest for a minute then whisk again to smooth it out.
- Refrigerate for at least 20 minutes to thicken slightly. If you need to use it immediately, add a teaspoon or two of cornstarch, or as needed.: When you fold in the unsweetened applesauce , you will notice the aroma shifts toward a fruitier, lighter profile and the color may lighten slightly. The applesauce brings body and moisture, transforming the glossy liquid into a thicker, scoopable frosting. Stir gently until the applesauce is fully incorporated and the surface takes on a velvety sheen. The reason this step matters is it balances fat with water content, creating structure without heavy dairy. A sensory cue to watch for is the way the mixture holds shape on a spoon; it should form a soft peak but not be runny. A frequent error is adding too much applesauce at once which can make the frosting loose, so add incrementally and test spreadability. If it becomes too thin, chill briefly to firm up or add a touch more cocoa powder to absorb excess moisture. This stage benefits from a patient hand, gentle folding, and tasting as you go.
- Refrigerate for at least 20 minutes to thicken slightly: After chilling, the frosting will firm up as the coconut oil cools, and you will notice a more matte finish with a denser feel under the stirring spoon. The cold temperature helps it hold peaks and makes spreading onto cakes or piping onto cupcakes much easier. Sensory signs include a cooler touch and a quieter, less glossy surface. This step matters because it stabilizes the texture without adding extra ingredients, preserving the clean flavor. Avoid leaving it in the fridge for too long and then attempting to overwork it at room temperature, which can cause separation. If the frosting becomes too solid to spread, let it sit at room temperature for a few minutes and then whip briefly to restore spreadability.
- If you need to use it immediately, add a teaspoon or two of cornstarch, or as needed: Cornstarch absorbs excess moisture and helps the frosting set faster when chilling time is not available, and you will see the mixture thicken almost immediately after stirring it in. The texture will become slightly more velvety, and the taste remains neutral if you use just a small amount. The reason to use cornstarch is practical, it mimics the thickening effect of time in the fridge. A pitfall is adding too much cornstarch, which can make the frosting chalky, so incorporate sparingly and test. When using this shortcut, taste for balance because the absorption can mute sweetness, and adjust with a drop of maple syrup if necessary.
How to Switch It Up
There are a few safe and simple ways to change the profile of this frosting without breaking its healthy intent. I like to think in small adjustments that shift texture or flavor, rather than overhaul the recipe.
- Boost chocolate intensity by using dark cocoa powder or adding an extra tablespoon of cocoa for a deeper, more bittersweet note.
- Sweeter finish can be achieved by increasing the maple syrup by a teaspoon at a time, tasting as you go to avoid oversweetening.
- Firmer set is possible by chilling longer or adding a small pinch of cornstarch to absorb moisture and speed up thickening.
- Lighter spread comes from adding a touch more applesauce, which will thin the frosting and make it drippier for glazes.
- Texture variation can be created by briefly whipping the mixture after chilling to incorporate tiny air pockets and produce a fluffier topping.
Perfect Matches for Healthy Frosting
This frosting pairs beautifully with a range of baked goods and occasions, and it adapts to different serving needs. Whether you are finishing cupcakes for a birthday or topping a simple sheet cake for a casual gathering, the lighter finish plays well with many flavors. Below I outline ideas and serving approaches so you can match it to the moment.
- Best bases include chocolate brownies, spiced loaf cakes, or muffin tops where the cocoa powder echoes the dessert flavors.
- Occasion picks range from afternoon tea and casual birthday parties to Ramadan if you want a lighter touch after a meal.
- Storage tip keep leftovers in an airtight container in the refrigerator for up to two weeks, and allow the frosting to sit at room temperature for fifteen to twenty minutes before spreading to regain softness.
- Freezing guidance portion into a freezer friendly container and freeze for up to two months, thaw in the refrigerator overnight, then bring to room temperature before stirring gently.
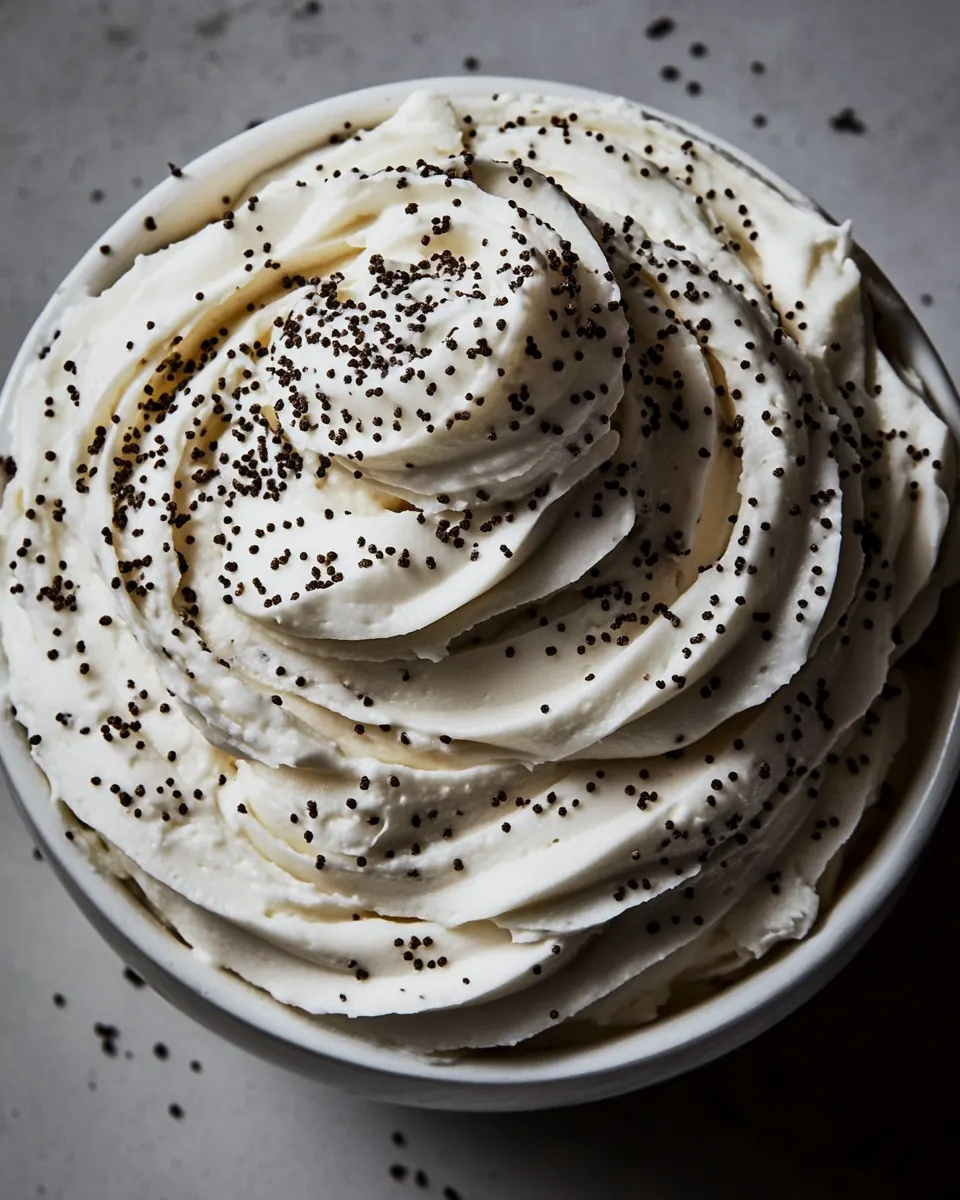
- Presentation pipe chilled frosting with a wide tip for clean swirls, or spoon it on and smooth with an offset spatula for a rustic look that still reads polished.
FAQ
Conclusion
This Healthy Frosting stands out because it transforms simple pantry staples into a creamy, chocolatey topping that feels indulgent without heaviness. I encourage you to give it a try the next time you want a cleaner finish for cupcakes or a quick cake, because it is fast to make and forgiving to tweak. Enjoy the process of adjusting texture to your preference, and savor how a few thoughtful swaps can deliver a satisfying chocolate experience.

Healthy Frosting
Equipment
- Large Mixing Bowl
- Whisk or spatula
- Refrigerator
Ingredients
- 1/2 cup coconut oil melted Melted to provide a smooth, spreadable fat that helps create a glossy, creamy frosting texture and adds richness without dairy. It also firms up when chilled, giving the frosting structure and stability for piping or spreading.
- 3 tablespoons maple syrup Sweetens naturally while contributing a subtle caramel complexity and liquid balance that helps dissolve cocoa and combine ingredients evenly. It also keeps the frosting softer and scoopable at cooler temperatures compared with granulated sugars.
- 1/2 cup cocoa powder I used dark cocoa powder Adds deep chocolate flavor and intense color while keeping the frosting low in sugar and dense in cocoa solids for a rich taste. It also absorbs some liquid from the applesauce and maple syrup, helping to thicken the mixture to a cohesive spreadable consistency.
- 1 cup unsweetened applesauce * see notes Provides bulk and moisture while supplying natural sweetness and a smoother mouthfeel that reduces the need for additional liquids. It helps create a creamy body for the frosting and contributes to a lighter texture compared with butter or cream bases.
Instructions
- In a large mixing bowl, combine your coconut oil, maple syrup, and cocoa powder. Mix until a glossy liquid chocolate texture remains. Add your unsweetened applesauce. Start with 1 cup and, depending on what texture you are after, increase.: The bowl will smell faintly of coconut and cocoa as the ingredients come together, with the syrup adding a warming sweetness scent. Use a whisk or flexible spatula to break up any dry pockets of cocoa powder , and you should see a shiny, cohesive mixture that drapes off the whisk in ribbons. The glossy appearance indicates the oil is well emulsified with the syrup, which makes the frosting spreadable and visually appealing. If you hear scraping sounds as you whisk, that is normal; the mixture thickens slightly as you work. The purpose of this step is to fully hydrate the powder and integrate the sweetener so there are no gritty bits. One common misstep is adding the applesauce too early or mixing too aggressively, which can create a soupy texture. If the mixture seems grainy, let it rest for a minute then whisk again to smooth it out.
- Refrigerate for at least 20 minutes to thicken slightly. If you need to use it immediately, add a teaspoon or two of cornstarch, or as needed.: When you fold in the unsweetened applesauce , you will notice the aroma shifts toward a fruitier, lighter profile and the color may lighten slightly. The applesauce brings body and moisture, transforming the glossy liquid into a thicker, scoopable frosting. Stir gently until the applesauce is fully incorporated and the surface takes on a velvety sheen. The reason this step matters is it balances fat with water content, creating structure without heavy dairy. A sensory cue to watch for is the way the mixture holds shape on a spoon; it should form a soft peak but not be runny. A frequent error is adding too much applesauce at once which can make the frosting loose, so add incrementally and test spreadability. If it becomes too thin, chill briefly to firm up or add a touch more cocoa powder to absorb excess moisture. This stage benefits from a patient hand, gentle folding, and tasting as you go.
- Refrigerate for at least 20 minutes to thicken slightly: After chilling, the frosting will firm up as the coconut oil cools, and you will notice a more matte finish with a denser feel under the stirring spoon. The cold temperature helps it hold peaks and makes spreading onto cakes or piping onto cupcakes much easier. Sensory signs include a cooler touch and a quieter, less glossy surface. This step matters because it stabilizes the texture without adding extra ingredients, preserving the clean flavor. Avoid leaving it in the fridge for too long and then attempting to overwork it at room temperature, which can cause separation. If the frosting becomes too solid to spread, let it sit at room temperature for a few minutes and then whip briefly to restore spreadability.
- If you need to use it immediately, add a teaspoon or two of cornstarch, or as needed: Cornstarch absorbs excess moisture and helps the frosting set faster when chilling time is not available, and you will see the mixture thicken almost immediately after stirring it in. The texture will become slightly more velvety, and the taste remains neutral if you use just a small amount. The reason to use cornstarch is practical, it mimics the thickening effect of time in the fridge. A pitfall is adding too much cornstarch, which can make the frosting chalky, so incorporate sparingly and test. When using this shortcut, taste for balance because the absorption can mute sweetness, and adjust with a drop of maple syrup if necessary.
Notes
- Boost chocolate intensity by using dark cocoa powder or adding an extra tablespoon of cocoa for a deeper, more bittersweet note.
- Sweeter finish can be achieved by increasing the maple syrup by a teaspoon at a time, tasting as you go to avoid oversweetening.
- Firmer set is possible by chilling longer or adding a small pinch of cornstarch to absorb moisture and speed up thickening.
- Lighter spread comes from adding a touch more applesauce, which will thin the frosting and make it drippier for glazes.
- Texture variation can be created by briefly whipping the mixture after chilling to incorporate tiny air pockets and produce a fluffier topping.