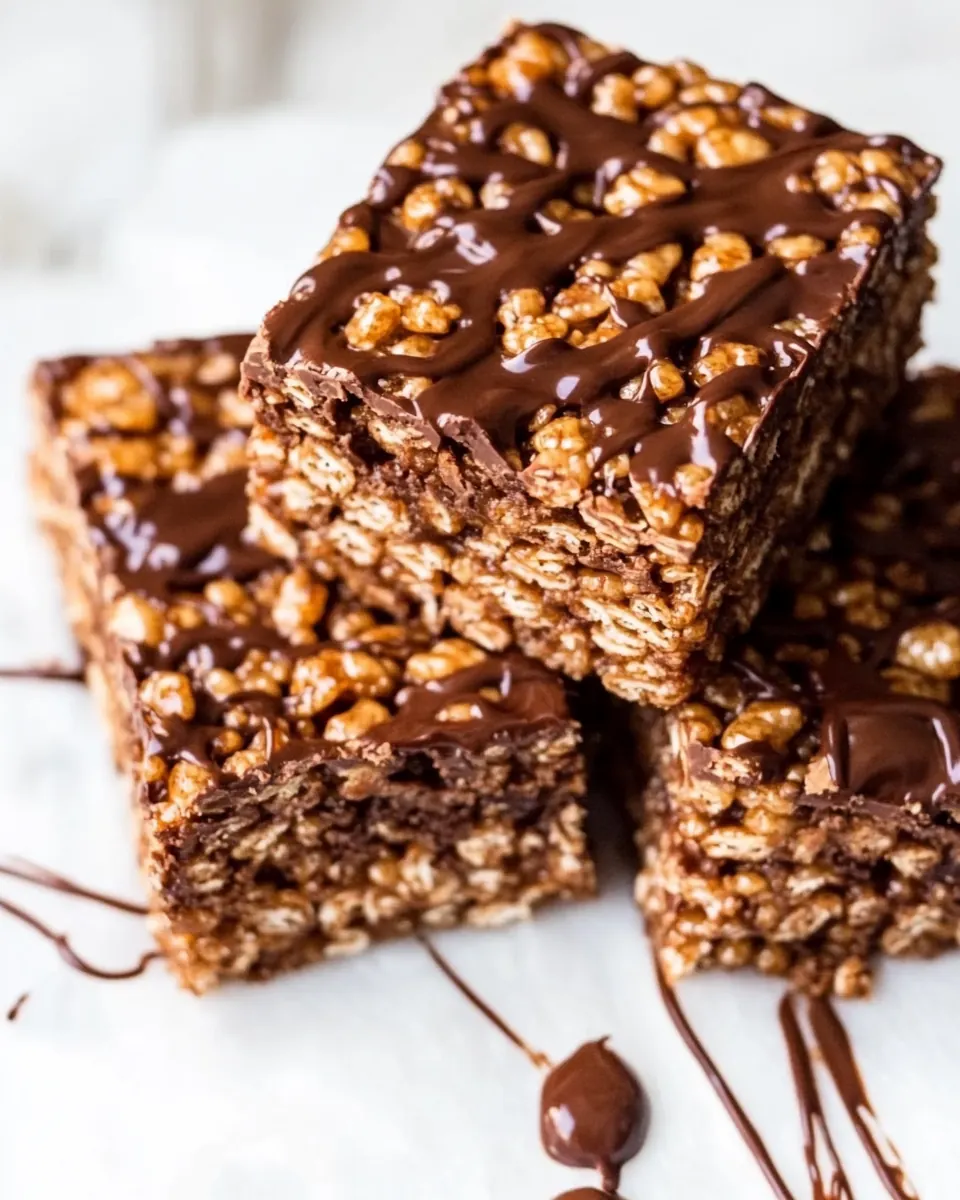
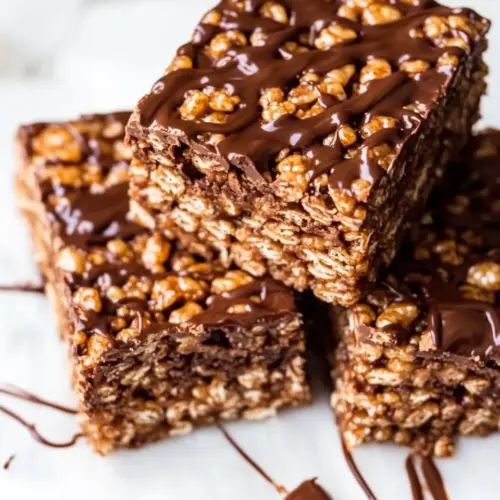
Peanut Butter Nutella Rice Krispie Treats
Peanut Butter Nutella Rice Krispie Treats have been my go to crowd pleaser since I first smashed together jars of peanut butter and Nutella on a rainy afternoon when I needed a serious sugar fix.
That first batch came together almost by accident, with a chorus of tiny hands hovering for taste tests and a kitchen that smelled like toasted cereal and warm chocolate. I still remember the sticky, comforting texture as I pressed the mixture into the pan and tried not to eat the whole thing hot, straight from the spatula. Over time I tweaked the press, the stir, and the drizzle until they had just the right chew and shine.
Whenever I make Peanut Butter Nutella Rice Krispie Treats now, neighbors appear unannounced, and kids suddenly have homework that needs handing in early. I like how forgiving the recipe is, and how it makes everyone feel a little nostalgic, like a cozy afternoon revisited. These treats travel well, they make a statement at bake sales, and they are one of those recipes I reach for when I want to impress without fuss.
Recipe Snapshot
20 mins
10 mins
10 mins
Medium
200 kcal
American
Gluten-Free, Vegan
Desserts
Nutella Chocolate Hazelnut Spread, Mini Marshmallows, Rice Krispies Cereal
Why You’ll Love This Peanut Butter Nutella Rice Krispie Treats
1. Crowd pleasing combo
I love these treats because the marriage of peanut butter and Nutella is instant happiness. The creamy, slightly salty note from the peanut butter plays off the hazelnut chocolate depth of the Nutella, making each bite complex but familiar. I find that guests often say this feels like an elevated childhood favorite.
2. Easy, fast assembly
We can whip these up in a single pan and a few minutes of active work. The process is straightforward, which is why I reach for it on busy afternoons. The simplicity makes it a lifesaver when you want homemade without a long commitment.
3. Texture balance
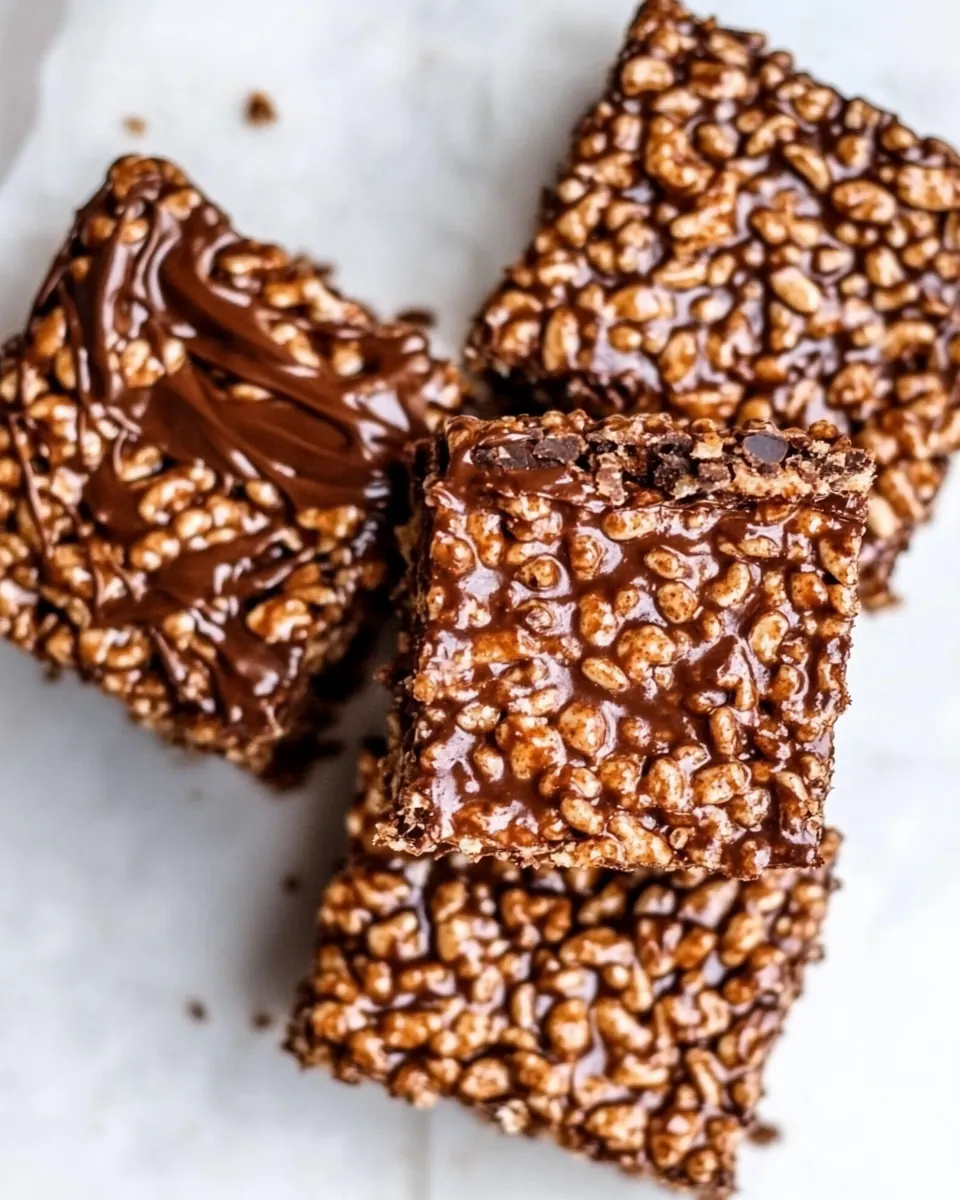
The Rice Krispie cereal contributes that signature crisp snap, while the melted marshmallows and spreads create chew and binding. I appreciate how each component contributes a distinct mouthfeel, so the treat is never one note.
4. Kid friendly and portable
These bars travel well and are sturdy enough for lunchboxes or potlucks. I often bring them to neighborhood gatherings because they stay intact, slice clean, and keep their flavor. They are a nostalgic pick that also feels a bit special because of the Nutella.
5. Little touches make a difference
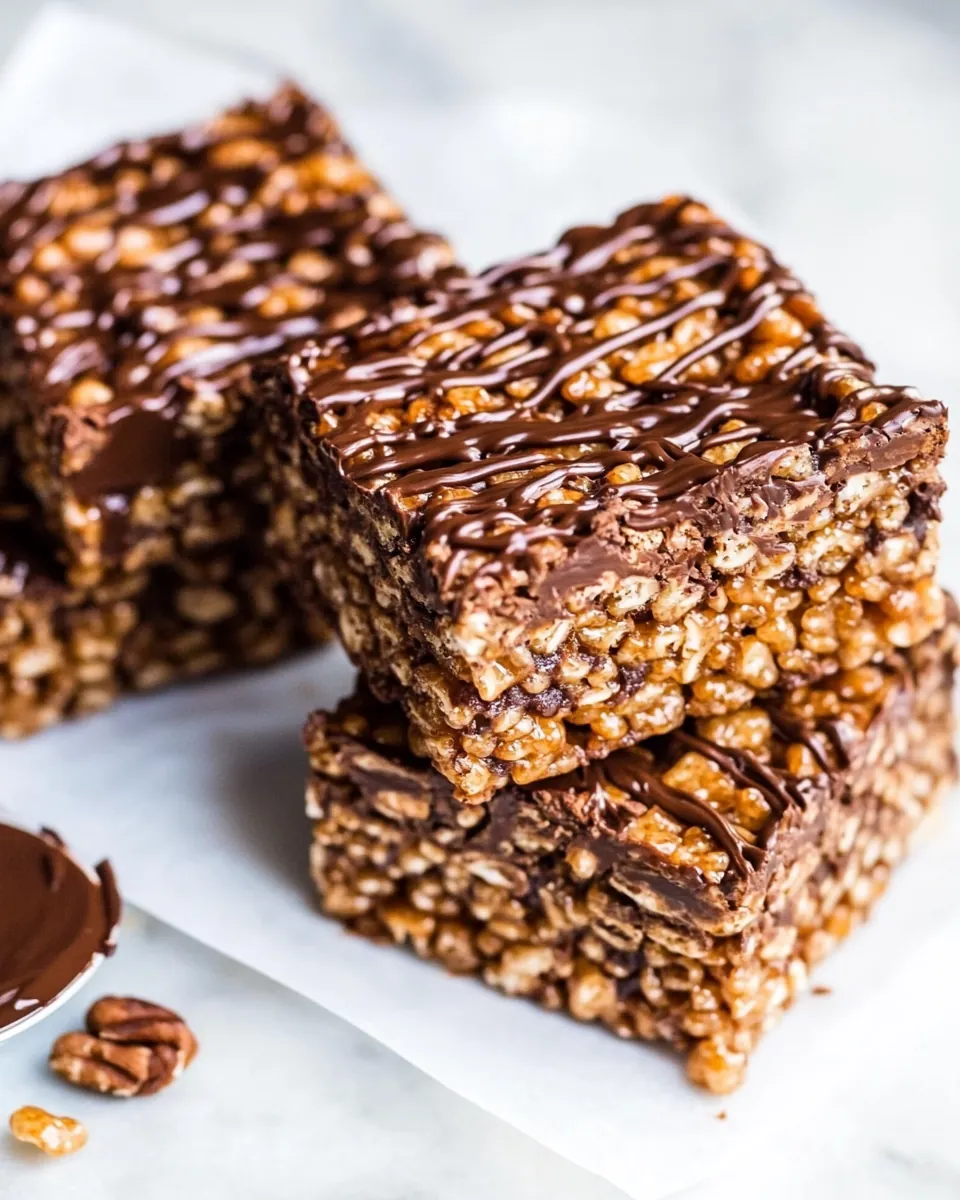
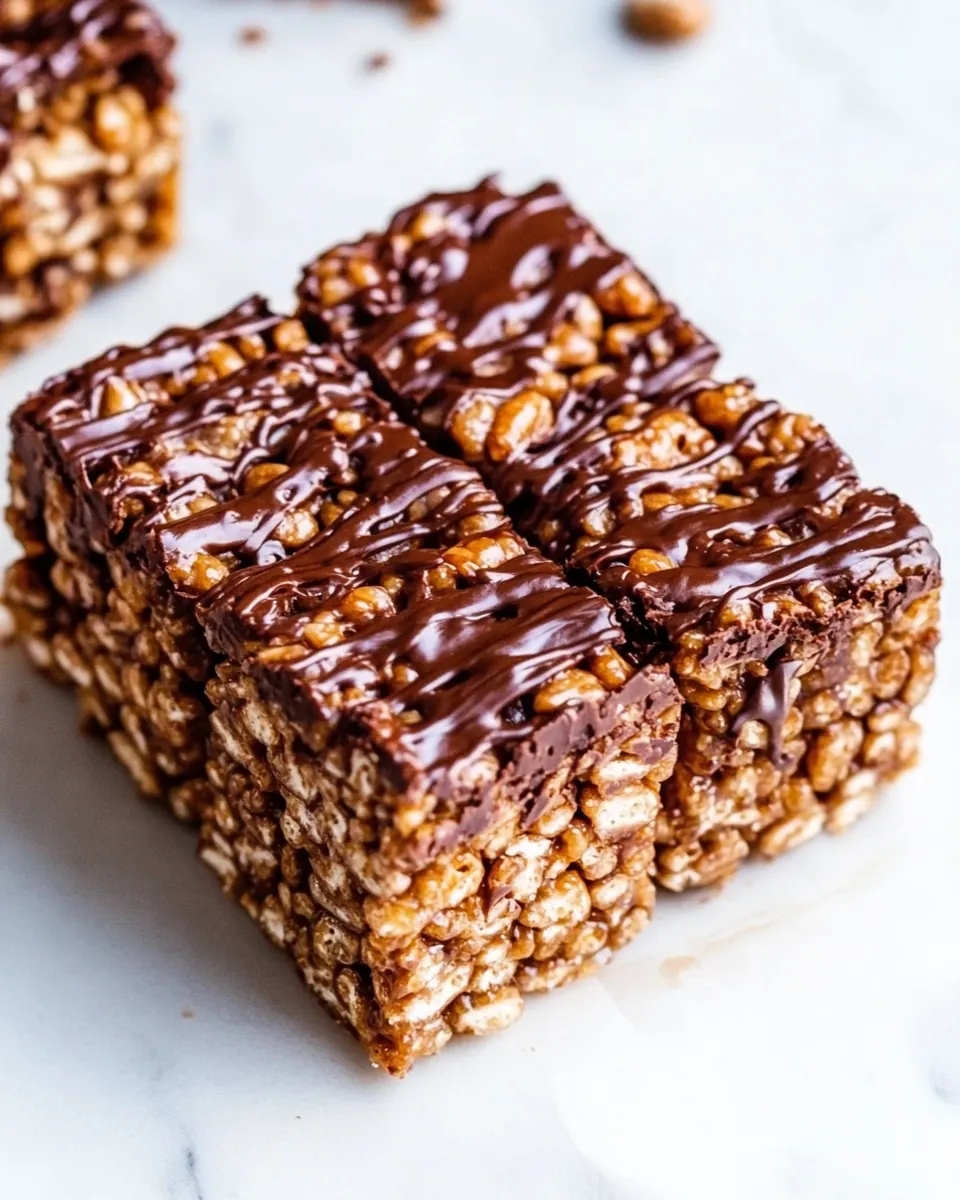
I always drizzle a touch of melted chocolate on top, it adds shine and a professional finish. Small additions, like pressing gently instead of compacting, affect texture dramatically, and I enjoy sharing those tips when friends ask how to make them perfect.
What Goes Into Peanut Butter Nutella Rice Krispie Treats
These ingredients are simple, yet purposeful. The stars are the spreads and the cereal, while the marshmallows act like edible glue. Together they create a balance of creamy, crunchy, and sweet, and each component is there to support texture and flavor without overcomplicating the process.
- 4 tablespoons unsalted butter: Melted and stirred to provide a rich, creamy fat that helps bind marshmallows and cereal while adding buttery flavor and smooth mouthfeel. Use at low heat to prevent browning and ensure a pliable mixture for shaping into bars.
- 110 ounce bag mini marshmallows: Softly melted into the butter to create a cohesive, stretchy base that binds the cereal; its sweetness and airy texture help create the classic chewiness. Add gradually while stirring to avoid scorching and to achieve a uniform, smooth mixture.
- 1/4 cup creamy peanut butter: Stirred in to add creaminess, a nutty flavor, and extra binding fat that enhances chew and richness in each bite. Incorporate while the marshmallow mixture is warm so it melts smoothly and evenly distributes its flavor throughout the treats.
- 1/4 cup Nutella: Swirled or folded in to introduce chocolate-hazelnut flavor and additional creaminess, creating pockets of rich taste that contrast with the cereal’s crunch. Add while the base is warm for easier incorporation or warm slightly before folding in for smooth ribbons.
- 6 cups Rice Krispie cereal: Folded gently to provide the primary crunchy structure and lighter texture that defines these treats; its crisp rice pieces absorb coating while retaining a satisfying snap. Combine quickly and evenly to prevent sogginess and ensure each bite has balanced cereal-to-binding ratio.
- 2 tablespoons melted chocolate: Drizzled or spread as a finishing touch to add concentrated chocolate flavor and an attractive glossy finish, also helping to visually define portions. Use melted and slightly cooled to create decorative lines or an overall thin coating without making the treats greasy.
Making This Peanut Butter Nutella Rice Krispie Treats
These instructions are friendly and conversational, meant to guide you through each sensory cue. Keep your spatula handy, listen for changes in texture, and trust the glossy look of the melted mixture. The steps below will help you avoid common pitfalls and get bars that set up perfectly.
- Line a 9×9 dish with parchment paper, set aside.: The paper creates a nonstick cradle so you can lift the set bars out cleanly. When you press the mixture later, the parchment prevents sticking and makes slicing effortless, with neat edges. Try to center the paper and leave a bit of overhang on two sides to help lift the slab, and avoid folding wrinkles that could imprint the surface. A common mistake is skipping this step and wrestling the bars out after they cool, which risks breakage and messy serving.
- In a large pan with high sides add butter and set over medium heat.: As the unsalted butter melts, it should shimmer and start to foam slightly, releasing a gentle, toasty aroma. Using a pan with high sides prevents spills when you stir in the marshmallows and cereal later. The butter also creates an even heat base so the marshmallows melt smoothly. If the pan is too small, you will struggle to combine everything without spilling, so choose a roomy pan.
- When the butter has melted add marshmallows.: Once the butter is fully liquid and warm, add the mini marshmallows and watch them begin to puff and soften. You want medium heat so they melt evenly without browning, producing a glossy pool instead of little toasted bits. If you raise the heat too high the marshmallows can scorch and taste burnt, so moderate the flame and be patient for a smooth texture.
- Stir with a silicone spatula until they have melted and the mixture is smooth.: Stirring produces a satiny, elastic marshmallow mass that clings to the spatula in long ribbons. The sound is quiet, the color uniform and pale, and the surface should look glossy. Use a heatproof silicone spatula to scrape the bottom and prevent hot spots. A hurried stir can leave unmelted lumps, so take your time and ensure there are no grainy bits before proceeding.
- Turn off the heat and stir in the peanut butter and Nutella. Keep stirring until the mixture has totally combined.: With the pan off the burner, stir in the peanut butter and Nutella so the residual heat warms them just enough to blend. The mix will become silkier and take on a pale tan color from the spreads, releasing a warm, nutty scent. This step is crucial because adding the spreads off the heat prevents them from seizing or separating, which can happen if overheated. If you mix on high heat, the texture may become grainy.
- Add in the cereal and stir to combine. This step will make your arm burn but just keep stirring until combined. I like to continue to use my silicone spatula so the mixture won’t stick.: Continue folding until you see no streaks of peanut butter or Nutella , and the surface is homogeneous. The aroma will deepen and the mixture should be glossy and cohesive, ready to embrace the cereal. If you stop too soon you may get pockets of spread that change texture when cooled, so make sure everything is uniform.
- Add the cereal mixture to the prepared pan and lightly press into the pan to make the top even. Don’t press too hard because if you compact them too tightly they come out hard.: As you fold in the Rice Krispie cereal , you will hear crunches and watch flakes become coated in the sticky, shiny mixture. The cereal should be just coated, not soggy, so use a gentle folding motion to preserve the crisp structure. Expect this to be arm work; keep stirring until every piece is lightly covered. Over mixing can crush the cereal and lead to denser bars, so stop when coverage is even.
- Drizzle the top with melted chocolate and let it harden, at least an hour, before cutting and serving.: Transfer the coated cereal into the lined 9 by 9 dish and press gently to level the surface. The top should be even without being compacted, which preserves chewiness. I press using the back of a spatula or parchment paper to avoid sticking. Pressing too hard will compact the bars into a hard slab, so aim for light, even pressure and a smooth finish.
- Don’t press too hard because if you compact them too tightly they come out hard.: Light pressing keeps the interior airy and chewy, while heavy compression squeezes out air and creates a dense texture that can feel brick like. Let the bars set with some openness in the structure so each bite remains tender. If your bars turn out tough, next time use a gentler hand and limit the pressing to just leveling the top.
- Drizzle the top with melted chocolate and let it harden, at least an hour, before cutting and serving.: The melted chocolate drizzle adds shine and a slightly firm contrast on top when it sets. Spread fine lines or a loose web and allow the pan to sit undisturbed at room temperature until the chocolate snaps and the bars feel set underneath. Avoid cutting too soon because warm bars can smear and crumble, while waiting too long makes them easier to slice neatly. A common misstep is refrigerating immediately which can create condensation when returned to room temperature, so for best texture let them set naturally for the recommended time.
Ways to Customize
If you want to personalize these bars, small changes make a big difference. Swap textures, adjust the drizzle pattern, or experiment with pressing technique. Below are practical suggestions to tweak flavor and presentation while keeping the core method intact.
- Boost the crunch. Fold in a small handful of extra Rice Krispie cereal at the end for extra crispness without affecting the structure.
- Adjust the sweetness. Reduce the amount of Nutella slightly if you prefer a less sweet bar, but keep the balance of peanut butter to maintain creaminess.
- Make it glossy. Warm the top drizzle just enough to flow, then set, producing a shiny finish that looks professional.
- Change the drizzle style. Use a fork to create thin lines of melted chocolate for a delicate look, or a spoon for bold swirls.
- Transport friendly packing. Layer parchment between slices when packing for a bake sale to keep them neat and easy to serve.
Serving This Peanut Butter Nutella Rice Krispie Treats
These bars are versatile for many occasions and easy to portion. They work equally well for casual snack times, lunchbox treats, and festive gatherings. Below I outline serving ideas, pairings, and storage notes to keep them tasting fresh.
- Casual snack plate. Arrange squares on a platter for movie nights, keeping them at room temperature so the texture stays ideal.
- Lunchbox treat. Wrap individual squares in parchment for tidy transport and to prevent sticking.
- Bake sale or potluck. Display in neat rows, and use the chocolate drizzle to differentiate flavors if you make multiple varieties.
- Storage for freshness. Store in an airtight container at room temperature for up to three days, separating layers with parchment to avoid sticking.
- Occasions to serve. These are perfect for casual gatherings, children’s parties, after school snacks, or anytime you want a quick homemade sweet that feels special.
- Seasonal pairing. In cooler months the warm, nutty flavors feel cozy; in warmer months serve at room temperature and avoid refrigeration to prevent sweating.
FAQ
Conclusion
These Peanut Butter Nutella Rice Krispie Treats stand out because they combine nostalgic crunch with a rich, nutty chocolate twist that makes every bite sing. I encourage you to give them a try the next time you need a quick, shareable dessert that looks special with almost no fuss. They are forgiving, fast, and fun to make, and I promise they will disappear quickly once you put them down.
Peanut Butter Nutella Rice Krispie Treats
Equipment
- Nutella Chocolate Hazelnut Spread
- Mini Marshmallows
- Rice Krispies Cereal
Ingredients
- 4 tablespoons unsalted butter Melted and stirred to provide a rich, creamy fat that helps bind marshmallows and cereal while adding buttery flavor and smooth mouthfeel. Use at low heat to prevent browning and ensure a pliable mixture for shaping into bars.
- 110 ounce bag mini marshmallows Softly melted into the butter to create a cohesive, stretchy base that binds the cereal; its sweetness and airy texture help create the classic chewiness. Add gradually while stirring to avoid scorching and to achieve a uniform, smooth mixture.
- 1/4 cup creamy peanut butter Stirred in to add creaminess, a nutty flavor, and extra binding fat that enhances chew and richness in each bite. Incorporate while the marshmallow mixture is warm so it melts smoothly and evenly distributes its flavor throughout the treats.
- 1/4 cup Nutella Swirled or folded in to introduce chocolate-hazelnut flavor and additional creaminess, creating pockets of rich taste that contrast with the cereal’s crunch. Add while the base is warm for easier incorporation or warm slightly before folding in for smooth ribbons.
- 6 cups Rice Krispie cereal Folded gently to provide the primary crunchy structure and lighter texture that defines these treats; its crisp rice pieces absorb coating while retaining a satisfying snap. Combine quickly and evenly to prevent sogginess and ensure each bite has balanced cereal-to-binding ratio.
- 2 tablespoons melted chocolate Drizzled or spread as a finishing touch to add concentrated chocolate flavor and an attractive glossy finish, also helping to visually define portions. Use melted and slightly cooled to create decorative lines or an overall thin coating without making the treats greasy.
Instructions
- Line a 9×9 dish with parchment paper, set aside.: The paper creates a nonstick cradle so you can lift the set bars out cleanly. When you press the mixture later, the parchment prevents sticking and makes slicing effortless, with neat edges. Try to center the paper and leave a bit of overhang on two sides to help lift the slab, and avoid folding wrinkles that could imprint the surface. A common mistake is skipping this step and wrestling the bars out after they cool, which risks breakage and messy serving.
- In a large pan with high sides add butter and set over medium heat.: As the unsalted butter melts, it should shimmer and start to foam slightly, releasing a gentle, toasty aroma. Using a pan with high sides prevents spills when you stir in the marshmallows and cereal later. The butter also creates an even heat base so the marshmallows melt smoothly. If the pan is too small, you will struggle to combine everything without spilling, so choose a roomy pan.
- When the butter has melted add marshmallows.: Once the butter is fully liquid and warm, add the mini marshmallows and watch them begin to puff and soften. You want medium heat so they melt evenly without browning, producing a glossy pool instead of little toasted bits. If you raise the heat too high the marshmallows can scorch and taste burnt, so moderate the flame and be patient for a smooth texture.
- Stir with a silicone spatula until they have melted and the mixture is smooth.: Stirring produces a satiny, elastic marshmallow mass that clings to the spatula in long ribbons. The sound is quiet, the color uniform and pale, and the surface should look glossy. Use a heatproof silicone spatula to scrape the bottom and prevent hot spots. A hurried stir can leave unmelted lumps, so take your time and ensure there are no grainy bits before proceeding.
- Turn off the heat and stir in the peanut butter and Nutella. Keep stirring until the mixture has totally combined.: With the pan off the burner, stir in the peanut butter and Nutella so the residual heat warms them just enough to blend. The mix will become silkier and take on a pale tan color from the spreads, releasing a warm, nutty scent. This step is crucial because adding the spreads off the heat prevents them from seizing or separating, which can happen if overheated. If you mix on high heat, the texture may become grainy.
- Add in the cereal and stir to combine. This step will make your arm burn but just keep stirring until combined. I like to continue to use my silicone spatula so the mixture won’t stick.: Continue folding until you see no streaks of peanut butter or Nutella , and the surface is homogeneous. The aroma will deepen and the mixture should be glossy and cohesive, ready to embrace the cereal. If you stop too soon you may get pockets of spread that change texture when cooled, so make sure everything is uniform.
- Add the cereal mixture to the prepared pan and lightly press into the pan to make the top even. Don’t press too hard because if you compact them too tightly they come out hard.: As you fold in the Rice Krispie cereal , you will hear crunches and watch flakes become coated in the sticky, shiny mixture. The cereal should be just coated, not soggy, so use a gentle folding motion to preserve the crisp structure. Expect this to be arm work; keep stirring until every piece is lightly covered. Over mixing can crush the cereal and lead to denser bars, so stop when coverage is even.
- Drizzle the top with melted chocolate and let it harden, at least an hour, before cutting and serving.: Transfer the coated cereal into the lined 9 by 9 dish and press gently to level the surface. The top should be even without being compacted, which preserves chewiness. I press using the back of a spatula or parchment paper to avoid sticking. Pressing too hard will compact the bars into a hard slab, so aim for light, even pressure and a smooth finish.
- Don’t press too hard because if you compact them too tightly they come out hard.: Light pressing keeps the interior airy and chewy, while heavy compression squeezes out air and creates a dense texture that can feel brick like. Let the bars set with some openness in the structure so each bite remains tender. If your bars turn out tough, next time use a gentler hand and limit the pressing to just leveling the top.
- Drizzle the top with melted chocolate and let it harden, at least an hour, before cutting and serving.: The melted chocolate drizzle adds shine and a slightly firm contrast on top when it sets. Spread fine lines or a loose web and allow the pan to sit undisturbed at room temperature until the chocolate snaps and the bars feel set underneath. Avoid cutting too soon because warm bars can smear and crumble, while waiting too long makes them easier to slice neatly. A common misstep is refrigerating immediately which can create condensation when returned to room temperature, so for best texture let them set naturally for the recommended time.
Notes
- Boost the crunch. Fold in a small handful of extra Rice Krispie cereal at the end for extra crispness without affecting the structure.
- Adjust the sweetness. Reduce the amount of Nutella slightly if you prefer a less sweet bar, but keep the balance of peanut butter to maintain creaminess.
- Make it glossy. Warm the top drizzle just enough to flow, then set, producing a shiny finish that looks professional.
- Change the drizzle style. Use a fork to create thin lines of melted chocolate for a delicate look, or a spoon for bold swirls.
- Transport friendly packing. Layer parchment between slices when packing for a bake sale to keep them neat and easy to serve.