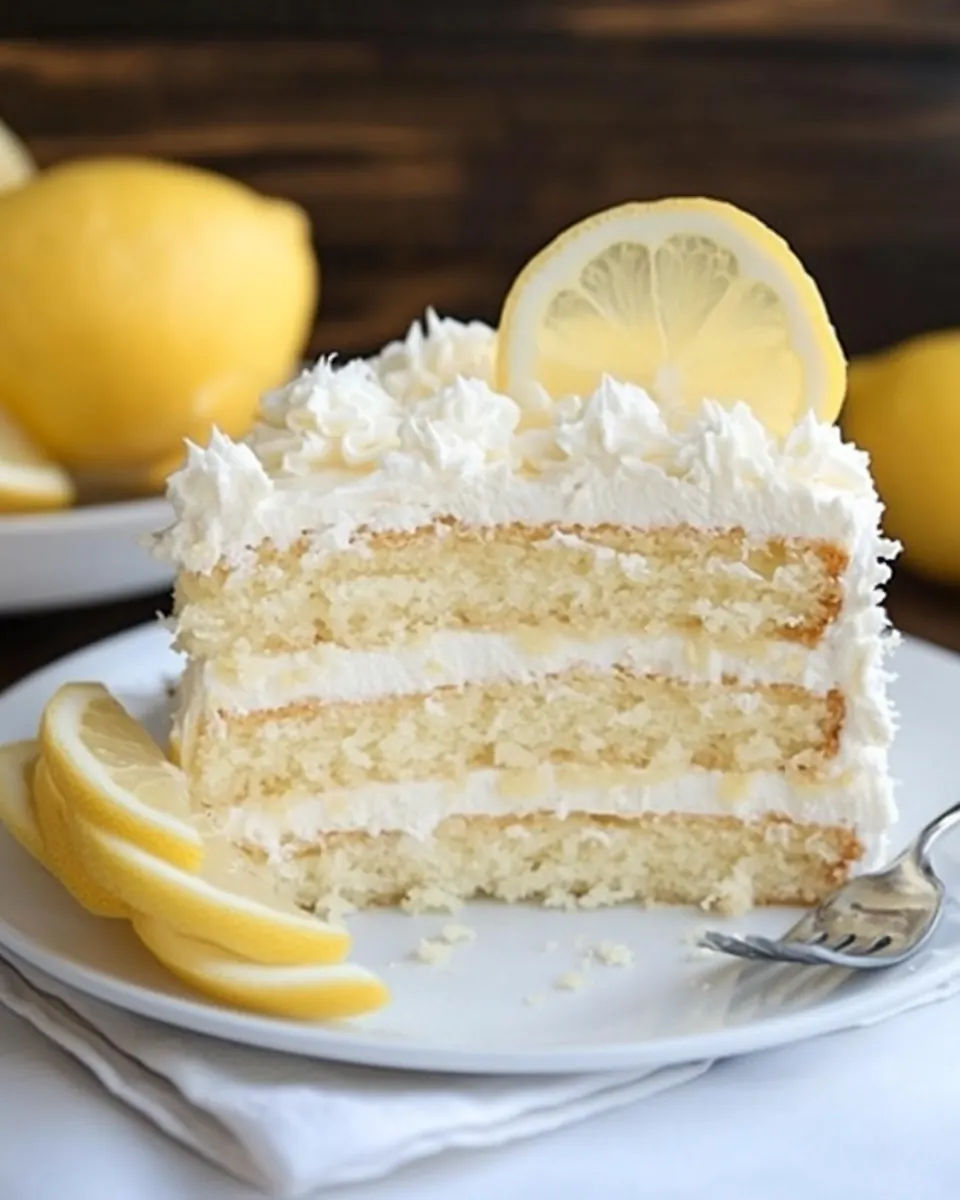
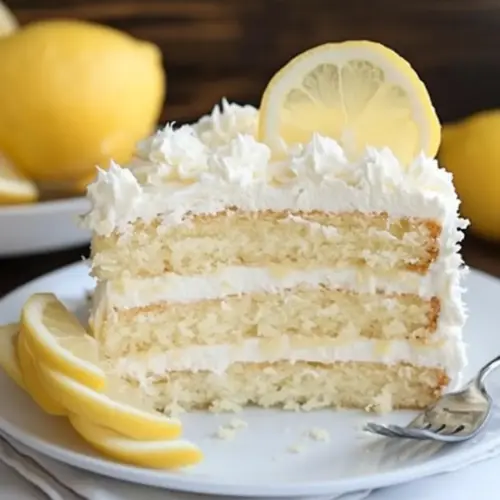
Lemon Layer Cake with Lemon Curd Filling
Lemon Layer Cake with Lemon Curd Filling has been a bright, sunny staple in my kitchen for years, the kind of cake I reach for when I want a dessert that tastes like celebration but feels effortless to slice and serve. The first time I made it I was juggling a fussy oven, a toddler who insisted on helping, and a deadline for a dinner party. Somehow the cake came out tall and tender, the curd bright and tangy between soft layers, and everyone asked for the recipe before dessert plates hit the dishwasher.
I remember the texture most vividly, a sponge that holds a smear of curd without collapsing, and a buttercream that whispers of lemon without being tart. I learned to trust the rhythm of alternating wet and dry additions, and I learned that a little patience while cooling makes all the difference when you want neat slices. Over time I adjusted small details to suit my tastes, and this version is what I now bring to birthdays and spring gatherings.
Baking this Lemon Layer Cake with Lemon Curd Filling became a ritual, one that taught me about timing, about the way lemon aroma lifts a room, and about how a simple set of pantry ingredients can produce something surprisingly elegant. I love that it looks like a showstopper but slices like a weeknight cake, which means I can make it for both Sunday company and for a Tuesday treat. If you bake along with me, you’ll learn the cues that tell you when the cake is ready, when the meringue has reached the right silkiness, and how to assemble layers so every forkful has a balance of cake, curd, and buttercream.
Recipe Snapshot
1 hr 5 mins
30 mins
35 mins
Hard
350 kcal
American
Gluten-Free, Low FODMAP
Desserts
Mixing bowls, Stand mixer or electric mixer, 9 inch cake pans, Offset spatula, Parchment paper, Saucepan for double boiler, Cooling racks, Serrated knife
Why This Lemon Layer Cake with Lemon Curd Filling Shines
Bright, Balanced Flavor
I adore how Lemon Layer Cake with Lemon Curd Filling manages to be zesty yet smooth. The lemon curd cuts through the sweet buttercream, creating a lively contrast, and that interplay makes each bite memorable. I often tell guests that this cake tastes like sunshine in pastry form, and they usually nod in agreement after the first forkful.
Texture That Holds Up
One reason I keep making this cake is its structure. The layers stay light but sturdy enough to hold a smear of curd and a generous coat of buttercream. When I slice it, the layers do not smoosh, which means you get tidy portraits on each plate. That is a huge win when I need to serve a crowd and want pretty slices without frantic assembly in the kitchen.
Techniques You Can Learn From
This recipe teaches a few transferable baking moves. Alternating additions of flour and milk builds a tender crumb, while beating the butter and sugar to pale fluffiness sets the cake’s lift. Making the meringue-style buttercream over a hot bath introduces you to temperature control that results in an impossibly silky frosting. I love sharing these small lessons because they improve all of my baking.
Flexible for Occasions
I appreciate how adaptable this cake is. It shines at springtime showers, casual weekend tea, or special celebrations. You can dress it up with extra decorations or keep it simple and rustic. I often change the garnish depending on the event, and each version still feels cohesive because the lemon flavor is the anchor.
Comfort and Impressiveness
Finally, this cake sits neatly between comfort and showstopper. It is approachable enough for a confident beginner to attempt, but the layers and curd give it professional polish. I enjoy serving something that makes people smile and also teaches me a thing or two with every bake.
Shopping List for Lemon Layer Cake with Lemon Curd Filling
This collection of ingredients is deliberately straightforward. I wanted each component to play a clear role so the final cake stays tender, flavorful, and stable for slicing. The key players are the cake flour for a soft crumb, the buttermilk to add tang and moisture, and the lemon elements for bright aromatics. The combination of whipped egg whites and careful creaming creates lift without heaviness.
- 2 1/4 cups cake flour: Provides a tender, fine crumb by supplying the primary structure and gluten content suited for cakes; sifted to ensure lightness and even mixing, it helps absorb liquids and stabilize batters for consistent rise.
- 1 tablespoon baking powder: Leavens the cake by producing carbon dioxide when combined with wet ingredients and heat; evenly distributed baking powder ensures a reliable lift and light texture without altering flavor.
- 1/2 teaspoon table salt: Balances sweetness and enhances overall flavor while tightening the batter slightly; a small amount of salt improves depth and brings out lemon and butter notes.
- 1 1/4 cups buttermilk: Adds acidity and moisture that react with leavening agents to produce a soft, tangy crumb; contributes fat-free richness and keeps the cake tender while complementing the lemon components.
- 4 egg whites, at room temperature: Incorporates air and provides structure and lift while keeping yolk fat out for a lighter cake; at room temperature, whites whip better and blend more smoothly into the batter.
- 1 1/2 cups sugar: Sweetens and helps tenderize the cake by interacting with proteins and starches, promoting browning and moisture retention; creamed with butter it also contributes to a fine, even crumb.
- 2 teaspoons finely grated lemon zest: Imparts bright citrus aroma and concentrated lemon flavor without extra liquid; finely grated zest disperses essential oils that enhance freshness and complement the curd filling.
- 1 stick (4 ounces) unsalted butter, at room temperature: Adds richness, flavor, and moisture while aiding in leavening when creamed with sugar; at room temperature it blends smoothly to create an emulsion that improves texture and mouthfeel.
- 1/2 teaspoon pure lemon extract, I use Penzey's brand: Contributes a concentrated, pure lemon flavor that amplifies citrus notes without adding acidity or liquid; a small amount provides consistent lemon aroma throughout the cake batter.
The Method for Lemon Layer Cake with Lemon Curd Filling
I like to move methodically through this recipe, giving each stage the attention it deserves so the layers bake evenly and the buttercream becomes silky. Read through the steps before you begin so the timing of the meringue and assembly feels comfortable. Keep tools and cooled layers ready for a calm, enjoyable build.
- Preheat the oven to 350 degrees. Grease two 9-inch cake pans with non-stick flour and oil baking spray (like Baker's Joy) and line the bottom of each pan with parchment. Spray the top of the parchment as well.: The first sensory cue is the faint warmth and the dry oven smell, which signals your environment is ready. Warming the oven ensures the batter starts rising immediately on contact with heat, producing even domes rather than flat, dense layers. A common mistake is putting batter into a non fully preheated oven, which can cause uneven texture and longer bake times; always wait until the oven stabilizes at 350 degrees and use an oven thermometer if yours runs cool or hot. When you slide the pans in, listen for the soft whoosh of the door closing and note the quick scent of caramelizing sugar a few minutes into the bake.
- To make the cake, first whisk together the flour, baking powder, and salt. Whisk together the milk and egg whites in another bowl.: The tactile action of greasing and lining is worth the effort because it prevents sticking. The parchment gives a smooth bottom and helps release delicate layers intact. Press the parchment so it lies flat, then spray the paper top as well to ensure effortless removal. A typical error is skipping the parchment which risks tearing the cake; also be sure to grease the sides evenly so the cake climbs the walls uniformly. After prepping the pans, they should feel lightly slick and ready.
- Put the sugar and lemon zest in your mixer bowl and rub the zest into the sugar until the sugar becomes moist and fragrant.: The dry mix should look uniform, with a pale, slightly powdery appearance and no pockets of leavening. Sifting or whisking aerates the cake flour , which contributes to the light crumb you want. Mixing thoroughly prevents salty or bitter pockets and helps the leavening distribute evenly. Avoid overworking the flour after liquid is added, as that can develop too much gluten and lead to toughness.
- Add the butter and beat at medium speed until the butter and sugar are very light, about 3 minutes. Mix in the extract, then add one-third of the flour mixture and mix until combined, then half the milk-egg mixture until incorporated, another third of the flour mixture, the rest of the milk-egg mixture, and finally the last of the flour.: The mixture should be smooth and slightly glossy from the whites, and bringing the whites to room temperature helps them incorporate more evenly. This milky blend adds moisture and lift when alternated with dry ingredients, producing a tender crumb. If the whites are too cold they will not blend smoothly, which can cause streaks in the batter and inconsistent texture.
- Scrape the bowl as needed and make sure ingredients are incorporated as you alternate. Beat for another 2 minutes.: Rubbing releases aromatic oils, transforming dry sugar into a perfumed base that will carry lemon scent through the cake. The sugar should appear slightly clumped and glistening, and the aroma should be noticeably citrus forward. A frequent oversight is skipping the rubbing step which reduces the intensity of lemon aroma in the finished cake.
- Divide the batter between the two pans and smooth the tops with an offset spatula. Bake for 30-35 minutes or until the middle of the cake springs back after being touched.: During this stage the mixture will change from dense to pale and fluffy, with a softer, creamy texture and a faint sweet butter scent. Proper creaming traps air, which supports rise and tenderness. Under beating yields a dense cake, while over beating after flour is added can collapse the structure; stop when the mixture is light and has increased in volume.
- Remove the cakes to cooling racks. Let cool for 5 minutes before removing from the pans. Remove the parchment from the cakes, then let finish cooling with the top sides up.: The batter will shift between thicker and looser stages as you alternate ingredients, and this rhythm helps maintain a delicate crumb. Visually the batter should be smooth and homogenous by the end, with no streaks of flour or pockets of liquid. The technique prevents overmixing, which would make the cake tough. A common mistake is dumping everything at once, which increases gluten development and ruins the tenderness.
- To make the buttercream, place the sugar and egg whites in a heat-safe mixer bowl over a pot of simmering water.: Scraping ensures no hidden pockets of dry ingredients remain, and the final brief beat develops a cohesive, airy batter. The batter should look glossy and hold soft peaks, with an even distribution of zest and no lumps. If you skip scraping, you may end up with uneven texture in the baked layers, and pockets of flour can stay uncooked.
- Whisk the mixture continuously until it becomes hot to the touch and the sugar is dissolved, about 3 full minutes.: You want the tops to feel slightly springy and to have a pale golden color. The interior should no longer jiggle and a toothpick inserted near the center will come out with a few moist crumbs. Listen for the quiet settling sound when you remove them from the oven, and breath in the warm citrus and butter notes. A common issue is opening the oven too often, which causes temperature fluctuations and uneven rise; try to resist peeking until close to the minimum time.
- Carefully remove the bowl from the heat and beat on high for about 5 minutes, or until the meringue has cooled (I recommend using a stand mixer if you have one).: The initial rest allows the crumb to set slightly so the layers do not tear when unmolded. When you lift the cakes, they should detach easily and the parchment will slide off with little resistance. Allowing them to cool top side up prevents condensation from puddling on the bottom, which can make the layers soggy. Removing them too soon risks collapse, and leaving them in the pans too long can cause steam to make the bottom dense.
- Using the paddle attachment mix in the butter a stick at a time, beating until smooth.: As the bowl warms, you will feel heat through the metal and notice the sugar dissolving into the whites, which becomes glossy and more fluid. This step is crucial for a stable meringue base for your buttercream; it tempers the whites and dissolves the sugar so the final frosting is silky rather than grainy. Do not let the bottom of the bowl touch the water, as direct steam can overcook the whites and scramble them.
- Once all the butter is in, beat in the mixture on high speed until it is thick and very smooth, 6-10 minutes.: The mixture will change from foamy to smooth and satiny, and you will be able to rub a small amount between your fingers to test for graininess. Continuous whisking ensures even heating and prevents stray cooked bits. A misstep is rushing this part, which leaves a gritty texture in the buttercream; take your time until the mixture is fully smooth.
- Decrease the speed to medium and gradually beat in the lemon juice, waiting until each addition is absorbed before adding more. Mix in vanilla. Set aside while preparing the cakes.: The meringue will transform into glossy, voluminous peaks as it cools, with a marshmallow like sheen and a stable structure. Using a stand mixer makes this effortless; if you use a hand mixer, be prepared for a workout. If the meringue remains warm when you add butter, the butter will melt and the frosting will separate, so ensure it is fully cooled.
- To assemble, slice each layer horizontally in half. I place toothpicks around the perimeter of the cake a little below where I want to slice. This helps guide my serrated knife as I saw through the layers.: Adding softened butter in increments encourages a silky final texture and prevents lumps. The mixture will shift between looking slightly broken and then coming together glossy and smooth. Patience here pays off; adding too much butter at once can leave greasy pockets or cause the frosting to curdle.
- Place one layer, cut side up on your serving dish. Spread it with one-third of the lemon curd, about 1/3 cup.: At high speed the buttercream will become pale, cloud like, and velvety with a satiny sheen. This long whisking incorporates air and refines texture. If your buttercream seems thin at first, continue beating; it often comes together after several minutes. Avoid stopping too early which can leave the frosting dense and heavy.
- Spread about 1/4 of the buttercream over the lemon curd, repeat two more times, then top with the final layer of cake with the baked side up.: You should sense a brightening of aroma and a slight loosening of the buttercream as you add acid; the final frosting will be tart yet balanced. Adding juice slowly prevents separation and gives you control over acidity. A mistake is adding all the juice at once which can break the emulsion, resulting in a curdled texture.
- Use the rest of the buttercream to frost the top and sides of the cake. Press the coconut over the frosted surfaces.: When slicing you should hear a gentle sawing sound and see even, clean edges. The toothpicks act as a visual guide and protect the cake from slipping. A common error is using a dull knife, which shreds the crumb; use a long serrated knife and a light sawing motion for the best results.
- Place one layer cut side up on your serving dish Spread it with one third of the lemon curd about 1/3 cup: The curd should be glossy and spreadable, with a bright citrus scent. Spreading it on the cut side helps it stay in place under the buttercream. If the curd is too runny, chill briefly until it firms; too firm and it will tear the cake when spreading. Aim for an even, thin layer to keep balance in each bite.
- Spread about 1/4 of the buttercream over the lemon curd repeat two more times then top with the final layer of cake with the baked side up: The contrast of creamy buttercream and zippy curd is what makes each forkful sing. As you layer, press gently to maintain stability but do not compress the crumb. If you overfill, the cake can lean, so keep the layers moderate and even. The final baked side up gives an attractive finish once frosted.
- Use the rest of the buttercream to frost the top and sides of the cake Press the coconut over the frosted surfaces: Frosting should feel cool and spread smoothly with faint ridges from your spatula. When you press the coconut onto the sides, it adheres easily to the buttercream and adds a tender chew and visual contrast. Work quickly before the buttercream softens from room temperature, and refrigerate briefly if it needs to set for cleaner slices.
Pro Tips and Tweaks
I like to keep a few tricks up my sleeve when making this cake so it bakes evenly and assembles beautifully. These ideas cover texture, timing, and presentation so you can tailor the cake to your event or skill level.
- Room Temperature Ingredients Ensure butter, egg whites, and buttermilk are at room temperature for smoother mixing and better emulsion of fats and liquids.
- Fresh Leavening Check your baking powder for freshness by mixing a small amount with hot water and watching for fizz, to guarantee reliable rise.
- Zesting Technique Use a microplane for lemon zest to avoid bitter pith and to release maximum aromatic oils into the sugar when rubbed together.
- Even Layers Weigh the batter between pans for identical layers, this prevents lopsided stacking and promotes a neat final presentation.
- Chill Between Steps If the buttercream becomes too soft, chill the cake assembly briefly to firm the layers and make smoothing easier without losing structure.
What Complements This Lemon Layer Cake with Lemon Curd Filling
This cake pairs well with simple accompaniments that echo its bright, fresh character. Serve it at gatherings where you want something celebratory yet approachable, and consider light beverages and seasonal fruit to round the plate.
- Light Tea Service Offer delicate teas such as green tea or a mild Earl Grey, which will complement the lemon without overpowering it. A warm cuppa is a lovely companion for a slice after brunch.
- Fresh Berries Present a bowl of mixed berries alongside the cake, their tartness and texture create a pleasing contrast to the creamy buttercream and smooth curd.
- Spring Celebrations This cake works wonderfully for showers and garden parties, where its citrus brightness matches seasonal menus and floral settings.
- Storage Tips Store the frosted cake in the refrigerator, covered, for up to three days. For longer storage, freeze unfrosted layers wrapped well for up to one month and thaw before assembly.
- Serving Size Slice modestly thin for events to ensure everyone gets a taste, and for family desserts feel free to serve slightly larger pieces with coffee.
FAQ
Conclusion
This Lemon Layer Cake with Lemon Curd Filling stands out because it balances tender cake, tangy curd, and silky buttercream in every slice. Give it a try and let the bright lemon flavors lift your next gathering, whether it is a casual tea or a special celebration. I hope you enjoy the process of layering and frosting as much as I do, and that each slice brings a little moment of sunshine to your table.
Lemon Layer Cake with Lemon Curd Filling
Equipment
- Mixing Bowls
- Stand mixer or electric mixer
- 9-inch cake pans
- Offset Spatula
- Parchment Paper
- Saucepan for double boiler
- Cooling racks
- Serrated Knife
Ingredients
- 2 1/4 cups cake flour Provides a tender, fine crumb by supplying the primary structure and gluten content suited for cakes; sifted to ensure lightness and even mixing, it helps absorb liquids and stabilize batters for consistent rise.
- 1 tablespoon baking powder Leavens the cake by producing carbon dioxide when combined with wet ingredients and heat; evenly distributed baking powder ensures a reliable lift and light texture without altering flavor.
- 1/2 teaspoon table salt Balances sweetness and enhances overall flavor while tightening the batter slightly; a small amount of salt improves depth and brings out lemon and butter notes.
- 1 1/4 cups buttermilk Adds acidity and moisture that react with leavening agents to produce a soft, tangy crumb; contributes fat-free richness and keeps the cake tender while complementing the lemon components.
- 4 egg whites, at room temperature Incorporates air and provides structure and lift while keeping yolk fat out for a lighter cake; at room temperature, whites whip better and blend more smoothly into the batter.
- 1 1/2 cups sugar Sweetens and helps tenderize the cake by interacting with proteins and starches, promoting browning and moisture retention; creamed with butter it also contributes to a fine, even crumb.
- 2 teaspoons finely grated lemon zest Imparts bright citrus aroma and concentrated lemon flavor without extra liquid; finely grated zest disperses essential oils that enhance freshness and complement the curd filling.
- 1 stick (4 ounces) unsalted butter, at room temperature Adds richness, flavor, and moisture while aiding in leavening when creamed with sugar; at room temperature it blends smoothly to create an emulsion that improves texture and mouthfeel.
- 1/2 teaspoon pure lemon extract, I use Penzey's brand Contributes a concentrated, pure lemon flavor that amplifies citrus notes without adding acidity or liquid; a small amount provides consistent lemon aroma throughout the cake batter.
Instructions
- Preheat the oven to 350 degrees. Grease two 9-inch cake pans with non-stick flour and oil baking spray (like Baker's Joy) and line the bottom of each pan with parchment. Spray the top of the parchment as well.: The first sensory cue is the faint warmth and the dry oven smell, which signals your environment is ready. Warming the oven ensures the batter starts rising immediately on contact with heat, producing even domes rather than flat, dense layers. A common mistake is putting batter into a non fully preheated oven, which can cause uneven texture and longer bake times; always wait until the oven stabilizes at 350 degrees and use an oven thermometer if yours runs cool or hot. When you slide the pans in, listen for the soft whoosh of the door closing and note the quick scent of caramelizing sugar a few minutes into the bake.
- To make the cake, first whisk together the flour, baking powder, and salt. Whisk together the milk and egg whites in another bowl.: The tactile action of greasing and lining is worth the effort because it prevents sticking. The parchment gives a smooth bottom and helps release delicate layers intact. Press the parchment so it lies flat, then spray the paper top as well to ensure effortless removal. A typical error is skipping the parchment which risks tearing the cake; also be sure to grease the sides evenly so the cake climbs the walls uniformly. After prepping the pans, they should feel lightly slick and ready.
- Put the sugar and lemon zest in your mixer bowl and rub the zest into the sugar until the sugar becomes moist and fragrant.: The dry mix should look uniform, with a pale, slightly powdery appearance and no pockets of leavening. Sifting or whisking aerates the cake flour , which contributes to the light crumb you want. Mixing thoroughly prevents salty or bitter pockets and helps the leavening distribute evenly. Avoid overworking the flour after liquid is added, as that can develop too much gluten and lead to toughness.
- Add the butter and beat at medium speed until the butter and sugar are very light, about 3 minutes. Mix in the extract, then add one-third of the flour mixture and mix until combined, then half the milk-egg mixture until incorporated, another third of the flour mixture, the rest of the milk-egg mixture, and finally the last of the flour.: The mixture should be smooth and slightly glossy from the whites, and bringing the whites to room temperature helps them incorporate more evenly. This milky blend adds moisture and lift when alternated with dry ingredients, producing a tender crumb. If the whites are too cold they will not blend smoothly, which can cause streaks in the batter and inconsistent texture.
- Scrape the bowl as needed and make sure ingredients are incorporated as you alternate. Beat for another 2 minutes.: Rubbing releases aromatic oils, transforming dry sugar into a perfumed base that will carry lemon scent through the cake. The sugar should appear slightly clumped and glistening, and the aroma should be noticeably citrus forward. A frequent oversight is skipping the rubbing step which reduces the intensity of lemon aroma in the finished cake.
- Divide the batter between the two pans and smooth the tops with an offset spatula. Bake for 30-35 minutes or until the middle of the cake springs back after being touched.: During this stage the mixture will change from dense to pale and fluffy, with a softer, creamy texture and a faint sweet butter scent. Proper creaming traps air, which supports rise and tenderness. Under beating yields a dense cake, while over beating after flour is added can collapse the structure; stop when the mixture is light and has increased in volume.
- Remove the cakes to cooling racks. Let cool for 5 minutes before removing from the pans. Remove the parchment from the cakes, then let finish cooling with the top sides up.: The batter will shift between thicker and looser stages as you alternate ingredients, and this rhythm helps maintain a delicate crumb. Visually the batter should be smooth and homogenous by the end, with no streaks of flour or pockets of liquid. The technique prevents overmixing, which would make the cake tough. A common mistake is dumping everything at once, which increases gluten development and ruins the tenderness.
- To make the buttercream, place the sugar and egg whites in a heat-safe mixer bowl over a pot of simmering water.: Scraping ensures no hidden pockets of dry ingredients remain, and the final brief beat develops a cohesive, airy batter. The batter should look glossy and hold soft peaks, with an even distribution of zest and no lumps. If you skip scraping, you may end up with uneven texture in the baked layers, and pockets of flour can stay uncooked.
- Whisk the mixture continuously until it becomes hot to the touch and the sugar is dissolved, about 3 full minutes.: You want the tops to feel slightly springy and to have a pale golden color. The interior should no longer jiggle and a toothpick inserted near the center will come out with a few moist crumbs. Listen for the quiet settling sound when you remove them from the oven, and breath in the warm citrus and butter notes. A common issue is opening the oven too often, which causes temperature fluctuations and uneven rise; try to resist peeking until close to the minimum time.
- Carefully remove the bowl from the heat and beat on high for about 5 minutes, or until the meringue has cooled (I recommend using a stand mixer if you have one).: The initial rest allows the crumb to set slightly so the layers do not tear when unmolded. When you lift the cakes, they should detach easily and the parchment will slide off with little resistance. Allowing them to cool top side up prevents condensation from puddling on the bottom, which can make the layers soggy. Removing them too soon risks collapse, and leaving them in the pans too long can cause steam to make the bottom dense.
- Using the paddle attachment mix in the butter a stick at a time, beating until smooth.: As the bowl warms, you will feel heat through the metal and notice the sugar dissolving into the whites, which becomes glossy and more fluid. This step is crucial for a stable meringue base for your buttercream; it tempers the whites and dissolves the sugar so the final frosting is silky rather than grainy. Do not let the bottom of the bowl touch the water, as direct steam can overcook the whites and scramble them.
- Once all the butter is in, beat in the mixture on high speed until it is thick and very smooth, 6-10 minutes.: The mixture will change from foamy to smooth and satiny, and you will be able to rub a small amount between your fingers to test for graininess. Continuous whisking ensures even heating and prevents stray cooked bits. A misstep is rushing this part, which leaves a gritty texture in the buttercream; take your time until the mixture is fully smooth.
- Decrease the speed to medium and gradually beat in the lemon juice, waiting until each addition is absorbed before adding more. Mix in vanilla. Set aside while preparing the cakes.: The meringue will transform into glossy, voluminous peaks as it cools, with a marshmallow like sheen and a stable structure. Using a stand mixer makes this effortless; if you use a hand mixer, be prepared for a workout. If the meringue remains warm when you add butter, the butter will melt and the frosting will separate, so ensure it is fully cooled.
- To assemble, slice each layer horizontally in half. I place toothpicks around the perimeter of the cake a little below where I want to slice. This helps guide my serrated knife as I saw through the layers.: Adding softened butter in increments encourages a silky final texture and prevents lumps. The mixture will shift between looking slightly broken and then coming together glossy and smooth. Patience here pays off; adding too much butter at once can leave greasy pockets or cause the frosting to curdle.
- Place one layer, cut side up on your serving dish. Spread it with one-third of the lemon curd, about 1/3 cup.: At high speed the buttercream will become pale, cloud like, and velvety with a satiny sheen. This long whisking incorporates air and refines texture. If your buttercream seems thin at first, continue beating; it often comes together after several minutes. Avoid stopping too early which can leave the frosting dense and heavy.
- Spread about 1/4 of the buttercream over the lemon curd, repeat two more times, then top with the final layer of cake with the baked side up.: You should sense a brightening of aroma and a slight loosening of the buttercream as you add acid; the final frosting will be tart yet balanced. Adding juice slowly prevents separation and gives you control over acidity. A mistake is adding all the juice at once which can break the emulsion, resulting in a curdled texture.
- Use the rest of the buttercream to frost the top and sides of the cake. Press the coconut over the frosted surfaces.: When slicing you should hear a gentle sawing sound and see even, clean edges. The toothpicks act as a visual guide and protect the cake from slipping. A common error is using a dull knife, which shreds the crumb; use a long serrated knife and a light sawing motion for the best results.
- Place one layer cut side up on your serving dish Spread it with one third of the lemon curd about 1/3 cup: The curd should be glossy and spreadable, with a bright citrus scent. Spreading it on the cut side helps it stay in place under the buttercream. If the curd is too runny, chill briefly until it firms; too firm and it will tear the cake when spreading. Aim for an even, thin layer to keep balance in each bite.
- Spread about 1/4 of the buttercream over the lemon curd repeat two more times then top with the final layer of cake with the baked side up: The contrast of creamy buttercream and zippy curd is what makes each forkful sing. As you layer, press gently to maintain stability but do not compress the crumb. If you overfill, the cake can lean, so keep the layers moderate and even. The final baked side up gives an attractive finish once frosted.
- Use the rest of the buttercream to frost the top and sides of the cake Press the coconut over the frosted surfaces: Frosting should feel cool and spread smoothly with faint ridges from your spatula. When you press the coconut onto the sides, it adheres easily to the buttercream and adds a tender chew and visual contrast. Work quickly before the buttercream softens from room temperature, and refrigerate briefly if it needs to set for cleaner slices.
Notes
- Room Temperature Ingredients Ensure butter, egg whites, and buttermilk are at room temperature for smoother mixing and better emulsion of fats and liquids.
- Fresh Leavening Check your baking powder for freshness by mixing a small amount with hot water and watching for fizz, to guarantee reliable rise.
- Zesting Technique Use a microplane for lemon zest to avoid bitter pith and to release maximum aromatic oils into the sugar when rubbed together.
- Even Layers Weigh the batter between pans for identical layers, this prevents lopsided stacking and promotes a neat final presentation.
- Chill Between Steps If the buttercream becomes too soft, chill the cake assembly briefly to firm the layers and make smoothing easier without losing structure.