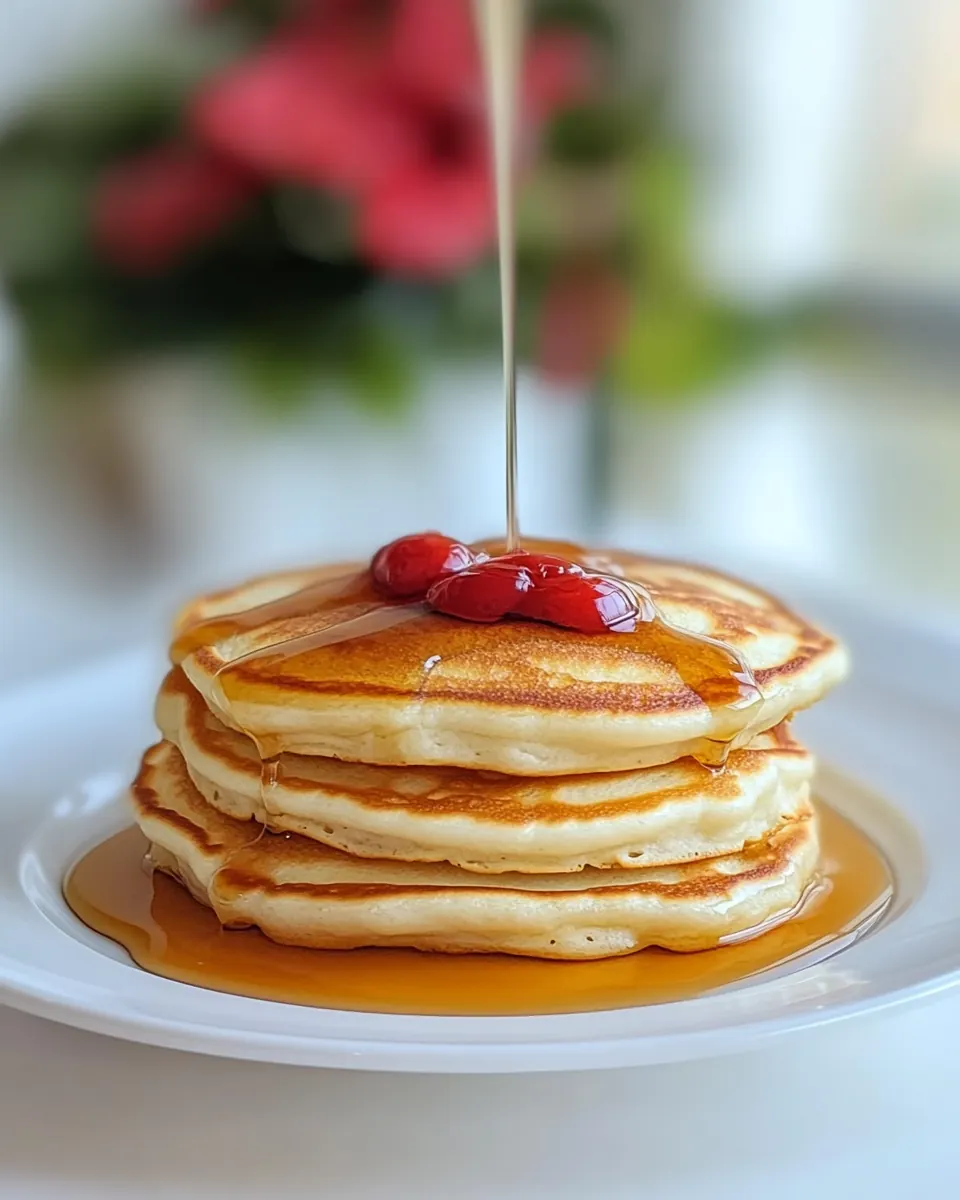
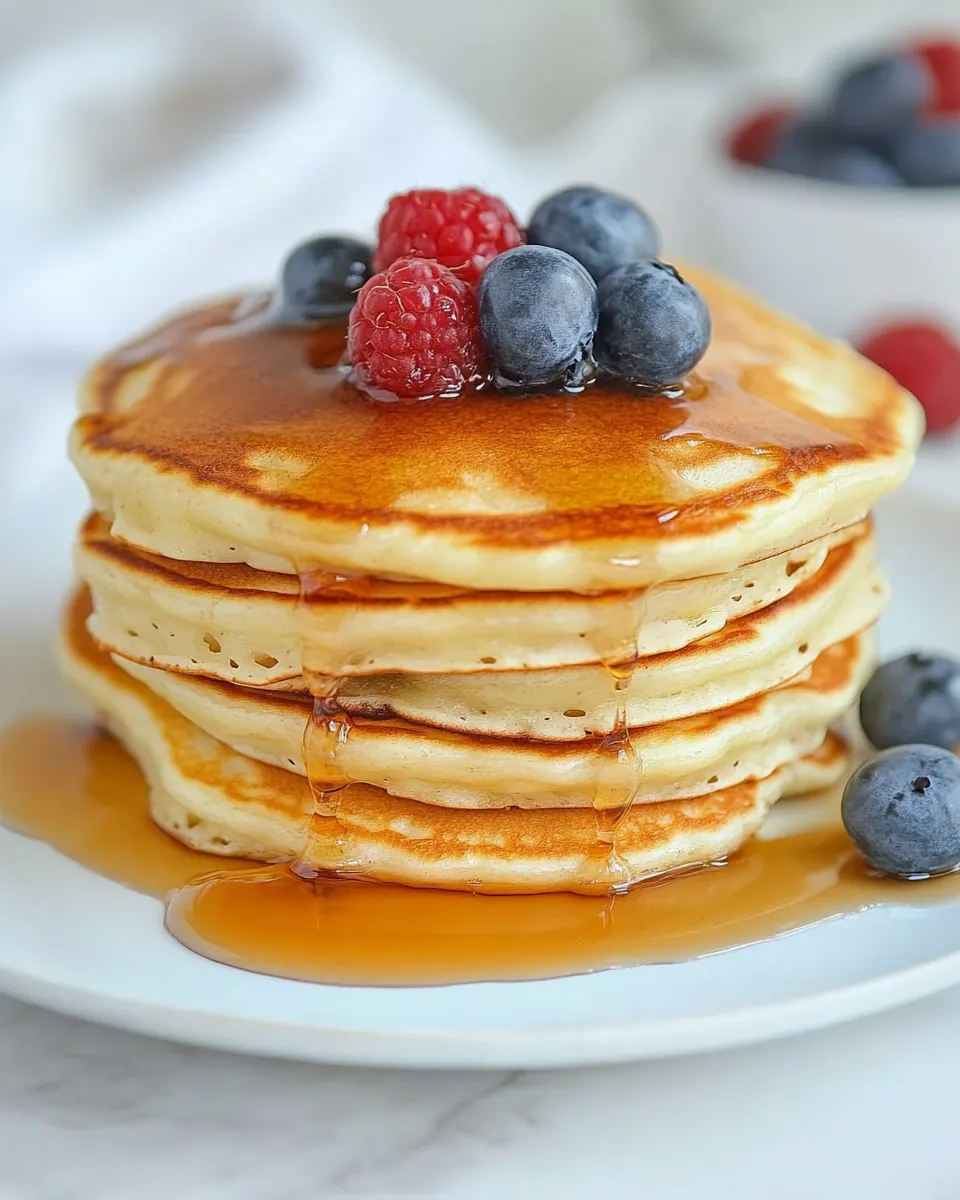
Greek Yogurt Pancakes
Greek Yogurt Pancakes are the kind of breakfast I turn to when I want something comforting yet a little bit clever, a meal that feels indulgent without being heavy. The first time I made these I was trying to use up a tub of plain Greek yogurt and a bag of whole wheat flour, and what came out of the pan was unexpectedly tender, lightly tangy, and golden at the edges. I remember standing at the stove, flipping pancakes while the kitchen filled with a warm, toasty scent, thinking that simple swaps can make mornings both healthier and more delicious.
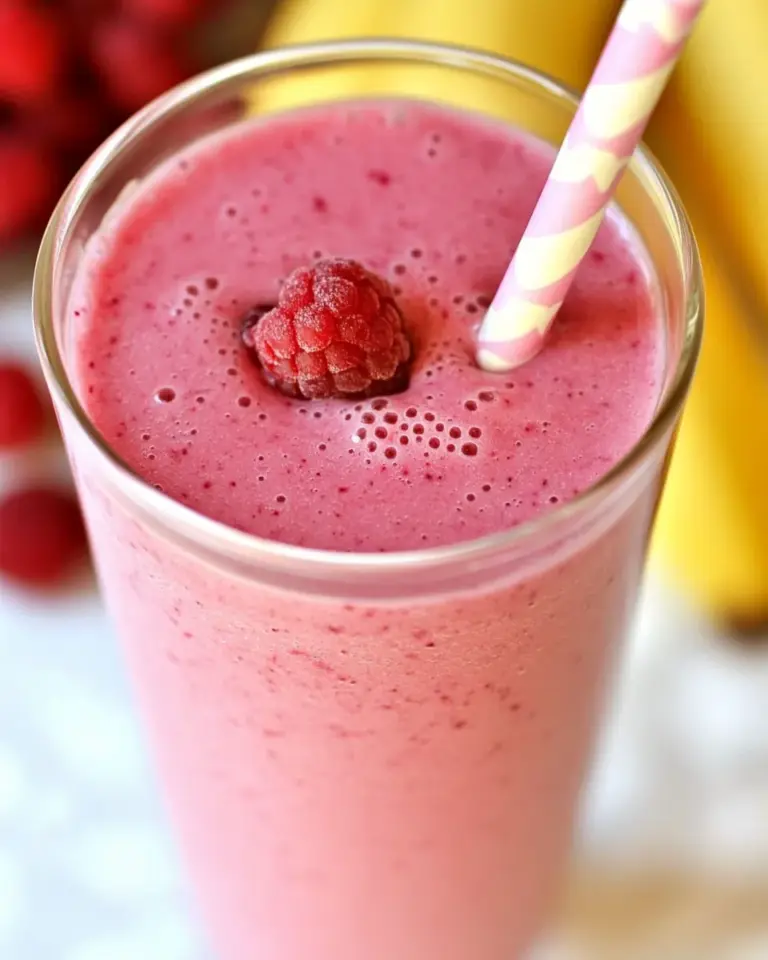
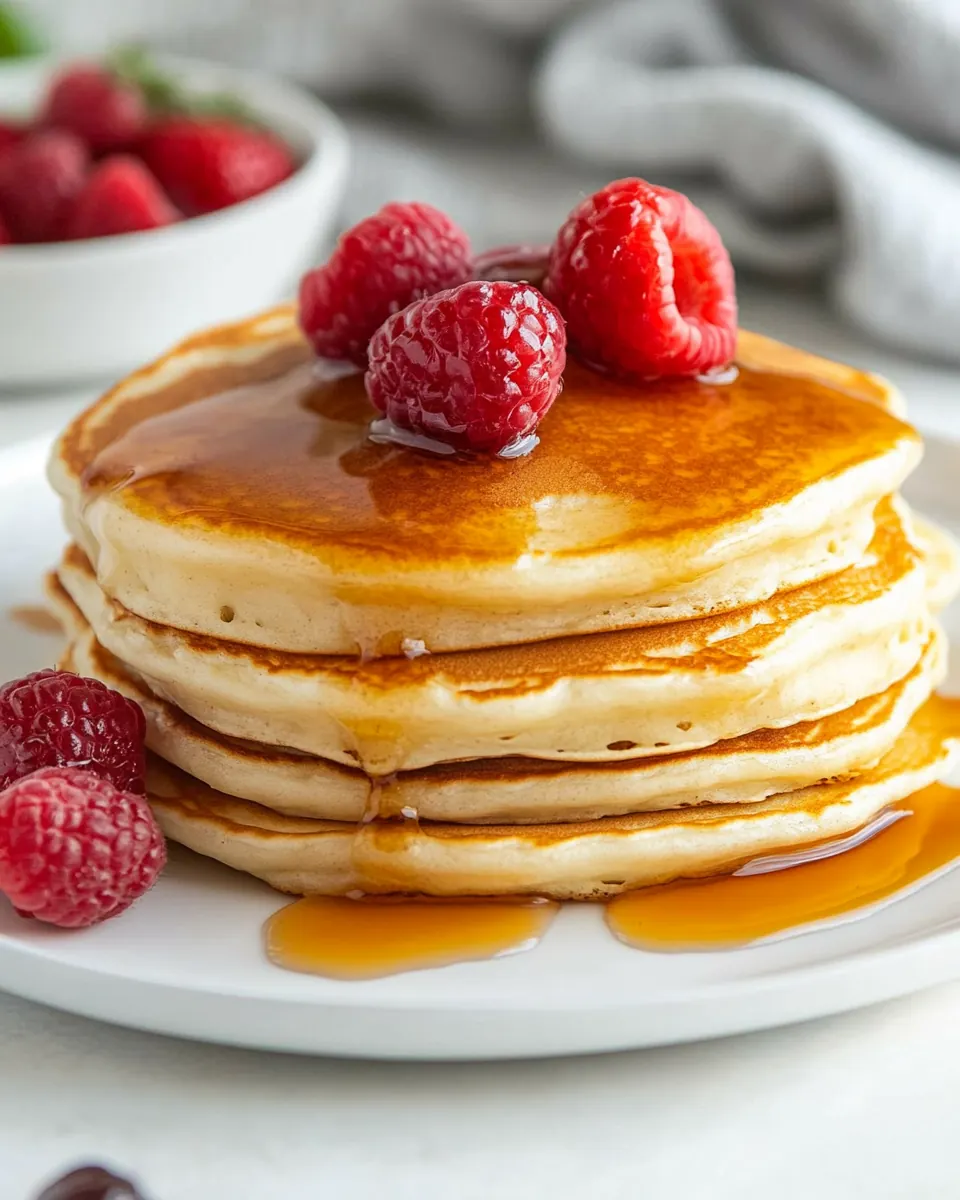
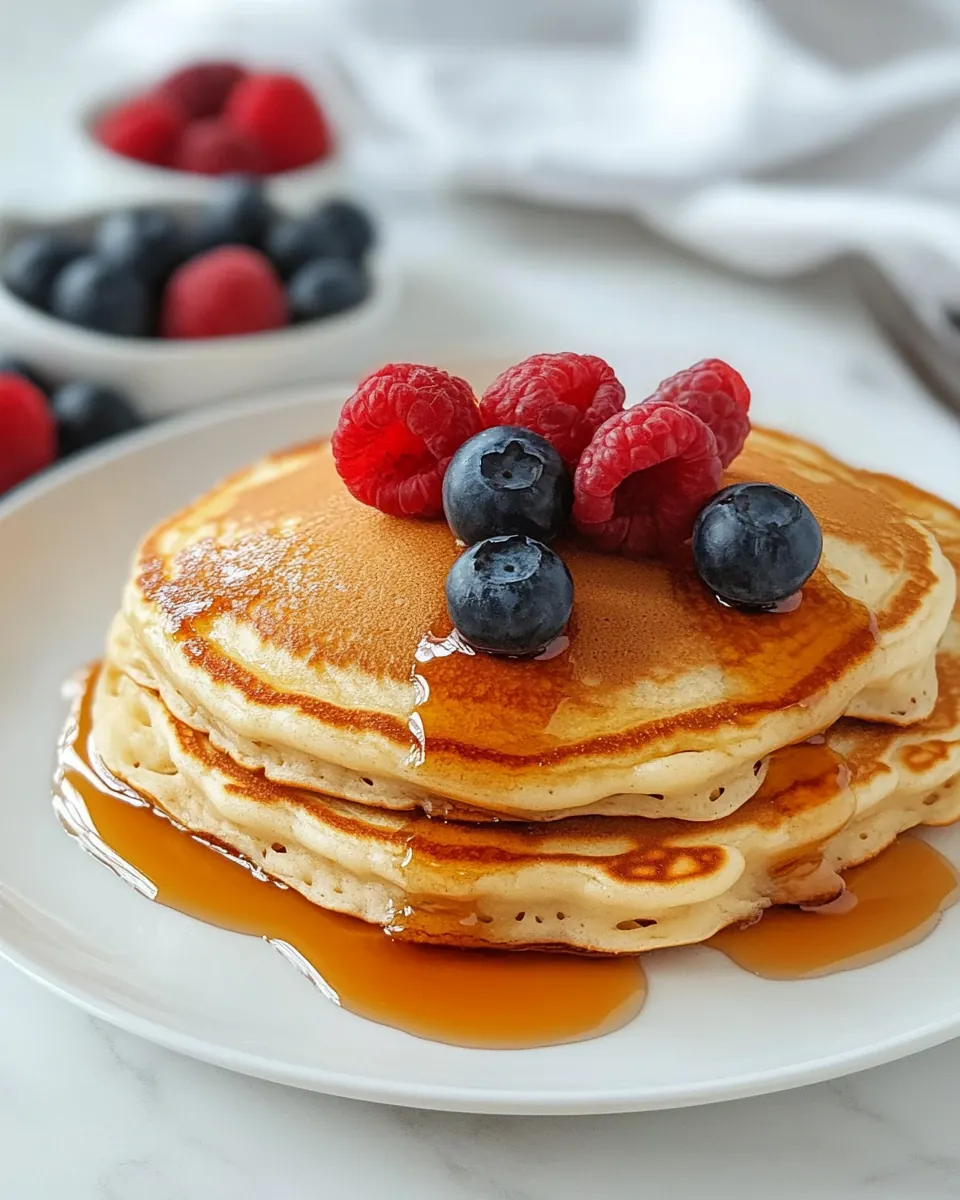
Over the years I have refined this batter to stay thick enough to hold shape, but loose enough to spread into those perfect rounds. I like how the batter hums with a quiet richness from the Greek yogurt and a gentle nuttiness from the whole wheat flour. Serving them with bright fresh berries or warm banana slices creates a contrast in flavor and texture that always makes people smile. When guests arrive, I love how quickly the skillet produces stack after stack, each one ready for honey or a dusting of cinnamon.
Recipe Snapshot
30 mins
10 mins
20 mins
Easy
220 kcal
Mediterranean
Gluten-Free, Paleo
Breakfast
Nonstick pan, Mixing bowls, Whisk, Thin spatula, Measuring cups
What Makes This Greek Yogurt Pancakes Special
1. Nutrient packed without sacrificing texture
I love how Greek Yogurt Pancakes deliver creamy protein from Greek yogurt while keeping a tender crumb with whole wheat flour. The result is a breakfast that holds you longer, so I often serve these when I want something filling for a busy morning. The tang of the yogurt balances the mild sweetness naturally, and that makes each bite lively instead of cloying.
2. Versatile and forgiving
These pancakes adapt to what you have on hand. I often switch between unsweetened almond milk and dairy milk depending on the fridge, and the batter remains forgiving. That flexibility is one reason I reach for this recipe on rushed weekends, because it tolerates small substitutions without collapsing.
3. Quick to make, great for sharing
From bowl to plate these pancakes come together fast, especially if you warm the pan ahead. I appreciate recipes that let me chat with friends while flipping pancakes rather than babysitting complicated steps. When company comes over, I can easily scale the mix and keep pancakes warm in a low oven, so everyone gets hot stacks right away.
4. Balanced flavors and textures
The pairing of coconut oil in the batter and the toasty edges from frying creates a crisp exterior with a soft, slightly moist interior. I find that this contrast is what turns a good pancake into a memorable one. Adding toppings like fresh berries or banana slices brings freshness and a burst of natural sweetness, making every mouthful interesting.
5. Healthy feel without preaching
I value recipes that feel nourishing instead of restrictive. These pancakes give me that feeling, with whole wheat flour offering fiber and Greek yogurt contributing protein, so I can serve them confidently even on mornings when I want something a bit healthier. That sweet spot between taste and nutrition is why I keep this recipe in heavy rotation.
Ingredient List for Greek Yogurt Pancakes
I approach ingredients like a small orchestra where each player supports the others. The heart of this recipe is the pairing of whole wheat flour and Greek yogurt, which together produce a tender, slightly tangy pancake. The leavening and salt lift and sharpen the batter, while the coconut oil and almond milk adjust richness and texture. Toppings give the final flourish.
- 1 1/2 cups whole-wheat flour: Provide structure and whole-grain flavor while contributing fiber; helps create a hearty, slightly nutty pancake base and absorbs liquids to form the batter.
- 2 teaspoons baking powder: Leaven pancakes by producing carbon dioxide when heated; ensures a light, fluffy texture and helps lift the whole–wheat batter for tender cakes.
- 1/2 teaspoons salt: Enhance overall flavor balance and highlight sweetness while controlling gluten development; a small amount sharpens other flavors and stabilizes the batter.
- 2 tablespoons coconut oil: Add healthy fat and moisture while contributing mild coconut flavor; helps prevent sticking, promotes browning, and creates a smooth, rich mouthfeel in the pancakes.
- 2 large eggs: Bind ingredients and add richness with protein and moisture; contribute to structure, help trap air for lift, and improve texture and color when cooked.
- 1 teaspoon vanilla extract: Provide aromatic sweetness and depth of flavor; elevates the batter’s taste profile and complements the tang of the yogurt for a well-rounded pancake.
- 3/4 cup plain nonfat Greek yogurt: Introduce tanginess, protein, and moisture while tenderizing the batter; react with the leavening to create lift and yield a creamy, slightly tangy interior.
- 3/4 cup unsweetened almond milk: Adjust batter consistency and add subtle creaminess without dairy fat; helps thin the batter to pourable thickness and contributes a mild, neutral flavor.
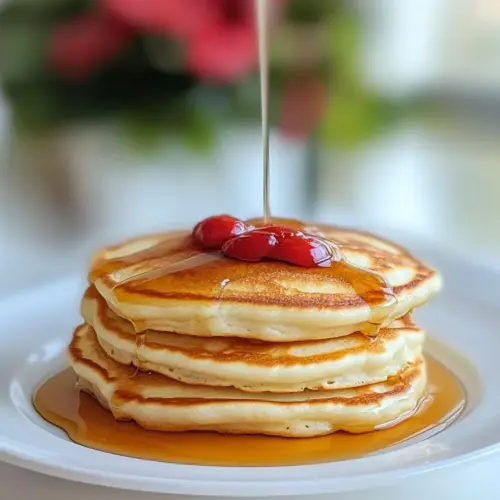
- Fresh berries, banana slices, honey, or cinnamon for toppings: Offer fresh flavor contrast and natural sweetness for serving; provide optional toppings that enhance appearance, texture, and flavor with fruit, honey, or warming spice.
How to Assemble Greek Yogurt Pancakes
Assembling these pancakes is pleasantly straightforward, and the sensory cues will guide you. Take your time with the batter, listen for the sizzle, and watch for bubbles so you flip at just the right moment. The following steps expand on each direction so you can feel confident at the pan.
- Warm up your nonstick pan over medium heat. Sift together the whole-wheat flour, baking powder, and salt in a large mixing bowl and set aside.: The sound you want is a gentle hiss when a drop of batter hits the surface, not a violent sputter. Warming the pan ensures the pancakes start cooking immediately, creating a golden exterior while the inside cooks through. If the pan is too hot, the edges will burn before the center sets, so adjust to maintain an even, moderate temperature. A common mistake is heating the pan on high, which leads to dark, undercooked middles; if you see smoke, lower the heat and let the pan cool slightly.
- In a separate bowl, whisk together the coconut oil, eggs, vanilla extract, and Greek yogurt until smooth.: When you sift, the dry mix becomes airy and free of lumps, which promotes even rising and a light texture. The flour should smell faintly nutty and the blend should look uniform. Skipping sifting can cause clumps that resist hydrating, leading to uneven pockets in the pancakes. If you do notice lumps after combining, press them through a sieve or whisk thoroughly to distribute the leavening evenly.
- Fold the dry ingredients into the wet mix and stir until just combined. Do not to overmix.: You are aiming for a glossy, cohesive wet mixture where you no longer see streaks of egg or yogurt. The aroma will turn slightly sweet from the vanilla and the texture should feel creamy. This stage helps the fat emulsify with the yogurt, delivering tenderness. Overbeating may incorporate too much air, causing uneven bubbles in the cooked pancake, so whisk just until combined.
- Gradually mix in the almond milk. Your batter needs to be thick but pourable.: After folding, the batter should show streaks of flour but no large dry patches. This gentle combining helps preserve the lightness created by the baking powder. A batter that is overmixed becomes tough because of gluten development, so stop when the major lumps are gone. If the batter feels tight or gummy, let it rest briefly to relax the gluten before adding the milk.
- Oil the pan with coconut oil. Pour 1/4 cup of batter for each pancake and spread it into a round shape. Cook until you see bubbles forming on the surface and the edges start to set (about 2 minutes).: Adding the almond milk slowly allows you to control the batter consistency so it remains thick but pourable. You want it to flow slowly from a spoon rather than drop like syrup. The batter should mound slightly on the pan then spread gradually. If the batter becomes too thin the pancakes will flatten and cook too fast on the edges; if too thick, they will be dense and may not cook through.
- Flip the pancakes with a thin spatula and cook for an additional minute. Both sides should be golden brown. Serve hot with your choice of toppings.: A thin sheen of melted coconut oil prevents sticking and helps the pancakes form crisp, golden rims. Heat the oil until it shimmers but does not smoke, then wipe excess with a folded paper towel if needed to avoid greasy surfaces. Using too much oil results in heavy, fried edges instead of a delicate crust, so use just enough to coat.
- Pour 1/4 cup of batter for each pancake and spread it into a round shape: Look for a smooth circle with even thickness so the center cooks at the same rate as the edges. The batter will sizzle softly on contact and begin to bubble on top within about two minutes. If the batter runs wildly when poured, the pan may be too hot or the batter too thin; reduce heat or let the batter rest to thicken slightly.
- Cook until you see bubbles forming on the surface and the edges start to set: Bubbles that pop and leave small craters are your cue that the underside has set and the interior has begun to cook through. The edges should look matt and slightly tightened. If you flip too early the pancake will break or be gummy inside, and flipping too late will overbrown the bottom. Aim for visible bubbles across the surface and edges that hold shape.
- Flip the pancakes with a thin spatula: When you flip, you should hear a soft sizzle and see a golden brown underside. Use a thin spatula slid gently under the pancake to prevent tearing. The second side cooks faster, so watch closely and aim for about one minute until it is golden as well. A common error is flipping multiple times; each flip cools the surface and disrupts browning, so flip once and finish cooking.
- Cook for an additional minute: During this final minute the interior finishes setting and the exterior deepens in color. The scent will turn toasty and sweet, and the pancake should spring back slightly when pressed. If the center still feels very soft, you may need to lower the heat and give a few extra seconds; if the edge darkens too quickly, remove the pancake and let the pan cool marginally.
- Both sides should be golden brown: A well cooked pancake presents even golden tones rather than dark spots. Stack them on a warm plate to preserve heat and texture before serving. If the pancakes must wait, keep them in a single layer on a baking sheet in a low oven to prevent sogginess. A typical mistake is piling pancakes immediately, which traps steam and leads to limp surfaces.
- Serve hot with your choice of toppings: Hot pancakes soak up honey or melt a dab of butter quickly, and fresh toppings like berries or banana slices add contrast in temperature and texture. Drizzle sparingly so the pancakes remain pleasantly moist and not syrup soaked. If using powdered or sticky toppings, add them at the last moment to retain visual appeal.
Variations to Try
If you enjoy experimentation, these variations let you tweak texture and flavor without breaking the recipe. Each option keeps the structure intact while introducing new notes that can change the breakfast mood.
- Add a citrus twist Mix a teaspoon of finely grated lemon or orange zest into the wet ingredients to brighten the batter and add a fragrant lift that pairs beautifully with berries.
- Make them spiced Stir in a half teaspoon of ground cinnamon and a pinch of nutmeg to the dry ingredients for warm, cozy flavors that echo classic breakfast spices.
- Boost the protein Fold a spoonful of powdered milk or a scoop of unflavored protein powder into the dry mix to increase protein content without drastically changing texture, just add a little extra liquid if needed.
- Sweeten lightly If you prefer a touch more sweetness, add one to two tablespoons of honey or maple syrup to the wet mixture, but avoid overdoing it so the yogurt tang still shines through.
- Make smaller silver dollar pancakes Use a tablespoon measure for a fun, bite sized version that is great for sharing and for children, and they cook faster so watch the timing closely.
Pairing Suggestions for Greek Yogurt Pancakes
These pancakes work across many occasions, from leisurely weekend brunch to a nourishing weekday breakfast. Think about balancing textures and temperatures on the plate, and choose beverages and sides that complement the tangy profile of the batter.
- Classic brunch plate Serve stacks with a bowl of mixed fresh berries and banana slices, a drizzle of honey, and a pot of freshly brewed coffee for an easy but elegant spread.
- Light morning meal Pair with a small side of Greek yogurt and a sprinkle of cinnamon or chopped nuts for a protein forward offering that keeps you satisfied for hours.
- Weekend crowd Keep pancakes warm on a sheet pan in a low oven, set up a toppings station with fruit and sweeteners, and let guests build their own stacks for a convivial brunch.
- Seasonal ideas In warmer months use ripe stone fruit and berries for brightness, and in cooler months choose warmed banana slices and a dusting of spice for comforting notes.
- Storage and leftover tips Cool pancakes fully before stacking and refrigerate in an airtight container for up to three days, or freeze between parchment sheets for up to one month; reheat in a toaster or oven to revive texture.
- Serving style For a more polished presentation, stagger pancakes on a plate, top with berries and a light dusting of cinnamon, and finish with a thin ribbon of honey so each bite has contrast.
FAQ
Conclusion
These Greek Yogurt Pancakes bring together wholesome ingredients and approachable technique to produce a stack that is both nourishing and delicious. They are ideal when you want a breakfast that feels special without demanding extra effort, thanks to the protein rich yogurt and hearty whole wheat flour. Give them a try on a slow morning or for a quick weekend brunch, and experiment with toppings to make each plate your own. I hope these pancakes become a routine favorite, a simple way to start the day with warmth and flavor.
Greek Yogurt Pancakes
Equipment
- Nonstick pan
- Mixing Bowls
- Whisk
- Thin spatula
- Measuring Cups
Ingredients
- 1 1/2 cups whole-wheat flour Provide structure and whole-grain flavor while contributing fiber; helps create a hearty, slightly nutty pancake base and absorbs liquids to form the batter.
- 2 teaspoons baking powder Leaven pancakes by producing carbon dioxide when heated; ensures a light, fluffy texture and helps lift the whole-wheat batter for tender cakes.
- 1/2 teaspoons salt Enhance overall flavor balance and highlight sweetness while controlling gluten development; a small amount sharpens other flavors and stabilizes the batter.
- 2 tablespoons coconut oil Add healthy fat and moisture while contributing mild coconut flavor; helps prevent sticking, promotes browning, and creates a smooth, rich mouthfeel in the pancakes.
- 2 large eggs Bind ingredients and add richness with protein and moisture; contribute to structure, help trap air for lift, and improve texture and color when cooked.
- 1 teaspoon vanilla extract Provide aromatic sweetness and depth of flavor; elevates the batter’s taste profile and complements the tang of the yogurt for a well-rounded pancake.
- 3/4 cup plain nonfat Greek yogurt Introduce tanginess, protein, and moisture while tenderizing the batter; react with the leavening to create lift and yield a creamy, slightly tangy interior.
- 3/4 cup unsweetened almond milk Adjust batter consistency and add subtle creaminess without dairy fat; helps thin the batter to pourable thickness and contributes a mild, neutral flavor.
- Fresh berries, banana slices, honey, or cinnamon for toppings Offer fresh flavor contrast and natural sweetness for serving; provide optional toppings that enhance appearance, texture, and flavor with fruit, honey, or warming spice.
Instructions
- Warm up your nonstick pan over medium heat. Sift together the whole-wheat flour, baking powder, and salt in a large mixing bowl and set aside.: The sound you want is a gentle hiss when a drop of batter hits the surface, not a violent sputter. Warming the pan ensures the pancakes start cooking immediately, creating a golden exterior while the inside cooks through. If the pan is too hot, the edges will burn before the center sets, so adjust to maintain an even, moderate temperature. A common mistake is heating the pan on high, which leads to dark, undercooked middles; if you see smoke, lower the heat and let the pan cool slightly.
- In a separate bowl, whisk together the coconut oil, eggs, vanilla extract, and Greek yogurt until smooth.: When you sift, the dry mix becomes airy and free of lumps, which promotes even rising and a light texture. The flour should smell faintly nutty and the blend should look uniform. Skipping sifting can cause clumps that resist hydrating, leading to uneven pockets in the pancakes. If you do notice lumps after combining, press them through a sieve or whisk thoroughly to distribute the leavening evenly.
- Fold the dry ingredients into the wet mix and stir until just combined. Do not to overmix.: You are aiming for a glossy, cohesive wet mixture where you no longer see streaks of egg or yogurt. The aroma will turn slightly sweet from the vanilla and the texture should feel creamy. This stage helps the fat emulsify with the yogurt, delivering tenderness. Overbeating may incorporate too much air, causing uneven bubbles in the cooked pancake, so whisk just until combined.
- Gradually mix in the almond milk. Your batter needs to be thick but pourable.: After folding, the batter should show streaks of flour but no large dry patches. This gentle combining helps preserve the lightness created by the baking powder. A batter that is overmixed becomes tough because of gluten development, so stop when the major lumps are gone. If the batter feels tight or gummy, let it rest briefly to relax the gluten before adding the milk.
- Oil the pan with coconut oil. Pour 1/4 cup of batter for each pancake and spread it into a round shape. Cook until you see bubbles forming on the surface and the edges start to set (about 2 minutes).: Adding the almond milk slowly allows you to control the batter consistency so it remains thick but pourable. You want it to flow slowly from a spoon rather than drop like syrup. The batter should mound slightly on the pan then spread gradually. If the batter becomes too thin the pancakes will flatten and cook too fast on the edges; if too thick, they will be dense and may not cook through.
- Flip the pancakes with a thin spatula and cook for an additional minute. Both sides should be golden brown. Serve hot with your choice of toppings.: A thin sheen of melted coconut oil prevents sticking and helps the pancakes form crisp, golden rims. Heat the oil until it shimmers but does not smoke, then wipe excess with a folded paper towel if needed to avoid greasy surfaces. Using too much oil results in heavy, fried edges instead of a delicate crust, so use just enough to coat.
- Pour 1/4 cup of batter for each pancake and spread it into a round shape: Look for a smooth circle with even thickness so the center cooks at the same rate as the edges. The batter will sizzle softly on contact and begin to bubble on top within about two minutes. If the batter runs wildly when poured, the pan may be too hot or the batter too thin; reduce heat or let the batter rest to thicken slightly.
- Cook until you see bubbles forming on the surface and the edges start to set: Bubbles that pop and leave small craters are your cue that the underside has set and the interior has begun to cook through. The edges should look matt and slightly tightened. If you flip too early the pancake will break or be gummy inside, and flipping too late will overbrown the bottom. Aim for visible bubbles across the surface and edges that hold shape.
- Flip the pancakes with a thin spatula: When you flip, you should hear a soft sizzle and see a golden brown underside. Use a thin spatula slid gently under the pancake to prevent tearing. The second side cooks faster, so watch closely and aim for about one minute until it is golden as well. A common error is flipping multiple times; each flip cools the surface and disrupts browning, so flip once and finish cooking.
- Cook for an additional minute: During this final minute the interior finishes setting and the exterior deepens in color. The scent will turn toasty and sweet, and the pancake should spring back slightly when pressed. If the center still feels very soft, you may need to lower the heat and give a few extra seconds; if the edge darkens too quickly, remove the pancake and let the pan cool marginally.
- Both sides should be golden brown: A well cooked pancake presents even golden tones rather than dark spots. Stack them on a warm plate to preserve heat and texture before serving. If the pancakes must wait, keep them in a single layer on a baking sheet in a low oven to prevent sogginess. A typical mistake is piling pancakes immediately, which traps steam and leads to limp surfaces.
- Serve hot with your choice of toppings: Hot pancakes soak up honey or melt a dab of butter quickly, and fresh toppings like berries or banana slices add contrast in temperature and texture. Drizzle sparingly so the pancakes remain pleasantly moist and not syrup soaked. If using powdered or sticky toppings, add them at the last moment to retain visual appeal.
Notes
- Add a citrus twist Mix a teaspoon of finely grated lemon or orange zest into the wet ingredients to brighten the batter and add a fragrant lift that pairs beautifully with berries.
- Make them spiced Stir in a half teaspoon of ground cinnamon and a pinch of nutmeg to the dry ingredients for warm, cozy flavors that echo classic breakfast spices.
- Boost the protein Fold a spoonful of powdered milk or a scoop of unflavored protein powder into the dry mix to increase protein content without drastically changing texture, just add a little extra liquid if needed.
- Sweeten lightly If you prefer a touch more sweetness, add one to two tablespoons of honey or maple syrup to the wet mixture, but avoid overdoing it so the yogurt tang still shines through.
- Make smaller silver dollar pancakes Use a tablespoon measure for a fun, bite sized version that is great for sharing and for children, and they cook faster so watch the timing closely.