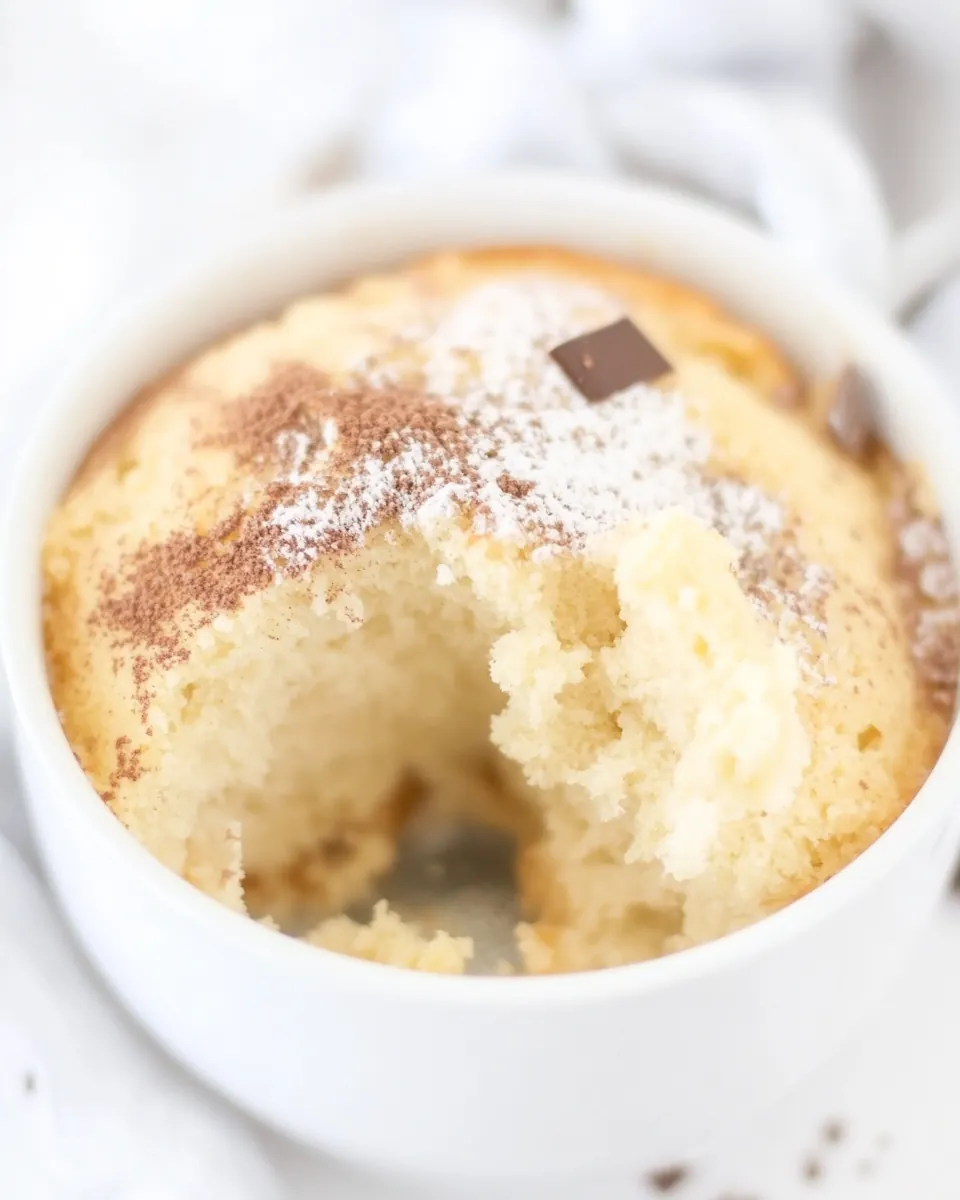
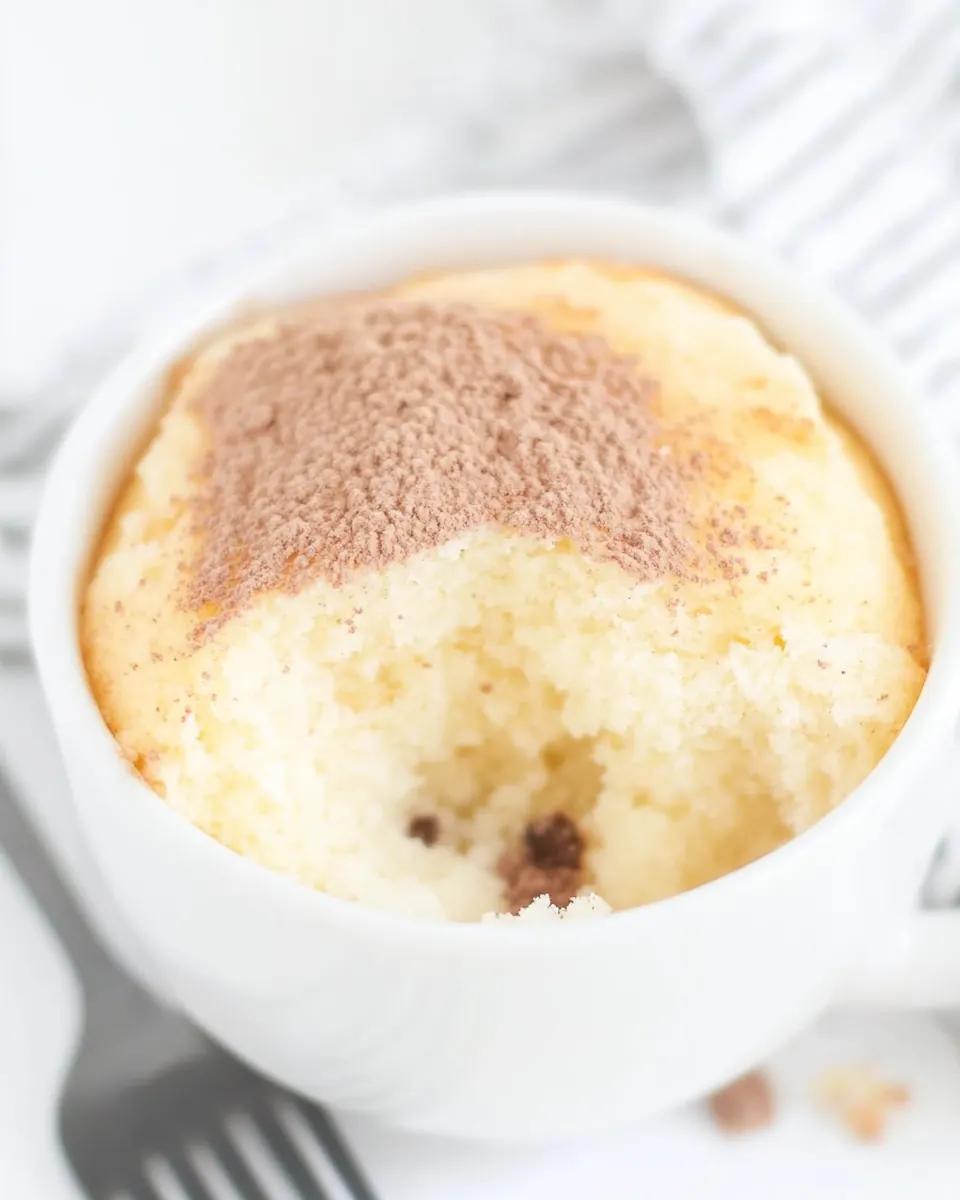
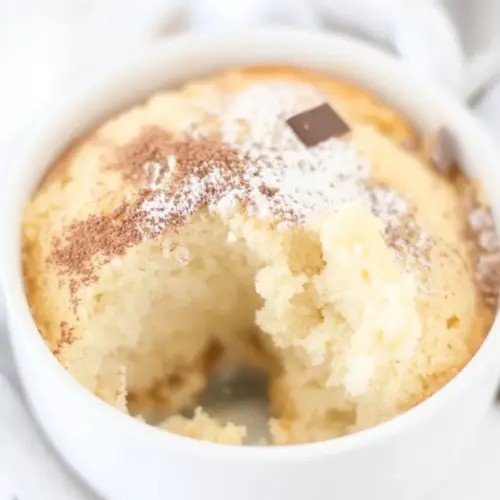
Coconut Flour Mug Cake
Coconut Flour Mug Cake has been my secret for those evenings when I crave something sweet but want it without fuss, and it shows up whenever I need a quick, cozy bite.
I remember the first time I made this, a rainy night and a stubborn sweet tooth, I pulled together a few simple pantry staples and a humble mug. The batter came together in moments, and the scent of warm coconut flour and cinnamon filled the kitchen. It felt like comfort food in miniature, and I loved how the texture was tender yet slightly crumbly, a reminder that small things can be deeply satisfying.
Over the months I refined the method, learning how to coax the best rise from the batter and how a swirl of syrup transforms the top into sticky, fragrant goodness. I now reach for this recipe when I want an indulgence without leftovers, or when I need to impress a guest with something improbable and easy. It also became my go to when I wanted to test a new coconut cream brand or a different sweetener. Each tweak revealed a new nuance in flavor or moisture, and that process of tiny experiments kept the recipe fresh.
What I adore most is the simplicity, the immediacy, and the way a mug cake can feel both decadent and sensible. If you keep a few pantry staples on hand, you can have a warm treat in under two minutes, and the ritual of stirring in a mug is oddly satisfying. Give it a try when you need a small, fast pick me up, and you might find yourself smiling at how such little effort yields a proper little pleasure.
Recipe Snapshot
4 mins
3 mins
1 mins
Easy
300 kcal
American
Gluten-Free, Low FODMAP
Desserts
Mug 200 ml, Fork, Microwave, Small bowl, Spoon
Why Try This Coconut Flour Mug Cake
Speed and simplicity
I love that Coconut Flour Mug Cake takes almost no time from start to finish, so it fits right into a busy evening when you want a treat fast. The microwave magic means you do not wait around, and the whole process is just stirring and microwaving, which is liberating when you are short on patience.
Pantry friendly
We often have the core players on hand, and that makes this dessert enormously flexible. With staples like coconut flour, coconut cream, and a sweetener, you can improvise based on what you have, which I find very reassuring when the grocery run is not an option.
Great texture for a single serving
The crumb of this Coconut Flour Mug Cake is delicate yet moist, thanks to the balance between the absorbent coconut flour and the richness of coconut cream and egg. Each bite offers a contrast of tender cake and syrupy swirls, which I always appreciate when I want a dessert that feels complete on its own.
Customizable flavor
I adore the way you can tweak the sweetness and spice to your liking. A little extra cinnamon makes it cozy, while a touch more syrup gives it a gooey finish. The recipe invites experimentation without risk, so you can tailor it to your exact cravings.
Minimal cleanup
Making a single mug means you only dirty one vessel, which is a huge win in my book. When I am craving something comforting but do not want a sink full of dishes, this Coconut Flour Mug Cake is the perfect compromise between indulgence and convenience.
What’s In This Coconut Flour Mug Cake
These ingredients are chosen to balance absorbency, fat, and lift so the cake bakes quickly in a mug while staying tender. The key players are the dry, highly absorbent coconut flour, the rich binder coconut cream and egg, and the sweet elements that add both flavor and moisture. Together they create a single serve cake that feels indulgent yet relies on pantry staples.
- 2 tablespoon coconut flour: Provides a light, absorbent base that thickens the batter and creates a tender crumb; use measured spoonfuls since coconut flour is highly absorbent and too much will dry the cake. Adds a subtle coconut flavor that complements the coconut cream, helping the mug cake hold structure without gluten.
- 1 tablespoon powdered sweetener: Contributes sweetness without sugar and helps balance flavors; powdered form dissolves easily into the batter for uniform texture. Helps keep the cake low-carb while still providing a pleasant sweet profile that pairs well with cinnamon.
- 1/4 teaspoon baking powder: Leavens the batter by releasing gas when heated, creating lift and a slightly lighter texture; use in small amount to avoid chemical aftertaste. Ensures the mug cake rises enough in the microwave to avoid a dense, flat result.
- 4 tablespoon coconut cream: Adds fat and moisture, creating a rich, creamy texture and intensified coconut flavor; stir well before measuring to ensure consistency. Fat in the cream tenderizes the crumb and helps prevent the tiny cake from becoming dry during quick cooking.
- 1 egg medium: Binds the ingredients together, provides structure and moisture, and contributes to lift when beaten or mixed; choose a fresh, medium egg for best results. The protein network set during cooking gives the mug cake a cake-like texture rather than a loose, custardy one.
- 1/2 teaspoon vanilla extract: Enhances aromatic profile and rounds out flavors with a warm, sweet note; use measured amounts to avoid overpowering the delicate coconut and sweetener. Vanilla also helps mask any residual bitter or eggy flavors, creating a cohesive taste.
- 1 tablespoon Lakanto sugar free syrup: Adds liquid sweetness and a touch of caramelized flavor while keeping the recipe sugar–free; syrup helps adjust batter consistency and adds moisture. Using a sugar–free syrup maintains low net carbs and contributes a pleasant mouthfeel.
- 1 teaspoon cinnamon: Provides warm spice and depth, enhancing the overall flavor with aromatic, slightly sweet notes; a small amount is sufficient to make the cake taste cozy and well-rounded. Cinnamon pairs especially well with coconut and vanilla, elevating the mug cake's flavor profile.
How to Make Coconut Flour Mug Cake
This is a microwave friendly, very hands on set of steps that moves quickly. Gather your ingredients, choose a 200 ml mug, and work steadily since the batter will go from raw to done in under two minutes. I recommend having your syrup mixture ready to swirl before microwaving.
- Mix the coconut flour, powdered sweetener and baking powder in a mug (200 ml volume) with a fork. Make sure there are no lumps.: The dry blend should smell faintly sweet and nutty, and when you whisk with a fork you will hear the tiny clinks of powder settling, indicating the ingredients are combining. This step removes lumps which is important because any unmixed pockets of coconut flour will remain dry and grainy after microwaving. A common mistake is rushing this step, leaving clumps that create dry spots, so take a few extra seconds to break them up and aim for an even powdery mixture.
- Add the coconut cream, vanilla extract and egg and mix until smooth. Flatten the top.: The batter will transition from dusty to glossy, with the coconut cream creating a silky texture and the egg giving it body. Stirring thoroughly ensures the moisture is evenly distributed and the batter becomes cohesive rather than streaky. You should be able to see a homogeneous pale batter with no streaks of egg white. If the batter seems too thick, it may be from packed flour; avoid adding extra liquid unnecessarily, instead mix a little more to hydrate the flour evenly.
- In a separate bowl, combine the sugar free syrup and cinnamon. Swirl the cinnamon syrup into the mug cake batter with a spoon.: Pressing the batter into an even surface helps the cake cook uniformly, so you will notice no domed or underdone center if the top is level. A smooth top also receives the cinnamon syrup swirl in a neat pattern. A common error is leaving a high mound in the center, which can cause the middle to stay gooey while the edges overcook, so gently smooth the surface with the back of a spoon.
- Microwave for 90 – 100 seconds. (My microwave cooks at 900 W – see recommended microwave timings for other Wattages in the recipe notes below).: Mix until the cinnamon is fully suspended in the syrup and the aroma of cinnamon becomes prominent, which signals a well infused swirl. The syrup will have a glossy sheen and a syrupy sound when stirred, and spooning it into the batter will create visible veins of spice. Avoid adding too much syrup to the top, as excessive wetness can weigh down the cake and create a gummy texture; a light swirl is usually enough for flavor and visual appeal.
- Swirl the cinnamon syrup into the mug cake batter with a spoon: Dragging the syrup through the batter creates marbled pockets that caramelize slightly when microwaved, offering contrast in texture and flavor. You should see thin ribbons of darker syrup against the pale batter, and those pockets will yield sticky, spiced bites after cooking. A misstep here is over mixing the swirl away, which will mute the cinnamon pockets, so aim for a few gentle motions to keep distinct ribbons.
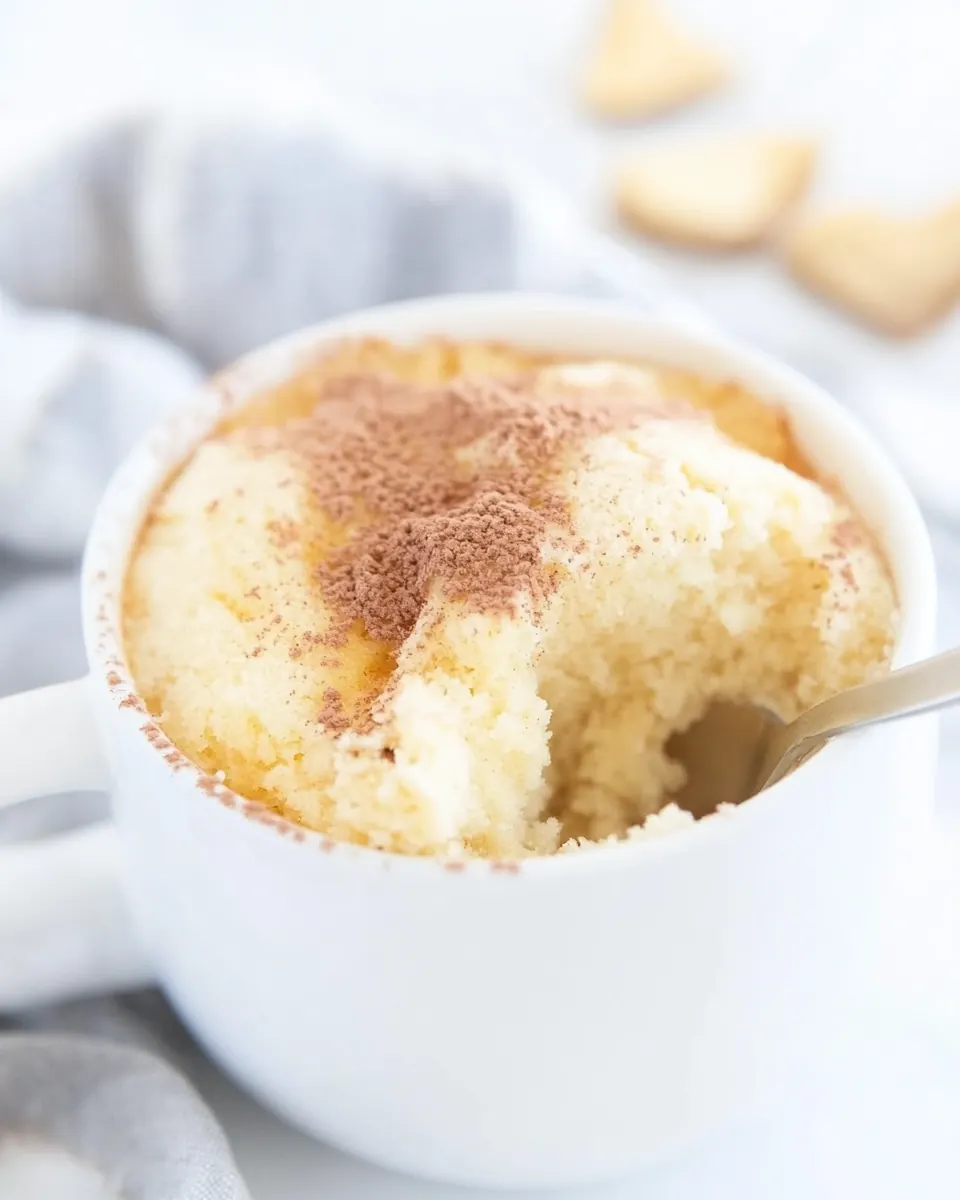
- Microwave for 90 to 100 seconds: As the mug warms, you will first smell the coconut and sweet aromas, then see the batter rise slightly and firm at the edges. When done, the top should spring back gently to the touch and a toothpick inserted near the center will come out with a few moist crumbs but not wet batter. Microwaves vary, so follow the timing guidance closely, because cooking too long will dry the cake and cooking too briefly will leave the center unset; if in doubt, start with the shorter time and add increments of ten seconds.
Tips for Success

These tips collect the small details that make the difference between a so so mug cake and one that impresses. Read them before you start, and keep them in mind while you mix and microwave.
- Measure coconut flour accurately, spoon into your measuring spoon and level it, because packed coconut flour will absorb more liquid and result in a dry cake.
- Use room temperature egg and coconut cream, they incorporate more smoothly and yield a more uniform batter, which helps the cake rise and set evenly in the microwave.
- Prepare the syrup swirl first, mixing the Lakanto sugar free syrup and cinnamon early saves time and ensures the cinnamon is fully distributed when you add it to the batter.
- Start with the lower microwave time, then add short increments if needed, because microwaves vary and it is easier to add time than to rescue an overcooked cake.
- Give the cake a brief rest, letting it sit for about a minute after microwaving allows residual heat to finish setting the interior and improves texture.
Serve This Coconut Flour Mug Cake With
This mug cake is best enjoyed warm and simply presented. Below are thoughtful serving ideas, pairings, and occasions where this small treat shines.
- Simple and solo, serve the warm mug directly with a small spoon for a cozy solo dessert that requires no plating, ideal for late night cravings.
- Tea time companion, pair with a cup of hot tea or coffee for a modest afternoon treat that balances the beverage with a touch of sweetness.
- Light brunch option, offer it as a petite sweet alongside fresh fruit for a casual brunch where guests appreciate single serve portions.
- Occasion friendly, this recipe works well for small celebrations or when you need a quick dessert during holidays or family gatherings, offering minimal prep and fuss.
- Storage and leftovers, while best eaten fresh, you can refrigerate any cooled leftovers in a covered container for a day, then gently rewarm in short microwave bursts to revive texture.
- Seasonal pairings, in cooler months emphasize warmer spices like extra cinnamon, while in summer a lighter swirl of syrup keeps it airy and comforting.
FAQ
Conclusion
This Coconut Flour Mug Cake stands out for its speed, minimal dishes, and satisfying blend of tender texture and warm cinnamon notes. I hope you give it a try the next time you want a small indulgence without fuss. It is the kind of recipe that fits into hectic nights, gentle celebrations, and quiet solo moments, offering a little reward with very little effort.
Coconut Flour Mug Cake
Equipment
- Mug 200 ml
- Fork
- Microwave
- Small Bowl
- Spoon
Ingredients
- 2 tablespoon coconut flour Provides a light, absorbent base that thickens the batter and creates a tender crumb; use measured spoonfuls since coconut flour is highly absorbent and too much will dry the cake. Adds a subtle coconut flavor that complements the coconut cream, helping the mug cake hold structure without gluten.
- 1 tablespoon powdered sweetener Contributes sweetness without sugar and helps balance flavors; powdered form dissolves easily into the batter for uniform texture. Helps keep the cake low-carb while still providing a pleasant sweet profile that pairs well with cinnamon.
- 1/4 teaspoon baking powder Leavens the batter by releasing gas when heated, creating lift and a slightly lighter texture; use in small amount to avoid chemical aftertaste. Ensures the mug cake rises enough in the microwave to avoid a dense, flat result.
- 4 tablespoon coconut cream Adds fat and moisture, creating a rich, creamy texture and intensified coconut flavor; stir well before measuring to ensure consistency. Fat in the cream tenderizes the crumb and helps prevent the tiny cake from becoming dry during quick cooking.
- 1 egg medium Binds the ingredients together, provides structure and moisture, and contributes to lift when beaten or mixed; choose a fresh, medium egg for best results. The protein network set during cooking gives the mug cake a cake-like texture rather than a loose, custardy one.
- 1/2 teaspoon vanilla extract Enhances aromatic profile and rounds out flavors with a warm, sweet note; use measured amounts to avoid overpowering the delicate coconut and sweetener. Vanilla also helps mask any residual bitter or eggy flavors, creating a cohesive taste.
- 1 tablespoon Lakanto sugar free syrup Adds liquid sweetness and a touch of caramelized flavor while keeping the recipe sugar-free; syrup helps adjust batter consistency and adds moisture. Using a sugar-free syrup maintains low net carbs and contributes a pleasant mouthfeel.
- 1 teaspoon cinnamon Provides warm spice and depth, enhancing the overall flavor with aromatic, slightly sweet notes; a small amount is sufficient to make the cake taste cozy and well-rounded. Cinnamon pairs especially well with coconut and vanilla, elevating the mug cake's flavor profile.
Instructions
- Mix the coconut flour, powdered sweetener and baking powder in a mug (200 ml volume) with a fork. Make sure there are no lumps.: The dry blend should smell faintly sweet and nutty, and when you whisk with a fork you will hear the tiny clinks of powder settling, indicating the ingredients are combining. This step removes lumps which is important because any unmixed pockets of coconut flour will remain dry and grainy after microwaving. A common mistake is rushing this step, leaving clumps that create dry spots, so take a few extra seconds to break them up and aim for an even powdery mixture.
- Add the coconut cream, vanilla extract and egg and mix until smooth. Flatten the top.: The batter will transition from dusty to glossy, with the coconut cream creating a silky texture and the egg giving it body. Stirring thoroughly ensures the moisture is evenly distributed and the batter becomes cohesive rather than streaky. You should be able to see a homogeneous pale batter with no streaks of egg white. If the batter seems too thick, it may be from packed flour; avoid adding extra liquid unnecessarily, instead mix a little more to hydrate the flour evenly.
- In a separate bowl, combine the sugar free syrup and cinnamon. Swirl the cinnamon syrup into the mug cake batter with a spoon.: Pressing the batter into an even surface helps the cake cook uniformly, so you will notice no domed or underdone center if the top is level. A smooth top also receives the cinnamon syrup swirl in a neat pattern. A common error is leaving a high mound in the center, which can cause the middle to stay gooey while the edges overcook, so gently smooth the surface with the back of a spoon.
- Microwave for 90 - 100 seconds. (My microwave cooks at 900 W - see recommended microwave timings for other Wattages in the recipe notes below).: Mix until the cinnamon is fully suspended in the syrup and the aroma of cinnamon becomes prominent, which signals a well infused swirl. The syrup will have a glossy sheen and a syrupy sound when stirred, and spooning it into the batter will create visible veins of spice. Avoid adding too much syrup to the top, as excessive wetness can weigh down the cake and create a gummy texture; a light swirl is usually enough for flavor and visual appeal.
- Swirl the cinnamon syrup into the mug cake batter with a spoon: Dragging the syrup through the batter creates marbled pockets that caramelize slightly when microwaved, offering contrast in texture and flavor. You should see thin ribbons of darker syrup against the pale batter, and those pockets will yield sticky, spiced bites after cooking. A misstep here is over mixing the swirl away, which will mute the cinnamon pockets, so aim for a few gentle motions to keep distinct ribbons.
- Microwave for 90 to 100 seconds: As the mug warms, you will first smell the coconut and sweet aromas, then see the batter rise slightly and firm at the edges. When done, the top should spring back gently to the touch and a toothpick inserted near the center will come out with a few moist crumbs but not wet batter. Microwaves vary, so follow the timing guidance closely, because cooking too long will dry the cake and cooking too briefly will leave the center unset; if in doubt, start with the shorter time and add increments of ten seconds.
Notes
- Measure coconut flour accurately, spoon into your measuring spoon and level it, because packed coconut flour will absorb more liquid and result in a dry cake.
- Use room temperature egg and coconut cream, they incorporate more smoothly and yield a more uniform batter, which helps the cake rise and set evenly in the microwave.
- Prepare the syrup swirl first, mixing the Lakanto sugar free syrup and cinnamon early saves time and ensures the cinnamon is fully distributed when you add it to the batter.
- Start with the lower microwave time, then add short increments if needed, because microwaves vary and it is easier to add time than to rescue an overcooked cake.
- Give the cake a brief rest, letting it sit for about a minute after microwaving allows residual heat to finish setting the interior and improves texture.