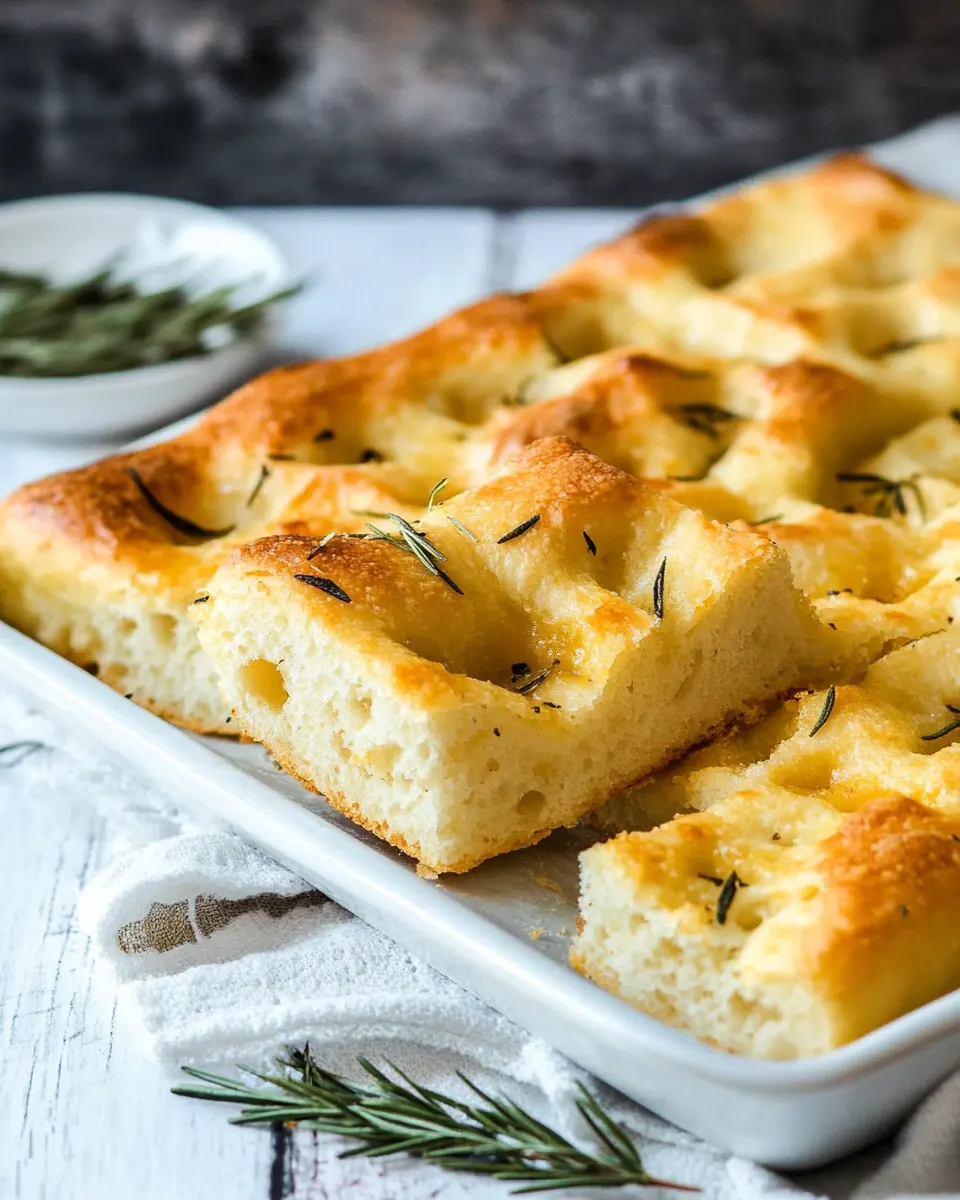
How to Make Focaccia
How to Make Focaccia has always been the sort of recipe that pulls me into the kitchen on a slow afternoon, hands dusted with flour and a radio humming in the background. The first time I made it I remember the scent of olive oil warming in the pan, and how that simple aroma felt like a promise of warm bread and company. I tend to make this when I want something that is forgiving, tactile, and deeply rewarding, the sort of loaf that invites me to press my fingers into the dough and watch it bloom.
Over the years I have learned to treat this dough like a small ritual. I measure my bread flour with a light hand, I appreciate the texture when the dough is ready, and I never underestimate the power of good olive oil or a sprinkle of flaky sea salt at the end. Making How to Make Focaccia is less about perfection than about presence, and that is why it often shows up on my table when friends stop by unannounced or when I need a little culinary comfort. I like to tell a story with food, and this recipe always has a warm chapter to share.
Recipe Snapshot
1 hr 10 mins
15 mins
55 mins
Medium
250 kcal
Italian
Gluten-Free, Low FODMAP
Dinner
Kitchen Scale (optional), 9×13 Baking Pan, Stand Mixer
Why You’ll Love This How to Make Focaccia
It is beautifully simple to make
I love that How to Make Focaccia strips bread down to essential, honest ingredients. With just bread flour, water, yeast, olive oil, and a touch of salt, you get bakery level texture at home. The process is approachable, and I often bring a neighbor into the kitchen to knead or press the dough into the pan. That shared, hands on moment makes the final loaf taste even better to me.
Texture that rewards patience
The crumb is airy yet substantial, with those signature pockets that soak up oil. When you bake this focaccia right, the exterior crisps while the inside stays tender. I can tell you from experience the wait during the rise is worth it, because those little gas pockets are what give each bite its lift and chew, and they make the bread perfect for tearing and sharing.
Flavor comes from smart little details
It is the finishing touches that make this recipe sing. Brushing with melted butter and drizzling a little extra olive oil before the final bake brings a glossy, rich crust. A sprinkle of Herbs de Provence and flaky sea salt lifts the whole loaf into something almost floral and bright, which always surprises guests who expect plain bread.
Versatile at the table
How to Make Focaccia works for a wide range of meals. I serve it with soups, use it for sandwiches, or tear it to accompany a salad. That flexibility means I end up making it often, because one recipe can cover appetizers, sides, or a main carb for a casual lunch. It is especially handy when I need something that travels well to potlucks or picnics.
Forgiving and adaptable
This dough tolerates small mistakes. If the water is a touch warmer or you overwork it a little, you still get a lovely result. I appreciate a recipe that doesn’t demand perfection, because it lets me focus on the sensory parts I enjoy most, like pressing dimples into the surface and smelling the olive oil as it toasts in the pan.
Ingredients Required for How to Make Focaccia
These ingredients are a study in restraint. Each item plays a clear role in building the texture and flavor I expect from a great focaccia. The starch and protein in bread flour create structure, the instant yeast gives reliable lift, the olive oil enriches crumb and crust, and a final sprinkle of sea salt sharpens every bite. Smaller players like Herbs de Provence and butter add aromatic and buttery notes that make this loaf memorable.
- 4 tbsp olive oil 50 g, best you can afford: Enhancing richness and providing a glossy finish, add to the pan or drizzle over the dough before baking to promote browning and tender crumb while contributing flavor.
- 1 1/2 cups hot water 340 g (12 oz.): Wetting the dough and activating the environment, pour at a warm but not scalding temperature to hydrate flour, help yeast fermentation, and create an open crumb structure.
- 1 1/4 oz . olive oil 35 g for the dough: Incorporating into the dough to add fat for tenderness, combine with the flour and water to improve extensibility and enrich the dough’s flavor and texture.
- 1 tbsp kosher salt 9 g: Seasoning the dough to strengthen gluten flavor and control fermentation, dissolve in the dough mixture to balance yeast activity and enhance overall taste.
- 3 1/2 cups bread flour 418 g (14.75 oz.): Providing the structural backbone and chew, measure precisely to develop gluten, trap gas from fermentation, and create the characteristic focaccia texture.
- 1 tbsp instant yeast 9 g: Leavening the dough by producing carbon dioxide gas, sprinkle into the flour or water to initiate fermentation for rise and lightness in the finished bread.
- 1 1/2 tsp Herbs de Provence 5 g, divided: Aromatic seasoning to layer herbal flavor, divide between dough and topping for subtle savory notes that complement the olive oil and butter.
- 4 tbsp unsalted butter 57 g, melted and divided (1/2 stick): Contributing richness and a soft crumb, melt and divide between brushing stages to add flavor, promote browning, and create a tender mouthfeel.
- flake sea salt , for sprinkling on top (optional): Finishing touch for texture and flavor, lightly sprinkle on top before or after baking to provide crunchy bursts of salt and enhance the overall taste.
Cooking Instructions for How to Make Focaccia
These directions are straightforward, but the magic is in the small sensory cues and timing. I will guide you through each stage so you can feel confident about texture and doneness. Follow the sequence and pay attention to the visual and tactile hints I note below.
- Spray a 9×13-inch pan with nonstick spray. Pour 4 tbsp really good extra virgin olive oil into the bottom of the pan.: The first thing you will notice is the glossy pool of olive oil that lines the pan, which will brown and perfume the bottom of the focaccia as it bakes. The oil sizzles slightly when the dough hits it and that sound is an early sign that the crust will crisp up well. Use enough oil to coat the pan evenly so the bread releases easily, and avoid skimping because too little oil can cause sticking and a dry base.
- Combine hot water, 1 1/4 oz. olive oil, kosher salt, bread flour, instant yeast, and 1/2 tsp Herbs de Provence in the bowl of a stand mixer fitted with the paddle attachment. Beat at low speed until most of the flour has incorporated, then turn the speed to medium-high. Beat for 1 minute.: At this stage you should sense warmth from the hot water and see the mixture come together into a shaggy mass before smoothing. The paddle attachment mixes cleanly without overworking gluten at first, and after a minute the dough becomes elastic and slightly tacky. You will smell the yeasty, wheaty aroma developing, which is a good sign of activity. If the dough looks dry, stop and add a teaspoon of water at a time; conversely, if it is overly sticky, sprinkle a little flour. A common pitfall is running the mixer too long early, which can overheat the dough and result in tight crumb.
- Transfer the dough to the prepared pan. Rub your fingers with olive oil and use them to push the dough to the edges of the pan and to make indentations in the dough. Cover the pan with plastic wrap, place it in a warm, draft-free spot, and let it rise to double its height for 1 hour. The dough should be puffy but stable.: When you press the dough and create those classic dimples, the sound is soft and the surface stretches under your touch, leaving visible wells that will hold oil and flavor. The dough should rise gently until doubled, looking airy and puffy but not collapsing under its own weight. You will smell fermentation as the yeast works, a pleasant bready note. Avoid placing the pan in a cold or drafty spot, because inconsistent temperature yields uneven rise. If the dough rises too quickly and then deflates, the structure may be weak.
- While the dough is rising, preheat oven to 400°F.: Preheating brings the oven to a steady environment for consistent browning. You will hear the oven click as it reaches temperature, and having it ready ensures the structure set during baking is strong. The heat activates the crust formation and caramelization of the oil soaked into the bottom. A frequent mistake is underheating the oven, which leads to pale, underdeveloped crust and a gummy crumb.
- After the dough has risen, brush the dough with 2 tbsp melted butter and sprinkle the top, lightly and evenly, with flaked sea salt and the remaining 1 tsp Herbs de Provence. Once again, use your fingers to make indentations across the dough and from the surface of the dough to the bottom.: Brushing with warm butter adds a nutty aroma and immediate sheen, while the herbs and salt provide fragrant and textural contrast. As you press, you will feel slight resistance then a supple give, and the surface will glisten where the butter adheres. These dimples trap the flavors, creating those pockets that soak up the finishing fat. Avoid rough handling that deflates the rise, and be careful not to press too aggressively or you will compress the airy interior.
- Bake 20 minutes.: During the first portion of baking you should notice a gentle rise and the edges beginning to take on color. The top will set and the oil at the base will start to bubble quietly, giving off a toasty scent. This initial bake sets the crumb structure so it does not collapse when you finish. A common error is opening the oven too soon to check, which can drop the oven temperature and interrupt the rise.
- Brush the top with the remaining 2 tbsp melted unsalted butter and very lightly sprinkle the top with flaked sea salt.: The second brush deepens the golden color and adds layered richness, and right away you will notice a brighter aroma and a slightly crisper surface. The added salt enhances contrast, making each bite more interesting. Apply sparingly, because flaky salt is potent; too much will overpower the delicate herb notes. Avoid brushing cold butter, which will not soak in and will look patchy.
- Rotate the pan front to back and bake another 15-20 minutes or until the bread is golden brown on the bottom and the top.: Rotating ensures even browning, because most ovens have hot spots that create uneven color. You will see the top deepen to an appetizing gold and the bottom develop a deeper tan if you can glance safely. The crust should sound slightly hollow when tapped on the underside, an audible cue of doneness. Leaving it in too long risks an overly hard crust, while removing it too soon yields a gummy interior.
- Transfer to a wire rack and cool 5 minutes. After 5 minutes, turn the bread out of the pan onto the wire rack to finish cooling.: The first five minutes of rest let the crumb settle and the steam redistribute. You will notice the bread release from the pan as it cools slightly, and turning it out onto a rack prevents condensation and sogginess. The aroma at this point is warm and inviting, and the crumb will still be soft but set. Cutting too early traps steam and leads to a gummy texture, so be patient for those five minutes before releasing and finishing the cool down.
Variations to Try
I like to tinker with small changes that make a big difference to the final loaf. Below are practical ideas you can try that respect the original ingredient list and elevate the finished focaccia in distinct ways.
- Make it extra herby by gently folding a small pinch more Herbs de Provence into the dough for added aroma, watching that the herbs do not clump and affect gluten development.
- Use a flavored olive oil for the pan oil and dough portion to boost complexity, being mindful of intensity so it does not overwhelm the subtle butter finish.
- Brush with butter at two stages as directed to get both a browned exterior and a softer enriched crumb inside, ensuring the butter is warm when applied.
- Try a longer rise if you have time, by placing the dough in the fridge for a slow overnight fermentation, which deepens flavor but requires returning the dough to room temperature before baking.
- Adjust salt to taste at the finish with flake sea salt for bright bursts of flavor, but keep the kosher salt in the dough consistent for proper fermentation control.
- Bake in a hot spot aware oven by rotating the pan halfway through to avoid uneven browning; this helps achieve uniform golden color across the loaf.
Best Served With
When I plan a meal around this focaccia, I think about complementary textures and occasions. The bread adapts to casual lunches, dinner spreads, or festive gatherings. Below are serving ideas, storage notes, and pairing suggestions to help you present this bread with confidence.
- Serve warm, torn into pieces and presented in a basket for a casual lunch or dinner, perfect when you want a rustic, welcoming centerpiece.
- Accompany with simple dips, such as olive oil and a pinch of herbs or a gentle flavored oil, which highlights the bread‘s porous crumb and ability to soak up flavors.
- Use for sandwiches, slicing horizontally to build rustic sandwiches for picnics or packed lunches, the sturdy crumb holds fillings without falling apart.
- Pair for gatherings, bring this to potlucks or family meals where tearing and sharing is desirable, it travels well and stays enjoyable at room temperature.
- Store properly, wrap cooled slices in a clean kitchen towel or place in an airtight container for short term keeping, refrigerating will dry it out faster so room temperature storage is preferred for one to two days.
- Reheat gently, pop slices in a warm oven for a few minutes or briefly in a toaster oven to revive crispness and aroma before serving at larger meals.
FAQ
Conclusion
This focaccia stands out because it pairs simple technique with bold olive oil flavor for reliably great results. Try it as your next weekend bake and notice how the herb and butter finishes elevate the loaf. You will find it rewarding to press the dimples, watch the dough rise, and share the warm bread with friends or family. It is friendly enough for everyday meals and impressive enough for gatherings, making it a recipe you will return to often.
How to Make Focaccia
Equipment
- Kitchen Scale (optional)
- 9×13 baking pan
- Stand mixer
Ingredients
- 4 tbsp olive oil 50 g, best you can afford Enhancing richness and providing a glossy finish, add to the pan or drizzle over the dough before baking to promote browning and tender crumb while contributing flavor.
- 1 1/2 cups hot water 340 g (12 oz.) Wetting the dough and activating the environment, pour at a warm but not scalding temperature to hydrate flour, help yeast fermentation, and create an open crumb structure.
- 1 1/4 oz . olive oil 35 g for the dough Incorporating into the dough to add fat for tenderness, combine with the flour and water to improve extensibility and enrich the dough’s flavor and texture.
- 1 tbsp kosher salt 9 g Seasoning the dough to strengthen gluten flavor and control fermentation, dissolve in the dough mixture to balance yeast activity and enhance overall taste.
- 3 1/2 cups bread flour 418 g (14.75 oz.) Providing the structural backbone and chew, measure precisely to develop gluten, trap gas from fermentation, and create the characteristic focaccia texture.
- 1 tbsp instant yeast 9 g Leavening the dough by producing carbon dioxide gas, sprinkle into the flour or water to initiate fermentation for rise and lightness in the finished bread.
- 1 1/2 tsp Herbs de Provence 5 g, divided Aromatic seasoning to layer herbal flavor, divide between dough and topping for subtle savory notes that complement the olive oil and butter.
- 4 tbsp unsalted butter 57 g, melted and divided (1/2 stick) Contributing richness and a soft crumb, melt and divide between brushing stages to add flavor, promote browning, and create a tender mouthfeel.
- flake sea salt optional, for sprinkling on top Finishing touch for texture and flavor, lightly sprinkle on top before or after baking to provide crunchy bursts of salt and enhance the overall taste.
Instructions
- Spray a 9×13-inch pan with nonstick spray. Pour 4 tbsp really good extra virgin olive oil into the bottom of the pan.: The first thing you will notice is the glossy pool of olive oil that lines the pan, which will brown and perfume the bottom of the focaccia as it bakes. The oil sizzles slightly when the dough hits it and that sound is an early sign that the crust will crisp up well. Use enough oil to coat the pan evenly so the bread releases easily, and avoid skimping because too little oil can cause sticking and a dry base.
- Combine hot water, 1 1/4 oz. olive oil, kosher salt, bread flour, instant yeast, and 1/2 tsp Herbs de Provence in the bowl of a stand mixer fitted with the paddle attachment. Beat at low speed until most of the flour has incorporated, then turn the speed to medium-high. Beat for 1 minute.: At this stage you should sense warmth from the hot water and see the mixture come together into a shaggy mass before smoothing. The paddle attachment mixes cleanly without overworking gluten at first, and after a minute the dough becomes elastic and slightly tacky. You will smell the yeasty, wheaty aroma developing, which is a good sign of activity. If the dough looks dry, stop and add a teaspoon of water at a time; conversely, if it is overly sticky, sprinkle a little flour. A common pitfall is running the mixer too long early, which can overheat the dough and result in tight crumb.
- Transfer the dough to the prepared pan. Rub your fingers with olive oil and use them to push the dough to the edges of the pan and to make indentations in the dough. Cover the pan with plastic wrap, place it in a warm, draft-free spot, and let it rise to double its height for 1 hour. The dough should be puffy but stable.: When you press the dough and create those classic dimples, the sound is soft and the surface stretches under your touch, leaving visible wells that will hold oil and flavor. The dough should rise gently until doubled, looking airy and puffy but not collapsing under its own weight. You will smell fermentation as the yeast works, a pleasant bready note. Avoid placing the pan in a cold or drafty spot, because inconsistent temperature yields uneven rise. If the dough rises too quickly and then deflates, the structure may be weak.
- While the dough is rising, preheat oven to 400°F.: Preheating brings the oven to a steady environment for consistent browning. You will hear the oven click as it reaches temperature, and having it ready ensures the structure set during baking is strong. The heat activates the crust formation and caramelization of the oil soaked into the bottom. A frequent mistake is underheating the oven, which leads to pale, underdeveloped crust and a gummy crumb.
- After the dough has risen, brush the dough with 2 tbsp melted butter and sprinkle the top, lightly and evenly, with flaked sea salt and the remaining 1 tsp Herbs de Provence. Once again, use your fingers to make indentations across the dough and from the surface of the dough to the bottom.: Brushing with warm butter adds a nutty aroma and immediate sheen, while the herbs and salt provide fragrant and textural contrast. As you press, you will feel slight resistance then a supple give, and the surface will glisten where the butter adheres. These dimples trap the flavors, creating those pockets that soak up the finishing fat. Avoid rough handling that deflates the rise, and be careful not to press too aggressively or you will compress the airy interior.
- Bake 20 minutes.: During the first portion of baking you should notice a gentle rise and the edges beginning to take on color. The top will set and the oil at the base will start to bubble quietly, giving off a toasty scent. This initial bake sets the crumb structure so it does not collapse when you finish. A common error is opening the oven too soon to check, which can drop the oven temperature and interrupt the rise.
- Brush the top with the remaining 2 tbsp melted unsalted butter and very lightly sprinkle the top with flaked sea salt.: The second brush deepens the golden color and adds layered richness, and right away you will notice a brighter aroma and a slightly crisper surface. The added salt enhances contrast, making each bite more interesting. Apply sparingly, because flaky salt is potent; too much will overpower the delicate herb notes. Avoid brushing cold butter, which will not soak in and will look patchy.
- Rotate the pan front to back and bake another 15-20 minutes or until the bread is golden brown on the bottom and the top.: Rotating ensures even browning, because most ovens have hot spots that create uneven color. You will see the top deepen to an appetizing gold and the bottom develop a deeper tan if you can glance safely. The crust should sound slightly hollow when tapped on the underside, an audible cue of doneness. Leaving it in too long risks an overly hard crust, while removing it too soon yields a gummy interior.
- Transfer to a wire rack and cool 5 minutes. After 5 minutes, turn the bread out of the pan onto the wire rack to finish cooling.: The first five minutes of rest let the crumb settle and the steam redistribute. You will notice the bread release from the pan as it cools slightly, and turning it out onto a rack prevents condensation and sogginess. The aroma at this point is warm and inviting, and the crumb will still be soft but set. Cutting too early traps steam and leads to a gummy texture, so be patient for those five minutes before releasing and finishing the cool down.
Notes
- Make it extra herby by gently folding a small pinch more Herbs de Provence into the dough for added aroma, watching that the herbs do not clump and affect gluten development.
- Use a flavored olive oil for the pan oil and dough portion to boost complexity, being mindful of intensity so it does not overwhelm the subtle butter finish.
- Brush with butter at two stages as directed to get both a browned exterior and a softer enriched crumb inside, ensuring the butter is warm when applied.
- Try a longer rise if you have time, by placing the dough in the fridge for a slow overnight fermentation, which deepens flavor but requires returning the dough to room temperature before baking.
- Adjust salt to taste at the finish with flake sea salt for bright bursts of flavor, but keep the kosher salt in the dough consistent for proper fermentation control.
- Bake in a hot spot aware oven by rotating the pan halfway through to avoid uneven browning; this helps achieve uniform golden color across the loaf.