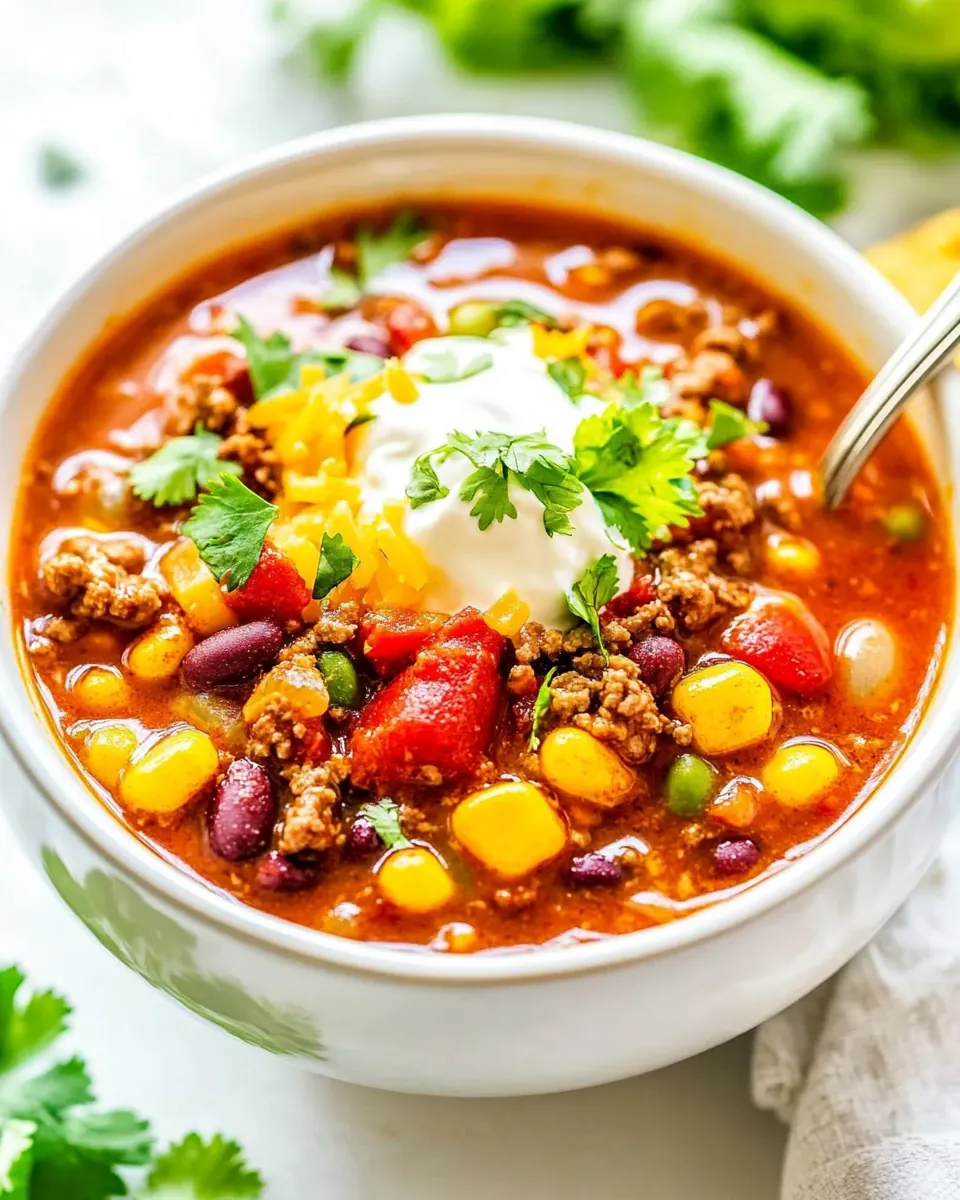
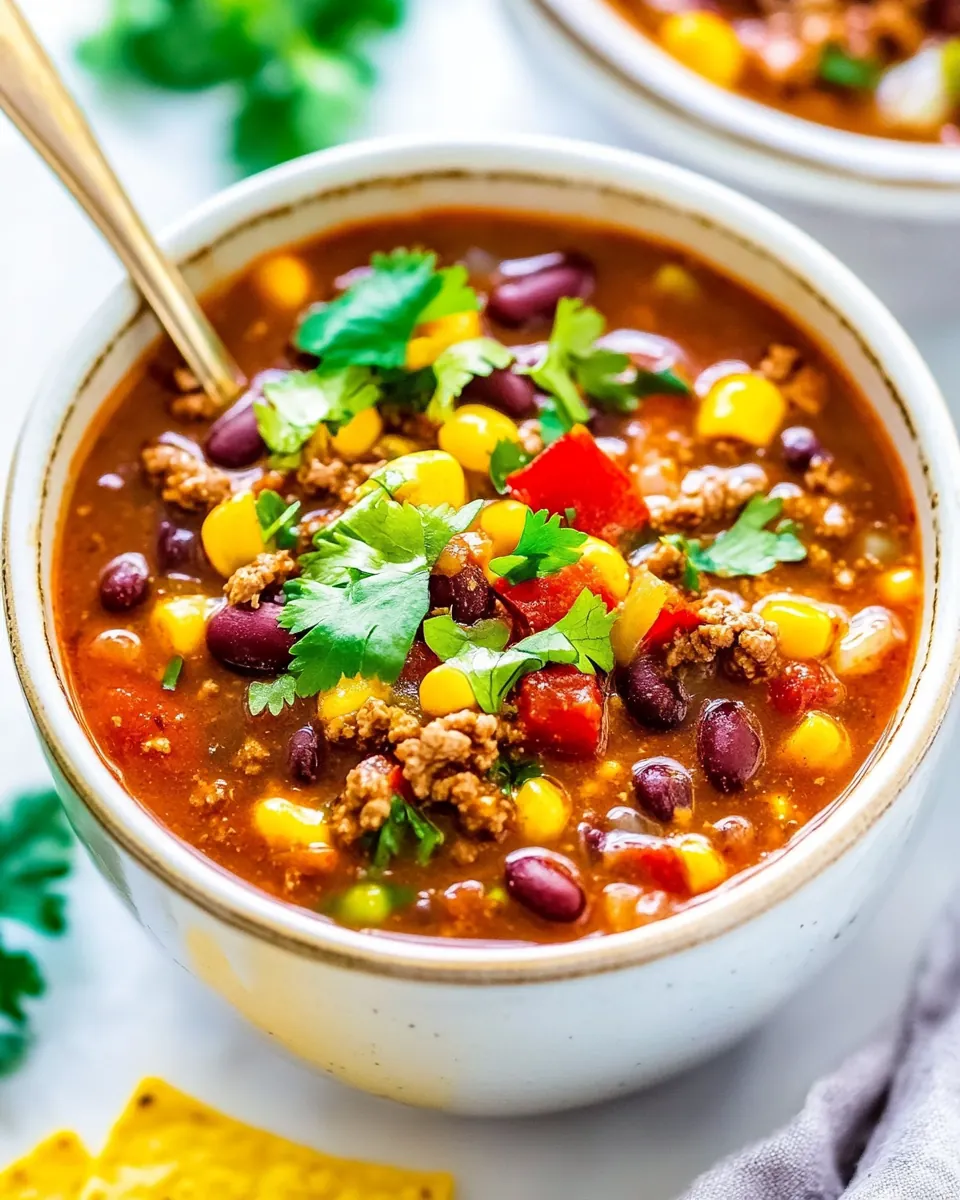
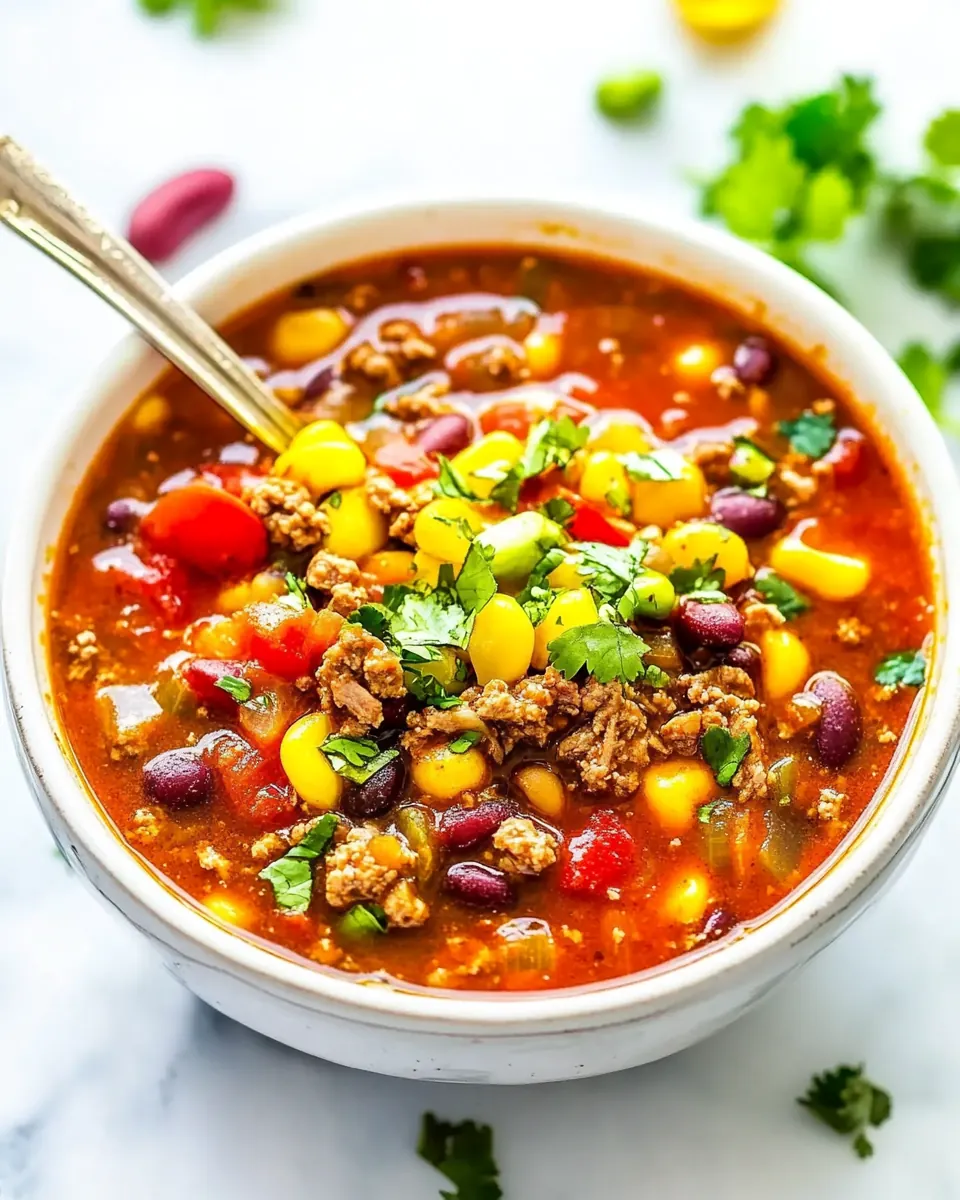
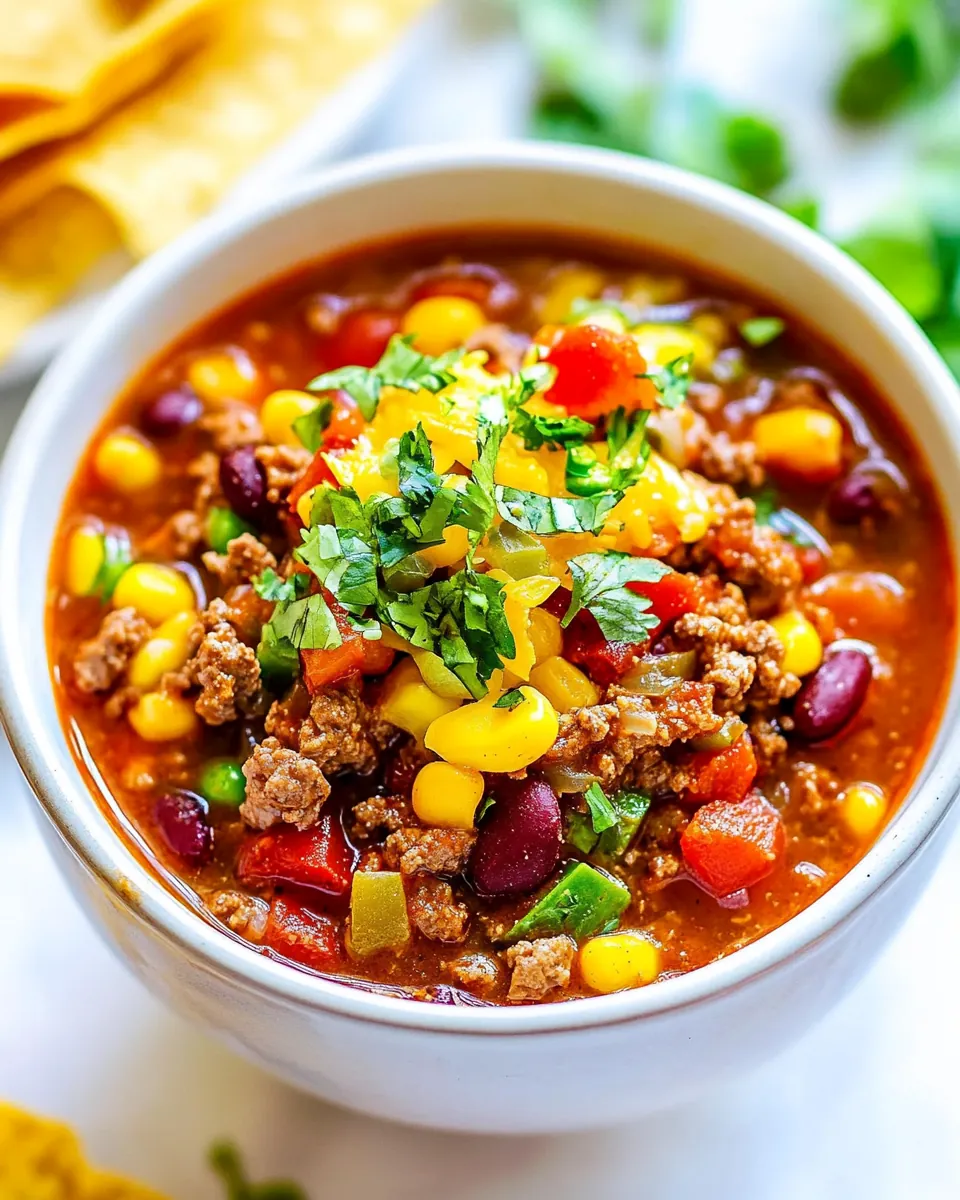
Easy 30 Minute Beef Taco Chili
Easy 30 Minute Beef Taco Chili became my go to when I needed something hearty, fast, and forgiving on a weeknight. The first time I made it I was juggling a grocery run, a late meeting, and two hungry people who promised they would wait, and this bowl of spicy, savory comfort pulled everything together like a kitchen miracle. I remember the smell of browned beef and onion filling the house, and how everyone paused at the door, curious, then sat down with steaming bowls and wide smiles.
Over the years I refined the balance between bright and smoky, keeping the process simple so the flavors can shine. I like recipes that don t demand perfection, and this Easy 30 Minute Beef Taco Chili is one of those forgiving dishes that rewards small experiments. Swap the heat level, use a leaner or fattier beef, and adjust the broth to hit your preferred thickness. Each change nudges the final bowl in a new direction, and that flexibility is the real magic.
What I love most is how it doubles as a weeknight dinner and a game day crowd pleaser. You can stretch it with beans, pile it into baked potatoes, or spoon it over rice for a quick, satisfying meal. The combination of pantry staples and a couple of fresh touches like minced cilantro or a squeeze of lime means you get complexity without fuss. I ve written this version to be straightforward, chatty, and practical, because that s how I cook when time is short but standards remain high.
Recipe Snapshot
25 mins
5 mins
20 mins
Medium
350 kcal
Mexican
Gluten-Free, Low FODMAP
Dinner
Large Dutch oven, Wooden spoon, Can opener, Measuring spoons
Why This Easy 30 Minute Beef Taco Chili Works
Fast and Flavorful
I love that Easy 30 Minute Beef Taco Chili delivers a bold, layered flavor profile in under an hour, usually much quicker. The quick sear of beef builds caramelized notes, while the spices bloom in the hot pan, giving you depth without hours on the stove. For busy nights, this recipe feels like a gift because you don t sacrifice taste for speed.
Pantry Friendly and Flexible
One of the reasons I keep making this chili is how it relies on pantry stalwarts like canned tomatoes, canned beans, and canned green chiles. These items store long term, so you can pull together a satisfying meal with minimal thinking. I often tweak the broth level or the heat to suit whatever s on hand, and the recipe adapts beautifully.
Family Friendly with Bold Character
There s enough taco spice personality to feel like a celebration, yet it s gentle enough for kids and picky eaters when you reduce the heat. I ve watched reluctant tasters come around after the first bite, and that s a recurring win at my table. The texture from the corn and beans gives every spoonful satisfying chew, while the spices keep things interesting.
Great for Meal Prep and Leftovers
I always make a double batch because this chili stores and reheats brilliantly. The flavors actually deepen after a day or two, so leftovers are often better than the first night. If you re feeding a group, it s easy to scale up and still keep things simple, which is why this recipe is my go to for potlucks and casual gatherings.
Nutritionally Balanced Comfort
Between the lean beef, fiber rich beans, and the vegetable additions, this bowl feels like balanced comfort food. It s hearty enough to be a main, but you can also pair smaller portions with bright salads or crusty bread for variety. I appreciate a recipe that satisfies both palate and practicality.
Ingredients Required for Easy 30 Minute Beef Taco Chili
These ingredients are chosen for speed and harmony. The key players are the seasoned beef, canned tomatoes, and beans, which provide body and richness, while the spices bring taco inspired warmth. Together they create a layered chili that is quick to assemble, forgiving in technique, and flexible in seasoning.
- 1 to 2 tablespoons olive oil, based on how much fat your ground beef has (optional): Adds richness and helps brown the beef; use only if ground beef is very lean to prevent sticking and add mouthfeel. Sauté briefly until shimmering to bloom flavors. Can be omitted if using fattier beef for a lighter result.
- 1 pound lean ground beef, (I use extra lean, 90 to 95% lean): Provides hearty protein and the chili’s base flavor; choose extra–lean if you want less grease and quicker browning. Break into small pieces while cooking for even texture and simmer with spices to absorb flavors. Browns well and releases savory juices that form the foundation of the chili.
- 1 medium/large yellow onion, peeled and diced small: Contributes sweetness and aromatic depth when softened; dice small to blend seamlessly into the chili. Sweat until translucent to develop mellow flavor without caramelizing. Balances acidity from tomatoes and adds body to the broth.
- 4 to 5 cloves garlic, finely minced or pressed: Imparts pungent, savory brightness and enhances overall flavor; mince finely or press to distribute evenly. Add early in cooking to mellow and release oils that infuse the chili. Be careful not to burn to avoid bitterness.
- one 1.25-ounce packet taco seasoning, I used reduced sodium, medium heat: Provides a ready-made blend of Mexican-style spices and salt for quick seasoning; use reduced sodium to control overall saltiness. Stir in after browning the meat so the spices bloom in the fat. Adjust heat level by choosing mild, medium, or hot varieties.
- 1 tablespoon cumin: Adds warm, earthy, slightly citrusy undertones that complement chili flavors; measure precisely to avoid overpowering. Toast briefly in the pan after adding to release aromatic oils. Pairs well with cumin and chili powder for classic taco–chili notes.
- 1 tablespoon chili powder: Gives smoky, warm heat and deep chili flavor; use to establish the chili backbone. Add during cooking to meld with other spices and tomatoes. Adjust quantity to control overall spiciness and color.
- 1 teaspoon freshly ground black pepper, or to taste: Provides sharp heat and peppery spice; grind fresh for best flavor and adjust to taste. Sprinkle in while simmering to allow flavors to integrate. Balances other spices without adding heat intensity like cayenne.
- two 14.5-ounce cans petite diced tomatoes, I used no-salt added: Adds acidity, texture, and tomatoey body; use petite diced for small, consistent pieces throughout the chili. Pour with juices to enrich the broth and simmer to meld flavors. No-salt varieties let you better control final seasoning.
- one 15-ounce can black beans, drained and rinsed (I used no-salt added): Offers creamy texture, protein, and fiber while stretching the chili; drain and rinse to reduce excess sodium. Stir in near the end of cooking to warm through without losing shape. Black beans add earthy flavor and visual contrast.
- one 15-ounce can red kidney beans, drained and rinsed (I used dark, no-salt added): Provides firm texture, color contrast, and added protein and fiber; drain and rinse to control salt. Add with other beans to create a chili-like bean mix that holds its shape. Kidney beans contribute hearty bite and absorb seasonings.
- one 4-ounce can diced green chiles, I used hot fire-roasted: Adds mild heat, smoky tang, and a slightly charred pepper flavor if fire–roasted; drain before adding or include with juices for extra flavor. Stir in to complement tomatoes and spices. Hot variety increases overall spiciness.
- 1 cup corn, I used frozen straight from the freezer: Supplies sweetness, color, and a pop of texture; frozen corn can be added directly from the freezer. Stir in toward the end of cooking to preserve some bite. Corn balances savory and spicy elements with natural sweetness.
- 32 ounce low-sodium chicken broth, or as desired: Creates a savory, thin broth and deglazes the pot while providing simmering liquid for flavors to meld; choose low-sodium to control salt. Add gradually to reach desired consistency and simmer to concentrate flavors. Chicken broth contributes umami without beefiness.
- kosher salt, to taste: Used to adjust and enhance the overall salt level to taste; add sparingly if reduced–sodium canned items were used. Season near the end of cooking and taste repeatedly to avoid over-salting. Kosher salt dissolves quickly and balances flavors.
- 3 to 4 bay leaves: Imparts subtle herbal, aromatic depth and bay-like warmth when simmered; add whole and remove before serving. Use 3 to 4 leaves to infuse the broth during the simmering period. Avoid crushing to prevent overpowering bitterness.
- pinch cayenne pepper, and to taste (optional): Provides concentrated heat to boost spiciness if desired; start with a pinch and adjust carefully. Add during simmering to distribute evenly through the chili. Optional for those who prefer milder flavors.
- 1/3 cup fresh cilantro finely minced, or to taste: Adds fresh, bright, herbaceous finish and a burst of color when stirred in at the end; finely mince for even distribution. Use to taste to avoid overwhelming the chili’s cooked flavors. Cilantro lifts and balances the rich, spicy base.
- pinch sugar, and to taste (optional): Balances acidity and rounds flavors with a tiny touch of sweetness to reduce harsh tomato tang; add a pinch at a time and taste. Useful to harmonize flavors when tomatoes taste too sharp. Optional for a subtly smoother finish.
- lemon/lime juice, and to taste (optional): Brightens and balances the chili with acidity and freshness; squeeze lemon or lime to taste at the end. Adds lively citrus notes that enhance spices and cut richness. Optional and adjustable depending on preferred brightness.
Preparation Steps for Easy 30 Minute Beef Taco Chili
These steps are written to be conversational and reassuring, guiding you through the quick build of this chili while explaining what to watch for at each stage. Follow the sequence and use sensory cues to know you re on track.
- To a large Dutch oven, optionally add the oil, beef, onion, and cook over medium-high heat until beef is cooked through and onions are translucent, about 7 to 8 minutes; crumble beef as it cooks and stir intermittently to ensure even cooking.: You will notice the sizzling sound as the beef hits the hot pan and the aroma of browning meat will deepen in a few minutes, signaling the Maillard reactions that build savory flavor. The onion softens and becomes glossy, releasing sweet notes that mellow the tomato acidity later on. Stirring intermittently helps create even browning and prevents large clumps, while crumbling the meat ensures a pleasant, even texture in the finished chili. If the pan gives off a lot of fat, drain some to keep the chili from becoming greasy. A common pitfall is overcrowding the pot which steams instead of browning the beef , so if the pan feels crowded, brown in batches or raise the heat slightly to encourage browning without burning.
- Add the garlic and cook for about 1 minute, or until fragrant; stir nearly constantly.: The moment you add minced garlic you should smell a bright, slightly pungent aroma almost immediately, and the sound of the pan will soften as the garlic sizzles briefly. This short cook time is critical because garlic goes from fragrant to bitter if it burns, so stir nearly constantly and remove from direct high heat if you see dark specks. The reason we add it now is to release those aromatic oils which mingle with the browned beef to enrich the base of the chili. Avoid walking away during this step since burnt garlic is a common mistake that can make the whole pot taste off.
- Add the taco seasoning, cumin, chili powder, pepper, and stir to incorporate.: As you sprinkle in the spices, you will immediately sense a nutty, toasty perfume as they hit the warm fat and juices in the pot, which is desirable because it activates the oils and deepens flavor. Stir thoroughly to coat the meat and aromatics, ensuring the spices are evenly distributed and not clumping. This technique helps the chili carry a cohesive spice profile rather than pockets of overwhelmed or under seasoned bites. A frequent error here is adding too much salt with pre mixed seasonings, so taste later before final salting.
- Add the tomatoes, black beans, kidney beans, green chiles, corn, broth (if you prefer thicker chili start with 2/3 to 3/4 of the container), salt to taste, bay leaves, optional cayenne, and stir to combine.: When you add the canned tomatoes and beans , the pot will look lively and colorful, and the added liquid will loosen the seared bits from the bottom, which you should scrape up because they carry a lot of flavor. The contrasting textures of the canned beans and frozen corn give the chili structure, and the green chiles add a roasted brightness. Choosing less broth initially gives you control over final thickness, since simmering will further reduce the liquid. Be mindful of saltiness from cans and packet seasoning so you don t over salt early on, and tuck in the bay leaves for subtle aromatic support; remember to remove them before serving.
- Bring to boil and allow chili to gently boil for about 5 to 10 minutes or until chili has reduced and thickened some.: You should see small, steady bubbles and smell the mingled spices as the chili concentrates; this gentle boil allows water to evaporate and flavors to intensify, thickening the broth into a clingy, spoonable sauce. Stir occasionally to prevent scorching on the bottom, paying attention to the aroma which will grow richer as it reduces. If the chili reduces too quickly or the bottom starts to brown aggressively, lower the heat and keep it at a simmer. A common mistake is rushing this step, leaving the chili thin and underdeveloped, so take the minutes to coax out complexity.
- Add the cilantro and stir to combine.: When you stir in the minced cilantro , its fresh, herbaceous scent will brighten the pot and add a lift to the dense, savory base. Adding it at the end preserves its vibrant green color and fresh flavor rather than cooking it away. The presence of fresh herbs at this stage balances the deeper, roasted notes from the spices, creating a layered finish. Overcooking herbs is an easy misstep that mutes their impact, so add them at the tail end.
- Stir, taste, optionally add sugar to taste (sugar balances the acid from the tomatoes), optional lemon/lime juice (brightens up the flavor), and additional salt, pepper, etc. if desired.: Begin this step by inhaling the aroma and taking a small spoonful to evaluate balance; you re aiming for a harmony of savory, acidic, and slightly spicy notes. A pinch of sugar can round tomato acidity, and a splash of lemon or lime juice can lift the whole bowl, making flavors pop. Adjust seasonings gradually and taste after each addition because it s easy to overshoot. One common error is adding too much acid or salt at once, so small increments are the rule here.
- Remove bay leaves, ladle into bowls, and optionally garnish with cheese, sour cream, avocado, etc.: Before serving, fish out the bay leaves and note the final texture, which should be thick enough to cling to a spoon yet still saucy. Ladling the chili will release a comforting steam and the first spoonful should show a cohesive mix of meat, beans, and vegetables. Garnishes like shredded cheese or a dollop of sour cream provide cool contrast, while slices of avocado lend creaminess. A frequent oversight is forgetting to remove bay leaves, which can surprise and be unpleasant for guests, so double check the pot.
Tips and Variations
I like to offer practical ways to make this chili your own, whether you re adjusting heat, changing texture, or planning leftovers. Below are detailed tips and variations that I ve used and tested to help you get consistent results.
- Control the richness, if you use very lean beef add 1 tablespoon of olive oil at the start to help the spices bloom and prevent sticking, while fattier beef may not need any added oil at all.
- Adjust thickness, begin with two thirds to three quarters of the broth container if you want a thicker chili, then simmer until the liquid reduces to your liking, tasting as it concentrates to avoid over seasoning.
- Heat management, use cayenne sparingly and add it incrementally; remember that spice intensifies as it sits, so err on the side of less if you re unsure about your guests’ heat tolerance.
- Make ahead strategy, chili often tastes better the next day as flavors meld; cool to room temperature quickly, refrigerate in airtight containers, and reheat gently to preserve texture.
- Fresh finishing touches, add minced cilantro and a final squeeze of lime or lemon just before serving for a bright, fresh contrast that lifts the bowl.
Accompaniments for Easy 30 Minute Beef Taco Chili
This chili pairs well with simple sides and fits many occasions, from a cozy winter dinner to a casual gathering. Think about textures and temperatures that complement the warm, spiced bowl.
- Rice or Grain Base, spoon the chili over steamed rice or quinoa for a hearty, budget friendly meal that stretches servings and soaks up the sauce nicely.
- Bread and Chips, serve with crusty bread or tortilla chips for dipping and added crunch, which contrasts the chili s soft beans and tender beef.
- Fresh Toppings Bar, set out bowls of diced avocado, chopped cilantro, shredded cheese, and sour cream for guests to customize their bowls to taste, making it ideal for gatherings.
- Occasions, this recipe works for weeknight dinners, game days, potlucks, and winter meals where comfort and speed matter most; it s also a solid option for Ramadan if you re breaking a fast and need something soul satisfying and nourishing.
- Storage Tips, refrigerate in airtight containers for up to five days, or freeze in portions for up to four months; thaw overnight in the fridge and reheat gently on the stove to preserve texture.
- Seasonal Pairings, in winter I serve it with roasted winter vegetables and a simple salad for freshness, while in milder months a crisp green salad and lime wedges make a lighter pairing.
FAQ
Conclusion
This recipe stands out for its ability to deliver a robust, comforting bowl of chili with minimal effort. It balances quick cooking with layered flavors so you can have a satisfying, crowd pleasing meal on a busy evening. Give it a try the next time you need something comforting and fast, and don t be surprised if it becomes a regular in your rotation. I love how adaptable it is, and I hope you enjoy the same warm, spicy satisfaction it brings to my table.

Easy 30 Minute Beef Taco Chili
Equipment
- Large Dutch oven
- Wooden Spoon
- Can opener
- Measuring Spoons
Ingredients
- 1 to 2 tablespoons olive oil, optional based on how much fat your ground beef has Adds richness and helps brown the beef; use only if ground beef is very lean to prevent sticking and add mouthfeel. Sauté briefly until shimmering to bloom flavors. Can be omitted if using fattier beef for a lighter result.
- 1 pound lean ground beef, (I use extra lean, 90 to 95% lean) Provides hearty protein and the chili’s base flavor; choose extra-lean if you want less grease and quicker browning. Break into small pieces while cooking for even texture and simmer with spices to absorb flavors. Browns well and releases savory juices that form the foundation of the chili.
- 1 medium/large yellow onion, peeled and diced small Contributes sweetness and aromatic depth when softened; dice small to blend seamlessly into the chili. Sweat until translucent to develop mellow flavor without caramelizing. Balances acidity from tomatoes and adds body to the broth.
- 4 to 5 cloves garlic, finely minced or pressed Imparts pungent, savory brightness and enhances overall flavor; mince finely or press to distribute evenly. Add early in cooking to mellow and release oils that infuse the chili. Be careful not to burn to avoid bitterness.
- one 1.25-ounce packet taco seasoning, I used reduced sodium, medium heat Provides a ready-made blend of Mexican-style spices and salt for quick seasoning; use reduced sodium to control overall saltiness. Stir in after browning the meat so the spices bloom in the fat. Adjust heat level by choosing mild, medium, or hot varieties.
- 1 tablespoon cumin Adds warm, earthy, slightly citrusy undertones that complement chili flavors; measure precisely to avoid overpowering. Toast briefly in the pan after adding to release aromatic oils. Pairs well with cumin and chili powder for classic taco-chili notes.
- 1 tablespoon chili powder Gives smoky, warm heat and deep chili flavor; use to establish the chili backbone. Add during cooking to meld with other spices and tomatoes. Adjust quantity to control overall spiciness and color.
- 1 teaspoon freshly ground black pepper, or to taste Provides sharp heat and peppery spice; grind fresh for best flavor and adjust to taste. Sprinkle in while simmering to allow flavors to integrate. Balances other spices without adding heat intensity like cayenne.
- two 14.5-ounce cans petite diced tomatoes, I used no-salt added Adds acidity, texture, and tomatoey body; use petite diced for small, consistent pieces throughout the chili. Pour with juices to enrich the broth and simmer to meld flavors. No-salt varieties let you better control final seasoning.
- one 15-ounce can black beans, drained and rinsed (I used no-salt added) Offers creamy texture, protein, and fiber while stretching the chili; drain and rinse to reduce excess sodium. Stir in near the end of cooking to warm through without losing shape. Black beans add earthy flavor and visual contrast.
- one 15-ounce can red kidney beans, drained and rinsed (I used dark, no-salt added) Provides firm texture, color contrast, and added protein and fiber; drain and rinse to control salt. Add with other beans to create a chili-like bean mix that holds its shape. Kidney beans contribute hearty bite and absorb seasonings.
- one 4-ounce can diced green chiles, I used hot fire-roasted Adds mild heat, smoky tang, and a slightly charred pepper flavor if fire-roasted; drain before adding or include with juices for extra flavor. Stir in to complement tomatoes and spices. Hot variety increases overall spiciness.
- 1 cup corn, I used frozen straight from the freezer Supplies sweetness, color, and a pop of texture; frozen corn can be added directly from the freezer. Stir in toward the end of cooking to preserve some bite. Corn balances savory and spicy elements with natural sweetness.
- 32 -ounce low-sodium chicken broth, or as desired Creates a savory, thin broth and deglazes the pot while providing simmering liquid for flavors to meld; choose low-sodium to control salt. Add gradually to reach desired consistency and simmer to concentrate flavors. Chicken broth contributes umami without beefiness.
- kosher salt, to taste Used to adjust and enhance the overall salt level to taste; add sparingly if reduced-sodium canned items were used. Season near the end of cooking and taste repeatedly to avoid over-salting. Kosher salt dissolves quickly and balances flavors.
- 3 to 4 bay leaves Imparts subtle herbal, aromatic depth and bay-like warmth when simmered; add whole and remove before serving. Use 3 to 4 leaves to infuse the broth during the simmering period. Avoid crushing to prevent overpowering bitterness.
- pinch cayenne pepper, optional and to taste Provides concentrated heat to boost spiciness if desired; start with a pinch and adjust carefully. Add during simmering to distribute evenly through the chili. Optional for those who prefer milder flavors.
- 1/3 cup fresh cilantro finely minced, or to taste Adds fresh, bright, herbaceous finish and a burst of color when stirred in at the end; finely mince for even distribution. Use to taste to avoid overwhelming the chili’s cooked flavors. Cilantro lifts and balances the rich, spicy base.
- pinch sugar, optional and to taste Balances acidity and rounds flavors with a tiny touch of sweetness to reduce harsh tomato tang; add a pinch at a time and taste. Useful to harmonize flavors when tomatoes taste too sharp. Optional for a subtly smoother finish.
- lemon/lime juice, optional and to taste Brightens and balances the chili with acidity and freshness; squeeze lemon or lime to taste at the end. Adds lively citrus notes that enhance spices and cut richness. Optional and adjustable depending on preferred brightness.
Instructions
- To a large Dutch oven, optionally add the oil, beef, onion, and cook over medium-high heat until beef is cooked through and onions are translucent, about 7 to 8 minutes; crumble beef as it cooks and stir intermittently to ensure even cooking.: You will notice the sizzling sound as the beef hits the hot pan and the aroma of browning meat will deepen in a few minutes, signaling the Maillard reactions that build savory flavor. The onion softens and becomes glossy, releasing sweet notes that mellow the tomato acidity later on. Stirring intermittently helps create even browning and prevents large clumps, while crumbling the meat ensures a pleasant, even texture in the finished chili. If the pan gives off a lot of fat, drain some to keep the chili from becoming greasy. A common pitfall is overcrowding the pot which steams instead of browning the beef , so if the pan feels crowded, brown in batches or raise the heat slightly to encourage browning without burning.
- Add the garlic and cook for about 1 minute, or until fragrant; stir nearly constantly.: The moment you add minced garlic you should smell a bright, slightly pungent aroma almost immediately, and the sound of the pan will soften as the garlic sizzles briefly. This short cook time is critical because garlic goes from fragrant to bitter if it burns, so stir nearly constantly and remove from direct high heat if you see dark specks. The reason we add it now is to release those aromatic oils which mingle with the browned beef to enrich the base of the chili. Avoid walking away during this step since burnt garlic is a common mistake that can make the whole pot taste off.
- Add the taco seasoning, cumin, chili powder, pepper, and stir to incorporate.: As you sprinkle in the spices, you will immediately sense a nutty, toasty perfume as they hit the warm fat and juices in the pot, which is desirable because it activates the oils and deepens flavor. Stir thoroughly to coat the meat and aromatics, ensuring the spices are evenly distributed and not clumping. This technique helps the chili carry a cohesive spice profile rather than pockets of overwhelmed or under seasoned bites. A frequent error here is adding too much salt with pre mixed seasonings, so taste later before final salting.
- Add the tomatoes, black beans, kidney beans, green chiles, corn, broth (if you prefer thicker chili start with 2/3 to 3/4 of the container), salt to taste, bay leaves, optional cayenne, and stir to combine.: When you add the canned tomatoes and beans , the pot will look lively and colorful, and the added liquid will loosen the seared bits from the bottom, which you should scrape up because they carry a lot of flavor. The contrasting textures of the canned beans and frozen corn give the chili structure, and the green chiles add a roasted brightness. Choosing less broth initially gives you control over final thickness, since simmering will further reduce the liquid. Be mindful of saltiness from cans and packet seasoning so you don t over salt early on, and tuck in the bay leaves for subtle aromatic support; remember to remove them before serving.
- Bring to boil and allow chili to gently boil for about 5 to 10 minutes or until chili has reduced and thickened some.: You should see small, steady bubbles and smell the mingled spices as the chili concentrates; this gentle boil allows water to evaporate and flavors to intensify, thickening the broth into a clingy, spoonable sauce. Stir occasionally to prevent scorching on the bottom, paying attention to the aroma which will grow richer as it reduces. If the chili reduces too quickly or the bottom starts to brown aggressively, lower the heat and keep it at a simmer. A common mistake is rushing this step, leaving the chili thin and underdeveloped, so take the minutes to coax out complexity.
- Add the cilantro and stir to combine.: When you stir in the minced cilantro , its fresh, herbaceous scent will brighten the pot and add a lift to the dense, savory base. Adding it at the end preserves its vibrant green color and fresh flavor rather than cooking it away. The presence of fresh herbs at this stage balances the deeper, roasted notes from the spices, creating a layered finish. Overcooking herbs is an easy misstep that mutes their impact, so add them at the tail end.
- Stir, taste, optionally add sugar to taste (sugar balances the acid from the tomatoes), optional lemon/lime juice (brightens up the flavor), and additional salt, pepper, etc. if desired.: Begin this step by inhaling the aroma and taking a small spoonful to evaluate balance; you re aiming for a harmony of savory, acidic, and slightly spicy notes. A pinch of sugar can round tomato acidity, and a splash of lemon or lime juice can lift the whole bowl, making flavors pop. Adjust seasonings gradually and taste after each addition because it s easy to overshoot. One common error is adding too much acid or salt at once, so small increments are the rule here.
- Remove bay leaves, ladle into bowls, and optionally garnish with cheese, sour cream, avocado, etc.: Before serving, fish out the bay leaves and note the final texture, which should be thick enough to cling to a spoon yet still saucy. Ladling the chili will release a comforting steam and the first spoonful should show a cohesive mix of meat, beans, and vegetables. Garnishes like shredded cheese or a dollop of sour cream provide cool contrast, while slices of avocado lend creaminess. A frequent oversight is forgetting to remove bay leaves, which can surprise and be unpleasant for guests, so double check the pot.
Notes
- Control the richness, if you use very lean beef add 1 tablespoon of olive oil at the start to help the spices bloom and prevent sticking, while fattier beef may not need any added oil at all.
- Adjust thickness, begin with two thirds to three quarters of the broth container if you want a thicker chili, then simmer until the liquid reduces to your liking, tasting as it concentrates to avoid over seasoning.
- Heat management, use cayenne sparingly and add it incrementally; remember that spice intensifies as it sits, so err on the side of less if you re unsure about your guests' heat tolerance.
- Make ahead strategy, chili often tastes better the next day as flavors meld; cool to room temperature quickly, refrigerate in airtight containers, and reheat gently to preserve texture.
- Fresh finishing touches, add minced cilantro and a final squeeze of lime or lemon just before serving for a bright, fresh contrast that lifts the bowl.