Cheese Grits
Cheese Grits has been my cozy kitchen anchor on chilly nights when I want something comforting and reliably satisfying.
Years ago I first made Cheese Grits for a friend who was nursing a scraped knee and an appetite for things that felt like home. As the pot bubbled on the stove, the kitchen filled with a mellow, savory aroma that pulled us both to the table before the timer even rang. I remember stirring slowly, tasting, and adjusting until the texture was just right, creamy but with body, the way a proper bowl of grits should hold its shape. That night taught me the joy of simple ingredients coming together to make a memorable dish.
Since then, Cheese Grits has become my go to for weekend brunches and midweek dinners. I love that it can be dressed up or kept humble, and that it rewards small attentions like freshly grated cheese and a patient stir. It’s the kind of dish that invites conversation, because while it cooks you can chat, sip something warm, and feel the ritual of feeding people well. Whenever I make it, people linger at the table, scooping the warm, cheesy spoonfuls and commenting on the silky texture and the savory lift from the garlic cheese.
Recipe Snapshot
1 hr 25 mins
10 mins
75 mins
Medium
300 kcal
American
Keto, Gluten-Free
Side Dishes
Large saucepan, Casserole dish, Oven, Mixing bowl
Why We Love This Cheese Grits
Comforting, Not Heavy
I find Cheese Grits manages to be indulgent without feeling overly heavy. The texture is creamy, and the cheeses meld into the grits so each bite is smooth and satisfying. I often tell friends it hits that sweet spot between rich and approachable, which is why I make it when I want something that feels like a hug without being a full on feast.
Quick to Assemble, Worth the Wait
Even though it bakes at the end, the active hands on time is remarkably short. I can get the grits started, stir in the cheeses, and assemble the casserole while catching up on a phone call. Then the oven does the rest, and I love that gentle bubble and golden top that emerges. It’s one of those recipes where patience during the bake rewards you with deep flavor and perfect texture.
Flexible and Crowd Friendly
I often make Cheese Grits for gatherings because it scales easily. The base is simple and forgiving, so I can double it for a larger pan without worrying about proportions going wrong. Guests tend to love that it’s familiar yet special, and it pairs well with a range of mains and sides, making it an effortless addition to a buffet or family table.
Layered Cheese Flavor
The combination of a creamy garlic cheese and sharp cheddar creates depth. The garlic cheese brings a subtle aromatic lift, while the shredded cheddar provides sharpness and that classic melted pull. I appreciate how these cheeses play different roles, making every forkful taste complex without needing many ingredients.
Beginner Friendly, Pro Chef Results
I recommend Cheese Grits to cooks of all levels because the techniques are simple yet yield impressive results. You don’t need specialized skills to get a velvety texture, just attention to liquid ratios and a careful ear for the oven’s bubbling and browning cues. When you follow those signals, you’ll end up with a cozy, confident dish that looks and tastes like you spent more time than you did.
Main Ingredients for Cheese Grits
These ingredients are designed to work together to create a rich, creamy casserole that holds its shape yet feels silky on the spoon. The grits provide the body and gentle corn flavor, the cheeses build layers of savory complexity, and the eggs and milk add structure and tenderness so the dish slices cleanly while remaining moist.
- 4 cups water: Bring water to a simmer to hydrate and cook the grits evenly, forming the base texture of the dish. Maintain gentle heat and stir occasionally to prevent sticking and ensure smooth consistency.
- 1 cup quick cooking grits: Slowly cook quick cooking grits in simmering liquid, absorbing moisture to become tender and creamy. Stir frequently to avoid lumps and achieve a uniform porridge-like texture.
- 1 teaspoon kosher salt: Season the cooking liquid with kosher salt to enhance the natural corn flavor and balance the richness of dairy and cheese. Dissolve fully so the grits absorb a consistent level of seasoning throughout.
- 1/4 cup butter: Incorporate butter to add silkiness and a rich mouthfeel, helping to bind the cooked grits into a creamy cohesion. Melt completely into the hot grits to distribute fat and improve flavor depth.
- 5.2 ounces garlic cheese (I use Boursin garlic and herb cheese): Fold in garlic cheese to introduce pronounced garlic and herb notes while boosting creaminess and tang. Soften or warm the cheese slightly so it blends smoothly into the hot grits for uniform flavor.
- 2 cups shredded cheddar cheese, divided: Stir shredded cheddar cheese gradually to impart sharp, savory flavor and create a gooey, melty texture in the finished grits. Reserve half of the cheddar to stir in and the rest to fold in at the end for pockets of melted cheese and added richness.
- 2 large eggs, whisked: Whisk eggs thoroughly to add richness and a custard-like silk when tempered into the hot grits, helping to thicken and stabilize the final dish. Temper the eggs slowly with a bit of hot grits before combining fully to prevent curdling.
- 3/4 cup whole milk: Add whole milk to loosen the texture and contribute creamy mouthfeel, balancing thickness without watering down flavor. Warm slightly before adding to help integrate smoothly with the hot grits and cheeses.
The Process for Making Cheese Grits
These steps transform simple pantry items into a comforting, golden casserole. Read each stage carefully so you recognize the right visual and sensory cues, from thickening grits to a bubbling, golden top in the oven.
- Preheat oven to 350°F.: The air in the oven warms and creates steady heat, producing an even bake that sets the custard and browns the top. You should feel a warm, consistent flow when you open the door and see the racks gently glowing, not scorching. Ensuring the oven reaches temperature prevents undercooked centers, a frequent mistake, so give it time to stabilize before placing the dish inside.
- Bring the water to a boil in a large saucepan and add the grits and salt.: As the water hits a rolling boil you will see lively bubbles and steam rising, and adding the grits then begins the thickening process immediately. Stir briskly to prevent lumping, and listen for the subtle change from rapid boil to a calmer simmer; that tells you to reduce heat. Adding grits to water that is not fully boiling or failing to stir often leads to grainy clumps.
- Reduce the heat to a simmer, cover and cook grits for 5 minutes or until thickened.: At a simmer the surface will show gentle ripple and the aroma of cooked corn will emerge. Covering helps the grits absorb liquid evenly; steam forms tiny beads on the lid which is a good sign. Stir once or twice to check texture. The proper thickness is spoonable yet not dry; overcooking or leaving at high heat can make them gluey, so keep a patient eye on the pot.
- Remove grits from the heat and stir in the butter, garlic cheese and 1 cup of cheddar until melted.: Once off the heat, the butter and cheeses melt luxuriously into the warm grits , releasing a savory perfume from the garlic cheese and a sharper cheddar note. You should see glossy swirls and hear a soft, settling hiss as the mixture cools slightly. Stirring gently ensures a homogenous texture. A common misstep is rushing this step while the pot is too cool, which prevents full melting and creates uneven pockets of cheese.
- In a separate bowl mix the egg and milk then add to the grits mixture, stirring briskly until combined.: The combined eggs and milk should be smooth and slightly frothy when whisked, and when incorporated the mixture will darken minutely and become silkier. Start by tempering if the grits are piping hot, adding a spoonful of the grits into the egg mixture to warm it, then fold back in, which avoids curdled eggs. Listen for a gentle thickening sound and watch the mixture gain body. Adding cold eggs directly to very hot grits can scramble them, so tempering prevents that.
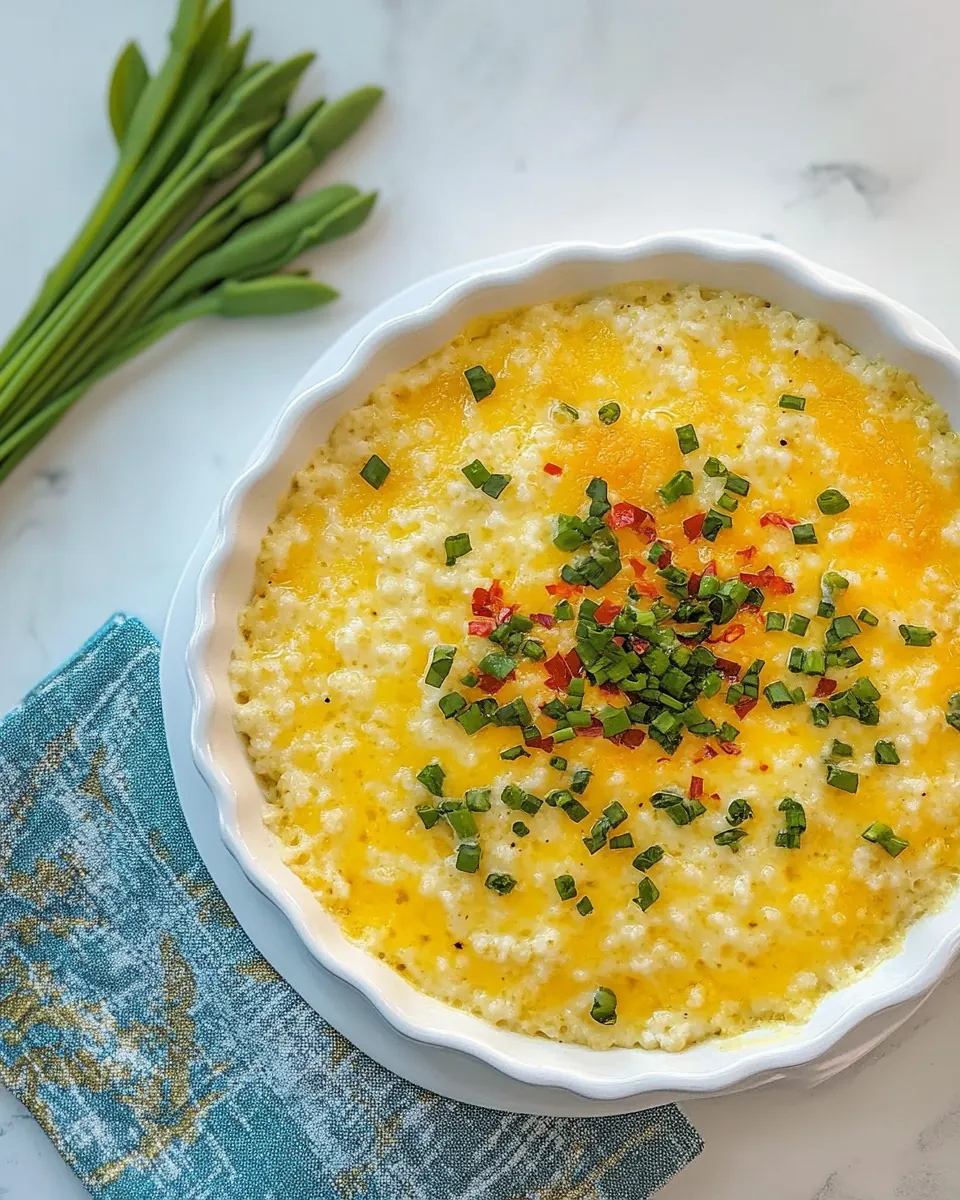
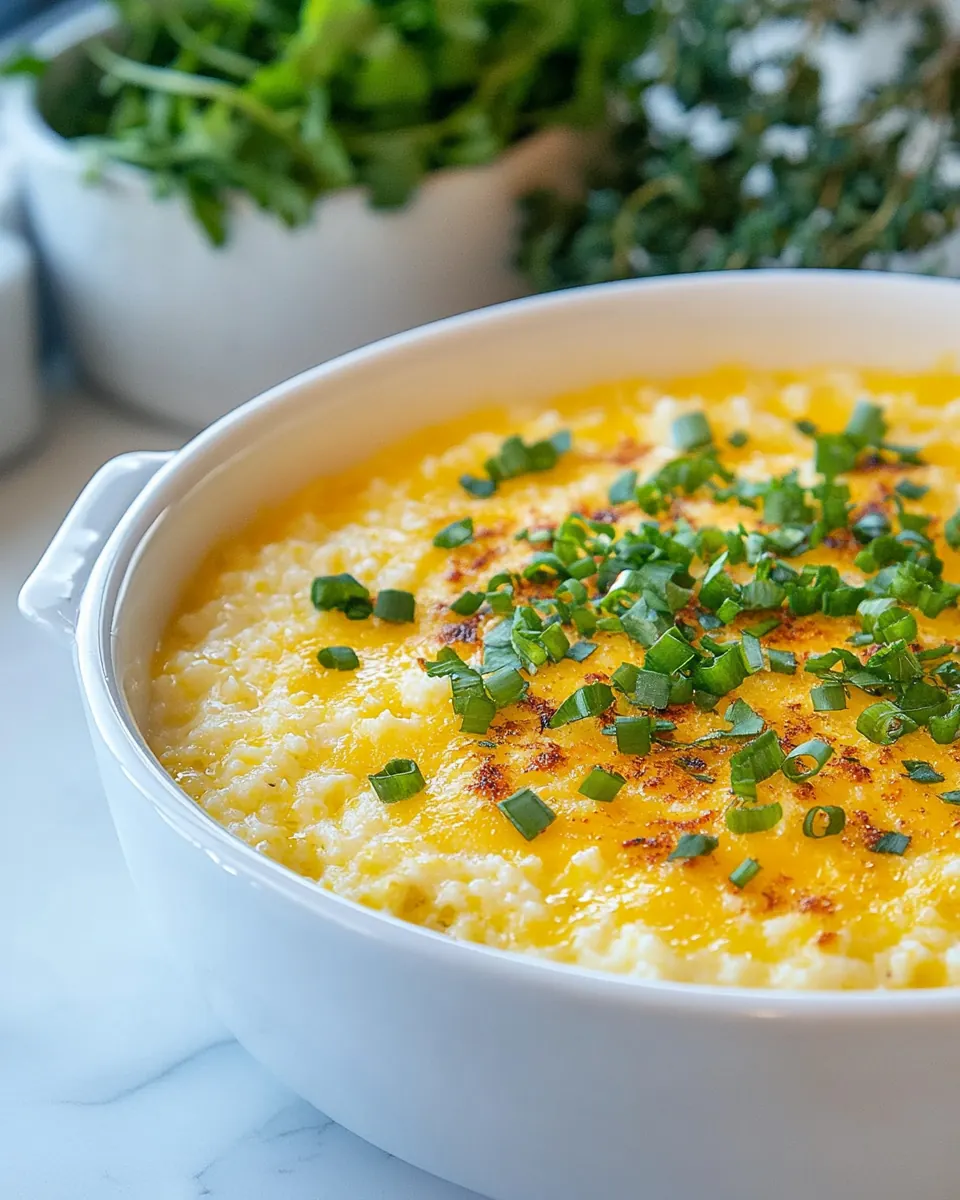
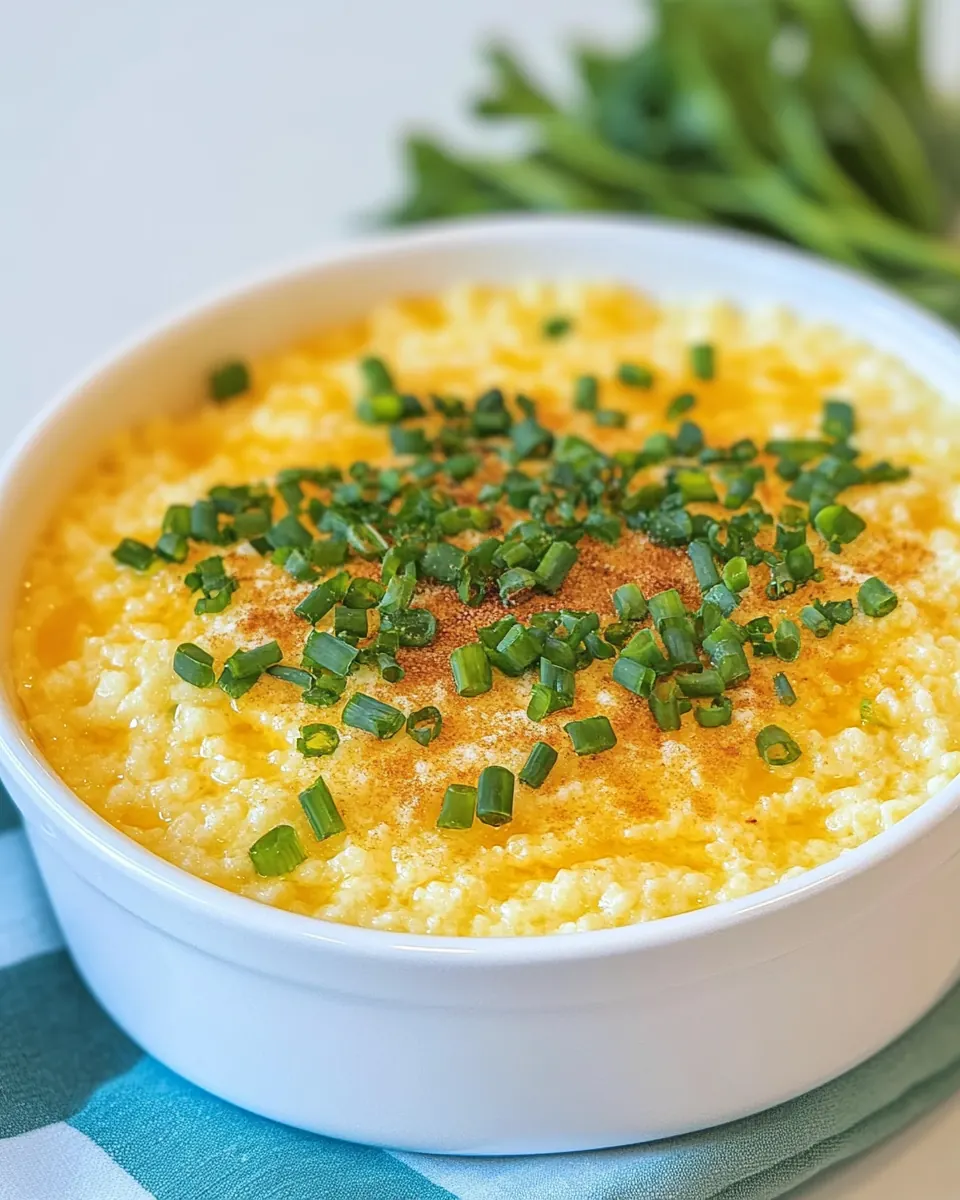
- Pour into a buttered 11 x 7 inch casserole dish and top with remaining 1 cup cheddar cheese.: As you transfer the custardy grits , notice the glossy, spoonable texture settling into the dish. Level it gently with a spatula and sprinkle the remaining cheddar cheese evenly for uniform browning. The visual should be a smooth surface dotted with cheese that will melt and bubble into a golden crust. An error to avoid is overcrowding the dish which can change bake time and texture.
- Bake for 1 hour or until golden and bubbly and serve.: In the oven you will hear soft bubbling and see steam waft through the golden, blistered cheese top. The aroma becomes rich and inviting, with toasted cheese notes. The center should be set but still slightly custardy when you jiggle the pan. Let it rest briefly before cutting so the structure firms. The usual mistake is removing it too soon, which leads to a loose center that does not hold slices well.
Recipe Tips about Cheese Grits

I like to think of these tips as the short list of things that turn a good batch into a great one. They focus on technique, timing, and small choices that influence texture and flavor.
- Shred Your Own Cheese: Freshly grated cheddar cheese melts more smoothly and provides a purer flavor. Pre shredded cheese often contains anti caking agents that prevent a silky melt, so I grate a block myself right before assembling the casserole for the best texture.
- Temper the Eggs: When you add the eggs to the hot grits, tempering prevents curdling. Whisk a small ladle of the warm grits into the egg mixture first, then stir that back into the main pot. This keeps the custard homogeneous and avoids scrambled bits in the finished dish.
- Use Room Temperature Dairy: Let the butter, garlic cheese, and milk sit briefly at room temperature so they blend effortlessly into the hot grits. Cold dairy can cause uneven melting and textural inconsistencies, so I plan ahead by setting them out while the grits cook.
- Check for Doneness Early: Ovens vary, so start checking the casserole around 45 minutes into baking. Look for a golden, bubbling top and a center that is set but still slightly custardy. If the top browns too fast, tent with foil for the remainder of the bake to prevent over browning.
- Rest Before Serving: Allow the casserole to rest 5 to 10 minutes after coming out of the oven. This lets the custard firm, making it easier to slice and serve, and helps the texture finish with a pleasant, cohesive mouthfeel rather than sloppy spoonfuls.
Accompaniments for Cheese Grits
Cheese Grits pairs beautifully with a variety of sides and occasions, making it useful for brunch, dinner, and special gatherings. Below I outline serving ideas, storage tips, and seasonal pairings so you can present it well.
- Brunch Plate: Serve a generous scoop of Cheese Grits alongside a fresh green salad and roasted tomatoes for a balanced brunch. The warm, creamy grits complement crisp, acid driven sides and make the meal feel complete without much extra work.
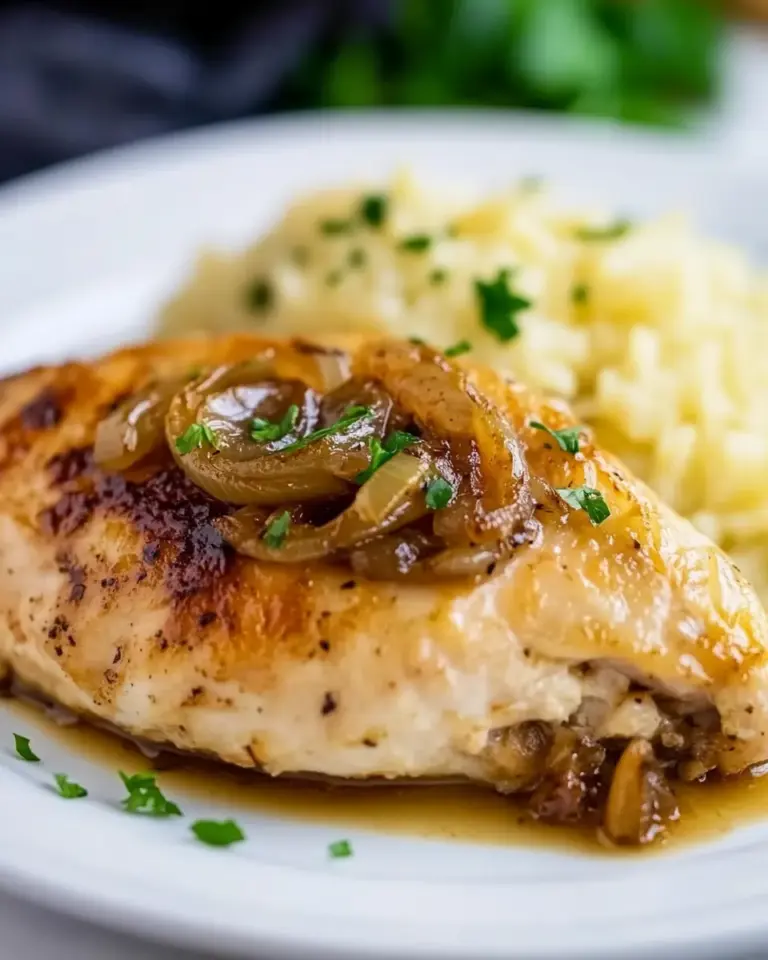
- Family Dinner: For a cozy family dinner, present the casserole with steamed vegetables and a simple roast or baked protein. The creamy texture of the grits contrasts nicely with crisp vegetables, and the cheesy notes make it feel indulgent yet homey.
- Holiday Table: On holiday mornings or winter gatherings, include Cheese Grits as a side for communal sharing. It works well with roasted root vegetables and makes a comforting addition to a seasonal spread, especially during colder months when hearty dishes are welcome.
- Storage and Leftovers: Store leftovers in an airtight container in the refrigerator for up to three days, or freeze for up to three months. Reheat gently in the oven or microwave until warmed through, adding a splash of milk if the texture seems too firm to restore creaminess.
- Seasonal Pairings: In winter, pair with braised greens or roasted squash to highlight earthy flavors. The richness of the grits balances bitter or roasted sides, creating a pleasing contrast that suits seasonal menus.
FAQ
Conclusion
Cheese Grits stands out for its comforting, creamy texture and layered cheese flavor that feels both indulgent and approachable. Give it a try when you want a dish that pleases a crowd but is simple to prepare, especially on chilly evenings or casual brunches. This casserole rewards small attentions like freshly grated cheese and a patient bake, and it will likely become a repeat favorite because it is reliably satisfying and easy to make.

Cheese Grits
Equipment
- Large saucepan
- Casserole Dish
- Oven
- Mixing Bowl
Ingredients
- 4 cups water Bring water to a simmer to hydrate and cook the grits evenly, forming the base texture of the dish. Maintain gentle heat and stir occasionally to prevent sticking and ensure smooth consistency.
- 1 cup quick cooking grits Slowly cook quick cooking grits in simmering liquid, absorbing moisture to become tender and creamy. Stir frequently to avoid lumps and achieve a uniform porridge-like texture.
- 1 teaspoon kosher salt Season the cooking liquid with kosher salt to enhance the natural corn flavor and balance the richness of dairy and cheese. Dissolve fully so the grits absorb a consistent level of seasoning throughout.
- 1/4 cup butter Incorporate butter to add silkiness and a rich mouthfeel, helping to bind the cooked grits into a creamy cohesion. Melt completely into the hot grits to distribute fat and improve flavor depth.
- 5.2 ounces garlic cheese (I use Boursin garlic and herb cheese) Fold in garlic cheese to introduce pronounced garlic and herb notes while boosting creaminess and tang. Soften or warm the cheese slightly so it blends smoothly into the hot grits for uniform flavor.
- 2 cups shredded cheddar cheese, divided Stir shredded cheddar cheese gradually to impart sharp, savory flavor and create a gooey, melty texture in the finished grits. Reserve half of the cheddar to stir in and the rest to fold in at the end for pockets of melted cheese and added richness.
- 2 large eggs, whisked Whisk eggs thoroughly to add richness and a custard-like silk when tempered into the hot grits, helping to thicken and stabilize the final dish. Temper the eggs slowly with a bit of hot grits before combining fully to prevent curdling.
- 3/4 cup whole milk Add whole milk to loosen the texture and contribute creamy mouthfeel, balancing thickness without watering down flavor. Warm slightly before adding to help integrate smoothly with the hot grits and cheeses.
Instructions
- Preheat oven to 350°F.: The air in the oven warms and creates steady heat, producing an even bake that sets the custard and browns the top. You should feel a warm, consistent flow when you open the door and see the racks gently glowing, not scorching. Ensuring the oven reaches temperature prevents undercooked centers, a frequent mistake, so give it time to stabilize before placing the dish inside.
- Bring the water to a boil in a large saucepan and add the grits and salt.: As the water hits a rolling boil you will see lively bubbles and steam rising, and adding the grits then begins the thickening process immediately. Stir briskly to prevent lumping, and listen for the subtle change from rapid boil to a calmer simmer; that tells you to reduce heat. Adding grits to water that is not fully boiling or failing to stir often leads to grainy clumps.
- Reduce the heat to a simmer, cover and cook grits for 5 minutes or until thickened.: At a simmer the surface will show gentle ripple and the aroma of cooked corn will emerge. Covering helps the grits absorb liquid evenly; steam forms tiny beads on the lid which is a good sign. Stir once or twice to check texture. The proper thickness is spoonable yet not dry; overcooking or leaving at high heat can make them gluey, so keep a patient eye on the pot.
- Remove grits from the heat and stir in the butter, garlic cheese and 1 cup of cheddar until melted.: Once off the heat, the butter and cheeses melt luxuriously into the warm grits , releasing a savory perfume from the garlic cheese and a sharper cheddar note. You should see glossy swirls and hear a soft, settling hiss as the mixture cools slightly. Stirring gently ensures a homogenous texture. A common misstep is rushing this step while the pot is too cool, which prevents full melting and creates uneven pockets of cheese.
- In a separate bowl mix the egg and milk then add to the grits mixture, stirring briskly until combined.: The combined eggs and milk should be smooth and slightly frothy when whisked, and when incorporated the mixture will darken minutely and become silkier. Start by tempering if the grits are piping hot, adding a spoonful of the grits into the egg mixture to warm it, then fold back in, which avoids curdled eggs. Listen for a gentle thickening sound and watch the mixture gain body. Adding cold eggs directly to very hot grits can scramble them, so tempering prevents that.
- Pour into a buttered 11 x 7 inch casserole dish and top with remaining 1 cup cheddar cheese.: As you transfer the custardy grits , notice the glossy, spoonable texture settling into the dish. Level it gently with a spatula and sprinkle the remaining cheddar cheese evenly for uniform browning. The visual should be a smooth surface dotted with cheese that will melt and bubble into a golden crust. An error to avoid is overcrowding the dish which can change bake time and texture.
- Bake for 1 hour or until golden and bubbly and serve.: In the oven you will hear soft bubbling and see steam waft through the golden, blistered cheese top. The aroma becomes rich and inviting, with toasted cheese notes. The center should be set but still slightly custardy when you jiggle the pan. Let it rest briefly before cutting so the structure firms. The usual mistake is removing it too soon, which leads to a loose center that does not hold slices well.
Notes
- Shred Your Own Cheese: Freshly grated cheddar cheese melts more smoothly and provides a purer flavor. Pre shredded cheese often contains anti caking agents that prevent a silky melt, so I grate a block myself right before assembling the casserole for the best texture.
- Temper the Eggs: When you add the eggs to the hot grits, tempering prevents curdling. Whisk a small ladle of the warm grits into the egg mixture first, then stir that back into the main pot. This keeps the custard homogeneous and avoids scrambled bits in the finished dish.
- Use Room Temperature Dairy: Let the butter, garlic cheese, and milk sit briefly at room temperature so they blend effortlessly into the hot grits. Cold dairy can cause uneven melting and textural inconsistencies, so I plan ahead by setting them out while the grits cook.
- Check for Doneness Early: Ovens vary, so start checking the casserole around 45 minutes into baking. Look for a golden, bubbling top and a center that is set but still slightly custardy. If the top browns too fast, tent with foil for the remainder of the bake to prevent over browning.
- Rest Before Serving: Allow the casserole to rest 5 to 10 minutes after coming out of the oven. This lets the custard firm, making it easier to slice and serve, and helps the texture finish with a pleasant, cohesive mouthfeel rather than sloppy spoonfuls.