Blackberry Cheesecake Bars
Blackberry Cheesecake Bars have been my go to when I want something that feels both celebratory and comfortably familiar. The first time I made these I was juggling a school pickup and a last minute dinner invitation, and the way the tangy blackberry swirl cut through the rich, creamy cheesecake made everyone ask for the recipe before dessert plates were even cleared. I remember pausing to taste a warm corner and thinking how simple elements can create a moment that feels special.
Over the years I have tweaked how I press the crust and how I strain the berry puree, small moves that transform the texture from good to unforgettable. When friends drop by I often slice a few bars and hand them over wrapped in parchment, watching their faces as the first bite balances buttery graham crackers with silken cream cheese. Baking these feels like giving a little thoughtful gift, and I love that the recipe scales for a crowd without losing its charm.
Recipe Snapshot
1 hr 15 mins
30 mins
45 mins
Medium
220 kcal
American
Gluten-Free, Low FODMAP
Desserts
Oven, 9×13 inch baking pan, Aluminum foil, Food processor, Handheld electric mixer, Fine mesh strainer, Wire cooling rack
Why This Blackberry Cheesecake Bars Stands Out
Bold, fresh flavor
I love how Blackberry Cheesecake Bars deliver an immediate punch of fruit brightness, thanks to the fresh blackberries. The puree is vivid and slightly tart, which keeps the bars from feeling too sweet. When I swirl the berry over the pale cheesecake, the color contrast is irresistible and every bite sings with balanced flavor.
Reliable texture
One reason I come back to this recipe is the predictable, creamy texture of the cheesecake layer. Using full fat cream cheese and beating it until completely smooth gives a luscious mouthfeel that holds up when chilled. I find that folding the flour in gently keeps the filling dense yet tender, so slices come out clean without crumbling.
Easy to make for gatherings
These bars are practical for parties and potlucks. The 9 by 13 pan yields a crowd pleasing tray that travels well. I often make the blackberry puree a day ahead, which frees up time on bake day. The foil lift trick makes removing and slicing the bars painless, and I appreciate how effortlessly they stack for transport.
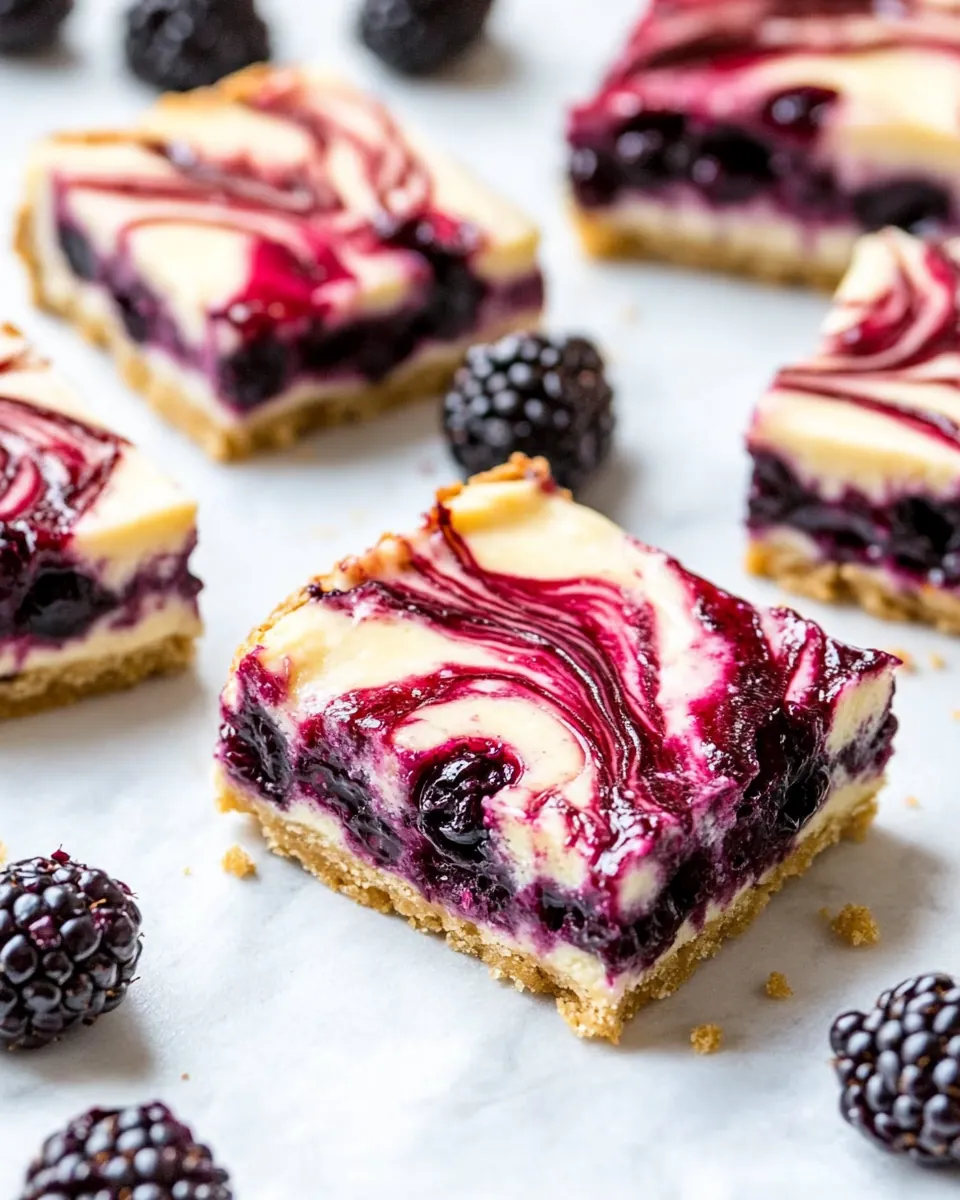
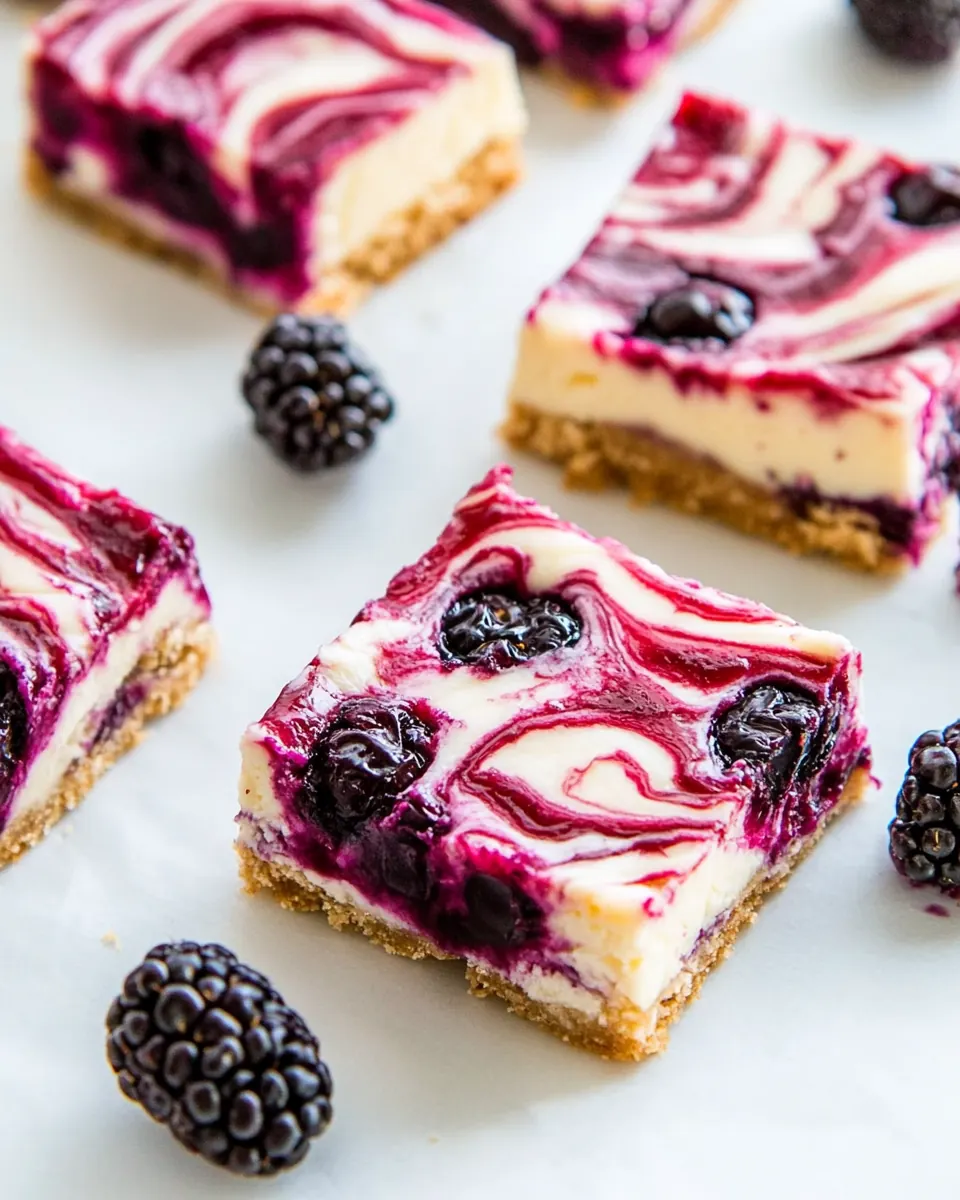
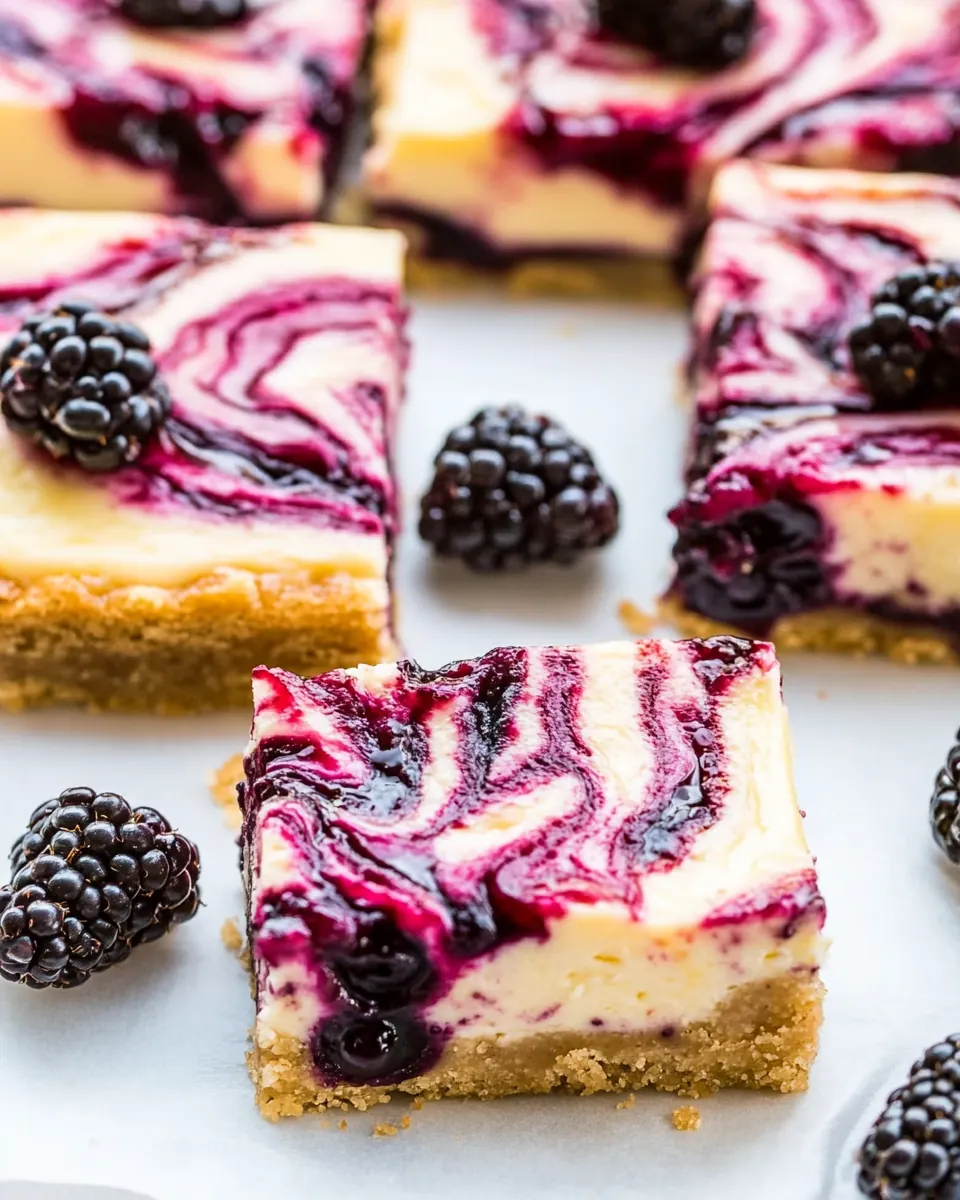
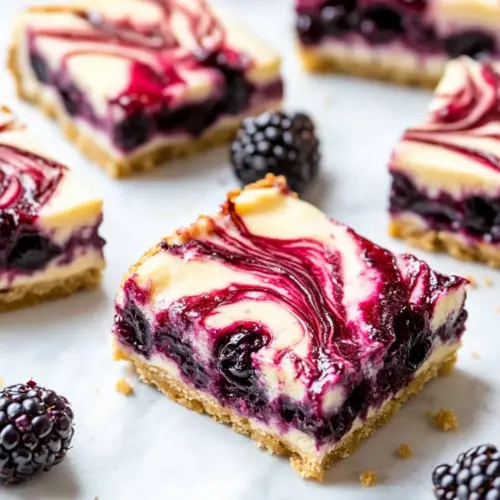
Visual appeal
I judge desserts partly by how they look on the platter, and these bars are a winner. The marbled blackberry streaks against the vanilla colored filling create a professional look without fussy decorating. Guests always pause to admire the swirls before tasting, and that little moment of anticipation matters to me.
Comfort with a twist
What I really enjoy about Blackberry Cheesecake Bars is how they bridge classic and modern. They feel like a comfort dessert because of the familiar cheesecake base, but the fresh blackberries give them a seasonal, slightly adventurous edge. I reach for this recipe when I want something that feels homemade and just a bit elevated.
Ingredients for Blackberry Cheesecake Bars
These ingredients are thoughtfully chosen to build layers of texture and flavor. The crust provides a buttery, crunchy foundation, while the filling creates a creamy, stable body. The blackberries play the role of bright contrast, both visually and on the palate. Together they form a classic composition where each component supports the others, and the minimal ingredient list makes it approachable.
- 2 and 1/4 cups graham crackers, pulsed into crumbs: Crushed to form the base, provides structure and a toasty flavor that holds the crust together when combined with butter. Use fine crumbs for an even, compact crust that presses firmly into the pan. Pulsing ensures uniform texture and quicker mixing with melted butter.
- 1/2 cup granulated sugar: Sweetens the crust and balances the tanginess of the filling while aiding caramelization during baking. Sprinkle evenly into crumbs before adding butter to distribute sweetness uniformly. Adjust slightly if using sweeter crackers or toppings.
- 1/4 teaspoons salt: Enhances overall flavor by balancing sweetness and accentuating other ingredients; also strengthens the crust slightly. Dissolve into the crumb mixture to ensure even salt distribution. Use measured amounts to avoid overpowering the cheesecake's delicate taste.
- 1/2 cup (8 tablespoons) unsalted butter, melted: Binds the graham crumbs when mixed, creating a cohesive, sliceable crust and contributing rich, buttery flavor. Melt completely and pour evenly over crumbs before pressing into the pan for an even layer. Cool slightly so it combines without cooking the crumbs.
- (4) 8 ounce blocks of full-fat cream cheese, very soft: Softened to a very smooth, creamy consistency to create the rich, silky cheesecake filling; provides primary fat and tang. Beat at medium speed to eliminate lumps and incorporate air for a lighter texture. Bring to room temperature to ensure uniform mixing and prevent graininess.
- 1 and 1/4 cups granulated sugar: Sweetens the cream cheese filling and helps achieve a balanced flavor profile while contributing to the filling's structure. Add gradually while whipping to dissolve fully and maintain a creamy texture. Use measured amount to prevent over-sweetening.
- 3 large eggs plus 2 egg yolks, at room temperature: Adds richness and helps set the filling by contributing proteins that coagulate during baking for a custard-like texture. Beat one at a time into the cream cheese to ensure even incorporation and avoid curdling. Use room–temperature eggs for smooth blending.
- 2 teaspoons fresh lemon zest: Brightens the filling with citrus aroma and a subtle acidic note that cuts through richness for a fresher taste. Finely grate only the yellow part to avoid bitterness from the pith and distribute zest evenly into the batter. Adds complexity without thinning the mixture.
- 1/4 cup fresh lemon juice: Provides acidity to balance richness and slightly stabilize the filling by interacting with dairy proteins. Strain if needed to remove seeds, and mix with other wet ingredients for even dispersion. Freshly squeezed juice offers the best bright flavor.
- 1 and 1/2 tablespoons all-purpose flour: Lightly thickens the filling and helps stabilize it, yielding a firmer set and smoother texture without graininess. Sift or whisk in to avoid lumps and incorporate just until combined to prevent overworking the batter. Small amounts are sufficient for structure.
- 1 cup fresh blackberries: Adds small pockets of fresh fruity flavor and a tart-sweet contrast to the creamy filling; offers visual appeal and bursts of juice. Gently fold in to keep berries intact and prevent color bleeding throughout the batter. Rinse and pat dry to avoid excess moisture.
- 1/4 cup granulated sugar: Sprinkles over berries or filling to enhance sweetness and balance berry tartness while also helping to stabilize the fruit during baking. Toss with berries or stir into the top layer gently to ensure even sweetness. Can caramelize slightly on the surface for extra flavor.
The Process for Making Blackberry Cheesecake Bars

Working through these steps feels like choreography, each move setting up the next for success. I like to prepare my mise en place so the assembly flows smoothly, and I pay attention to the sensory cues that tell me when components are ready. Below I unpack each direction into careful, sensory rich guidance so you know exactly what to look for and what to avoid.
- Preheat oven to 350 degrees (F).: The room fills with gentle warmth as the oven comes up to temperature, and preheating ensures the crust begins to bake immediately for a crisp edge. I always wait until the oven signals ready, because putting the pan into a cold oven changes baking times and can lead to a soggy crust. A common mistake is assuming the oven is ready after a short beep, so allow the full preheat cycle.
- Line a 9×13-inch baking pan with aluminum foil, allowing two of the sides to overlap. Spray foil and any exposed pan with non-stick baking spray; set aside.: The foil creates a convenient sling for lifting the bars out after chilling, and the spray prevents sticking. I press the foil so it lies flat and the overlap gives me handles for removal. If you skip the spray, the butter in the crust can glue the edges to the pan, making it hard to release clean bars.
- In the body of a blender or food processor, combine graham crackers, sugar, and salt; pulse until the crackers have been completely transformed into fine crumbs. Add melted butter and stir well to combine. Press down evenly into prepared pan. Bake in preheated oven for 10 minutes; set aside to cool.: As you pulse, the kitchen will smell warm and biscuity, a good sign you are creating a fragrant base. The crumbs should be fine like wet sand so they bind with the melted butter . Press firmly and evenly with the bottom of a measuring cup to compact the crust, which prevents crumbling later. Watch the crust while it bakes for a light golden color, since overbaking can harden it while underbaking leaves it loose.
- In a large bowl using a handheld electric mixer (or in the bowl of a stand mixer fitted with the paddle attachment) beat the cream cheese until completely smooth, scraping down the sides of the bowl as needed; about 3 minutes. Add in the sugar, eggs, and egg yolks and beat until smooth and creamy; about 2 minutes. Turn the mixer off. Using a rubber spatula, fold in the lemon zest and lemon juice, stirring until combined. Quickly fold in the flour, stirring just until combined. Pour the cheesecake batter on top of the partially baked crust. Set aside to make your blackberry swirl.: When you beat the cream cheese , the texture should become glossy and lump free, which indicates it is thoroughly softened. Adding the sugar and eggs should result in a silky, homogenous batter that ribbons slightly off the beaters. Scrape the bowl often so no pockets of unwhipped cream cheese remain. Folding in the lemon zest and juice brightens the batter, and the small amount of flour stabilizes the set without making it cakey. A typical error is overbeating after the eggs are added, which traps air and can cause cracking in the oven.
- In a small food processor or blender, puree the blackberries until completely smooth. Press the mixture through a fine mesh strainer, discarding seeds and pulp. Stir in the granulated sugar.: The puree should be a vivid deep purple with an aromatic, tart fragrance. Straining removes seeds that would create an unpleasant gritty texture, leaving a glossy sauce that swirls beautifully. Stirring in the sugar mellows the tartness, but taste first because berry ripeness affects sweetness. If you skip straining, seeds will interrupt the silkiness of each bite.
- Spoon the blackberry mixture on top of the unbaked cheesecake layer, a few dollops at a time. Use a skewer to swirl the mixture gently.: When you spoon the puree, dot the surface in an even pattern so the color distributes across the pan. Using a skewer, draw gentle S shaped motions to create marbling without overmixing; you want distinct streaks. The visual cue is a balanced contrast, not a homogenous purple. Over swirling will blend the colors and lose the attractive ribboning effect.
- Bake for 35-40 minutes, or until the cheesecake layer is set at the edges and only slightly wiggly in the center. Place the pan of cheesecake bars on top of a wire cooling rack and cool at room temperature until the pan is no longer hot.: As the bars bake the edges will firm and take on a faint ivory color, while the center will jiggle like gelatin when nudged, indicating it is not overdone. A thermally consistent oven helps here, and the sound is a quiet, steady oven hum rather than a loud fan. Removing too early leaves the center unset, while overbaking creates dryness and small cracks.
- Place cheesecake bars in the fridge until completely cooled, about 2 hours. When ready to serve, use the overlapped aluminum foil to lift the cheesecake out and onto a large cutting board.: Chilling firms the filling so slices cut cleanly and flavors meld. You will feel a cool, solid texture under the foil when it is fully chilled. Use the foil sling to lift slowly, keeping the slab level to avoid slumping. Cutting before adequate chilling creates messy slices and a softer mouthfeel than intended.
- Cut cheesecake into 16 bars and serve.: A sharp knife warmed under hot water and wiped dry makes neat slices, producing glossy edges and minimal crumbs. Each bar should reveal a defined crust, creamy interior, and a beautiful blackberry swirl. If the knife drags, wipe it between cuts to maintain tidy portions. Serving too soon can result in squashed bars that lose their elegant shape.
Pro Tips and Tweaks
I like to treat tips as little tweaks that make a big difference. These practical notes come from repeated testing and will help you get the most consistent texture and flavor from Blackberry Cheesecake Bars.
- Room temperature ingredients: Ensure the cream cheese and eggs are at room temperature so the batter becomes ultra smooth without lumps, which prevents overmixing and reduces the risk of cracks.
- Fine crumb crust: Pulse the graham crackers until very fine so the butter can coat every particle, giving a cohesive crust that holds together when sliced and does not crumble apart.
- Strain the puree: For a professional look and silky mouthfeel, press the blackberry puree through a fine mesh sieve to remove seeds that would otherwise create an uneven texture.
- Gentle swirling: Use a skewer for delicate S shaped swirls to create distinct ribbons of fruit, and stop before the colors fully blend to preserve visual contrast.
- Even baking: Place the pan on the center rack and avoid opening the oven during the final bake to maintain steady heat, which helps the filling set evenly without cracking.
- Pre make puree: You can prepare the blackberry puree a day ahead and refrigerate it, which saves time on bake day and allows the flavors to mellow.
Serving Ideas for Blackberry Cheesecake Bars
These bars work beautifully for many occasions and present well on a dessert tray. Below are detailed serving ideas that cover pairings, occasions, and storage strategies so you can showcase them at gatherings or enjoy them at home.
- Casual gatherings: Serve at brunch alongside coffee and tea, arranging the bars on a wooden board so guests can help themselves. The fruity brightness pairs especially well with milder beverages.
- Holiday dessert table: These bars are elegant enough for a festive spread. Place on a tiered stand and garnish with a few whole blackberries for color contrast and a seasonal touch.
- Picnic friendly: Wrapped in parchment and packed in a rigid container, the bars travel well for outdoor meals. Keep them chilled in a cooler until ready to eat to maintain their firm texture.
- Storage tips: Store leftovers in an airtight container in the refrigerator for up to three days. For longer storage, you can freeze slices individually wrapped in plastic and foil, then thaw in the fridge overnight.
- Occasions: These bars are great for potlucks, baby showers, weekend bake sales, and anytime you want a dessert that feels both classic and seasonal, especially in summer when blackberries are at their peak.
- Presentation: For a refined plate, dust edges lightly with powdered sugar just before serving and add a few fresh blackberries and a small mint leaf on the side for color and contrast.
FAQ
Conclusion
These bars stand out because they combine a buttery, crisp crust with a luxuriously creamy filling and a bright, fresh blackberry swirl that looks and tastes special. I encourage you to try this recipe because it reliably produces impressive results while remaining approachable, and small techniques like straining the puree and chilling fully will make a noticeable difference. Enjoy the process, and share a plate with friends or keep them for a quiet, sweet moment at home.
Blackberry Cheesecake Bars
Equipment
- Oven
- 9x13-inch Baking Pan
- Aluminum Foil
- Food Processor
- Handheld electric mixer
- Fine-mesh strainer
- wire cooling rack
Ingredients
- 2 and 1/4 cups graham crackers, pulsed into crumbs Crushed to form the base, provides structure and a toasty flavor that holds the crust together when combined with butter. Use fine crumbs for an even, compact crust that presses firmly into the pan. Pulsing ensures uniform texture and quicker mixing with melted butter.
- 1/2 cup granulated sugar Sweetens the crust and balances the tanginess of the filling while aiding caramelization during baking. Sprinkle evenly into crumbs before adding butter to distribute sweetness uniformly. Adjust slightly if using sweeter crackers or toppings.
- 1/4 teaspoons salt Enhances overall flavor by balancing sweetness and accentuating other ingredients; also strengthens the crust slightly. Dissolve into the crumb mixture to ensure even salt distribution. Use measured amounts to avoid overpowering the cheesecake's delicate taste.
- 1/2 cup (8 tablespoons) unsalted butter, melted Binds the graham crumbs when mixed, creating a cohesive, sliceable crust and contributing rich, buttery flavor. Melt completely and pour evenly over crumbs before pressing into the pan for an even layer. Cool slightly so it combines without cooking the crumbs.
- (4) 8 ounce blocks of full-fat cream cheese, very soft Softened to a very smooth, creamy consistency to create the rich, silky cheesecake filling; provides primary fat and tang. Beat at medium speed to eliminate lumps and incorporate air for a lighter texture. Bring to room temperature to ensure uniform mixing and prevent graininess.
- 1 and 1/4 cups granulated sugar Sweetens the cream cheese filling and helps achieve a balanced flavor profile while contributing to the filling's structure. Add gradually while whipping to dissolve fully and maintain a creamy texture. Use measured amount to prevent over-sweetening.
- 3 large eggs plus 2 egg yolks, at room temperature Adds richness and helps set the filling by contributing proteins that coagulate during baking for a custard-like texture. Beat one at a time into the cream cheese to ensure even incorporation and avoid curdling. Use room-temperature eggs for smooth blending.
- 2 teaspoons fresh lemon zest Brightens the filling with citrus aroma and a subtle acidic note that cuts through richness for a fresher taste. Finely grate only the yellow part to avoid bitterness from the pith and distribute zest evenly into the batter. Adds complexity without thinning the mixture.
- 1/4 cup fresh lemon juice Provides acidity to balance richness and slightly stabilize the filling by interacting with dairy proteins. Strain if needed to remove seeds, and mix with other wet ingredients for even dispersion. Freshly squeezed juice offers the best bright flavor.
- 1 and 1/2 tablespoons all-purpose flour Lightly thickens the filling and helps stabilize it, yielding a firmer set and smoother texture without graininess. Sift or whisk in to avoid lumps and incorporate just until combined to prevent overworking the batter. Small amounts are sufficient for structure.
- 1 cup fresh blackberries Adds small pockets of fresh fruity flavor and a tart-sweet contrast to the creamy filling; offers visual appeal and bursts of juice. Gently fold in to keep berries intact and prevent color bleeding throughout the batter. Rinse and pat dry to avoid excess moisture.
- 1/4 cup granulated sugar Sprinkles over berries or filling to enhance sweetness and balance berry tartness while also helping to stabilize the fruit during baking. Toss with berries or stir into the top layer gently to ensure even sweetness. Can caramelize slightly on the surface for extra flavor.
Instructions
- Preheat oven to 350 degrees (F).: The room fills with gentle warmth as the oven comes up to temperature, and preheating ensures the crust begins to bake immediately for a crisp edge. I always wait until the oven signals ready, because putting the pan into a cold oven changes baking times and can lead to a soggy crust. A common mistake is assuming the oven is ready after a short beep, so allow the full preheat cycle.
- Line a 9×13-inch baking pan with aluminum foil, allowing two of the sides to overlap. Spray foil and any exposed pan with non-stick baking spray; set aside.: The foil creates a convenient sling for lifting the bars out after chilling, and the spray prevents sticking. I press the foil so it lies flat and the overlap gives me handles for removal. If you skip the spray, the butter in the crust can glue the edges to the pan, making it hard to release clean bars.
- In the body of a blender or food processor, combine graham crackers, sugar, and salt; pulse until the crackers have been completely transformed into fine crumbs. Add melted butter and stir well to combine. Press down evenly into prepared pan. Bake in preheated oven for 10 minutes; set aside to cool.: As you pulse, the kitchen will smell warm and biscuity, a good sign you are creating a fragrant base. The crumbs should be fine like wet sand so they bind with the melted butter . Press firmly and evenly with the bottom of a measuring cup to compact the crust, which prevents crumbling later. Watch the crust while it bakes for a light golden color, since overbaking can harden it while underbaking leaves it loose.
- In a large bowl using a handheld electric mixer (or in the bowl of a stand mixer fitted with the paddle attachment) beat the cream cheese until completely smooth, scraping down the sides of the bowl as needed; about 3 minutes. Add in the sugar, eggs, and egg yolks and beat until smooth and creamy; about 2 minutes. Turn the mixer off. Using a rubber spatula, fold in the lemon zest and lemon juice, stirring until combined. Quickly fold in the flour, stirring just until combined. Pour the cheesecake batter on top of the partially baked crust. Set aside to make your blackberry swirl.: When you beat the cream cheese , the texture should become glossy and lump free, which indicates it is thoroughly softened. Adding the sugar and eggs should result in a silky, homogenous batter that ribbons slightly off the beaters. Scrape the bowl often so no pockets of unwhipped cream cheese remain. Folding in the lemon zest and juice brightens the batter, and the small amount of flour stabilizes the set without making it cakey. A typical error is overbeating after the eggs are added, which traps air and can cause cracking in the oven.
- In a small food processor or blender, puree the blackberries until completely smooth. Press the mixture through a fine mesh strainer, discarding seeds and pulp. Stir in the granulated sugar.: The puree should be a vivid deep purple with an aromatic, tart fragrance. Straining removes seeds that would create an unpleasant gritty texture, leaving a glossy sauce that swirls beautifully. Stirring in the sugar mellows the tartness, but taste first because berry ripeness affects sweetness. If you skip straining, seeds will interrupt the silkiness of each bite.
- Spoon the blackberry mixture on top of the unbaked cheesecake layer, a few dollops at a time. Use a skewer to swirl the mixture gently.: When you spoon the puree, dot the surface in an even pattern so the color distributes across the pan. Using a skewer, draw gentle S shaped motions to create marbling without overmixing; you want distinct streaks. The visual cue is a balanced contrast, not a homogenous purple. Over swirling will blend the colors and lose the attractive ribboning effect.
- Bake for 35-40 minutes, or until the cheesecake layer is set at the edges and only slightly wiggly in the center. Place the pan of cheesecake bars on top of a wire cooling rack and cool at room temperature until the pan is no longer hot.: As the bars bake the edges will firm and take on a faint ivory color, while the center will jiggle like gelatin when nudged, indicating it is not overdone. A thermally consistent oven helps here, and the sound is a quiet, steady oven hum rather than a loud fan. Removing too early leaves the center unset, while overbaking creates dryness and small cracks.
- Place cheesecake bars in the fridge until completely cooled, about 2 hours. When ready to serve, use the overlapped aluminum foil to lift the cheesecake out and onto a large cutting board.: Chilling firms the filling so slices cut cleanly and flavors meld. You will feel a cool, solid texture under the foil when it is fully chilled. Use the foil sling to lift slowly, keeping the slab level to avoid slumping. Cutting before adequate chilling creates messy slices and a softer mouthfeel than intended.
- Cut cheesecake into 16 bars and serve.: A sharp knife warmed under hot water and wiped dry makes neat slices, producing glossy edges and minimal crumbs. Each bar should reveal a defined crust, creamy interior, and a beautiful blackberry swirl. If the knife drags, wipe it between cuts to maintain tidy portions. Serving too soon can result in squashed bars that lose their elegant shape.
Notes
- Room temperature ingredients: Ensure the cream cheese and eggs are at room temperature so the batter becomes ultra smooth without lumps, which prevents overmixing and reduces the risk of cracks.
- Fine crumb crust: Pulse the graham crackers until very fine so the butter can coat every particle, giving a cohesive crust that holds together when sliced and does not crumble apart.
- Strain the puree: For a professional look and silky mouthfeel, press the blackberry puree through a fine mesh sieve to remove seeds that would otherwise create an uneven texture.
- Gentle swirling: Use a skewer for delicate S shaped swirls to create distinct ribbons of fruit, and stop before the colors fully blend to preserve visual contrast.
- Even baking: Place the pan on the center rack and avoid opening the oven during the final bake to maintain steady heat, which helps the filling set evenly without cracking.
- Pre make puree: You can prepare the blackberry puree a day ahead and refrigerate it, which saves time on bake day and allows the flavors to mellow.