
Lemon Poppy Seed Scones
Lemon Poppy Seed Scones are the kind of bakery treat that makes a morning feel intentionally gentle, the sort of thing I reach for when I want a simple ritual that tastes like sunlight. The first time I baked these, I was trying to recreate a bakery memory from a spring market, and the bright, lemony notes with the little crunch of poppy seeds felt like a quiet celebration. I still remember the way the kitchen smelled, sharp and floral, while I zested two lemons and measured out the flour and granulated sugar with a kind of reverent slowness.
These scones are comfort that travels well, whether I tuck them in a picnic basket or set them next to a steaming mug. I like that the dough is forgiving, so even if your hands are a little impatient, the result can be tender and flaky. Working the cold unsalted butter into the flour until the mixture resembles coarse meal is a tactile moment I always savor. After baking, while the scones cool and the glaze sets, I find a quiet way to celebrate small wins, usually by stealing a warm wedge before anyone else notices.
Recipe Snapshot
29 mins
15 mins
14 mins
Easy
250 kcal
American
Gluten-Free, Low FODMAP
Breakfast
Oven, Large bowl, Pastry cutter or two knives, Baking sheet, Parchment paper, Wire rack, Small bowl
Why This Lemon Poppy Seed Scones Hits Different
Bright, balanced flavor
I love how Lemon Poppy Seed Scones strike a balance between tart and sweet. The fresh lemon juice and zest cut through the richness of the heavy cream and unsalted butter, creating a lift in every bite, while the powdered sugar glaze ties everything together.
Textural contrast
The little crunch of poppy seeds against the tender crumb makes each bite interesting. We want scones that are flaky and light, not dense, and the right technique produces a pleasing contrast between crisp exterior and soft center.
Simple ingredients, big impact
There is something satisfying about just a handful of pantry staples turning into something special. With basic all purpose flour, a touch of baking powder and baking soda, and a few tablespoons of granulated sugar, you get bakery quality results without fuss.
Flexible serving options
You can serve these for a casual morning with coffee, or add them to a spring brunch spread. I often make a batch for guests, because they travel and plate nicely, and they pair beautifully with both bold and light brews.
User friendly method
We keep the technique straightforward, so even if you are new to baking scones, you can succeed. Cold butter, gentle handling, and a brief bake time are the small details that make the difference between crumbly and perfect.
Shopping List for Lemon Poppy Seed Scones

These ingredients are classic and purposeful. I chose each one to play a clear role: structure from all purpose flour, lift from leaveners, richness from heavy cream and unsalted butter, brightness from lemons, and the delicate crunch from poppy seeds. Together they create scones that are tender yet sturdy enough to hold a glossy glaze.
- 2 cups all-purpose flour: Provide structure and bulk to the scones, creating a tender crumb when combined with fat and liquid; whisk or sift to ensure even distribution and lighter texture before mixing.
- 3 tablespoons granulated sugar: Add subtle sweetness to balance the tart lemon flavor and enhance browning; dissolve into the dough for an evenly sweetened bite without overpowering.
- 2 tablespoons poppy seeds: Contribute a pleasant nutty crunch and characteristic flecks throughout the scone batter; sprinkle into the dry ingredients so the tiny seeds are evenly distributed in each piece.
- 2 large lemons: Offer bright citrus zest and aromatic oils that intensify lemon flavor; grate the outer rind finely and fold into the batter to release fragrant notes without adding acidity.
- 1 tablespoon baking powder: Leaven the dough by producing air pockets during baking for lift and tender crumb; measure accurately and mix into the dry ingredients for consistent rise.
- 1/2 teaspoon baking soda: Provide additional leavening and a touch of acidity control to fine-tune texture and rise; combine with wet ingredients to activate and ensure even leavening.
- 1/2 tablespoon salt: Enhance overall flavor balance by bringing out sweetness and controlling bitterness; dissolve into the dry mixture to season every bite uniformly.
- 1/2 cup cold unsalted butter, cut into 1 tablespoon size pieces: Incorporate cold fat that creates flaky layers and richness when cut into the flour; keep pieces chilled and evenly sized to achieve a light, laminated scone texture.
- 1/2 cup heavy cream: Add richness and moisture to create a tender, slightly creamy dough; stir in with the butter and dry ingredients until the mixture comes together without overmixing.
- 1/4 cup fresh lemon juice: Introduce bright acidity that sharpens lemon flavor and aids in tenderizing the dough; measure carefully and add with the cream to avoid over-wetting.
- 1 tablespoon fresh lemon juice: Provide concentrated fresh lemon flavor for the glaze or finishing touch, boosting brightness without adding bulk; stir into the powdered sugar to make a smooth, tangy icing.
- 1/2 cup powdered sugar: Create a sweet, silky glaze that balances tartness and adds a glossy finish when mixed with lemon juice; sift and combine until smooth, then drizzle over cooled scones.
Step by Step Guide for Lemon Poppy Seed Scones

These steps guide you from mixing to glazing, written like a conversation at the counter. Follow the sensory cues and gentle handling advice and you will end up with bakery style scones that feel celebratory but are easy to make at home.
- Heat oven to 400 degrees F. In a large bowl, whisk together flour, granulated sugar, poppy seeds, lemon zest, baking powder, baking soda, and salt.: Warmth in the kitchen signals the start, and you should notice a gentle rise in ambient heat as the oven approaches 400 degrees F . Preheating ensures the moment the scones hit the oven they begin to set and rise; otherwise they can spread and lose height. A common mistake is not allowing the oven to fully preheat, which yields uneven browning, so wait until the temperature stabilizes.
- Using a pastry cutter or two knives, cut butter into flour mixture until it resembles very coarse meal. Pour in heavy cream, then add 1/4 cup lemon juice, stirring just until dough forms.: The dry mix should smell faintly citrus from the lemon zest and look uniform, flecked with the tiny black poppy seeds . Whisking aerates the flour , helping a lighter crumb. If you skip thorough whisking, pockets of leavening can form, causing uneven texture, so take a moment to blend everything evenly.
- Gather the dough together with your hands gently form an 8-inch disk and cut into 8 wedges. Alternately, evenly divide the dough into eights and form balls. Transfer dough to a parchment-lined baking sheet and place scones 1 inch apart. Bake until golden and a toothpick inserted into center comes out clean, about 12 to 14 minutes. Remove from oven and transfer scones to a wire rack and let cool, about 20 minutes.: As you work in the cold unsalted butter , you will feel small pea sized pieces throughout the mix; these bits are the secret to flaky layers. The mixture should look rugged and sandy, not smooth. The danger here is overworking until the butter melts, which produces dense scones, so stop when you can still see cold butter bits.
- In the meantime, in a small bowl, mix powdered sugar with remaining lemon juice and stir until smooth. Using a spoon, drizzle glaze over cooled scones.: As the heavy cream and lemon juice hit the flour mixture, you will hear a soft, slightly sticky cohesion and see clumps start to come together. Stir until the dough barely holds, because overmixing develops gluten and makes tough scones. If the dough feels crumbly, a tablespoon of extra cream can help, but add carefully.
- Enjoy with a cup of fresh brewed Tully’s® Italian Roast Extra Bold Coffee: When you bring the dough into a disk, press gently so the layers remain. The surface should look slightly uneven and floured, not glossy. Cutting into wedges yields those classic triangular scones with crisp edges. A frequent error is pressing too hard while shaping, which compresses the layers; handle lightly to preserve flakiness.
- Recipe adapted from Country Living.: If you prefer round scones, shape each piece into a loose ball; the tops should be slightly domed. The dough surface will feel cool to the touch because of the butter. Overworking while rolling can warm the butter and cause spreading, so shape quickly and chill briefly if needed.
- Transfer dough to a parchment lined baking sheet and place scones 1 inch apart: Arrange them so air circulates evenly, and the parchment will prevent sticking while encouraging an even brown underside. You should see small gaps between each piece, and the sheet should not be overcrowded. Crowding leads to steamed edges, so maintain spacing for crisp outsides.
- Bake until golden and a toothpick inserted into center comes out clean, about 12 to 14 minutes: In the oven the aroma will shift from raw flour to toasty butter and bright citrus; watch for deepening color at the edges and top. The scones should sound hollow when tapped. A common misstep is pulling them out too early, resulting in a gummy center, so err on the longer end if unsure.
- Remove from oven and transfer scones to a wire rack and let cool, about 20 minutes: Cooling on a wire rack prevents the bottoms from stewing and preserves a crisp exterior. The scones will finish setting as they cool and the crumb will become tender. Cutting into them too soon can produce a doughy interior, so give them time to rest.
- In the meantime, in a small bowl, mix powdered sugar with remaining lemon juice and stir until smooth: This glaze should be glossy and pourable, with the bright scent of lemon juice cutting the sweetness of the powdered sugar . If too thick, add a few drops of juice; if too thin, sprinkle in a pinch more sugar. Avoid lumps by whisking briskly, otherwise the glaze will look streaky when applied.
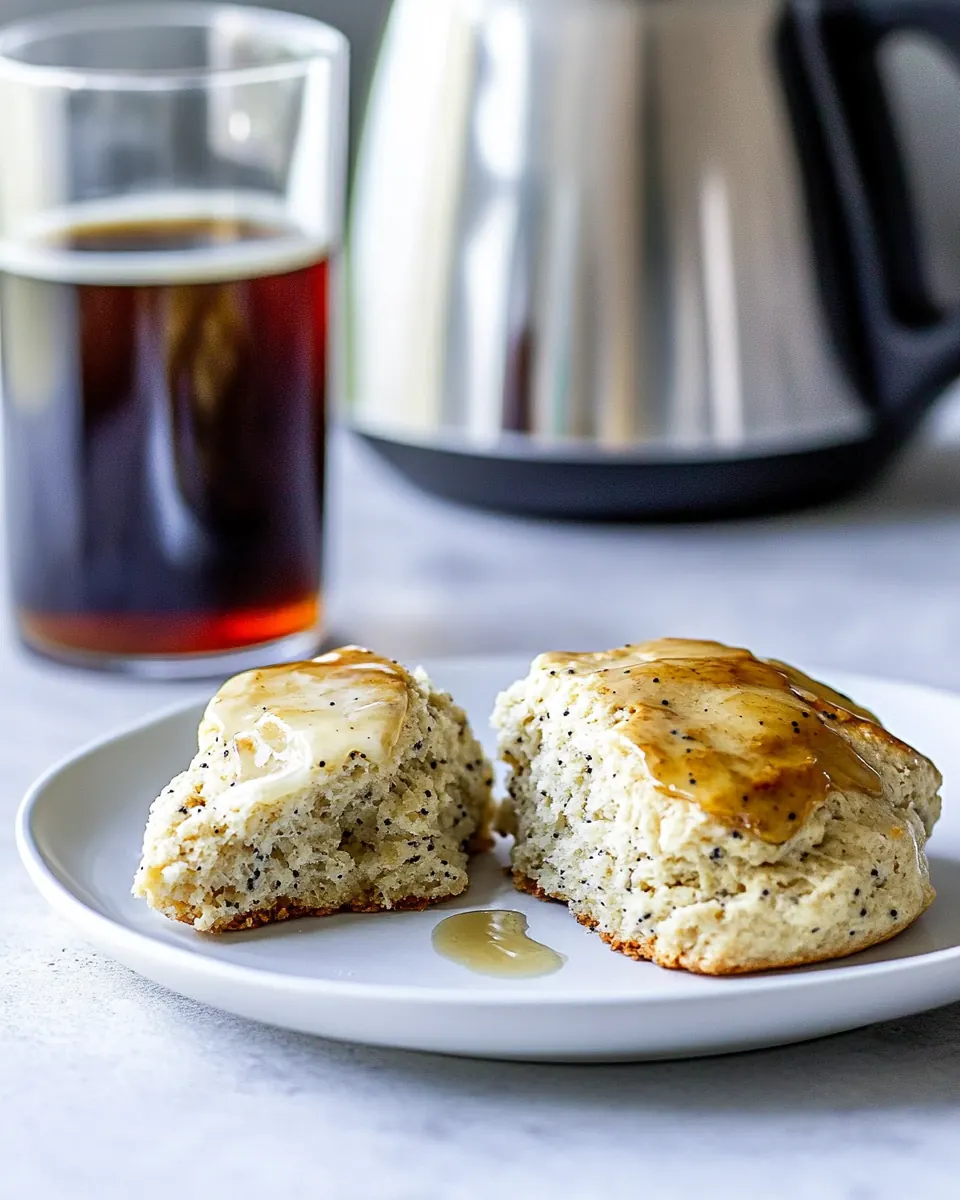
- Using a spoon, drizzle glaze over cooled scones: The glaze should form soft ribbons and set to a delicate sheen. Drizzle in a back and forth motion for even coverage, and allow it to firm slightly before stacking. Pouring while the scones are warm will make the glaze run off and create a thin result, while waiting too long can prevent adhesion, so aim for just cool enough.
- Enjoy with a cup of fresh brewed Tully’s Italian Roast Extra Bold Coffee: Serve the scones with a bold, rich cup so the citrus cuts through the roast, or pair with a lighter brew if you prefer. You'll notice the contrast between the bright lemon and the deep coffee notes. A poor pairing can mute the lemon, so choose a coffee that complements rather than overwhelms.
- Recipe adapted from Country Living: This credit reminds us these techniques are time tested, and you can tweak them gently to match your pantry. Adaptations can be helpful, but if you stray too far you risk losing the balance that makes these scones work.
Pro Tips and Tweaks
I like to think of these tips as small shifts that reward you with bakery quality results. Below are practical tweaks and troubleshooting notes that I use every time I bake Lemon Poppy Seed Scones, each designed to protect texture and amplify flavor.
- Measure flour correctly by spooning into the cup and leveling to avoid packing. Too much all purpose flour will make scones dry and heavy, so weigh if you can for precise results.
- Keep everything cold, especially the butter. Work quickly on the pastry cutter step and chill the bowl if the butter starts to soften, because cold fat creates steam pockets that make the scones flaky.
- Balance lemon intensity by tasting your juice and adjusting zest. If the juice is particularly sour, rely more on zest for aromatic brightness and less on liquid to protect dough consistency.
- Use fresh leaveners like baking powder and baking soda. Old agents lose potency and will yield flatter, denser scones, so replace them regularly for reliable rise.
- Test for doneness with visual cues not just time. Look for deep golden tops and slightly darker edges, and a toothpick in the center should come out clean to indicate fully baked interiors.
- Store wisely in an airtight container at room temperature for up to two days. To refresh, warm briefly in a low oven to revive crispness without over drying.
What to Serve With Lemon Poppy Seed Scones
These scones are wonderfully versatile and pair well with a variety of beverages and accompaniments. Think morning coffee, light brunch spreads, or a springtime picnic. Below are detailed serving suggestions, storage notes, and seasonal pairing ideas to help you present them beautifully.
- Mornings with coffee: Serve the scones alongside a bold brew for contrast, such as a deep roast that brings out the bright lemon flavors while standing up to the richness of the heavy cream in the recipe.
- Brunch spread: Add the scones to a table with fresh fruit and a light yogurt for guests. Their citrus note complements berries and stone fruit nicely and keeps the plate feeling fresh.
- Picnic friendly: Wrapped gently in parchment, these travel well and make a refined picnic treat. Keep glaze in a separate container and drizzle just before serving to avoid stickiness.
- Seasonal pairing: In spring, pair them with bright salads or floral teas to echo seasonal flavors. The lemon gives a lightness that makes these scones feel right for warmer days.
- Storage tips: Store at room temperature in an airtight container for two days, or freeze individually wrapped for up to two months. Reheat briefly in a low oven to refresh texture and aroma before serving.
- Occasions: Perfect for casual breakfasts, brunch gatherings, Mother’s Day or Father’s Day treats, and small celebratory moments where a homemade bakery touch is welcome.
FAQ
Conclusion
These scones shine because they deliver bright lemon flavor, tender crumb, and a delicate crunch from the poppy seeds, all with a straightforward method. I encourage you to make them when you want a small, homemade treat that feels special without taking over your morning. Bake a batch, share with friends or family, and savor the little ritual of a fresh pastry and a good cup of coffee.

Lemon Poppy Seed Scones
Equipment
- Oven
- Large Bowl
- Pastry cutter or two knives
- Baking Sheet
- Parchment Paper
- Wire Rack
- Small Bowl
Ingredients
- 2 cups all-purpose flour Provide structure and bulk to the scones, creating a tender crumb when combined with fat and liquid; whisk or sift to ensure even distribution and lighter texture before mixing.
- 3 tablespoons granulated sugar Add subtle sweetness to balance the tart lemon flavor and enhance browning; dissolve into the dough for an evenly sweetened bite without overpowering.
- 2 tablespoons poppy seeds Contribute a pleasant nutty crunch and characteristic flecks throughout the scone batter; sprinkle into the dry ingredients so the tiny seeds are evenly distributed in each piece.
- 2 large lemons Offer bright citrus zest and aromatic oils that intensify lemon flavor; grate the outer rind finely and fold into the batter to release fragrant notes without adding acidity.
- 1 tablespoon baking powder Leaven the dough by producing air pockets during baking for lift and tender crumb; measure accurately and mix into the dry ingredients for consistent rise.
- 1/2 teaspoon baking soda Provide additional leavening and a touch of acidity control to fine-tune texture and rise; combine with wet ingredients to activate and ensure even leavening.
- 1/2 tablespoon salt Enhance overall flavor balance by bringing out sweetness and controlling bitterness; dissolve into the dry mixture to season every bite uniformly.
- 1/2 cup cold unsalted butter, cut into 1 tablespoon size pieces Incorporate cold fat that creates flaky layers and richness when cut into the flour; keep pieces chilled and evenly sized to achieve a light, laminated scone texture.
- 1/2 cup heavy cream Add richness and moisture to create a tender, slightly creamy dough; stir in with the butter and dry ingredients until the mixture comes together without overmixing.
- 1/4 cup fresh lemon juice Introduce bright acidity that sharpens lemon flavor and aids in tenderizing the dough; measure carefully and add with the cream to avoid over-wetting.
- 1 tablespoon fresh lemon juice Provide concentrated fresh lemon flavor for the glaze or finishing touch, boosting brightness without adding bulk; stir into the powdered sugar to make a smooth, tangy icing.
- 1/2 cup powdered sugar Create a sweet, silky glaze that balances tartness and adds a glossy finish when mixed with lemon juice; sift and combine until smooth, then drizzle over cooled scones.
Instructions
- Heat oven to 400 degrees F. In a large bowl, whisk together flour, granulated sugar, poppy seeds, lemon zest, baking powder, baking soda, and salt.: Warmth in the kitchen signals the start, and you should notice a gentle rise in ambient heat as the oven approaches 400 degrees F . Preheating ensures the moment the scones hit the oven they begin to set and rise; otherwise they can spread and lose height. A common mistake is not allowing the oven to fully preheat, which yields uneven browning, so wait until the temperature stabilizes.
- Using a pastry cutter or two knives, cut butter into flour mixture until it resembles very coarse meal. Pour in heavy cream, then add 1/4 cup lemon juice, stirring just until dough forms.: The dry mix should smell faintly citrus from the lemon zest and look uniform, flecked with the tiny black poppy seeds . Whisking aerates the flour , helping a lighter crumb. If you skip thorough whisking, pockets of leavening can form, causing uneven texture, so take a moment to blend everything evenly.
- Gather the dough together with your hands gently form an 8-inch disk and cut into 8 wedges. Alternately, evenly divide the dough into eights and form balls. Transfer dough to a parchment-lined baking sheet and place scones 1 inch apart. Bake until golden and a toothpick inserted into center comes out clean, about 12 to 14 minutes. Remove from oven and transfer scones to a wire rack and let cool, about 20 minutes.: As you work in the cold unsalted butter , you will feel small pea sized pieces throughout the mix; these bits are the secret to flaky layers. The mixture should look rugged and sandy, not smooth. The danger here is overworking until the butter melts, which produces dense scones, so stop when you can still see cold butter bits.
- In the meantime, in a small bowl, mix powdered sugar with remaining lemon juice and stir until smooth. Using a spoon, drizzle glaze over cooled scones.: As the heavy cream and lemon juice hit the flour mixture, you will hear a soft, slightly sticky cohesion and see clumps start to come together. Stir until the dough barely holds, because overmixing develops gluten and makes tough scones. If the dough feels crumbly, a tablespoon of extra cream can help, but add carefully.
- Enjoy with a cup of fresh brewed Tully’s® Italian Roast Extra Bold Coffee: When you bring the dough into a disk, press gently so the layers remain. The surface should look slightly uneven and floured, not glossy. Cutting into wedges yields those classic triangular scones with crisp edges. A frequent error is pressing too hard while shaping, which compresses the layers; handle lightly to preserve flakiness.
- Recipe adapted from Country Living.: If you prefer round scones, shape each piece into a loose ball; the tops should be slightly domed. The dough surface will feel cool to the touch because of the butter. Overworking while rolling can warm the butter and cause spreading, so shape quickly and chill briefly if needed.
- Transfer dough to a parchment lined baking sheet and place scones 1 inch apart: Arrange them so air circulates evenly, and the parchment will prevent sticking while encouraging an even brown underside. You should see small gaps between each piece, and the sheet should not be overcrowded. Crowding leads to steamed edges, so maintain spacing for crisp outsides.
- Bake until golden and a toothpick inserted into center comes out clean, about 12 to 14 minutes: In the oven the aroma will shift from raw flour to toasty butter and bright citrus; watch for deepening color at the edges and top. The scones should sound hollow when tapped. A common misstep is pulling them out too early, resulting in a gummy center, so err on the longer end if unsure.
- Remove from oven and transfer scones to a wire rack and let cool, about 20 minutes: Cooling on a wire rack prevents the bottoms from stewing and preserves a crisp exterior. The scones will finish setting as they cool and the crumb will become tender. Cutting into them too soon can produce a doughy interior, so give them time to rest.
- In the meantime, in a small bowl, mix powdered sugar with remaining lemon juice and stir until smooth: This glaze should be glossy and pourable, with the bright scent of lemon juice cutting the sweetness of the powdered sugar . If too thick, add a few drops of juice; if too thin, sprinkle in a pinch more sugar. Avoid lumps by whisking briskly, otherwise the glaze will look streaky when applied.
- Using a spoon, drizzle glaze over cooled scones: The glaze should form soft ribbons and set to a delicate sheen. Drizzle in a back and forth motion for even coverage, and allow it to firm slightly before stacking. Pouring while the scones are warm will make the glaze run off and create a thin result, while waiting too long can prevent adhesion, so aim for just cool enough.
- Enjoy with a cup of fresh brewed Tully’s Italian Roast Extra Bold Coffee: Serve the scones with a bold, rich cup so the citrus cuts through the roast, or pair with a lighter brew if you prefer. You'll notice the contrast between the bright lemon and the deep coffee notes. A poor pairing can mute the lemon, so choose a coffee that complements rather than overwhelms.
- Recipe adapted from Country Living: This credit reminds us these techniques are time tested, and you can tweak them gently to match your pantry. Adaptations can be helpful, but if you stray too far you risk losing the balance that makes these scones work.
Notes
- Measure flour correctly by spooning into the cup and leveling to avoid packing. Too much all purpose flour will make scones dry and heavy, so weigh if you can for precise results.
- Keep everything cold, especially the butter. Work quickly on the pastry cutter step and chill the bowl if the butter starts to soften, because cold fat creates steam pockets that make the scones flaky.
- Balance lemon intensity by tasting your juice and adjusting zest. If the juice is particularly sour, rely more on zest for aromatic brightness and less on liquid to protect dough consistency.
- Use fresh leaveners like baking powder and baking soda. Old agents lose potency and will yield flatter, denser scones, so replace them regularly for reliable rise.
- Test for doneness with visual cues not just time. Look for deep golden tops and slightly darker edges, and a toothpick in the center should come out clean to indicate fully baked interiors.
- Store wisely in an airtight container at room temperature for up to two days. To refresh, warm briefly in a low oven to revive crispness without over drying.