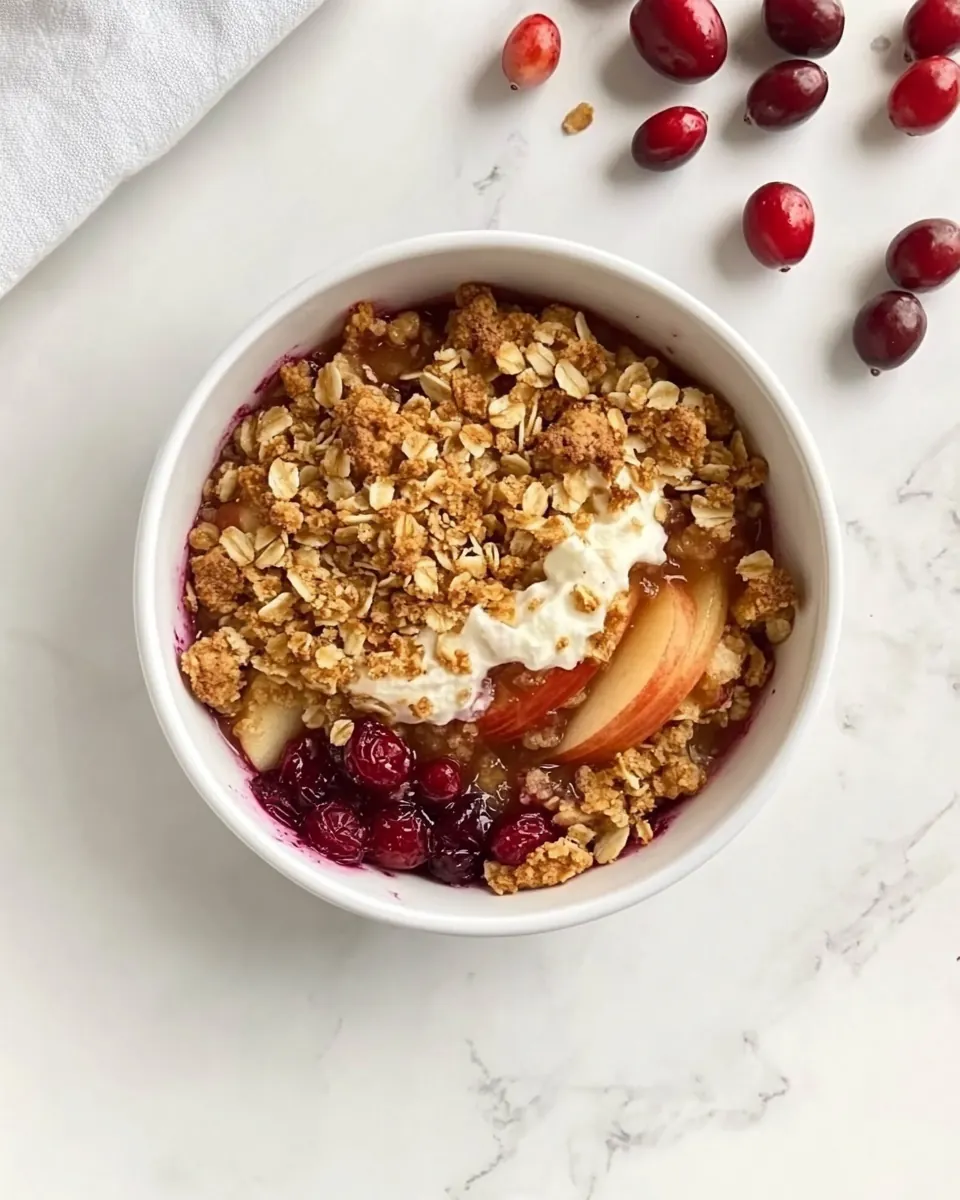
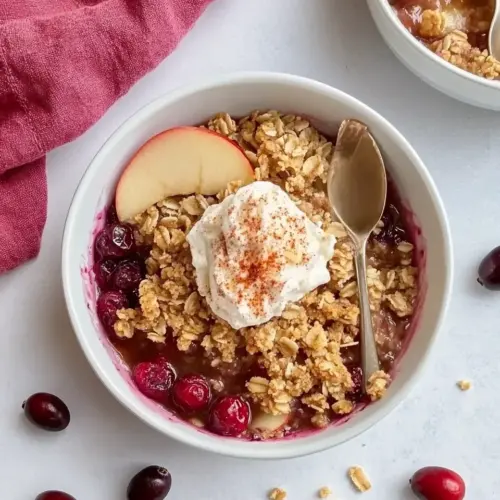
Apple Cranberry Crisp
Apple Cranberry Crisp has been one of those recipes I turn to when I want something that feels like home and also impresses a crowd without much fuss.
My earliest memory of Apple Cranberry Crisp involves a chilly afternoon when a neighbor dropped by with a basket of tart cranberries and a bag of wind knocked apples from her tree. I remember standing at the kitchen counter, hands dusted with flour, thinking how such simple ingredients could turn into something so comforting. I chose bright, slightly tart cranberries to balance the sweet, tender apples, and the result was a bubbling, fragrant dish that filled the house with orange and cinnamon notes. Over the years, I tweaked the topping to be delightfully crumbly, and it became the dessert I bring to potlucks and small gatherings because it travels well and warms up beautifully.
There are evenings when I make Apple Cranberry Crisp just because I want an easy way to end the day on a cozy note, and other times when it’s the centerpiece of a holiday table, its aroma mingling with the chatter of friends. I like the contrast between the soft fruit filling and the crispy, buttery topping, and the tiny pop you get from the cranberries when they burst open in the oven. I also enjoy the ritual of peeling or leaving the peels on the apples depending on my mood, and that choice subtly changes the texture, which keeps this recipe interesting. Each time I serve it, someone asks for the recipe, and that always makes me smile because it feels like sharing a small piece of my kitchen.
Recipe Snapshot
1 hr 5 mins
15 mins
50 mins
Medium
250 kcal
American
Gluten-Free, Vegan
Desserts
Oven, 9×13 inch or large casserole dish, Mixing bowls
Why This Apple Cranberry Crisp Stands Out
Balanced flavor and texture
I love how Apple Cranberry Crisp marries tart and sweet. The bright bite of cranberries cuts through the natural sweetness of the apples, while the buttery topping adds crunch. I often say the contrast is the whole point, it keeps each spoonful lively and interesting.
Simple pantry friendly ingredients
One of the biggest reasons I reach for this recipe is that it relies on pantry staples. Simple items like flour, brown sugar, and cinnamon form the backbone, so you can pull it together on short notice. I appreciate recipes that are forgiving, and this one definitely is.
Make ahead and crowd friendly
I frequently prepare Apple Cranberry Crisp ahead of time. The filling can be assembled and the topping prepared, then refrigerated until you are ready to bake. This makes it an ideal dessert for gatherings when you want to spend time with guests rather than the oven.
Seasonal charm
Because I use seasonal apples and citrus zest to brighten the filling, this recipe feels especially at home in cooler months. It brings cozy aromas into the kitchen, and it pairs wonderfully with warm drinks or a scoop of ice cream if you wish.
Flexible and customizable
I love that Apple Cranberry Crisp can be adjusted for sweetness, peel preference, and dietary needs. Small swaps, like more sugar for tartness or plant based butter to make it vegan, mean you can tailor it to who you are feeding without losing the essence of the dish.
Apple Cranberry Crisp Shopping List
These ingredients work together to create a bright, warmly spiced fruit filling and a rich, crumbly topping. The filling balances tart cranberries with sweet apples and fresh orange notes, while the topping brings texture and buttery flavor. The key players are the fruit for body and brightness, and the flour and butter in the topping for that irresistible crunch.
- 6 apples about 6-7 medium apples: Peel and slice to provide the tender, juicy base for the crisp; apples deliver natural sweetness and structure when baked, and their texture contrasts with the crunchy topping. Choose firm varieties to hold shape and release flavorful juices that meld with the cranberries and spices during baking.
- 2 c fresh cranberries, (frozen will work, do not thaw): Add tart, bright flavor and juicy pops that balance the sweetness of the apples and sugars; fresh cranberries also release pectin that helps thicken the filling as they cook. Keep them frozen if using frozen berries to prevent early mushiness and preserve texture until baking.
- 1/2 c brown sugar: Sprinkle in to sweeten the filling and create a caramelized depth as the fruit releases juices during baking; brown sugar contributes subtle molasses notes. Combine evenly with the fruit so the sweetness is balanced throughout the tart cranberry and apple mixture.
- 1/2 c sugar, 1/4 c more for less tart cranberries: Adjust granulated sugar to taste to tame cranberry tartness or enhance overall sweetness; adding an extra 1/4 cup is recommended if cranberries are very tart. Dissolve thoroughly with the fruit juices to help create a cohesive, slightly syrupy filling during baking.
- zest of 1 orange: Grate finely to add fragrant citrus oils that brighten and enhance the fruit flavors; orange zest adds aromatic complexity without additional acidity. Mix into the filling to lift the overall flavor profile and complement the cinnamon and nutmeg.
- 1 T corn starch: Whisk in to thicken the fruit juices as they cook, creating a glossy, slightly gelled filling that holds together when served. Corn starch should be evenly distributed to prevent lumps and ensure the filling sets properly as it cools.
- 1 T freshly squeezed orange juice: Squeeze fresh to add a burst of citrus acidity that balances sweetness and enhances the natural fruit flavors; orange juice also loosens and blends the filling components. Incorporate with the cornstarch so the acid is evenly distributed and brightens the overall taste.
- 1 1/2 tsp cinnamon: Sprinkle to contribute warm, aromatic spice that complements apples and cranberries; cinnamon adds depth and familiar dessert character. Blend into the filling for consistent spice throughout each bite.
- 1/2 tsp nutmeg: Grate or measure to add warm, nutty spice with slightly sweet, woodsy undertones that complements cinnamon and fruit flavors. Nutmeg should be used sparingly to avoid overpowering the delicate balance of the filling.
- 1 coat: Coat lightly to create a barrier or initial surface layer that helps distribute flavors or prevent sticking; this likely refers to coating the baking dish or fruit to ensure even cooking. Ensure an even, thin layer to aid in assembly and baking performance.
- 3/4 c flour: Combine to form the base of the crisp topping, providing structure and a tender crumb when baked; flour binds with fat and sugar to create the desired crumbly texture. Measure accurately and mix with the other dry topping ingredients for an even, cohesive streusel.
- 1 tsp cinnamon: Season the topping with warm spice that mirrors the filling and adds aromatic continuity; cinnamon in the streusel enhances overall flavor harmony. Distribute evenly through the flour and sugar so each bite of topping has balanced spice.
- 2/3 c brown sugar: Sweeten the crumble topping and contribute chewiness and molasses notes that deepen the dessert's flavor; brown sugar helps create a slightly sticky, crisped texture when baked. Mix thoroughly with the dry ingredients before adding melted butter to ensure uniform sweetness.
- 1/2 tsp vanilla: Flavor with warm, floral vanilla to round out and enhance the topping's sweetness and aroma; vanilla adds a mellow, aromatic finish that complements the spices. Stir into the wet topping ingredients so the scent permeates the crumble.
- 1/4 tsp sea salt: Season with mild salinity to enhance the overall flavors and balance sweetness; sea salt brings out fruit and spice nuances while improving the dessert's depth. Mix into the dry topping components for even seasoning throughout.
- 1/2 c butter, melted: Pour melted to bind the topping ingredients, create a crisp golden finish, and provide rich, buttery flavor; butter helps the streusel crisp while keeping it tender. Ensure melted butter is incorporated evenly so the topping bakes to a uniform, crunchy texture.
Step by Step Guide for Apple Cranberry Crisp
These directions will walk you through baking a bubbling, golden Apple Cranberry Crisp with a crisp topping and tender fruit below. I like to move deliberately, savor the aromas, and watch for visual cues so the final texture is just right.
- Preheat oven to 350°F.: When you preheat the oven, you should notice the warmth spreading and the faint metallic hum as elements engage. This step ensures even baking so the topping becomes golden while the fruit cooks through. A common mistake is not waiting until the oven reaches temperature, which can lead to an underbaked topping or uneven bubbling. I recommend using an oven thermometer to verify accuracy, and allow at least 10 minutes after setting the dial so internal heat stabilizes.
- In a medium bowl, (or the dish you are baking it in) stir together ingredients for the apple cranberry filling. Pour into a well greased 9×13 inch or large casserole dish and set aside while you make the crisp topping.: As you mix, you'll hear the gentle scrape of a spoon and smell citrus and spice joining the fruit. The juices will begin to draw out from the apples and cranberries , and the mixture should look glossy and slightly syrupy. This step builds the base of flavor and lets the corn starch and sugar start to bind the juices. Avoid overworking the fruit, which can bruise apples and release too much liquid. If the filling seems too watery, a little extra corn starch mixed with the sugar will help, but add sparingly to avoid a pasty texture.
- In another bowl, stir together the flour, oats, cinnamon, sea salt, brown sugar and vanilla. Pour the melted butter over top and stir until evenly coated and crumbly.: When the melted butter hits the dry mix, steam rises and the aroma of baked sugar and spice becomes more pronounced. The goal here is a coarse, crumbly texture, with pockets of butter coating the flour and oats so they crisp in the oven. If the mixture is too dry it will not bind into crumbs; if too wet it will clump and become greasy. A common pitfall is pouring hot butter that is too hot which can flatten the texture, so let the butter cool slightly before incorporating.
- Sprinkle oat topping evenly over the fruit layer. Bake for about 40-50 minutes or until topping is golden brown and fruit is bubbling.: The visual cue to aim for is an even blanket of topping covering the fruit so heat distributes uniformly and the topping browns consistently. As it bakes, you'll hear a gentle bubbling from the fruit and later a faint crackle as the topping crisps. Uneven topping leads to some patches overcooked and others underbaked, so take a moment to pat the topping into place without compressing it. If you press too hard, the topping can become compacted and lose its desirable crumble.
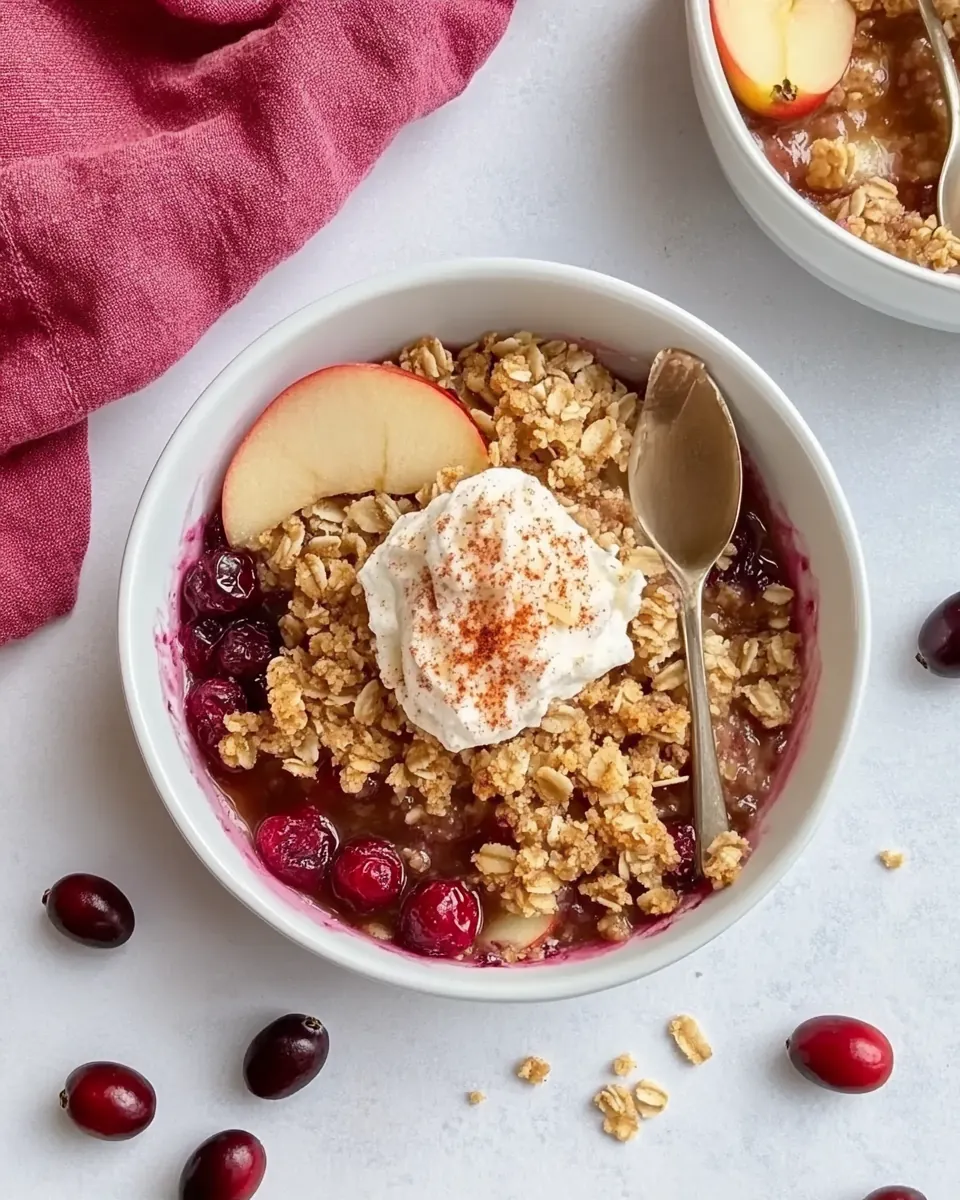
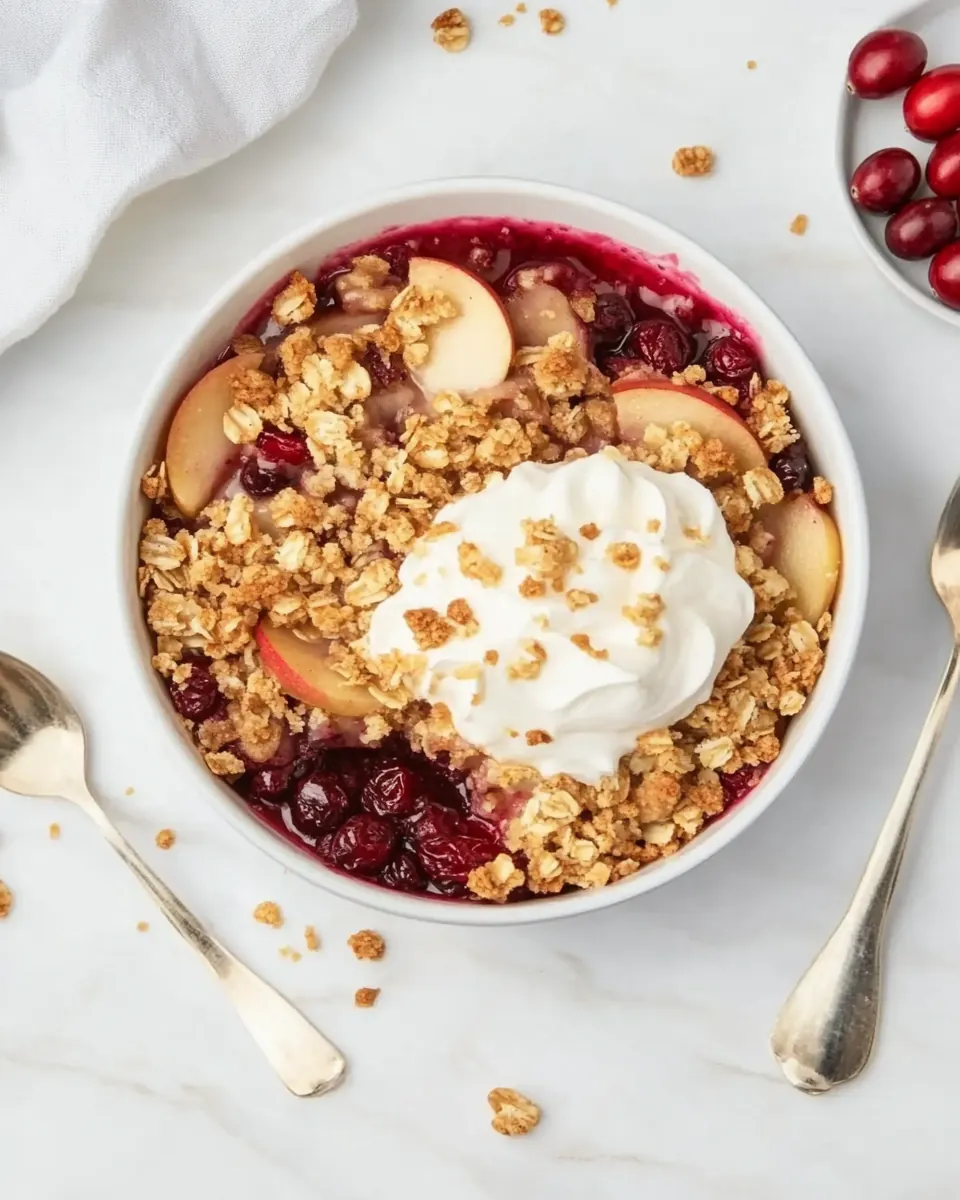
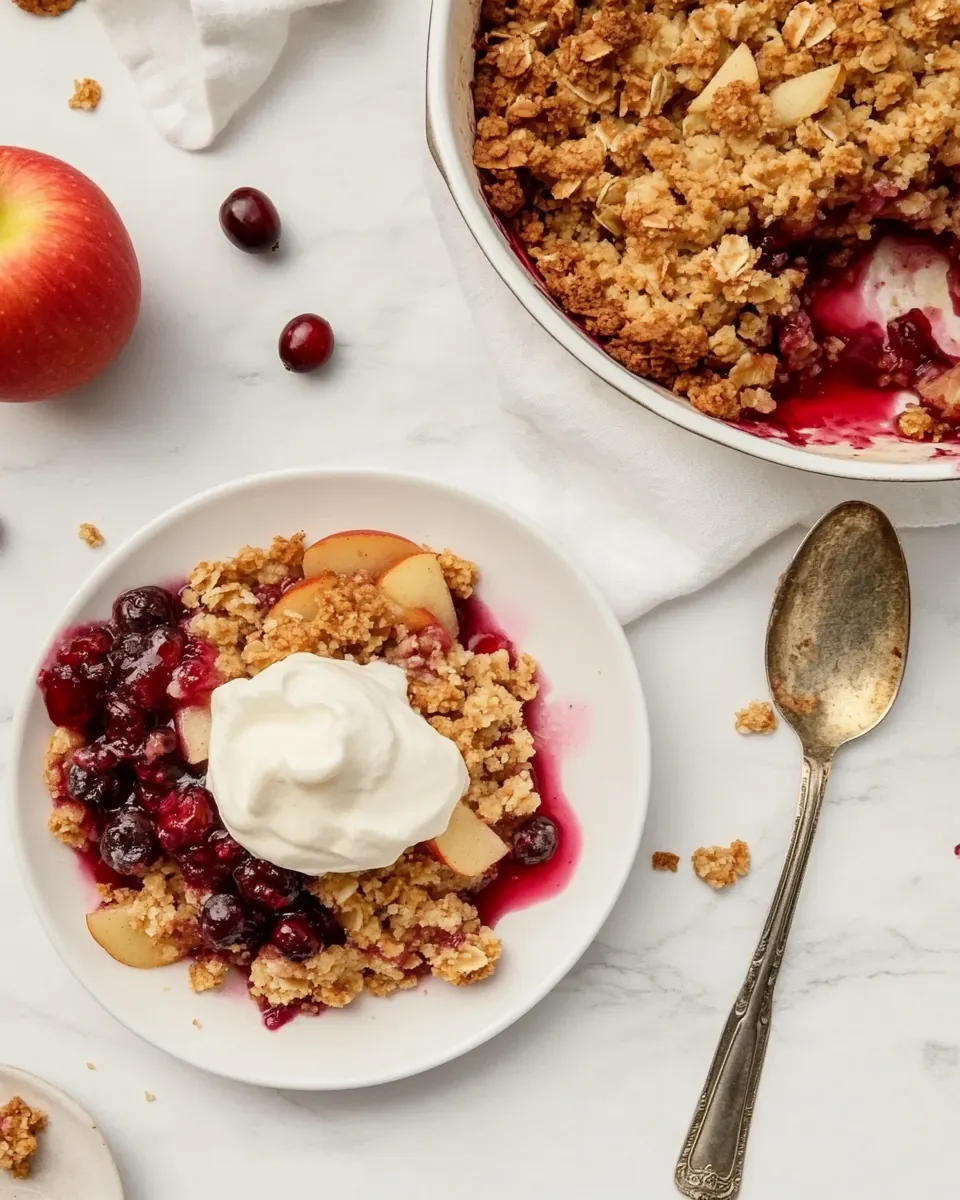
- Allow to cool 5-10 minutes before serving. Serve with a big scoop of vanilla ice cream and a sprinkle of cinnamon. Enjoy!: During baking, the kitchen will fill with the scent of orange, cinnamon, and baked fruit. Watch for bubbling along the edges and center, and aim for a deep golden top. Opening the oven early can cause temperature fluctuations which extend baking time, so resist checking until at least 30 minutes have passed. If the topping browns too quickly, tent loosely with foil to prevent burning while the fruit finishes cooking. An underbaked topping will be pale and soft, whereas an overbaked one will be hard rather than pleasantly crisp.
- Allow to cool 5 to 10 minutes before serving.: As the crisp rests, juices set slightly and the filling thickens, which makes serving cleaner and the texture more enjoyable. You'll notice steam easing out and a quieter kitchen as bubbling subsides. Serving immediately can result in runny portions, so patience yields better slices. A frequent mistake is slicing too soon, which leads to a loose filling; let it rest briefly for the best balance between warm filling and stable texture.
- Serve with a big scoop of vanilla ice cream and a sprinkle of cinnamon. Enjoy!: The cold creaminess of ice cream contrasts beautifully with the warm, tart fruit and crunchy topping, creating a satisfying mouthfeel. The first bite should be warm and fragrant, with the crisp giving way to tender fruit. If you skip the ice cream, the dish still stands on its own, but the temperature contrast truly elevates it. Avoid overdressing with too much topping on one spoonful, balance keeps each bite harmonious.
Expert Tips about Apple Cranberry Crisp
I like to keep a few helpful tricks in my back pocket when making Apple Cranberry Crisp. These tips are practical, based on experience, and designed to help you get consistent, delicious results every time.
- Choose firm apples: Firm apples provide structure and hold their shape, creating pleasing slices in the filling rather than a mushy texture which can happen with overly soft varieties.
- Use frozen cranberries smartly: Adding frozen cranberries without thawing helps maintain texture and prevents the filling from becoming overly watery, as they release liquid gradually while baking.
- Pack brown sugar lightly: Lightly packing the brown sugar in measuring cups gives reliable sweetness and moisture to both the filling and the topping, avoiding rock hard clumps in the topping.
- Let the butter cool slightly: Pouring very hot melted butter into the topping can create a greasy texture, so let it cool just enough to be warm but not steaming when mixing.
- Tent if necessary: If your topping is browning before the fruit bubbles, tent a sheet of foil loosely over the dish to allow the filling to finish cooking without burning the crust.
- Adjust sweetness to taste: Taste the filling mixture before baking, especially if your cranberries are extra tart, and add up to the extra 1/4 cup of sugar if needed for balance.
Great Combinations for Apple Cranberry Crisp
This dessert pairs well with a few thoughtful accompaniments and suits many occasions. Below are practical serving ideas, storage notes, and pairing suggestions to help you present and preserve this dish.
- Classic scoop style: Serve warm slices with a scoop of vanilla ice cream for contrast between hot and cold textures, perfect for dinner guests and family nights.
- Spiced beverage pairing: Offer warm spiced beverages alongside, as the cinnamon and orange notes in the crisp complement hot drinks, making it ideal for chilly evenings.
- Holiday centerpiece: Use Apple Cranberry Crisp as a dessert at seasonal gatherings like Thanksgiving, where its bright fruit and cozy spices fit the table well.
- Make ahead for ease: Assemble the filling and topping the day before, cover and refrigerate, then bake when guests arrive so you can relax and mingle instead of stressing in the kitchen.
- Storage tips: Refrigerate leftovers in an airtight container for up to three days; reheat in a 325 degree oven until warmed through to preserve crisp texture rather than microwaving which softens the topping.
- Portion and serve: Spoon into individual ramekins for an elegant presentation, or serve family style straight from the casserole dish for a cozier feel.
- Seasonal pairings: This recipe shines in fall, pairing well with roasted nuts or a simple salad earlier in the meal that has complementary autumn flavors.
FAQ
Conclusion
Apple Cranberry Crisp stands out because it pairs tart, bright fruit with a buttery, crispy topping that is both comforting and festive. You should give it a try because it comes together with pantry staples, yet delivers big flavor and warm aromas that make any meal feel special. I hope you enjoy crafting this dish, whether you make it for a holiday table or a quiet dessert night, and that it becomes one of those recipes you return to for its simplicity and charm.
Apple Cranberry Crisp
Equipment
- Oven
- 9x13 inch or large casserole dish
- Mixing Bowls
Ingredients
- 6 apples about 6-7 medium apples Peel and slice to provide the tender, juicy base for the crisp; apples deliver natural sweetness and structure when baked, and their texture contrasts with the crunchy topping. Choose firm varieties to hold shape and release flavorful juices that meld with the cranberries and spices during baking.
- 2 c fresh cranberries, (frozen will work, do not thaw) Add tart, bright flavor and juicy pops that balance the sweetness of the apples and sugars; fresh cranberries also release pectin that helps thicken the filling as they cook. Keep them frozen if using frozen berries to prevent early mushiness and preserve texture until baking.
- 1/2 c brown sugar Sprinkle in to sweeten the filling and create a caramelized depth as the fruit releases juices during baking; brown sugar contributes subtle molasses notes. Combine evenly with the fruit so the sweetness is balanced throughout the tart cranberry and apple mixture.
- 1/2 c sugar, 1/4 c more for less tart cranberries Adjust granulated sugar to taste to tame cranberry tartness or enhance overall sweetness; adding an extra 1/4 cup is recommended if cranberries are very tart. Dissolve thoroughly with the fruit juices to help create a cohesive, slightly syrupy filling during baking.
- zest of 1 orange Grate finely to add fragrant citrus oils that brighten and enhance the fruit flavors; orange zest adds aromatic complexity without additional acidity. Mix into the filling to lift the overall flavor profile and complement the cinnamon and nutmeg.
- 1 T corn starch Whisk in to thicken the fruit juices as they cook, creating a glossy, slightly gelled filling that holds together when served. Corn starch should be evenly distributed to prevent lumps and ensure the filling sets properly as it cools.
- 1 T freshly squeezed orange juice Squeeze fresh to add a burst of citrus acidity that balances sweetness and enhances the natural fruit flavors; orange juice also loosens and blends the filling components. Incorporate with the cornstarch so the acid is evenly distributed and brightens the overall taste.
- 1 1/2 tsp cinnamon Sprinkle to contribute warm, aromatic spice that complements apples and cranberries; cinnamon adds depth and familiar dessert character. Blend into the filling for consistent spice throughout each bite.
- 1/2 tsp nutmeg Grate or measure to add warm, nutty spice with slightly sweet, woodsy undertones that complements cinnamon and fruit flavors. Nutmeg should be used sparingly to avoid overpowering the delicate balance of the filling.
- 1 coat Coat lightly to create a barrier or initial surface layer that helps distribute flavors or prevent sticking; this likely refers to coating the baking dish or fruit to ensure even cooking. Ensure an even, thin layer to aid in assembly and baking performance.
- 3/4 c flour Combine to form the base of the crisp topping, providing structure and a tender crumb when baked; flour binds with fat and sugar to create the desired crumbly texture. Measure accurately and mix with the other dry topping ingredients for an even, cohesive streusel.
- 1 tsp cinnamon Season the topping with warm spice that mirrors the filling and adds aromatic continuity; cinnamon in the streusel enhances overall flavor harmony. Distribute evenly through the flour and sugar so each bite of topping has balanced spice.
- 2/3 c brown sugar Sweeten the crumble topping and contribute chewiness and molasses notes that deepen the dessert's flavor; brown sugar helps create a slightly sticky, crisped texture when baked. Mix thoroughly with the dry ingredients before adding melted butter to ensure uniform sweetness.
- 1/2 tsp vanilla Flavor with warm, floral vanilla to round out and enhance the topping's sweetness and aroma; vanilla adds a mellow, aromatic finish that complements the spices. Stir into the wet topping ingredients so the scent permeates the crumble.
- 1/4 tsp sea salt Season with mild salinity to enhance the overall flavors and balance sweetness; sea salt brings out fruit and spice nuances while improving the dessert's depth. Mix into the dry topping components for even seasoning throughout.
- 1/2 c butter, melted Pour melted to bind the topping ingredients, create a crisp golden finish, and provide rich, buttery flavor; butter helps the streusel crisp while keeping it tender. Ensure melted butter is incorporated evenly so the topping bakes to a uniform, crunchy texture.
Instructions
- Preheat oven to 350°F.: When you preheat the oven, you should notice the warmth spreading and the faint metallic hum as elements engage. This step ensures even baking so the topping becomes golden while the fruit cooks through. A common mistake is not waiting until the oven reaches temperature, which can lead to an underbaked topping or uneven bubbling. I recommend using an oven thermometer to verify accuracy, and allow at least 10 minutes after setting the dial so internal heat stabilizes.
- In a medium bowl, (or the dish you are baking it in) stir together ingredients for the apple cranberry filling. Pour into a well greased 9×13 inch or large casserole dish and set aside while you make the crisp topping.: As you mix, you'll hear the gentle scrape of a spoon and smell citrus and spice joining the fruit. The juices will begin to draw out from the apples and cranberries , and the mixture should look glossy and slightly syrupy. This step builds the base of flavor and lets the corn starch and sugar start to bind the juices. Avoid overworking the fruit, which can bruise apples and release too much liquid. If the filling seems too watery, a little extra corn starch mixed with the sugar will help, but add sparingly to avoid a pasty texture.
- In another bowl, stir together the flour, oats, cinnamon, sea salt, brown sugar and vanilla. Pour the melted butter over top and stir until evenly coated and crumbly.: When the melted butter hits the dry mix, steam rises and the aroma of baked sugar and spice becomes more pronounced. The goal here is a coarse, crumbly texture, with pockets of butter coating the flour and oats so they crisp in the oven. If the mixture is too dry it will not bind into crumbs; if too wet it will clump and become greasy. A common pitfall is pouring hot butter that is too hot which can flatten the texture, so let the butter cool slightly before incorporating.
- Sprinkle oat topping evenly over the fruit layer. Bake for about 40-50 minutes or until topping is golden brown and fruit is bubbling.: The visual cue to aim for is an even blanket of topping covering the fruit so heat distributes uniformly and the topping browns consistently. As it bakes, you'll hear a gentle bubbling from the fruit and later a faint crackle as the topping crisps. Uneven topping leads to some patches overcooked and others underbaked, so take a moment to pat the topping into place without compressing it. If you press too hard, the topping can become compacted and lose its desirable crumble.
- Allow to cool 5-10 minutes before serving. Serve with a big scoop of vanilla ice cream and a sprinkle of cinnamon. Enjoy!: During baking, the kitchen will fill with the scent of orange, cinnamon, and baked fruit. Watch for bubbling along the edges and center, and aim for a deep golden top. Opening the oven early can cause temperature fluctuations which extend baking time, so resist checking until at least 30 minutes have passed. If the topping browns too quickly, tent loosely with foil to prevent burning while the fruit finishes cooking. An underbaked topping will be pale and soft, whereas an overbaked one will be hard rather than pleasantly crisp.
- Allow to cool 5 to 10 minutes before serving.: As the crisp rests, juices set slightly and the filling thickens, which makes serving cleaner and the texture more enjoyable. You'll notice steam easing out and a quieter kitchen as bubbling subsides. Serving immediately can result in runny portions, so patience yields better slices. A frequent mistake is slicing too soon, which leads to a loose filling; let it rest briefly for the best balance between warm filling and stable texture.
- Serve with a big scoop of vanilla ice cream and a sprinkle of cinnamon. Enjoy!: The cold creaminess of ice cream contrasts beautifully with the warm, tart fruit and crunchy topping, creating a satisfying mouthfeel. The first bite should be warm and fragrant, with the crisp giving way to tender fruit. If you skip the ice cream, the dish still stands on its own, but the temperature contrast truly elevates it. Avoid overdressing with too much topping on one spoonful, balance keeps each bite harmonious.
Notes
- Choose firm apples: Firm apples provide structure and hold their shape, creating pleasing slices in the filling rather than a mushy texture which can happen with overly soft varieties.
- Use frozen cranberries smartly: Adding frozen cranberries without thawing helps maintain texture and prevents the filling from becoming overly watery, as they release liquid gradually while baking.
- Pack brown sugar lightly: Lightly packing the brown sugar in measuring cups gives reliable sweetness and moisture to both the filling and the topping, avoiding rock hard clumps in the topping.
- Let the butter cool slightly: Pouring very hot melted butter into the topping can create a greasy texture, so let it cool just enough to be warm but not steaming when mixing.
- Tent if necessary: If your topping is browning before the fruit bubbles, tent a sheet of foil loosely over the dish to allow the filling to finish cooking without burning the crust.
- Adjust sweetness to taste: Taste the filling mixture before baking, especially if your cranberries are extra tart, and add up to the extra 1/4 cup of sugar if needed for balance.