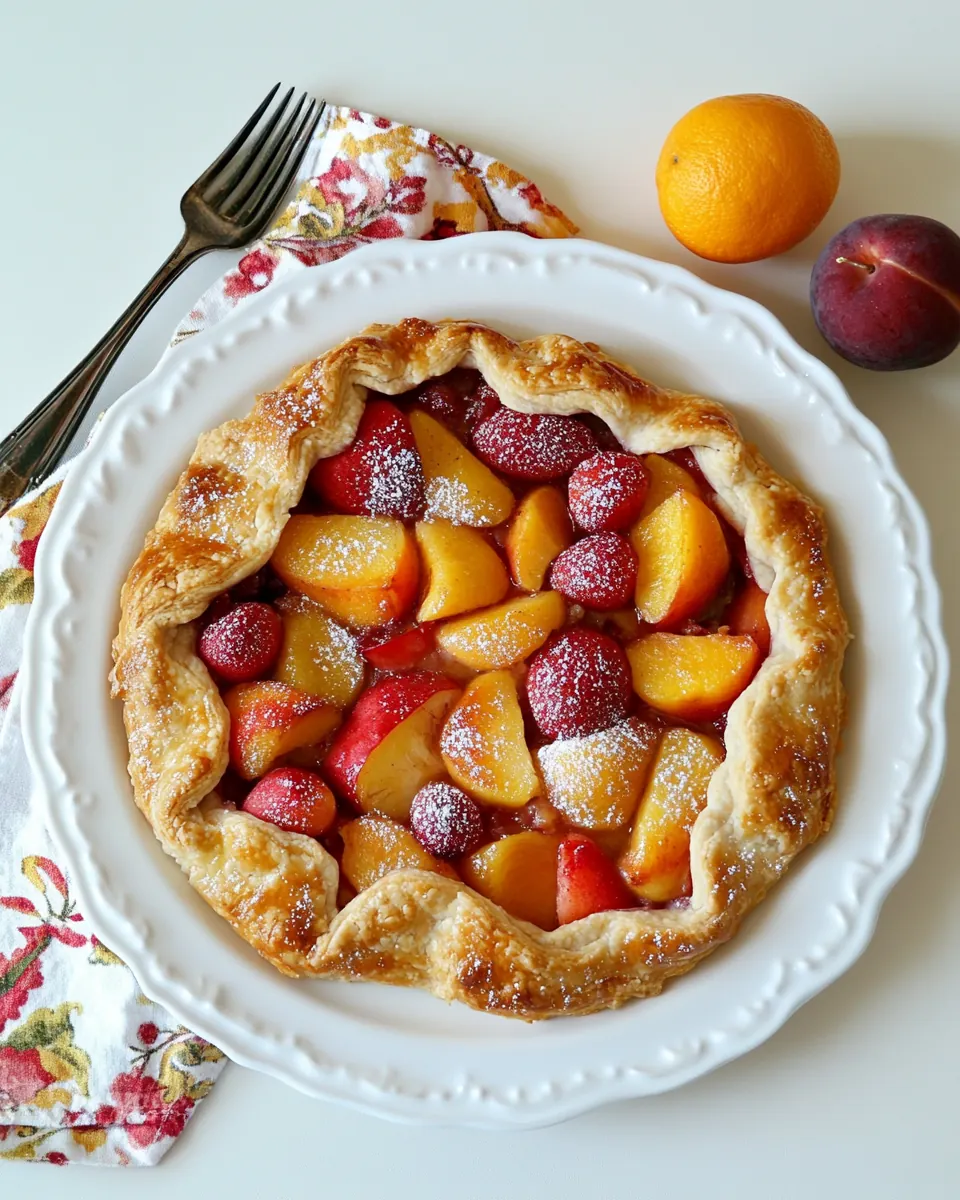
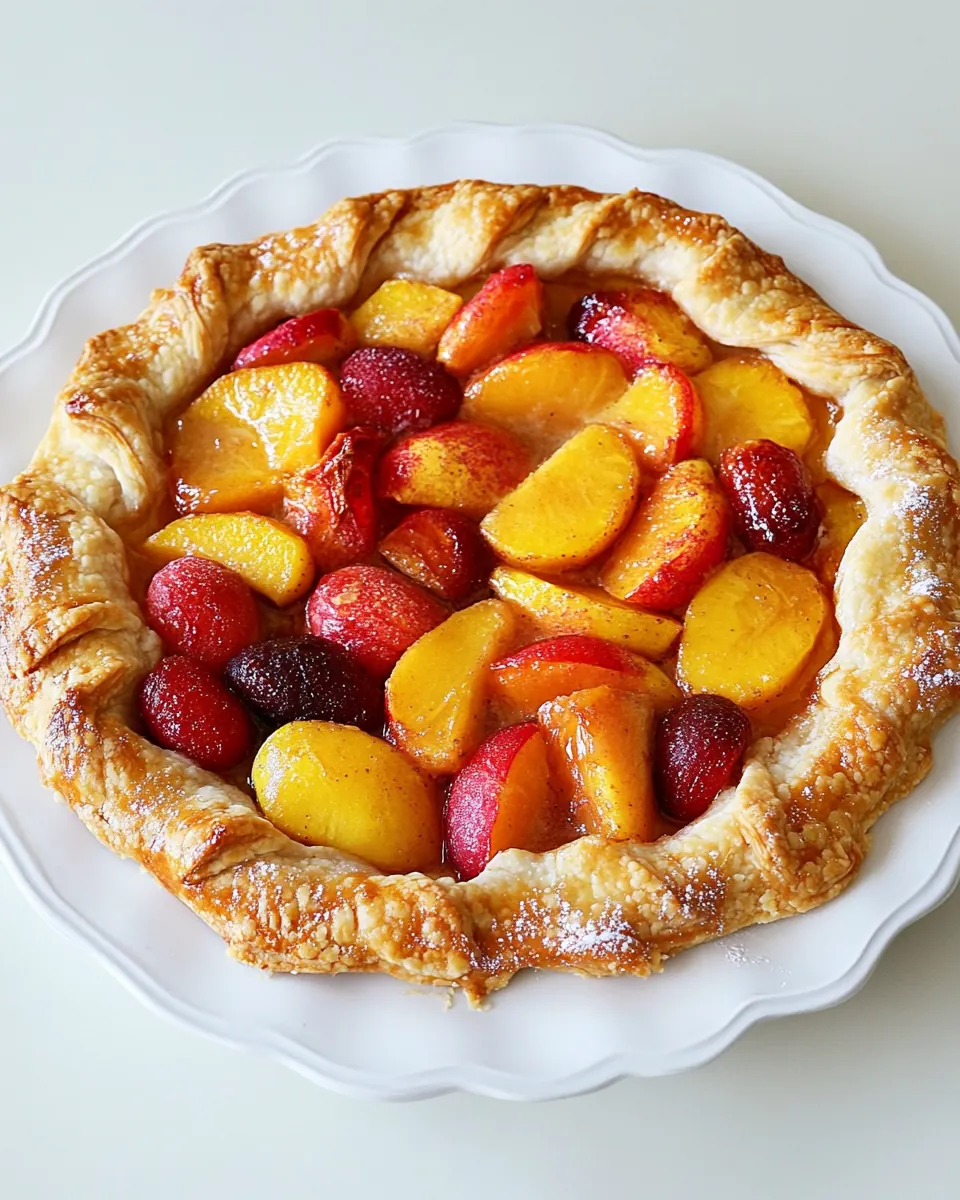
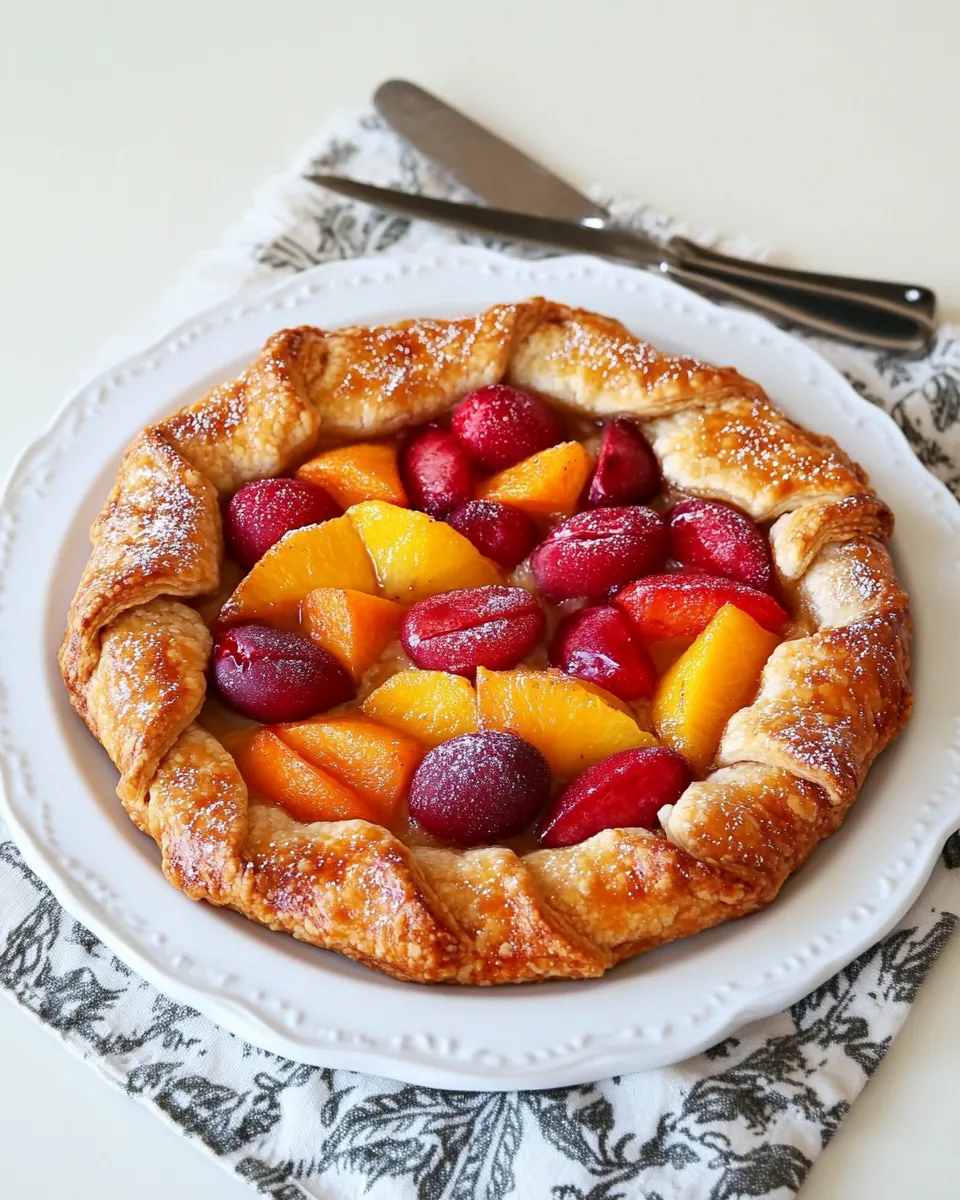
Stone Fruit Galette with Ginger and Vanilla
Stone Fruit Galette with Ginger and Vanilla is the kind of rustic dessert I reach for when late summer fruit arrives at the farmers market and my kitchen needs a little sunshine.
I remember the first time I folded a freeform crust around ripe peaches and cherries, the sticky juices scenting the air with a bright sweetness while the faint warmth of fresh ginger cut through like a clever surprise. That day I learned that a galette does not demand perfection, only patience and respect for good ingredients. As I worked, I chatted with a neighbor who stopped by, and we traded stories while I pleated the dough, each fold making the pastry feel more like a shared ritual than a recipe. The little bits of cold butter in the dough gave a promise of flakiness, and the simple egg wash made the crust glisten like it was dressed for a small celebration.
What I love about Stone Fruit Galette with Ginger and Vanilla is how forgiving it is. You can let the fruit juices bubble freely without fuss, and the galette will still emerge from the oven golden and slightly caramelized at the edges. I often serve it warm, spooning a melting scoop of vanilla ice cream over a slice while we sit at the kitchen table and talk about the day. This dessert always brings a relaxed, honest joy to the end of a meal, and it has a way of turning a weekday dinner into something a little more memorable.
Recipe Snapshot
50 mins
30 mins
20 mins
Medium
300 kcal
American
Gluten-Free, Vegan
Desserts
Food processor, Baking sheet, Parchment paper, Mixing bowl, Rolling pin
Why This Stone Fruit Galette with Ginger and Vanilla Works
Bright seasonal flavor
I adore how the natural sweetness of ripe stone fruit carries the whole dish. When peaches, nectarines, apricots, and cherries are in season, their juices become the main attraction, balancing sugar and acid in perfect harmony. I often taste the filling as I toss it, adjusting only if the fruit needs a touch more lemon to pop.
Simple, rustic technique
There is something deeply satisfying about folding a hand-rolled crust over fruit, no special molds required. The technique highlights texture, with buttery, flaky flour layers meeting juicy fruit, and it is forgiving if your shaping is imperfect. I love that you can focus on feel rather than measurements at times.
Textural contrast
The interplay between the tender, syrupy filling and the slightly crisp, golden crust is what keeps me coming back. Tiny butter bits that remain cold until they meet the oven steam create flaky pockets in the crust. That contrast is the secret to an excellent galette, and I make a point to keep the dough chilled to preserve it.
Bright aromatics
Adding ginger and vanilla gives the filling that unexpected lift. The ginger adds a warm, spicy scent that cuts through the sweetness, while the vanilla rounds flavors and ties everything together. I recommend grating the ginger finely so it disperses evenly and infuses every bite.
Approachable entertaining
This galette is a champion for casual gatherings. It travels well to potlucks, slices easily, and needs no elaborate plating. I often make one to share with friends who drop by, and it never fails to generate compliments because it tastes more refined than the effort it requires.
Recipe Ingredients for Stone Fruit Galette with Ginger and Vanilla
These ingredients celebrate the simplicity and seasonality that make a galette shine. The list combines a sturdy base of flour and cold butter to build a flaky crust, while the fruit and a few aromatics create the juicy, fragrant filling. Each component plays a clear role: structure, moisture control, flavor lift, and finishing texture.
- 2 cups flour: Provide structure and body to the dough, creating a tender yet sturdy crust that holds the filling; measure accurately for proper texture, whisking or sifting if needed to remove lumps; combine with salt and butter using a pastry cutter or fingertips until coarse crumbs form.
- 1/4 teaspoon fine grain sea salt: Enhance overall flavor balance by seasoning the pastry dough lightly, drawing out sweetness in the fruit and highlighting buttery notes; distribute evenly through the flour before cutting in the butter to ensure consistent taste.
- 1 stick (1/2 cup) cold butter, cubed: Contribute rich fat for flakiness and flavor; keep cold and cubed, incorporating quickly into the flour to create layers in the pastry; handle minimally to avoid melting and to retain flaky texture.
- 3 tablespoons cold water, plus more as needed: Bind dry ingredients into a cohesive dough without overworking, providing necessary hydration while maintaining pastry tenderness; add gradually and chill if dough becomes too warm, adding more as needed for proper consistency.
- 1 pound stone fruit (such as peaches, nectarines, apricots and cherries): Supply the sweet, juicy filling with varied textures and flavors that caramelize when baked; pit and slice as appropriate, mixing varieties for complexity and to achieve a pleasing balance of tartness and sweetness.
- 3 tablespoons sugar: Sweeten the fruit filling lightly to encourage caramelization and enhance natural fruit flavors; sprinkle and toss with the fruit so sugar dissolves and helps create a saucy interior as the galette bakes.
- Juice of 1/2 lemon: Brighten and balance the sweetness in the filling with acidity, preventing cloying flavors and helping fruit retain shape; squeeze fresh and mix with the sliced fruit to keep flavors lively.
- 1 teaspoon finely grated ginger: Add a warm, spicy note with fresh brightness; grate finely to distribute evenly through the filling and pair with vanilla for aromatic complexity without overpowering the fruit.
- 1/2 teaspoon vanilla extract: Introduce aromatic depth and a soft, sweet perfume to the filling; stir in sparingly to complement ginger and fruit while enhancing the overall flavor profile without dominating.
- 1 tablespoon flour: Thicken fruit juices released during baking to prevent a soggy crust and help the filling set; toss with the sliced fruit so it absorbs moisture and creates a cohesive interior.
- 1 teaspoon butter, cut into small bits: Add small enriched butter pieces to the filling for pockets of richness and flavor; dot across the fruit before folding the pastry to create glossy, buttery accents as the galette bakes.
- 1 egg, beaten with a little water: Provide an egg wash for the crust that promotes a golden, glossy finish and helps toppings adhere; beat with a little water and brush evenly before sprinkling with sugar for color and shine.
- Turbinado sugar, for sprinkling: Create a crunchy, sparkling topping that enhances texture and appearance; sprinkle over the egg-washed crust edges to caramelize and add visual appeal during baking.
- Vanilla ice cream, for serving: Offer a cool, creamy contrast when serving, complementing warm fruit and crisp pastry; scoop alongside slices to balance temperature and add indulgent richness.
Step by Step Instructions for Stone Fruit Galette with Ginger and Vanilla
These instructions guide you from dough to golden galette with approachable steps and sensory cues to help you know when you are on track. I will walk you through making the crust, assembling the filling, and baking until you have a warm, fragrant dessert to enjoy.
- To make the crust, add flour, salt and butter to a food processor and pulse until the butter is the size of peas. Sprinkle over 3 tablespoons cold water and pulse until incorporated. Drizzle in a little water and pulse until larger clumps start to form. You'll see the dough start moving away from the blade and up the sides of the processor, then falling back into the center. The mixture will look crumbly, but it should hold together when you pinch some between your fingers.: The first scents you should notice are cold butter and neutral flour as they combine visually into coarse crumbs, with small, pea sized bits of butter visible against the pale flour. Texture is everything here because those butter bits will turn to steam and make flaky layers in the oven, so work quickly and chill if your hands feel warm. A common mistake is over processing until the mixture becomes pasty, which reduces flakiness; stop pulsing once pea sized pieces remain. If you do not have a food processor, you can use a pastry cutter but the goal remains the same, coarse crumbs with visible butter.
- Turn the dough out on to a floured work surface and form into a flat disc. Do not over work here. You want to see small bits of butter throughout your dough. This is the key to a perfectly flaky crust. Wrap the disc in plastic wrap and let rest in the refrigerator for 15 minutes.: When you add cold water , pulse in short bursts and watch for the dough to begin to clump without becoming wet. You want the mixture to stick together when you squeeze a bit between your fingers, but not to be overly moist. Sensory clues include the dough starting to gather into larger pieces and a slightly tacky feel; avoid adding too much water which will make the crust tough. If the dough feels crumbly, add a teaspoon of cold water at a time until it holds.
- While the dough is resting, prepare the filling. Pit and slice all stone fruit. I cut the cherries in half, and others into even slices. Add sliced fruit to a medium bowl with sugar and lemon juice, gently tossing to combine. Let sit for 10 minutes. Add ginger, vanilla and flour, gently stirring until combined. Set aside.: As you continue, you should see clusters of dough forming that lift from the blade and fall back to the center of the processor, a visual cue that the dough is cohesive but still layered. This stage preserves the integrity of those cold butter pieces so the final crust is tender and flaky. The mistake to avoid here is overworking, which makes the dough develop gluten and become chewy instead of delicate. If you notice a smooth, homogeneous dough, pause and chill the mixture to restore some firmness.
- Preheat the oven to 425°F and place a rack in the middle position. Line a rimmed baking sheet with parchment paper or a silpat and set aside.: That movement is the telltale sign of proper hydration and consistency, and you will also sense a slight change in sound as the pulses shift from grinding to clumping. The dough should still appear crumbly but should hold when pinched; this balance is crucial because it ensures pockets of butter remain. A common pitfall is waiting too long to stop pulsing and ending up with an overly smooth dough, which reduces flakiness when baked.
- Return the disc to a floured work surface and roll out to a 12" diameter. This doesn't have to be perfect. Carefully transfer the dough to the prepared baking sheet. Spoon all fruit and juices into the center of the dough, forming a 7 to 8-inch circle.: Pinching is the most reliable test, since visual cues can be misleading. The dough should compress into a single mass but break apart easily when handled, indicating the right moisture level. If it falls completely apart, it needs a touch more cold water ; if it feels sticky and soft, chill it briefly to firm up the butter . Avoid adding warm water because it will melt the butter prematurely and ruin the texture.
- Fold the dough up around the filling. Start by folding one edge across the filling. Fold an adjacent edge the same way. There will be a pleat between the two edges. Repeat this process around the entire galette. Dot the top of the filling with butter bits. Brush egg-water mixture lightly over the exposed dough (egg wash). Sprinkle everything with turbinado sugar.: You will feel the dough lending itself to gentle shaping without sticking, and the surface should be lightly floured so it slides easily under your hands. Forming a flat disc reduces handling and helps the dough chill evenly, which preserves those flaky layers. Overworking here is the usual misstep; press and fold just enough to unify the dough, then stop. Wrap the disc in plastic to prevent it from picking up fridge odors while chilling.
- Bake galette for 18 – 20 minutes, until the crust is golden brown. Let cool for 15 minutes, then slice and serve with a scoop of vanilla ice cream.: Light, careful handling keeps the butter pieces intact and results in a tender crust after baking. As you form the disc you should notice coolness from the butter and a slightly coarse surface texture. Over kneading warms the dough and merges the fat into the flour, creating a dense, biscuit like texture rather than flaky pastry, so be gentle and brief with any shaping motions.
- You want to see small bits of butter throughout your dough: Those small chilled pockets will melt in the oven and create steam, separating layers of baked flour into flaky sheets. Keep an eye on the dough for visual confirmation that the butter is still in visible pieces rather than absorbed. If your kitchen is warm, chill the dough longer to maintain those pockets; insufficient chilling is the most common reason for a flat, greasy crust.
- Wrap the disc in plastic wrap and let rest in the refrigerator for 15 minutes: Cooling the dough firms the butter so the crust will puff and flake when baked; you will feel the dough become more solid after chilling. This rest period also relaxes any gluten strands formed during mixing, making rolling easier. Rushing this step often results in a tough crust, so resist the temptation to roll too soon. If you need more time, the dough can chill for up to an hour.
- While the dough is resting, prepare the filling: The aroma of fresh stone fruit being handled is immediately rewarding, and preparing the filling while the dough chills is efficient. Pit and slice the fruits to similar thicknesses so they cook uniformly, and combine them with sugar and the lemon juice in a bowl to macerate. A common error is slicing unevenly, which leads to some pieces overcooking while others remain firm.
- Pit and slice all stone fruit: The tactile act of pitting and slicing releases fragrant juices and sets the stage for how the filling will feel and look once baked. Cutting pieces to a consistent size ensures even cooking and a cohesive texture in every bite. Be mindful of stone fragments, especially with cherries and apricots, as stray pits can ruin a bite; take a moment to double check pits and stems.
- I cut the cherries in half, and others into even slices: Halving cherries helps them integrate smoothly into the mix without creating large pockets, while slicing larger fruits yields a pleasing layered look. This method also controls how much juice each fruit releases, avoiding a soggy center. Overstuffing the filling with uneven chunks can prevent the crust from folding properly and lead to spillage during baking.
- Add sliced fruit to a medium bowl with sugar and lemon juice, gently tossing to combine: You will hear a soft rustling as the fruit moves and see juices start to glisten; that is when sugar begins to draw moisture out of the fruit, creating a glossy, syrupy coating. Gentle tossing preserves the texture of the fruit so it does not become mashed. Vigorous stirring can bruise delicate pieces and create an overly runny filling, so handle the mixture with care.
- Let sit for 10 minutes: Allowing the fruit to rest gives time for sugar and lemon to extract flavor and moisture, which will concentrate in the filling during baking. You will notice the bowl collecting fragrant juices, an important sign that the fruit is macerating properly. Skipping this step risks a filling that lacks depth and does not release enough juices to meld with the spices.
- Add ginger, vanilla and flour, gently stirring until combined: When you fold in grated ginger , a warm, zesty scent rises and complements the fruity perfume; the vanilla brings a rounded sweetness while the extra tablespoon of flour helps the juices thicken. Stir just until incorporated so you preserve fruit texture. A mistake to avoid is adding the flour too early, which can clump and create dry pockets instead of absorbing juices evenly.
- Set aside: After combining, set the filling aside while you preheat the oven and roll the dough; the flavors continue to marry and the juices settle. The mixture should be glossy and slightly saucy, not syrup puddles. Leaving it too long without stirring may allow heavier juices to pool at the bottom, so give it a final gentle fold before assembling if needed.
- Preheat the oven to 425°F and place a rack in the middle position: You will feel the oven hum as it warms, and reaching 425°F ensures a quick oven rise that crisps the crust while gently cooking the fruit. A hot oven promotes caramelization at the edges and a flakier crust, so be patient while it heats. Putting the galette in a cooler oven can cause the fruit to steam excessively and the crust to become soggy instead of golden.
- Line a rimmed baking sheet with parchment paper or a silpat and set aside: Preparing a lined baking sheet prevents sticking and collects any juices that bubble over, keeping your oven clean. The parchment also helps the galette slide off easily after baking. Forgoing a rimmed sheet risks spillover and hard to clean caramelized sugars in the oven.
- Return the disc to a floured work surface and roll out to a 12" diameter: As you roll, you should see the dough thin and feel the small cold butter pieces beneath the surface, which is a good sign the crust will be flaky. Rotate the dough occasionally to maintain an even circle and add minimal flour to prevent sticking. Rolling too thin will make the crust fragile and may cause tearing during transfer.
- This doesn't have to be perfect: The charm of a galette is its imperfect, rustic look, so embrace slight asymmetry. Visual cues such as an even thickness and visible butter pockets matter more than a precise circle. Trying to force symmetry often results in over handling, which warms the dough and reduces flakiness.
- Carefully transfer the dough to the prepared baking sheet: Use a wide spatula or roll the dough gently onto the rolling pin and lift it to the sheet; you will notice the dough retaining its coolness and pliability. Take care not to stretch the crust, as that can cause it to shrink while baking. A common mistake is lifting by one edge only, which can cause tearing and uneven thickness.
- Spoon all fruit and juices into the center of the dough, forming a 7 to 8-inch circle: The filling should look juicy but contained, with the fruit arranged so the center is slightly piled to prevent run off. Leave a visible border for folding, about 2 inches, so you can pleat the dough neatly. Overfilling is the most frequent error here, as it can cause leaking and a soggy rim.
- Fold the dough up around the filling: Folding creates a protective edge that keeps the filling in while allowing steam to escape, resulting in a nicely browned crust. As you fold, the dough layers will press lightly together, forming pleats that look artisanal without needing perfect precision. Forgetting to leave enough border before folding will make pleating awkward and could press fruit out.
- Start by folding one edge across the filling: Begin with a single fold, pressing lightly where it meets the filling, and you will hear a soft, flaky rustle as the layers meet. This initial fold anchors the shape and sets the rhythm for the rest of the pleats. Folding too tightly will compress the layers and reduce the final flakiness.
- Fold an adjacent edge the same way: Alternate folds to form even pleats around the galette, and visually you will see a charming rustic border forming. Keep the folds loose enough to allow for expansion while baking. Pulling the dough taught will cause the crust to shrink back during baking and may squeeze out juices.
- There will be a pleat between the two edges: These pleats are attractive and functional, and as you continue around the galette they create a series of overlapping folds that hold the filling. The texture of the dough at the pleats should be firm but not compressed. If pleats tear, patch them gently with excess dough rather than stretching.
- Repeat this process around the entire galette: Continue folding methodically until the filling is encircled, and the visual rhythm of pleats will feel satisfying and deliberate. The result should be a rustic, stable edge that crisps up beautifully. Rushing can lead to uneven pleats and a less appealing finish.
- Dot the top of the filling with butter bits: Small pieces of butter on top will melt and create pockets of decadent richness and slight caramelization on the fruit, adding glossy highlights to the finished galette. Scatter evenly so each wedge benefits. Using cold butter ensures it does not immediately melt into the fruit before baking.
- Brush egg-water mixture lightly over the exposed dough (egg wash): Brushing a thin coat of the beaten egg and water mixture will give the crust a shiny, golden finish and help the turbinado sugar adhere. Use a soft brush and avoid sloshing the wash into the filling, as too much moisture can cause soggy edges. A heavy hand here can weigh down the dough and prevent crisping.
- Sprinkle everything with turbinado sugar: The coarse turbinado sugar adds delightful crunch and sparkle to the crust, and when it melts slightly it gives a caramelized note to the edges. Sprinkle lightly and evenly for texture contrast. Over application can lead to overly sweet, gritty patches on the crust.
- Bake galette for 18 to 20 minutes, until the crust is golden brown: As it bakes, you will hear a gentle crackle from the crust and smell the mingling of baked flour , caramelized fruit , and warm spices. The visual cue is a deep golden rim and bubbling juices in the center. A common error is removing it too early; underbaked crust will be pale and lack crispness, while overbaking can dry the fruit.
- Let cool for 15 minutes, then slice and serve with a scoop of vanilla ice cream: Cooling allows the juices to thicken slightly so slices hold their shape, and the fragrant steam will settle into a warm, inviting aroma. Serving with cold vanilla ice cream creates a hot and cold contrast that elevates the experience. Cutting too soon can lead to juices running out and messy slices, so patience pays off.
Ways to Adapt This Recipe
This section offers practical variations and adjustments to suit your pantry, dietary needs, or the fruit you find at market. Each tip starts with a bold phrase to guide quick decisions and then expands the idea into a usable adaptation.
- Swap fruit combinations: Use any mix of ripe stone fruit you have on hand, such as peaches and apricots, to vary sweetness and texture, keeping total volume the same so the baking behavior remains consistent.
- Adjust sugar to taste: If your fruit is very sweet, reduce the added sugar slightly to prevent an overly sugary syrup; conversely, tart fruit benefits from the full amount for balance.
- Make-ahead dough: Prepare the crust dough in advance and refrigerate for up to two days or freeze for longer storage, thawing in the fridge before rolling to maintain cold butter pockets.
- Stabilize juicy fillings: If your fruit is exceptionally juicy, increase the additional tablespoon of flour by a small amount to help absorb excess liquid and keep slices tidy.
- Gluten free option: Substitute an equal measure of a gluten free all purpose flour blend, and handle gently since gluten free doughs can be more fragile when rolling.
- Make individual galettes: Divide the dough into smaller discs and make single serving galettes for a pretty presentation and quicker bake times, watching closely for doneness.
Serving Suggestions
This galette is versatile for casual meals and special occasions, and here are thoughtful ways I like to present it depending on the moment. The list focuses on pairing ideas, serving styles, and storage guidance to keep slices tasting their best.
- Warm with vanilla ice cream: Serve slices warm and add a scoop of cold vanilla ice cream for a classic hot and cold contrast that enhances texture and flavor.
- Simple afternoon treat: Offer the galette on its own with coffee or tea for a relaxed afternoon when you want something light but satisfying.
- End of summer dinner dessert: Finish a seasonal dinner with a wedge of galette, letting the rustic look and fresh stone fruit flavors complement a simple main course.
- Potluck friendly: Transport the galette on its baking sheet and serve at room temperature; it travels well and slices easily for sharing.
- Storage short term: Keep leftover slices covered at room temperature for up to a day, or refrigerate for up to three days, reheating briefly to restore crispness.
- Freezing option: Freeze unbaked assembled galette wrapped tightly, then bake from frozen adding a few extra minutes to the bake time, which is handy for planning ahead.
FAQ
Conclusion
This galette stands out for its combination of flaky, buttery crust and bright, aromatic stone fruit filling with ginger and vanilla. Give it a try when summer fruit is at its peak, and enjoy how the simple technique yields a dessert that looks and tastes special. It is an easy recipe to make ahead or adapt, and sharing warm slices with friends or family always feels rewarding and cozy.

Stone Fruit Galette with Ginger and Vanilla
Equipment
- Food Processor
- Baking Sheet
- Parchment Paper
- Mixing Bowl
- Rolling Pin
Ingredients
- 2 cups flour Provide structure and body to the dough, creating a tender yet sturdy crust that holds the filling; measure accurately for proper texture, whisking or sifting if needed to remove lumps; combine with salt and butter using a pastry cutter or fingertips until coarse crumbs form.
- 1/4 teaspoon fine grain sea salt Enhance overall flavor balance by seasoning the pastry dough lightly, drawing out sweetness in the fruit and highlighting buttery notes; distribute evenly through the flour before cutting in the butter to ensure consistent taste.
- 1 stick (1/2 cup) cold butter, cubed Contribute rich fat for flakiness and flavor; keep cold and cubed, incorporating quickly into the flour to create layers in the pastry; handle minimally to avoid melting and to retain flaky texture.
- 3 tablespoons cold water, plus more as needed Bind dry ingredients into a cohesive dough without overworking, providing necessary hydration while maintaining pastry tenderness; add gradually and chill if dough becomes too warm, adding more as needed for proper consistency.
- 1 pound stone fruit (such as peaches, nectarines, apricots and cherries) Supply the sweet, juicy filling with varied textures and flavors that caramelize when baked; pit and slice as appropriate, mixing varieties for complexity and to achieve a pleasing balance of tartness and sweetness.
- 3 tablespoons sugar Sweeten the fruit filling lightly to encourage caramelization and enhance natural fruit flavors; sprinkle and toss with the fruit so sugar dissolves and helps create a saucy interior as the galette bakes.
- Juice of 1/2 lemon Brighten and balance the sweetness in the filling with acidity, preventing cloying flavors and helping fruit retain shape; squeeze fresh and mix with the sliced fruit to keep flavors lively.
- 1 teaspoon finely grated ginger Add a warm, spicy note with fresh brightness; grate finely to distribute evenly through the filling and pair with vanilla for aromatic complexity without overpowering the fruit.
- 1/2 teaspoon vanilla extract Introduce aromatic depth and a soft, sweet perfume to the filling; stir in sparingly to complement ginger and fruit while enhancing the overall flavor profile without dominating.
- 1 tablespoon flour Thicken fruit juices released during baking to prevent a soggy crust and help the filling set; toss with the sliced fruit so it absorbs moisture and creates a cohesive interior.
- 1 teaspoon butter, cut into small bits Add small enriched butter pieces to the filling for pockets of richness and flavor; dot across the fruit before folding the pastry to create glossy, buttery accents as the galette bakes.
- 1 egg, beaten with a little water Provide an egg wash for the crust that promotes a golden, glossy finish and helps toppings adhere; beat with a little water and brush evenly before sprinkling with sugar for color and shine.
- Turbinado sugar, for sprinkling Create a crunchy, sparkling topping that enhances texture and appearance; sprinkle over the egg-washed crust edges to caramelize and add visual appeal during baking.
- Vanilla ice cream, for serving Offer a cool, creamy contrast when serving, complementing warm fruit and crisp pastry; scoop alongside slices to balance temperature and add indulgent richness.
Instructions
- To make the crust, add flour, salt and butter to a food processor and pulse until the butter is the size of peas. Sprinkle over 3 tablespoons cold water and pulse until incorporated. Drizzle in a little water and pulse until larger clumps start to form. You'll see the dough start moving away from the blade and up the sides of the processor, then falling back into the center. The mixture will look crumbly, but it should hold together when you pinch some between your fingers.: The first scents you should notice are cold butter and neutral flour as they combine visually into coarse crumbs, with small, pea sized bits of butter visible against the pale flour. Texture is everything here because those butter bits will turn to steam and make flaky layers in the oven, so work quickly and chill if your hands feel warm. A common mistake is over processing until the mixture becomes pasty, which reduces flakiness; stop pulsing once pea sized pieces remain. If you do not have a food processor, you can use a pastry cutter but the goal remains the same, coarse crumbs with visible butter.
- Turn the dough out on to a floured work surface and form into a flat disc. Do not over work here. You want to see small bits of butter throughout your dough. This is the key to a perfectly flaky crust. Wrap the disc in plastic wrap and let rest in the refrigerator for 15 minutes.: When you add cold water , pulse in short bursts and watch for the dough to begin to clump without becoming wet. You want the mixture to stick together when you squeeze a bit between your fingers, but not to be overly moist. Sensory clues include the dough starting to gather into larger pieces and a slightly tacky feel; avoid adding too much water which will make the crust tough. If the dough feels crumbly, add a teaspoon of cold water at a time until it holds.
- While the dough is resting, prepare the filling. Pit and slice all stone fruit. I cut the cherries in half, and others into even slices. Add sliced fruit to a medium bowl with sugar and lemon juice, gently tossing to combine. Let sit for 10 minutes. Add ginger, vanilla and flour, gently stirring until combined. Set aside.: As you continue, you should see clusters of dough forming that lift from the blade and fall back to the center of the processor, a visual cue that the dough is cohesive but still layered. This stage preserves the integrity of those cold butter pieces so the final crust is tender and flaky. The mistake to avoid here is overworking, which makes the dough develop gluten and become chewy instead of delicate. If you notice a smooth, homogeneous dough, pause and chill the mixture to restore some firmness.
- Preheat the oven to 425°F and place a rack in the middle position. Line a rimmed baking sheet with parchment paper or a silpat and set aside.: That movement is the telltale sign of proper hydration and consistency, and you will also sense a slight change in sound as the pulses shift from grinding to clumping. The dough should still appear crumbly but should hold when pinched; this balance is crucial because it ensures pockets of butter remain. A common pitfall is waiting too long to stop pulsing and ending up with an overly smooth dough, which reduces flakiness when baked.
- Return the disc to a floured work surface and roll out to a 12" diameter. This doesn't have to be perfect. Carefully transfer the dough to the prepared baking sheet. Spoon all fruit and juices into the center of the dough, forming a 7 to 8-inch circle.: Pinching is the most reliable test, since visual cues can be misleading. The dough should compress into a single mass but break apart easily when handled, indicating the right moisture level. If it falls completely apart, it needs a touch more cold water ; if it feels sticky and soft, chill it briefly to firm up the butter . Avoid adding warm water because it will melt the butter prematurely and ruin the texture.
- Fold the dough up around the filling. Start by folding one edge across the filling. Fold an adjacent edge the same way. There will be a pleat between the two edges. Repeat this process around the entire galette. Dot the top of the filling with butter bits. Brush egg-water mixture lightly over the exposed dough (egg wash). Sprinkle everything with turbinado sugar.: You will feel the dough lending itself to gentle shaping without sticking, and the surface should be lightly floured so it slides easily under your hands. Forming a flat disc reduces handling and helps the dough chill evenly, which preserves those flaky layers. Overworking here is the usual misstep; press and fold just enough to unify the dough, then stop. Wrap the disc in plastic to prevent it from picking up fridge odors while chilling.
- Bake galette for 18 - 20 minutes, until the crust is golden brown. Let cool for 15 minutes, then slice and serve with a scoop of vanilla ice cream.: Light, careful handling keeps the butter pieces intact and results in a tender crust after baking. As you form the disc you should notice coolness from the butter and a slightly coarse surface texture. Over kneading warms the dough and merges the fat into the flour, creating a dense, biscuit like texture rather than flaky pastry, so be gentle and brief with any shaping motions.
- You want to see small bits of butter throughout your dough: Those small chilled pockets will melt in the oven and create steam, separating layers of baked flour into flaky sheets. Keep an eye on the dough for visual confirmation that the butter is still in visible pieces rather than absorbed. If your kitchen is warm, chill the dough longer to maintain those pockets; insufficient chilling is the most common reason for a flat, greasy crust.
- Wrap the disc in plastic wrap and let rest in the refrigerator for 15 minutes: Cooling the dough firms the butter so the crust will puff and flake when baked; you will feel the dough become more solid after chilling. This rest period also relaxes any gluten strands formed during mixing, making rolling easier. Rushing this step often results in a tough crust, so resist the temptation to roll too soon. If you need more time, the dough can chill for up to an hour.
- While the dough is resting, prepare the filling: The aroma of fresh stone fruit being handled is immediately rewarding, and preparing the filling while the dough chills is efficient. Pit and slice the fruits to similar thicknesses so they cook uniformly, and combine them with sugar and the lemon juice in a bowl to macerate. A common error is slicing unevenly, which leads to some pieces overcooking while others remain firm.
- Pit and slice all stone fruit: The tactile act of pitting and slicing releases fragrant juices and sets the stage for how the filling will feel and look once baked. Cutting pieces to a consistent size ensures even cooking and a cohesive texture in every bite. Be mindful of stone fragments, especially with cherries and apricots, as stray pits can ruin a bite; take a moment to double check pits and stems.
- I cut the cherries in half, and others into even slices: Halving cherries helps them integrate smoothly into the mix without creating large pockets, while slicing larger fruits yields a pleasing layered look. This method also controls how much juice each fruit releases, avoiding a soggy center. Overstuffing the filling with uneven chunks can prevent the crust from folding properly and lead to spillage during baking.
- Add sliced fruit to a medium bowl with sugar and lemon juice, gently tossing to combine: You will hear a soft rustling as the fruit moves and see juices start to glisten; that is when sugar begins to draw moisture out of the fruit, creating a glossy, syrupy coating. Gentle tossing preserves the texture of the fruit so it does not become mashed. Vigorous stirring can bruise delicate pieces and create an overly runny filling, so handle the mixture with care.
- Let sit for 10 minutes: Allowing the fruit to rest gives time for sugar and lemon to extract flavor and moisture, which will concentrate in the filling during baking. You will notice the bowl collecting fragrant juices, an important sign that the fruit is macerating properly. Skipping this step risks a filling that lacks depth and does not release enough juices to meld with the spices.
- Add ginger, vanilla and flour, gently stirring until combined: When you fold in grated ginger , a warm, zesty scent rises and complements the fruity perfume; the vanilla brings a rounded sweetness while the extra tablespoon of flour helps the juices thicken. Stir just until incorporated so you preserve fruit texture. A mistake to avoid is adding the flour too early, which can clump and create dry pockets instead of absorbing juices evenly.
- Set aside: After combining, set the filling aside while you preheat the oven and roll the dough; the flavors continue to marry and the juices settle. The mixture should be glossy and slightly saucy, not syrup puddles. Leaving it too long without stirring may allow heavier juices to pool at the bottom, so give it a final gentle fold before assembling if needed.
- Preheat the oven to 425°F and place a rack in the middle position: You will feel the oven hum as it warms, and reaching 425°F ensures a quick oven rise that crisps the crust while gently cooking the fruit. A hot oven promotes caramelization at the edges and a flakier crust, so be patient while it heats. Putting the galette in a cooler oven can cause the fruit to steam excessively and the crust to become soggy instead of golden.
- Line a rimmed baking sheet with parchment paper or a silpat and set aside: Preparing a lined baking sheet prevents sticking and collects any juices that bubble over, keeping your oven clean. The parchment also helps the galette slide off easily after baking. Forgoing a rimmed sheet risks spillover and hard to clean caramelized sugars in the oven.
- Return the disc to a floured work surface and roll out to a 12" diameter: As you roll, you should see the dough thin and feel the small cold butter pieces beneath the surface, which is a good sign the crust will be flaky. Rotate the dough occasionally to maintain an even circle and add minimal flour to prevent sticking. Rolling too thin will make the crust fragile and may cause tearing during transfer.
- This doesn't have to be perfect: The charm of a galette is its imperfect, rustic look, so embrace slight asymmetry. Visual cues such as an even thickness and visible butter pockets matter more than a precise circle. Trying to force symmetry often results in over handling, which warms the dough and reduces flakiness.
- Carefully transfer the dough to the prepared baking sheet: Use a wide spatula or roll the dough gently onto the rolling pin and lift it to the sheet; you will notice the dough retaining its coolness and pliability. Take care not to stretch the crust, as that can cause it to shrink while baking. A common mistake is lifting by one edge only, which can cause tearing and uneven thickness.
- Spoon all fruit and juices into the center of the dough, forming a 7 to 8-inch circle: The filling should look juicy but contained, with the fruit arranged so the center is slightly piled to prevent run off. Leave a visible border for folding, about 2 inches, so you can pleat the dough neatly. Overfilling is the most frequent error here, as it can cause leaking and a soggy rim.
- Fold the dough up around the filling: Folding creates a protective edge that keeps the filling in while allowing steam to escape, resulting in a nicely browned crust. As you fold, the dough layers will press lightly together, forming pleats that look artisanal without needing perfect precision. Forgetting to leave enough border before folding will make pleating awkward and could press fruit out.
- Start by folding one edge across the filling: Begin with a single fold, pressing lightly where it meets the filling, and you will hear a soft, flaky rustle as the layers meet. This initial fold anchors the shape and sets the rhythm for the rest of the pleats. Folding too tightly will compress the layers and reduce the final flakiness.
- Fold an adjacent edge the same way: Alternate folds to form even pleats around the galette, and visually you will see a charming rustic border forming. Keep the folds loose enough to allow for expansion while baking. Pulling the dough taught will cause the crust to shrink back during baking and may squeeze out juices.
- There will be a pleat between the two edges: These pleats are attractive and functional, and as you continue around the galette they create a series of overlapping folds that hold the filling. The texture of the dough at the pleats should be firm but not compressed. If pleats tear, patch them gently with excess dough rather than stretching.
- Repeat this process around the entire galette: Continue folding methodically until the filling is encircled, and the visual rhythm of pleats will feel satisfying and deliberate. The result should be a rustic, stable edge that crisps up beautifully. Rushing can lead to uneven pleats and a less appealing finish.
- Dot the top of the filling with butter bits: Small pieces of butter on top will melt and create pockets of decadent richness and slight caramelization on the fruit, adding glossy highlights to the finished galette. Scatter evenly so each wedge benefits. Using cold butter ensures it does not immediately melt into the fruit before baking.
- Brush egg-water mixture lightly over the exposed dough (egg wash): Brushing a thin coat of the beaten egg and water mixture will give the crust a shiny, golden finish and help the turbinado sugar adhere. Use a soft brush and avoid sloshing the wash into the filling, as too much moisture can cause soggy edges. A heavy hand here can weigh down the dough and prevent crisping.
- Sprinkle everything with turbinado sugar: The coarse turbinado sugar adds delightful crunch and sparkle to the crust, and when it melts slightly it gives a caramelized note to the edges. Sprinkle lightly and evenly for texture contrast. Over application can lead to overly sweet, gritty patches on the crust.
- Bake galette for 18 to 20 minutes, until the crust is golden brown: As it bakes, you will hear a gentle crackle from the crust and smell the mingling of baked flour , caramelized fruit , and warm spices. The visual cue is a deep golden rim and bubbling juices in the center. A common error is removing it too early; underbaked crust will be pale and lack crispness, while overbaking can dry the fruit.
- Let cool for 15 minutes, then slice and serve with a scoop of vanilla ice cream: Cooling allows the juices to thicken slightly so slices hold their shape, and the fragrant steam will settle into a warm, inviting aroma. Serving with cold vanilla ice cream creates a hot and cold contrast that elevates the experience. Cutting too soon can lead to juices running out and messy slices, so patience pays off.
Notes
- Swap fruit combinations: Use any mix of ripe stone fruit you have on hand, such as peaches and apricots, to vary sweetness and texture, keeping total volume the same so the baking behavior remains consistent.
- Adjust sugar to taste: If your fruit is very sweet, reduce the added sugar slightly to prevent an overly sugary syrup; conversely, tart fruit benefits from the full amount for balance.
- Make-ahead dough: Prepare the crust dough in advance and refrigerate for up to two days or freeze for longer storage, thawing in the fridge before rolling to maintain cold butter pockets.
- Stabilize juicy fillings: If your fruit is exceptionally juicy, increase the additional tablespoon of flour by a small amount to help absorb excess liquid and keep slices tidy.
- Gluten free option: Substitute an equal measure of a gluten free all purpose flour blend, and handle gently since gluten free doughs can be more fragile when rolling.
- Make individual galettes: Divide the dough into smaller discs and make single serving galettes for a pretty presentation and quicker bake times, watching closely for doneness.