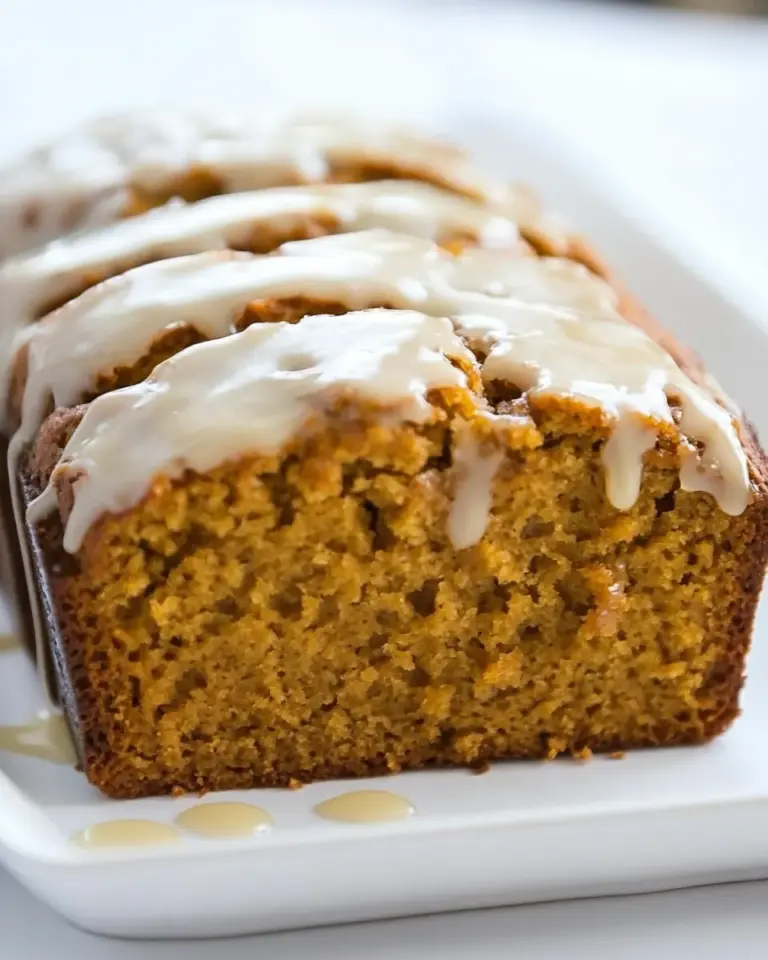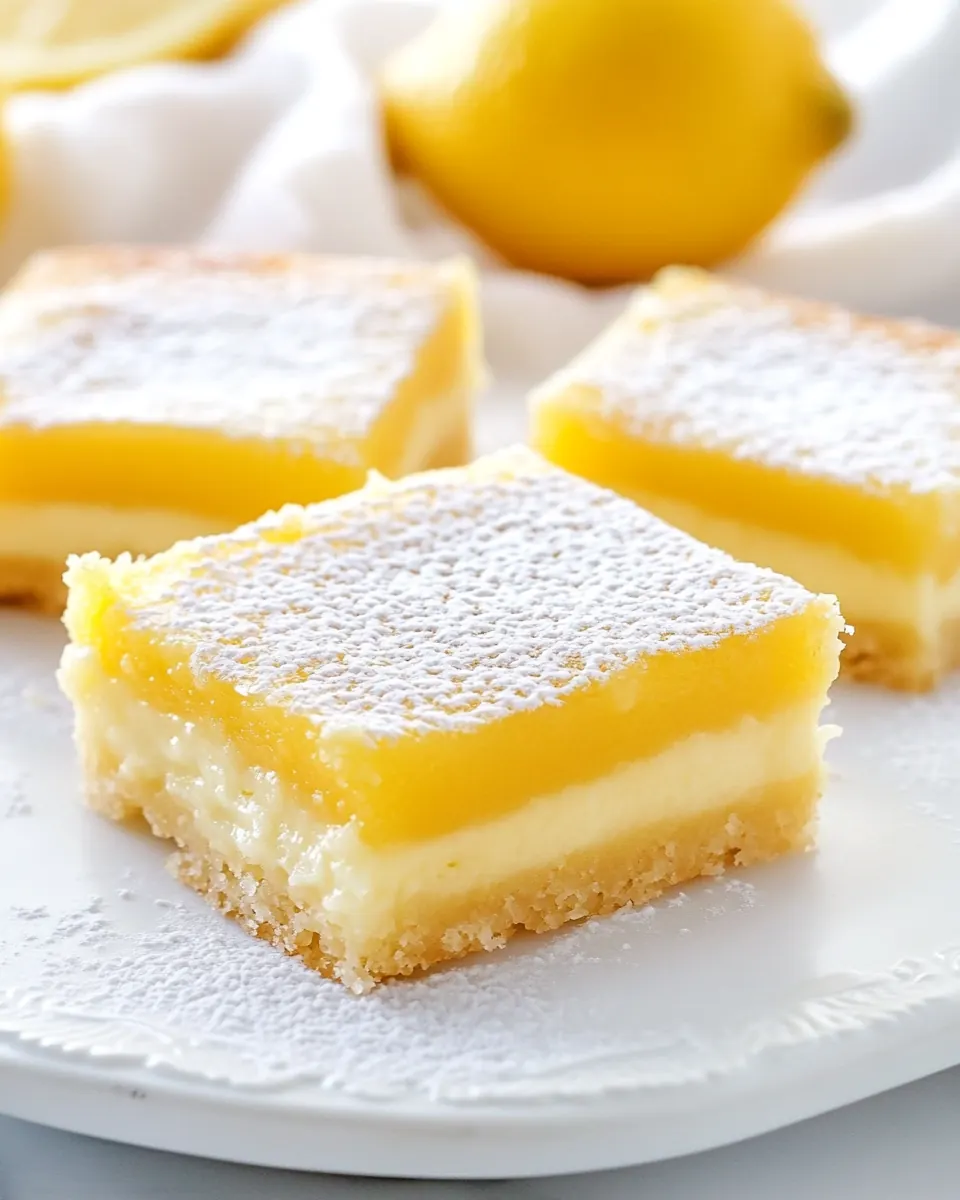
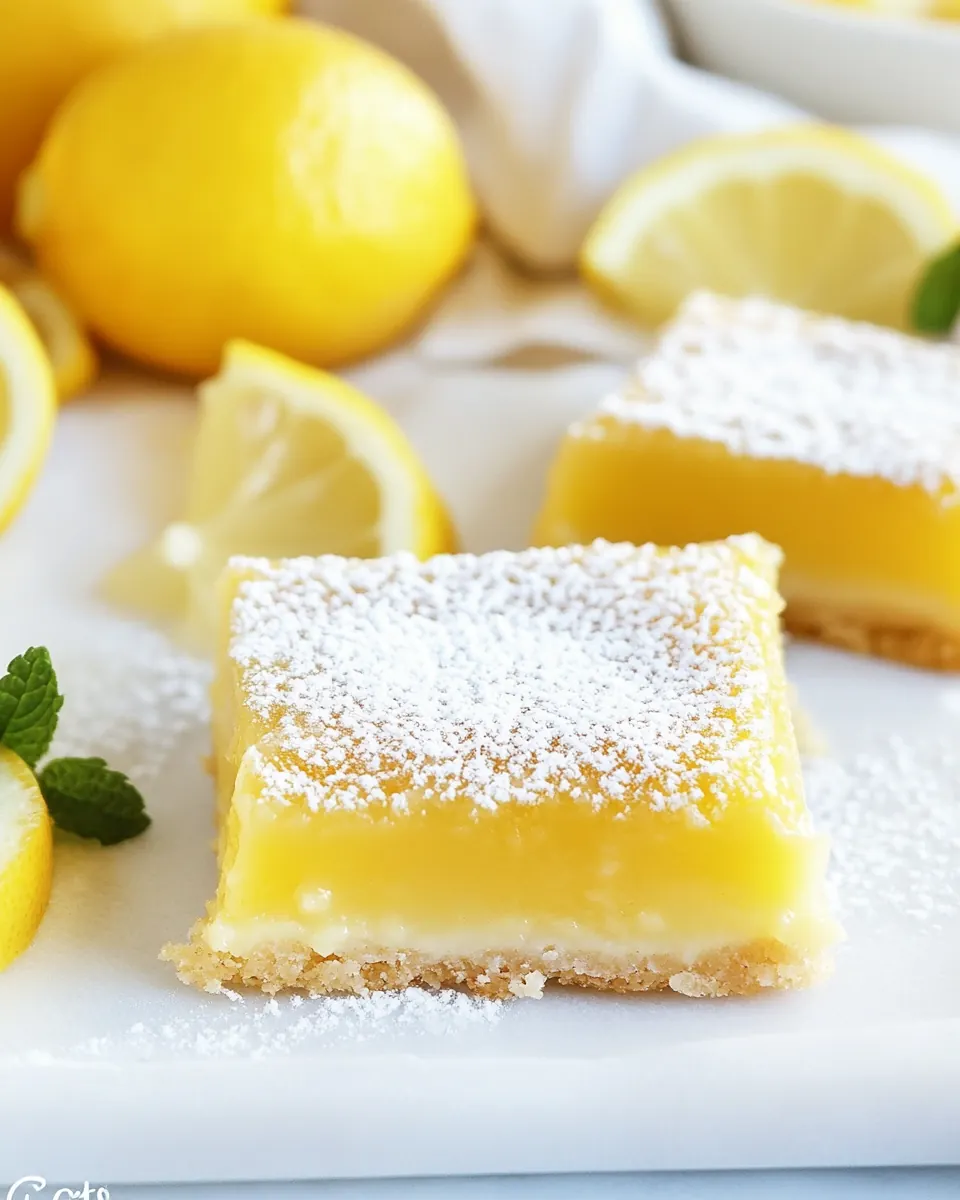
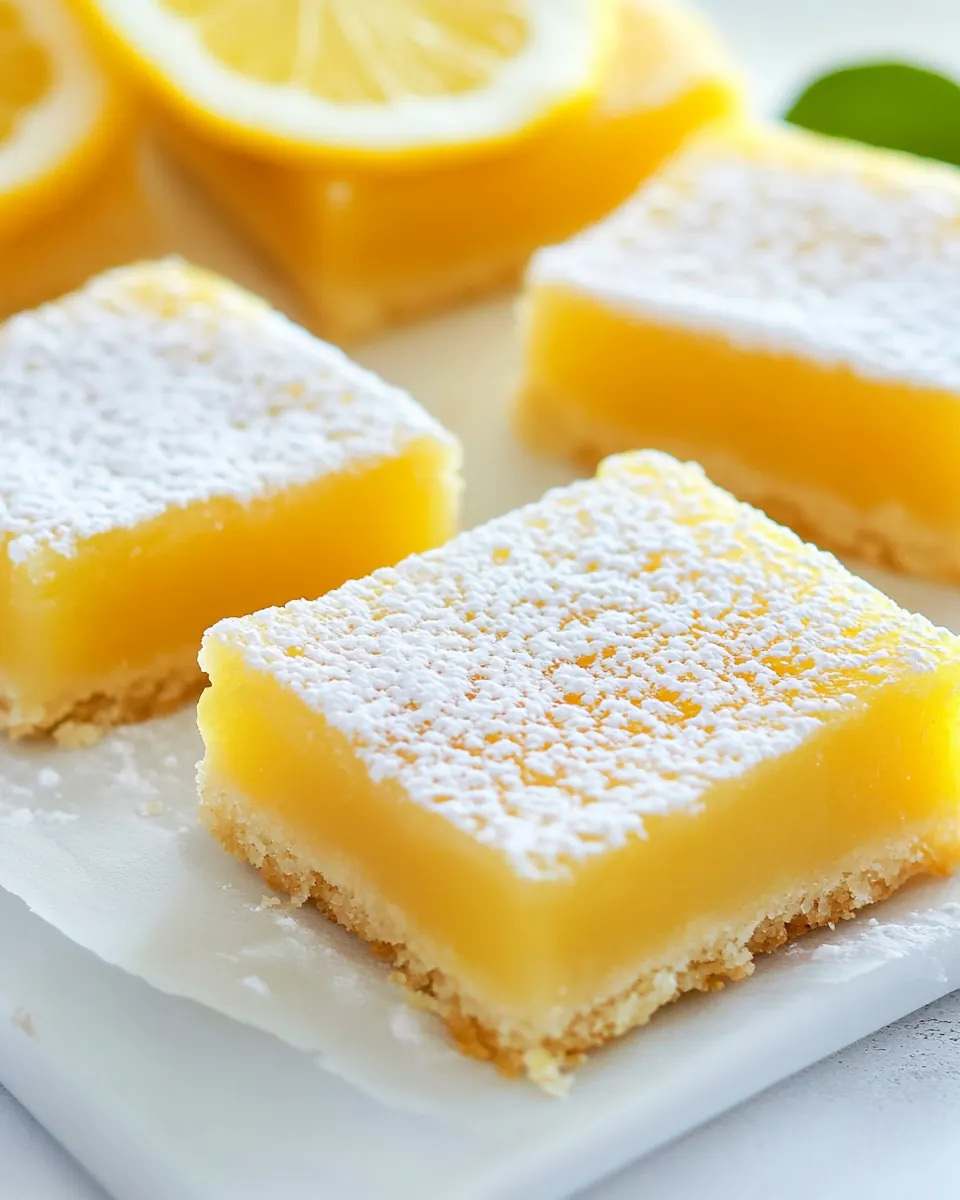
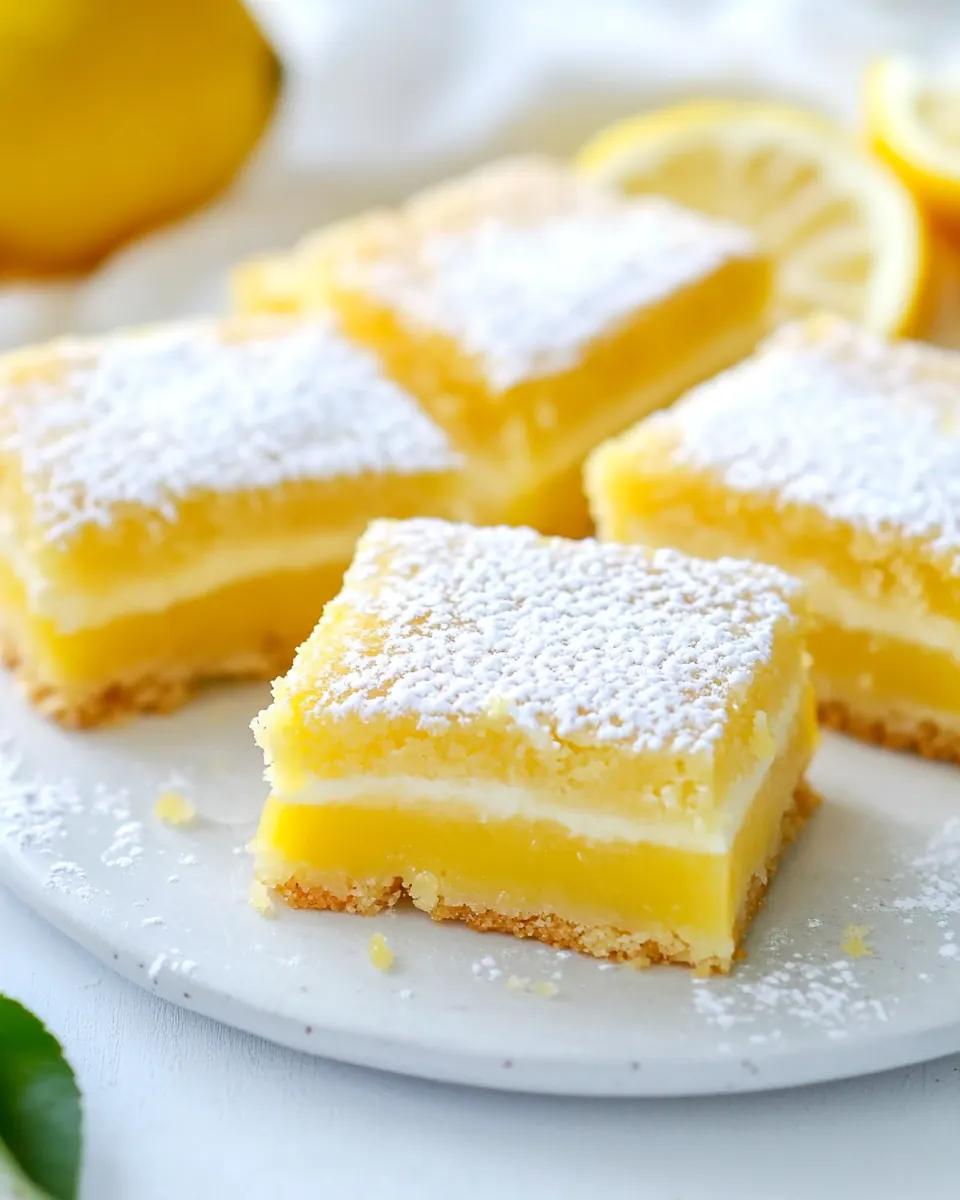
Air Fryer Lemon Squares
Air Fryer Lemon Squares have been my go to when I want a bright, tangy treat that does not demand a full oven or a whole afternoon. The first time I made these I was racing the clock between work calls and a school pickup, and the quick, citrusy bars felt like a small victory. They arrived at the table warm, with a sunlit lemon scent that pulled everyone from whatever they were doing, and that memory still makes me smile.
Over the years I have tweaked the method, and the version I share here balances a tender crust with a silky, slightly jiggly filling. I remember pressing the buttery base into a small pan and wondering if an air fryer could really deliver an even bake. It did, and the golden edges and glossy top sold me immediately. I love how the lemon comes through without being sharp, while the dusting of powdered sugar softens the tang and makes each square feel like a tiny celebration.
Recipe Snapshot
30 mins
10 mins
20 mins
Medium
210 kcal
American
Gluten-Free, Low FODMAP
Desserts
Air Fryer, 7 inch pan, Mixing bowls, Whisk, Wire rack
The Magic of This Air Fryer Lemon Squares
Bright citrus flavor that feels fresh
I love that Air Fryer Lemon Squares bring bold lemon brightness in every bite, thanks to the generous lemon juice and lemon zest. The acidity wakes up your palate, and the balance of sugar keeps the flavor friendly for all ages. When I serve these, people comment first on the lemon, and then on how smooth the filling is.
Quick and accessible baking method
Using an air fryer means you can make this dessert even when your oven is occupied. I often make them in midweek, because the total cook time is short and the process is straightforward. The small footprint of the pan means heat distributes quickly, producing a delicate set in the filling without drying it out.
Buttery, tender crust that supports the filling
The crust, made with room temperature unsalted butter and all purpose flour, presses into the pan and bakes to a tender, slightly crisp base. I appreciate how it contrasts the silky texture of the filling, giving you a satisfying bite. Over time I learned that pressing the crust evenly prevents thin spots and ensures each square slices cleanly.
Simple pantry ingredients, big impact
This recipe relies on common ingredients like white sugar, eggs, and vanilla extract, which means you can pull it together without a special grocery run. That accessibility is why I keep it in my mental rotation for gatherings. They come together fast, and the result reads like something made with care.
Make ahead friendly and easy to transport
I often refrigerate the bars a few hours before serving to let them firm up, which makes them ideal for potlucks. They travel well in a covered container, and reheating is not necessary. I appreciate recipes that let me prep in advance and still deliver a fresh tasting dessert.
Air Fryer Lemon Squares Shopping List
These ingredients come together to create a classic lemon bar, where each component plays a clear role. The crust provides a buttery, slightly crisp foundation, while the filling adds bright, creamy lemon flavor. I keep the ingredient list simple on purpose, so the lemon remains the star and the textures contrast in every bite.
- 1 cup unsalted butter room temperature: Soften to room temperature to create a pliable base for the crust; cream with sugar until light and fluffy to incorporate air and improve texture. Provide richness and flavor that balances the tart lemon filling, and help bind the flour into a tender shortbread-like layer.
- 1/2 cup white sugar: Sweeten the crust and filling, helping to dissolve into butter for a smooth texture; contribute to caramelization at the edges when baked in an air fryer. Adjust sweetness to personal preference and ensure even distribution by thoroughly mixing with butter and eggs as directed.
- 2 cups all-purpose flour: Incorporate as the primary dry structure for the crust, providing gluten and starch that form a tender, slightly crumbly base when combined with butter. Sift or whisk to remove lumps and mix evenly so the dough presses uniformly into the pan for consistent baking.
- 1 teaspoon lemon zest: Zest to release aromatic lemon oils that intensify citrus flavor without adding extra acidity; distribute finely into the filling or crust to avoid bitter pith. Elevate the overall fragrance of the bars and complement the lemon juice by contributing bright, fresh notes.
- 4 eggs room temperature: Bring to room temperature so eggs emulsify properly, creating a smooth, homogenous filling; whisk with sugar to set when baked, contributing structure and a custard-like texture. Provide moisture and protein that help the lemon layer hold together once cooled.
- 1 1/2 cup white sugar: Sweeten the lemon custard and balance the tartness of lemon juice; dissolve with eggs to form a silky filling that sets upon baking. Fine granulated sugar also aids in achieving a glossy surface and pleasant mouthfeel in the finished bars.
- 1/4 cup all-purpose flour: Thicken the lemon filling slightly and help it set by adding a small amount of starch and structure; blend thoroughly to prevent lumps and ensure a smooth, velvety consistency. Complement the eggs' coagulation to produce a stable, sliceable curd.
- 1/2 cup lemon juice: Provide the primary acidic, citrus flavor that defines lemon squares; combine with sugar and eggs to create a tangy, bright custard that contrasts the buttery crust. Adjust quantity for desired tartness and strain if necessary to remove pulp for a smooth filling.
- 1 teaspoon vanilla extract: Enhance the aromatic profile of the filling with warm, sweet notes that round out lemon's acidity; stir in sparingly to avoid overpowering citrus flavors. Pair with zest and juice to create a balanced, nuanced lemon square flavor.
Making This Air Fryer Lemon Squares
These steps lean into sensory cues and small techniques that make the difference between so so bars and truly memorable ones. I guide you through pressing the crust, spotting the golden cues, and judging the filling set. I like to narrate these parts so you can trust what you see and feel at every stage.
- In a large bowl mix the butter, flour, lemon zest, and sugar. Once smooth and fully combined, press into a 7-inch pan that would fit in your air fryer.: The bowl will fill with the faint aroma of lemon zest as the ingredients come together, and the texture should shift from crumbly to cohesive as the unsalted butter integrates with the all purpose flour and white sugar . You want to feel a soft, malleable dough that presses easily, not a greasy puddle. Why this matters, the right texture ensures the crust bakes into a tender yet sturdy base that supports the filling. A common mistake is overworking the mixture, which can activate gluten and create a tougher crust. If the dough seems too dry, lightly press with a warm hand to help it bind, rather than adding more liquid.
- Transfer the pan to the air fryer and cook for 7-8 minutes at 320 degrees F until golden brown, after that remove it and set it aside.: As you press the mixture into the pan, listen for a faint squeak from the bottom of the glass or metal as you flatten it, and watch for an even, smooth surface without cracks. Even pressure is important to avoid thin spots that brown too quickly. This matters because an uneven crust can lead to uneven baking, with some pieces overly crisp and others underbaked. A typical error is leaving thin edges, which can burn, so press the dough up the sides slightly for a uniform border. Use the bottom of a heavy glass to smooth and compact the base for a firm result.
- In a large bowl mix together the eggs, sugar, flour, vanilla, and lemon juice whisk until smooth.: You will notice the crust develop a pale golden color around the edges and a slightly firmer feel under your fingertips when it is ready. The smell of browned butter and baked flour becomes pronounced, and that aroma signals proper progress. Heating at 320 degrees F gives the crust time to set without rushing the edges to burn. This technique prevents a soggy bottom once the filling is added. A common misstep is leaving it in too long; the crust should be lightly golden not deeply browned, so check early and often.
- Pour the filling over the baked crust and air fry at 320 degrees F, for 12-14 minutes, or until set.: As you whisk, the mixture will go from chunky to glossy, and you should see tiny bubbles form on the surface when it is well blended. The combination should smell bright and slightly sweet, and the texture should be silky, not lumpy. The reason this step matters is that a smooth filling yields a uniform custard that cooks evenly, avoiding spots that curdle or remain unset. A pitfall is underwhisking which leaves lumps of flour or pockets of unmixed egg. Scrape the bowl sides and whisk until the mass is homogenous.
- The bars will harden more as they cool.: When you pour, the filling will spread like satin across the crust, and you will hear a soft thud as it settles into corners. As it cooks, the top will change from glossy to slightly matte and the center will jiggle gently, like a very soft custard, when nudged. The set is reached when the edges no longer wiggle and the center has a slight wobble. Cooking at 320 degrees F ensures the filling firms slowly, preventing cracking. A frequent error is overbaking until the top cracks or becomes dry, so aim for that gentle wobble when you test.
- Remove from the air fryer and cool on a wire rack. After that refrigerate for a few hours.: Expect the texture to change noticeably as they come down from the heat, going from a tender, slightly jiggly custard to a sliceable, firm bar. The cooling process concentrates flavors and helps the filling achieve the classic lemon bar texture. This step matters because slicing warm bars leads to messy pieces. One misstep is trying to slice too early, which results in sloppy edges; be patient and allow time for the bars to firm.
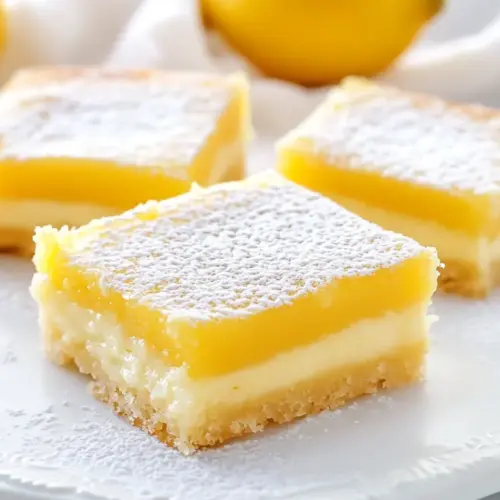
- Dust with powdered sugar, slice and serve.: Allowing the pan to sit on a wire rack encourages airflow under the pan, so the bottom does not trap steam and get soggy. You will notice the residual heat continue to set the filling, and tiny steam wisps may rise for a few minutes. This strategy preserves texture and prevents a wet base. A common oversight is leaving the bars in the hot pan on a solid surface, which can cause condensation and soften the crust.
- After that refrigerate for a few hours: Chilling firms the bars completely and makes slicing neat and clean, which is especially useful if you want tidy squares for serving. The chilling step deepens the lemon flavor as the sugars and acids meld. A typical error is skipping refrigeration and attempting to serve immediately, which leads to sloppy, misshapen pieces. Plan ahead so the bars have adequate cold time for best presentation.
- Dust with powdered sugar, slice and serve: The final dusting adds a soft sweetness and a contrast in appearance, creating a delicate white top against the yellow filling. Use a fine mesh sieve to achieve an even layer, and slice with a warm, clean knife for precise squares. This finishing touch enhances both taste and aesthetics. A mistake is using too much powdered sugar which masks the lemon; a light dusting is all you need.
Tips and Variations
I like to offer small variations and practical pointers that keep the core technique intact while letting you adapt to what you have on hand. These tips are drawn from repeated tests and small adjustments that made a meaningful difference for texture and flavor.
- Room temperature ingredients: Bringing unsalted butter and eggs to room temperature helps them blend smoothly and prevents curdling in the filling. This simple step yields a silkier texture and more consistent bake.
- Even crust pressing: Use the bottom of a heavy glass to pack the crust evenly, which prevents thin spots that can burn. A uniform base ensures each square has the same balanced crunch and support for the filling.
- Pan choice matters: A glass or oven safe dish that fits your air fryer basket promotes even heat distribution. Avoid oddly shaped pans that create hot pockets and inconsistent set.
- Watch the wobble: When the filling is mostly set with a slight center wobble, pull it from the air fryer. Residual heat finishes the set without drying the custard, preventing a chalky texture.
- Light dusting: Use a fine sieve for powdered sugar to achieve an even, delicate finish. A heavy hand can mute the lemon brightness, so aim for a whisper of sweetness.
How to Serve Air Fryer Lemon Squares
These bars are versatile for many occasions, from casual coffee breaks to festive dessert spreads. I usually serve them chilled or room temperature, and they pair beautifully with a hot beverage or a simple fruit plate. Below are practical serving ideas and storage notes to help you plan.
- Serve chilled or room temperature: Chilling yields clean slices and a firmer texture, while room temperature enhances the custardy mouthfeel. Choose based on your desired texture.
- Pairings for casual snack: Offer the bars with a cup of tea or coffee for mid afternoon treats. The brightness of the lemon juice pairs especially well with milky beverages.
- Occasions: These are great for brunch, potlucks, or Ramadan if you are sharing a sweet and citrusy treat after fasting hours. Their small format makes them easy to portion and pass around.
- Make ahead and transport: Refrigerate in a single layer, or stack with parchment between layers for transport. They hold up well for a few hours, making them ideal for picnics or gatherings.
- Storage: Keep chilled in an airtight container for up to four days, and bring to room temperature if you prefer a softer bite. Freezing is possible for longer storage; thaw in the refrigerator before serving.
FAQ
Conclusion
What makes these bars special is their bright lemon flavor coupled with a tender, buttery crust that comes together quickly in an air fryer. The method keeps the filling silky and the crust perfectly tender, delivering a small batch dessert that feels both elegant and effortless. Give these a try when you want a fast, crowd pleasing sweet that travels well and stores easily. I hope you enjoy their sunny flavor as much as I do, and that they become a reliable go to for sweet moments.
Air Fryer Lemon Squares
Equipment
- Air Fryer
- 7 inch pan
- Mixing Bowls
- Whisk
- Wire Rack
Ingredients
- 1 cup unsalted butter room temperature Soften to room temperature to create a pliable base for the crust; cream with sugar until light and fluffy to incorporate air and improve texture. Provide richness and flavor that balances the tart lemon filling, and help bind the flour into a tender shortbread-like layer.
- 1/2 cup white sugar Sweeten the crust and filling, helping to dissolve into butter for a smooth texture; contribute to caramelization at the edges when baked in an air fryer. Adjust sweetness to personal preference and ensure even distribution by thoroughly mixing with butter and eggs as directed.
- 2 cups all-purpose flour Incorporate as the primary dry structure for the crust, providing gluten and starch that form a tender, slightly crumbly base when combined with butter. Sift or whisk to remove lumps and mix evenly so the dough presses uniformly into the pan for consistent baking.
- 1 teaspoon lemon zest Zest to release aromatic lemon oils that intensify citrus flavor without adding extra acidity; distribute finely into the filling or crust to avoid bitter pith. Elevate the overall fragrance of the bars and complement the lemon juice by contributing bright, fresh notes.
- 4 eggs room temperature Bring to room temperature so eggs emulsify properly, creating a smooth, homogenous filling; whisk with sugar to set when baked, contributing structure and a custard-like texture. Provide moisture and protein that help the lemon layer hold together once cooled.
- 1 1/2 cup white sugar Sweeten the lemon custard and balance the tartness of lemon juice; dissolve with eggs to form a silky filling that sets upon baking. Fine granulated sugar also aids in achieving a glossy surface and pleasant mouthfeel in the finished bars.
- 1/4 cup all-purpose flour Thicken the lemon filling slightly and help it set by adding a small amount of starch and structure; blend thoroughly to prevent lumps and ensure a smooth, velvety consistency. Complement the eggs' coagulation to produce a stable, sliceable curd.
- 1/2 cup lemon juice Provide the primary acidic, citrus flavor that defines lemon squares; combine with sugar and eggs to create a tangy, bright custard that contrasts the buttery crust. Adjust quantity for desired tartness and strain if necessary to remove pulp for a smooth filling.
- 1 teaspoon vanilla extract Enhance the aromatic profile of the filling with warm, sweet notes that round out lemon's acidity; stir in sparingly to avoid overpowering citrus flavors. Pair with zest and juice to create a balanced, nuanced lemon square flavor.
Instructions
- In a large bowl mix the butter, flour, lemon zest, and sugar. Once smooth and fully combined, press into a 7-inch pan that would fit in your air fryer.: The bowl will fill with the faint aroma of lemon zest as the ingredients come together, and the texture should shift from crumbly to cohesive as the unsalted butter integrates with the all purpose flour and white sugar . You want to feel a soft, malleable dough that presses easily, not a greasy puddle. Why this matters, the right texture ensures the crust bakes into a tender yet sturdy base that supports the filling. A common mistake is overworking the mixture, which can activate gluten and create a tougher crust. If the dough seems too dry, lightly press with a warm hand to help it bind, rather than adding more liquid.
- Transfer the pan to the air fryer and cook for 7-8 minutes at 320 degrees F until golden brown, after that remove it and set it aside.: As you press the mixture into the pan, listen for a faint squeak from the bottom of the glass or metal as you flatten it, and watch for an even, smooth surface without cracks. Even pressure is important to avoid thin spots that brown too quickly. This matters because an uneven crust can lead to uneven baking, with some pieces overly crisp and others underbaked. A typical error is leaving thin edges, which can burn, so press the dough up the sides slightly for a uniform border. Use the bottom of a heavy glass to smooth and compact the base for a firm result.
- In a large bowl mix together the eggs, sugar, flour, vanilla, and lemon juice whisk until smooth.: You will notice the crust develop a pale golden color around the edges and a slightly firmer feel under your fingertips when it is ready. The smell of browned butter and baked flour becomes pronounced, and that aroma signals proper progress. Heating at 320 degrees F gives the crust time to set without rushing the edges to burn. This technique prevents a soggy bottom once the filling is added. A common misstep is leaving it in too long; the crust should be lightly golden not deeply browned, so check early and often.
- Pour the filling over the baked crust and air fry at 320 degrees F, for 12-14 minutes, or until set.: As you whisk, the mixture will go from chunky to glossy, and you should see tiny bubbles form on the surface when it is well blended. The combination should smell bright and slightly sweet, and the texture should be silky, not lumpy. The reason this step matters is that a smooth filling yields a uniform custard that cooks evenly, avoiding spots that curdle or remain unset. A pitfall is underwhisking which leaves lumps of flour or pockets of unmixed egg. Scrape the bowl sides and whisk until the mass is homogenous.
- The bars will harden more as they cool.: When you pour, the filling will spread like satin across the crust, and you will hear a soft thud as it settles into corners. As it cooks, the top will change from glossy to slightly matte and the center will jiggle gently, like a very soft custard, when nudged. The set is reached when the edges no longer wiggle and the center has a slight wobble. Cooking at 320 degrees F ensures the filling firms slowly, preventing cracking. A frequent error is overbaking until the top cracks or becomes dry, so aim for that gentle wobble when you test.
- Remove from the air fryer and cool on a wire rack. After that refrigerate for a few hours.: Expect the texture to change noticeably as they come down from the heat, going from a tender, slightly jiggly custard to a sliceable, firm bar. The cooling process concentrates flavors and helps the filling achieve the classic lemon bar texture. This step matters because slicing warm bars leads to messy pieces. One misstep is trying to slice too early, which results in sloppy edges; be patient and allow time for the bars to firm.
- Dust with powdered sugar, slice and serve.: Allowing the pan to sit on a wire rack encourages airflow under the pan, so the bottom does not trap steam and get soggy. You will notice the residual heat continue to set the filling, and tiny steam wisps may rise for a few minutes. This strategy preserves texture and prevents a wet base. A common oversight is leaving the bars in the hot pan on a solid surface, which can cause condensation and soften the crust.
- After that refrigerate for a few hours: Chilling firms the bars completely and makes slicing neat and clean, which is especially useful if you want tidy squares for serving. The chilling step deepens the lemon flavor as the sugars and acids meld. A typical error is skipping refrigeration and attempting to serve immediately, which leads to sloppy, misshapen pieces. Plan ahead so the bars have adequate cold time for best presentation.
- Dust with powdered sugar, slice and serve: The final dusting adds a soft sweetness and a contrast in appearance, creating a delicate white top against the yellow filling. Use a fine mesh sieve to achieve an even layer, and slice with a warm, clean knife for precise squares. This finishing touch enhances both taste and aesthetics. A mistake is using too much powdered sugar which masks the lemon; a light dusting is all you need.
Notes
- Room temperature ingredients: Bringing unsalted butter and eggs to room temperature helps them blend smoothly and prevents curdling in the filling. This simple step yields a silkier texture and more consistent bake.
- Even crust pressing: Use the bottom of a heavy glass to pack the crust evenly, which prevents thin spots that can burn. A uniform base ensures each square has the same balanced crunch and support for the filling.
- Pan choice matters: A glass or oven safe dish that fits your air fryer basket promotes even heat distribution. Avoid oddly shaped pans that create hot pockets and inconsistent set.
- Watch the wobble: When the filling is mostly set with a slight center wobble, pull it from the air fryer. Residual heat finishes the set without drying the custard, preventing a chalky texture.
- Light dusting: Use a fine sieve for powdered sugar to achieve an even, delicate finish. A heavy hand can mute the lemon brightness, so aim for a whisper of sweetness.