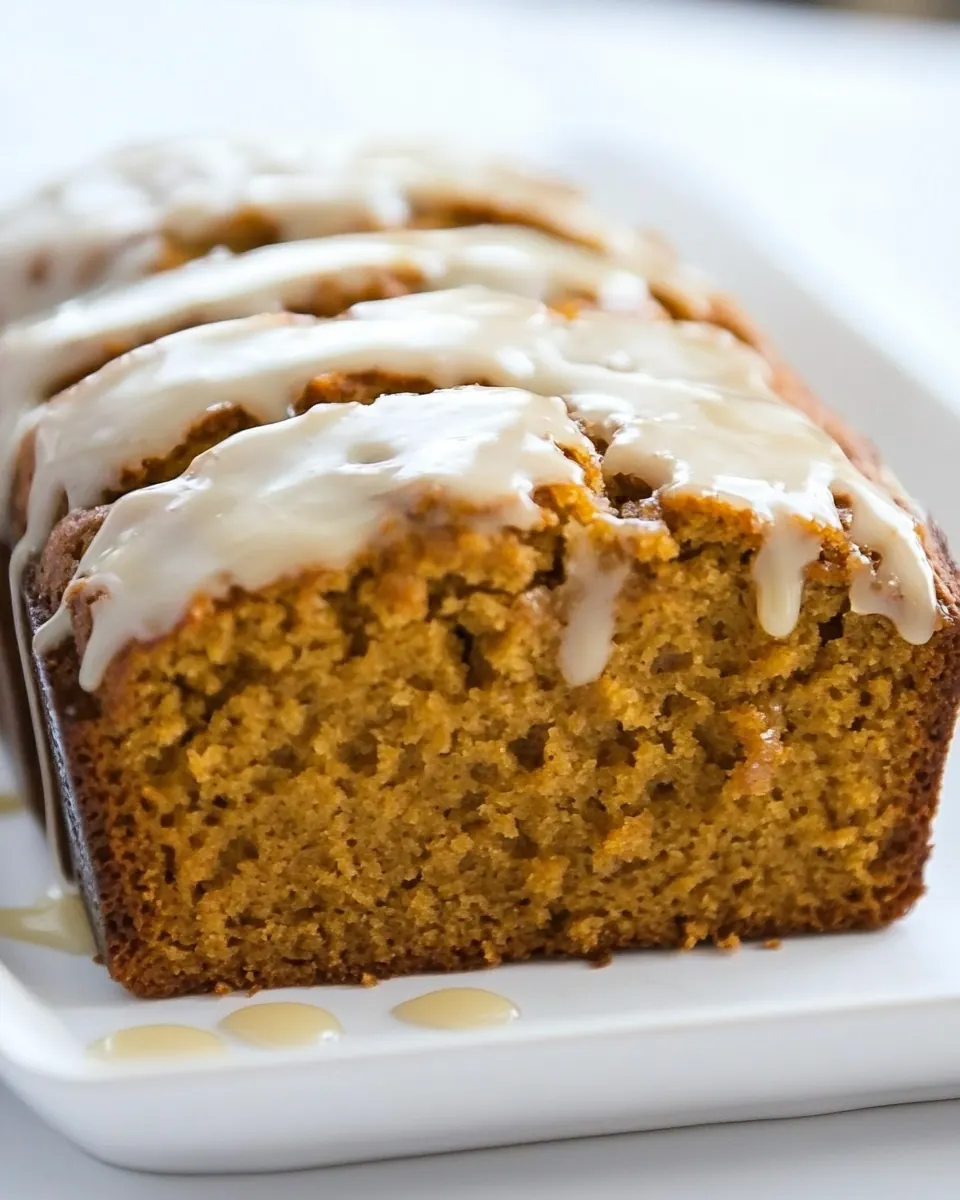
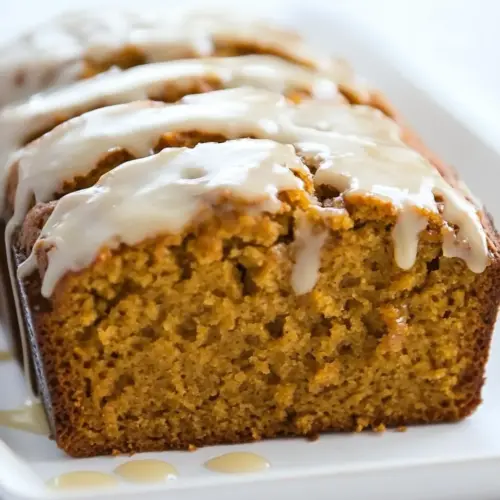
Pumpkin Bread with Brown Butter Maple Glaze
Pumpkin Bread with Brown Butter Maple Glaze is the loaf I find myself making every time the air turns crisp and my kitchen begings to smell like spice and comfort.
Years ago I baked this while juggling holiday chaos and a toddler who insisted on taste testing every batter bowl. That frantic afternoon taught me how forgiving the recipe is, how the texture still comes out tender even when life makes the timing imperfect, and how the glaze transforms a simple loaf into a moment people pause for. I remember the first time I browned the butter for the glaze and the whole house filled with nutty caramel notes that made the kids stop their playing and come sniffing. It became our unofficial family welcome sign for guests and a reliable contribution to potlucks, because it slices clean, travels well, and stays moist for days.
What I love most is the balance between the warm spices and the mellow savor of canned pumpkin, paired with the slightly crisp exterior that bakes up when you give it a little time in the oven. I often make a double batch to freeze one loaf for later, and I keep the glaze simple so it can be spooned on warm or refrigerated. Over the years I learned small tricks like checking the loaf a touch early, and how a thin glaze soaks in just enough to marry the flavors without making the bread soggy. Whether you want something to nibble with coffee, or a cozy baked good to bring to a friend, this recipe has become my go to for those cozy gatherings and quiet weekend mornings.
Recipe Snapshot
1 hr 20 mins
10 mins
70 mins
Medium
250 kcal
American
Gluten-Free, Low FODMAP
Desserts
Loaf Pan, Hand mixer
What You’ll Enjoy About This Pumpkin Bread with Brown Butter Maple Glaze
Comfort in every slice
I adore how Pumpkin Bread with Brown Butter Maple Glaze wraps the season into one loaf. The crumb is soft and yielding, and when you slice it you get that comforting, slightly moist interior that says fall. I often reach for this when I want a simple way to make someone feel cared for.
Balanced flavors that arent fussy
This loaf relies on pantry staples like all purpose flour and canned pumpkin, yet it tastes layered thanks to warm spices and the maple glaze. The brown butter adds nutty complexity that rounds out the sweetness without being cloying. I find it especially satisfying when guests ask whats in it, then are surprised at how homey the components feel.
Easy to scale and share
I love that this recipe is forgiving, so you can double it or halve it depending on the need. It travels well to potlucks and keeps in the freezer for quick gifting. When I bring a loaf to gatherings, people always comment on the glazes glossy finish and the tender texture inside.
Technique that elevates the ordinary
Taking the few extra minutes to brown the butter for the glaze transforms ordinary ingredients into something richer and more refined. I like to watch the butter closely as it sizzles and turns amber, because thats the moment the aroma shifts from buttery to toasted, and I know the glaze will sing. Small techniques like that make a big difference.
Versatile for many occasions
This loaf works as breakfast, snack, or dessert, which makes it a recipe I reach for year after year. Ive served it at holiday mornings and casual midweek coffee breaks; both feel right. That versatility is a big reason I keep this in my rotation.
Shopping List for Pumpkin Bread with Brown Butter Maple Glaze
This list focuses on ingredients that create classic pumpkin loaf texture and a glossy maple glaze. I choose components that offer structure, moisture, spice, and a touch of richness. The all purpose flour and eggs give the crumb body, while pumpkin and oils supply moisture. The brown butter in the glaze is a small flourish that lifts each slice.
- 1 3/4 cups all-purpose flour: Provide structure and tenderness to the loaf by forming the flour matrix that traps air and moisture during baking; sift or whisk to avoid lumps and measure accurately for proper crumb.
- 1 teaspoon baking soda: Leaven baked goods by releasing carbon dioxide when reacting with acidic components, helping the bread rise evenly; distribute evenly with dry ingredients to prevent bitter pockets.
- 2 teaspoons ground cinnamon: Warm and aromatic spice that enhances the pumpkin's flavor and adds depth; mix thoroughly into the dry ingredients for consistent spice throughout the bread.
- 1/4 teaspoon ground cloves: Pungent spice that adds a warm, slightly sweet and aromatic note to complement cinnamon and nutmeg; use sparingly to avoid overpowering the blend.
- 1/4 teaspoon ground nutmeg: Sweet, warm spice offering a slightly nutty aroma that complements pumpkin and cinnamon; incorporate into the spice mix for balanced fall flavors.
- 3/4 teaspoons salt: Enhance and balance flavor while strengthening gluten formation slightly; measure carefully since too much salt can inhibit yeast and alter taste.
- 2 large eggs: Provide structure and moisture as a binding agent and help with leavening through steam and protein coagulation; beat lightly before adding to the batter for even distribution.
- 3/4 cup granulated sugar: Add sweetness and contribute to the bread's tenderness by interacting with wet ingredients to retain moisture; cream briefly with eggs or mix into batter until dissolved.
- 1/2 cup light brown sugar, packed: Impart a deeper, caramel-like sweetness and add moisture that enriches the crumb; pack firmly when measuring for accurate sweetness and moisture contribution.
- 1 1/2 cups canned pumpkin: Deliver moisture, density, and pumpkin flavor, contributing to the loaf's tender, rich texture; use pure canned pumpkin for consistent results and avoid pie filling.
- 1/2 cup oil (vegetable or canola oil): Supply fat for moistness and richness without overwhelming flavor; opt for neutral oils like vegetable or canola to let pumpkin and spices shine.
- 1/4 cup milk: Add a touch of dairy richness and help thin the batter slightly for a smoother texture; use standard milk for expected consistency and flavor.
- 4 tablespoons butter: Brown to develop nutty, toasty flavor notes that deepen the glaze's complexity; melt and brown carefully until golden and fragrant, then cool slightly before combining with sugar.
- 2/3 cup powdered sugar: Create a smooth, sweet glaze base that adds brightness and a silky finish to the bread; sift powdered sugar to remove lumps for a glossy result.
- 1 tablespoon pure maple syrup (not pancake syrup): Introduce maple-specific sweetness and a subtle woody flavor to complement brown butter; use pure maple syrup for authentic maple flavor rather than imitation syrups.
- 2 tablespoons milk (to thin the glaze): Adjust glaze consistency to the desired pourability while adding a touch of creaminess; add gradually until the glaze reaches a ribbon-like pourable texture.
The Process for Making Pumpkin Bread with Brown Butter Maple Glaze
This is where simple steps become sensory rituals. Take your time to notice the aromas as spices bloom and the crackle as the loaf bakes. I like to move deliberately through each stage so the texture and flavor come out as intended.
- Adjust your oven rack to the lower third position and preheat the oven to 350 F degrees. Spray a 9 x 5 inch loaf pan with non-stick spray. Set aside.: As the oven warms you should notice an even, dry heat filling the cavity, which helps the loaf develop a nicely browned top while baking through. I preheat for at least 10 minutes so the temperature stabilizes, because an oven that is not fully hot can make the loaf dense. A common mistake is relying on the dial setting alone, so I recommend an oven thermometer to confirm accuracy. The lower third placement encourages the bottom and center to cook fully without overbrowning the top. If your oven runs hot, tent with foil about halfway through baking to avoid too dark a crust.
- In a large bowl, whisk together the flour, baking soda, cinnamon, nutmeg, cloves, and salt.: When you prepare the pan, you ll feel the smooth coating cover the metal and trust it will release cleanly after baking. I prefer a light coating plus a strip of parchment for foolproof release. Skipping this step risks the loaf sticking and breaking when inverted. If you don t have spray, rub the pan with a little butter and dust with flour, tapping out excess, to achieve a similar nonstick surface.
- In a medium bowl, whisk the eggs, granulated sugar, and brown sugar together until well combined.: As you whisk the dry ingredients, the spices release their aroma and mingle into a single, fragrant blend that will flavor the entire loaf. I take care to break up any lumps so the flour and leavening are evenly distributed, which prevents pockets of uneven rise. A common error is under mixing the dry blend, which can lead to uneven spice pockets; be thorough but gentle. Whisking also aerates the dry mix slightly, contributing to a lighter crumb.
- Add the pumpkin, oil, and milk and stir to combine. Pour the wet ingredients into the dry ingredients and gently mix together just until combined (do not overmix).: Whipping these together creates a glossy, slightly pale mixture that traps air and lends lift to the loaf. You should feel the mixture thicken a little and smell the caramel notes from the brown sugar . Avoid overbeating to the point of ribbon stage, which is unnecessary here and can make the batter tough. If you notice grainy sugar after a short whisk, continue briefly until smooth.
- Pour the batter into the prepared loaf pan.: At this point the batter will be dense, silky, and spiced, with the orange hue of the pumpkin evident. Fold gently so you preserve air pockets from the eggs, which keeps the loaf tender. Overmixing is the most common issue here it develops gluten and makes the finished loaf heavy. Look for no streaks of dry flour , but expect some small lumps; that s fine for a moist crumb.
- Bake for 55-65 minutes or until a toothpick inserted in the center comes out clean.: As you pour, notice the batter s viscosity it should mound slightly rather than collapse flat. Smooth the top with a spatula for even browning. I tap the pan on the counter once to release trapped air bubbles. Filling the pan too high can cause overflow, so keep the fill level to about three quarters full. If the batter seems excessively thick, a tablespoon of extra milk can help reach a pourable consistency.
- Check the bread about 3/4 of the way through cooking and place a piece of aluminum foil on top if you feel it's getting too brown.: During baking you will hear the quiet settling and might notice the aroma of spices filling the kitchen as sugars caramelize. The surface should become golden brown and spring back slightly when touched. A common mistake is removing the bread too early; the center can be underbaked and gummy. If a toothpick comes out with a few moist crumbs that is okay, but wet batter means it needs more time. Rotate the pan halfway if your oven has hot spots, but do so gently to avoid collapse.
- Allow the bread to cool for a few minutes in the pan and then invert onto a cooling rack to cool completely.: The visual cue here is the top s color if it s deepening too quickly while the center remains underdone, shield it with foil to slow browning. You should still get a firm crust while allowing the middle to finish cooking. A mistake is adding foil too early, which can prevent proper browning altogether; only tent when the top is noticeably ahead of the interior. Watching this stage helps you learn your oven s temperament.
- While bread cools, make your glaze. Melt the butter in a small saucepan over medium-low heat.: Inverting releases a warm, steamy aroma as the loaf comes free, and the cooling rack permits air to circulate so the crust does not become soggy. Cooling completely before glazing prevents the glaze from melting into the crumb. A common error is glazing while the loaf is hot, which yields a runny finish that won t set. If the loaf sticks, slide a thin knife around the edges before inverting to help release cleanly.
- Continue cooking, watching butter carefully and swirling it in the pan until it sizzles and begins to turn amber in color, about 4-5 minutes. Watch it closely so it doesn't burn!: As the butter warms you ll hear gentle sizzling and notice it foaming. Keep the heat modest so the milk solids brown slowly, producing a toasty, nutty aroma. Rushing this step on high heat risks burning, which imparts a bitter edge. Stir gently and be ready to remove from heat the moment it reaches amber.
- Remove butter from heat and pour it into a mixing bowl. Add the powdered sugar and maple syrup and beat with electric mixers until smooth.: The moment the butter moves from foamy to amber is when the aromas deepen into caramelized, toasted notes that elevate the glaze. Swirling helps the solids brown evenly and prevents hot spots. A common mistake is walking away during browning; it can go from perfect to burnt in seconds. Pour immediately into a separate bowl to stop cooking once you see the amber hue.
- Add some milk to thin it, if necessary, or a little extra powdered sugar to thicken it until a soft glaze has formed.: Combining the browned butter with powdered sugar and maple syrup creates a glossy, silky glaze that smells nutty and sweet. Beat until you see a pouring consistency that holds slightly on a spoon. If the glaze is gritty, continue beating briefly or sift the powdered sugar first. Overbeating can incorporate too much air, making the glaze frothy instead of shiny.
- Spoon the glaze generously over top of the pumpkin loaf and let it set. Cut into slices and serve!: Adjusting the texture allows you to control how the glaze drapes over slices a thinner glaze soaks slightly into the top, while a thicker one sits luxuriously on the surface. Add milk a teaspoon at a time to avoid making it too runny. If it becomes too thin, add more powdered sugar in small amounts to restore body.
- Spoon the glaze generously over top of the pumpkin loaf and let it set. Cut into slices and serve: As the glaze lands it should cascade into soft peaks that level out with a glossy finish, making the loaf look inviting and polished. Let it set until slightly tacky so it won t smear when slicing. A common mistake is slicing immediately, which can drag the glaze and tear the crumb. Use a serrated knife and gentle sawing motions for neat slices.
Ways to Adapt This Recipe
You can gently tweak the loaf to suit dietary needs or flavor preferences, while keeping the core technique intact. Below are practical, tested adaptations you can try without losing the essence of the loaf.
- Use oil for tenderness: Keeping the specified 1/2 cup of neutral oil delivers a moist crumb that holds up over days, making it perfect for make ahead.
- Adjust sweetness with brown sugar: Slightly increasing the packed light brown sugar to 2 3/4 tablespoons more will deepen molasses notes without overwhelming the spices.
- Control glaze thickness: Add milk one teaspoon at a time to reach a pourable glaze that either soaks in a little or sits decoratively on top.
- Swap pan sizes carefully: If using a different pan, monitor baking time closely; a wider pan will reduce bake time while a narrower pan will increase it.
- Freeze for later: Wrap the cooled loaf tightly in plastic and foil to freeze for up to three months, then thaw overnight in the refrigerator for best texture.
Accompaniments for Pumpkin Bread with Brown Butter Maple Glaze
This loaf pairs well with simple accompaniments and adapts to many occasions. Below are ideas for serving, storage, and seasonal pairings to get the most out of every slice.
- Morning coffee pairing: Serve warm slices with a cup of black coffee or a milky latte for a cozy breakfast experience that highlights the spices.
- Afternoon snack setup: Arrange slices with a small bowl of yogurt for spooning, and a few toasted nuts to offer texture contrast and complementary flavors.
- Holiday brunch: Present the loaf on a wooden board alongside fresh fruit and warm beverages, making it easy for guests to help themselves during family gatherings.
- Storage tips: Keep the loaf wrapped at room temperature for up to three days, refrigerate for up to a week, or freeze for up to three months; slice before freezing for quicker thawing.
- Seasonal pairing: The loaf shines in fall and Thanksgiving spreads, fitting neatly into dessert trays or as part of a brunch buffet when paired with savory quiches or egg dishes.
FAQ
Conclusion
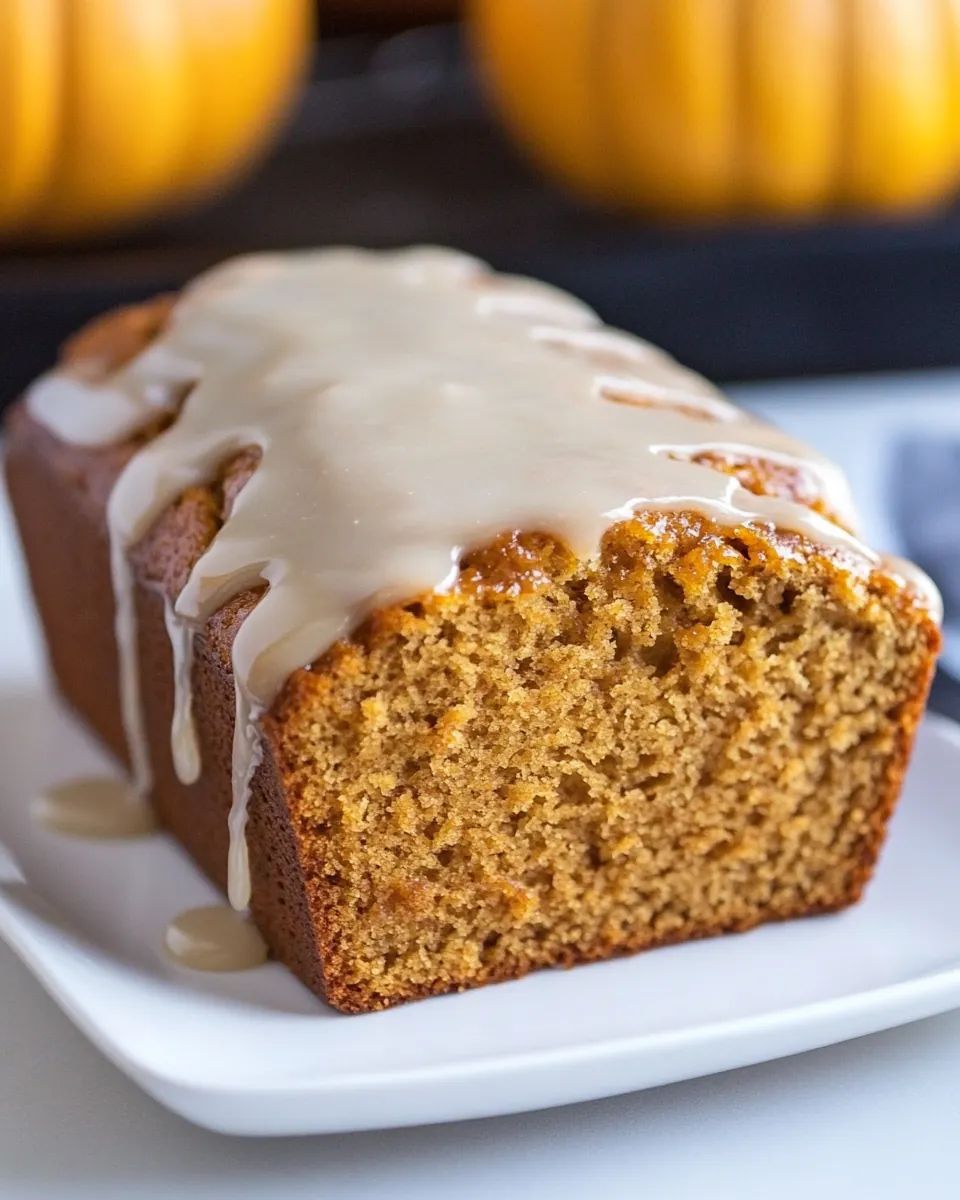
This Pumpkin Bread with Brown Butter Maple Glaze stands out for its warm spices, moist crumb, and the extra richness the browned butter glaze provides. Its a recipe I return to when I want something reliably comforting and a little special. Try it the next cool morning or for a holiday brunch, and enjoy the cozy aromas and glossy finish that make each slice feel like a small celebration.
Pumpkin Bread with Brown Butter Maple Glaze
Equipment
- Loaf Pan
- Hand Mixer
Ingredients
- 1 3/4 cups all-purpose flour Provide structure and tenderness to the loaf by forming the flour matrix that traps air and moisture during baking; sift or whisk to avoid lumps and measure accurately for proper crumb.
- 1 teaspoon baking soda Leaven baked goods by releasing carbon dioxide when reacting with acidic components, helping the bread rise evenly; distribute evenly with dry ingredients to prevent bitter pockets.
- 2 teaspoons ground cinnamon Warm and aromatic spice that enhances the pumpkin's flavor and adds depth; mix thoroughly into the dry ingredients for consistent spice throughout the bread.
- 1/4 teaspoon ground cloves Pungent spice that adds a warm, slightly sweet and aromatic note to complement cinnamon and nutmeg; use sparingly to avoid overpowering the blend.
- 1/4 teaspoon ground nutmeg Sweet, warm spice offering a slightly nutty aroma that complements pumpkin and cinnamon; incorporate into the spice mix for balanced fall flavors.
- 3/4 teaspoons salt Enhance and balance flavor while strengthening gluten formation slightly; measure carefully since too much salt can inhibit yeast and alter taste.
- 2 large eggs Provide structure and moisture as a binding agent and help with leavening through steam and protein coagulation; beat lightly before adding to the batter for even distribution.
- 3/4 cup granulated sugar Add sweetness and contribute to the bread's tenderness by interacting with wet ingredients to retain moisture; cream briefly with eggs or mix into batter until dissolved.
- 1/2 cup light brown sugar, packed Impart a deeper, caramel-like sweetness and add moisture that enriches the crumb; pack firmly when measuring for accurate sweetness and moisture contribution.
- 1 1/2 cups canned pumpkin Deliver moisture, density, and pumpkin flavor, contributing to the loaf's tender, rich texture; use pure canned pumpkin for consistent results and avoid pie filling.
- 1/2 cup oil (vegetable or canola oil) Supply fat for moistness and richness without overwhelming flavor; opt for neutral oils like vegetable or canola to let pumpkin and spices shine.
- 1/4 cup milk Add a touch of dairy richness and help thin the batter slightly for a smoother texture; use standard milk for expected consistency and flavor.
- 4 tablespoons butter Brown to develop nutty, toasty flavor notes that deepen the glaze's complexity; melt and brown carefully until golden and fragrant, then cool slightly before combining with sugar.
- 2/3 cup powdered sugar Create a smooth, sweet glaze base that adds brightness and a silky finish to the bread; sift powdered sugar to remove lumps for a glossy result.
- 1 tablespoon pure maple syrup (not pancake syrup) Introduce maple-specific sweetness and a subtle woody flavor to complement brown butter; use pure maple syrup for authentic maple flavor rather than imitation syrups.
- 2 tablespoons milk (to thin the glaze) Adjust glaze consistency to the desired pourability while adding a touch of creaminess; add gradually until the glaze reaches a ribbon-like pourable texture.
Instructions
- Adjust your oven rack to the lower third position and preheat the oven to 350 F degrees. Spray a 9 x 5 inch loaf pan with non-stick spray. Set aside.: As the oven warms you should notice an even, dry heat filling the cavity, which helps the loaf develop a nicely browned top while baking through. I preheat for at least 10 minutes so the temperature stabilizes, because an oven that is not fully hot can make the loaf dense. A common mistake is relying on the dial setting alone, so I recommend an oven thermometer to confirm accuracy. The lower third placement encourages the bottom and center to cook fully without overbrowning the top. If your oven runs hot, tent with foil about halfway through baking to avoid too dark a crust.
- In a large bowl, whisk together the flour, baking soda, cinnamon, nutmeg, cloves, and salt.: When you prepare the pan, you ll feel the smooth coating cover the metal and trust it will release cleanly after baking. I prefer a light coating plus a strip of parchment for foolproof release. Skipping this step risks the loaf sticking and breaking when inverted. If you don t have spray, rub the pan with a little butter and dust with flour, tapping out excess, to achieve a similar nonstick surface.
- In a medium bowl, whisk the eggs, granulated sugar, and brown sugar together until well combined.: As you whisk the dry ingredients, the spices release their aroma and mingle into a single, fragrant blend that will flavor the entire loaf. I take care to break up any lumps so the flour and leavening are evenly distributed, which prevents pockets of uneven rise. A common error is under mixing the dry blend, which can lead to uneven spice pockets; be thorough but gentle. Whisking also aerates the dry mix slightly, contributing to a lighter crumb.
- Add the pumpkin, oil, and milk and stir to combine. Pour the wet ingredients into the dry ingredients and gently mix together just until combined (do not overmix).: Whipping these together creates a glossy, slightly pale mixture that traps air and lends lift to the loaf. You should feel the mixture thicken a little and smell the caramel notes from the brown sugar . Avoid overbeating to the point of ribbon stage, which is unnecessary here and can make the batter tough. If you notice grainy sugar after a short whisk, continue briefly until smooth.
- Pour the batter into the prepared loaf pan.: At this point the batter will be dense, silky, and spiced, with the orange hue of the pumpkin evident. Fold gently so you preserve air pockets from the eggs, which keeps the loaf tender. Overmixing is the most common issue here it develops gluten and makes the finished loaf heavy. Look for no streaks of dry flour , but expect some small lumps; that s fine for a moist crumb.
- Bake for 55-65 minutes or until a toothpick inserted in the center comes out clean.: As you pour, notice the batter s viscosity it should mound slightly rather than collapse flat. Smooth the top with a spatula for even browning. I tap the pan on the counter once to release trapped air bubbles. Filling the pan too high can cause overflow, so keep the fill level to about three quarters full. If the batter seems excessively thick, a tablespoon of extra milk can help reach a pourable consistency.
- Check the bread about 3/4 of the way through cooking and place a piece of aluminum foil on top if you feel it's getting too brown.: During baking you will hear the quiet settling and might notice the aroma of spices filling the kitchen as sugars caramelize. The surface should become golden brown and spring back slightly when touched. A common mistake is removing the bread too early; the center can be underbaked and gummy. If a toothpick comes out with a few moist crumbs that is okay, but wet batter means it needs more time. Rotate the pan halfway if your oven has hot spots, but do so gently to avoid collapse.
- Allow the bread to cool for a few minutes in the pan and then invert onto a cooling rack to cool completely.: The visual cue here is the top s color if it s deepening too quickly while the center remains underdone, shield it with foil to slow browning. You should still get a firm crust while allowing the middle to finish cooking. A mistake is adding foil too early, which can prevent proper browning altogether; only tent when the top is noticeably ahead of the interior. Watching this stage helps you learn your oven s temperament.
- While bread cools, make your glaze. Melt the butter in a small saucepan over medium-low heat.: Inverting releases a warm, steamy aroma as the loaf comes free, and the cooling rack permits air to circulate so the crust does not become soggy. Cooling completely before glazing prevents the glaze from melting into the crumb. A common error is glazing while the loaf is hot, which yields a runny finish that won t set. If the loaf sticks, slide a thin knife around the edges before inverting to help release cleanly.
- Continue cooking, watching butter carefully and swirling it in the pan until it sizzles and begins to turn amber in color, about 4-5 minutes. Watch it closely so it doesn't burn!: As the butter warms you ll hear gentle sizzling and notice it foaming. Keep the heat modest so the milk solids brown slowly, producing a toasty, nutty aroma. Rushing this step on high heat risks burning, which imparts a bitter edge. Stir gently and be ready to remove from heat the moment it reaches amber.
- Remove butter from heat and pour it into a mixing bowl. Add the powdered sugar and maple syrup and beat with electric mixers until smooth.: The moment the butter moves from foamy to amber is when the aromas deepen into caramelized, toasted notes that elevate the glaze. Swirling helps the solids brown evenly and prevents hot spots. A common mistake is walking away during browning; it can go from perfect to burnt in seconds. Pour immediately into a separate bowl to stop cooking once you see the amber hue.
- Add some milk to thin it, if necessary, or a little extra powdered sugar to thicken it until a soft glaze has formed.: Combining the browned butter with powdered sugar and maple syrup creates a glossy, silky glaze that smells nutty and sweet. Beat until you see a pouring consistency that holds slightly on a spoon. If the glaze is gritty, continue beating briefly or sift the powdered sugar first. Overbeating can incorporate too much air, making the glaze frothy instead of shiny.
- Spoon the glaze generously over top of the pumpkin loaf and let it set. Cut into slices and serve!: Adjusting the texture allows you to control how the glaze drapes over slices a thinner glaze soaks slightly into the top, while a thicker one sits luxuriously on the surface. Add milk a teaspoon at a time to avoid making it too runny. If it becomes too thin, add more powdered sugar in small amounts to restore body.
- Spoon the glaze generously over top of the pumpkin loaf and let it set. Cut into slices and serve: As the glaze lands it should cascade into soft peaks that level out with a glossy finish, making the loaf look inviting and polished. Let it set until slightly tacky so it won t smear when slicing. A common mistake is slicing immediately, which can drag the glaze and tear the crumb. Use a serrated knife and gentle sawing motions for neat slices.
Notes
- Use oil for tenderness: Keeping the specified 1/2 cup of neutral oil delivers a moist crumb that holds up over days, making it perfect for make ahead.
- Adjust sweetness with brown sugar: Slightly increasing the packed light brown sugar to 2 3/4 tablespoons more will deepen molasses notes without overwhelming the spices.
- Control glaze thickness: Add milk one teaspoon at a time to reach a pourable glaze that either soaks in a little or sits decoratively on top.
- Swap pan sizes carefully: If using a different pan, monitor baking time closely; a wider pan will reduce bake time while a narrower pan will increase it.
- Freeze for later: Wrap the cooled loaf tightly in plastic and foil to freeze for up to three months, then thaw overnight in the refrigerator for best texture.