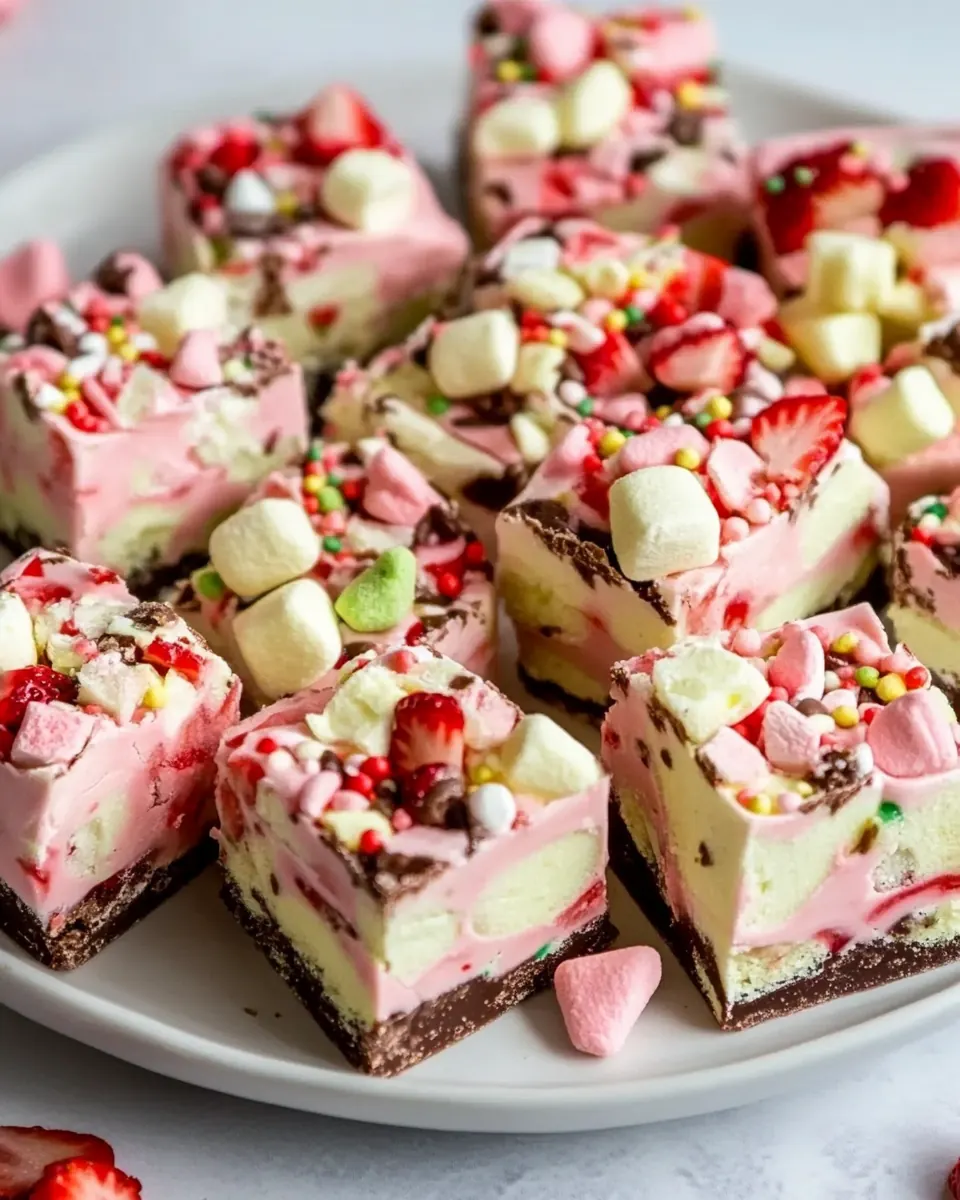
Strawberry Marshmallow Fudge
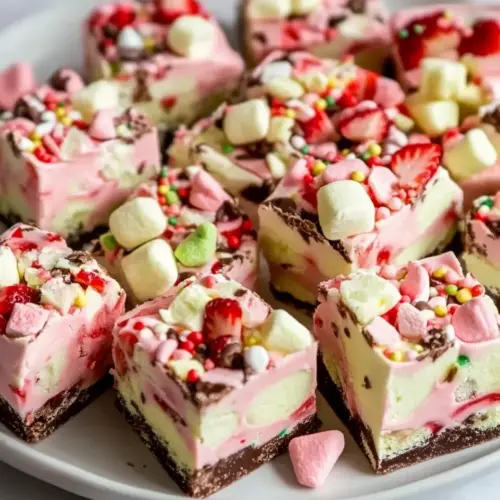
Strawberry Marshmallow Fudge came into my kitchen on a rainy spring afternoon when I needed something cheerful and slightly nostalgic to share with neighbors. I remember pulling a bowl of glossy melted chocolate from the microwave and thinking about the childhood joy of sticky fingers and tiny toasted treats, then nudging that memory into something a bit more grown up by adding chopped dried strawberries and a crunchy cereal for texture.
That first batch was a hit because it balanced playful sweetness with satisfying bite. I like how the soft, fruit flavored marshmallows anchor the base while the chocolate brings deep richness. Over several attempts, I learned when to stop stirring, how to press the mixture so the squares cut cleanly, and when to pop the pan into the fridge so the texture sets just right. Each iteration taught me a little about patience and precision, and it has become my go to when I want to gift a treat that looks festive but is easy to make.
Recipe Snapshot
2 hr 5 mins
5 mins
120 mins
Hard
150 kcal
American
Gluten-Free, Vegan
Desserts
Microwave safe bowl, 8 inch baking dish, Parchment paper, Spatula, Knife
Why This Strawberry Marshmallow Fudge Hits Different
Comfort with a twist
I adore this version because Strawberry Marshmallow Fudge feels familiar yet unexpected. The marshmallows bring that pillowy comfort we all know, while the dried strawberries add an aromatic, slightly tart note that keeps the sweetness from feeling flat.
Simple technique, impressive result
I love that you do not need fancy equipment to get a glossy, sliceable fudge. Melting chocolate chips and Nutella in short bursts yields a smooth sheen, and the method is forgiving for home cooks of any level.
Texture play
What makes this recipe stand out for me is the contrast. Soft fruit flavored marshmallows give chew, while the cocoa crisped rice cereal adds a delicate crunch. That combination keeps each bite interesting and makes the fudge feel layered rather than one note.
Customizable and festive
I often adapt this for holidays by swapping sprinkles or cereals, and the base stays reliable. The recipe welcomes small tweaks, so you can make it more chocolate forward or fruit forward and still get great results.
Make ahead friendly
Because it sets firmly in the fridge and holds shape well, I like preparing this a day ahead for parties. That means less last minute fuss, and more time to focus on presentation and company.
Ingredients for Strawberry Marshmallow Fudge
I pick ingredients that each play a clear role: the chocolates provide the lush, creamy body, the marshmallows bring chew and lift, the Nutella deepens chocolate flavor, the cereal adds crunch, and the dried strawberries contribute bright fruit notes. Together they create a balanced confection that is texturally interesting and visually appealing.
- 2 1/2 cups Campfire® mini fruit-flavored marshmallows divided: Provide chewable sweetness and fruity pockets that melt into the fudge; fold most into the chocolate base while reserving a few for topping to maintain texture contrast. Enhance color and nostalgia, contributing small bursts of strawberry flavor throughout the fudge for visual appeal.
- 12 ounces semi-sweet chocolate chips: Add rich cocoa depth and structure to the fudge; melt smoothly to create the primary chocolate matrix that binds other mix-ins together. Provide balanced bittersweet flavor to offset the marshmallow and Nutella sweetness.
- 11 1/2 ounces milk chocolate chips: Contribute creamy, milky chocolate richness and sweetness to the candy; melt with the semi–sweet chips to create a smooth, scoopable texture. Help create a softer, silkier mouthfeel and milder chocolate flavor profile.
- 1/2 cup Nutella: Introduce hazelnut-chocolate creaminess and extra fat for shine and smoothness; stir in while warm to yield a glossy, spreadable fudge consistency. Add a subtle nutty undertone that complements both chocolate and fruit flavors.
- 1/2 cup cocoa crisped rice cereal: Deliver light crunch and crisp texture as a contrast to the soft fudge; gently fold in last to retain some crispness and prevent sogginess. Also help absorb a small amount of residual moisture, aiding overall texture stability.
- 1/2 cup dried strawberries roughly chopped: Provide concentrated strawberry flavor and chewy texture that punctuates each bite; distribute evenly so pieces remain detectable without overwhelming the chocolate. Add natural fruit notes and slight tartness to balance the sweetness.
- festive sprinkles (optional): Supply a festive visual finish and optional crunchy bite for garnish; sprinkle sparingly over chilled fudge to add color and celebratory appearance. Offer negligible flavor change but enhance presentation for special occasions.
Strawberry Marshmallow Fudge Instructions
These instructions will guide you through the tactile steps to assemble, melt, combine, and set the fudge. I like to move deliberately, pausing to check the melt and texture so the final squares are glossy and sliceable.
- Line an 8-inch baking dish with parchment paper. Add 1 cup Campfire® mini fruit-flavored marshmallows into bottom of the prepared baking dish.: The scent of clean parchment and the gentle crinkle as you press it into the dish is the first small joy. Lining the pan prevents sticking and gives clean edges when you lift the set fudge out. Make sure the paper extends over the sides so you can lift the block easily, and smooth any large creases. A common mistake is using too small a sheet, so the fudge adheres to the pan and tears on removal.
- In a large microwave-safe bowl, combine the chocolate chips and Nutella. Microwave for 30 seconds and stir to combine. Continue cooking fudge in 30 second increments until the mixture is smooth.: When you layer the bowl with marshmallows they create a springy bed that stops the melted chocolate from seeping all the way to the pan. The marshmallows should glint slightly and sit evenly so the final squares have pockets of soft chew. If you heap them unevenly, the distribution of marshmallow will be lumpy, so spread them gently with your fingers or a small spatula.
- Stir in the remaining marshmallows, cocoa crisped rice cereal and dried strawberries.: When you combine the chocolate chips and Nutella you are building the flavor core. The mixture smells deeply chocolatey and nutty, and the Nutella helps the chips melt more smoothly. Use a large bowl so stirring is easy and no hot spots remain. An error here is using a bowl that is too small, which can cause uneven heating and splatter.
- Pour melted chocolate and Nutella mixture over the marshmallows in the baking dish. If desired, add festive sprinkles evenly over the fudge. Place fudge into the refrigerator until firm, about 2 hours. Cut into 1-inch squares.: At this stage the chocolate will only be partially melted and the act of stirring begins the emulsification. Stirring distributes heat and helps achieve a glossy finish. Listen for the faint quiet of the chocolate shifting consistency, and stop when you see a mostly homogeneous sheen. Overheating can make the chocolate grainy, so take short bursts and stir between intervals.
- Continue cooking fudge in 30 second increments until the mixture is smooth: Patience matters here, because the glossy melt is the difference between a silky fudge and a dull one. Each 30 second burst should be followed by a vigorous stir, scraping the bowl sides so remaining lumps melt from residual heat. The bowl will radiate warmth and the chocolate should flow like thick silk. If it looks separated or oily, reduce microwave time and stir more to coax the emulsion back together.
- Stir in the remaining marshmallows cocoa crisped rice cereal and dried strawberries: Once the chocolate is smooth, folding in the remaining marshmallows , cocoa crisped rice cereal , and chopped dried strawberries creates a mosaic of textures. You want even distribution so each square has a bit of everything. Fold gently to keep the cereal crisp and prevent marshmallows from fully dissolving. A typical slipup is over stirring which can deflate the marshmallows and make the mixture uniformly dense.
- Pour melted chocolate and Nutella mixture over the marshmallows in the baking dish: Pouring is sensory rich, watch the glossy stream of chocolate pool over the soft bed of marshmallows and then settle. Use a spatula to nudge it into corners and to press it down lightly so there are no air gaps. The surface should look even and shiny. If you press too hard you may compress the marshmallows, losing their airy quality.
- If desired add festive sprinkles evenly over the fudge: Sprinkles give a cheerful visual pop and a faint crunch. Scatter them quickly and evenly so they adhere to the warm surface before it cools. If you wait too long the sprinkles will not stick, and if you press them in they may bleed color into the top.
- Place fudge into the refrigerator until firm about 2 hours: The fridge hushes the cooling process and firms the chocolate into sliceable bars. After about 2 hours the block should feel solid when you lift the parchment, and the top will lose its glossy wet sheen. Avoid freezing right away as very rapid chilling can cause the chocolate to bloom and lose shine.
- Cut into 1 inch squares: I like the tactile satisfaction of slicing clean squares, the knife gliding through the set edge with a soft resistance. For neat cuts warm the knife under hot water and dry it between slices, wiping crumbs away. Cutting too soon leads to smooshed pieces, while waiting too long can make the fudge brittle, so aim for a firm but not rock hard set.
Substitutions and Tips
This recipe is forgiving and welcomes small substitutions while keeping the core idea intact. Below I share focused tips and practical variations to help you get consistent results and tailor the fudge to your tastes.
- Choose quality chocolate Good quality chocolate chips melt smoother and taste richer, which makes a big difference in texture and overall flavor.
- Control microwave power If your microwave runs hot, reduce power to 70 percent to avoid overheating and grainy chocolate during melting.
- Check cereal freshness Fresh cocoa crisped rice cereal keeps its crunch longer, so store it in an airtight container before folding into the mixture.
- Evenly chop dried strawberries Chop dried strawberries to uniform pieces so every square has balanced fruit pockets and you avoid big chunks that tear the parchment.
- Use divided marshmallows Reserve a portion of the marshmallows for the bottom layer, it creates air pockets that make the fudge feel lighter.
- Warm your knife between cuts Run a knife under hot water and dry it before slicing, this yields cleaner edges and less crumb.
- Press gently when assembling Use a spatula to press the surface lightly for an even top, avoid compressing the internal marshmallows which would remove their chew.
Serving This Strawberry Marshmallow Fudge
This fudge is versatile for gifting, potlucks, and dessert trays. When serving, think about color contrast and bite size so each piece is an inviting mouthful. Below are detailed serving ideas and storage notes to help you present it beautifully.
- Party trays Arrange 1 inch squares on a platter with small doilies, alternating directions so the visual pattern looks intentional and tidy.
- Gifting Stack squares in a small box lined with parchment and tie with a ribbon for a homemade gift that feels thoughtful and celebratory.
- Occasions This is great for spring gatherings, birthday parties, and casual tea times where a sweet treat is welcome; its colorful marshmallows read festive without being fussy.
- Serving size Offer one or two squares per person as a sweet bite after a meal, they pair nicely with coffee or a simple fruit salad to balance richness.
- Storage short term Keep in an airtight container in the refrigerator for up to 7 days to maintain texture and prevent melting in warm kitchens.
- Make ahead Prepare up to 3 days in advance and store chilled, then bring to cool room temperature before serving so flavors are most pronounced.
- Transport tips To avoid shifting, place parchment layers between tiers in a tin or sturdy container when carrying to events.
FAQ
Conclusion
This recipe stands out for its playful combination of textures and reliably simple technique, making it a favorite when I want a showy but low fuss dessert. I encourage you to give it a try, because the mix of soft fruit flavored marshmallows, glossy melted chocolate, and crunchy cereal creates a memorable bite that guests love. Enjoy the process of melting, folding, and chilling, and then share the sweet results with people you care about.
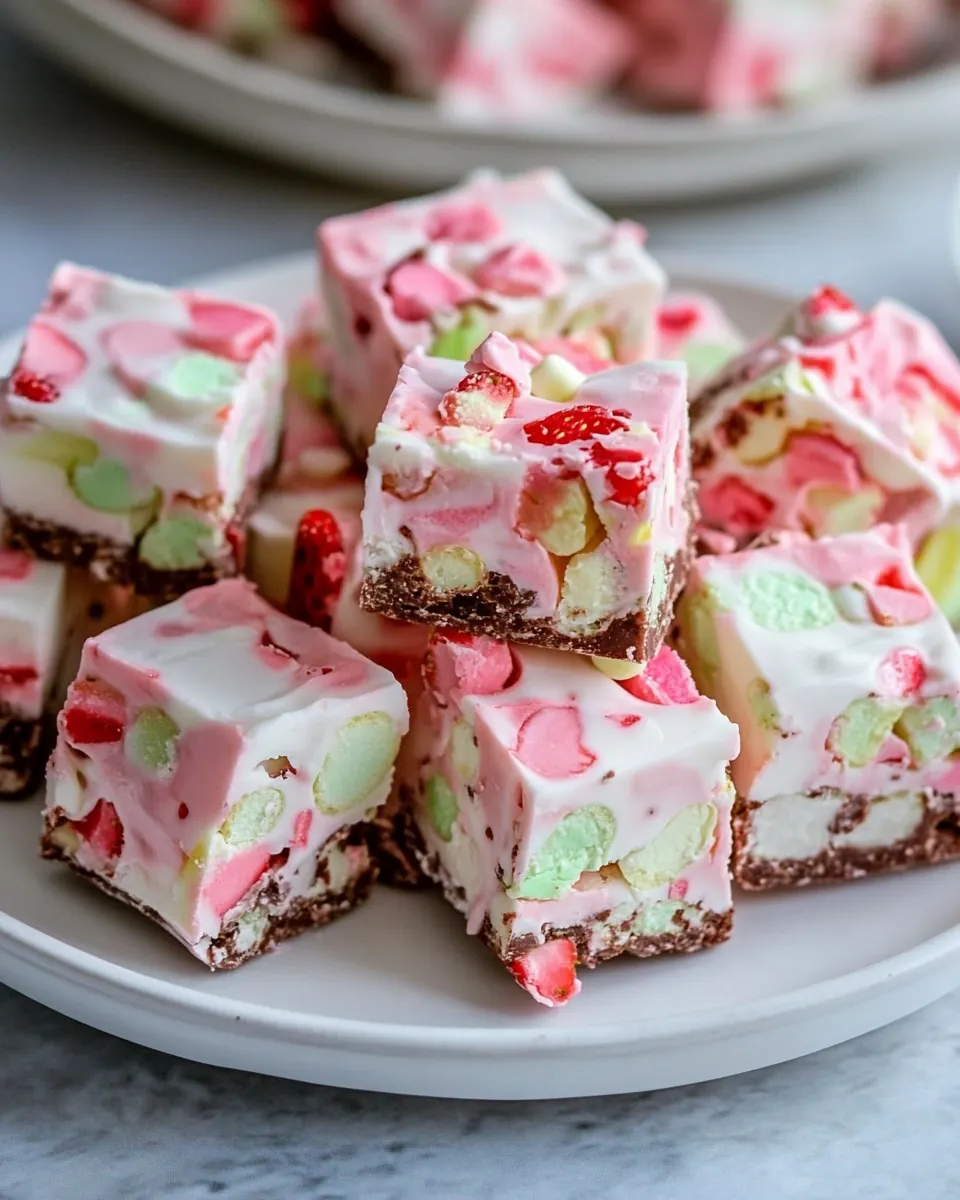
Strawberry Marshmallow Fudge
Equipment
- Microwave-safe Bowl
- 8 inch baking dish
- Parchment Paper
- Spatula
- Knife
Ingredients
- 2 1/2 cups Campfire® mini fruit-flavored marshmallows divided Provide chewable sweetness and fruity pockets that melt into the fudge; fold most into the chocolate base while reserving a few for topping to maintain texture contrast. Enhance color and nostalgia, contributing small bursts of strawberry flavor throughout the fudge for visual appeal.
- 12 ounces semi-sweet chocolate chips Add rich cocoa depth and structure to the fudge; melt smoothly to create the primary chocolate matrix that binds other mix-ins together. Provide balanced bittersweet flavor to offset the marshmallow and Nutella sweetness.
- 11 1/2 ounces milk chocolate chips Contribute creamy, milky chocolate richness and sweetness to the candy; melt with the semi-sweet chips to create a smooth, scoopable texture. Help create a softer, silkier mouthfeel and milder chocolate flavor profile.
- 1/2 cup Nutella Introduce hazelnut-chocolate creaminess and extra fat for shine and smoothness; stir in while warm to yield a glossy, spreadable fudge consistency. Add a subtle nutty undertone that complements both chocolate and fruit flavors.
- 1/2 cup cocoa crisped rice cereal Deliver light crunch and crisp texture as a contrast to the soft fudge; gently fold in last to retain some crispness and prevent sogginess. Also help absorb a small amount of residual moisture, aiding overall texture stability.
- 1/2 cup dried strawberries roughly chopped Provide concentrated strawberry flavor and chewy texture that punctuates each bite; distribute evenly so pieces remain detectable without overwhelming the chocolate. Add natural fruit notes and slight tartness to balance the sweetness.
- festive sprinkles optional Supply a festive visual finish and optional crunchy bite for garnish; sprinkle sparingly over chilled fudge to add color and celebratory appearance. Offer negligible flavor change but enhance presentation for special occasions.
Instructions
- Line an 8-inch baking dish with parchment paper. Add 1 cup Campfire® mini fruit-flavored marshmallows into bottom of the prepared baking dish.: The scent of clean parchment and the gentle crinkle as you press it into the dish is the first small joy. Lining the pan prevents sticking and gives clean edges when you lift the set fudge out. Make sure the paper extends over the sides so you can lift the block easily, and smooth any large creases. A common mistake is using too small a sheet, so the fudge adheres to the pan and tears on removal.
- In a large microwave-safe bowl, combine the chocolate chips and Nutella. Microwave for 30 seconds and stir to combine. Continue cooking fudge in 30 second increments until the mixture is smooth.: When you layer the bowl with marshmallows they create a springy bed that stops the melted chocolate from seeping all the way to the pan. The marshmallows should glint slightly and sit evenly so the final squares have pockets of soft chew. If you heap them unevenly, the distribution of marshmallow will be lumpy, so spread them gently with your fingers or a small spatula.
- Stir in the remaining marshmallows, cocoa crisped rice cereal and dried strawberries.: When you combine the chocolate chips and Nutella you are building the flavor core. The mixture smells deeply chocolatey and nutty, and the Nutella helps the chips melt more smoothly. Use a large bowl so stirring is easy and no hot spots remain. An error here is using a bowl that is too small, which can cause uneven heating and splatter.
- Pour melted chocolate and Nutella mixture over the marshmallows in the baking dish. If desired, add festive sprinkles evenly over the fudge. Place fudge into the refrigerator until firm, about 2 hours. Cut into 1-inch squares.: At this stage the chocolate will only be partially melted and the act of stirring begins the emulsification. Stirring distributes heat and helps achieve a glossy finish. Listen for the faint quiet of the chocolate shifting consistency, and stop when you see a mostly homogeneous sheen. Overheating can make the chocolate grainy, so take short bursts and stir between intervals.
- Continue cooking fudge in 30 second increments until the mixture is smooth: Patience matters here, because the glossy melt is the difference between a silky fudge and a dull one. Each 30 second burst should be followed by a vigorous stir, scraping the bowl sides so remaining lumps melt from residual heat. The bowl will radiate warmth and the chocolate should flow like thick silk. If it looks separated or oily, reduce microwave time and stir more to coax the emulsion back together.
- Stir in the remaining marshmallows cocoa crisped rice cereal and dried strawberries: Once the chocolate is smooth, folding in the remaining marshmallows , cocoa crisped rice cereal , and chopped dried strawberries creates a mosaic of textures. You want even distribution so each square has a bit of everything. Fold gently to keep the cereal crisp and prevent marshmallows from fully dissolving. A typical slipup is over stirring which can deflate the marshmallows and make the mixture uniformly dense.
- Pour melted chocolate and Nutella mixture over the marshmallows in the baking dish: Pouring is sensory rich, watch the glossy stream of chocolate pool over the soft bed of marshmallows and then settle. Use a spatula to nudge it into corners and to press it down lightly so there are no air gaps. The surface should look even and shiny. If you press too hard you may compress the marshmallows, losing their airy quality.
- If desired add festive sprinkles evenly over the fudge: Sprinkles give a cheerful visual pop and a faint crunch. Scatter them quickly and evenly so they adhere to the warm surface before it cools. If you wait too long the sprinkles will not stick, and if you press them in they may bleed color into the top.
- Place fudge into the refrigerator until firm about 2 hours: The fridge hushes the cooling process and firms the chocolate into sliceable bars. After about 2 hours the block should feel solid when you lift the parchment, and the top will lose its glossy wet sheen. Avoid freezing right away as very rapid chilling can cause the chocolate to bloom and lose shine.
- Cut into 1 inch squares: I like the tactile satisfaction of slicing clean squares, the knife gliding through the set edge with a soft resistance. For neat cuts warm the knife under hot water and dry it between slices, wiping crumbs away. Cutting too soon leads to smooshed pieces, while waiting too long can make the fudge brittle, so aim for a firm but not rock hard set.
Notes
- Choose quality chocolate Good quality chocolate chips melt smoother and taste richer, which makes a big difference in texture and overall flavor.
- Control microwave power If your microwave runs hot, reduce power to 70 percent to avoid overheating and grainy chocolate during melting.
- Check cereal freshness Fresh cocoa crisped rice cereal keeps its crunch longer, so store it in an airtight container before folding into the mixture.
- Evenly chop dried strawberries Chop dried strawberries to uniform pieces so every square has balanced fruit pockets and you avoid big chunks that tear the parchment.
- Use divided marshmallows Reserve a portion of the marshmallows for the bottom layer, it creates air pockets that make the fudge feel lighter.
- Warm your knife between cuts Run a knife under hot water and dry it before slicing, this yields cleaner edges and less crumb.
- Press gently when assembling Use a spatula to press the surface lightly for an even top, avoid compressing the internal marshmallows which would remove their chew.