Walking Tacos
Walking Tacos started as my go to for chaotic summer evenings when we wanted something portable, festive, and completely forgiving.
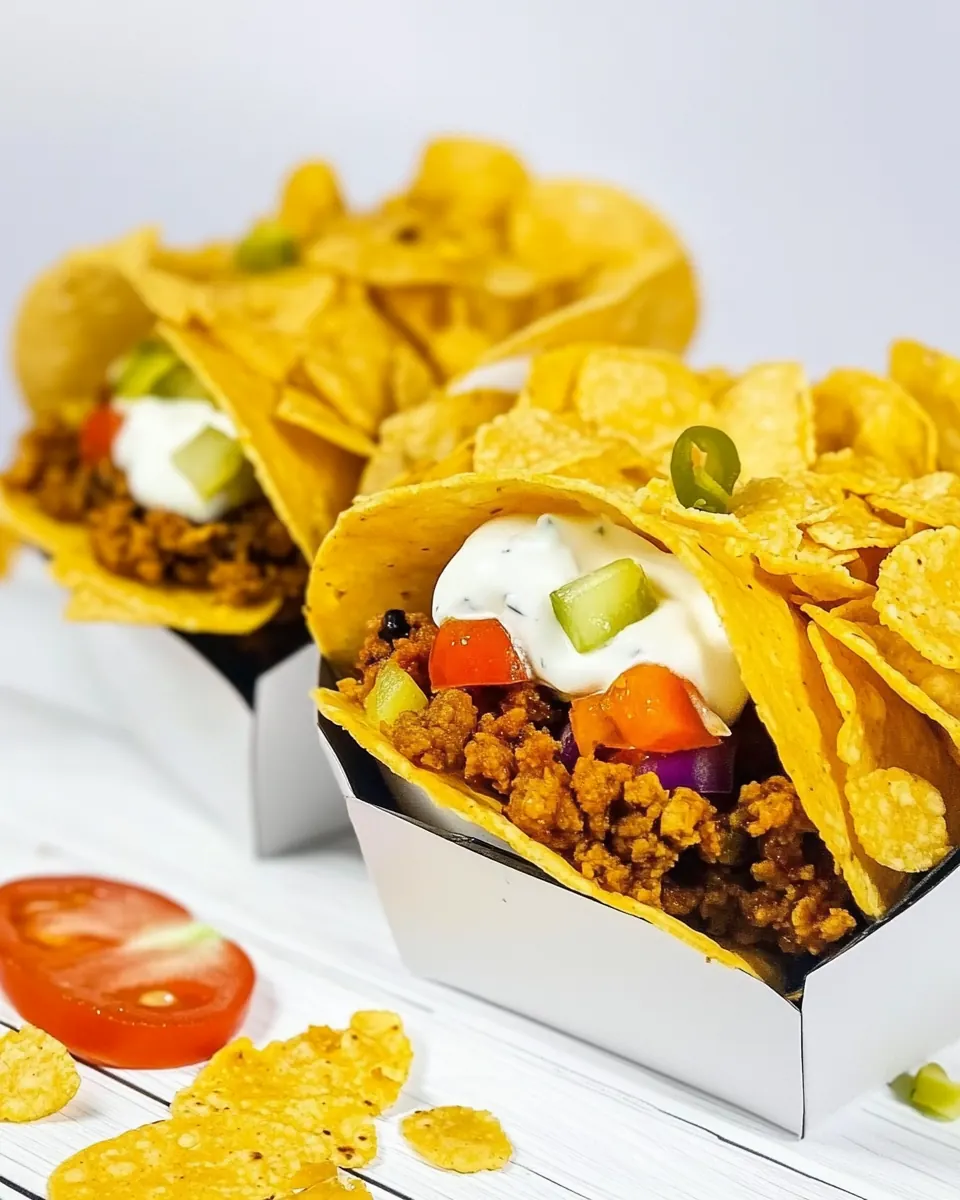
I first made Walking Tacos for a neighborhood block party, carrying a skillet of sizzling, seasoned ground beef down the driveway, and watching neighbors laugh as they customized their bags. There was something joyful about handing someone a crunchy bag filled with warm, spiced ground beef, spoonfuls of hearty black beans, and a cascade of fresh toppings, and seeing their face light up. That memory sticks with me because this dish combines comfort and convenience in a way few things do. It taught me that great food does not need to be complicated, just thoughtful.
Over time I refined the balance between creamy and crunchy, learning that a generous sprinkle of shredded mexican blend cheese and a dollop of cool sour cream helps temper the tang of salsa. I also discovered that the right chips hold up better, which matters when you plan to eat right out of the bag. Whenever I serve Walking Tacos, people tend to gather around, swapping topping ideas and laughing about who made the messiest but tastiest bag. Those little moments, when conversation and food collide, are why I keep this recipe in regular rotation.
Recipe Snapshot
30 mins
23 mins
7 mins
Easy
400 kcal
Mexican
Gluten-Free, Low FODMAP
Dinner
Skillet, Spatula, Serving bowl
What’s Great About This Walking Tacos
Comfort meets convenience
I adore how Walking Tacos takes classic taco flavors and makes them instantly approachable. You get the familiar, savory hit of seasoned ground beef, but its delivered in a fun, single serve package that eliminates plates. I love serving this when I want guests to mingle, because it frees people to move around and chat while they eat.
Customizable for every palate
We always mix and match toppings, and that versatility is a major reason I come back to this recipe. Whether someone prefers extra salsa or loads of shredded mexican blend cheese, its easy to personalize each bag. I like that the base stays the same, but the final bite can vary wildly from person to person.
Fast and forgiving
This dish is remarkably quick to pull together, and I appreciate that it tolerates small mistakes. If the ground beef gets a touch too browned, the beans and salsa bring moisture back. I often make it when time is tight because a warm, satisfying meal is ready in about a half hour.
Great for crowds and kids
Ive used Walking Tacos at family gatherings and birthday parties. Kids love the novelty of eating from a bag, and adults appreciate the minimal cleanup. Its a rare recipe that delights multiple generations and keeps the hostess stress low.
Textural contrast that sings
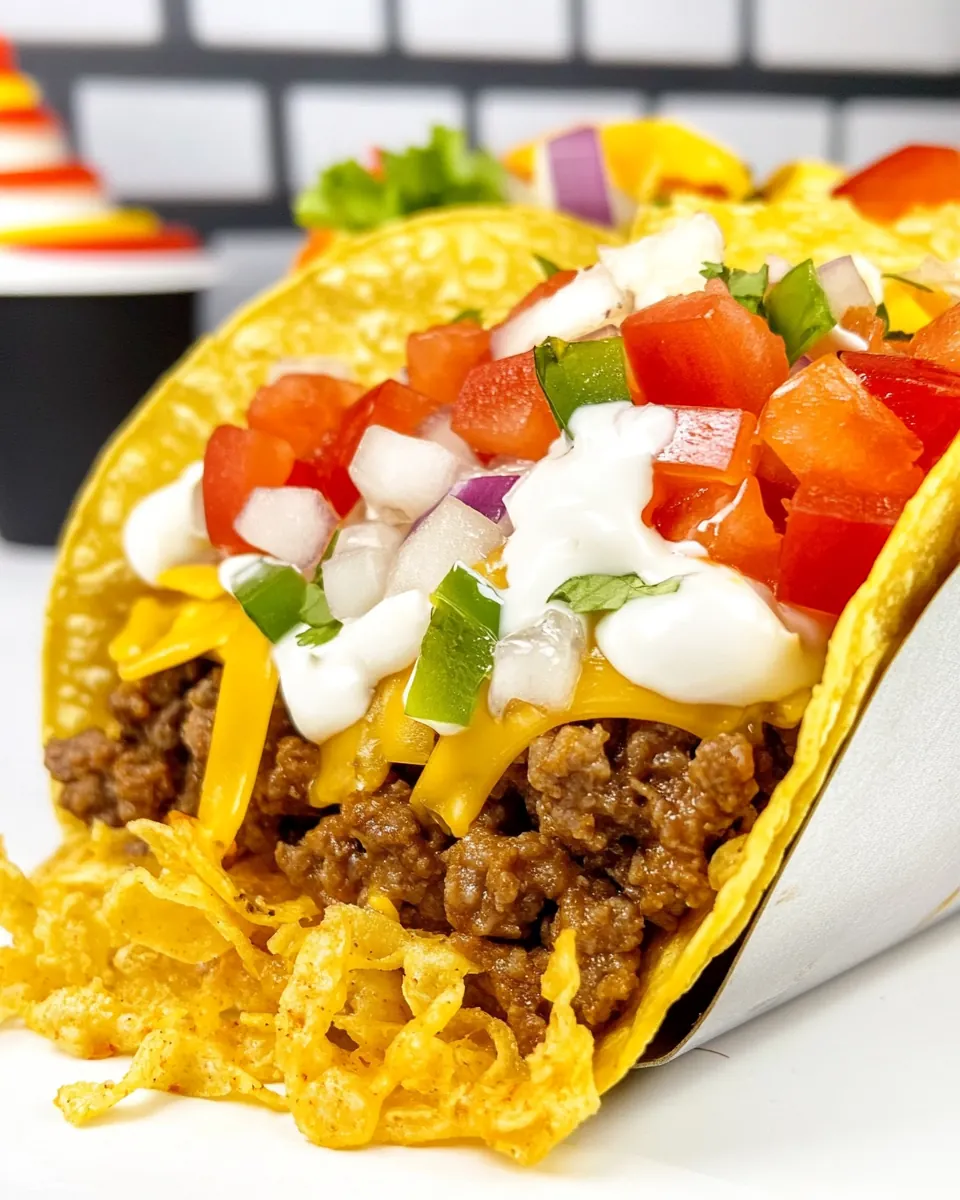
The interplay between crunchy corn chips, creamy sour cream, melty mexican blend cheese, and the seasoned ground beef is why I keep making this. Each bite gives you crisp, warm, cool, and gooey all at once, and that mix is endlessly satisfying.
What You Need for Walking Tacos
I approach the ingredients for Walking Tacos with a simple philosophy: keep the foundation robust, and let the toppings do the personalizing. The key players are the savory ground beef seasoned well, the creamy and tangy elements like sour cream and salsa, and the crunchy corn chips that act as both vessel and texture generator. Together they form a balanced bite that feels festive yet familiar.
- 1 pound ground beef: Brown and crumble to provide a savory, protein-rich base that carries taco flavors and binds fillings together. Season while cooking to enhance depth and ensure even flavor distribution throughout the dish.
- 1/2 cup onion diced: Sauté until translucent to add sweet, aromatic background notes and slight crunch contrast. Dice small so pieces distribute evenly among the chips and other toppings for balanced bites.
- 2 tablespoons taco seasoning: Sprinkle and stir in to deliver concentrated chili, cumin, and savory spices that define the taco profile. Adjust quantity to taste and mix thoroughly into the meat for consistent seasoning.
- 15 ounces black beans one can, about 1 1/2 cups cooked beans: Drain and rinse before adding to introduce a creamy, earthy texture and boost protein and fiber content. Mash slightly or leave whole to create satisfying mouthfeel and to stretch the filling for more servings.
- 1 cup salsa: Pour and mix in to contribute bright, tangy tomato flavor and moisture that prevents the filling from drying out. Choose a medium-spiced variety to complement the seasoning without overwhelming milder toppings.
- 21 ounces corn chips we used 6 3.5 ounce bags, see notes: Crumble or crush into a portable, edible vessel that holds the fillings and provides crunchy texture and salty contrast. Use individual bags or a single large bowl of chips to make serving convenient and fun.
- 1 cup mexican-blend cheese shredded: Sprinkle over the hot filling so it melts slightly and adds rich, creamy dairy flavor with a mild tang. Use freshly shredded blend for optimal melting and even coverage across the tacos.
- 1 cup lettuce shredded or chopped: Shred or chop finely to bring crisp, refreshing contrast and a cool, vegetal element that lightens richer components. Add just before serving to preserve a crisp texture and vibrant color.
- 1/2 cup sour cream: Dollop on top to add cool, tangy creaminess that balances spice and adds richness. Keep chilled until serving to maintain fresh flavor and smooth texture when combined with hot ingredients.
- 1/2 cup salsa: Spoon on as an extra layer of bright, zesty flavor that can be used for moisture and heat control across servings. Offer it in addition to the salsa already in the filling so eaters can customize spice levels.
- 3 tablespoons green onions sliced: Slice thinly and sprinkle for a fresh, oniony bite that finishes the dish with mild sharpness and color. Use green parts primarily for a gentler flavor and garnish visual appeal.
Directions for Walking Tacos
These directions are written to be chatty and reassuring, so you feel confident the whole way through. I like to keep the energy upbeat while I cook, and these steps are arranged to help you build warm, balanced fillings and assemble fun individual servings.
- Place the ground beef and onion in a skillet on medium heat. Brown the meat for 5-7 minutes or until the meat is fully cooked. Drain any excess liquid from the meat.: The moment the ground beef and diced onion hit the hot skillet you will hear a satisfying sizzle, and the aromatics will begin to bloom, releasing sweet, savory notes that signal the start of depth. As the meat browns, the surface undergoes Maillard reactions, creating nutty, roasted flavors that are essential for a full tasting filling, and the onion softens and turns translucent, contributing gentle sweetness. One important why here is that even, medium heat ensures the beef renders fat slowly, preventing it from steaming and becoming tough, while creating browned bits that boost flavor. A common mistake is crowding the pan which lowers the temperature and causes the meat to stew rather than brown, so give the skillet breathing room and stir occasionally to promote even coloring. Look for small browned flecks on the meat and slightly caramelized edges on the onion as visual cues that you re on the right track. Use a sturdy spatula to break the beef apart so it browns evenly, and drain any puddles of excess grease to avoid soggy chips later.
- Add in the taco seasoning, black beans, and 1 cup of salsa to the ground beef. Heat for 2-3 minutes or until warm all the way through then place in a serving bowl.: As the meat reaches a deep brown, aroma intensifies, filling the kitchen with a warm, meaty perfume that hints at the finished dish; the sound will soften from loud sizzles to a gentle bubble as moisture cooks off. Browning for the recommended time ensures the ground beef is safely cooked and develops the texture that holds up inside the chips. This step matters because undercooked meat will be unsafe and overly wet meat will make the chips limp, so aim for even color and firm texture. A common error is rushing this step on too high heat which can char the exterior while leaving the center underdone, so maintain steady medium heat. When the meat has no pink remaining and the juices run clear, it s ready. Remove excess fat with care, because leaving a little fat improves mouthfeel, but too much will lead to soggy results.
- Open the bags of chips. To each bag add about 1/4 cup of the warm meat mixture.: After the beef has browned, you will notice pockets of rendered fat and browned juices collecting in the skillet, their glossy sheen signaling the need to remove them for a balanced filling. Draining keeps the final mixture from becoming greasy and helps the corn chips stay crisp when filled. The why behind this is simple, excess liquid dilutes flavors and undermines texture, so a brief drain preserves integrity. A common mistake is overdraining to the point where the meat becomes dry, so leave a hint of moisture that will blend with the added salsa and black beans . Tilt the pan and use a spoon to scoop away the majority, or carefully pour off into a heatproof container, watching out for hot splashes. The visual cue you want is meat that looks moist but not swimming in fat.
- In each bag of chips top the meat mixture with shredded cheese, lettuce, sour cream, extra salsa, and green onions or other toppings as desired. Eat out of the bag with a fork and enjoy!: When you stir the taco seasoning , canned black beans , and 1 cup of salsa into the warm meat, steam will rise carrying fragrant notes of chili, cumin, and tomato, and the mixture will take on a cohesive saucy sheen. This melding step matters because spices need a bit of moisture and heat to bloom fully, and the beans absorb flavor while contributing creamy texture. Stir gently to combine, then let the mixture simmer until the salsa softens and the beans warm through, which binds flavors and balances spice. A typical pitfall is adding the seasoning without enough moisture, which leads to uneven distribution and pockets of intense flavor, so the salsa plays a key role here. Look for glossy, evenly coated meat and beans, and a reduced, not watery, sauce clinging to the combination.
- Heat for 2 to 3 minutes or until warm all the way through then place in a serving bowl: During this short warming phase the filling will release comforting steam and the spices will marry, producing a unified aroma that promises bright, savory bites. Warming thoroughly ensures food safety and that every spoonful is hot enough to slightly melt the shredded mexican blend cheese when added later. The reason this matters is texture and temperature affect perception of flavor, so a lukewarm filling will feel underwhelming compared with a properly heated one. Avoid overheating which can dry the mixture; 2 to 3 minutes is usually sufficient for a pan that is already hot. The right visual cue is steady steam and a uniform hot temperature when tasted cautiously. Transfer to a bowl for easy assembly and to keep the skillet free for any final touches.
- Open the bags of chips: When you open each bag of corn chips , you ll notice their crisp crackle and bright corn aroma which promise satisfying texture contrasts. Preparing one bag at a time keeps the chips fresh and prevents them from becoming stale before assembly. The why is simple, chips left exposed lose their crispness, and the experience is less fun if the vessel collapses under warm filling. A common mistake is overfilling multiple bags at once and letting them sit, which leads to limp chips, so open and fill in sequence as you work. Visually, you want intact chips with minimal crumbs so each bag can hold the filling without immediate breakage.
- To each bag add about 1/4 cup of the warm meat mixture: Spoon about 1/4 cup of the hot filling into each chip bag, and you will immediately see steam rise and the meat settle among the chips, coating them with savory sauce. This calibrated portion gives every person a balanced ratio of meat to chips, ensuring a crunchy bite and enough filling for flavor without sogginess. The technique matters because overfilling overwhelms the chip structure and underfilling makes the bag feel insubstantial, so aim for that modest quarter cup. A common error is adding filling straight from a cold pan which lowers temperature too quickly; use the warm serving bowl for even distribution. The visual cue of chips coated but not saturated indicates success.
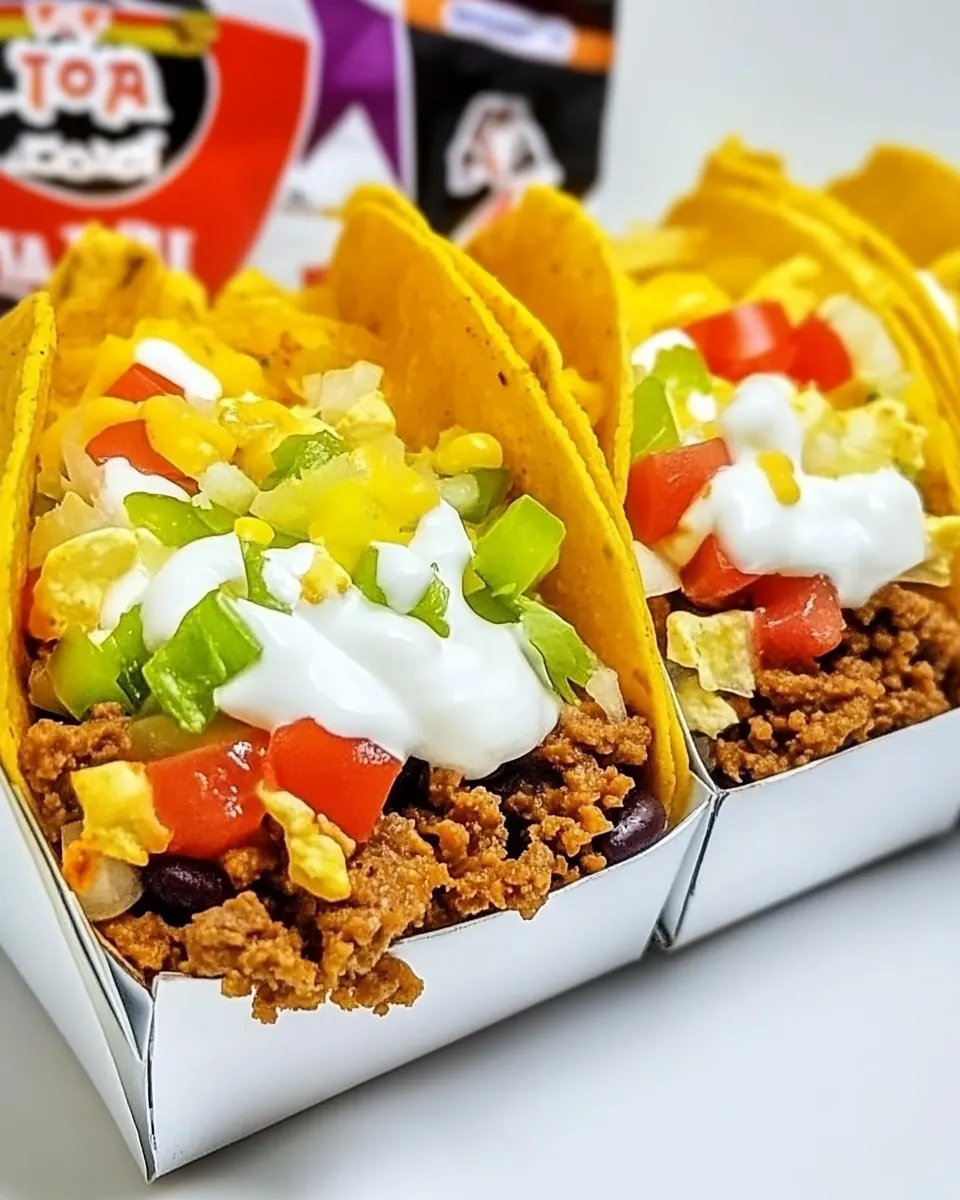
- In each bag of chips top the meat mixture with shredded cheese, lettuce, sour cream, extra salsa, and green onions or other toppings as desired: Layering toppings creates a play of temperatures and textures the moment the warm filling meets cold sour cream and crisp shredded lettuce , while melted mexican blend cheese becomes the glue that melds components together. Adding toppings in a thoughtful order matters, because cheese benefits from contact with warm filling and delicate garnishes like sliced green onions should remain fresh. A frequent mistake is applying wet toppings first which can hasten chip sogginess, so place cheese and lettuce directly over the meat, then dot with sour cream and extra salsa . Listen for the subtle hush as people press a fork in to scoop, and watch for streams of melted cheese that show the ideal balance of warm and cool.
- Eat out of the bag with a fork and enjoy: The final act is sensory joy, forks clinking against bag edges and the mix of warm, savory filling with cool, tangy toppings creating a dynamic bite that is both indulgent and playful. Eating straight from the bag keeps cleanup minimal and preserves the novelty that makes gatherings feel casual and fun. The reason this serving style shines is it encourages people to customize freely and to eat on the move without fuss, perfect for parties or informal dinners. Avoid holding the bag too tightly which can crush chips into fine crumbs, instead support the bottom gently while you eat. The visual and tactile cues of melted cheese, bright salsa, and crisp lettuce let you know you have a perfectly assembled Walking Tacos bag.
Customization Ideas
I like to offer a handful of focused customization tips so each guest can tailor their bag. These ideas are practical and keep the fun going without complicating prep.
- Swap or stretch the meat Use lean ground turkey or a meat and bean mix to stretch portions while keeping hearty texture, but keep the cooking method the same so moisture levels remain balanced.
- Double up on salsa Offer both mild and spicy salsa on the side so guests can control heat, and place the spicier option in a separate bowl to avoid accidental cross contamination.
- Cheese strategy Provide pre shredded mexican blend cheese and an extra small pan to melt a portion for those who want gooier results, the warm cheese clings better to chips and filling.
- Chip choices Use sturdier corn chips for heavier fillings or smaller snack bags for bite sized servings at parties, matching bag size to portion expectations.
- Presentation trick Place open chip bags upright in a shallow tray to create a self contained serving station that minimizes spills and makes assembly easier for guests.
How to Enjoy Walking Tacos
Walking Tacos works beautifully for casual gatherings and weeknight dinners when everyone wants something hands on. I recommend setting up a small station and letting guests build their own so flavors remain fresh and portions are individualized.
- Casual dinners Set out the warm meat bowl, bowls of black beans, shredded mexican blend cheese, lettuce, sour cream, and extra salsa. Guests assemble as they please, making this a low stress option for informal weeknight meals.
- Summer parties Serve outdoors where people can mingle, because Walking Tacos lets everyone eat while standing and chatting. Its ideal for backyard barbecues and block parties during the warmer months.
- Kid friendly option Kids love the novelty of eating from a bag. Offer milder salsa and let them choose their toppings, which makes mealtime interactive and fun.
- Storage tips Keep the filling refrigerated in an airtight container for up to three days, and reheat gently on the stovetop with a splash of salsa to restore moisture before assembling fresh bags.
- Occasions Great for game days, potlucks, and casual gatherings where you want to minimize dishes and maximize mingling; serve a range of toppings to suit different preferences.
- Seasonal pairing In summer, serve with fresh chopped tomatoes or a corn salsa to amplify brightness; in cooler months, focus on warm, melty cheese to add comfort.
FAQ
Conclusion
Walking Tacos stands out for its playful presentation and its perfect balance of crunchy, warm, and creamy elements that make every bite satisfying. Give it a try at your next low stress gathering or busy weeknight, because the ease of assembly and crowd pleasing flavors mean less fuss and more time with friends and family. Whether you keep it simple or build a full toppings bar, this recipe brings people together around good food with minimal cleanup, and its an easy way to make mealtime feel festive and relaxed.

Walking Tacos
Equipment
- Skillet
- Spatula
- Serving bowl
Ingredients
- 1 pound ground beef Brown and crumble to provide a savory, protein-rich base that carries taco flavors and binds fillings together. Season while cooking to enhance depth and ensure even flavor distribution throughout the dish.
- 1/2 cup onion diced Sauté until translucent to add sweet, aromatic background notes and slight crunch contrast. Dice small so pieces distribute evenly among the chips and other toppings for balanced bites.
- 2 tablespoons taco seasoning Sprinkle and stir in to deliver concentrated chili, cumin, and savory spices that define the taco profile. Adjust quantity to taste and mix thoroughly into the meat for consistent seasoning.
- 15 ounces black beans one can, about 1 1/2 cups cooked beans Drain and rinse before adding to introduce a creamy, earthy texture and boost protein and fiber content. Mash slightly or leave whole to create satisfying mouthfeel and to stretch the filling for more servings.
- 1 cup salsa Pour and mix in to contribute bright, tangy tomato flavor and moisture that prevents the filling from drying out. Choose a medium-spiced variety to complement the seasoning without overwhelming milder toppings.
- 21 ounces corn chips we used 6 3.5 ounce bags, see notes Crumble or crush into a portable, edible vessel that holds the fillings and provides crunchy texture and salty contrast. Use individual bags or a single large bowl of chips to make serving convenient and fun.
- 1 cup mexican-blend cheese shredded Sprinkle over the hot filling so it melts slightly and adds rich, creamy dairy flavor with a mild tang. Use freshly shredded blend for optimal melting and even coverage across the tacos.
- 1 cup lettuce shredded or chopped Shred or chop finely to bring crisp, refreshing contrast and a cool, vegetal element that lightens richer components. Add just before serving to preserve a crisp texture and vibrant color.
- 1/2 cup sour cream Dollop on top to add cool, tangy creaminess that balances spice and adds richness. Keep chilled until serving to maintain fresh flavor and smooth texture when combined with hot ingredients.
- 1/2 cup salsa Spoon on as an extra layer of bright, zesty flavor that can be used for moisture and heat control across servings. Offer it in addition to the salsa already in the filling so eaters can customize spice levels.
- 3 tablespoons green onions sliced Slice thinly and sprinkle for a fresh, oniony bite that finishes the dish with mild sharpness and color. Use green parts primarily for a gentler flavor and garnish visual appeal.
Instructions
- Place the ground beef and onion in a skillet on medium heat. Brown the meat for 5-7 minutes or until the meat is fully cooked. Drain any excess liquid from the meat.: The moment the ground beef and diced onion hit the hot skillet you will hear a satisfying sizzle, and the aromatics will begin to bloom, releasing sweet, savory notes that signal the start of depth. As the meat browns, the surface undergoes Maillard reactions, creating nutty, roasted flavors that are essential for a full tasting filling, and the onion softens and turns translucent, contributing gentle sweetness. One important why here is that even, medium heat ensures the beef renders fat slowly, preventing it from steaming and becoming tough, while creating browned bits that boost flavor. A common mistake is crowding the pan which lowers the temperature and causes the meat to stew rather than brown, so give the skillet breathing room and stir occasionally to promote even coloring. Look for small browned flecks on the meat and slightly caramelized edges on the onion as visual cues that you re on the right track. Use a sturdy spatula to break the beef apart so it browns evenly, and drain any puddles of excess grease to avoid soggy chips later.
- Add in the taco seasoning, black beans, and 1 cup of salsa to the ground beef. Heat for 2-3 minutes or until warm all the way through then place in a serving bowl.: As the meat reaches a deep brown, aroma intensifies, filling the kitchen with a warm, meaty perfume that hints at the finished dish; the sound will soften from loud sizzles to a gentle bubble as moisture cooks off. Browning for the recommended time ensures the ground beef is safely cooked and develops the texture that holds up inside the chips. This step matters because undercooked meat will be unsafe and overly wet meat will make the chips limp, so aim for even color and firm texture. A common error is rushing this step on too high heat which can char the exterior while leaving the center underdone, so maintain steady medium heat. When the meat has no pink remaining and the juices run clear, it s ready. Remove excess fat with care, because leaving a little fat improves mouthfeel, but too much will lead to soggy results.
- Open the bags of chips. To each bag add about 1/4 cup of the warm meat mixture.: After the beef has browned, you will notice pockets of rendered fat and browned juices collecting in the skillet, their glossy sheen signaling the need to remove them for a balanced filling. Draining keeps the final mixture from becoming greasy and helps the corn chips stay crisp when filled. The why behind this is simple, excess liquid dilutes flavors and undermines texture, so a brief drain preserves integrity. A common mistake is overdraining to the point where the meat becomes dry, so leave a hint of moisture that will blend with the added salsa and black beans . Tilt the pan and use a spoon to scoop away the majority, or carefully pour off into a heatproof container, watching out for hot splashes. The visual cue you want is meat that looks moist but not swimming in fat.
- In each bag of chips top the meat mixture with shredded cheese, lettuce, sour cream, extra salsa, and green onions or other toppings as desired. Eat out of the bag with a fork and enjoy!: When you stir the taco seasoning , canned black beans , and 1 cup of salsa into the warm meat, steam will rise carrying fragrant notes of chili, cumin, and tomato, and the mixture will take on a cohesive saucy sheen. This melding step matters because spices need a bit of moisture and heat to bloom fully, and the beans absorb flavor while contributing creamy texture. Stir gently to combine, then let the mixture simmer until the salsa softens and the beans warm through, which binds flavors and balances spice. A typical pitfall is adding the seasoning without enough moisture, which leads to uneven distribution and pockets of intense flavor, so the salsa plays a key role here. Look for glossy, evenly coated meat and beans, and a reduced, not watery, sauce clinging to the combination.
- Heat for 2 to 3 minutes or until warm all the way through then place in a serving bowl: During this short warming phase the filling will release comforting steam and the spices will marry, producing a unified aroma that promises bright, savory bites. Warming thoroughly ensures food safety and that every spoonful is hot enough to slightly melt the shredded mexican blend cheese when added later. The reason this matters is texture and temperature affect perception of flavor, so a lukewarm filling will feel underwhelming compared with a properly heated one. Avoid overheating which can dry the mixture; 2 to 3 minutes is usually sufficient for a pan that is already hot. The right visual cue is steady steam and a uniform hot temperature when tasted cautiously. Transfer to a bowl for easy assembly and to keep the skillet free for any final touches.
- Open the bags of chips: When you open each bag of corn chips , you ll notice their crisp crackle and bright corn aroma which promise satisfying texture contrasts. Preparing one bag at a time keeps the chips fresh and prevents them from becoming stale before assembly. The why is simple, chips left exposed lose their crispness, and the experience is less fun if the vessel collapses under warm filling. A common mistake is overfilling multiple bags at once and letting them sit, which leads to limp chips, so open and fill in sequence as you work. Visually, you want intact chips with minimal crumbs so each bag can hold the filling without immediate breakage.
- To each bag add about 1/4 cup of the warm meat mixture: Spoon about 1/4 cup of the hot filling into each chip bag, and you will immediately see steam rise and the meat settle among the chips, coating them with savory sauce. This calibrated portion gives every person a balanced ratio of meat to chips, ensuring a crunchy bite and enough filling for flavor without sogginess. The technique matters because overfilling overwhelms the chip structure and underfilling makes the bag feel insubstantial, so aim for that modest quarter cup. A common error is adding filling straight from a cold pan which lowers temperature too quickly; use the warm serving bowl for even distribution. The visual cue of chips coated but not saturated indicates success.
- In each bag of chips top the meat mixture with shredded cheese, lettuce, sour cream, extra salsa, and green onions or other toppings as desired: Layering toppings creates a play of temperatures and textures the moment the warm filling meets cold sour cream and crisp shredded lettuce , while melted mexican blend cheese becomes the glue that melds components together. Adding toppings in a thoughtful order matters, because cheese benefits from contact with warm filling and delicate garnishes like sliced green onions should remain fresh. A frequent mistake is applying wet toppings first which can hasten chip sogginess, so place cheese and lettuce directly over the meat, then dot with sour cream and extra salsa . Listen for the subtle hush as people press a fork in to scoop, and watch for streams of melted cheese that show the ideal balance of warm and cool.
- Eat out of the bag with a fork and enjoy: The final act is sensory joy, forks clinking against bag edges and the mix of warm, savory filling with cool, tangy toppings creating a dynamic bite that is both indulgent and playful. Eating straight from the bag keeps cleanup minimal and preserves the novelty that makes gatherings feel casual and fun. The reason this serving style shines is it encourages people to customize freely and to eat on the move without fuss, perfect for parties or informal dinners. Avoid holding the bag too tightly which can crush chips into fine crumbs, instead support the bottom gently while you eat. The visual and tactile cues of melted cheese, bright salsa, and crisp lettuce let you know you have a perfectly assembled Walking Tacos bag.
Notes
- Swap or stretch the meat Use lean ground turkey or a meat and bean mix to stretch portions while keeping hearty texture, but keep the cooking method the same so moisture levels remain balanced.
- Double up on salsa Offer both mild and spicy salsa on the side so guests can control heat, and place the spicier option in a separate bowl to avoid accidental cross contamination.
- Cheese strategy Provide pre shredded mexican blend cheese and an extra small pan to melt a portion for those who want gooier results, the warm cheese clings better to chips and filling.
- Chip choices Use sturdier corn chips for heavier fillings or smaller snack bags for bite sized servings at parties, matching bag size to portion expectations.
- Presentation trick Place open chip bags upright in a shallow tray to create a self contained serving station that minimizes spills and makes assembly easier for guests.