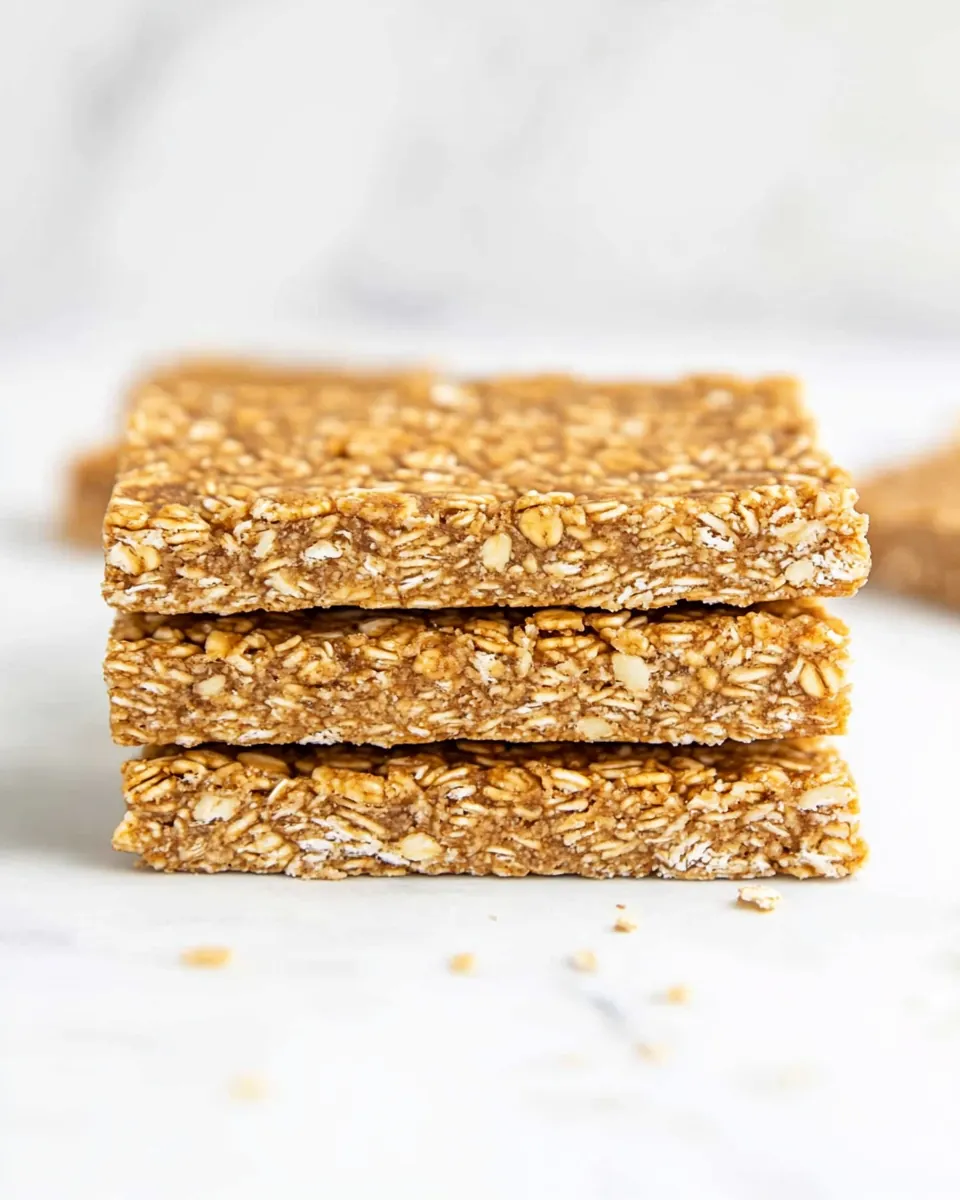
Easy Homemade Granola Bars
Easy Homemade Granola Bars are the kind of snack I reach for when I need something wholesome, chewy, and reliably satisfying. The first time I made these I was chasing a weekend rhythm, folding laundry between oven timers, and craving something that would travel in my bag without turning into crumbs. I remember pressing the mixture into the pan with slightly sticky fingers, the sweet scent of honey warming the kitchen, and thinking, this is going to be a keeper.
Over the years I’ve tweaked the mix for texture and convenience, and these bars have shown up at hikes, lunchboxes, and late night study sessions. Each batch tells a small story of substitutions when the pantry calls the shots, like swapping in sunflower seed butter when I ran out of peanut butter. I like how flexible they are, and how forgiving the method feels even when life is chaotic.
Every time I prepare them I notice different little things, like how warming the honey and nut butter makes the mix come together with less effort, or how pressing the dough thin yields crisp edges that contrast with a tender middle. Friends often ask for the recipe because they’re impressed by how simple ingredients can taste so comforting. These bars are practical, real food that you can make without fuss, and they reward small acts of care with big, snackable results.
Recipe Snapshot
30 mins
10 mins
20 mins
Medium
150 kcal
American
Vegan, Gluten-Free
Breakfast
Baking Sheet, Whole-Wheat Flour, Storage Containers
What Sets This Easy Homemade Granola Bars Apart
They are genuinely convenient
I love how Easy Homemade Granola Bars stash easily in a tote, and how they travel without needing special containers. The mix compresses into bars that hold together, making them my go to for impromptu picnics, packed lunches, or when I want a bite between meetings.
Flexible to pantry reality
I often run out of one thing or another, and this recipe forgives substitutions. With options for the sweetener, nut butter, or purees, I can adapt based on what I have on hand, which keeps me from ordering takeout when time is tight.
Balanced texture and flavor
The combination of rolled oats, a touch of whole wheat flour, and a sticky binder like honey creates bars that are chewy but not gummy, with toasty edges if baked until golden. I appreciate that contrast, it makes every bite interesting.
Kid and crowd friendly
These bars disappear quickly at family gatherings because they are mildly sweet, wholesome, and not overly complicated. I like that I can make a tray and cut it to any size, serving a group without fuss.
Smart make ahead and storage
I almost always make a double batch and refrigerate or freeze portions. They keep well, and thaw predictably, which means I can plan snacks for the week without daily prep. That reliability is a big reason they live in my routine.
Everything You Need for Easy Homemade Granola Bars
I think of the ingredient list for Easy Homemade Granola Bars like a small team where each member plays a clear role. The oats provide the structure, the binder offers chew and sweetness, and small additions like chia seeds add texture and subtle nutrition. Together they form bars that are portable, satisfying, and adaptable.
- 1 1/2 cups rolled oats: Provide hearty texture and whole-grain body while absorbing liquids to bind the bar mixture; offers chewy mouthfeel and mild nutty flavor that complements sweeteners. Help maintain structure during baking or setting so bars hold together when cut and handled.
- 1/2 cups shredded unsweetened coconut (or use 1/2 cup additional oats): Add light, tropical flavor and tender chew while contributing a slightly crisp texture when toasted; can be substituted with extra oats for a more neutral whole-grain profile. Help balance moisture and add subtle natural sweetness without overpowering other flavors.
- 1/4 cup honey (or maple syrup or applesauce): Bind ingredients and add natural sweetness while caramelizing lightly during baking to create depth of flavor; can be swapped for maple syrup or applesauce to adjust vegan status and moisture. Help hold the mixture together and provide sticky cohesion necessary for firm bars.
- 1/4 cup whole-wheat flour: Contribute light structure and a bit of body to the bars while absorbing excess moisture to prevent sogginess; whole–wheat flour also adds mild nutty flavor and extra fiber. Help create a cohesive crumb and improve slicing quality once bars are set.
- 3 tablespoons peanut butter (or sunflower seed butter or 1 egg): Act as a rich, emulsifying binder that adds creaminess and nutty flavor while helping ingredients stick together; sunflower seed butter or an egg can replace peanut butter depending on allergy or dietary needs. Help improve chewiness and provide healthy fats and protein to increase satiety.
- 1 teaspoon vanilla extract: Enhance overall sweetness perception and deepen flavor complexity with a warm, aromatic note; vanilla also helps meld the different ingredients' flavors into a unified profile. Use sparingly to avoid overwhelming the delicate oat and nutty elements.
- 1/2 teaspoon cinnamon: Provide warm, aromatic spice that complements oats and nuts while subtly boosting perceived sweetness without added sugar; cinnamon also contributes a hint of warmth and depth. Use in moderation to avoid masking other nuanced flavors in the bars.
- 1 teaspoon baking powder: Act as a gentle leavening agent to produce slight lift and lighten the texture, especially if using egg as a binder alternative; baking powder also helps balance density when bars are baked briefly. Ensure even distribution to avoid uneven rise or metallic pockets.
- 1 teaspoon salt: Help season and balance flavors by suppressing overly sweet notes and enhancing savory or nutty components; salt also strengthens gluten formation slightly and improves overall taste perception. Use the specified amount to avoid salinity overpowering the bars.
- 2 tablespoons chia seeds: Add tiny bursts of nutty flavor and a pleasant pop while increasing fiber, omega-3s, and binding capacity as they absorb liquid and thicken the mixture. Help improve nutritional profile and contribute to a firmer, chewier texture when hydrated.
- 1/4 cup water (or 1/4 cup mashed ripe banana, pumpkin puree, applesauce, butternut squash puree, OR sweet potato puree): Adjust moisture level and help hydrate dry ingredients for proper mixing and setting; mashed fruit or puree options provide extra sweetness, flavor, and binding while altering calorie and sugar content. Use the liquid that best matches desired texture and dietary preferences to achieve the correct consistency.
Step by Step Instructions for Easy Homemade Granola Bars
These directions feel approachable, and I like to walk through them with a calm rhythm. I’ll often prep my sheet and ingredients first, then move through steps with small pauses to check texture and aroma. The goal is a bar that is golden at the edges and tender in the middle.
- Preheat the oven to 325 degrees F and line a baking sheet with parchment paper or a Silpat. Warm the honey and peanut butter for about 15 seconds if not stored at room temperature.: When you step into this moment you should notice a gentle warmth from the oven as it comes up to temperature, which is comforting and signals the start of the bake. Warming the honey and peanut butter briefly makes them glossy and runnier, allowing them to coat the oats more evenly, and that smoother coating improves the bars' cohesion. A common mistake is overheating the honey, which can thin it too much and make measuring tricky; use short bursts in the microwave or a small pan over low heat, stirring frequently. Visually you want the mixture to look glossy and pourable, not bubbling or browned, and the aroma should shift from tight sweetness to a more aromatic, syrupy scent.
- Place the oats and coconut into the bowl of a food processor and blitz to grind into a coarse texture (similar to quick oats).: As you pulse, listen for the oats shifting from a heavier thud to a more delicate, sand like whisper, and watch the coconut break into finer strands. This textural change helps the mixture bind more uniformly; coarse oats can make bars crumbly while overly fine oats can yield a gummy interior, so aim for a middle ground that still reads as oats. A typical pitfall is over processing until it's flour like, which will change the chew; instead pulse in short bursts and check the texture between pulses. The scent becomes nuttier and toastier as the oats break down, which is a good sign you're on the right track.
- Add the remaining ingredients, including the peanut butter and honey, and blend well.: At this stage the bowl will begin to smell sweet and nutty, and you should see the mixture start to clump slightly as the peanut butter and honey distribute. The action here is all about achieving even distribution so every bite has the same balance of binder and oats. If the mix looks dry in spots, scrape the sides and pulse again to ensure there are no pockets of dry flour or oats. One error people make is under blending which leads to uneven bars, so take your time to get a cohesive batter, but avoid overworking which can make the texture dense.
- (You can also grind the oats or use instant oats, then mix everything together in a bowl.): This parenthetical option is a useful fallback if you do not have a food processor. When mixing by hand, you'll notice more manual effort is required to reach the same cohesion, and the texture will be a bit rougher, which can be pleasant for added chew. Use a wooden spoon or spatula, pressing against the bowl to combine, and test by pinching some mixture between your fingers to see if it holds. The trap here is under mixing so the wet ingredients do not reach every bit of the oat; take a few extra stirs to incorporate fully and make sure the batter has a uniform sheen.
- Add 1/4 cup water and blend until batter comes together like thick cookie dough. You should be able to press the batter together between your fingers and have it stick together. If it doesn't, add a bit more water.: This hydration step is tactile and informative, so use your fingers to test the feel. The batter should be pliable, slightly tacky, and hold its shape when pressed; if it is crumbly the bars will not hold, and if it is overly wet they will spread and become dense. One common mistake is adding too much water at once, so add small amounts and test. The smell here will be a mild hit of toasted oats with the underlying sweetness of the binder, and visually you want a uniform mass that responds to pressure without oozing.
- Place batter onto the center of the prepared baking sheet and use your hands to press thin, about 1/4-1/2-inch thick and about 8×8-inches big. I measure roughly using an 8×8-inch baking pan. (You can also roll out the dough—just cover it with a piece of parchment paper first to make sure it's easy to do.) Use a knife to lightly score lines for squares in whatever size you like.: Pressing the batter thin ensures even baking and that pleasing crisp at the edges, and scoring helps you break neatly after baking. Use lightly oiled or damp hands to avoid sticking, and aim for an even thickness across the slab so no corners bake faster than the center. If the slab is patchy the edges will brown quickly while the center remains soft. Rolling under parchment gives a smooth surface and uniform thickness, while hand pressing gives a rustic look that I often prefer. Look for a smooth top and straight edges as your visual guide.
- Bake for 18-20 minutes, remove from oven, and let cool completely on the pan.: During baking you will notice the kitchen filling with a toasty, warm aroma, and the scored lines will settle slightly as the bars set. The edges should take on a light golden color which signals the sugars have caramelized a bit and the texture is set. A rookie mistake is removing the bars while still warm; they continue to firm up as they cool, so patience yields cleaner squares. If the bars brown too fast, reduce the oven temperature slightly next time. Cooling on the pan prevents breakage and helps the bars hold their shape when cut.
- Break into squares and serve.: Once cooled you can follow the scored lines and the bars should separate easily into uniform pieces. The texture should be cohesive with a tender middle and lightly crisp edges, and you might hear a faint, satisfying snap when you break them. If they crumble excessively, it usually means they needed a touch more binder or a slightly longer bake time to set. Serve them at room temperature or chilled depending on your preference, and enjoy the balance of chew, sweetness, and subtle spice.
- Store in an airtight container for up to 2 weeks in the fridge or a week at room temperature. To freeze, place cooled bars in a sealed zip top freezer bag for up to 3 months. Thaw overnight in the fridge before serving.: Proper storage keeps the bars fresh and preserves texture. Refrigeration tightens the bars, making them firmer and excellent for packing, while room temperature storage keeps them chewier. Freezing works well for long term planning, but be sure to cool completely first to avoid condensation which can make them soggy. A common oversight is stacking warm bars which traps steam and softens them; always cool fully before storing.
Making Adjustments
These adjustments help you tailor Easy Homemade Granola Bars to your pantry and preferences. Small swaps change texture and flavor in predictable ways, so you can experiment while keeping the method consistent.
- Use room temperature binders. If your honey or peanut butter is cold they will not blend smoothly, so warming briefly makes the batter easier to combine.
- Swap coconut for oats. Replacing the shredded unsweetened coconut with extra rolled oats preserves texture while neutralizing flavor for those who prefer less coconut aroma.
- Choose puree over water for flavor. Using mashed banana or pumpkin puree instead of water adds moisture and a distinct flavor profile, but expect to add a few extra minutes of baking time for the edges to brown.
- Adjust sweetness cautiously. If you reduce the honey, the bars may need a touch more binder like extra nut butter or a splash of water to hold together properly.
- Make them nut free. Swap peanut butter for sunflower seed butter to avoid tree nut allergens, keeping the binding and richness intact.
- Increase seed content. Adding or increasing chia seeds will slightly thicken the batter and boost texture, but compensate with a touch more liquid if the mix becomes dry.
- Use quick oats for no food processor. If you do not have a food processor, quick or instant oats blend easily by hand and still produce cohesive bars when mixed well.
Serve This Easy Homemade Granola Bars With
I often think about pairing these bars with drinks and small plates for different occasions. They fit into lunchboxes, picnic bistros, or as a quick breakfast on the go. Below I map out serving ideas, storage, and seasonal pairings to make the most of the bars.
- Breakfast on the go. Pair a bar with a piece of fruit and a cup of coffee for a portable morning meal, offering contrast between the bar’s chew and the fresh fruit’s juiciness.
- Lunchbox staple. Pack a bar alongside a sandwich and chopped veggies for a balanced midday meal that travels well without refrigeration for short periods.
- Hike and outdoors snack. These bars hold up well on trails, providing compact energy and a satisfying chew that replaces less wholesome packaged options.
- Party nibble. Cut into small squares and serve on a platter for casual gatherings, offering guests a mildly sweet, wholesome choice among other snacks.
- Storage for weekly planning. Store a stack in an airtight container in the fridge for up to two weeks, or freeze extras for months; thaw in the fridge overnight before serving for best texture.
- Seasonal flavor pairings. In autumn consider using pumpkin or sweet potato puree for a warm profile, while summer batches might favor banana puree for a brighter note.
FAQ
Conclusion
These bars stand out because they combine simplicity, flexibility, and reliable texture into one easy recipe. Making them rewards a small investment of time with ready to eat snacks that travel well and adapt to what you have on hand. Give them a try this week, and you may find they become a pantry staple for quick breakfasts, hiking fuel, or lunchbox treats. Enjoy the process, play with gentle substitutions if you like, and remember the best batches are the ones that match your taste and schedule.
Easy Homemade Granola Bars
Equipment
- Baking Sheet
- Whole-Wheat Flour
- Storage Containers
Ingredients
- 1 1/2 cups rolled oats Provide hearty texture and whole-grain body while absorbing liquids to bind the bar mixture; offers chewy mouthfeel and mild nutty flavor that complements sweeteners. Help maintain structure during baking or setting so bars hold together when cut and handled.
- 1/2 cups shredded unsweetened coconut (or use 1/2 cup additional oats) Add light, tropical flavor and tender chew while contributing a slightly crisp texture when toasted; can be substituted with extra oats for a more neutral whole-grain profile. Help balance moisture and add subtle natural sweetness without overpowering other flavors.
- 1/4 cup honey (or maple syrup or applesauce) Bind ingredients and add natural sweetness while caramelizing lightly during baking to create depth of flavor; can be swapped for maple syrup or applesauce to adjust vegan status and moisture. Help hold the mixture together and provide sticky cohesion necessary for firm bars.
- 1/4 cup whole-wheat flour Contribute light structure and a bit of body to the bars while absorbing excess moisture to prevent sogginess; whole-wheat flour also adds mild nutty flavor and extra fiber. Help create a cohesive crumb and improve slicing quality once bars are set.
- 3 tablespoons peanut butter (or sunflower seed butter or 1 egg) Act as a rich, emulsifying binder that adds creaminess and nutty flavor while helping ingredients stick together; sunflower seed butter or an egg can replace peanut butter depending on allergy or dietary needs. Help improve chewiness and provide healthy fats and protein to increase satiety.
- 1 teaspoon vanilla extract Enhance overall sweetness perception and deepen flavor complexity with a warm, aromatic note; vanilla also helps meld the different ingredients' flavors into a unified profile. Use sparingly to avoid overwhelming the delicate oat and nutty elements.
- 1/2 teaspoon cinnamon Provide warm, aromatic spice that complements oats and nuts while subtly boosting perceived sweetness without added sugar; cinnamon also contributes a hint of warmth and depth. Use in moderation to avoid masking other nuanced flavors in the bars.
- 1 teaspoon baking powder Act as a gentle leavening agent to produce slight lift and lighten the texture, especially if using egg as a binder alternative; baking powder also helps balance density when bars are baked briefly. Ensure even distribution to avoid uneven rise or metallic pockets.
- 1 teaspoon salt Help season and balance flavors by suppressing overly sweet notes and enhancing savory or nutty components; salt also strengthens gluten formation slightly and improves overall taste perception. Use the specified amount to avoid salinity overpowering the bars.
- 2 tablespoons chia seeds Add tiny bursts of nutty flavor and a pleasant pop while increasing fiber, omega-3s, and binding capacity as they absorb liquid and thicken the mixture. Help improve nutritional profile and contribute to a firmer, chewier texture when hydrated.
- 1/4 cup water (or 1/4 cup mashed ripe banana, pumpkin puree, applesauce, butternut squash puree, OR sweet potato puree) Adjust moisture level and help hydrate dry ingredients for proper mixing and setting; mashed fruit or puree options provide extra sweetness, flavor, and binding while altering calorie and sugar content. Use the liquid that best matches desired texture and dietary preferences to achieve the correct consistency.
Instructions
- Preheat the oven to 325 degrees F and line a baking sheet with parchment paper or a Silpat. Warm the honey and peanut butter for about 15 seconds if not stored at room temperature.: When you step into this moment you should notice a gentle warmth from the oven as it comes up to temperature, which is comforting and signals the start of the bake. Warming the honey and peanut butter briefly makes them glossy and runnier, allowing them to coat the oats more evenly, and that smoother coating improves the bars' cohesion. A common mistake is overheating the honey, which can thin it too much and make measuring tricky; use short bursts in the microwave or a small pan over low heat, stirring frequently. Visually you want the mixture to look glossy and pourable, not bubbling or browned, and the aroma should shift from tight sweetness to a more aromatic, syrupy scent.
- Place the oats and coconut into the bowl of a food processor and blitz to grind into a coarse texture (similar to quick oats).: As you pulse, listen for the oats shifting from a heavier thud to a more delicate, sand like whisper, and watch the coconut break into finer strands. This textural change helps the mixture bind more uniformly; coarse oats can make bars crumbly while overly fine oats can yield a gummy interior, so aim for a middle ground that still reads as oats. A typical pitfall is over processing until it's flour like, which will change the chew; instead pulse in short bursts and check the texture between pulses. The scent becomes nuttier and toastier as the oats break down, which is a good sign you're on the right track.
- Add the remaining ingredients, including the peanut butter and honey, and blend well.: At this stage the bowl will begin to smell sweet and nutty, and you should see the mixture start to clump slightly as the peanut butter and honey distribute. The action here is all about achieving even distribution so every bite has the same balance of binder and oats. If the mix looks dry in spots, scrape the sides and pulse again to ensure there are no pockets of dry flour or oats. One error people make is under blending which leads to uneven bars, so take your time to get a cohesive batter, but avoid overworking which can make the texture dense.
- (You can also grind the oats or use instant oats, then mix everything together in a bowl.): This parenthetical option is a useful fallback if you do not have a food processor. When mixing by hand, you'll notice more manual effort is required to reach the same cohesion, and the texture will be a bit rougher, which can be pleasant for added chew. Use a wooden spoon or spatula, pressing against the bowl to combine, and test by pinching some mixture between your fingers to see if it holds. The trap here is under mixing so the wet ingredients do not reach every bit of the oat; take a few extra stirs to incorporate fully and make sure the batter has a uniform sheen.
- Add 1/4 cup water and blend until batter comes together like thick cookie dough. You should be able to press the batter together between your fingers and have it stick together. If it doesn't, add a bit more water.: This hydration step is tactile and informative, so use your fingers to test the feel. The batter should be pliable, slightly tacky, and hold its shape when pressed; if it is crumbly the bars will not hold, and if it is overly wet they will spread and become dense. One common mistake is adding too much water at once, so add small amounts and test. The smell here will be a mild hit of toasted oats with the underlying sweetness of the binder, and visually you want a uniform mass that responds to pressure without oozing.
- Place batter onto the center of the prepared baking sheet and use your hands to press thin, about 1/4-1/2-inch thick and about 8×8-inches big. I measure roughly using an 8×8-inch baking pan. (You can also roll out the dough—just cover it with a piece of parchment paper first to make sure it's easy to do.) Use a knife to lightly score lines for squares in whatever size you like.: Pressing the batter thin ensures even baking and that pleasing crisp at the edges, and scoring helps you break neatly after baking. Use lightly oiled or damp hands to avoid sticking, and aim for an even thickness across the slab so no corners bake faster than the center. If the slab is patchy the edges will brown quickly while the center remains soft. Rolling under parchment gives a smooth surface and uniform thickness, while hand pressing gives a rustic look that I often prefer. Look for a smooth top and straight edges as your visual guide.
- Bake for 18-20 minutes, remove from oven, and let cool completely on the pan.: During baking you will notice the kitchen filling with a toasty, warm aroma, and the scored lines will settle slightly as the bars set. The edges should take on a light golden color which signals the sugars have caramelized a bit and the texture is set. A rookie mistake is removing the bars while still warm; they continue to firm up as they cool, so patience yields cleaner squares. If the bars brown too fast, reduce the oven temperature slightly next time. Cooling on the pan prevents breakage and helps the bars hold their shape when cut.
- Break into squares and serve.: Once cooled you can follow the scored lines and the bars should separate easily into uniform pieces. The texture should be cohesive with a tender middle and lightly crisp edges, and you might hear a faint, satisfying snap when you break them. If they crumble excessively, it usually means they needed a touch more binder or a slightly longer bake time to set. Serve them at room temperature or chilled depending on your preference, and enjoy the balance of chew, sweetness, and subtle spice.
- Store in an airtight container for up to 2 weeks in the fridge or a week at room temperature. To freeze, place cooled bars in a sealed zip top freezer bag for up to 3 months. Thaw overnight in the fridge before serving.: Proper storage keeps the bars fresh and preserves texture. Refrigeration tightens the bars, making them firmer and excellent for packing, while room temperature storage keeps them chewier. Freezing works well for long term planning, but be sure to cool completely first to avoid condensation which can make them soggy. A common oversight is stacking warm bars which traps steam and softens them; always cool fully before storing.
Notes
- Use room temperature binders. If your honey or peanut butter is cold they will not blend smoothly, so warming briefly makes the batter easier to combine.
- Swap coconut for oats. Replacing the shredded unsweetened coconut with extra rolled oats preserves texture while neutralizing flavor for those who prefer less coconut aroma.
- Choose puree over water for flavor. Using mashed banana or pumpkin puree instead of water adds moisture and a distinct flavor profile, but expect to add a few extra minutes of baking time for the edges to brown.
- Adjust sweetness cautiously. If you reduce the honey, the bars may need a touch more binder like extra nut butter or a splash of water to hold together properly.
- Make them nut free. Swap peanut butter for sunflower seed butter to avoid tree nut allergens, keeping the binding and richness intact.
- Increase seed content. Adding or increasing chia seeds will slightly thicken the batter and boost texture, but compensate with a touch more liquid if the mix becomes dry.
- Use quick oats for no food processor. If you do not have a food processor, quick or instant oats blend easily by hand and still produce cohesive bars when mixed well.