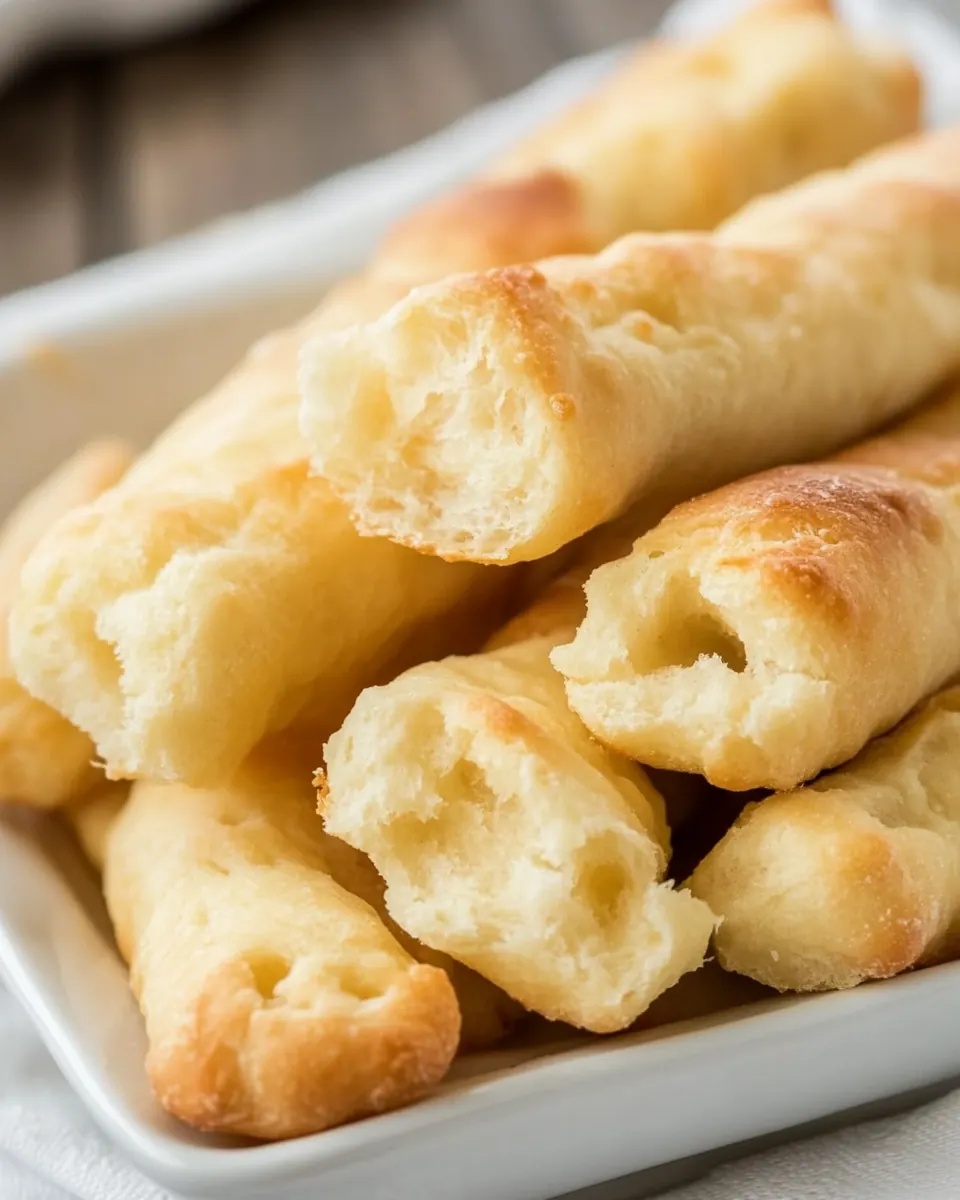
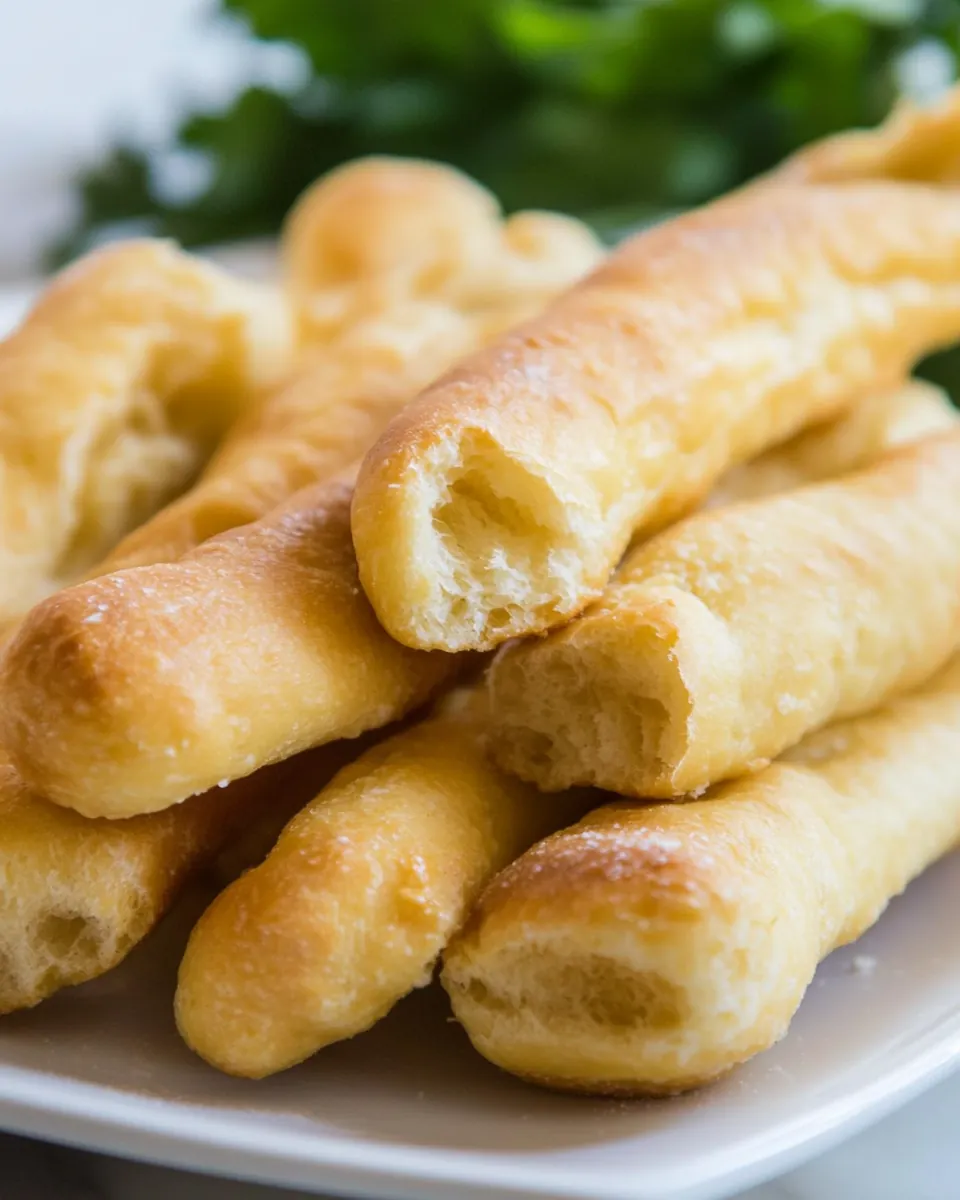
Utterly Butterly Breadsticks
Utterly Butterly Breadsticks came into my life on a sleepy Sunday when I needed comfort that was simple, buttery, and impossible to resist. I was craving something warm and hands on, a snack that invited chatter and sticky fingers, so I pulled out my stand mixer and those few pantry staples that always seem to save the day. From the first whirl of dough to the final brush of molten butter, this recipe felt like an old friend coming over to stay.
That morning I paced between the bench and the oven, tasting edges as they cooled, hearing the quiet crackle as butter met hot bread. I remember thinking how small rituals, like scoring with a sharp knife or letting dough rest beneath a tea towel, add ceremony to otherwise ordinary moments. Each step felt intentional, and by the time the breadsticks were done, the kitchen smelled like a bakery and the house felt wrapped in a buttery hug.
Recipe Snapshot
1 hr 15 mins
60 mins
15 mins
Medium
150 kcal
Italian
Gluten-Free, Low FODMAP
Appetizers
Stand mixer, Dough hook, Baking tray, Microwave, Sharp knife
What’s Great About This Utterly Butterly Breadsticks
Buttery Flavor That Wins Hearts
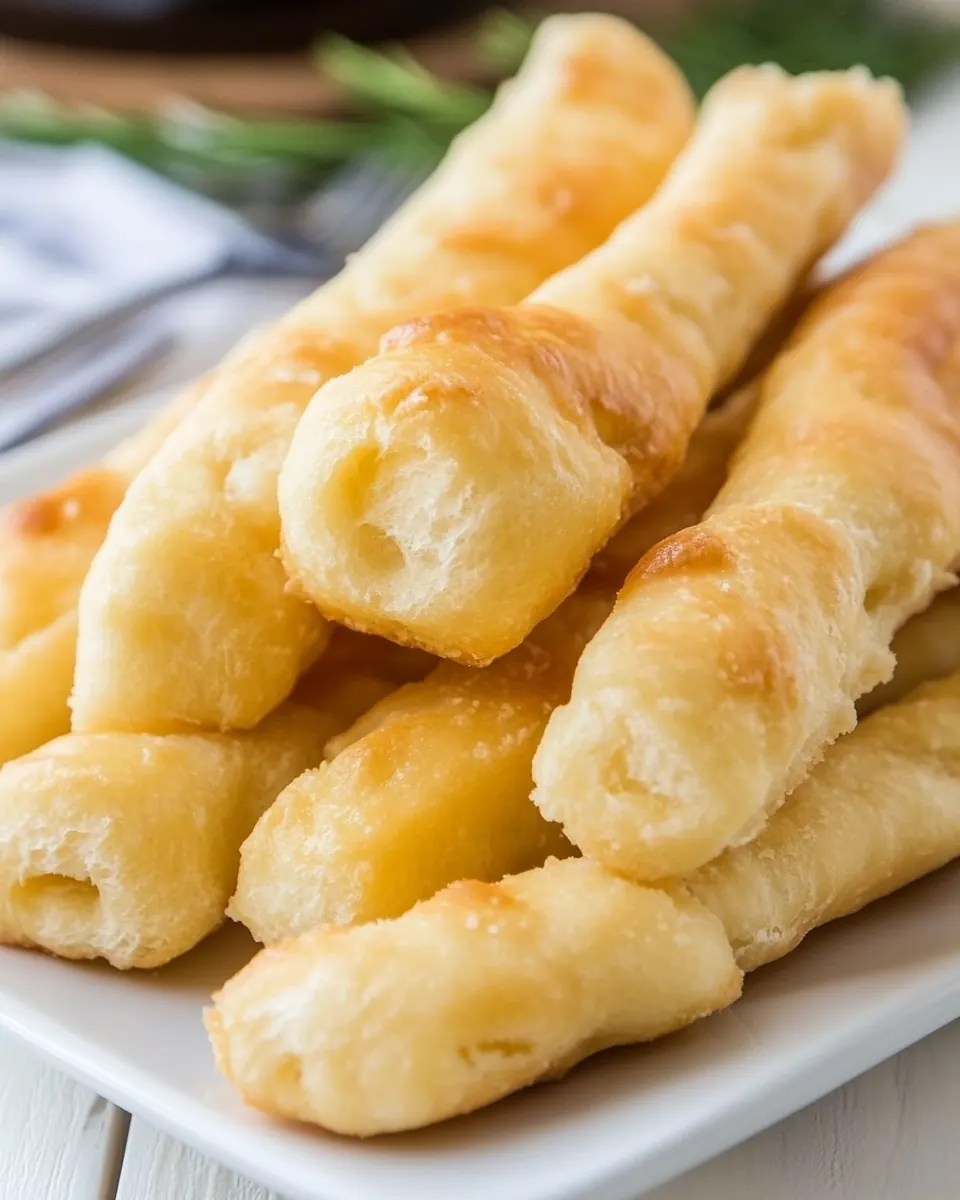
I love how Utterly Butterly Breadsticks lean into rich, salty butter. The two additions of salted butter create layered richness, so each bite is luxuriously soft inside, with an indulgent shine outside. I find the contrast between the tender crumb and the glossy finish makes these irresistibly snackable.
Simple Ingredients, Big Results
What excites me most is that this recipe asks for honest pantry players like plain flour, instant dry yeast, and a little granulated sugar. Together they form a reliable backbone that yields consistent texture. When I am short on time or energy, I count on this list to produce impressive results without fuss.
Hands On, Comforting Process
I adore the tactile experience of kneading and shaping. Working the dough with a dough hook or by hand connects me to the food. The gentle resistance while kneading, the pop of air as dough doubles, these sensory cues are deeply satisfying and make the ritual worth it.
Flexible and Approachable
These breadsticks are forgiving. If the dough is slightly sticky I nudge in a tablespoon more plain flour, and if the butter seems abundant when brushing, trust the technique, as it absorbs into the crust beautifully. I often serve them alongside soups or salads, and they never fail to impress guests with minimal effort.
Quick Enough for Weekends
While the dough takes time to rise, active hands on time is modest. The overall timeline fits nicely into a relaxed morning or afternoon, and the payoff is warm, fragrant bread you can share. That balance of time investment to reward is exactly why I keep coming back to Utterly Butterly Breadsticks.
Ingredients You’ll Need for Utterly Butterly Breadsticks
These ingredients are straightforward, and each one plays a clear role: the instant dry yeast gives lift, plain flour builds structure, salted butter provides flavor and richness, and a touch of granulated sugar helps the yeast bloom. The warm water activates the yeast, while the final butter bath seals in sheen and mouthfeel. Together, they make a soft interior and a glossy, buttery exterior.
- 1 1/2 tablespoon granulated sugar: Sweeten and feed the yeast to help fermentation; granulated sugar provides food for yeast activity and enhances browning. Use exactly the stated amount to balance sweetness without overpowering the savory breadstick flavor. Dissolve into the warm water to ensure even distribution and consistent dough rise.
- 2 teaspoon instant dry yeast: Activate and leaven the dough by producing carbon dioxide; instant dry yeast rapidly incorporates into dry or slightly warm liquids. Sprinkle into warm water with sugar to begin proofing and bubbling within minutes. Measure carefully to achieve proper rise and an open, tender crumb in the finished breadsticks.
- 250 ml warm water (around 40ºC): Provide the liquid necessary to hydrate flour and activate yeast; warm water around 40ºC encourages optimal yeast activity without killing the cells. Use the specified temperature to ensure predictable fermentation and dough consistency. Combine with sugar and yeast so the yeast can dissolve and begin producing gas immediately.
- 60 g salted butter: Enrich and tenderize the dough while adding a buttery flavor; salted butter contributes both fat and a small amount of salt. Melt or soften as directed to incorporate smoothly and create a richer mouthfeel. Balance with additional butter later for finishing to achieve layered buttery notes.
- 360 g plain flour: Supply structure and bulk to the dough through gluten formation; plain flour creates the network that traps gas for rise and chew. Measure and mix to the specified weight for consistent hydration and dough elasticity. Handle gently to develop enough gluten for shape without making the breadsticks tough.
- 1 1/2 teaspoons salt: Season and regulate yeast activity; salt enhances flavor and tightens gluten structure, contributing to chew and crumb. Dissolve or mix evenly into the dough to prevent localized concentrations that could inhibit yeast. Stick to the amount specified to achieve balanced savory taste without over-salting.
- 40 g salted butter (keep separate): Finish and glaze the breadsticks with additional richness; keeping some salted butter separate allows for brushing after baking to maximize buttery sheen and flavor. Melt and apply while sticks are warm so butter absorbs into the crust for a soft, glossy finish. Use as instructed to boost aroma and eating quality.
Instructions for Utterly Butterly Breadsticks
These directions guide you from yeast blooming to brushing hot bread with melted butter. I wrote them to help you notice the tactile and sensory signs that indicate success, and to flag common pitfalls so you can fix them quickly.
- Pour the sugar and yeast into the bowl of your stand mixer (or a large mixing bowl) then gently pour over the warm water. Set the bowl aside for 5 minutes without stirring it.: The air will fill with a faint yeasty fragrance and the surface may look slightly foamy, which signals activation. You will hear almost nothing, but visually a few bubbles at the edges are a green light. Avoid stirring too soon, since that can disrupt the initial enzymatic process. One common mistake is using water that is too hot, which kills yeast, so check that the water feels warm not hot to your wrist.
- Place the 60 g of butter into the microwave and heat on full for 30 seconds or until just melted.: You will notice the butter liquefy quickly and release a nutty, dairy aroma. The melted salted butter should be warm not bubbling, which keeps its fat structure stable for mixing. Overheating can brown the butter and change flavor, so stop heating as soon as it is fully melted and allow it to cool slightly if it is very hot.
- Add this to the yeast mixture then add the flour and salt.: As you fold in the melted salted butter , the mixture will look slack at first, then begin to form a shaggy mass once the plain flour is introduced. You will smell the combination of dough and butter, and the texture will move from sticky batter to something you can work with. A common error is adding all flour at once without ensuring even distribution of salt , so sprinkle the salt across the flour for balance.
- Use your dough hook on a low speed, and combine the ingredients (or use a fork if doing it by hand).: The dough will start to pull away from the bowl as gluten develops, producing a slight clicking sound from the mixer. You will feel resistance increase as the dough becomes more elastic. Avoid running the mixer at high speed which can overwork the dough and warm it excessively; low and steady is the way to get even gluten formation.
- Knead for 5-6 minutes. If the dough is really too sticky add an extra tablespoon of flour.: During this kneading window you will notice the dough become smoother and springy, with occasional tackiness that is normal. When pressed, it should slowly bounce back. A sticky mass that never firms up suggests more flour is needed, but be cautious adding too much which yields dense bread. Resist the temptation to shorten the knead time, as under-kneaded dough will not trap gas effectively.
- Once it has been kneaded, remove the dough hook, cover the bowl with cling film and leave it to double in size. About an hour.: The bowl will fill as the yeast produces gas, and the dough surface may show small bubbles and a taut skin. The aroma will turn lightly fermented and pleasant. If it does not double, the room might be cold; move the bowl to a warmer spot for gentle proofing. Avoid punching it down prematurely, as that will waste the trapped gas needed for lift.
- Once it has risen, divide the dough into 6 pieces and form them into batons.: You will feel the dough relax as you divide, and shaping will produce smooth, elongated logs. The texture should be soft and slightly springy under your hands. If the dough resists shaping, let it rest for a few minutes to relax the gluten. A common oversight is rolling too tightly which can squeeze out gas and lead to tighter crumb.
- Line a baking tray with cooking paper and place the breadsticks on it. Cover them with a tea towel and leave them for an hour.: The second proof develops final volume, and the dough will puff and feel airy when touched. The surface may show tiny pinprick bubbles, which is a good sign. Avoid rough handling while transferring, since pressing can deflate the shapes and reduce oven spring.
- Preheat oven to 200ºC.: You will hear the oven hum as it reaches temperature, and the interior should feel consistently hot when you open it. Preheating ensures immediate oven spring and correct crust formation. Do not slide the sticks in before the oven reaches the full temperature, as a cooler oven yields pale, undercooked crusts.
- Take a very sharp knife and score the rolls on the diagonal (2 or 3 scores per stick).: The clean slice will reveal a pale interior and create decorative vents that guide expansion. A sharp blade makes precise, neat cuts, producing crisp edges that brown attractively. Dull knives drag and deform the dough, so sharpen or use a lame to avoid tearing the surface.
- Bake in the middle of the oven for 15 minutes.: The sticks will change color, moving from pale to a golden brown with a gently crisping exterior. You will hear a faint crackle of the crust setting and smell deepened, toasty notes. Underbaking leaves doughy centers, while overbaking dries them out, so aim for a golden hue as your visual cue.
- A minute before you remove the rolls from the oven place the 40 g of butter into the microwave to melt.: The butter should liquefy and send a warm, rich aroma across the kitchen, ready to be brushed on hot bread. Melting at the last minute ensures the butter is perfectly warm for soaking into the crust. Avoid overheating to the point of browning, as that alters flavor balance.
- Remove the breadsticks from the oven and carefully brush each roll with the melted butter. It will look like you have far too much butter but just start on the first roll and brush it with butter, then move onto the next. By the time you have done all 6, it will have soaked into the first and you can repeat. Do this until all the butter has been used up. (don't forget the sides of your breadsticks).: The hot bread will hiss softly as the butter meets crust, releasing a glossy sheen and intensified butter aroma. Brushing while hot helps the fat soak in, creating a tender surface that keeps the sticks indulgent. An easy mistake is applying cold butter which will not absorb properly and leave clumps, so always use warmed salted butter .
- Eat warm.: The best sensory payoff is immediate warmth, with a buttery aroma and a soft interior that yields satisfying chew. Serve right away to enjoy the contrast between glossy exterior and pillowy inside. Waiting too long cools the butter and slightly firms the crumb, so plan to enjoy them while they are freshly brushed.
Change It Up
If you want to vary these breadsticks, small adjustments make a big difference. Below are practical, flavorful ideas that play with texture and presentation while staying true to the recipe’s simple spirit.
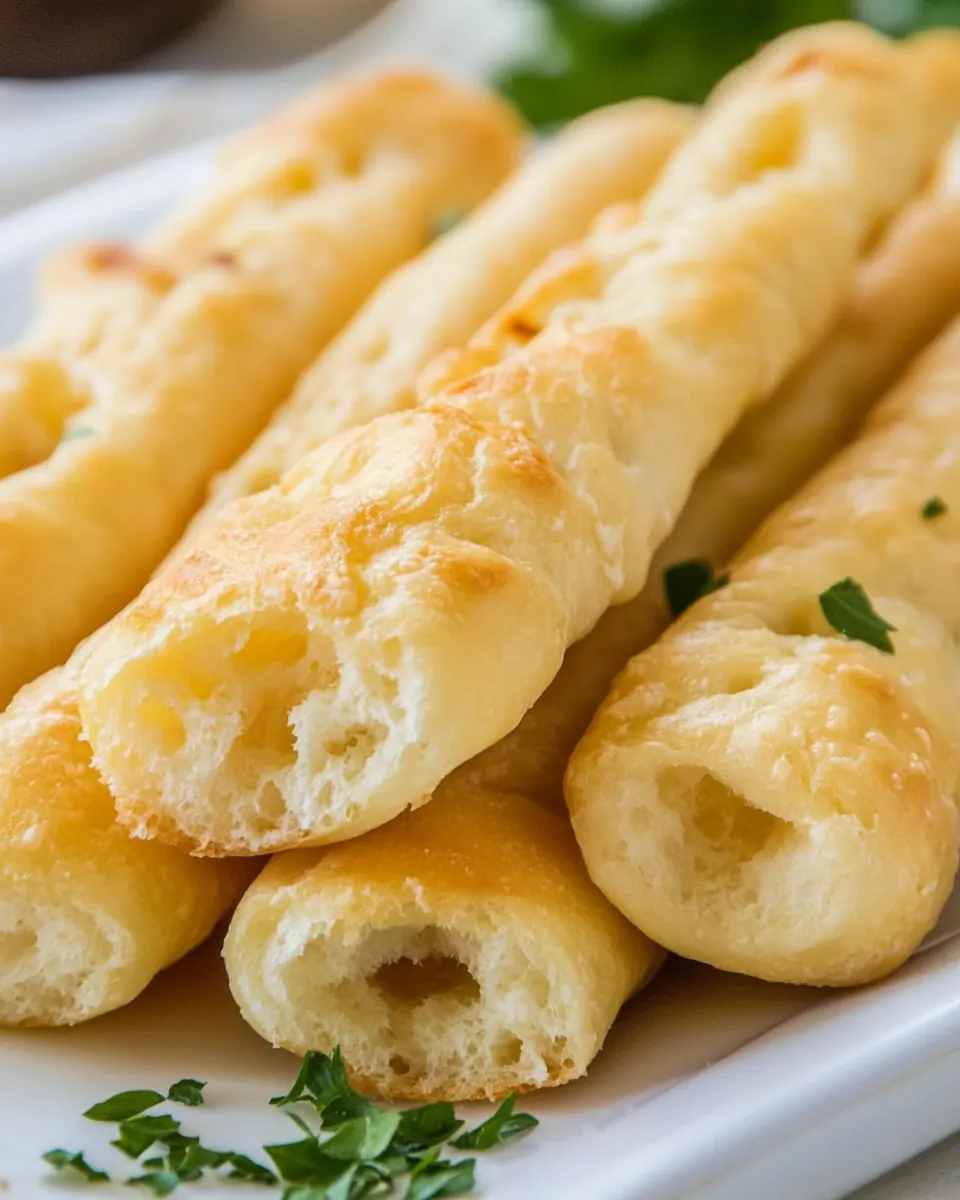
- Herb finishing: After brushing with the melted salted butter, sprinkle a little chopped fresh herb for brightness and aroma.
- Cheesy twist: Right after scoring, dust a small amount of finely grated cheese onto the sticks so it melts during baking, creating a savory crust.
- Garlic butter: Mix a crushed garlic clove into the melted salted butter for a pungent, aromatic glaze that clings to the hot surface.
- Seeded top: Press sesame or nigella seeds into the surface right after brushing to add crunch and visual appeal.
- Sweet variation: Swap the final butter for a cinnamon sugar glaze for a breakfast friendly version.
Serving This Utterly Butterly Breadsticks
These breadsticks are versatile, fitting casual meals or special occasions. Here are thoughtful serving ideas and storage notes that keep them fresh and enjoyable.
- Serve warm with soups: Pair with a bowl of soup to use them as a dipper and soak up broths.
- Accompany salads: Offer alongside a crisp salad to add a comforting, carby counterpoint.
- Party platter: Present them with small dips for gatherings, they are excellent for sharing.
- Storage tip: Keep leftover breadsticks in an airtight container at room temperature for up to two days, reheat briefly in a warm oven to refresh.
- Occasion ideas: Great for casual dinners, weekend brunches, or as part of Ramadan iftar spreads where warm bread is welcome.
FAQ
Conclusion
These Utterly Butterly Breadsticks stand out for their simple ingredient list and rich, buttery finish that makes every bite feel special. They are comforting to make and rewarding to share, whether you are feeding a small family or entertaining guests. Give them a try on a relaxed morning or beside a favorite soup for a memorable touch. You will find the process calming and the result reliably delicious, a recipe that earns a spot in your baking rotation.
Utterly Butterly Breadsticks
Equipment
- Stand mixer
- Dough Hook
- Baking Tray
- Microwave
- Sharp Knife
Ingredients
- 1 1/2 tablespoon granulated sugar Sweeten and feed the yeast to help fermentation; granulated sugar provides food for yeast activity and enhances browning. Use exactly the stated amount to balance sweetness without overpowering the savory breadstick flavor. Dissolve into the warm water to ensure even distribution and consistent dough rise.
- 2 teaspoon instant dry yeast Activate and leaven the dough by producing carbon dioxide; instant dry yeast rapidly incorporates into dry or slightly warm liquids. Sprinkle into warm water with sugar to begin proofing and bubbling within minutes. Measure carefully to achieve proper rise and an open, tender crumb in the finished breadsticks.
- 250 ml warm water (around 40ºC) Provide the liquid necessary to hydrate flour and activate yeast; warm water around 40ºC encourages optimal yeast activity without killing the cells. Use the specified temperature to ensure predictable fermentation and dough consistency. Combine with sugar and yeast so the yeast can dissolve and begin producing gas immediately.
- 60 g salted butter Enrich and tenderize the dough while adding a buttery flavor; salted butter contributes both fat and a small amount of salt. Melt or soften as directed to incorporate smoothly and create a richer mouthfeel. Balance with additional butter later for finishing to achieve layered buttery notes.
- 360 g plain flour Supply structure and bulk to the dough through gluten formation; plain flour creates the network that traps gas for rise and chew. Measure and mix to the specified weight for consistent hydration and dough elasticity. Handle gently to develop enough gluten for shape without making the breadsticks tough.
- 1 1/2 teaspoons salt Season and regulate yeast activity; salt enhances flavor and tightens gluten structure, contributing to chew and crumb. Dissolve or mix evenly into the dough to prevent localized concentrations that could inhibit yeast. Stick to the amount specified to achieve balanced savory taste without over-salting.
- 40 g salted butter (keep separate) Finish and glaze the breadsticks with additional richness; keeping some salted butter separate allows for brushing after baking to maximize buttery sheen and flavor. Melt and apply while sticks are warm so butter absorbs into the crust for a soft, glossy finish. Use as instructed to boost aroma and eating quality.
Instructions
- Pour the sugar and yeast into the bowl of your stand mixer (or a large mixing bowl) then gently pour over the warm water. Set the bowl aside for 5 minutes without stirring it.: The air will fill with a faint yeasty fragrance and the surface may look slightly foamy, which signals activation. You will hear almost nothing, but visually a few bubbles at the edges are a green light. Avoid stirring too soon, since that can disrupt the initial enzymatic process. One common mistake is using water that is too hot, which kills yeast, so check that the water feels warm not hot to your wrist.
- Place the 60 g of butter into the microwave and heat on full for 30 seconds or until just melted.: You will notice the butter liquefy quickly and release a nutty, dairy aroma. The melted salted butter should be warm not bubbling, which keeps its fat structure stable for mixing. Overheating can brown the butter and change flavor, so stop heating as soon as it is fully melted and allow it to cool slightly if it is very hot.
- Add this to the yeast mixture then add the flour and salt.: As you fold in the melted salted butter , the mixture will look slack at first, then begin to form a shaggy mass once the plain flour is introduced. You will smell the combination of dough and butter, and the texture will move from sticky batter to something you can work with. A common error is adding all flour at once without ensuring even distribution of salt , so sprinkle the salt across the flour for balance.
- Use your dough hook on a low speed, and combine the ingredients (or use a fork if doing it by hand).: The dough will start to pull away from the bowl as gluten develops, producing a slight clicking sound from the mixer. You will feel resistance increase as the dough becomes more elastic. Avoid running the mixer at high speed which can overwork the dough and warm it excessively; low and steady is the way to get even gluten formation.
- Knead for 5-6 minutes. If the dough is really too sticky add an extra tablespoon of flour.: During this kneading window you will notice the dough become smoother and springy, with occasional tackiness that is normal. When pressed, it should slowly bounce back. A sticky mass that never firms up suggests more flour is needed, but be cautious adding too much which yields dense bread. Resist the temptation to shorten the knead time, as under-kneaded dough will not trap gas effectively.
- Once it has been kneaded, remove the dough hook, cover the bowl with cling film and leave it to double in size. About an hour.: The bowl will fill as the yeast produces gas, and the dough surface may show small bubbles and a taut skin. The aroma will turn lightly fermented and pleasant. If it does not double, the room might be cold; move the bowl to a warmer spot for gentle proofing. Avoid punching it down prematurely, as that will waste the trapped gas needed for lift.
- Once it has risen, divide the dough into 6 pieces and form them into batons.: You will feel the dough relax as you divide, and shaping will produce smooth, elongated logs. The texture should be soft and slightly springy under your hands. If the dough resists shaping, let it rest for a few minutes to relax the gluten. A common oversight is rolling too tightly which can squeeze out gas and lead to tighter crumb.
- Line a baking tray with cooking paper and place the breadsticks on it. Cover them with a tea towel and leave them for an hour.: The second proof develops final volume, and the dough will puff and feel airy when touched. The surface may show tiny pinprick bubbles, which is a good sign. Avoid rough handling while transferring, since pressing can deflate the shapes and reduce oven spring.
- Preheat oven to 200ºC.: You will hear the oven hum as it reaches temperature, and the interior should feel consistently hot when you open it. Preheating ensures immediate oven spring and correct crust formation. Do not slide the sticks in before the oven reaches the full temperature, as a cooler oven yields pale, undercooked crusts.
- Take a very sharp knife and score the rolls on the diagonal (2 or 3 scores per stick).: The clean slice will reveal a pale interior and create decorative vents that guide expansion. A sharp blade makes precise, neat cuts, producing crisp edges that brown attractively. Dull knives drag and deform the dough, so sharpen or use a lame to avoid tearing the surface.
- Bake in the middle of the oven for 15 minutes.: The sticks will change color, moving from pale to a golden brown with a gently crisping exterior. You will hear a faint crackle of the crust setting and smell deepened, toasty notes. Underbaking leaves doughy centers, while overbaking dries them out, so aim for a golden hue as your visual cue.
- A minute before you remove the rolls from the oven place the 40 g of butter into the microwave to melt.: The butter should liquefy and send a warm, rich aroma across the kitchen, ready to be brushed on hot bread. Melting at the last minute ensures the butter is perfectly warm for soaking into the crust. Avoid overheating to the point of browning, as that alters flavor balance.
- Remove the breadsticks from the oven and carefully brush each roll with the melted butter. It will look like you have far too much butter but just start on the first roll and brush it with butter, then move onto the next. By the time you have done all 6, it will have soaked into the first and you can repeat. Do this until all the butter has been used up. (don't forget the sides of your breadsticks).: The hot bread will hiss softly as the butter meets crust, releasing a glossy sheen and intensified butter aroma. Brushing while hot helps the fat soak in, creating a tender surface that keeps the sticks indulgent. An easy mistake is applying cold butter which will not absorb properly and leave clumps, so always use warmed salted butter .
- Eat warm.: The best sensory payoff is immediate warmth, with a buttery aroma and a soft interior that yields satisfying chew. Serve right away to enjoy the contrast between glossy exterior and pillowy inside. Waiting too long cools the butter and slightly firms the crumb, so plan to enjoy them while they are freshly brushed.
Notes
- Herb finishing: After brushing with the melted salted butter, sprinkle a little chopped fresh herb for brightness and aroma.
- Cheesy twist: Right after scoring, dust a small amount of finely grated cheese onto the sticks so it melts during baking, creating a savory crust.
- Garlic butter: Mix a crushed garlic clove into the melted salted butter for a pungent, aromatic glaze that clings to the hot surface.
- Seeded top: Press sesame or nigella seeds into the surface right after brushing to add crunch and visual appeal.
- Sweet variation: Swap the final butter for a cinnamon sugar glaze for a breakfast friendly version.