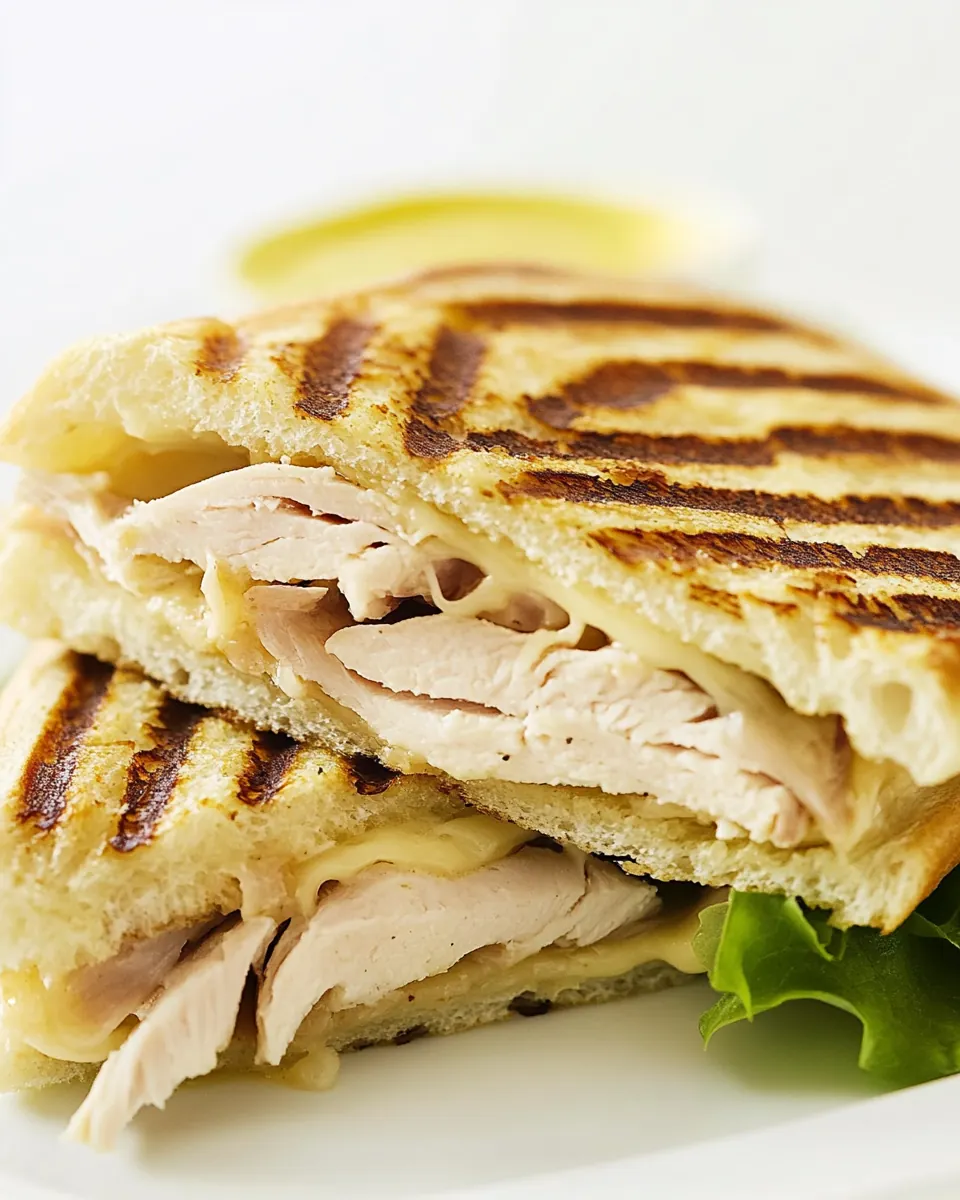
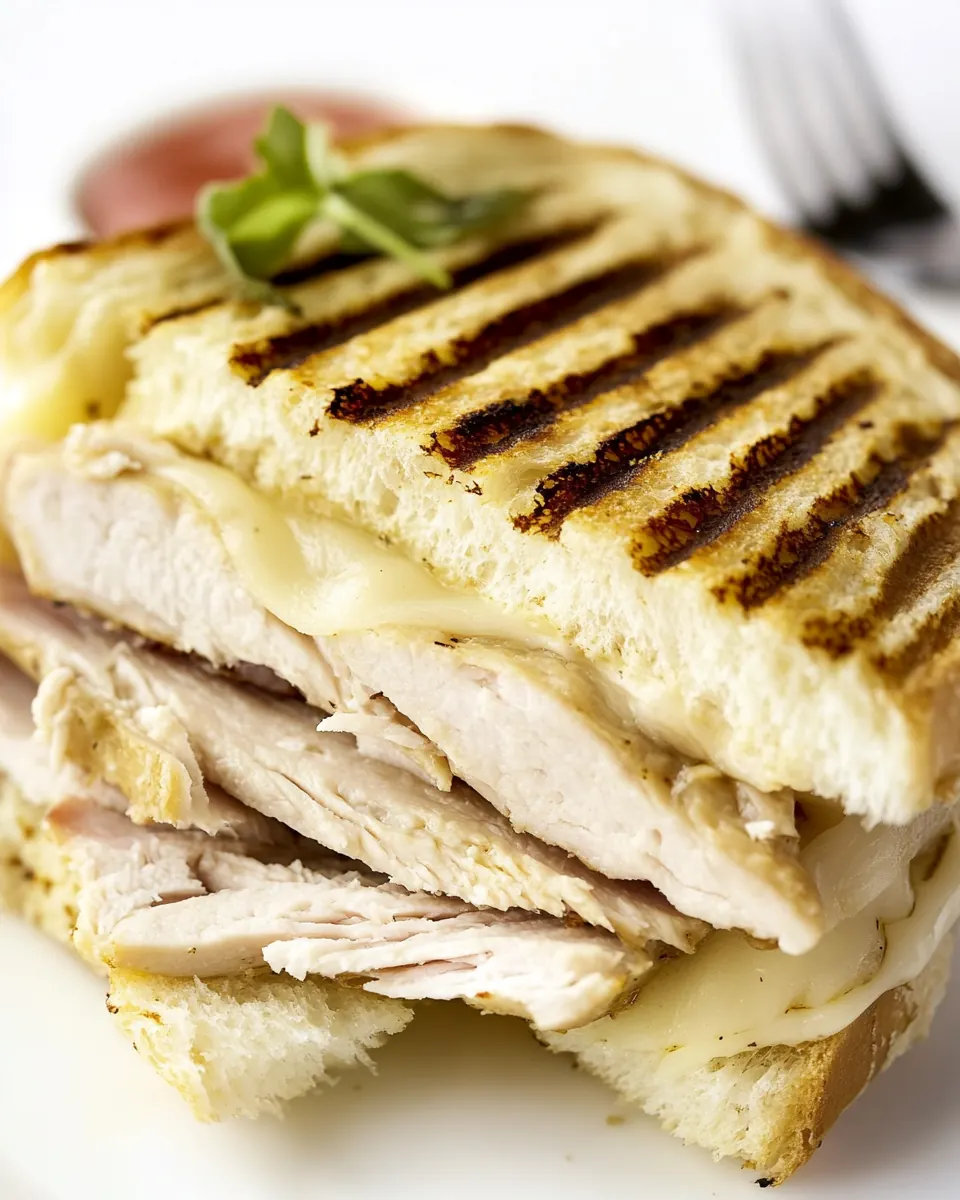
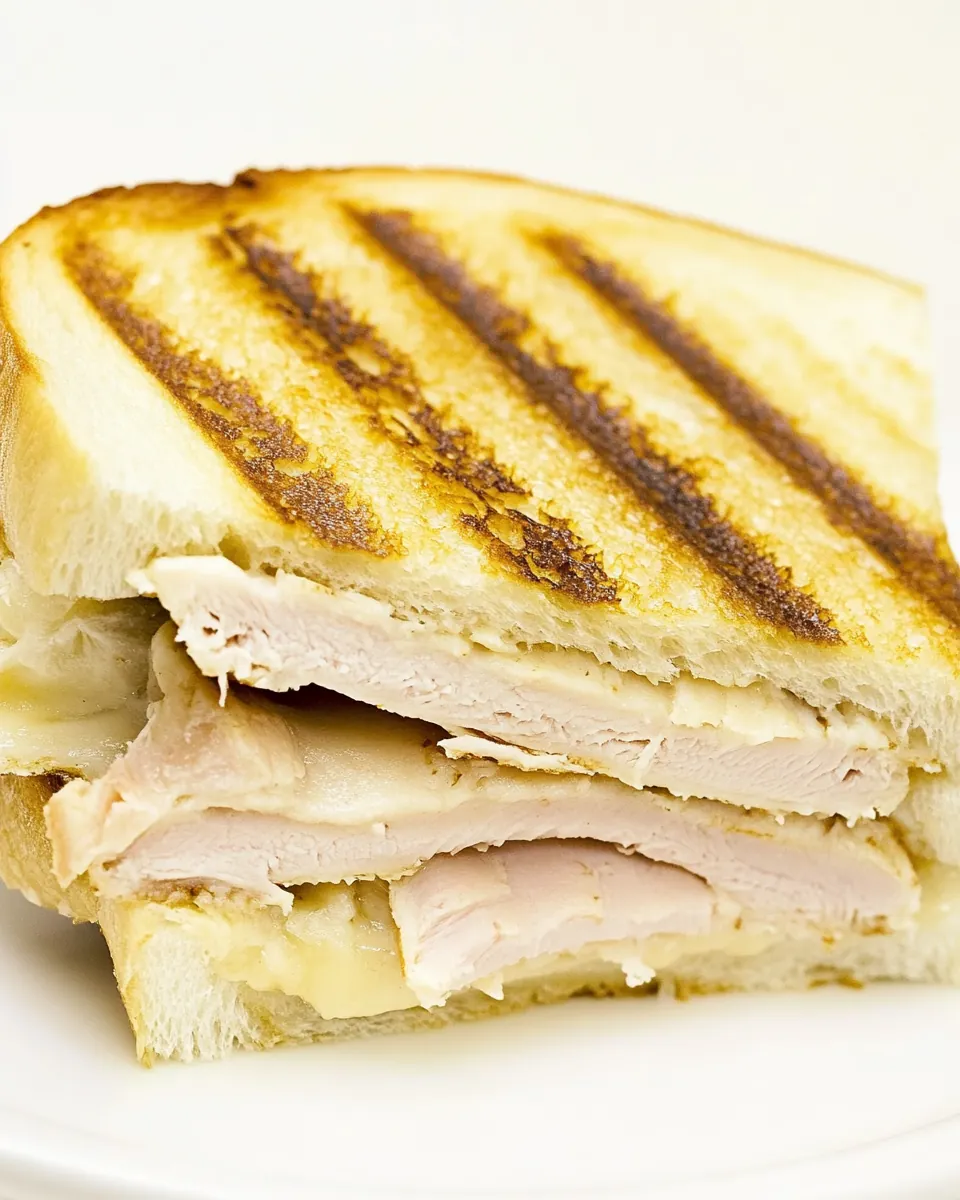
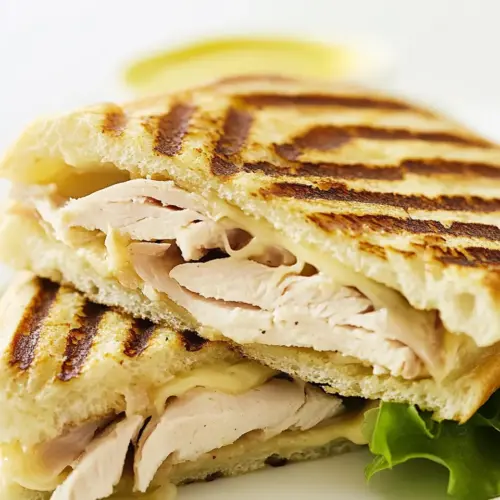
Turkey Panini
Turkey Panini became my quick go to when I needed something both comforting and fast after a long day of chasing deadlines and groceries.
One particular evening I was starving, the fridge was sparse, and I found two slices of sandwich bread, a sliver of butter, a couple of slices of cheese, and a tidy stack of deli turkey. I stacked them with care, pressed the sandwich until the edges crisped, and listened to that satisfying sizzle. The first bite, warm and slightly crunchy, felt like a small celebration. I like how this Turkey Panini rewards attention without demanding hours, and how the simple technique elevates humble ingredients.
Over time I adapted the routine for packed lunches and weekday dinners, learning small adjustments that made each sandwich more consistent, like creating a moisture barrier with an extra slice of cheese and letting it rest a touch before slicing. These tiny choices turned a plain sandwich into a repeatable favorite. Whether you have five minutes or are prepping for a picnic, this Turkey Panini is forgiving, quick, and reliably satisfying.
Recipe Snapshot
6 mins
5 mins
1 mins
Easy
350 kcal
American
Gluten-Free, Low FODMAP
Dinner
Equipment, 101 Packed Lunches, Kids Lunch Box
The Charm of This Turkey Panini
Reliable weeknight winner
I reach for this Turkey Panini when time is tight but I still want something comforting. The assembly takes moments, and the payoff is a hot, melty bite that feels like effort even when it was not.
Textural contrast
I adore the crisp exterior against the gooey cheese. That contrast is what keeps me coming back, and it makes each mouthful interesting instead of flat or one note.
Ingredient flexibility
The recipe is forgiving. If I have different sandwich loaves or a firmer tomato, the core method still shines. I often tweak quantities depending on hunger, and it always behaves well.
Portable and packable
When I need a lunch to tote, the sandwich holds up nicely. The middle layer of cheese acts as a moisture buffer, so the sandwich bread does not go soggy as quickly.
Comfort food with smart technique
What makes this more than a reheated sandwich is the pressing and gentle browning. I find that pressing until the crust is golden gives the filling a warm, cohesive texture that feels truly satisfying.
What You Need for Turkey Panini

These straightforward components come together to create a balanced sandwich. The key players are the sandwich bread which provides structure, the cheese which melts into a creamy binder, and the deli turkey which delivers savory, meaty flavor. A slice of tomato adds brightness and moisture, while a thin smear of butter on the outside ensures a golden, crisp crust when you grill it.
- 2 slices sandwich bread: Spread and melt on the outer sides of the bread to create a golden, crispy crust while preventing sticking; adds buttery flavor and helps achieve even browning during grilling.
- 2 slices cheese: Layer between the bread to provide creamy, melty richness and a mild savory profile that binds the sandwich components together; contributes to texture contrast and enhances overall mouthfeel when heated.
- 1 ounces deli turkey: Place within the sandwich as the primary savory protein, offering tender, smoky flavor and a satisfying chew; supplies salt and umami that complement the cheese and tomato.
- 2 slices of tomato: Arrange inside the sandwich to add fresh, juicy acidity and a light vegetal note that cuts through richness; contributes moisture, subtle sweetness, and textural contrast when warmed briefly.
- butter, for grilling: Coat the exterior of the bread before grilling to promote even browning and a crisp surface while imparting a rich, slightly savory taste; also helps prevent the panini from sticking to the cooking surface.
Directions for Turkey Panini
These directions are short and approachable, but the technique makes all the difference. I walk you through a simple assembly, grilling, and resting process so the sandwich comes out crisp, warm, and evenly melted.
- Make the sandwich starting with a layer of cheese, then add the turkey, the tomato in the middle, and then another layer of cheese to create a moisture barrier to prevent the bread from getting soggy.: The smell of fresh cheese and the faint sweetness of the tomato are immediate sensory clues that you are building a balanced sandwich. When you layer the deli turkey between two layers of cheese , the melting cheese will form a barrier that traps juices and prevents the sandwich bread from becoming limp. Press the components together gently with your fingers to compact the filling, which helps the sandwich heat uniformly. Watch for uneven stacks where one side is thicker than the other, because that can cause uneven browning and spots of unmelted cheese. A common pitfall is piling ingredients haphazardly, which leads to leaking juices and a sloppy press, so aim for even distribution and moderate pressure when assembling.
- Brush the outside of the sandwich with a little butter or olive oil. Grill it in a panini press or skillet with a heavy pan on top to press it down. Cook until golden on one side, flip, and repeat. Cheese should be gooey and the outside should be crisp.: You will notice a rich, nutty aroma as the butter warms on the surface. This thin coat creates immediate contact with the hot skillet or press, producing a crisp, golden exterior that contrasts the soft interior. The buttery sizzle signals that the Maillard reaction is taking place, which forms the brown, flavorful crust you want. Be careful not to overdo it, because too much butter can lead to greasy patches and uneven browning. A frequent oversight is using cold, clotted butter which does not spread smoothly, so soften it slightly for an even coat.
- Let it cool slightly before slicing it in half on a plate or cutting board. Enjoy!: When the sandwich hits the hot surface you should hear a steady sizzle, a sign that the crust is transforming. If you use a skillet, place a heavy pan on top to simulate a press, which compresses the layers and promotes even contact between filling and heat. This compression not only speeds melting but also gives you those characteristic pressed grill marks if using a press. The sandwich will steam slightly as the interior warms, and that steam aids in melding the flavors. One mistake to avoid is applying excessive weight immediately, which can squeeze out fillings; instead, add gentle, consistent pressure and increase it gradually if needed.
- Cook until golden on one side, flip, and repeat: Listen for a change in the sizzle, and visually check for a golden brown hue along the edges. Flip confidently using a spatula, then apply the same gentle weight again to ensure even browning on the second side. The visual cue of bubbling cheese near the edge is a reliable indicator the interior has become gooey. If you rush and remove the sandwich too early, the center may be underheated and the cheese will not reach that luscious, stringy stage. Conversely, leaving it too long can dry the turkey or over crisp the bread.
- Cheese should be gooey and the outside should be crisp: The contrast between a crunchy crust and a molten interior is the signature of a great panini. When you press the knife through, you should feel slight resistance, then a pull as the melted cheese yields. The aroma will be buttery and toasty, and the tomato will add a subtle bright note against the savory deli turkey . If the sandwich seems cold in the middle, return it to the pan for short intervals to avoid overbrowning while ensuring even warmth.
- Let it cool slightly before slicing it in half on a plate or cutting board: Allowing the sandwich to rest for a minute or two makes slicing cleaner and safer. You will notice the melting cheese thicken a touch as it cools, which prevents excessive dripping when you cut. This pause also lets the flavors settle so each half holds together nicely. A common mistake is slicing immediately, which can cause hot filling to spill and create a mess, so give it a brief rest.
- Enjoy: Take a moment to appreciate the warm, crisp exterior and the savory, melty interior. The first bite should deliver a balanced mix of textures and flavors. Savor how the simple technique turned minimal ingredients into something satisfying and comforting.
Customization Ideas
This section offers practical tweaks and serving variations to personalize your Turkey Panini. Small swaps can change texture, flavor, and portability, and each tip below includes a focused suggestion so you can adapt the sandwich to the moment.
- Double cheese shield: Add an extra slice of cheese both above and below the filling to create an effective moisture barrier that preserves the sandwich bread when packing for later.
- Minimal butter: Use a very thin layer of butter to brown the crust, this reduces greasiness while keeping that toasty aroma and crisp texture.
- Tomato placement: Keep the tomato centered between cheese layers to limit sogginess and ensure brightness in every bite.
- Even layering: Distribute the deli turkey in an even single layer rather than a thick mound to promote uniform heating and melting.
- Press gradually: If using a heavy pan, apply weight gradually to avoid squeezing out fillings, this preserves the structure and prevents leaks.
What Goes Well With This Turkey Panini
The Turkey Panini pairs well with light sides and is suitable for many occasions. Below are ways I like to serve and store it, with practical pairing ideas for lunch, casual dinners, and packed meals.
- Light salad: A crisp green salad dressed lightly complements the warm, cheesy sandwich and adds a refreshing contrast of texture and acidity.
- Crisp chips: A small portion of crunchy chips or crisps enhances the textural play, making each bite more satisfying for casual lunches.
- Pickles or relishes: A tart pickle on the side cuts through the richness and brightens the palate between bites.
- Packed lunch tips: Allow the sandwich to cool slightly, wrap it in parchment, and store it in a lunch container; the extra cheese layer helps maintain structure for transport.
- Occasions: Great for quick weekday dinners, relaxed weekend lunches, or as a reliable option for a simple packed meal when you need something filling but effortless.
- Storage: Refrigerate leftovers in an airtight container for up to one day, and reheat briefly in a skillet to regain crispness rather than microwaving, which can make the sandwich bread limp.
FAQ
Conclusion
This Turkey Panini is special because simple ingredients and a careful pressing technique transform ordinary slices into a warm, satisfying meal. The balance of crisp, buttery bread and melty cheese around savory deli turkey makes it a comforting, reliable choice for busy days. Give it a try the next time you need a fast, delicious meal, and notice how small steps like cheese placement and gentle pressing elevate the final sandwich.
Turkey Panini
Equipment
- Equipment
- 101 Packed Lunches
- Kids Lunch Box
Ingredients
- 2 slices sandwich bread Spread and melt on the outer sides of the bread to create a golden, crispy crust while preventing sticking; adds buttery flavor and helps achieve even browning during grilling.
- 2 slices cheese Layer between the bread to provide creamy, melty richness and a mild savory profile that binds the sandwich components together; contributes to texture contrast and enhances overall mouthfeel when heated.
- 1 ounces deli turkey Place within the sandwich as the primary savory protein, offering tender, smoky flavor and a satisfying chew; supplies salt and umami that complement the cheese and tomato.
- 2 slices of tomato Arrange inside the sandwich to add fresh, juicy acidity and a light vegetal note that cuts through richness; contributes moisture, subtle sweetness, and textural contrast when warmed briefly.
- butter, for grilling Coat the exterior of the bread before grilling to promote even browning and a crisp surface while imparting a rich, slightly savory taste; also helps prevent the panini from sticking to the cooking surface.
Instructions
- Make the sandwich starting with a layer of cheese, then add the turkey, the tomato in the middle, and then another layer of cheese to create a moisture barrier to prevent the bread from getting soggy.: The smell of fresh cheese and the faint sweetness of the tomato are immediate sensory clues that you are building a balanced sandwich. When you layer the deli turkey between two layers of cheese , the melting cheese will form a barrier that traps juices and prevents the sandwich bread from becoming limp. Press the components together gently with your fingers to compact the filling, which helps the sandwich heat uniformly. Watch for uneven stacks where one side is thicker than the other, because that can cause uneven browning and spots of unmelted cheese. A common pitfall is piling ingredients haphazardly, which leads to leaking juices and a sloppy press, so aim for even distribution and moderate pressure when assembling.
- Brush the outside of the sandwich with a little butter or olive oil. Grill it in a panini press or skillet with a heavy pan on top to press it down. Cook until golden on one side, flip, and repeat. Cheese should be gooey and the outside should be crisp.: You will notice a rich, nutty aroma as the butter warms on the surface. This thin coat creates immediate contact with the hot skillet or press, producing a crisp, golden exterior that contrasts the soft interior. The buttery sizzle signals that the Maillard reaction is taking place, which forms the brown, flavorful crust you want. Be careful not to overdo it, because too much butter can lead to greasy patches and uneven browning. A frequent oversight is using cold, clotted butter which does not spread smoothly, so soften it slightly for an even coat.
- Let it cool slightly before slicing it in half on a plate or cutting board. Enjoy!: When the sandwich hits the hot surface you should hear a steady sizzle, a sign that the crust is transforming. If you use a skillet, place a heavy pan on top to simulate a press, which compresses the layers and promotes even contact between filling and heat. This compression not only speeds melting but also gives you those characteristic pressed grill marks if using a press. The sandwich will steam slightly as the interior warms, and that steam aids in melding the flavors. One mistake to avoid is applying excessive weight immediately, which can squeeze out fillings; instead, add gentle, consistent pressure and increase it gradually if needed.
- Cook until golden on one side, flip, and repeat: Listen for a change in the sizzle, and visually check for a golden brown hue along the edges. Flip confidently using a spatula, then apply the same gentle weight again to ensure even browning on the second side. The visual cue of bubbling cheese near the edge is a reliable indicator the interior has become gooey. If you rush and remove the sandwich too early, the center may be underheated and the cheese will not reach that luscious, stringy stage. Conversely, leaving it too long can dry the turkey or over crisp the bread.
- Cheese should be gooey and the outside should be crisp: The contrast between a crunchy crust and a molten interior is the signature of a great panini. When you press the knife through, you should feel slight resistance, then a pull as the melted cheese yields. The aroma will be buttery and toasty, and the tomato will add a subtle bright note against the savory deli turkey . If the sandwich seems cold in the middle, return it to the pan for short intervals to avoid overbrowning while ensuring even warmth.
- Let it cool slightly before slicing it in half on a plate or cutting board: Allowing the sandwich to rest for a minute or two makes slicing cleaner and safer. You will notice the melting cheese thicken a touch as it cools, which prevents excessive dripping when you cut. This pause also lets the flavors settle so each half holds together nicely. A common mistake is slicing immediately, which can cause hot filling to spill and create a mess, so give it a brief rest.
- Enjoy: Take a moment to appreciate the warm, crisp exterior and the savory, melty interior. The first bite should deliver a balanced mix of textures and flavors. Savor how the simple technique turned minimal ingredients into something satisfying and comforting.
Notes
- Double cheese shield: Add an extra slice of cheese both above and below the filling to create an effective moisture barrier that preserves the sandwich bread when packing for later.
- Minimal butter: Use a very thin layer of butter to brown the crust, this reduces greasiness while keeping that toasty aroma and crisp texture.
- Tomato placement: Keep the tomato centered between cheese layers to limit sogginess and ensure brightness in every bite.
- Even layering: Distribute the deli turkey in an even single layer rather than a thick mound to promote uniform heating and melting.
- Press gradually: If using a heavy pan, apply weight gradually to avoid squeezing out fillings, this preserves the structure and prevents leaks.