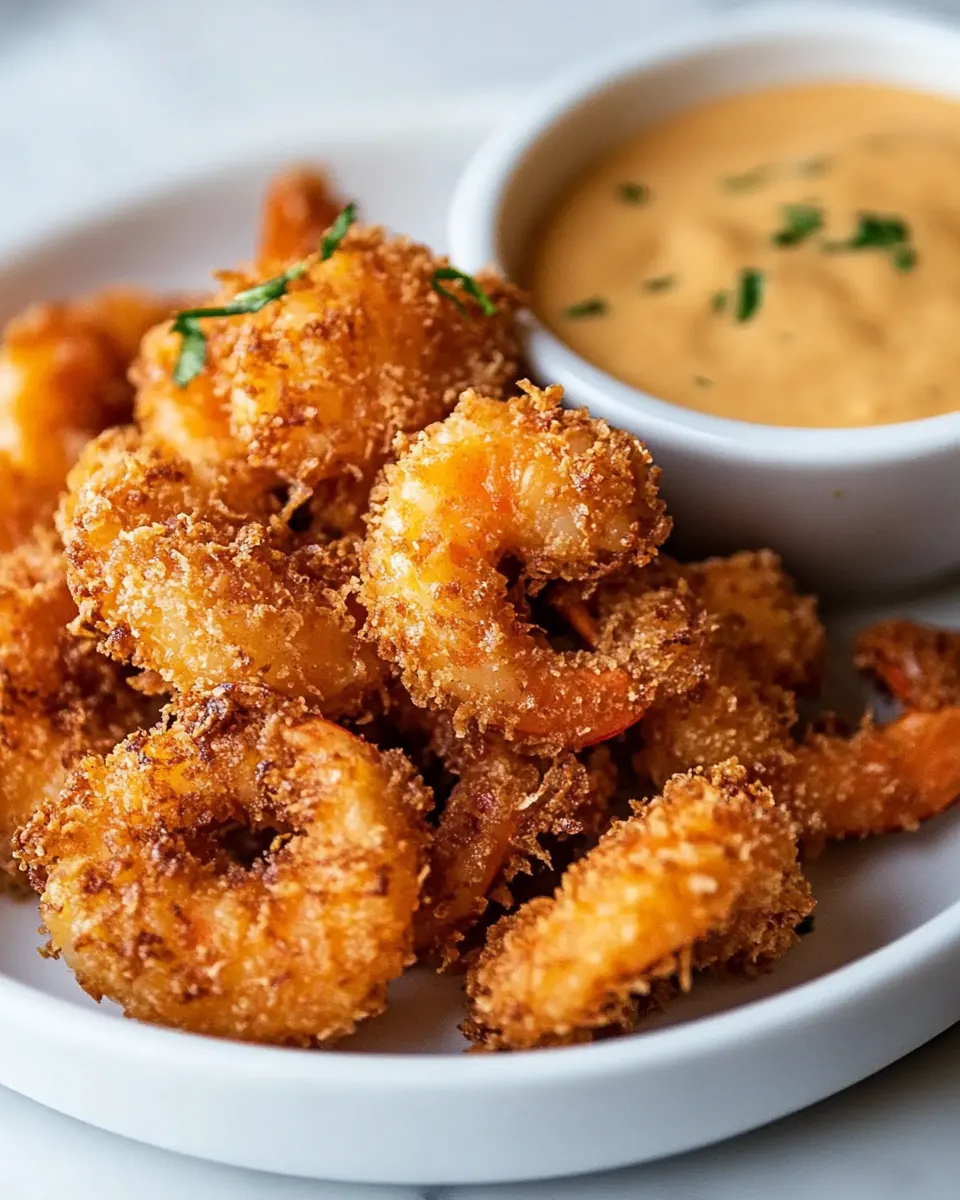
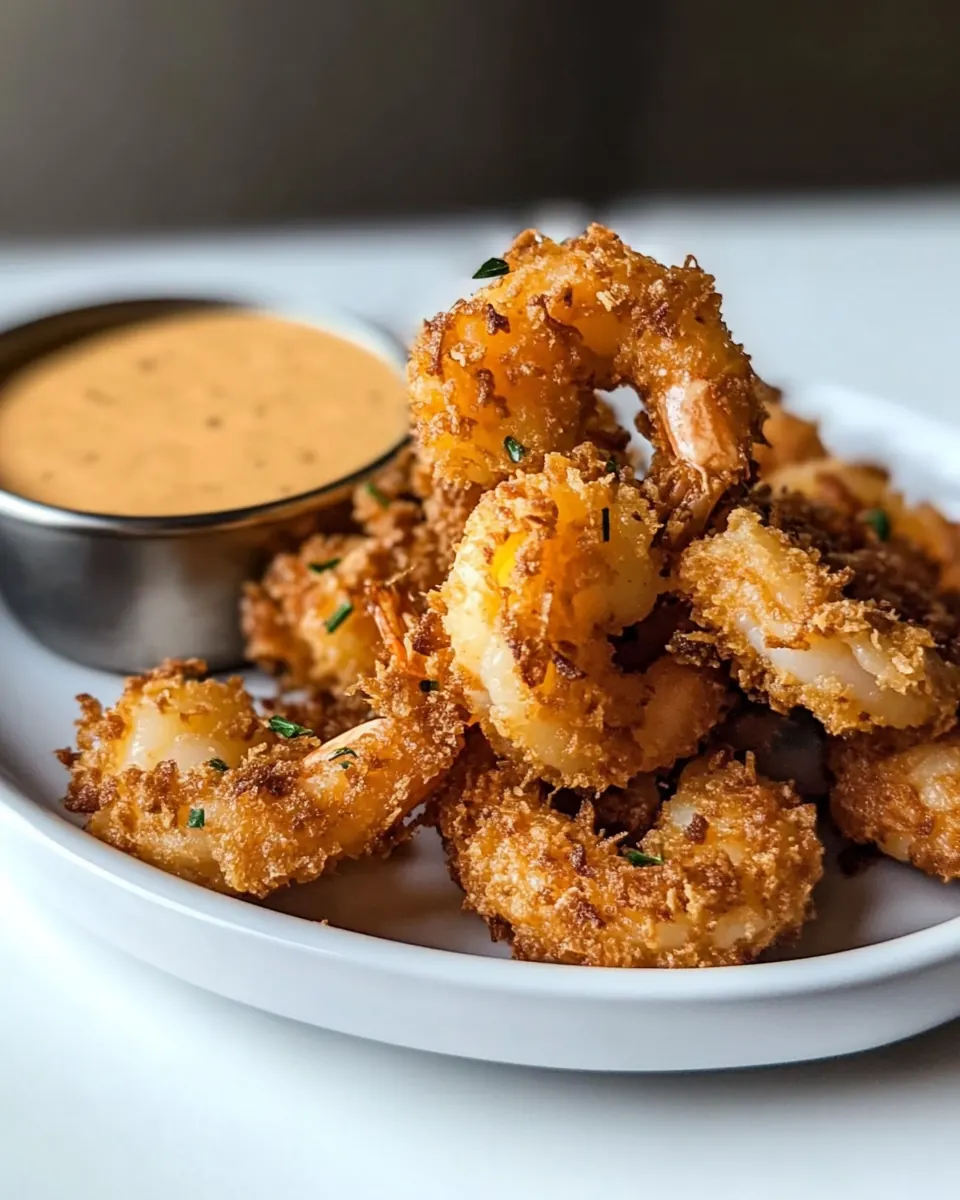
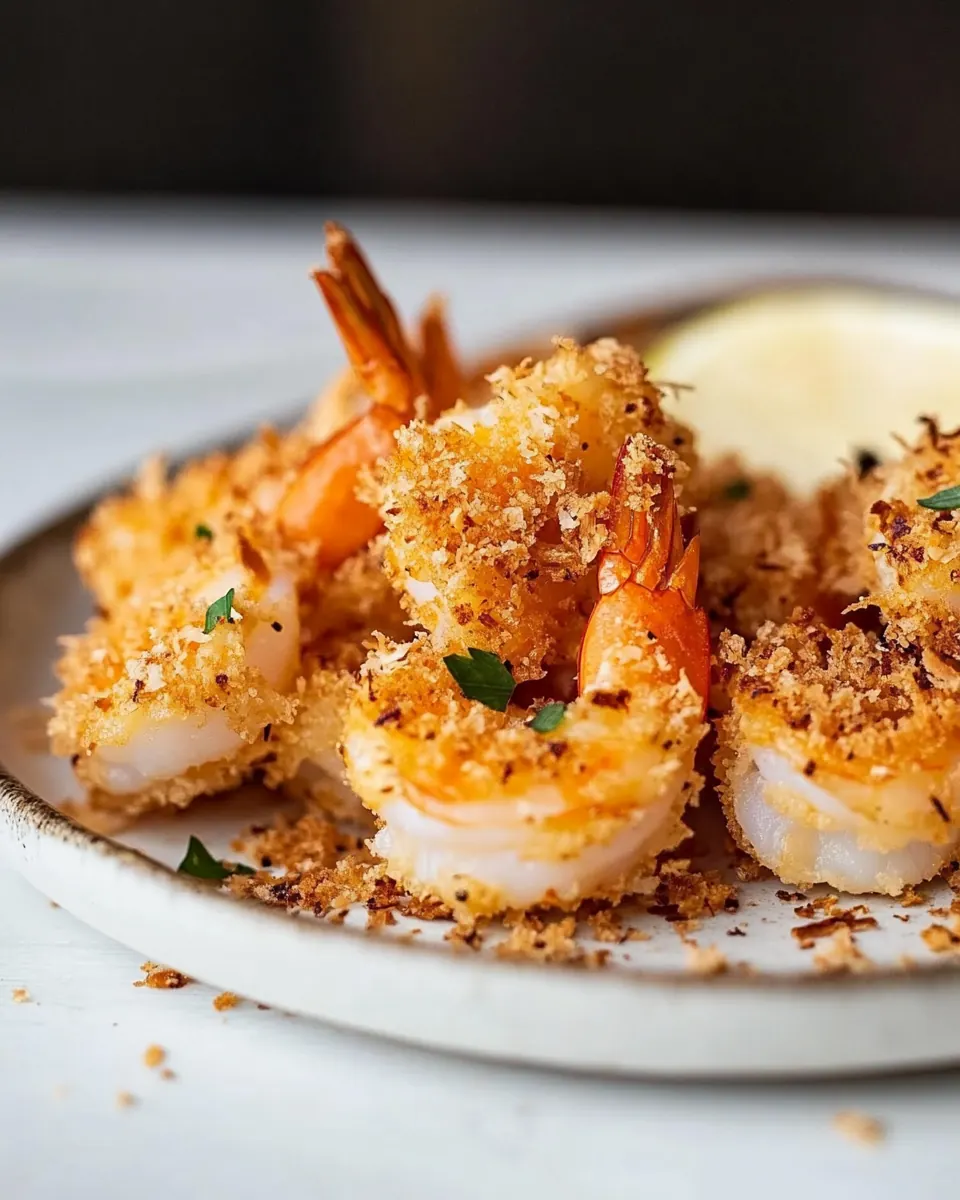
Coconut Shrimp
Coconut Shrimp is one of those recipes that always brings a smile to my table, a crunchy tropical bite that everyone reaches for first. I first made these for a small backyard gathering when my neighbor brought over a jar of Thai sweet chili sauce, and the combination of crunchy sweetened shredded coconut coating and juicy jumbo raw shrimp felt like sunshine on a plate. From that afternoon forward, this dish became my go to whenever I wanted to impress without fuss.
I remember the first time I tested the coating ratios, how the Panko bread crumbs gave the shell that satisfying shatter while the coconut toasted into caramel notes. Each batch taught me small lessons about timing, oil temperature, and how to keep the shrimp plump and tender. Over time I learned to trust simple techniques that let the natural sweetness of the shrimp sing beneath the crunchy shell.
When I serve Coconut Shrimp now, I like to plate it with a chilled dipping sauce that contrasts heat and creaminess, making each bite pop. Guests always ask for the recipe, and I love telling the short story of the neighbor and the jar of chili sauce that started it all. This recipe is casual enough for weeknight treats, yet festive enough for summer parties.
Recipe Snapshot
40 mins
30 mins
10 mins
Easy
350 kcal
American
Gluten-Free, Low FODMAP
Appetizers
Large saucepan, Thermometer, Three shallow dishes, Rimmed baking sheet
What You’ll Enjoy About This Coconut Shrimp
Crunchy contrast
I adore how Panko bread crumbs paired with sweetened shredded coconut creates a textural miracle, a crispy exterior that yields to tender jumbo raw shrimp. The contrast is immediate in the first bite, and that tactile joy keeps people coming back for more.
Fast and impressive
We can have hot, golden Coconut Shrimp on the table in under an hour, which is a real win when you want something impressive without a long lead time. The frying step is quick, and the preparation is mostly assembly, making this a great option for casual entertaining.
Flavor balance
This recipe balances savory, sweet, and a touch of heat. A creamy mayonnaise based dipping sauce with sriracha and Thai sweet chili sauce gives bright counterpoints to the toasted coconut. I like that each flavor plays a clear role, so no single element overwhelms the shrimp.
Reliable technique
Once you get the breading sequence right, the results are consistent. The three station system helps: a seasoned all purpose flour station, an eggs station, and a crunchy panko plus coconut station. This method minimizes mess and ensures even coverage every time.
Versatile for occasions
We serve Coconut Shrimp for summer get togethers, casual dinners, or as a festive appetizer. It fits many menus, and leftovers reheat well in an oven or air fryer for another quick craving fix.
What to Gather for Coconut Shrimp

These ingredients form a simple, harmonious team. The key players are the shrimp for juicy protein, the panko and sweetened shredded coconut for texture, and a few pantry staples that bind and season. Together they create a crisp, slightly sweet crust that browns beautifully in hot oil while protecting the tender shrimp inside.
- 1/2 cup mayonnaise: Adds creamy richness and a tender binding element to the dipping sauce, balancing heat and sweetness. Helps create a smooth texture that carries flavors and complements the crispy shrimp.
- 1 tablespoons sriracha: Provides a spicy kick and bright chili flavor to the sauce, enhancing overall heat. Blends well with mayonnaise and sweet chili sauce for a layered, piquant accompaniment.
- 1 tablespoon Thai sweet chili sauce: Contributes sweet heat and sticky glaze notes to the dipping sauce, giving a Thai-inspired flavor profile. Works with mayonnaise and sriracha to add complexity and a touch of sweetness.
- 1/3 cup all-purpose flour: Creates a light flour coating that helps the egg adhere to the shrimp and forms the first dry layer for breading. Ensures even coverage and contributes to a crisp but delicate fried exterior.
- Salt and freshly ground black pepper: Seasones the flour and batter to enhance overall flavor and balance sweetness from the coconut. Allows for customized salting and peppering so the shrimp and coating are well-seasoned.
- 2 eggs beaten: Acts as the wet binder that helps the flour and panko adhere to the shrimp, creating a sturdy breading. Promotes even coating and helps achieve a golden, crunchy finish when fried.
- 3/4 cup Panko bread crumbs: Provides a coarse, airy crunch that forms the primary crispy texture of the outer crust. Combines with coconut to produce a substantial, crunchy bite that fries evenly.
- 1 cup sweetened shredded coconut: Adds sweet, tropical flavor and chewy texture to the breading for signature coconut shrimp taste. Balances savory shrimp and crunchy panko while caramelizing lightly during frying.
- 1 pound jumbo raw shrimp thawed, peeled, and deveined: Supplies the main protein and focal point of the dish, offering tender, sweet meat once fried. Benefits from proper cleaning and drying to ensure optimal breading adhesion and even cooking.
- 2 cups canola oil for frying: Serves as the frying medium that achieves a uniform, high-heat environment for golden, crispy shrimp. Maintains consistent temperature and neutral flavor, allowing coatings to crisp without burning.
Step by Step Instructions for Coconut Shrimp
These steps walk you through the assembly line, frying, and plating with attention to sensory cues. Follow them patiently, and you will be rewarded with uniformly golden, crisp Coconut Shrimp that stay juicy inside.
- To make the dipping sauce, in a small bowl, whisk together the mayonnaise, sriracha, and Thai sweet chili sauce. Chill until serving time.: When you whisk the mayonnaise with sriracha and Thai sweet chili sauce , notice the sauce go from matte to glossy as air incorporates, and the aroma will shift to bright, tangy notes. Chill the sauce to let flavors meld, which rounds harsh edges and allows heat to calm. If the sauce tastes too sharp, a touch more mayonnaise will smooth it. Common mistake, adding too much heat too soon, can be corrected by tempering with extra mayo, but taste in small increments.
- In a shallow dish, add flour and salt and pepper to taste (I like 1/2 teaspoon and 1/4 teaspoon pepper). In a second shallow dish, add eggs and beat lightly. In a third shallow dish, combine panko and coconut. Stir to combine.: The three station setup creates rhythm and consistency. The seasoned flour should feel dry and pale, the eggs should be uniformly beaten with a slight sheen, and the panko plus coconut should be evenly distributed so each shrimp gets an even crust. This arrangement prevents clumping and cross contamination. One trap is overcrowding the dishes and getting wet spots in the panko bowl, which makes adhesion patchy; keep things tidy and use small batches.
- Working with one shrimp at a time, dredge in flour and shake off excess. Dip in eggs and tap gently on side of dish to remove excess. Add to panko-coconut mixture and press gently until crumbs adhere. Transfer to a large plate and repeat with remaining shrimp (shrimp can be wrapped in plastic and refrigerated for up to 2 hours).: As you dredge each shrimp , the light dusting of flour helps the eggs cling and creates a dry surface for the crumb to grab. You will hear the soft tap when removing excess eggs , and the panko mixture should stick evenly without large clumps. Pressing gently ensures full coverage, and be mindful to keep the shrimp spaced on the plate so the coating sets. A common error is rushing and pressing too hard, which can compress the crumbs and result in a dense crust instead of a crisp shell.
- Line rimmed baking sheet or large plate with 3 layers of paper towels. In a large saucepan over medium-high heat, heat canola oil until shimmering. Add shrimp in batches and fry until deep golden brown and cooked through, about 2 to 3 minutes per side (the shrimp should reach 120 degrees on an internal thermometer).: When the canola oil shimmers, it signals appropriate frying heat and you should hear a steady sizzle as the shrimp enter the oil. The exterior will quickly bloom to golden brown, and you will smell warm coconut and toasty notes. Frying in batches prevents the oil temperature from dropping, ensuring an even color and crispness. Use a thermometer to check doneness, and avoid crowding the pan which leads to greasy, soggy results. If the coating browns too fast while the interior is undercooked, lower the heat slightly and finish for a few extra moments.
- Drain shrimp well on paper towels. Repeat with remaining shrimp and serve with sauce.: After frying, the moment the shrimp rest on paper towels you will see steam rise and the crust settle into a crisp texture. Let them drain briefly so excess oil moves away, preserving crunch and keeping the interior juicy. Serve the pieces hot so the contrast between crunchy shell and tender shrimp is most pronounced. A typical misstep is leaving them on paper too long; they can soften as they cool, so plate and serve promptly for the best experience.
Ways to Adapt This Recipe
There are many little ways to tweak this recipe while keeping the core technique intact. Below are practical adaptations that honor the original texture and flavor profile.
- Swap the mayo base: Use a lighter mayonnaise if you want a tangier sauce, but maintain the creamy balance so the sriracha and Thai sweet chili sauce still shine through.
- Adjust the heat: Increase or decrease the sriracha amount to suit your spice tolerance, tasting the dipping sauce as you go to reach the right level of warmth.
- Toast the coconut: For deeper flavor, briefly toast the sweetened shredded coconut until golden, then cool before mixing with panko, which boosts aroma and crunch.
- Make ahead prep: Prep the breaded shrimp and refrigerate up to two hours before frying to save active cooking time while preserving coating adhesion.
- Oil choice matters: Use a neutral, high smoke point oil like canola oil for consistent browning without off flavors, which ensures the crust crisps properly.
Serving Options for Coconut Shrimp
Coconut Shrimp works for relaxed gatherings and more formal meals, pairing well with a range of sides. Below are ideas for occasions, side dishes, and storage notes to help you present this dish beautifully.
- Casual appetizer platter: Arrange hot Coconut Shrimp on a platter with the chilled dipping sauce in the center, adding lemon wedges for a bright squeeze if you enjoy acidity.
- Summer party: Serve alongside fresh fruit skewers or a crisp salad to keep the meal light and seasonal, leaning into tropical flavors.
- Weeknight dinner: Pair the shrimp with steamed rice and a side of quick sautéed greens for a simple, balanced meal that still feels special.
- Storage tips: Refrigerate leftovers in an airtight container for up to three days, and reheat in an oven or air fryer to restore crispness rather than using a microwave.
- Occasions to serve: Great for summer gatherings, brunch spreads, or anytime you want a shareable, crowd pleasing finger food that travels well from kitchen to table.
FAQ
Conclusion
Coconut Shrimp stands out for its irresistible contrast of crunchy, sweet coconut crust and juicy, tender shrimp. This recipe delivers that texture plus a creamy, tangy dipping sauce that balances heat and sweetness, making it a crowd pleaser for summer gatherings or a special weeknight treat. Try the simple three station breading method and steady frying temperature to achieve consistent, golden results. Serve them hot for the best experience, and enjoy how quickly this dish becomes a favorite.
Coconut Shrimp
Equipment
- Large saucepan
- Thermometer
- Three shallow dishes
- Rimmed Baking Sheet
Ingredients
- 1/2 cup mayonnaise Adds creamy richness and a tender binding element to the dipping sauce, balancing heat and sweetness. Helps create a smooth texture that carries flavors and complements the crispy shrimp.
- 1 tablespoons sriracha Provides a spicy kick and bright chili flavor to the sauce, enhancing overall heat. Blends well with mayonnaise and sweet chili sauce for a layered, piquant accompaniment.
- 1 tablespoon Thai sweet chili sauce Contributes sweet heat and sticky glaze notes to the dipping sauce, giving a Thai-inspired flavor profile. Works with mayonnaise and sriracha to add complexity and a touch of sweetness.
- 1/3 cup all-purpose flour Creates a light flour coating that helps the egg adhere to the shrimp and forms the first dry layer for breading. Ensures even coverage and contributes to a crisp but delicate fried exterior.
- Salt and freshly ground black pepper Seasones the flour and batter to enhance overall flavor and balance sweetness from the coconut. Allows for customized salting and peppering so the shrimp and coating are well-seasoned.
- 2 eggs beaten Acts as the wet binder that helps the flour and panko adhere to the shrimp, creating a sturdy breading. Promotes even coating and helps achieve a golden, crunchy finish when fried.
- 3/4 cup Panko bread crumbs Provides a coarse, airy crunch that forms the primary crispy texture of the outer crust. Combines with coconut to produce a substantial, crunchy bite that fries evenly.
- 1 cup sweetened shredded coconut Adds sweet, tropical flavor and chewy texture to the breading for signature coconut shrimp taste. Balances savory shrimp and crunchy panko while caramelizing lightly during frying.
- 1 pound jumbo raw shrimp thawed, peeled, and deveined Supplies the main protein and focal point of the dish, offering tender, sweet meat once fried. Benefits from proper cleaning and drying to ensure optimal breading adhesion and even cooking.
- 2 cups canola oil for frying Serves as the frying medium that achieves a uniform, high-heat environment for golden, crispy shrimp. Maintains consistent temperature and neutral flavor, allowing coatings to crisp without burning.
Instructions
- To make the dipping sauce, in a small bowl, whisk together the mayonnaise, sriracha, and Thai sweet chili sauce. Chill until serving time.: When you whisk the mayonnaise with sriracha and Thai sweet chili sauce , notice the sauce go from matte to glossy as air incorporates, and the aroma will shift to bright, tangy notes. Chill the sauce to let flavors meld, which rounds harsh edges and allows heat to calm. If the sauce tastes too sharp, a touch more mayonnaise will smooth it. Common mistake, adding too much heat too soon, can be corrected by tempering with extra mayo, but taste in small increments.
- In a shallow dish, add flour and salt and pepper to taste (I like 1/2 teaspoon and 1/4 teaspoon pepper). In a second shallow dish, add eggs and beat lightly. In a third shallow dish, combine panko and coconut. Stir to combine.: The three station setup creates rhythm and consistency. The seasoned flour should feel dry and pale, the eggs should be uniformly beaten with a slight sheen, and the panko plus coconut should be evenly distributed so each shrimp gets an even crust. This arrangement prevents clumping and cross contamination. One trap is overcrowding the dishes and getting wet spots in the panko bowl, which makes adhesion patchy; keep things tidy and use small batches.
- Working with one shrimp at a time, dredge in flour and shake off excess. Dip in eggs and tap gently on side of dish to remove excess. Add to panko-coconut mixture and press gently until crumbs adhere. Transfer to a large plate and repeat with remaining shrimp (shrimp can be wrapped in plastic and refrigerated for up to 2 hours).: As you dredge each shrimp , the light dusting of flour helps the eggs cling and creates a dry surface for the crumb to grab. You will hear the soft tap when removing excess eggs , and the panko mixture should stick evenly without large clumps. Pressing gently ensures full coverage, and be mindful to keep the shrimp spaced on the plate so the coating sets. A common error is rushing and pressing too hard, which can compress the crumbs and result in a dense crust instead of a crisp shell.
- Line rimmed baking sheet or large plate with 3 layers of paper towels. In a large saucepan over medium-high heat, heat canola oil until shimmering. Add shrimp in batches and fry until deep golden brown and cooked through, about 2 to 3 minutes per side (the shrimp should reach 120 degrees on an internal thermometer).: When the canola oil shimmers, it signals appropriate frying heat and you should hear a steady sizzle as the shrimp enter the oil. The exterior will quickly bloom to golden brown, and you will smell warm coconut and toasty notes. Frying in batches prevents the oil temperature from dropping, ensuring an even color and crispness. Use a thermometer to check doneness, and avoid crowding the pan which leads to greasy, soggy results. If the coating browns too fast while the interior is undercooked, lower the heat slightly and finish for a few extra moments.
- Drain shrimp well on paper towels. Repeat with remaining shrimp and serve with sauce.: After frying, the moment the shrimp rest on paper towels you will see steam rise and the crust settle into a crisp texture. Let them drain briefly so excess oil moves away, preserving crunch and keeping the interior juicy. Serve the pieces hot so the contrast between crunchy shell and tender shrimp is most pronounced. A typical misstep is leaving them on paper too long; they can soften as they cool, so plate and serve promptly for the best experience.
Notes
- Swap the mayo base: Use a lighter mayonnaise if you want a tangier sauce, but maintain the creamy balance so the sriracha and Thai sweet chili sauce still shine through.
- Adjust the heat: Increase or decrease the sriracha amount to suit your spice tolerance, tasting the dipping sauce as you go to reach the right level of warmth.
- Toast the coconut: For deeper flavor, briefly toast the sweetened shredded coconut until golden, then cool before mixing with panko, which boosts aroma and crunch.
- Make ahead prep: Prep the breaded shrimp and refrigerate up to two hours before frying to save active cooking time while preserving coating adhesion.
- Oil choice matters: Use a neutral, high smoke point oil like canola oil for consistent browning without off flavors, which ensures the crust crisps properly.