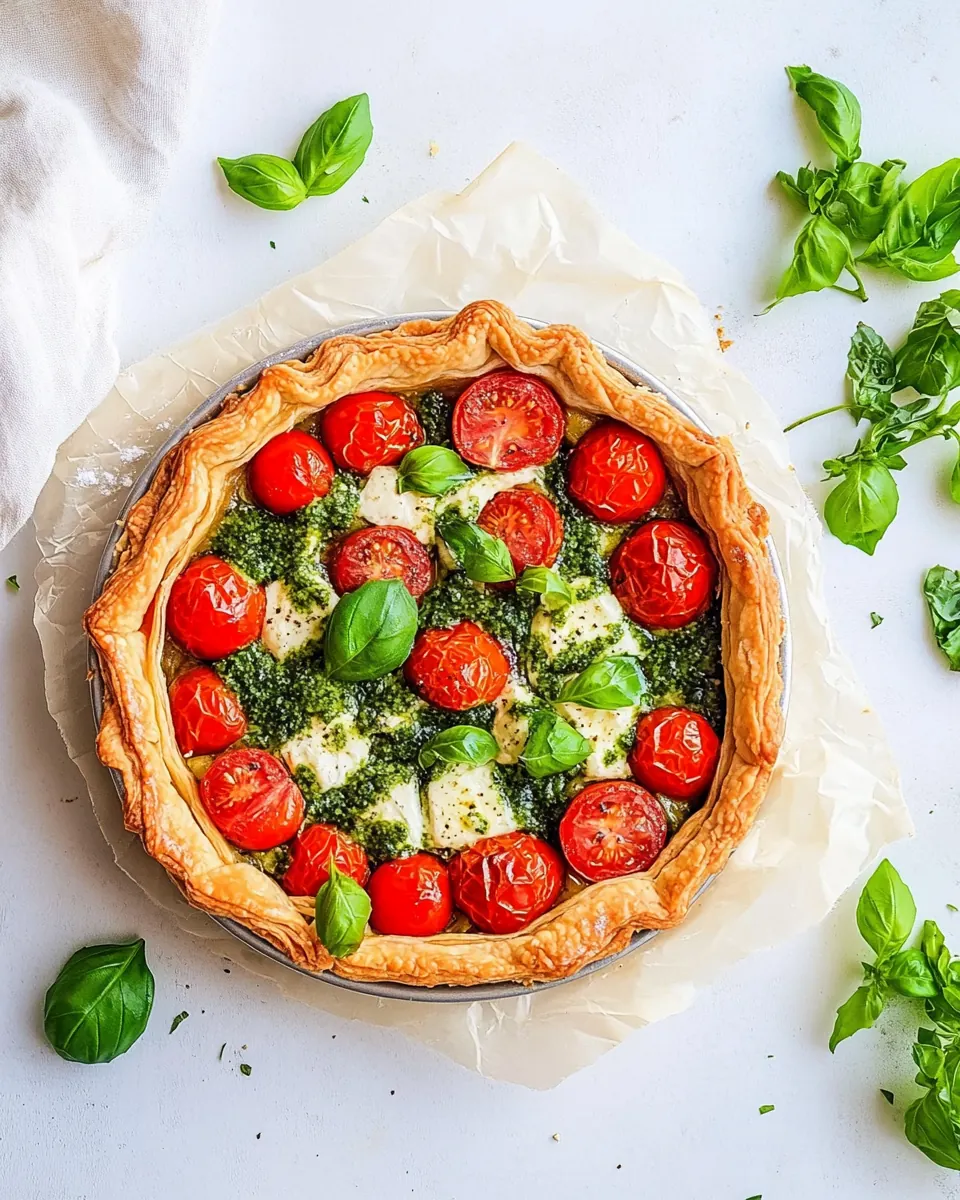
Tomato Tart
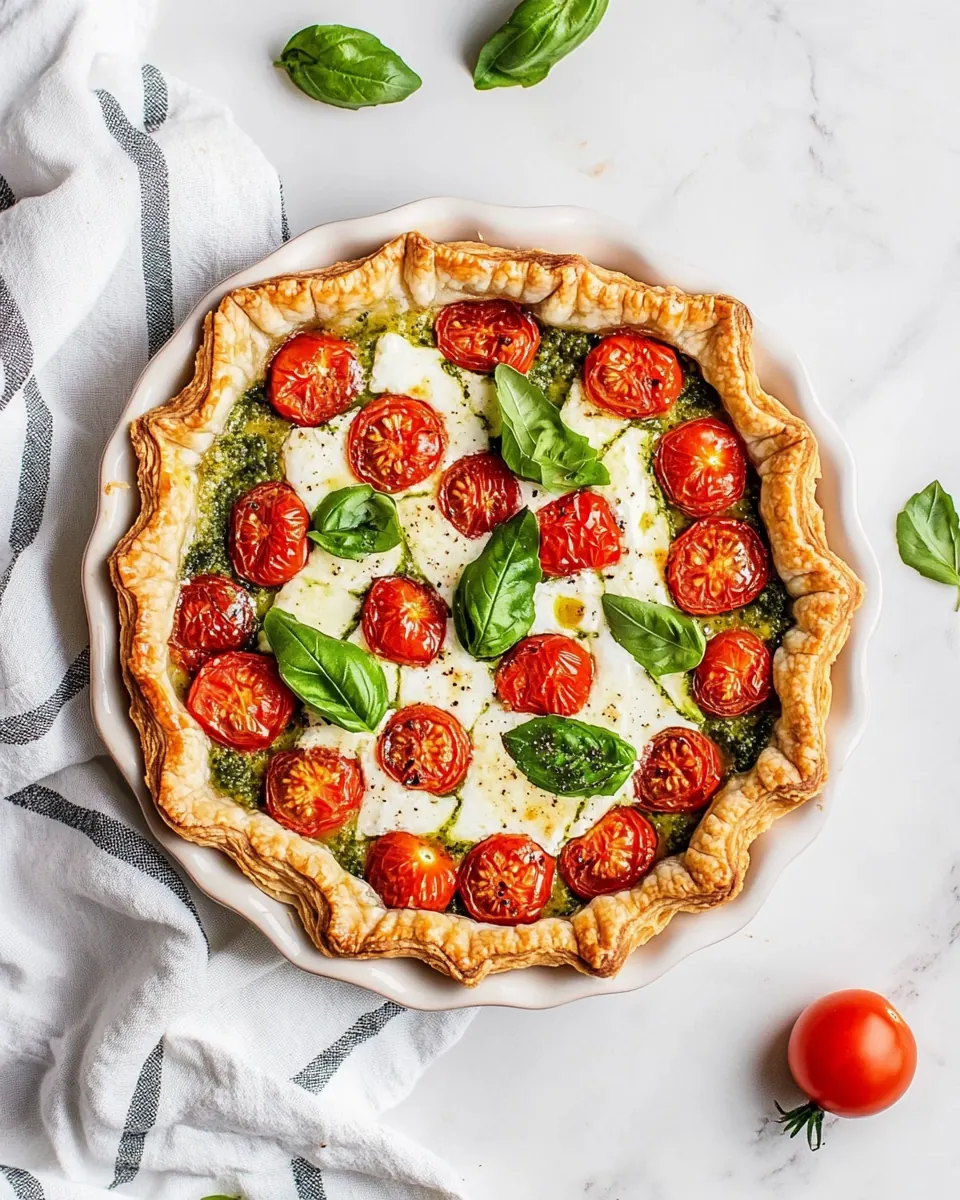
Tomato Tart began showing up in my kitchen the summer I wanted something that felt special but was simple enough for a weeknight. I remember carrying a box of sun warm cherry tomatoes from a farmers market, the aroma of basil in the air, and thinking how well those bright little fruits would pair with flaky store bought puff. That combination of crisp pastry and juicy tomato became my shortcut to an elegant meal that does not demand hours of attention.
Some evenings I serve the Tomato Tart with a small green salad and call it dinner, other times I slice it thin and hand it to friends as an appetizer while we chat about the day. I like recipes that let you taste each ingredient cleanly. The pastry gives a buttery crunch, the pesto brings herbaceous depth, while the melty mozzarella adds creamy pockets that balance the tomato acidity. It is the sort of recipe that rewards gentle hands and a patient oven.
There is a certain comfort to returning to this tart after a long day. I find the act of arranging sliced cherry tomatoes and tearing fresh mozzarella oddly meditative, and the aroma that fills the kitchen as it bakes always lifts my mood. Over time I learned small tricks to keep the pastry crisp and to coax out more flavor from the tomato without overcooking it, and those little habits turned this into one of my most requested dishes.
Recipe Snapshot
45 mins
20 mins
25 mins
Medium
250 kcal
Italian
Vegan, Gluten-Free
Appetizers
Oven, Baking sheet, Mixing bowl, Knife
The Best Thing About This Tomato Tart
1. Pure summer flavor in every bite
I love how the Tomato Tart captures the season. When cherry tomatoes are ripe they offer concentrated sweetness and acidity, and combined with a glossy swipe of pesto they sing. The contrast between juicy fruit and flaky pastry is what keeps me coming back.
2. Elegant but effortless
This tart looks like something you would order at a cafe, yet most of the hands on time is simple assembly. I can prep ingredients while the oven warms, and that ease makes it my go to for when I want to impress without stress.
3. Textural harmony
The crunch of baked puff, the soft chew of mozzarella, the burst of tomato, and the toasted pop of pine nuts all work together. I deliberately lean into contrasting textures because they make every bite interesting and satisfying.
4. Flexible and forgiving
I appreciate that you can scale the recipe to two large tarts or many small tartlets, and swap sizes of tomato freely. The technique is forgiving, so small deviations during assembly rarely ruin the final result.
5. Crowd friendly
This is a great dish to bring to a casual gathering because it slices neatly and holds up at room temperature. I often prepare it ahead, then reheat briefly to restore crispness, and it still tastes fresh and vibrant.
What’s In This Tomato Tart
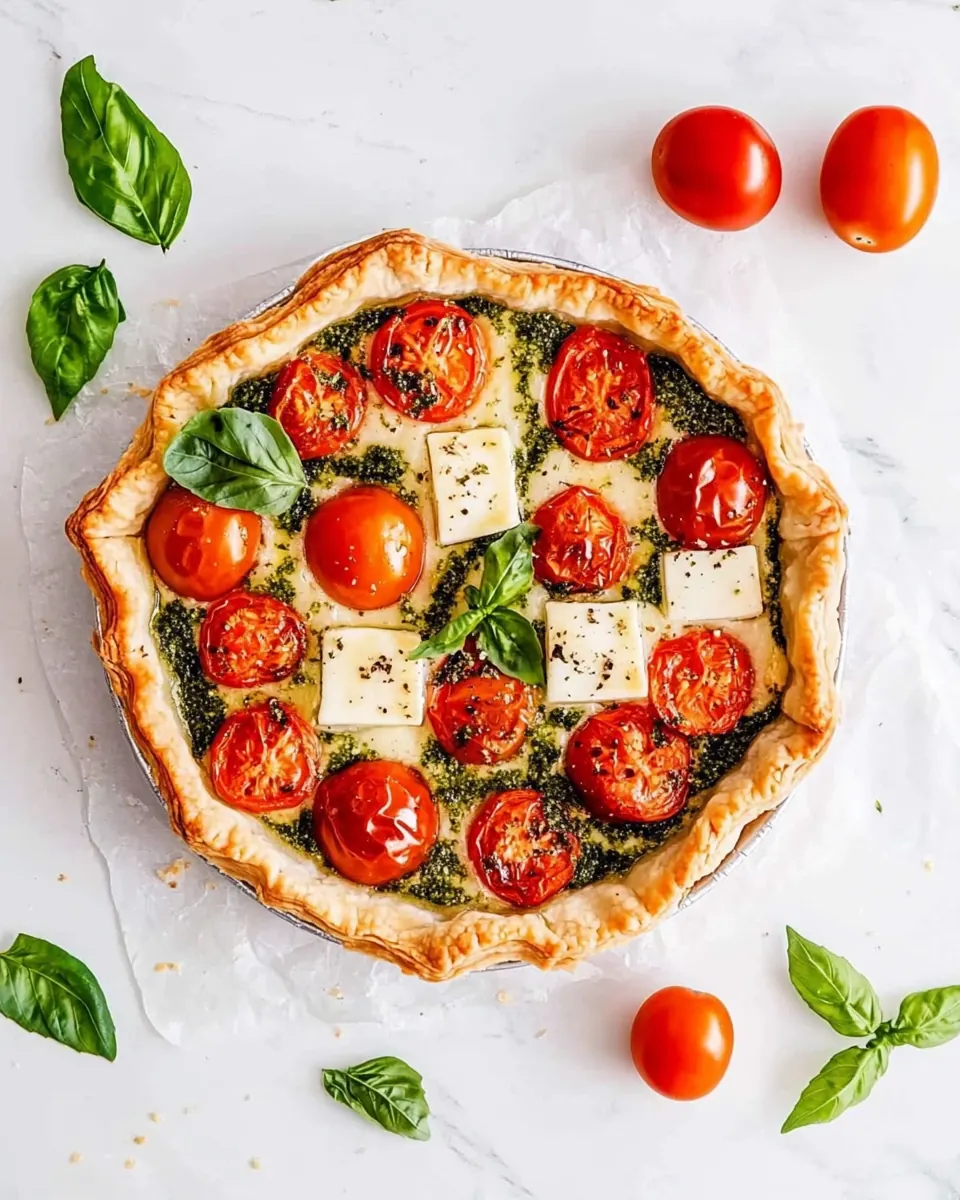
These ingredients are arranged to celebrate bright, herb forward summer cooking. The stars are the light flaky pastry and ripe cherry tomatoes, while pesto and mozzarella supply savory depth and creamy contrast. Little touches like pine nuts and fresh basil leaves bring texture and aroma, and simple seasoning with olive oil, salt, and pepper tie everything together.
- 2 sheets puff pastry: Provide a flaky, buttery base that lifts the tart; ensure sheets are thawed and rolled slightly to fit the pan. Blind-bake briefly to prevent sogginess and create a crisp foundation for toppings.
- 500 grams cherry tomatoes: Add a burst of sweet, acidic flavor and vibrant color when halved or left whole; roast or blister to concentrate juices and deepen taste. Arrange evenly to provide moist pockets that balance the pastry and cheese.
- 100 grams pesto half cup: Bring concentrated herb and garlic richness with a smooth, spreadable texture; use sparingly to build a savory flavor layer. Spread evenly over the pastry to infuse the tart with basil and umami notes without overpowering other elements.
- 100 grams mozzarella pearls: Supply creamy, milky pockets of soft cheese that melt slightly under heat; distribute evenly to create gooey bites. Use pearls for even melting and a pleasant, tender contrast to the crisp pastry and juicy tomatoes.
- 2 tablespoons pine nuts: Contribute a delicate, nutty crunch and toasty aroma when lightly toasted; sprinkle over the tart before or after baking. Provide textural contrast that enhances mouthfeel and adds subtle pine flavor.
- 2 tablespoons basil leaves finely sliced: Offer fresh, aromatic herbiness with bright green color; slice finely to release oils and scatter over the finished tart. Add just before serving to preserve fragrance and deliver a fresh basil lift.
- 2 tablespoons olive oil: Provide a glossy finish and help roast tomatoes while adding fruity, savory depth; drizzle lightly before baking. Use olive oil to enhance caramelization and enrich overall mouthfeel.
- salt: Enhance and balance flavors by seasoning to taste; sprinkle lightly to bring out sweetness and acidity in other components. Taste as you go to avoid over-salting delicate elements like cheese and pesto.
- pepper: Bring subtle heat and depth when freshly ground; season sparingly to complement rather than dominate. Use to add complexity and a gentle warmth that ties the ingredients together.
How to Assemble Tomato Tart
This recipe is straightforward to assemble and rewards careful attention to texture. Work on a cold surface, keep the pastry chilled until assembly, and focus on balancing juicy toppings with a protective layer of pesto and mozzarella. The directions below expand the original steps with sensory cues, reasons behind techniques, and common pitfalls to watch for.
- Preheat your oven to 200 degrees Celsius (400 F).: As the oven comes to temperature you will smell the warm, slightly metallic heat of the oven and feel a readiness in the kitchen, this high heat encourages the puff pastry to rise quickly creating tall, flaky layers. If the oven is not properly preheated the pastry may not puff evenly which can result in denser spots, so wait until the full temperature is reached. A common mistake is placing pastry in a slightly warm oven to save time, avoid this because it changes the rise and texture.
- Cut one of your pastry sheets in half. Cut the second sheet into thin strips (approximately 1 cm wide).: When you slice the sheets you will hear a clean, crisp edge and see layered, pale dough. Those thin strips will become the tart rim, offering a decorative and structural border that crisps up during baking. Keeping your knife sharp ensures neat edges and reduces tearing, while working quickly keeps the butter in the pastry cold so it can create steam pockets. If the pastry softens and becomes sticky chill it briefly before continuing.
- Brush the edges of your 2 pastry sheets with a little water. These will be the base of your tarts. Lie the pastry strips around the edges of the tart bases. You should now have two 'tart shells'.: The water acts like a glue, helping the strips adhere to the base while baking, and you'll notice a slightly glossy sheen where they meet. As the oven heat hits them the edges will brown and crisp, forming a welcoming cradle for the toppings. Press gently to seal but avoid compressing the layers too much or the rise will be compromised. A frequent error is over wetting which can cause sogginess, use only a light touch.
- Use a fork to prick the base of the tart shells. You want to do this multiple times, all over the base.: The fork pricks let steam escape from the center so the base does not become an overinflated dome, producing small, even holes that help the pastry stay flat. You will feel a slight resistance as the tines pass through the layers, and you should see tiny perforations across the surface. Avoid pricking the rim area where you want full rise, and do not overdo it to the point of creating large tears, as that can let filling leak through during baking.
- Bake the tart shells in the hot oven for 8-10 minutes, until they are puffed and golden brown. When your tart bases come out of the oven, if the centre has puffed up use a fork or spoon to push the base back down, it does not matter if the pastry flakes a bit when you do this.: As the shells bake you will hear a faint crackle and see the pastry dramatically expand then set into a crisp, golden surface. If the centre balloons, gently press it down to create an even bed for toppings, the slight flaking is normal because those fragile layers separate when cooled then reseal under toppings. Overbaking at this stage will make the pastry too brittle and prone to shattering when you add the toppings, so monitor closely and remove when evenly golden.
- While your tart bases are baking, prep your tomatoes by cutting some in half. Do this in a variety of ways i. e. through the middle and some lengthways and some leave whole. Place the tomato pieces in a bowl and toss with olive oil, salt and pepper. Tear up your mozzarella.: Handling the cherry tomatoes creates an immediate burst of fresh aroma, and tossing them with olive oil , salt , and pepper highlights their natural sweetness while preventing them from drying out. Tearing the mozzarella by hand yields uneven pieces that melt into attractive pockets rather than a uniform layer, which adds to the rustic appeal. A common slip here is overseasoning the tomatoes , which can mask their natural flavor, so taste a piece before committing to heavy salt.
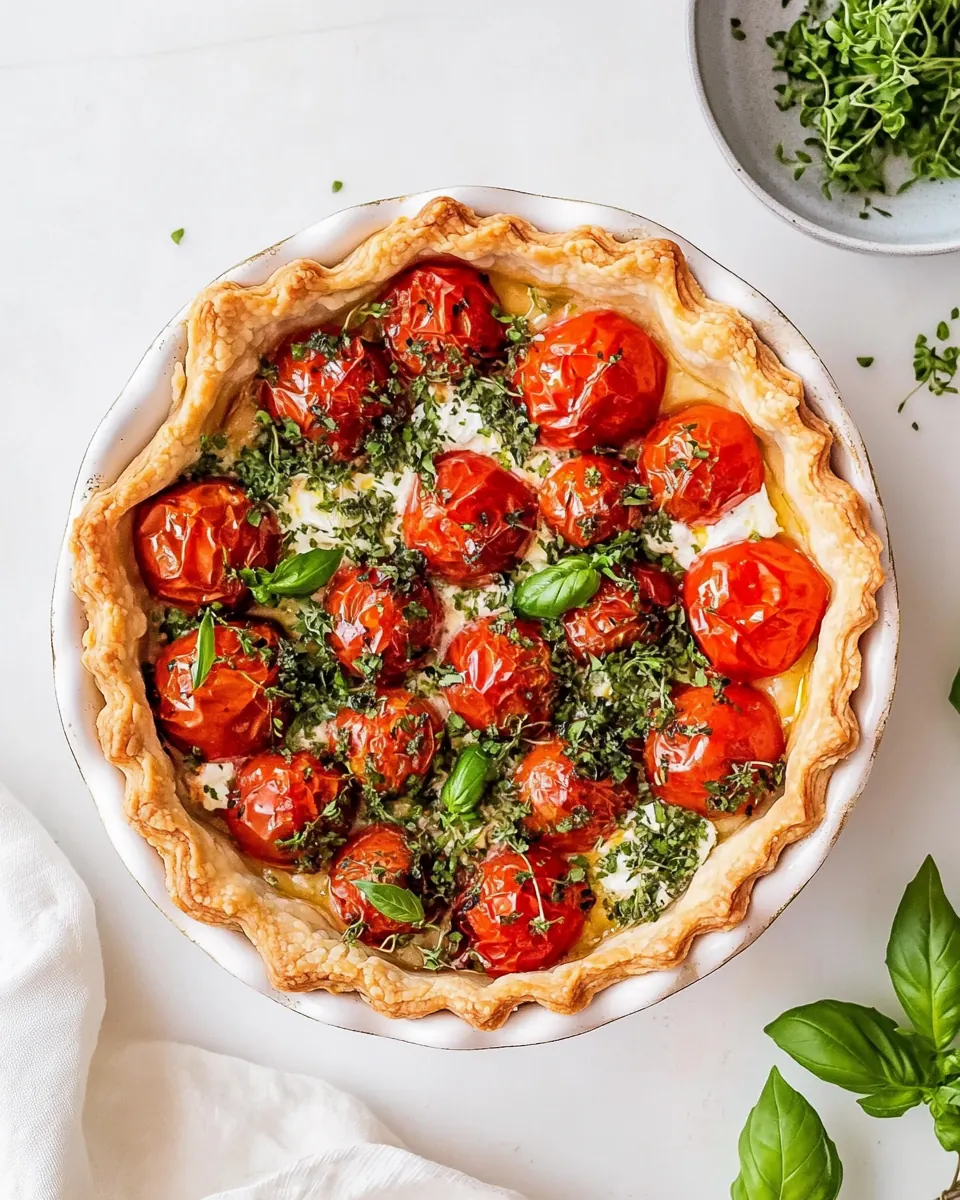
- Top the tart bases with the pesto, the tomatoes and the mozzarella. Return the tarts to the oven and bake for 12-15 minutes until the pastry is browned and tomatoes softened.: As the tart returns to the oven the kitchen fills with an herbaceous, roasted scent, and the edges of the pastry deepen to an even brown. The pesto infuses the base with savory basil notes while the mozzarella melts into creamy pockets, and the cherry tomatoes will soften, their skins collapsing slightly and releasing sweet juices that mingle with the pesto . Watch for bubbling cheese and a golden rim to know it is done; underbaking leaves the pastry chewy while overbaking can dry out the filling.
- Scatter the top of the tarts with pine nuts and finely sliced basil leaves.: The final scattering adds an aromatic finish and crunchy texture, with the warmed pine nuts delivering a toasty nuttiness against the cool brightness of fresh basil leaves . The contrast in temperature and texture enhances each bite, and the visual pop of green herbs makes the tart look freshly plated. Avoid adding the basil before baking or it will darken and lose fragrance, and do not leave the nuts to overtoast as they can quickly turn bitter.
Ways to Adapt This Recipe
This section offers adaptable ideas to suit different preferences and occasions while keeping the core spirit of the tart intact. Each tip starts with a clear action phrase to make it easy to scan.
- Swap the cheese: Use any mild melting cheese if you prefer a different flavor profile, but keep the texture creamy to complement the cherry tomatoes.
- Make individual tartlets: Use the same ingredient ratios but cut the pastry into smaller rounds for party friendly portions that brown faster and are perfect for sharing.
- Try different nuts: If pine nuts are unavailable use roasted pepitas or sunflower seeds for crunch, adjusting to personal taste and texture preferences.
- Use gluten free pastry: A high quality gluten free puff pastry can be substituted to accommodate dietary needs while preserving the flaky layers.
- Serve room temperature: The tart holds up well at room temperature making it a great option for picnics or buffet style meals where reheating is not convenient.
What to Serve Alongside Tomato Tart
The right accompaniments elevate the Tomato Tart to a complete meal or a party plate. Below are ideas organized by serving style and occasion, with practical notes on pairing and storage to keep service seamless.
- Light green salad: A crisp mixed leaf salad dressed simply with olive oil and lemon pairs perfectly for lunch or a light dinner, cutting through the richness of the pastry and cheese.
- Charcuterie free board: Offer olives, roasted vegetables, and crusty bread alongside the tart to create a relaxed sharing platter suitable for casual gatherings.
- Seasonal fruit: Fresh melon or sliced peaches complement the herbaceous notes and provide a sweet contrast suitable for summer entertaining.
- Occasion notes: This tart works beautifully for brunch, a summer lunch, iftar during Ramadan, or a relaxed dinner party where you want something elegant but easy to serve.
- Storage tips: Store leftover slices in the refrigerator for up to two days in an airtight container, and reheat briefly in an air fryer or oven to restore crispness rather than microwaving which can make the pastry soggy.
- Seasonal pairing: Serve with a simple tomato salad or grilled vegetables in peak summer when tomatoes are sweetest to amplify the seasonal charm.
FAQ
Conclusion
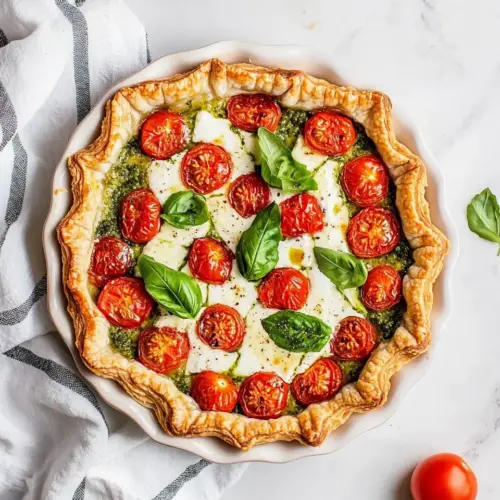
What makes this Tomato Tart special is the way simple, high quality ingredients come together to create a dish that feels both rustic and refined. The flaky puff pastry, bright cherry tomatoes, aromatic pesto, and melty mozzarella combine into a melody of texture and flavor that is approachable yet impressive. I encourage you to give it a try the next time you want a dinner that requires minimal fuss but rewards you with maximum satisfaction. Share it warm from the oven, and enjoy the small ritual of arranging toppings and savoring the first crisp bite.
Tomato Tart
Equipment
- Oven
- Baking Sheet
- Mixing Bowl
- Knife
Ingredients
- 2 sheets puff pastry Provide a flaky, buttery base that lifts the tart; ensure sheets are thawed and rolled slightly to fit the pan. Blind-bake briefly to prevent sogginess and create a crisp foundation for toppings.
- 500 grams cherry tomatoes Add a burst of sweet, acidic flavor and vibrant color when halved or left whole; roast or blister to concentrate juices and deepen taste. Arrange evenly to provide moist pockets that balance the pastry and cheese.
- 100 grams pesto half cup Bring concentrated herb and garlic richness with a smooth, spreadable texture; use sparingly to build a savory flavor layer. Spread evenly over the pastry to infuse the tart with basil and umami notes without overpowering other elements.
- 100 grams mozzarella pearls Supply creamy, milky pockets of soft cheese that melt slightly under heat; distribute evenly to create gooey bites. Use pearls for even melting and a pleasant, tender contrast to the crisp pastry and juicy tomatoes.
- 2 tablespoons pine nuts Contribute a delicate, nutty crunch and toasty aroma when lightly toasted; sprinkle over the tart before or after baking. Provide textural contrast that enhances mouthfeel and adds subtle pine flavor.
- 2 tablespoons basil leaves finely sliced Offer fresh, aromatic herbiness with bright green color; slice finely to release oils and scatter over the finished tart. Add just before serving to preserve fragrance and deliver a fresh basil lift.
- 2 tablespoons olive oil Provide a glossy finish and help roast tomatoes while adding fruity, savory depth; drizzle lightly before baking. Use olive oil to enhance caramelization and enrich overall mouthfeel.
- salt Enhance and balance flavors by seasoning to taste; sprinkle lightly to bring out sweetness and acidity in other components. Taste as you go to avoid over-salting delicate elements like cheese and pesto.
- pepper Bring subtle heat and depth when freshly ground; season sparingly to complement rather than dominate. Use to add complexity and a gentle warmth that ties the ingredients together.
Instructions
- Preheat your oven to 200 degrees Celsius (400 F).: As the oven comes to temperature you will smell the warm, slightly metallic heat of the oven and feel a readiness in the kitchen, this high heat encourages the puff pastry to rise quickly creating tall, flaky layers. If the oven is not properly preheated the pastry may not puff evenly which can result in denser spots, so wait until the full temperature is reached. A common mistake is placing pastry in a slightly warm oven to save time, avoid this because it changes the rise and texture.
- Cut one of your pastry sheets in half. Cut the second sheet into thin strips (approximately 1 cm wide).: When you slice the sheets you will hear a clean, crisp edge and see layered, pale dough. Those thin strips will become the tart rim, offering a decorative and structural border that crisps up during baking. Keeping your knife sharp ensures neat edges and reduces tearing, while working quickly keeps the butter in the pastry cold so it can create steam pockets. If the pastry softens and becomes sticky chill it briefly before continuing.
- Brush the edges of your 2 pastry sheets with a little water. These will be the base of your tarts. Lie the pastry strips around the edges of the tart bases. You should now have two 'tart shells'.: The water acts like a glue, helping the strips adhere to the base while baking, and you'll notice a slightly glossy sheen where they meet. As the oven heat hits them the edges will brown and crisp, forming a welcoming cradle for the toppings. Press gently to seal but avoid compressing the layers too much or the rise will be compromised. A frequent error is over wetting which can cause sogginess, use only a light touch.
- Use a fork to prick the base of the tart shells. You want to do this multiple times, all over the base.: The fork pricks let steam escape from the center so the base does not become an overinflated dome, producing small, even holes that help the pastry stay flat. You will feel a slight resistance as the tines pass through the layers, and you should see tiny perforations across the surface. Avoid pricking the rim area where you want full rise, and do not overdo it to the point of creating large tears, as that can let filling leak through during baking.
- Bake the tart shells in the hot oven for 8-10 minutes, until they are puffed and golden brown. When your tart bases come out of the oven, if the centre has puffed up use a fork or spoon to push the base back down, it does not matter if the pastry flakes a bit when you do this.: As the shells bake you will hear a faint crackle and see the pastry dramatically expand then set into a crisp, golden surface. If the centre balloons, gently press it down to create an even bed for toppings, the slight flaking is normal because those fragile layers separate when cooled then reseal under toppings. Overbaking at this stage will make the pastry too brittle and prone to shattering when you add the toppings, so monitor closely and remove when evenly golden.
- While your tart bases are baking, prep your tomatoes by cutting some in half. Do this in a variety of ways i. e. through the middle and some lengthways and some leave whole. Place the tomato pieces in a bowl and toss with olive oil, salt and pepper. Tear up your mozzarella.: Handling the cherry tomatoes creates an immediate burst of fresh aroma, and tossing them with olive oil , salt , and pepper highlights their natural sweetness while preventing them from drying out. Tearing the mozzarella by hand yields uneven pieces that melt into attractive pockets rather than a uniform layer, which adds to the rustic appeal. A common slip here is overseasoning the tomatoes , which can mask their natural flavor, so taste a piece before committing to heavy salt.
- Top the tart bases with the pesto, the tomatoes and the mozzarella. Return the tarts to the oven and bake for 12-15 minutes until the pastry is browned and tomatoes softened.: As the tart returns to the oven the kitchen fills with an herbaceous, roasted scent, and the edges of the pastry deepen to an even brown. The pesto infuses the base with savory basil notes while the mozzarella melts into creamy pockets, and the cherry tomatoes will soften, their skins collapsing slightly and releasing sweet juices that mingle with the pesto . Watch for bubbling cheese and a golden rim to know it is done; underbaking leaves the pastry chewy while overbaking can dry out the filling.
- Scatter the top of the tarts with pine nuts and finely sliced basil leaves.: The final scattering adds an aromatic finish and crunchy texture, with the warmed pine nuts delivering a toasty nuttiness against the cool brightness of fresh basil leaves . The contrast in temperature and texture enhances each bite, and the visual pop of green herbs makes the tart look freshly plated. Avoid adding the basil before baking or it will darken and lose fragrance, and do not leave the nuts to overtoast as they can quickly turn bitter.
Notes
- Swap the cheese: Use any mild melting cheese if you prefer a different flavor profile, but keep the texture creamy to complement the cherry tomatoes.
- Make individual tartlets: Use the same ingredient ratios but cut the pastry into smaller rounds for party friendly portions that brown faster and are perfect for sharing.
- Try different nuts: If pine nuts are unavailable use roasted pepitas or sunflower seeds for crunch, adjusting to personal taste and texture preferences.
- Use gluten free pastry: A high quality gluten free puff pastry can be substituted to accommodate dietary needs while preserving the flaky layers.
- Serve room temperature: The tart holds up well at room temperature making it a great option for picnics or buffet style meals where reheating is not convenient.