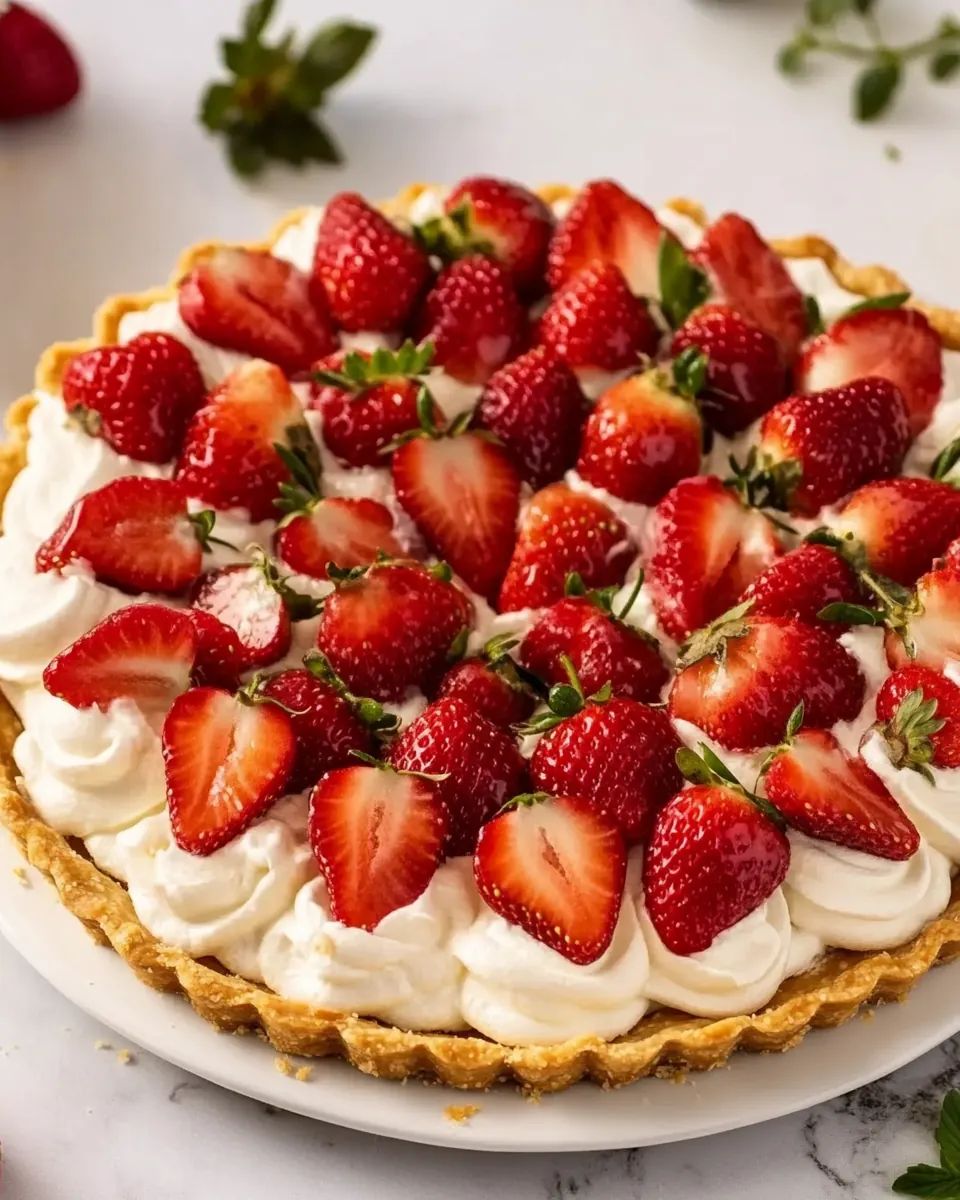
Strawberry Tart
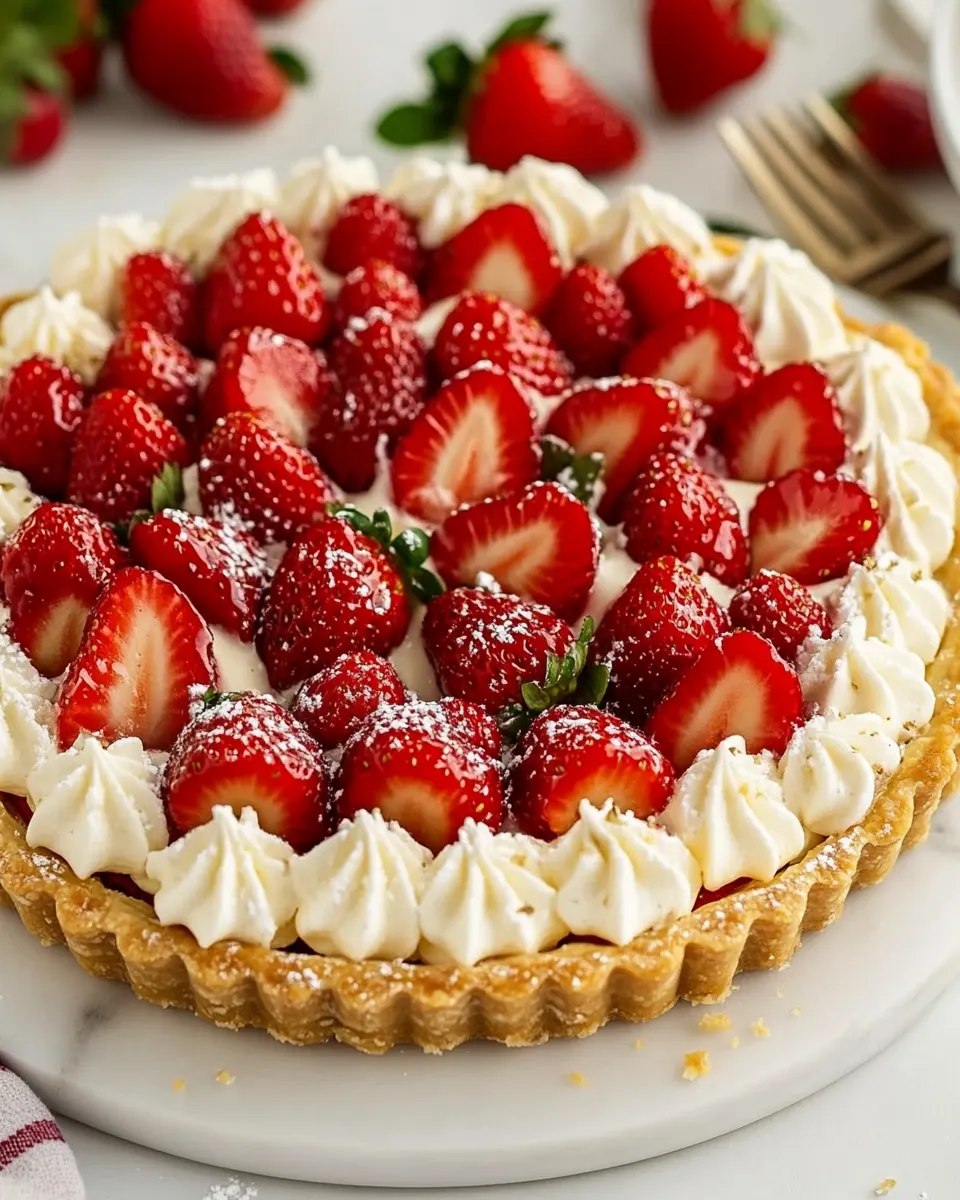
Strawberry Tart has been one of those recipes I return to when I want a simple yet showstopping dessert that feels like sunshine on a plate.
Years ago I brought a version of this tart to a spring potluck, and everyone asked for seconds before I had a chance to grab my camera. I remember the process unfolding on my kitchen counter, the tiny ritual of pressing the crumbly dough into the pan, the gentle hum of the mixer while I whipped the cream cheese filling, and then arranging the strawberries one by one, as if composing a little edible mosaic. That tactile, calming work always centers me, and the result rewards the care with bright fruit and a buttery crust that somehow tastes like celebration.
Every time I make Strawberry Tart I tweak small things depending on the season and the berries I can find. Once I used particularly fragrant berries from a roadside stand and the tart practically glowed. Another time I had to halve large strawberries and the visual changed, but the flavor stayed intact. I like that this tart is both relaxed and elegant, perfect for an afternoon tea or a casual dinner with friends.
Recipe Snapshot
52 mins
25 mins
27 mins
Medium
300 kcal
American
Gluten-Free, Low FODMAP
Desserts
Mixing bowl set, KitchenAid 9-Speed Digital Hand Mixer
Why This Strawberry Tart Is a Winner
It’s refreshingly simple
I love how Strawberry Tart strips dessert down to essentials, relying on quality strawberries and a tender crust instead of complicated techniques. The result feels honest, and I find that guests immediately sense the care in each slice.
Texture contrast that sings
The interplay of a slightly crisp, buttery crust and the creamy cream cheese filling creates a contrast that keeps each forkful interesting. I often pause between bites to savor that balance.
Customizable for seasons
Because the recipe leans on fresh fruit, it’s wonderfully adaptable. I’ll reach for tiny spring strawberries in season, and if I must I’ll halve larger ones. The base template lets you celebrate whichever fruit you have on hand.
Great for entertaining
This tart looks impressive without stressing you out. I usually make the crust ahead and chill it, so when guests arrive I can assemble and glaze the top quickly. It’s one of those dishes that makes you feel prepared and generous at once.
Reliable and forgiving
I value recipes that recover from small slips. If your crust cracks or your berries vary in size, the tart still comes together and tastes wonderful. That forgiving nature makes it a go to when you want something beautiful and dependable.
What’s In This Strawberry Tart
These ingredients are intentionally straightforward, aiming to highlight the bright, natural flavor of strawberries. The crust ingredients create a tender, buttery shell to cradle a smooth, slightly tangy cream cheese filling, and the jam acts as a glossy finish. Each component plays a clear role, and together they produce contrast in texture and a clean, fresh flavor profile.
- 6 tablespoons unsalted butter room temperature: Soften and cream to provide a tender, flaky crust by incorporating fat into the dough; ensure room temperature for even mixing and proper texture development during baking.
- 1/4 cup granulated sugar: Sweeten and balance the crust flavors while helping to tenderize the dough; measure precisely to avoid overly soft crust structure.
- 1 large egg yolk: Enrich and bind the crust with fat and flavor, promoting a richer mouthfeel and cohesive dough that holds its shape when rolled and baked.
- 1/4 teaspoons salt: Season and enhance overall flavor balance in the crust; a small amount prevents dullness and highlights the butter and lemon notes.
- 2 teaspoons lemon zest: Brighten and add citrus fragrance to the crust, cutting richness and providing a fresh aromatic contrast to sweet components.
- 1 cup all-purpose flour OR 1-to-1 gluten-free baking mix for a gluten-free version: Provide structure and bulk to the crust by forming gluten (or a gluten–free alternative) and creating the foundational texture for the tart shell.
- 16 ounces cream cheese room temperature: Soften and create a creamy filling base by bringing to room temperature for smooth blending; adds richness and tang that complements the fruit.
- 1/2 cup granulated sugar: Sweeten and balance the cream cheese filling while controlling texture and firmness; dissolve fully for a smooth, stable filling consistency.
- 1 teaspoon pure vanilla extract: Add warm, aromatic vanilla flavor to the filling, rounding out sweetness and enhancing the overall depth of taste.
- pinch of salt: Season and amplify other flavors in the filling; a small pinch helps balance sweetness and prevents a flat-tasting cream.
- 1 1/2 pounds small strawberries: Provide fresh, juicy fruit topping and bright color; select ripe, small berries for uniformity and better arrangement on the tart surface.
- 2 tablespoons strawberry jam warmed: Glaze and add shine to the finished tart while lightly sweetening the fruit; warming makes it easy to brush evenly for an attractive presentation.
Cooking Instructions for Strawberry Tart
I like to think of these steps as a slow, enjoyable choreography where each movement builds toward a neat, fragrant tart. The following directions will walk you through preparing the crust, baking it properly, making the filling, and arranging the strawberries for a glowing finish.
- Get out a 9″ tart pan with a removable bottom.: The kitchen smells calm and anticipation grows when you assemble your tools. A tart pan with a removable bottom helps you unmold the finished tart cleanly, preserving the pretty edge of the crust. You want a stable pan so the crust presses firmly and evenly, ensuring uniform baking. A common mistake is using a pan that is too large, which will make the crust too thin and prone to overbrowning, so check that your pan is the right size before you start.
- Beat the butter and sugar at medium speed using an electric hand mixer or stand mixer. Once smooth and well combined, add the egg yolk and beat for about a minute or until very well combined.: At this stage you’ll hear the mixer hum and watch the mixture go from chunky to smooth and glossy. The creaming action incorporates tiny air pockets that contribute to a tender crust, and adding the egg yolk enriches the dough. If the butter is properly softened, the process is quick and you should see a pale, smooth blend. If you notice clumps or the mixture is greasy, your butter was probably too warm or too cold, which can alter the texture of the crust.
- Add the salt, lemon zest and flour and beat on low just until the flour is well incorporated. It’ll resemble coarse crumbs and should stick together when you pinch it with your fingers.: You will smell bright citrus as you fold in the lemon zest , and the dough will change to a crumbly texture that holds when pinched. This step is about gentle incorporation to avoid developing gluten, which keeps the crust tender. Overmixing here is a typical pitfall and will lead to a tougher crust, so stop as soon as the flour disappears into the dough.
- Pat the dough up the sides and over the bottom of the ungreased tart pan. Cover with plastic wrap and freeze for at least one hour.: As you press the dough into the pan you’ll feel it compact and hold shape, with tiny pockets of butter visible. Freezing firms the dough so it bakes with less shrinkage and a clean edge. If you skip chilling, the crust can slump or spread in the oven, so allow the hour for best results.
- Preheat the oven to 375 °F. Remove the piece of plastic wrap and using a fork, poke holes about every 1″ over the bottom of the crust.: Poking holes, or docking, lets steam escape so the crust bakes flat instead of puffing up. You’ll see small neat holes and a slightly chilled dough as the pan warms. If you leave the dough wrapped and try to dock cold, you may not get uniform holes, which can cause uneven baking, so remove the wrap before docking.
- Bake the crust for 7 minutes and then check to make sure that the dough hasn’t puffed up. If it has, use the back of a metal spatula to flatten the crust.: The oven will create a toasty aroma as the edges begin to set. At the check point, the crust should show slight golden edges and remain mostly flat. If you notice puffing, press gently with the back of a metal spatula to deflate the dough, creating a uniform base. A common error is opening the oven too frequently which can alter baking temperature, so be quick during checks.
- Bake an additional 10-15 minutes or until the tart is golden brown.: During this longer bake you’ll watch the crust transition from pale to warm golden, and tiny crunchy flecks will appear. The color is the best indicator of doneness; aim for an even, deep golden hue. If your oven runs hot, the edges can darken too fast, so rotate the pan halfway if needed to prevent burning.
- Let cool completely, about 30-45 minutes, and then prepare the filling.: Cooling is when structure sets, and the kitchen will shift from baking warmth to a gentle, fragrant quiet. If you add filling to a warm crust, it can soften or become soggy, so patience here preserves texture. Rushing this step is a frequent misstep, leading to a softer crust and a less clean slice.
- Beat the cream cheese and sugar at medium speed using an electric hand mixer or stand mixer. Once smooth and well combined, beat in the vanilla and salt. Spread over the cooled crust.: As you whip the cream cheese and granulated sugar , the texture becomes luxuriously smooth and glossy. The aroma of vanilla will lift the filling and make it inviting. Spread the mixture in an even layer so the fruit sits nicely on top. If the filling seems lumpy or grainy, the cream cheese was likely too cold, so always start with room temperature ingredients for a silky finish.
- Rinse, hull, and pat the strawberries dry with a paper towel. Place the strawberries on top of the filling and then use a pastry brush to brush the warmed strawberry jam over the strawberries.: Fresh strawberries should be clean and dry so they adhere to the filling. Arranging them creates a visual rhythm and the warm jam glaze adds shine and concentrated fruit flavor. Brush gently so you do not displace the berries. A common mistake is placing wet strawberries directly on the filling, which can introduce excess moisture and make the tart less stable.
- Cover and chill until ready to serve. Best served the day it is made.: Chilling firms the filling and allows flavors to meld, yielding clean slices and a refreshing mouthfeel. When chilled properly the tart slices with a satisfying, smooth cut and the glossy fruit holds its shape. If left too long, the crust may soften slightly from the fruit juices, so plan to serve within the day for the best texture.
Tips and Variations
I like keeping these tips handy when I make Strawberry Tart because small adjustments elevate the result. Below are practical tweaks and variations that I use depending on the fruit size and occasion.
- Choose ripe small strawberries: Small berries lay neatly and provide consistent texture, and they tend to be sweeter per bite. If you must use larger berries, halve them evenly so the tart looks balanced.
- Check pan size: A 9 inch tart pan is ideal here. Using a larger pan will yield a thinner crust that bakes more quickly and may overbrown, while a smaller pan will make the filling level higher and change the bake time.
- Freeze before baking: Freezing the crust for at least one hour helps it hold shape and prevents shrinking, which produces a clean edge and consistent thickness.
- Room temperature ingredients: Bringing cream cheese and butter to room temperature ensures smooth blending and avoids lumps in the filling or a greasy crust.
- Glaze gently: Warm the jam just enough to loosen it so it brushes without displacing the fruit. A thin, even glaze preserves the tart’s aesthetic and seals in flavor.
Great Combinations for Strawberry Tart
This tart pairs beautifully with light beverages and simple accompaniments, and it suits a range of occasions from casual gatherings to festive tables. Below I outline serving ideas and storage notes so you can match the tart to the moment.
- Afternoon tea: Serve slices with hot brewed tea or a mild coffee for a gentle, refined pairing where the tart’s bright fruit shines.
- Spring brunch: Place the tart on a brunch spread with fresh fruit bowls and simple pastries, making it a star without overpowering the table.
- Picnic friendly: Chill the tart and transport in a flat container for a sweet finish to a picnic. Keep it cool to preserve the crust crunch and glossy fruit.
- Special occasions: For birthdays or showers, present the tart on a cake stand. The visual appeal of the arranged strawberries makes it festive and elegant.
- Storage tips: Cover and refrigerate leftover tart, and plan to eat within two days for best texture. The crust holds up best on the first day; beyond that the fruit juices can soften it slightly.
- Seasonal pairings: In spring serve with other light, floral dishes, while in summer pair with chilled herbal iced tea or simple lemon sorbet to accent the freshness.
FAQ
Conclusion
This recipe’s charm lies in its simple, complementary elements a buttery crust, silky cream cheese filling, and bright fresh strawberries. It’s a dessert that feels both homey and special, and it rewards a little attention with beautiful results. Give it a try the next time you want something that photographs well and tastes even better, and don’t be surprised if it becomes a requested favorite at your table.
Strawberry Tart
Equipment
- Mixing bowl set
- KitchenAid 9-Speed Digital Hand Mixer
Ingredients
- 6 tablespoons unsalted butter room temperature Soften and cream to provide a tender, flaky crust by incorporating fat into the dough; ensure room temperature for even mixing and proper texture development during baking.
- 1/4 cup granulated sugar Sweeten and balance the crust flavors while helping to tenderize the dough; measure precisely to avoid overly soft crust structure.
- 1 large egg yolk Enrich and bind the crust with fat and flavor, promoting a richer mouthfeel and cohesive dough that holds its shape when rolled and baked.
- 1/4 teaspoons salt Season and enhance overall flavor balance in the crust; a small amount prevents dullness and highlights the butter and lemon notes.
- 2 teaspoons lemon zest Brighten and add citrus fragrance to the crust, cutting richness and providing a fresh aromatic contrast to sweet components.
- 1 cup all-purpose flour OR 1-to-1 gluten-free baking mix for a gluten-free version Provide structure and bulk to the crust by forming gluten (or a gluten-free alternative) and creating the foundational texture for the tart shell.
- 16 ounces cream cheese room temperature Soften and create a creamy filling base by bringing to room temperature for smooth blending; adds richness and tang that complements the fruit.
- 1/2 cup granulated sugar Sweeten and balance the cream cheese filling while controlling texture and firmness; dissolve fully for a smooth, stable filling consistency.
- 1 teaspoon pure vanilla extract Add warm, aromatic vanilla flavor to the filling, rounding out sweetness and enhancing the overall depth of taste.
- pinch of salt Season and amplify other flavors in the filling; a small pinch helps balance sweetness and prevents a flat-tasting cream.
- 1 1/2 pounds small strawberries Provide fresh, juicy fruit topping and bright color; select ripe, small berries for uniformity and better arrangement on the tart surface.
- 2 tablespoons strawberry jam warmed Glaze and add shine to the finished tart while lightly sweetening the fruit; warming makes it easy to brush evenly for an attractive presentation.
Instructions
- Get out a 9″ tart pan with a removable bottom.: The kitchen smells calm and anticipation grows when you assemble your tools. A tart pan with a removable bottom helps you unmold the finished tart cleanly, preserving the pretty edge of the crust. You want a stable pan so the crust presses firmly and evenly, ensuring uniform baking. A common mistake is using a pan that is too large, which will make the crust too thin and prone to overbrowning, so check that your pan is the right size before you start.
- Beat the butter and sugar at medium speed using an electric hand mixer or stand mixer. Once smooth and well combined, add the egg yolk and beat for about a minute or until very well combined.: At this stage you’ll hear the mixer hum and watch the mixture go from chunky to smooth and glossy. The creaming action incorporates tiny air pockets that contribute to a tender crust, and adding the egg yolk enriches the dough. If the butter is properly softened, the process is quick and you should see a pale, smooth blend. If you notice clumps or the mixture is greasy, your butter was probably too warm or too cold, which can alter the texture of the crust.
- Add the salt, lemon zest and flour and beat on low just until the flour is well incorporated. It’ll resemble coarse crumbs and should stick together when you pinch it with your fingers.: You will smell bright citrus as you fold in the lemon zest , and the dough will change to a crumbly texture that holds when pinched. This step is about gentle incorporation to avoid developing gluten, which keeps the crust tender. Overmixing here is a typical pitfall and will lead to a tougher crust, so stop as soon as the flour disappears into the dough.
- Pat the dough up the sides and over the bottom of the ungreased tart pan. Cover with plastic wrap and freeze for at least one hour.: As you press the dough into the pan you’ll feel it compact and hold shape, with tiny pockets of butter visible. Freezing firms the dough so it bakes with less shrinkage and a clean edge. If you skip chilling, the crust can slump or spread in the oven, so allow the hour for best results.
- Preheat the oven to 375 °F. Remove the piece of plastic wrap and using a fork, poke holes about every 1″ over the bottom of the crust.: Poking holes, or docking, lets steam escape so the crust bakes flat instead of puffing up. You’ll see small neat holes and a slightly chilled dough as the pan warms. If you leave the dough wrapped and try to dock cold, you may not get uniform holes, which can cause uneven baking, so remove the wrap before docking.
- Bake the crust for 7 minutes and then check to make sure that the dough hasn’t puffed up. If it has, use the back of a metal spatula to flatten the crust.: The oven will create a toasty aroma as the edges begin to set. At the check point, the crust should show slight golden edges and remain mostly flat. If you notice puffing, press gently with the back of a metal spatula to deflate the dough, creating a uniform base. A common error is opening the oven too frequently which can alter baking temperature, so be quick during checks.
- Bake an additional 10-15 minutes or until the tart is golden brown.: During this longer bake you’ll watch the crust transition from pale to warm golden, and tiny crunchy flecks will appear. The color is the best indicator of doneness; aim for an even, deep golden hue. If your oven runs hot, the edges can darken too fast, so rotate the pan halfway if needed to prevent burning.
- Let cool completely, about 30-45 minutes, and then prepare the filling.: Cooling is when structure sets, and the kitchen will shift from baking warmth to a gentle, fragrant quiet. If you add filling to a warm crust, it can soften or become soggy, so patience here preserves texture. Rushing this step is a frequent misstep, leading to a softer crust and a less clean slice.
- Beat the cream cheese and sugar at medium speed using an electric hand mixer or stand mixer. Once smooth and well combined, beat in the vanilla and salt. Spread over the cooled crust.: As you whip the cream cheese and granulated sugar , the texture becomes luxuriously smooth and glossy. The aroma of vanilla will lift the filling and make it inviting. Spread the mixture in an even layer so the fruit sits nicely on top. If the filling seems lumpy or grainy, the cream cheese was likely too cold, so always start with room temperature ingredients for a silky finish.
- Rinse, hull, and pat the strawberries dry with a paper towel. Place the strawberries on top of the filling and then use a pastry brush to brush the warmed strawberry jam over the strawberries.: Fresh strawberries should be clean and dry so they adhere to the filling. Arranging them creates a visual rhythm and the warm jam glaze adds shine and concentrated fruit flavor. Brush gently so you do not displace the berries. A common mistake is placing wet strawberries directly on the filling, which can introduce excess moisture and make the tart less stable.
- Cover and chill until ready to serve. Best served the day it is made.: Chilling firms the filling and allows flavors to meld, yielding clean slices and a refreshing mouthfeel. When chilled properly the tart slices with a satisfying, smooth cut and the glossy fruit holds its shape. If left too long, the crust may soften slightly from the fruit juices, so plan to serve within the day for the best texture.
Notes
- Choose ripe small strawberries: Small berries lay neatly and provide consistent texture, and they tend to be sweeter per bite. If you must use larger berries, halve them evenly so the tart looks balanced.
- Check pan size: A 9 inch tart pan is ideal here. Using a larger pan will yield a thinner crust that bakes more quickly and may overbrown, while a smaller pan will make the filling level higher and change the bake time.
- Freeze before baking: Freezing the crust for at least one hour helps it hold shape and prevents shrinking, which produces a clean edge and consistent thickness.
- Room temperature ingredients: Bringing cream cheese and butter to room temperature ensures smooth blending and avoids lumps in the filling or a greasy crust.
- Glaze gently: Warm the jam just enough to loosen it so it brushes without displacing the fruit. A thin, even glaze preserves the tart’s aesthetic and seals in flavor.