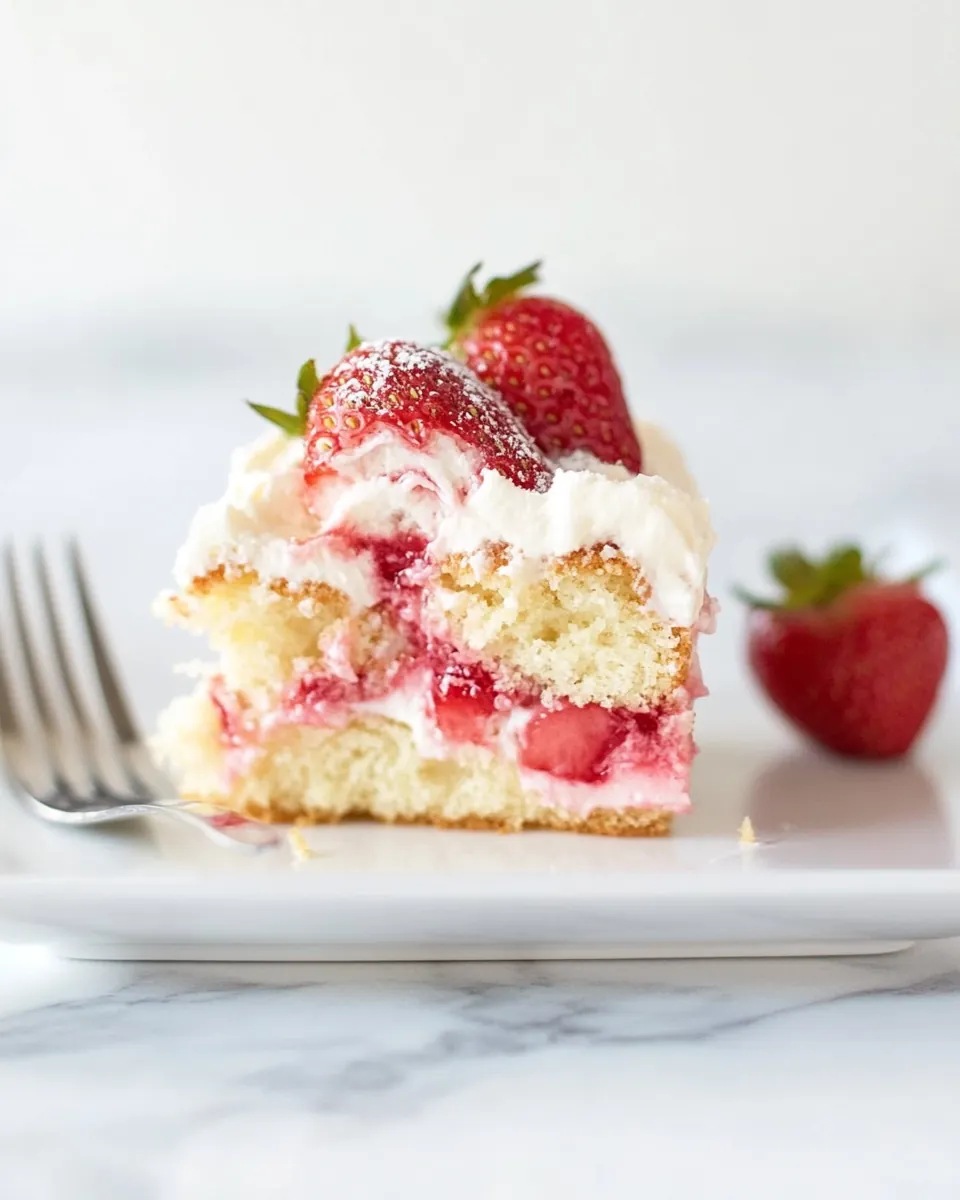
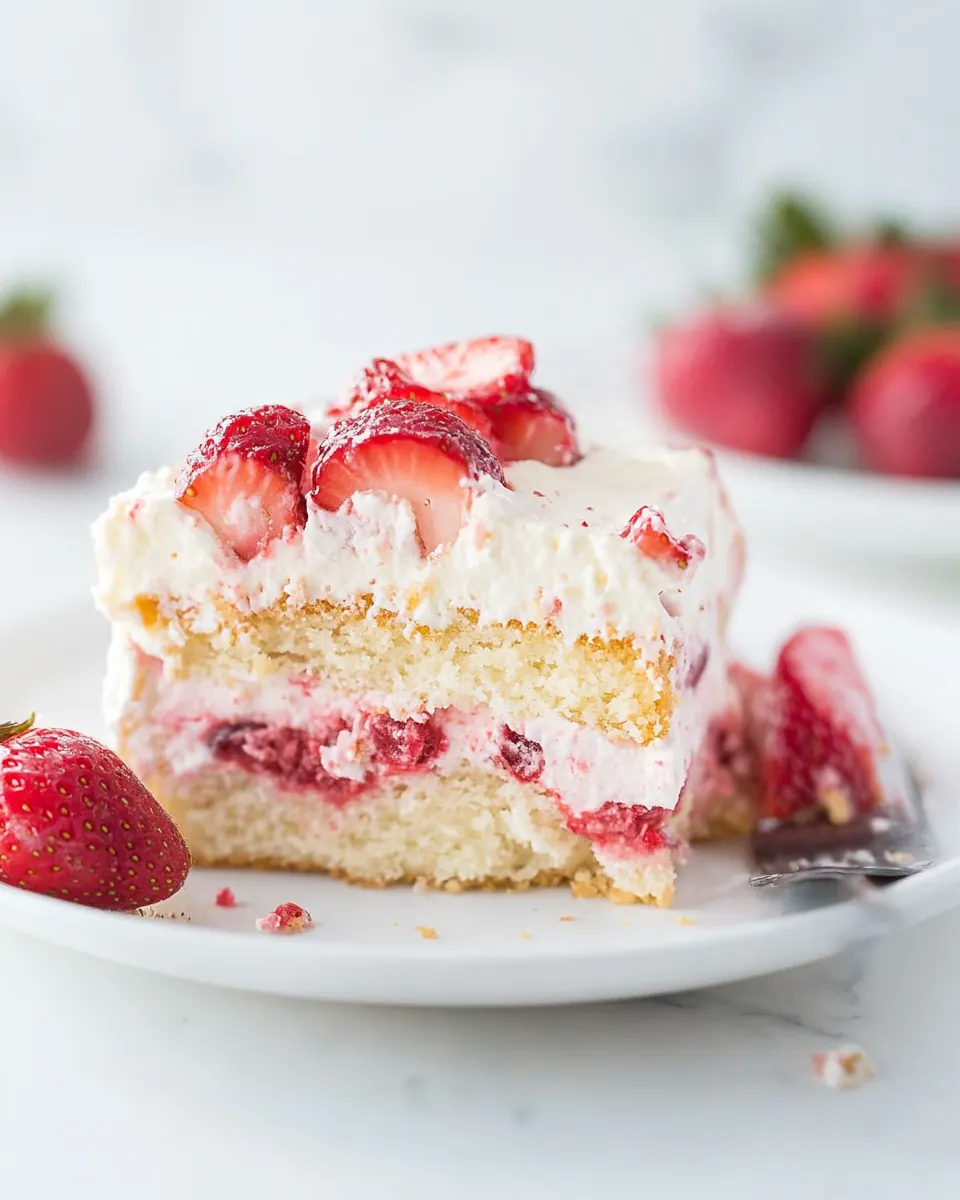
Strawberry Short Cake
Strawberry Short Cake is one of those desserts that always brings me back to sunlit afternoons and the sticky sweetness of freshly picked berries.
I remember the first time I layered this together for a family gathering, juggling a bowl of whipped cream and a stack of crumbly cookies while my niece impatiently sampled a halved strawberry. That small chaos turned into a ritual: quick beats of cream until it held proud peaks, the scent of ripe strawberries filling the kitchen, and the satisfying snap when a fork met the chilled layers. Over the years I have learned tiny tricks, like dicing most of the strawberries for an even distribution of juice, and leaving a few halved pieces for a pretty finish.
What I love about this version is how forgiving it is. You do not need a pastry degree to get it right, just good timing and an eye for texture. The contrast between airy whipped cream and crunchy cookies makes every bite interesting, and the strawberry puree ties the layers together with a bright, fragrant note. I often make it when I need a showstopper that travels well, because it happily sits in the fridge and develops flavor as it chills. This recipe feels like home, and yet it always earns compliments when I bring it to potlucks or weekend brunches.
Recipe Snapshot
21 mins
20 mins
1 mins
Medium
300 kcal
American
Gluten-Free, Low FODMAP
Desserts
Mixing bowl, Stand mixer or hand mixer, Spatula, 20 x 20 cm square dish, Cling film, Knife
What You’ll Enjoy About This Strawberry Short Cake
Bright, familiar flavors
I love how Strawberry Short Cake captures the pure taste of strawberries without overcomplicating things. The puree and diced strawberries amplify the fruitiness so every bite tastes like summer.
Texture play that keeps you coming back
The combination of whipped cream and crumbly cookies creates a contrast that is central to the dessert. I appreciate how the cookies soften just enough from the juices, yet still offer a gentle crunch that balances the cream.
Speed and simplicity
This is a recipe I reach for when I want something impressive in minimal time. With only a handful of components, it is approachable, and I find the technique is forgiving for cooks of all levels.
Flexible and adaptable
Because the framework is straightforward, I often swap in different cookies or use frozen strawberries when fresh are not available. The core idea remains the same, and it still delivers bright flavor and pleasing texture.
Great make ahead dessert
I adore that the flavors deepen as it chills. I usually make this a few hours ahead, which frees me up for other tasks while the layers settle into a cohesive, sliceable treat.
Ingredients Required for Strawberry Short Cake
These ingredients are intentionally simple, focusing on a few strong players that carry the dish. The whipped cream brings richness and lightness, the strawberries offer brightness and acidity, and the cookies act as the structure that soaks up berry juices for a lovely, tender bite. Each component works in harmony, producing a dessert that is more than the sum of its parts.
- 500 milliliters cream: Whip to soft peaks and incorporate air for a light, fluffy topping that balances the dessert's sweetness. Use cold cream and chill tools for the best volume; stabilize if needed for longer assembly or display. Gently fold other ingredients to maintain texture and avoid deflation.
- 1/4 cup icing sugar: Sift finely and dissolve into whipped cream or batter to add a smooth, even sweetness without graininess. Adjust quantity to taste, remembering it also helps stabilize whipped cream and reduce weeping. Use powder sugar alternatives cautiously to maintain texture.
- 2 teaspoons vanilla extract: Add aromatic depth and enhance the overall flavor profile with warm, familiar notes that complement strawberries. Measure precisely to avoid overpowering delicate components; a little goes a long way. Combine with liquids early so the flavor distributes evenly.
- 500 grams strawberries: Rinse and hull before slicing to provide fresh, juicy fruit that brings brightness, acidity, and natural sweetness to the cake. Macerate with a touch of sugar or puree for extra syrupy juices to layer between cake and cream. Choose ripe berries for best aroma and texture.
- 1/2 cup strawberry puree: Puree until smooth to intensify strawberry flavor and create a spreadable layer that soaks into cake for moistness and concentrated fruitiness. Strain if desired to remove seeds for a silky mouthfeel. Adjust sweetness to balance natural tartness.
- 320 grams cookies I used gluten free scotch finger biscuits.: Crush or pulse to fine crumbs to form a crunchy base or add texture contrast while keeping the recipe gluten–free. Press into layers or mix with a binder like melted butter for a cohesive crumb layer. Store airtight to maintain crispness before assembly.
Step by Step Instructions for Strawberry Short Cake
These directions will guide you through assembly, focusing on texture and timing so your layers set beautifully. I will walk you through sensory cues and troubleshooting so you can confidently assemble and chill the dessert for the best results.
- In a mixing bowl (or the bowl of a stand mixer) place the cream, icing sugar and vanilla extract. Beat until stiff peaks form.: You should hear a soft, rhythmic whir as the cream thickens and smell a gentle vanilla sweetness filling the air, while the bowl becomes colder to the touch. The correct signal is when the cream holds firm tips that remain upright, and the texture is glossy rather than grainy. This aeration traps air so the topping stays pillowy after chilling. A tip is to chill the bowl and beaters beforehand to speed the process. A common mistake is stopping too soon, resulting in loose cream that will not support the layers, or going too far which yields a grainy, buttery texture.
- Wash and hull the strawberries. Dice the three quarters of the strawberries. In a mixing bowl combine the diced strawberries with the strawberry puree. The remaining strawberries will go on the top of the frozen strawberry shortcake. Slice these strawberries in half.: As you rinse the strawberries you will notice their aroma intensify, and the bright red juices start to glisten as you dice. Combining the diced strawberries with the puree creates a glossy, jam like mixture that spreads easily and imparts even flavor throughout the dessert. Reserve the halved strawberries for garnish so they look fresh and structured on top. Watch out for overripe berries which can release too much liquid and make the cookie layers soggy; choose berries that are ripe yet firm for the best balance.
- Spread a thin layer of whipped cream in the bottom of a 20 x 20 cm square dish.: Run a spatula across the base, leaving an even, paper thin layer that will prevent the cookies from sliding and act as a neutral base. You should feel a cool resistance from the cream as you spread it, and the surface should be smooth and slightly glossy. This thin cushion is important because it keeps the bottom cookie from clumping and helps with clean slices later. Avoid pressing too hard or creating thick ridges, which can lead to uneven layering.
- Add a single layer of plain cookies, top the cookies with 1/3 of the whipped cream spreading the cream in an even layer with a spatula. Add 1/2 of the strawberry/strawberry puree mixture in an even layer.: Place each cookie snugly so they form a stable base, then feel the cool, luxurious cream glide across them as you add the first substantial layer. The scent of strawberries should become noticeable as you spread the puree, and you will see a pretty marbled effect where the juices sink slightly into the cookie surface. This technique ensures every forkful has balance. A mistake to avoid is piling too much cream in one spot, which can push the cookies out of alignment and cause uneven setting.
- You are now going to repeat these layers as follows: Cookies Cream Strawberries Cookies Cream.: Cookies Cream Strawberries Cookies Cream. : As you build the repeated structure you will notice the dessert compacting gently, the cookies softening at the edges as they absorb moisture and the layers starting to meld visually. This layering sequence is crucial for texture contrast, ensuring both crunch and cream appear in each bite. Pay attention to the level of the dish so layers stay even; uneven stacking can lead to a lopsided cake that is hard to slice neatly.
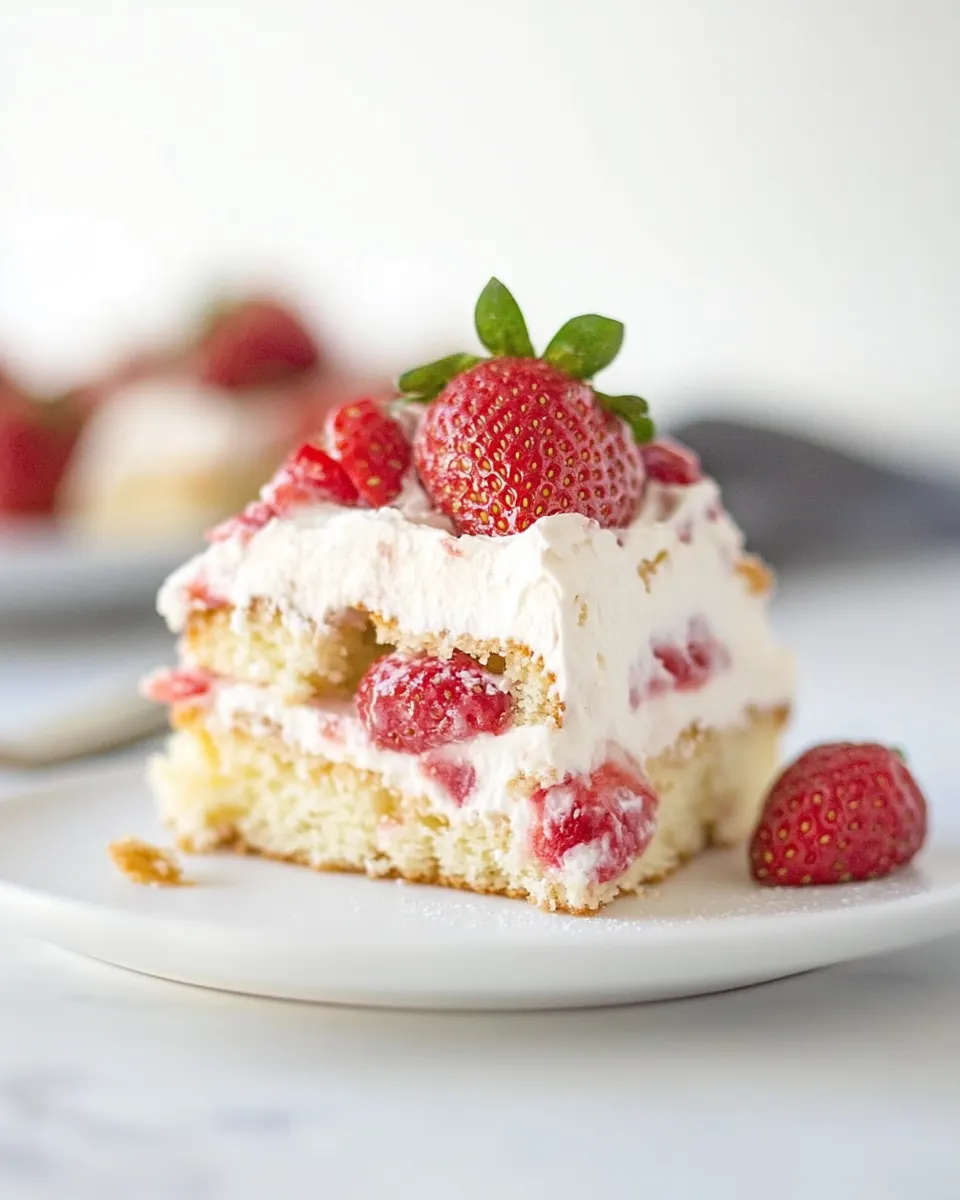
- Arrange the remaining strawberry slices on top of the cream.: Lay the halved strawberries in a decorative pattern, their glossy cut sides facing up so the top looks fresh and appetizing. You will notice their bright sheen and feel the slight resistance as you press them gently into the final cream layer. This finishing touch adds visual appeal and a burst of fresh texture. Avoid overcrowding, which can cause excess juice to pool on the surface and make the top soggy.
- Cover the dish with cling film and refrigerate for at least 4 hours before serving. (Overnight is perfect): The chilled environment lets the layers knit together, the cookies soften to a pleasant tender bite, and the flavors marry into a cohesive whole. You will find the dish cool to the touch and firmer when ready, and slicing yields clean pieces rather than collapsing spoonfuls. Refrigerating too briefly results in loose layers that fall apart, while freezing it too long can make slicing difficult unless you allow it to warm a little first.
- Enjoy!: When you serve, the first forkful should offer a contrast of textures, a breath of strawberry aroma, and the creamy, sweet lift of the whipped cream . Take a moment to notice the balance of sweetness and fruit, and how the cookie has softened just enough to feel tender but still present. A common misstep is serving it too warm, which can cause the layers to slump; keep it well chilled for the best presentation and texture.
Customization Ideas
You can easily tweak this recipe to suit diets, seasons, or presentation goals. Below are practical, tested ideas that keep the core flavor intact while offering variety and convenience.
- Swap the cookies for a different texture by choosing shortbread for a buttery bite, or graham style cookies for a honeyed note; each cookie type will change how the dessert soaks and slices, so adjust chilling time accordingly.
- Use frozen strawberries when fresh are unavailable; thaw and drain excess liquid to avoid overly soggy layers, and consider reducing the puree slightly to compensate for added moisture.
- Make it dairy free by chilling and whipping full fat coconut cream; it whips more slowly and yields a slightly different mouthfeel, but it preserves the creamy layer beautifully.
- Adjust sweetness by tasting the puree and diced berries before assembly; if they are very sweet, reduce the icing sugar in the whipped cream so the fruit can shine.
- Prepare ahead and refrigerate for at least four hours or overnight; the flavors meld and the dessert becomes easier to slice, but allow a short rest at room temperature if it is frozen too hard.
Great Combinations for Strawberry Short Cake
This dessert pairs well with simple accompaniments and fits a range of occasions from casual brunch to festive gatherings. Below I outline serving ideas, timing suggestions, and storage methods so you can present it beautifully every time.
- Serve with fresh mint leaves for a fragrant contrast that brightens each slice and enhances the berry aroma, especially useful for spring and summer gatherings.
- Pair with coffee or tea for a relaxed brunch setting; the bitter notes of a black tea or espresso complement the sweet strawberries and creamy layers.
- Occasion suggestions include birthday celebrations, springtime gatherings, and light dessert options for Ramadan if served after Iftar, because it is refreshing and easy to portion.
- Storage tips recommend keeping the cake covered in the refrigerator for up to three days; it holds well as the cookies continue to soften and the flavors integrate.
- Seasonal pairing ideas: in spring use the freshest strawberries, and in cooler months consider thawed frozen berries with slightly reduced puree to prevent excess moisture in the layers.
FAQ
Conclusion
Strawberry Short Cake shines because it layers bright, juicy berries with airy whipped cream and crisp cookies for an irresistible balance of flavor and texture. Give it a try the next time you want a make ahead dessert that is both elegant and comforting. It is forgiving to assemble, delightful to serve, and always welcomes a few personal tweaks to match your pantry and tastes.
Strawberry Short Cake
Equipment
- Mixing Bowl
- Stand mixer or hand mixer
- Spatula
- 20 x 20 cm square dish
- Cling film
- Knife
Ingredients
- 500 milliliters cream Whip to soft peaks and incorporate air for a light, fluffy topping that balances the dessert's sweetness. Use cold cream and chill tools for the best volume; stabilize if needed for longer assembly or display. Gently fold other ingredients to maintain texture and avoid deflation.
- 1/4 cup icing sugar Sift finely and dissolve into whipped cream or batter to add a smooth, even sweetness without graininess. Adjust quantity to taste, remembering it also helps stabilize whipped cream and reduce weeping. Use powder sugar alternatives cautiously to maintain texture.
- 2 teaspoons vanilla extract Add aromatic depth and enhance the overall flavor profile with warm, familiar notes that complement strawberries. Measure precisely to avoid overpowering delicate components; a little goes a long way. Combine with liquids early so the flavor distributes evenly.
- 500 grams strawberries Rinse and hull before slicing to provide fresh, juicy fruit that brings brightness, acidity, and natural sweetness to the cake. Macerate with a touch of sugar or puree for extra syrupy juices to layer between cake and cream. Choose ripe berries for best aroma and texture.
- 1/2 cup strawberry puree Puree until smooth to intensify strawberry flavor and create a spreadable layer that soaks into cake for moistness and concentrated fruitiness. Strain if desired to remove seeds for a silky mouthfeel. Adjust sweetness to balance natural tartness.
- 320 grams cookies I used gluten free scotch finger biscuits. Crush or pulse to fine crumbs to form a crunchy base or add texture contrast while keeping the recipe gluten-free. Press into layers or mix with a binder like melted butter for a cohesive crumb layer. Store airtight to maintain crispness before assembly.
Instructions
- In a mixing bowl (or the bowl of a stand mixer) place the cream, icing sugar and vanilla extract. Beat until stiff peaks form.: You should hear a soft, rhythmic whir as the cream thickens and smell a gentle vanilla sweetness filling the air, while the bowl becomes colder to the touch. The correct signal is when the cream holds firm tips that remain upright, and the texture is glossy rather than grainy. This aeration traps air so the topping stays pillowy after chilling. A tip is to chill the bowl and beaters beforehand to speed the process. A common mistake is stopping too soon, resulting in loose cream that will not support the layers, or going too far which yields a grainy, buttery texture.
- Wash and hull the strawberries. Dice the three quarters of the strawberries. In a mixing bowl combine the diced strawberries with the strawberry puree. The remaining strawberries will go on the top of the frozen strawberry shortcake. Slice these strawberries in half.: As you rinse the strawberries you will notice their aroma intensify, and the bright red juices start to glisten as you dice. Combining the diced strawberries with the puree creates a glossy, jam like mixture that spreads easily and imparts even flavor throughout the dessert. Reserve the halved strawberries for garnish so they look fresh and structured on top. Watch out for overripe berries which can release too much liquid and make the cookie layers soggy; choose berries that are ripe yet firm for the best balance.
- Spread a thin layer of whipped cream in the bottom of a 20 x 20 cm square dish.: Run a spatula across the base, leaving an even, paper thin layer that will prevent the cookies from sliding and act as a neutral base. You should feel a cool resistance from the cream as you spread it, and the surface should be smooth and slightly glossy. This thin cushion is important because it keeps the bottom cookie from clumping and helps with clean slices later. Avoid pressing too hard or creating thick ridges, which can lead to uneven layering.
- Add a single layer of plain cookies, top the cookies with 1/3 of the whipped cream spreading the cream in an even layer with a spatula. Add 1/2 of the strawberry/strawberry puree mixture in an even layer.: Place each cookie snugly so they form a stable base, then feel the cool, luxurious cream glide across them as you add the first substantial layer. The scent of strawberries should become noticeable as you spread the puree, and you will see a pretty marbled effect where the juices sink slightly into the cookie surface. This technique ensures every forkful has balance. A mistake to avoid is piling too much cream in one spot, which can push the cookies out of alignment and cause uneven setting.
- You are now going to repeat these layers as follows: Cookies Cream Strawberries Cookies Cream.: Cookies Cream Strawberries Cookies Cream. : As you build the repeated structure you will notice the dessert compacting gently, the cookies softening at the edges as they absorb moisture and the layers starting to meld visually. This layering sequence is crucial for texture contrast, ensuring both crunch and cream appear in each bite. Pay attention to the level of the dish so layers stay even; uneven stacking can lead to a lopsided cake that is hard to slice neatly.
- Arrange the remaining strawberry slices on top of the cream.: Lay the halved strawberries in a decorative pattern, their glossy cut sides facing up so the top looks fresh and appetizing. You will notice their bright sheen and feel the slight resistance as you press them gently into the final cream layer. This finishing touch adds visual appeal and a burst of fresh texture. Avoid overcrowding, which can cause excess juice to pool on the surface and make the top soggy.
- Cover the dish with cling film and refrigerate for at least 4 hours before serving. (Overnight is perfect): The chilled environment lets the layers knit together, the cookies soften to a pleasant tender bite, and the flavors marry into a cohesive whole. You will find the dish cool to the touch and firmer when ready, and slicing yields clean pieces rather than collapsing spoonfuls. Refrigerating too briefly results in loose layers that fall apart, while freezing it too long can make slicing difficult unless you allow it to warm a little first.
- Enjoy!: When you serve, the first forkful should offer a contrast of textures, a breath of strawberry aroma, and the creamy, sweet lift of the whipped cream . Take a moment to notice the balance of sweetness and fruit, and how the cookie has softened just enough to feel tender but still present. A common misstep is serving it too warm, which can cause the layers to slump; keep it well chilled for the best presentation and texture.
Notes
- Swap the cookies for a different texture by choosing shortbread for a buttery bite, or graham style cookies for a honeyed note; each cookie type will change how the dessert soaks and slices, so adjust chilling time accordingly.
- Use frozen strawberries when fresh are unavailable; thaw and drain excess liquid to avoid overly soggy layers, and consider reducing the puree slightly to compensate for added moisture.
- Make it dairy free by chilling and whipping full fat coconut cream; it whips more slowly and yields a slightly different mouthfeel, but it preserves the creamy layer beautifully.
- Adjust sweetness by tasting the puree and diced berries before assembly; if they are very sweet, reduce the icing sugar in the whipped cream so the fruit can shine.
- Prepare ahead and refrigerate for at least four hours or overnight; the flavors meld and the dessert becomes easier to slice, but allow a short rest at room temperature if it is frozen too hard.