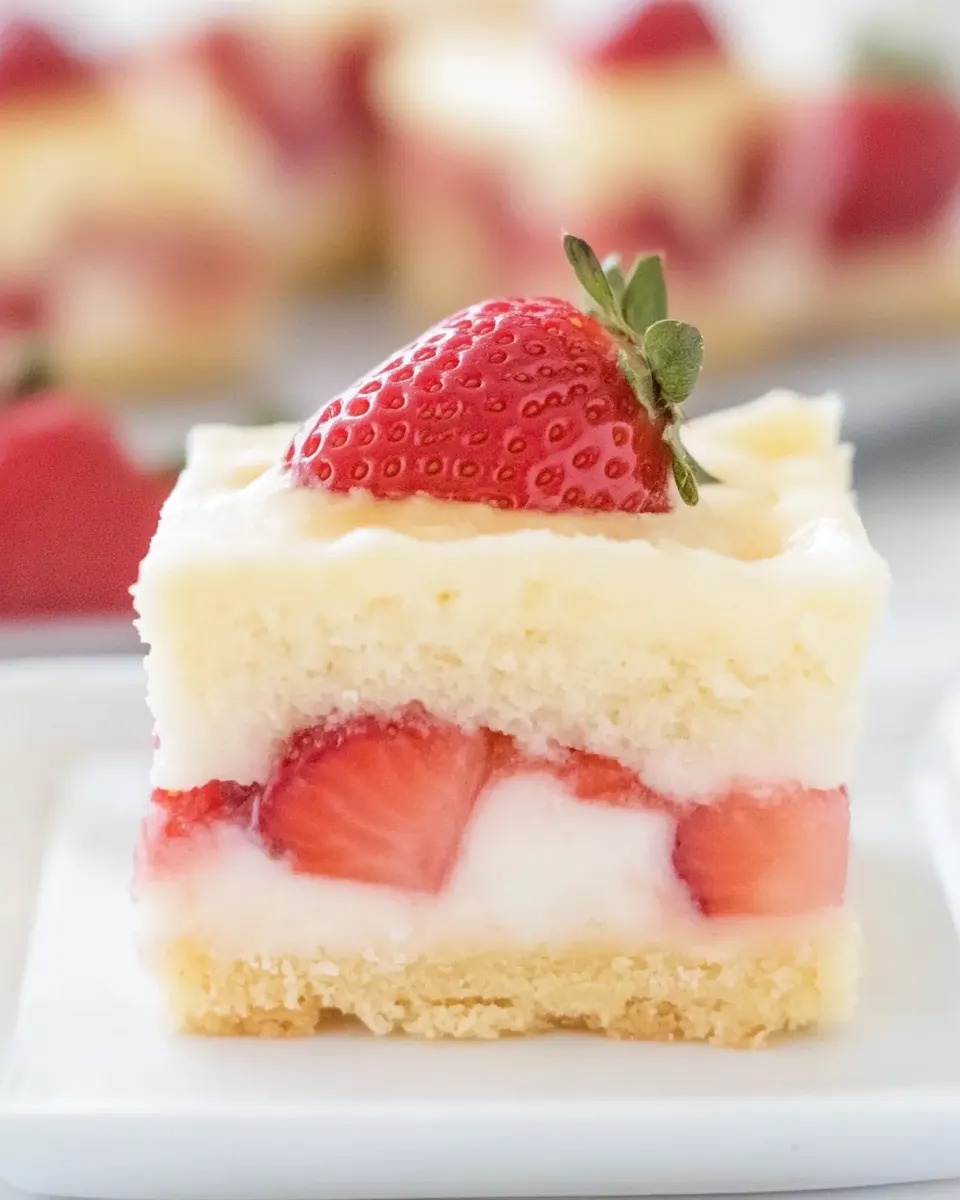
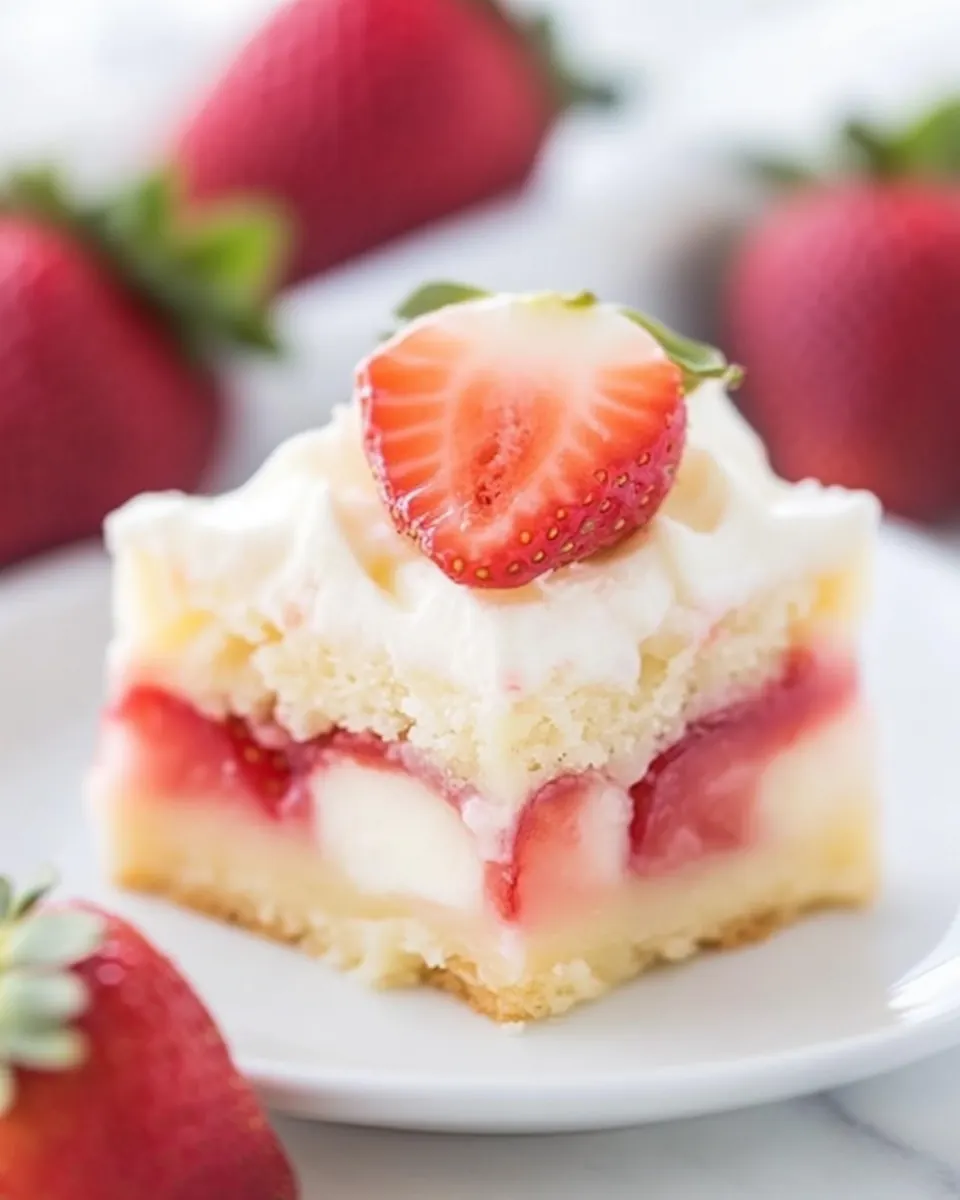
Strawberry Custard Bars
Strawberry Custard Bars are one of those recipes that bring me right back to a tiny kitchen filled with summer light and the smell of warm butter. The first time I made these I was testing a crust for a friend’s picnic and ended up keeping every single square, partly because the custard set into the most tender, slightly wobbly texture and partly because the strawberries sank into it and kept the whole thing bright and fresh.
There is a comforting rhythm to assembling Strawberry Custard Bars, from pressing the crumbly crust into the pan to whisking the glossy custard. I remember laughing at myself as I carefully arranged the diced strawberries, worried I might crowd them, then relaxing when the filling nestled between the fruit and bubbled golden in the oven. Sharing these bars at a summer brunch felt effortless, they vanished faster than I could slice them.
Recipe Snapshot
1 hr 5 mins
10 mins
55 mins
Medium
200 kcal
American
Gluten-Free, Low FODMAP
Desserts
8×8 inch baking pan, Aluminum foil, Mixing bowl, Whisk, Spatula, Wire rack
The Best Thing About This Strawberry Custard Bars
Bright, not cloying
I love how Strawberry Custard Bars balance sweetness with fresh strawberries. The natural acidity of the fruit keeps each bite lively, so the dessert never tastes overly sweet. For me, that contrast is what transforms a simple bar into something worth serving to guests.
Texture that sings
The combination of a firm, buttery crust and a silky, set custard provides a delightful textural interplay. When you bite in, you get a slight crunch from the base, followed by a smooth custard that melts across the tongue, with little bursts of juicy strawberries. I always pay attention to how the custard jiggles in the center before pulling it out of the oven, because that wobble predicts the perfect finish.
Easy to scale and pack
I find these bars straightforward to double for a crowd or halve for a smaller household. The components are forgiving, and they travel well when chilled, making them ideal for potlucks. I often make them a day ahead, because chilling helps the custard fully set and the flavors to meld.
Comfort in familiar ingredients
This recipe uses pantry staples like all purpose flour, granulated sugar, and eggs, so it’s approachable. I like that you do not need fancy tools to succeed, just a bowl, a whisk, and an oven. That accessibility is why I turn to this recipe whenever I want something impressive but not fussy.
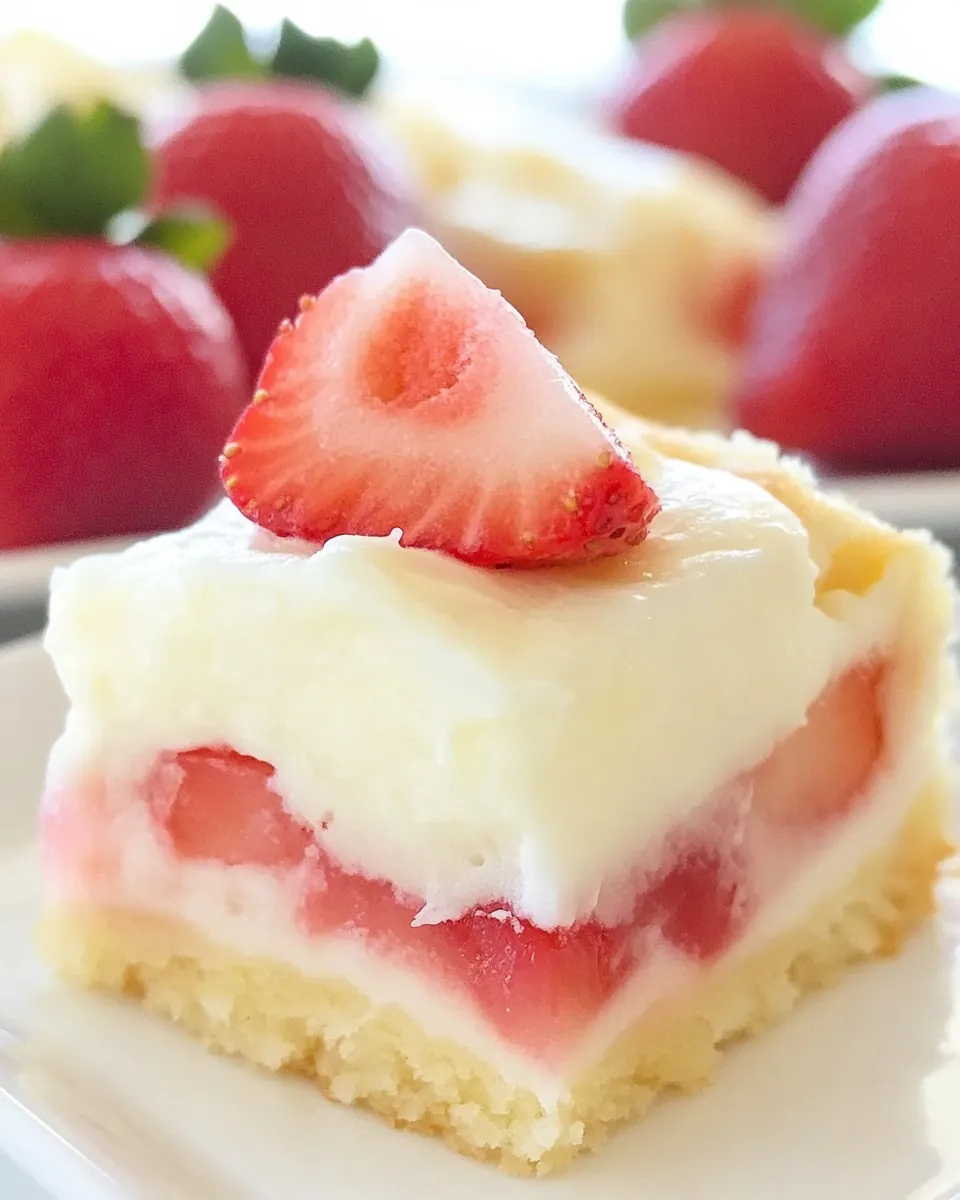
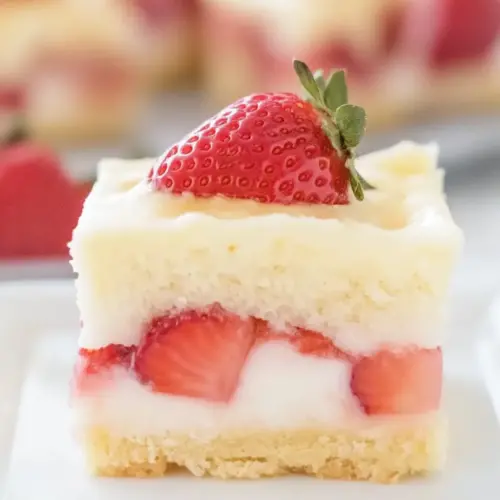
Versatile finishing touch
Topping the bars with whipped topping and fresh slices of strawberries gives a polished appearance, and you can choose a lighter topping if you want airy contrast. I prefer a stable whipped topping for make ahead events, because it holds up nicely in the fridge without weeping.
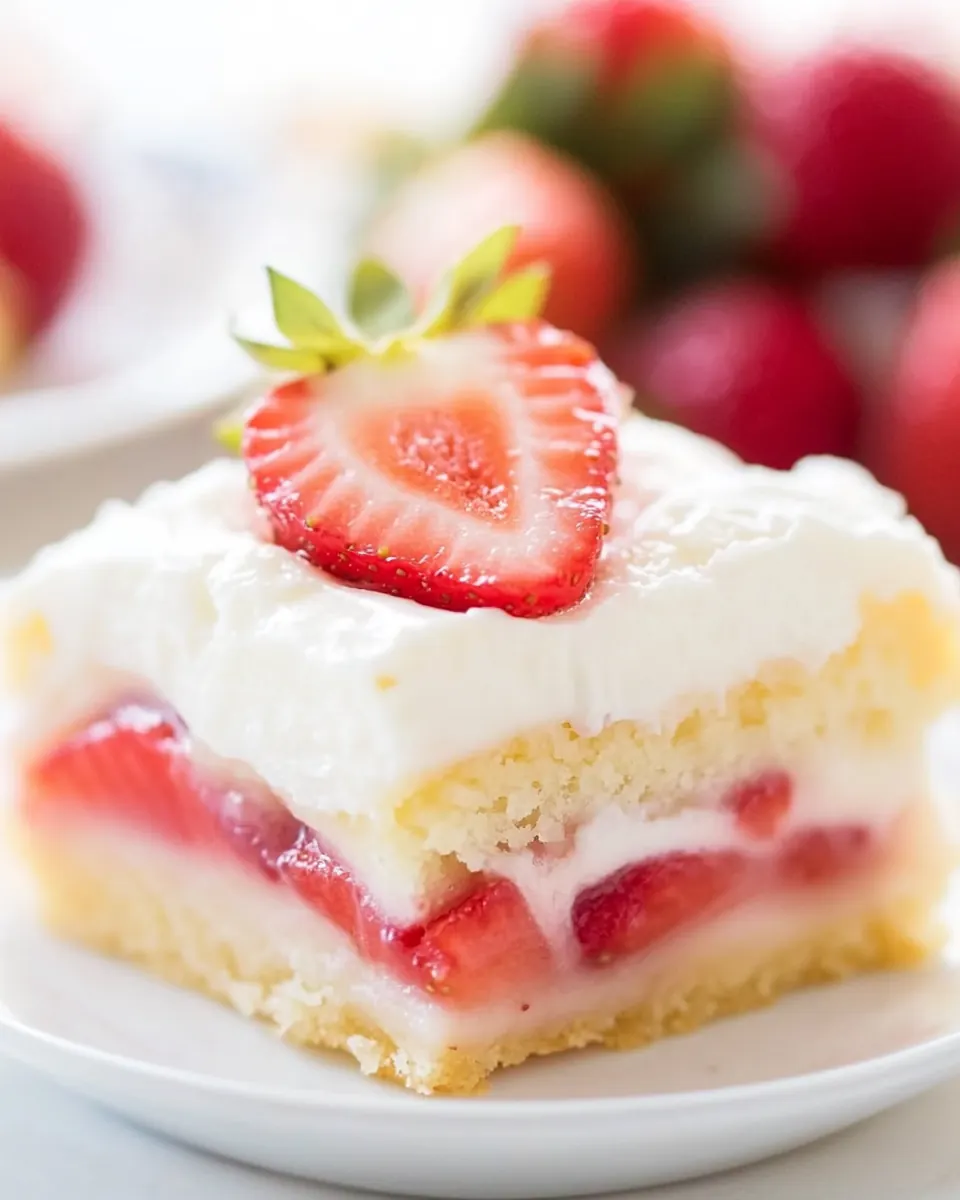
What Goes Into Strawberry Custard Bars
These ingredients form a trustworthy framework: a buttery crust to anchor, fresh strawberries for brightness, and a simple custard that sets creamy and smooth. The key players are the crust, which gives structure, the fruit, which brings acidity and texture, and the custard, which ties everything together with richness. Together they create a dessert that is both familiar and slightly elegant.
- 1 cup all-purpose flour: Provide structure and bulk to the crust and filling, creating a tender base when mixed with butter; sift or spoon into measuring cup for accuracy. Combine with the other flour portion later to help thicken the custard and ensure even texture throughout the bars.
- 1/2 cup cold unsalted butter: Cut into small cubes while cold to create flaky, shortbread-like crust; work quickly to prevent melting and to achieve a sandy texture. Chill the blended dough if needed before pressing into the pan to maintain a crisp edge once baked.
- 2 tablespoons granulated sugar: Add a light sweetness and help balance flavors in the crust; dissolve into the dough to slightly caramelize during baking for subtle depth. Use granulated sugar to control sweetness without adding moisture that could affect crust integrity.
- 1/2 teaspoons salt, or to taste: Enhance overall flavor and balance sweetness by providing a savory contrast; adjust to taste to prevent over-salting. Dissolve evenly into the crust mixture to ensure consistent seasoning throughout the base.
- 1 pound fresh strawberries, diced into small pieces (reserve about 5 whole strawberries for garnishing): Contribute fresh fruity flavor, natural juiciness, and texture to the filling while providing vibrant color; dice into small pieces so they distribute evenly in the custard. Reserve whole strawberries for garnish to add visual appeal and a fresh burst on top.
- 2 large eggs: Bind the custard filling and provide richness from the yolks while helping to set the custard as it bakes; beat until smooth for a silky texture. Temper eggs gradually when combining with hot cream to prevent curdling and ensure a uniform custard.
- 1 cup granulated sugar: Sweeten the custard filling and macerate slightly with the strawberries to draw out juices that flavor the bars; dissolve into the egg and cream mixture. Adjust quantity for desired sweetness, keeping in mind the whipped topping adds additional sweetness.
- 1/2 cup heavy whipping cream: Lend richness, creaminess, and a smooth mouthfeel to the custard; warm slightly before mixing to help incorporate with eggs for a cohesive custard. Use heavy whipping cream for stability and luxurious texture that sets well when chilled.
- 1 teaspoon vanilla extract: Provide aromatic warmth and enhance overall flavor profile with fragrant notes; add to the custard once other wet ingredients are combined for even distribution. Use pure vanilla extract for the cleanest, most pronounced flavor in the bars.
- 1/3 cup all-purpose flour: Thicken the custard and help it hold together once baked, contributing to a firm but tender set; whisk into the egg-sugar mixture to prevent lumps. Combine with the initial flour used for the crust to maintain the recipe's intended texture balance.
- about 3/4 of one 8-ounce container whipped topping, I used fat-free; homemade whipped cream may be substituted: Supply lightness and a cloudlike finish when dolloped or spread over the cooled bars; use whipped topping to add sweetness and contrast to the dense custard. Consider homemade whipped cream as a substitute for fresher flavor and control over sweetness and texture.
- strawberry slices, for garnishing: Enhance presentation and add a fresh, colorful finishing touch while reinforcing the strawberry flavor; slice thinly for elegant placement on top of the bars. Use ripe, evenly colored slices to maximize visual appeal and complementary bite.
How to Prepare Strawberry Custard Bars
These bars are assembled in a few straightforward stages: make the crust, add fruit, whisk the custard, bake until set, then chill. I find the sensory cues and timing far more helpful than strict clocks, so I describe what to look and listen for as you go along.
- Preheat oven to 350 F. Line an 8×8-inch baking pan with aluminum foil; set aside.: Warmth fills the kitchen as the oven comes to temperature, a steady, even heat that ensures the crust bakes through and the custard cooks gently. The oven preheat matters because an underheated oven can cause the crust to absorb more moisture and become soggy, while an overheated oven will brown the top too quickly. A common mistake is not allowing the oven to fully reach the set temperature, which can affect bake times, so wait until the indicator shows ready.
- To a large mixing bowl, add the flour, butter, sugar, salt, and using two forks or a pastry cutter, cut the butter into the dry ingredients until the mixture resembles coarse crumbs.: Lining the pan makes it easy to lift the bars out after chilling, and the foil edge gives a crisp rim as the crust meets the pan. Press the foil smoothly so it conforms to the corners, which avoids pockets where the crust might be uneven. If the foil wrinkles too much, the crust can bake irregularly, so smooth it as much as possible.
- Turn mixture out into prepared pan and hard-pack with a spatula to form an even, smooth, crust layer.: The sound of the butter being worked in is subtle, you will see pebble sized pieces coated in flour that hold together when pressed. This texture is crucial because those crumbs will compress into a crust that flaks slightly instead of crumbling apart. Avoid overworking the butter into a paste, which will yield a dense, short crust rather than one with tender flakiness.
- Bake for 10 minutes. Remove pan from oven and set on a wire rack to cool. While crust bakes, dice the strawberries.: Pressing the crust firmly creates a compact base that will support the custard without breaking apart. You should feel resistance as you press, and the surface should look smooth and even. A typical error is leaving the crust uneven, which can cause thin spots that bake too fast, so check the corners and edges carefully.
- After crust has cooled for about 5 minutes, evenly top with strawberries; set aside.: The oven will produce a warm, toasty aroma as the butter begins to brown and the sugar caramelizes slightly. This short bake firms the crust so it does not become soggy once the filling is added. If you skip this step, the custard may seep into the crust and ruin the texture, so do not omit the pre-bake.
- To a large mixing bowl (the same one used for the crust is fine, just wipe it out with a paper towel), add the eggs, sugar, cream, vanilla, and whisk vigorously for about 1 minute to combine.: Cooling on a wire rack allows air to circulate under the pan so the crust stops cooking quickly and retains its texture. After about a few minutes the surface will feel less hot to the touch and ready for the fruit. A mistake here is adding the filling while the crust is piping hot, which can cause the fruit to cook prematurely and release excess juices.
- Add the flour and stir to combine; don’t overmix.: As you chop, the scent of fresh strawberries brightens the kitchen. Dice them small so they distribute evenly and release just enough juice to flavor the custard without making it watery. Cutting too large will concentrate fruit in spots, causing uneven texture in the finished bars.
- Evenly pour filling mixture over the strawberries.: The fruit should spread into a single, even layer that contacts the crust, allowing the custard to seep around each piece. This positioning helps the strawberries stay suspended in the custard rather than sinking entirely to the bottom. Overcrowding the pan can cause the custard to struggle to envelop each piece, so spread evenly.
- Bake for about 40 to 45 minutes or until top is lightly golden brown and custard is set. Tip – In the last 10 to 15 minutes of baking, if the top is already looking fairly browned, tent the pan with a sheet of foil (loosely drape a sheet of foil over the pan) to prevent additional browning.: You will notice the mixture become glossy and slightly thickened as air incorporates. The aroma of vanilla will bloom, and whisking thoroughly ensures a uniform custard. Underwhisking can leave streaks of egg which cook unevenly, so aim for a cohesive, smooth liquid.
- Allow bars to cool uncovered on a wire rack for about 1 hour. Cover and refrigerate for 4 hours (or overnight), or until chilled.: The added flour stabilizes the custard, and stirring just until incorporated keeps the mixture tender. You want a lump free consistency but avoid vigorous mixing which can develop gluten and make the custard tougher. A common pitfall is overworking the batter, which leads to a firmer, less delicate set.
- Evenly spread the whipped topping over the top and garnish with strawberry slices. Serve immediately.: Pour slowly so the liquid settles between the fruit and avoids displacing it. You will see the custard wick around the diced strawberries and level naturally, a reassuring visual cue. Pouring too forcefully can push fruit aside and create voids, so be gentle.
- Bake for about 40 to 45 minutes or until top is lightly golden brown and custard is set: The kitchen will fill with a warm sweet aroma, and the custard will go from glossy and jiggly to slightly springy and matte at the edges. The top should be pale golden, and a thin knife inserted near the center should come out mostly clean. If the top browns too quickly tent the pan with foil, because excess browning can dry the custard and alter the silky texture. Not allowing sufficient bake time will leave the center runny, while overbaking can create a rubbery custard.
- Allow bars to cool uncovered on a wire rack for about 1 hour then cover and refrigerate for 4 hours or overnight or until chilled: Cooling first on the counter then chilling completes the set and concentrates flavors. The custard firms as it cools, and chilling prevents the whipped topping from melting when applied. A common error is slicing too soon; warm bars will not hold clean slices and the custard may spill out.
- Evenly spread the whipped topping over the top and garnish with strawberry slices serve immediately: The whipped topping adds a cool, creamy counterpoint and the fresh slices provide contrast in texture and color. Apply the topping just before serving so it looks fresh and pillowy. If you garnish too early, the fruit can weep and the topping may soften prematurely.
Making Adjustments
I often tweak small details based on timing and who I am serving. Below are practical adjustments I use, each expanded into a helpful tip so you can tailor the bars without losing their signature balance of crust custard and fresh strawberries.
- Swap whipped topping approach Use store bought whipped topping if you need more stability for make ahead serving, it holds up better in the fridge than freshly whipped cream.
- Crust texture control Press the crust firmly into the pan for a compact base, but avoid over packing which can lead to a dense bite rather than a delicate shortcrust feel.
- Fruit preparation Dice strawberries into small, uniform pieces so they distribute evenly, releasing moderate juice that flavors the custard without turning the crust soggy.
- Prevent over browning Tent the pan with foil loosely in the last portion of baking if the top is coloring too fast, this preserves a pale golden top and keeps the custard tender.
- Make ahead storage Store bars airtight in the refrigerator for up to five days, covering gently to avoid pressing on the whipped topping if applied ahead of time.
- Serving timing Add the whipped topping and garnishes just before serving to maintain the freshest texture and the best appearance.
What to Serve With Strawberry Custard Bars
These bars pair beautifully with light accompaniments and are flexible across occasions. Whether you are serving at a brunch picnic or a relaxed dessert after dinner, the right pairing highlights the bars without competing with their delicate custard and fresh strawberries.
- Serve chilled Present the bars cold so the custard remains firm and the topping stays pillowy, slices will hold their shape perfectly this way.
- Complement with tea or coffee A lightly brewed tea or a mild coffee complements the bars without overpowering their subtle flavors, especially for afternoon gatherings.
- Perfect for spring occasions These bars shine during spring events or light brunches when fresh strawberries are at their best and guests appreciate a refreshing dessert.
- Pack for potlucks Chill the bars and transport them in a flat container, then add whipped topping and garnish on arrival for the best presentation.
- Storage tips Keep airtight in the refrigerator for up to five days; for best texture add the whipped topping just before serving to avoid sogginess.
- Portioning Cut into nine equal squares for generous portions, or into smaller pieces for buffet style serving if you want more variety on a dessert table.
- Seasonal pairing ideas During spring and early summer when strawberries are sweet and juicy, these bars feel especially appropriate alongside other fruit forward dishes.
FAQ
Conclusion
These Strawberry Custard Bars stand out for their comforting combination of a tender, buttery crust, silky custard, and bright juicy strawberries. They are easy to assemble, travel well when chilled, and make a lovely dessert for spring gatherings or casual weeknight treats. Give them a try the next time you want something that feels both familiar and a little special. I hope you enjoy how the textures and flavors come together, and that these bars become one of your go to desserts for sharing with friends and family.
Strawberry Custard Bars
Equipment
- 8x8-inch Baking Pan
- Aluminum Foil
- Mixing Bowl
- Whisk
- Spatula
- Wire Rack
Ingredients
- 1 cup all-purpose flour Provide structure and bulk to the crust and filling, creating a tender base when mixed with butter; sift or spoon into measuring cup for accuracy. Combine with the other flour portion later to help thicken the custard and ensure even texture throughout the bars.
- 1/2 cup cold unsalted butter Cut into small cubes while cold to create flaky, shortbread-like crust; work quickly to prevent melting and to achieve a sandy texture. Chill the blended dough if needed before pressing into the pan to maintain a crisp edge once baked.
- 2 tablespoons granulated sugar Add a light sweetness and help balance flavors in the crust; dissolve into the dough to slightly caramelize during baking for subtle depth. Use granulated sugar to control sweetness without adding moisture that could affect crust integrity.
- 1/2 teaspoons salt, or to taste Enhance overall flavor and balance sweetness by providing a savory contrast; adjust to taste to prevent over-salting. Dissolve evenly into the crust mixture to ensure consistent seasoning throughout the base.
- 1 pound fresh strawberries, diced into small pieces (reserve about 5 whole strawberries for garnishing) Contribute fresh fruity flavor, natural juiciness, and texture to the filling while providing vibrant color; dice into small pieces so they distribute evenly in the custard. Reserve whole strawberries for garnish to add visual appeal and a fresh burst on top.
- 2 large eggs Bind the custard filling and provide richness from the yolks while helping to set the custard as it bakes; beat until smooth for a silky texture. Temper eggs gradually when combining with hot cream to prevent curdling and ensure a uniform custard.
- 1 cup granulated sugar Sweeten the custard filling and macerate slightly with the strawberries to draw out juices that flavor the bars; dissolve into the egg and cream mixture. Adjust quantity for desired sweetness, keeping in mind the whipped topping adds additional sweetness.
- 1/2 cup heavy whipping cream Lend richness, creaminess, and a smooth mouthfeel to the custard; warm slightly before mixing to help incorporate with eggs for a cohesive custard. Use heavy whipping cream for stability and luxurious texture that sets well when chilled.
- 1 teaspoon vanilla extract Provide aromatic warmth and enhance overall flavor profile with fragrant notes; add to the custard once other wet ingredients are combined for even distribution. Use pure vanilla extract for the cleanest, most pronounced flavor in the bars.
- 1/3 cup all-purpose flour Thicken the custard and help it hold together once baked, contributing to a firm but tender set; whisk into the egg-sugar mixture to prevent lumps. Combine with the initial flour used for the crust to maintain the recipe's intended texture balance.
- about 3/4 of one 8-ounce container whipped topping, I used fat-free; homemade whipped cream may be substituted Supply lightness and a cloudlike finish when dolloped or spread over the cooled bars; use whipped topping to add sweetness and contrast to the dense custard. Consider homemade whipped cream as a substitute for fresher flavor and control over sweetness and texture.
- strawberry slices, for garnishing Enhance presentation and add a fresh, colorful finishing touch while reinforcing the strawberry flavor; slice thinly for elegant placement on top of the bars. Use ripe, evenly colored slices to maximize visual appeal and complementary bite.
Instructions
- Preheat oven to 350 F. Line an 8×8-inch baking pan with aluminum foil; set aside.: Warmth fills the kitchen as the oven comes to temperature, a steady, even heat that ensures the crust bakes through and the custard cooks gently. The oven preheat matters because an underheated oven can cause the crust to absorb more moisture and become soggy, while an overheated oven will brown the top too quickly. A common mistake is not allowing the oven to fully reach the set temperature, which can affect bake times, so wait until the indicator shows ready.
- To a large mixing bowl, add the flour, butter, sugar, salt, and using two forks or a pastry cutter, cut the butter into the dry ingredients until the mixture resembles coarse crumbs.: Lining the pan makes it easy to lift the bars out after chilling, and the foil edge gives a crisp rim as the crust meets the pan. Press the foil smoothly so it conforms to the corners, which avoids pockets where the crust might be uneven. If the foil wrinkles too much, the crust can bake irregularly, so smooth it as much as possible.
- Turn mixture out into prepared pan and hard-pack with a spatula to form an even, smooth, crust layer.: The sound of the butter being worked in is subtle, you will see pebble sized pieces coated in flour that hold together when pressed. This texture is crucial because those crumbs will compress into a crust that flaks slightly instead of crumbling apart. Avoid overworking the butter into a paste, which will yield a dense, short crust rather than one with tender flakiness.
- Bake for 10 minutes. Remove pan from oven and set on a wire rack to cool. While crust bakes, dice the strawberries.: Pressing the crust firmly creates a compact base that will support the custard without breaking apart. You should feel resistance as you press, and the surface should look smooth and even. A typical error is leaving the crust uneven, which can cause thin spots that bake too fast, so check the corners and edges carefully.
- After crust has cooled for about 5 minutes, evenly top with strawberries; set aside.: The oven will produce a warm, toasty aroma as the butter begins to brown and the sugar caramelizes slightly. This short bake firms the crust so it does not become soggy once the filling is added. If you skip this step, the custard may seep into the crust and ruin the texture, so do not omit the pre-bake.
- To a large mixing bowl (the same one used for the crust is fine, just wipe it out with a paper towel), add the eggs, sugar, cream, vanilla, and whisk vigorously for about 1 minute to combine.: Cooling on a wire rack allows air to circulate under the pan so the crust stops cooking quickly and retains its texture. After about a few minutes the surface will feel less hot to the touch and ready for the fruit. A mistake here is adding the filling while the crust is piping hot, which can cause the fruit to cook prematurely and release excess juices.
- Add the flour and stir to combine; don’t overmix.: As you chop, the scent of fresh strawberries brightens the kitchen. Dice them small so they distribute evenly and release just enough juice to flavor the custard without making it watery. Cutting too large will concentrate fruit in spots, causing uneven texture in the finished bars.
- Evenly pour filling mixture over the strawberries.: The fruit should spread into a single, even layer that contacts the crust, allowing the custard to seep around each piece. This positioning helps the strawberries stay suspended in the custard rather than sinking entirely to the bottom. Overcrowding the pan can cause the custard to struggle to envelop each piece, so spread evenly.
- Bake for about 40 to 45 minutes or until top is lightly golden brown and custard is set. Tip – In the last 10 to 15 minutes of baking, if the top is already looking fairly browned, tent the pan with a sheet of foil (loosely drape a sheet of foil over the pan) to prevent additional browning.: You will notice the mixture become glossy and slightly thickened as air incorporates. The aroma of vanilla will bloom, and whisking thoroughly ensures a uniform custard. Underwhisking can leave streaks of egg which cook unevenly, so aim for a cohesive, smooth liquid.
- Allow bars to cool uncovered on a wire rack for about 1 hour. Cover and refrigerate for 4 hours (or overnight), or until chilled.: The added flour stabilizes the custard, and stirring just until incorporated keeps the mixture tender. You want a lump free consistency but avoid vigorous mixing which can develop gluten and make the custard tougher. A common pitfall is overworking the batter, which leads to a firmer, less delicate set.
- Evenly spread the whipped topping over the top and garnish with strawberry slices. Serve immediately.: Pour slowly so the liquid settles between the fruit and avoids displacing it. You will see the custard wick around the diced strawberries and level naturally, a reassuring visual cue. Pouring too forcefully can push fruit aside and create voids, so be gentle.
- Bake for about 40 to 45 minutes or until top is lightly golden brown and custard is set: The kitchen will fill with a warm sweet aroma, and the custard will go from glossy and jiggly to slightly springy and matte at the edges. The top should be pale golden, and a thin knife inserted near the center should come out mostly clean. If the top browns too quickly tent the pan with foil, because excess browning can dry the custard and alter the silky texture. Not allowing sufficient bake time will leave the center runny, while overbaking can create a rubbery custard.
- Allow bars to cool uncovered on a wire rack for about 1 hour then cover and refrigerate for 4 hours or overnight or until chilled: Cooling first on the counter then chilling completes the set and concentrates flavors. The custard firms as it cools, and chilling prevents the whipped topping from melting when applied. A common error is slicing too soon; warm bars will not hold clean slices and the custard may spill out.
- Evenly spread the whipped topping over the top and garnish with strawberry slices serve immediately: The whipped topping adds a cool, creamy counterpoint and the fresh slices provide contrast in texture and color. Apply the topping just before serving so it looks fresh and pillowy. If you garnish too early, the fruit can weep and the topping may soften prematurely.
Notes
- Swap whipped topping approach Use store bought whipped topping if you need more stability for make ahead serving, it holds up better in the fridge than freshly whipped cream.
- Crust texture control Press the crust firmly into the pan for a compact base, but avoid over packing which can lead to a dense bite rather than a delicate shortcrust feel.
- Fruit preparation Dice strawberries into small, uniform pieces so they distribute evenly, releasing moderate juice that flavors the custard without turning the crust soggy.
- Prevent over browning Tent the pan with foil loosely in the last portion of baking if the top is coloring too fast, this preserves a pale golden top and keeps the custard tender.
- Make ahead storage Store bars airtight in the refrigerator for up to five days, covering gently to avoid pressing on the whipped topping if applied ahead of time.
- Serving timing Add the whipped topping and garnishes just before serving to maintain the freshest texture and the best appearance.