Strawberry Chiffon Pie
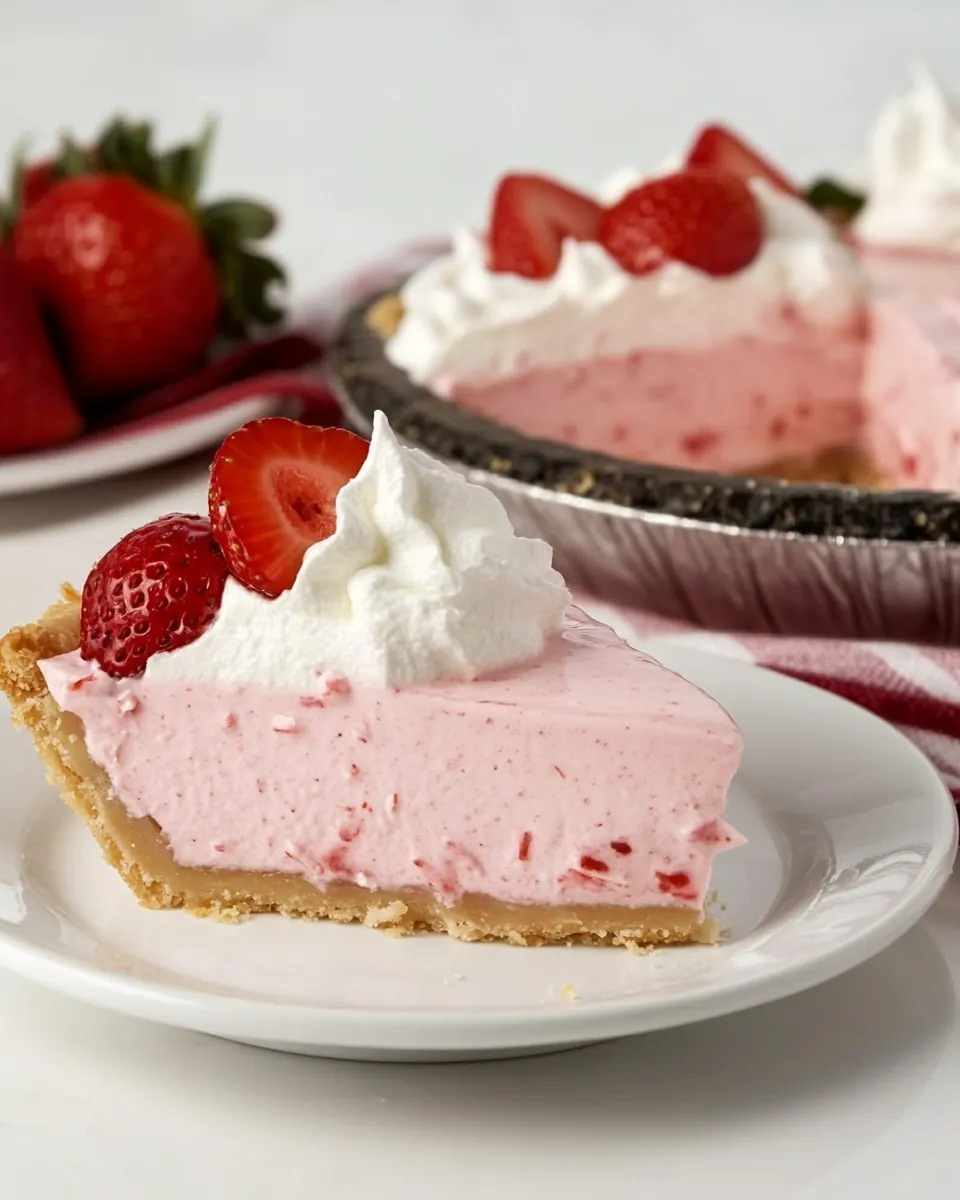
Strawberry Chiffon Pie has been one of those desserts that follows me through spring gatherings, backyard lunches, and lazy Sunday afternoons when I want something light yet celebratory. The first time I made it I remember the way the kitchen smelled of warm crust and bright, stewed strawberries, and how everyone paused conversation to take that first, airy forkful. I love that this pie feels both nostalgic and a little fancy, a dessert that says I cared without demanding all night in the kitchen.
Over the years I have adapted small rituals around making Strawberry Chiffon Pie. I usually pick the berries myself at a local farm when they are at their sweetest, and I always let the crust cool completely so the filling sets cleanly. There is a satisfying ceremony to blooming gelatin and whisking egg whites until they sing, and I enjoy how friends notice the texture before they even comment on the flavor. Sharing it always sparks stories about summer picnics and childhood treats, and it has become my go to when I want to bring something that both looks special and slices beautifully.
Recipe Snapshot
4 hr 45 mins
45 mins
240 mins
Hard
300 kcal
American
Gluten-Free, Low FODMAP
Desserts
mixing bowls, 9 inch pie pan, blender or food processor, fine mesh strainer, heat proof bowl, saucepan or double boiler, whisk, stand or hand mixer
Why This Strawberry Chiffon Pie Is a Winner
Light, airy texture that still feels decadent
I adore how Strawberry Chiffon Pie manages to be both feather light and luxuriously creamy. The whipped egg whites folded into the puree create a cloud like feel that melts on the tongue, while the custardy component anchored by egg yolks gives depth. When I serve it, people remark on the contrast between the crisp, buttery crust and the soft, buoyant filling, and that contrast is what makes the recipe memorable.
Bright, pure strawberry flavor
The star ingredient is obviously strawberries, and the recipe lets them shine. Pureeing fresh berries and straining them removes seeds and concentrates flavor, creating a fresh fruit forward profile. I find that this clarity of taste is refreshing after heavier courses, and it celebrates spring produce in a very simple, honest way.
Make ahead friendly
This pie loves preparation. You can bake the crust and make the filling earlier in the day, then chill until firm. I often make it before guests arrive so I can focus on company rather than finishing touches. The chilling time also helps the filling develop a clean slice, which is perfect if you want neat portions for a gathering.
Elegant but approachable technique
Although there are multiple components, none are intimidating. Blooming gelatin, tempering yolks, and whipping whites are classic pastry moves, and each teaches something useful. I enjoy showing curious friends how simple chemistry yields such a refined result, and the step by step nature makes it satisfying to execute.
Versatile for presentation
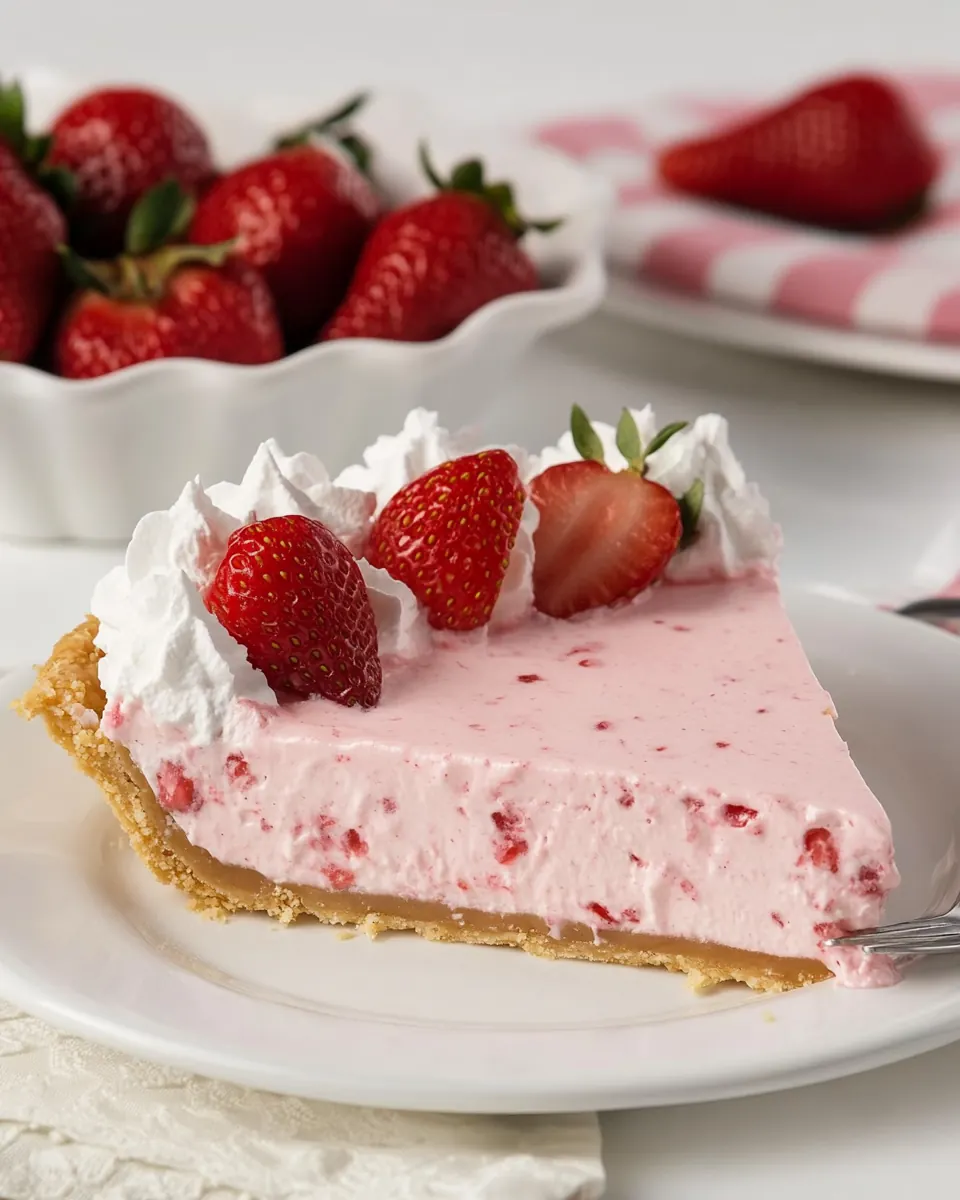
You can dress this up or keep it homey. A simple swirl of whipped cream and a few sliced strawberries make it look stunning, or serve smaller wedges with a dollop of extra puree on the side. I like having options depending on the occasion, and that flexibility is another reason I reach for this pie whenever I want a crowd pleasing dessert.
Everything You Need for Strawberry Chiffon Pie
This ingredient list is about balance: a sturdy, crisp base that supports an airy, bright filling. The graham crust brings toasty, caramel notes while the strawberries supply fresh acidity. Eggs are the structural heart, separated to create both richness and lift, and the gelatin ensures the filling sets cleanly. I rely on each component to do its job so the final pie slices neatly yet feels light on the palate.
- 1 1/3 cups graham cracker crumbs: Provide a crisp, buttery base when combined and pressed into a pan; graham cracker crumbs create texture and structure for the pie crust. Offer a toasty flavor that balances the sweet filling, and help absorb moisture to keep the crust from becoming soggy. Work well with melted butter to bind and set firmly after chilling.
- 1/4 cups sugar: Add sweetness to the crust or filling as needed, helping to balance tart fruit flavors while contributing to overall browning and texture. Dissolve readily into wet mixtures to integrate evenly, and can be adjusted to taste for desired sweetness levels. Also aid in stabilizing whipped components when used sparingly.
- 1/4 cup unsalted butter, melted and cooled: Bind the graham cracker crumbs and flavor the crust with a rich, creamy note once melted and cooled; unsalted butter controls salt level precisely. Provide necessary fat to create a tender, cohesive crust that firms up when chilled. Enhance mouthfeel and help carry flavors from other ingredients.
- 1/4 cup water: Hydrate powdered gelatin and assist in dissolving it smoothly when heated, providing necessary liquid for activation; water also helps create the correct consistency for some fillings. Allow controlled dilution of concentrated ingredients and prevent overly thick or dry textures. Use measured water to ensure proper set of gelatin-based components.
- 1 tablespoon powdered gelatin (if keeping kosher or vegetarian use kosher or vegan gelatin): Thicken and set the filling by providing a gel matrix when dissolved and activated with heat; powdered gelatin stabilizes airy chiffon textures. Offer a flexible setting agent that yields a light yet sliceable filling, and can be substituted with kosher or vegan alternatives if dietary needs require. Bloom gelatin in cold water before heating for best results.
- 1 pint fresh strawberries, washed and hulled: Contribute fresh, bright strawberry flavor and natural sweetness when pureed or chopped for the filling and topping. Provide color, aroma, and small seed texture that enhance the pie’s fruit characteristic. Serve both as blended filling and as decorative garnish when sliced or halved.
- 5 eggs, separated: Introduce structure and richness: egg yolks add custardy body to the filling while egg whites, whipped, create airy volume and lightness. Allow yolks to thicken when heated or combined with gelatin, and let whipped whites fold in to produce the characteristic chiffon lift. Separate carefully to avoid yolk contamination in whites for optimal whipping.
- 1/2 cups sugar, divided: Sweeten custard and meringue components and help create a stable texture when divided between yolk mixtures and whipped whites. Dissolve into warm yolks to sweeten smoothly and be gradually incorporated into whites while whipping to reach glossy, stable peaks. Adjust remaining sugar as needed for balanced sweetness.
- 1 teaspoon vanilla: Enhance overall flavor and aroma with a warm vanilla note that complements strawberries and custard. Add depth and a perception of sweetness without extra sugar, and harmonize the different components of the pie. Use pure vanilla for best flavor clarity.
- 1/4 teaspoon kosher salt: Balance sweetness and enhance other flavors by providing a subtle savory contrast; kosher salt sharpens fruit and cream components. Help strengthen egg proteins during cooking and improve overall taste perception in both crust and filling. Use measured amount to avoid over-salting delicate elements.
- Pinch cream of tartar: Stabilize whipped egg whites, helping them achieve and maintain volume and fine, even bubbles when beaten. Prevent overbeating and reduce the risk of collapse, resulting in a light, stable meringue structure. Useful particularly when folding whites into heavier fillings for chiffon texture.
- 1 cup heavy whipping cream: Add richness and creaminess to the topping or filling with a full-bodied fat that whips into stable peaks. Provide a smooth, luxurious mouthfeel and help meld flavors while giving volume to the final assembled pie. Chill before whipping for best aeration and structure.
- 2 tablespoons powdered sugar: Sweeten and slightly stabilize whipped cream while smoothing texture and reducing potential graininess; powdered sugar dissolves quickly for an even finish. Contribute a touch of extra sweetness and help the cream hold its shape longer on the pie. Use sparingly to maintain lightness.
- 1/2 teaspoon vanilla: Support and intensify vanilla flavor in the whipped cream topping with a secondary, subtle aromatic boost. Add continuity between the filling and topping flavors, reinforcing vanilla notes without overpowering the strawberries. Use to taste to create a balanced finish.
- additional strawberries, for garnish if desired: Provide fresh, attractive garnish and additional fruity flavor when sliced and arranged on top of the pie for presentation. Enhance perceived freshness and offer a contrasting texture to the creamy filling, inviting immediate serving. Use uniform slices or halves for best visual appeal.
- mixing bowls, 9 inch pie pan, blender or food processor, fine mesh strainer: Supply essential equipment for preparation and assembly, including bowls for mixing, a 9-inch pie pan for shaping and chilling, and a blender or food processor for puréeing fruit. Enable efficient and consistent texture development and streamline workflow when making crust and filling. Include a fine mesh strainer to remove seeds and achieve a silky filling if desired.
- heat proof bowl and saucepan or double boiler, whisk, stand or hand mixer: Offer necessary tools and heat control for blooming and dissolving gelatin as well as whipping and combining components, including a heat–proof bowl and saucepan or double boiler, whisk, and mixers. Ensure safe, even heating to dissolve gelatin and proper aeration when whipping egg whites and cream. Provide both stand and hand mixer options to suit available equipment and technique.
Instructions for Strawberry Chiffon Pie
These directions guide you through building each component and bringing them together into a graceful, set pie. I speak from having made this many times, so you will find sensory cues, timing tips, and small adjustments that keep things on track. Read through once to get the flow, then enjoy the rhythmic process as you work.
- Begin by making the crust. Heat the oven to 350°F. In a medium bowl combine the graham cracker crumbs, sugar, and melted butter.: The moment you mix the crumbs, sugar, and melted butter you will smell warm caramel notes rising from the bowl, and the texture should change from loose crumbs to a slightly damp sand. This binding stage matters because it determines whether the crust holds together when sliced, so press a small handful to check for cohesion. A common mistake here is adding too much butter which makes the crust greasy; if it seems oily, sprinkle a touch more crumbs to compensate. Visually, the mixture should look evenly moistened, with no dry patches or pools of butter, and the aroma should be rich and toasty.
- Mix until the graham cracker crumbs are evenly coated in butter.: As you stir, listen for the soft rubbing sound of crumbs coming together, and watch how the mixture glistens slightly as the melted butter disperses. This coating step ensures the crumbs compact firmly into the pan and brown evenly in the oven. If you mix unevenly you will end up with weak spots that crumble when sliced, so take a moment to scrape the bowl and break up any lumps. The texture should feel uniformly tacky between your fingers, not wet or powdery.
- Press the crumbs firmly into a 9-inch pie pan. Bake the crust for 10-12 minutes, or until the crust is golden brown and firm when gently pressed in the center. Cool completely to room temperature before adding the filling.: When pressing the crust, aim for an even thickness across the base and up the sides so the pie slices uniformly; the sound of firm pressure and the visual of compacted crumbs tell you it's ready. Baking develops a warm, toasty aroma and a slightly darker color at the edges; watch closely around 10 minutes so it does not overbrown. After baking, the center should feel set and not soft; cooling fully is critical because a warm crust will cause the filling to loosen and weep. Avoid underbaking, which yields a crumbly result, and avoid overbaking which makes it hard to bite through.
- Next, prepare the filling. In a small bowl combine the water and powdered gelatin. Allow to stand until completely bloomed, about 10 minutes. Set aside.: You will see the gelatin absorb the water and swell into a jelly like mass, which is the sign it has bloomed properly. This step is crucial because unbloomed gelatin will not dissolve smoothly and can lead to gritty texture. Keep the bowl at room temperature so the gelatin hydrates evenly; if it sits too long it may begin to break down, so use it promptly. Visually, the mixture should transform from powder into a soft, spongy bloom.
- Place the strawberries in the work bowl of a blender or food processor. Blend on high speed until the strawberries are thoroughly pureed, about 1 minute. Pour the puree through a fine mesh strainer to remove any seeds. Measure out 1 1/2 cups of the puree. Reserve any additional puree for mixing into smoothies, or pouring over ice cream.: Pureeing releases the sweet fragrance of the strawberries and creates a vivid, ruby colored liquid. Pressing the puree through a fine mesh strainer gives you a silky texture and removes tiny seeds that could interrupt the mousse like feel of the filling. If your strawberries are especially juicy you might notice a slightly thinner puree, so measure carefully and reserve extra for other uses. Avoid skipping the straining step because seeds will change the mouthfeel and visual smoothness of the pie.
- In a heat proof bowl, or the work bowl of a double boiler, combine the strawberry puree, egg yolks, 1/4 cup of the sugar, and the vanilla. Whisk to combine then place over a pan of simmering water. Cook the mixture, whisking constantly, until it thickens enough to coat the back of a spoon thickly and reaches a temperature of 160°F, about 8-10 minutes.: As you whisk over simmering water the mixture will slowly transform from a loose, glossy blend into a thicker, custardy pour that clings to the spoon. The aroma will become deeper and more rounded, and you may notice steam rising gently. Constant whisking prevents the yolks from scrambling and ensures even heat distribution. If you undercook, the filling will be too loose and may not set properly; if you overcook, the yolks can curdle and create a grainy texture. Use a thermometer to hit 160°F for food safety and ideal thickening.
- Remove the bowl from the heat and add the bloomed gelatin. Whisk until the gelatin is completely melted, about 1 minute. Chill in an ice bath for 3-5 minutes, stirring constantly, until it thickens slightly and is no warmer than room temperature. Set aside.: When you add the gelatin the mixture will smell bright and intense as the heat releases the strawberry aromatics, and whisking for about a minute dissolves the bloom into the custard creating a glossy sheen. Cooling in an ice bath brings the temperature down quickly so the whipped egg whites will not deflate when folded in. The mixture should become slightly viscous but still pourable; if it is too warm you risk collapsing the aeration of the meringue. A common slip is skipping the chill and ending with a runny filling.
- In the work bowl of a stand mixer fitted with the whip attachment, or in a large bowl with a hand mixer, add the egg whites, kosher salt, and cream of tartar. Whip on medium speed until the whites are frothy, about 1 minute. Increase the speed to medium high and gradually add the remaining 1/4 cup of sugar. Continue to beat until the egg whites form medium peaks, about 1-2 minutes.: The egg whites will transition from glossy foam to billowy peaks, and you will hear a changing cadence as the mixer works. The small pinch of cream of tartar stabilizes the foam so it can hold air while being folded into the filling. Gradual addition of sugar creates a glossy, stable meringue; adding it too fast can cause weeping or collapse. Aim for medium peaks that hold shape but still have a slight flex at the tip.
- Working in thirds, fold the egg whites into the strawberry mixture, making sure no large streaks of egg white remains.: Folding should be gentle and deliberate, with a soft swooping motion that preserves the air you worked to incorporate. The sound will be quiet and the texture will lighten and become mousselike as you go. This technique is why the pie is airy, so avoid vigorous stirring that deflates the mixture. If large streaks remain you may end up with uneven texture, so take the time to balance thoroughness with gentleness.
- Pour the mixture gently into the prepared crust and chill until firm, about 4 hours.: As you pour, the filling will settle into the crust with a glossy surface and a slight wobble, and chilling allows it to set to a sliceable consistency. The gelatin slowly firms the filling while the whipped whites maintain lift, producing a tender yet stable center. A common error is rushing to slice before the full chill time, which yields sloppy portions. For best results, plan ahead and let it rest undisturbed in the refrigerator.
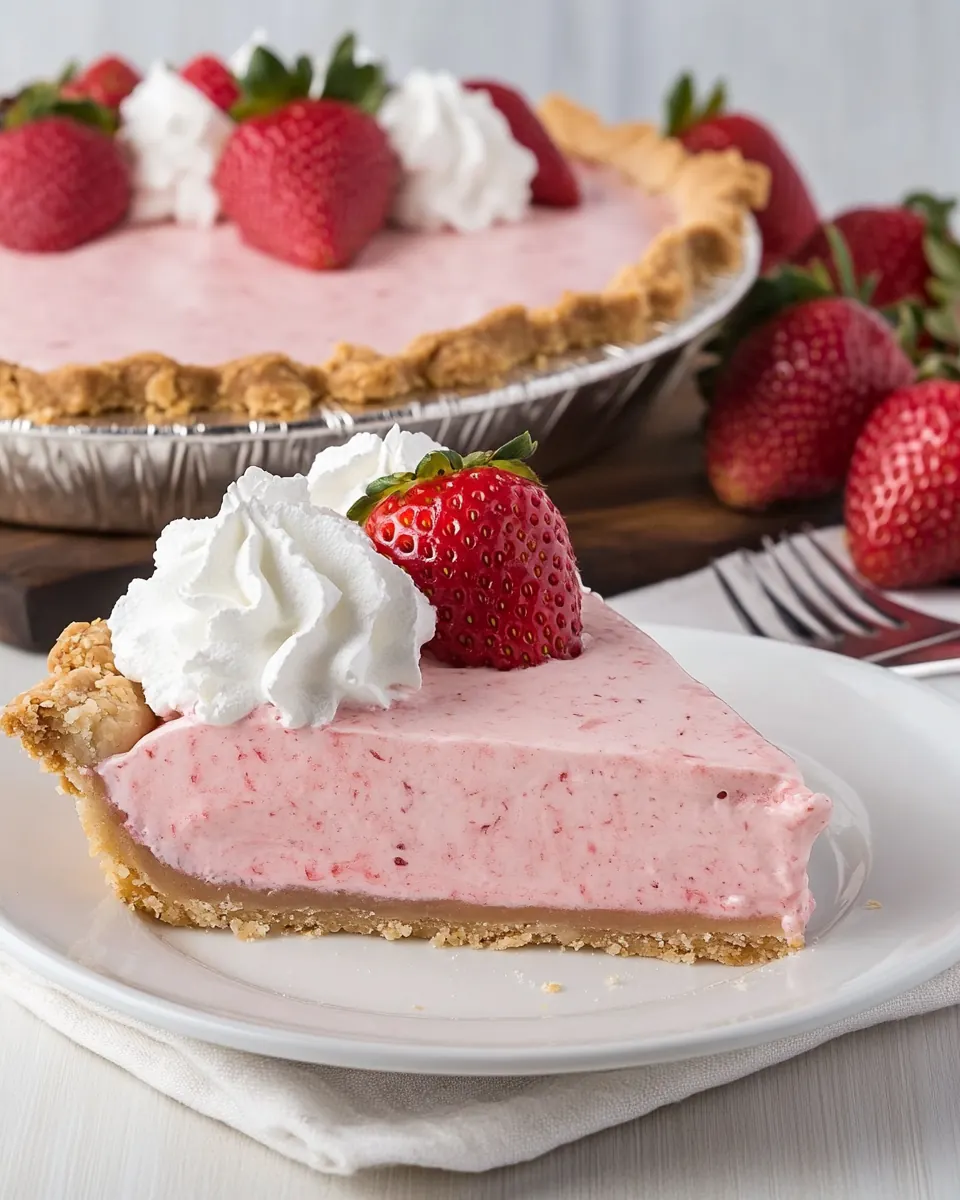
- Once chilled prepare the whipped cream topping. In the work bowl of a stand mixer, or in a large bowl with a hand mixer, add the cream, powdered sugar, and vanilla. Whip on medium speed until the cream begins to thicken, about 1 minute, then increase the speed to medium high until the cream is fluffy and holds medium to firm peaks, about 1-2 minutes more. Spread the whipped cream over the pie, and decorate with slices of fresh strawberry if desired.: Chilled equipment helps the heavy whipping cream come together quickly into a light, airy topping that contrasts the fruity filling. The whipped cream should be smooth and billowy, and it will add a cool, creamy note to the warm strawberry aroma. Avoid over whipping which will break the emulsion and turn the cream grainy or buttery. Arrange sliced strawberries just before serving to keep them looking fresh and vibrant.
Tips and Variations
This pie is forgiving and fun to adapt while staying true to its chiffon character. Below are focused tips and variations I use often to adjust sweetness, texture, and presentation without changing the core technique.
- Golden crust control — If your crust browns too quickly on the edges but not in the center, tent the pan loosely with foil during the last few minutes of baking so the center can catch up without burning the rim.
- Berry selection — Choose ripe, fragrant strawberries for maximum aroma and flavor; if berries lack sweetness, increase the puree measurement slightly or add a touch more sugar to the custard.
- Stabilize whipped cream — For a firmer topping that holds peaks longer, chill the bowl and beaters well, and add the powdered sugar gradually as the cream thickens.
- Prevent weeping — Make sure the strawberry custard is cooled to room temperature before folding in the whites to avoid releasing moisture that will cause a runny filling.
- Make ahead workflow — Bake the crust a day ahead and store it covered at room temperature; assemble the filling on the day you plan to serve to keep the texture lively.
Accompaniments for Strawberry Chiffon Pie
This pie pairs well with simple accompaniments that highlight its airy texture and fresh fruit notes. Think light contrasts, seasonal touches, and straightforward serving methods that elevate each slice without overwhelming the delicate filling.
- Simple beverage pairings, serve with chilled herbal iced tea or a lightly sweetened lemonade to complement the bright strawberries and cleanse the palate between bites.
- Occasions and timing, this pie is wonderful for spring lunches, afternoon tea, and festive gatherings where a lighter dessert is welcome; it also works beautifully for holiday brunches when you want a showstopper that does not feel heavy.
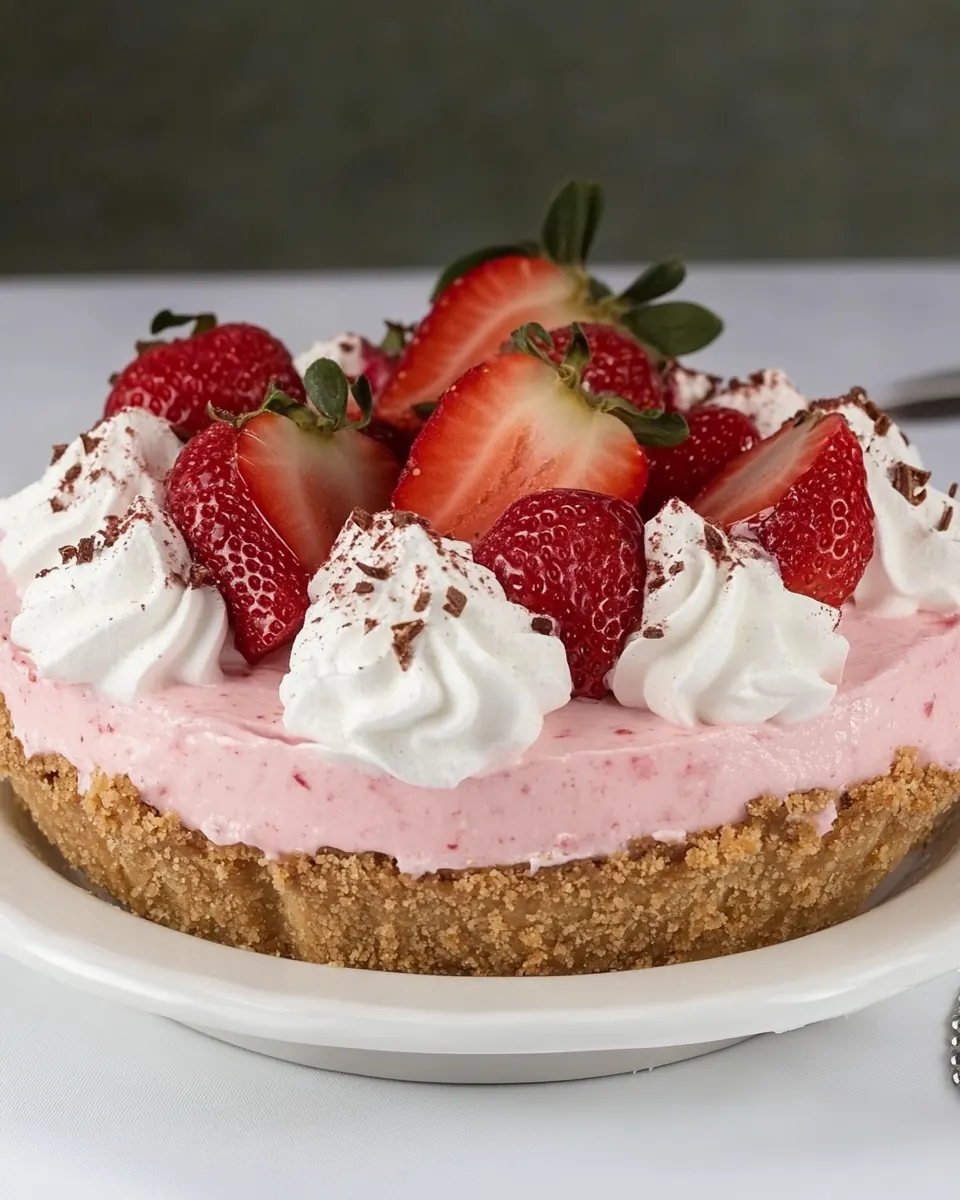
- Portioning and presentation, slice with a sharp, warmed knife for neat edges and serve each wedge with a small dollop of the whipped cream topping and a fan of fresh strawberries for visual appeal.
- Storage tips, keep the pie covered in the refrigerator and consume within 2 to 3 days for best texture; freezing is not recommended because the whipped components lose structure when thawed.
- Seasonal pairings, in spring serve with other light fruit dishes or a small selection of citrus segments to contrast the sweet berry profile.
- Serving style suggestions, offer extra reserved strawberry puree on the side for guests who like a more intensely fruity bite, and provide crisp plates to help maintain clean slices.
FAQ
Conclusion
Strawberry Chiffon Pie stands out for its feather light texture, bright fruit flavor, and elegant presentation. It is a dessert that feels special yet remains approachable, allowing you to practice classic pastry techniques while delivering a show stopping end to any meal. Give this pie a try when you want a dessert that slices neatly and celebrates fresh strawberries, and enjoy the satisfied smiles when guests taste that first airy forkful. With a bit of patience during chilling and careful folding, this pie rewards you with clean slices and a delicate balance of creamy and fruity notes, making it a reliable favorite for spring gatherings and casual celebrations alike.
Strawberry Chiffon Pie
Equipment
- Mixing Bowls
- 9-inch pie pan
- Blender or food processor
- Fine-mesh strainer
- heat proof bowl
- saucepan or double boiler
- Whisk
- Stand or hand mixer
Ingredients
- 1 1/3 cups graham cracker crumbs Provide a crisp, buttery base when combined and pressed into a pan; graham cracker crumbs create texture and structure for the pie crust. Offer a toasty flavor that balances the sweet filling, and help absorb moisture to keep the crust from becoming soggy. Work well with melted butter to bind and set firmly after chilling.
- 1/4 cups sugar Add sweetness to the crust or filling as needed, helping to balance tart fruit flavors while contributing to overall browning and texture. Dissolve readily into wet mixtures to integrate evenly, and can be adjusted to taste for desired sweetness levels. Also aid in stabilizing whipped components when used sparingly.
- 1/4 cup unsalted butter, melted and cooled Bind the graham cracker crumbs and flavor the crust with a rich, creamy note once melted and cooled; unsalted butter controls salt level precisely. Provide necessary fat to create a tender, cohesive crust that firms up when chilled. Enhance mouthfeel and help carry flavors from other ingredients.
- 1/4 cup water Hydrate powdered gelatin and assist in dissolving it smoothly when heated, providing necessary liquid for activation; water also helps create the correct consistency for some fillings. Allow controlled dilution of concentrated ingredients and prevent overly thick or dry textures. Use measured water to ensure proper set of gelatin-based components.
- 1 tablespoon powdered gelatin (if keeping kosher or vegetarian use kosher or vegan gelatin) Thicken and set the filling by providing a gel matrix when dissolved and activated with heat; powdered gelatin stabilizes airy chiffon textures. Offer a flexible setting agent that yields a light yet sliceable filling, and can be substituted with kosher or vegan alternatives if dietary needs require. Bloom gelatin in cold water before heating for best results.
- 1 pint fresh strawberries, washed and hulled Contribute fresh, bright strawberry flavor and natural sweetness when pureed or chopped for the filling and topping. Provide color, aroma, and small seed texture that enhance the pie’s fruit characteristic. Serve both as blended filling and as decorative garnish when sliced or halved.
- 5 eggs, separated Introduce structure and richness: egg yolks add custardy body to the filling while egg whites, whipped, create airy volume and lightness. Allow yolks to thicken when heated or combined with gelatin, and let whipped whites fold in to produce the characteristic chiffon lift. Separate carefully to avoid yolk contamination in whites for optimal whipping.
- 1/2 cups sugar, divided Sweeten custard and meringue components and help create a stable texture when divided between yolk mixtures and whipped whites. Dissolve into warm yolks to sweeten smoothly and be gradually incorporated into whites while whipping to reach glossy, stable peaks. Adjust remaining sugar as needed for balanced sweetness.
- 1 teaspoon vanilla Enhance overall flavor and aroma with a warm vanilla note that complements strawberries and custard. Add depth and a perception of sweetness without extra sugar, and harmonize the different components of the pie. Use pure vanilla for best flavor clarity.
- 1/4 teaspoon kosher salt Balance sweetness and enhance other flavors by providing a subtle savory contrast; kosher salt sharpens fruit and cream components. Help strengthen egg proteins during cooking and improve overall taste perception in both crust and filling. Use measured amount to avoid over-salting delicate elements.
- Pinch cream of tartar Stabilize whipped egg whites, helping them achieve and maintain volume and fine, even bubbles when beaten. Prevent overbeating and reduce the risk of collapse, resulting in a light, stable meringue structure. Useful particularly when folding whites into heavier fillings for chiffon texture.
- 1 cup heavy whipping cream Add richness and creaminess to the topping or filling with a full-bodied fat that whips into stable peaks. Provide a smooth, luxurious mouthfeel and help meld flavors while giving volume to the final assembled pie. Chill before whipping for best aeration and structure.
- 2 tablespoons powdered sugar Sweeten and slightly stabilize whipped cream while smoothing texture and reducing potential graininess; powdered sugar dissolves quickly for an even finish. Contribute a touch of extra sweetness and help the cream hold its shape longer on the pie. Use sparingly to maintain lightness.
- 1/2 teaspoon vanilla Support and intensify vanilla flavor in the whipped cream topping with a secondary, subtle aromatic boost. Add continuity between the filling and topping flavors, reinforcing vanilla notes without overpowering the strawberries. Use to taste to create a balanced finish.
- additional strawberries, for garnish if desired Provide fresh, attractive garnish and additional fruity flavor when sliced and arranged on top of the pie for presentation. Enhance perceived freshness and offer a contrasting texture to the creamy filling, inviting immediate serving. Use uniform slices or halves for best visual appeal.
- mixing bowls, 9 inch pie pan, blender or food processor, fine mesh strainer Supply essential equipment for preparation and assembly, including bowls for mixing, a 9-inch pie pan for shaping and chilling, and a blender or food processor for puréeing fruit. Enable efficient and consistent texture development and streamline workflow when making crust and filling. Include a fine mesh strainer to remove seeds and achieve a silky filling if desired.
- heat proof bowl and saucepan or double boiler, whisk, stand or hand mixer Offer necessary tools and heat control for blooming and dissolving gelatin as well as whipping and combining components, including a heat-proof bowl and saucepan or double boiler, whisk, and mixers. Ensure safe, even heating to dissolve gelatin and proper aeration when whipping egg whites and cream. Provide both stand and hand mixer options to suit available equipment and technique.
Instructions
- Begin by making the crust. Heat the oven to 350°F. In a medium bowl combine the graham cracker crumbs, sugar, and melted butter.: The moment you mix the crumbs, sugar, and melted butter you will smell warm caramel notes rising from the bowl, and the texture should change from loose crumbs to a slightly damp sand. This binding stage matters because it determines whether the crust holds together when sliced, so press a small handful to check for cohesion. A common mistake here is adding too much butter which makes the crust greasy; if it seems oily, sprinkle a touch more crumbs to compensate. Visually, the mixture should look evenly moistened, with no dry patches or pools of butter, and the aroma should be rich and toasty.
- Mix until the graham cracker crumbs are evenly coated in butter.: As you stir, listen for the soft rubbing sound of crumbs coming together, and watch how the mixture glistens slightly as the melted butter disperses. This coating step ensures the crumbs compact firmly into the pan and brown evenly in the oven. If you mix unevenly you will end up with weak spots that crumble when sliced, so take a moment to scrape the bowl and break up any lumps. The texture should feel uniformly tacky between your fingers, not wet or powdery.
- Press the crumbs firmly into a 9-inch pie pan. Bake the crust for 10-12 minutes, or until the crust is golden brown and firm when gently pressed in the center. Cool completely to room temperature before adding the filling.: When pressing the crust, aim for an even thickness across the base and up the sides so the pie slices uniformly; the sound of firm pressure and the visual of compacted crumbs tell you it's ready. Baking develops a warm, toasty aroma and a slightly darker color at the edges; watch closely around 10 minutes so it does not overbrown. After baking, the center should feel set and not soft; cooling fully is critical because a warm crust will cause the filling to loosen and weep. Avoid underbaking, which yields a crumbly result, and avoid overbaking which makes it hard to bite through.
- Next, prepare the filling. In a small bowl combine the water and powdered gelatin. Allow to stand until completely bloomed, about 10 minutes. Set aside.: You will see the gelatin absorb the water and swell into a jelly like mass, which is the sign it has bloomed properly. This step is crucial because unbloomed gelatin will not dissolve smoothly and can lead to gritty texture. Keep the bowl at room temperature so the gelatin hydrates evenly; if it sits too long it may begin to break down, so use it promptly. Visually, the mixture should transform from powder into a soft, spongy bloom.
- Place the strawberries in the work bowl of a blender or food processor. Blend on high speed until the strawberries are thoroughly pureed, about 1 minute. Pour the puree through a fine mesh strainer to remove any seeds. Measure out 1 1/2 cups of the puree. Reserve any additional puree for mixing into smoothies, or pouring over ice cream.: Pureeing releases the sweet fragrance of the strawberries and creates a vivid, ruby colored liquid. Pressing the puree through a fine mesh strainer gives you a silky texture and removes tiny seeds that could interrupt the mousse like feel of the filling. If your strawberries are especially juicy you might notice a slightly thinner puree, so measure carefully and reserve extra for other uses. Avoid skipping the straining step because seeds will change the mouthfeel and visual smoothness of the pie.
- In a heat proof bowl, or the work bowl of a double boiler, combine the strawberry puree, egg yolks, 1/4 cup of the sugar, and the vanilla. Whisk to combine then place over a pan of simmering water. Cook the mixture, whisking constantly, until it thickens enough to coat the back of a spoon thickly and reaches a temperature of 160°F, about 8-10 minutes.: As you whisk over simmering water the mixture will slowly transform from a loose, glossy blend into a thicker, custardy pour that clings to the spoon. The aroma will become deeper and more rounded, and you may notice steam rising gently. Constant whisking prevents the yolks from scrambling and ensures even heat distribution. If you undercook, the filling will be too loose and may not set properly; if you overcook, the yolks can curdle and create a grainy texture. Use a thermometer to hit 160°F for food safety and ideal thickening.
- Remove the bowl from the heat and add the bloomed gelatin. Whisk until the gelatin is completely melted, about 1 minute. Chill in an ice bath for 3-5 minutes, stirring constantly, until it thickens slightly and is no warmer than room temperature. Set aside.: When you add the gelatin the mixture will smell bright and intense as the heat releases the strawberry aromatics, and whisking for about a minute dissolves the bloom into the custard creating a glossy sheen. Cooling in an ice bath brings the temperature down quickly so the whipped egg whites will not deflate when folded in. The mixture should become slightly viscous but still pourable; if it is too warm you risk collapsing the aeration of the meringue. A common slip is skipping the chill and ending with a runny filling.
- In the work bowl of a stand mixer fitted with the whip attachment, or in a large bowl with a hand mixer, add the egg whites, kosher salt, and cream of tartar. Whip on medium speed until the whites are frothy, about 1 minute. Increase the speed to medium high and gradually add the remaining 1/4 cup of sugar. Continue to beat until the egg whites form medium peaks, about 1-2 minutes.: The egg whites will transition from glossy foam to billowy peaks, and you will hear a changing cadence as the mixer works. The small pinch of cream of tartar stabilizes the foam so it can hold air while being folded into the filling. Gradual addition of sugar creates a glossy, stable meringue; adding it too fast can cause weeping or collapse. Aim for medium peaks that hold shape but still have a slight flex at the tip.
- Working in thirds, fold the egg whites into the strawberry mixture, making sure no large streaks of egg white remains.: Folding should be gentle and deliberate, with a soft swooping motion that preserves the air you worked to incorporate. The sound will be quiet and the texture will lighten and become mousselike as you go. This technique is why the pie is airy, so avoid vigorous stirring that deflates the mixture. If large streaks remain you may end up with uneven texture, so take the time to balance thoroughness with gentleness.
- Pour the mixture gently into the prepared crust and chill until firm, about 4 hours.: As you pour, the filling will settle into the crust with a glossy surface and a slight wobble, and chilling allows it to set to a sliceable consistency. The gelatin slowly firms the filling while the whipped whites maintain lift, producing a tender yet stable center. A common error is rushing to slice before the full chill time, which yields sloppy portions. For best results, plan ahead and let it rest undisturbed in the refrigerator.
- Once chilled prepare the whipped cream topping. In the work bowl of a stand mixer, or in a large bowl with a hand mixer, add the cream, powdered sugar, and vanilla. Whip on medium speed until the cream begins to thicken, about 1 minute, then increase the speed to medium high until the cream is fluffy and holds medium to firm peaks, about 1-2 minutes more. Spread the whipped cream over the pie, and decorate with slices of fresh strawberry if desired.: Chilled equipment helps the heavy whipping cream come together quickly into a light, airy topping that contrasts the fruity filling. The whipped cream should be smooth and billowy, and it will add a cool, creamy note to the warm strawberry aroma. Avoid over whipping which will break the emulsion and turn the cream grainy or buttery. Arrange sliced strawberries just before serving to keep them looking fresh and vibrant.
Notes
- Golden crust control — If your crust browns too quickly on the edges but not in the center, tent the pan loosely with foil during the last few minutes of baking so the center can catch up without burning the rim.
- Berry selection — Choose ripe, fragrant strawberries for maximum aroma and flavor; if berries lack sweetness, increase the puree measurement slightly or add a touch more sugar to the custard.
- Stabilize whipped cream — For a firmer topping that holds peaks longer, chill the bowl and beaters well, and add the powdered sugar gradually as the cream thickens.
- Prevent weeping — Make sure the strawberry custard is cooled to room temperature before folding in the whites to avoid releasing moisture that will cause a runny filling.
- Make ahead workflow — Bake the crust a day ahead and store it covered at room temperature; assemble the filling on the day you plan to serve to keep the texture lively.