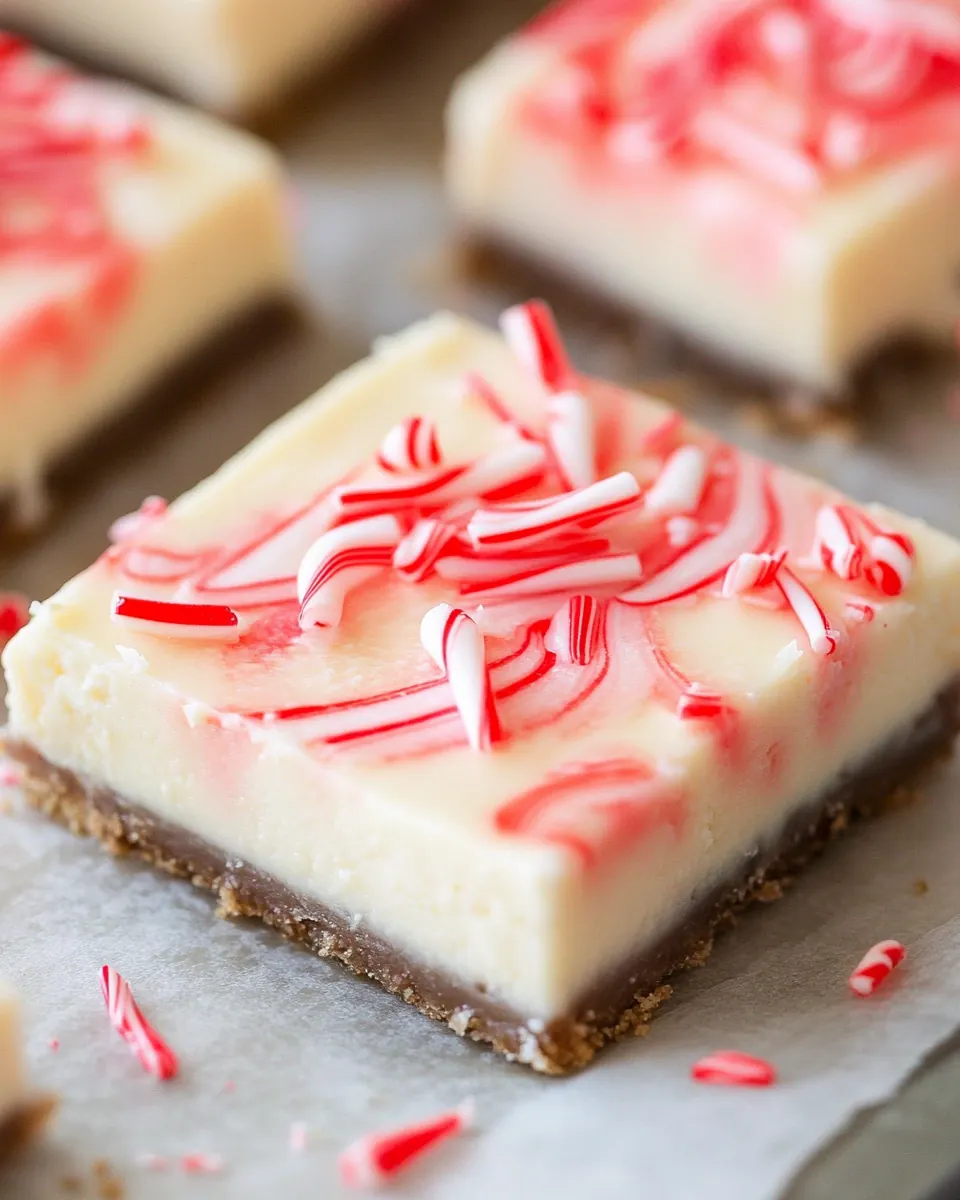
Peppermint Cheesecake Bars
Peppermint Cheesecake Bars have been my go to holiday treat when I need something that feels festive without fuss. The first time I made these I was running late for a family gathering and had to improvise with whatever I had on hand, yet the bright peppermint and creamy cream cheese instantly made everyone pause mid conversation and ask for the recipe. I remember laughing as cousins argued over the last square, and that memory has kept this recipe on my rotation ever since.
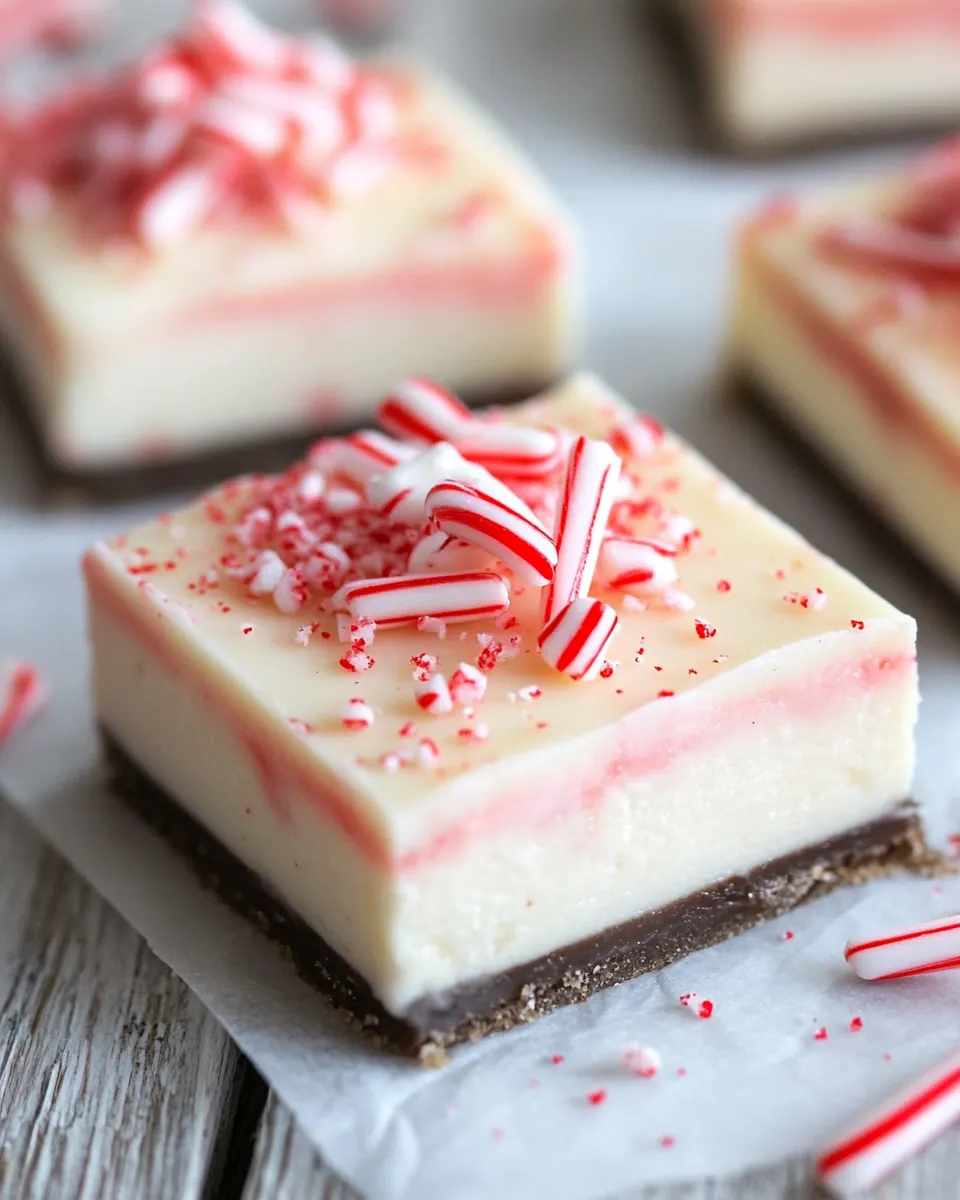
These bars are the kind of dessert that arrives with a story, and every batch tells a slightly different one. Sometimes I crush up extra candy canes for a loud crunchy finish, other times I keep the top smooth and swirl in a few drops of red food coloring for a subtle, pretty marbled look. They are an easy way to bring color and a peppermint pop to cookie exchanges, family dinners, or a cozy night by the tree.
Recipe Snapshot
10 mins
10 mins
Medium
300 kcal
American
Gluten-Free, Low FODMAP
Desserts
Hand mixer, 8×8 pan, Parchment paper, Knife
The Beauty of This Peppermint Cheesecake Bars
Bright Holiday Flavor with Little Effort
I love how these bars deliver a bold peppermint punch without hours in the kitchen. Using peppermint extract creates an immediate holiday note, while the soft, silky texture from the cream cheese keeps each bite melt in your mouth. You get festive impact with minimal technique, which is a win when the calendar is full.
Versatile Decoration Options
One reason I reach for this recipe again and again is the decorating freedom. You can crumble up Candy Canes for crunch, add delicate red food coloring swirls for elegance, or leave them plain for a classic look. I like to experiment depending on the event, and each choice feels intentional and special.
Great Make Ahead Dessert
These bars chill and set in the fridge, which makes them an ideal make ahead dessert. I often prepare them a day before a gathering, which lets me focus on mains the day of. The texture firms up nicely, and flavors settle together, giving a more cohesive taste after resting.
Kid Friendly and Crowd Pleasing
Kids tend to adore the candy cane crunch and the cool peppermint note. Adults appreciate the creamy balance from the cream cheese and the controlled sweetness from the sugar. I find they bridge generations at holiday tables because they are familiar yet festive.
Simple Ingredient List
I value recipes that respect my pantry, and these bars do exactly that. With a short list including butter, cream cheese, sugar, a splash of peppermint extract, and optional Candy Canes or red food coloring, you can craft a dessert without a special trip to the store. It makes this a reliable last minute option I turn to again and again.
Key Ingredients for Peppermint Cheesecake Bars
The philosophy behind these components is simplicity and clarity. Each ingredient plays a distinct role: the butter provides richness, the cream cheese creates the luscious, tangy body, and the sugar balances with sweetness. The peppermint extract gives that holiday signature aroma, while optional toppings like Candy Canes and red food coloring add texture and visual flair. Together they form a straightforward, festive bar that highlights cool peppermint without masking the creamy base.
- 1 1/2 cups butter softened: Soften and cream to provide a rich, tender base for both crust and filling, contributing moisture and buttery flavor that helps set the bars when chilled; ensure fully softened to avoid lumps and allow smooth incorporation with sugar and cream cheese.
- 20 oz cream cheese softened: Bring a tangy, creamy structure and dense texture to the cheesecake layer, supplying the primary body and slight acidity that balances sweetness; beat until silky to prevent cracks and achieve a velvety mouthfeel.
- 1 1/2 cups sugar: Sweeten and help stabilize the cheesecake filling while contributing to smoothness and slight caramelization notes if baked briefly; adjust amount slightly for desired sweetness but maintain enough to support structure and flavor balance.
- 2 1/2 tsp peppermint extract: Impart concentrated cool, minty flavor throughout the filling; add gradually and taste to reach a pleasing peppermint intensity without overpowering the creamy base.
- Candy Canes () (optional): Provide optional crunchy, festive topping and extra peppermint flavor when crushed and sprinkled over the bars; use sparingly to add texture contrast and visual appeal while keeping bites easy to cut.
- Red food coloring () (optional): Add optional color for a holiday look or swirled visual effect in the filling or topping; use gel or liquid sparingly to avoid altering consistency while enhancing presentation.
Step by Step Instructions for Peppermint Cheesecake Bars

These directions are written as if we are baking together in the same kitchen. I like to keep my tools at the ready and work through the steps with an eye on texture and timing so the final bars are smooth, festive, and easy to slice. Below you will find each original direction cleaned and expanded into evocative, chef level guidance.
- With a hand mixer, blend all ingredients together until smooth. Add additional peppermint extract as desired.: The moment you start mixing you should notice a creamy, pillowy texture forming as the cream cheese and softened butter come together, and the kitchen will take on a faint peppermint perfume from the peppermint extract . Use moderate speed so air is incorporated gently, which helps the mixture stay dense yet soft. The sound will be a steady low whir rather than a heavy clang, and visually you want a glossy, lump free batter. Why this matters is straightforward, a perfectly smooth base ensures even chilling and a velvet mouthfeel. A common mistake is working with cold cream cheese , which leads to tiny curdled bits, so scrape the bowl and beat until fully homogenous.
- Pour mixture into an 8×8 pan lined with wax or parchment paper (make sure paper is overflowing on the sides, for easy removal).: After tasting, you may choose to heighten the minty note; adding small amounts builds control and keeps the flavor from becoming sharp. The peppermint will become more aromatic as it integrates, filling the room with a clean, cooling scent. Go slow, because the extract can quickly dominate; typically a quarter teaspoon increments is sensible. If you add too much, the filling can taste artificial, so balance is key. If that happens, a little extra sugar or more cream cheese can mellow it out, though that alters texture slightly.
- For red swirls, put 3-5 drops of red food coloring on the top of the cheesecake and swirl using a knife.: As you pour, the batter should flow like thick custard and settle into a smooth surface, with the glossy top catching the light. Lining the pan with overhanging parchment is a small trick that makes unmolding effortless, preventing tearing and keeping edges neat. Press the batter gently to even it out, and tap the pan on the counter to release any trapped air bubbles that could create pockets. If you skip the parchment, the bars will stick, making clean removal difficult, so don’t skip this step.
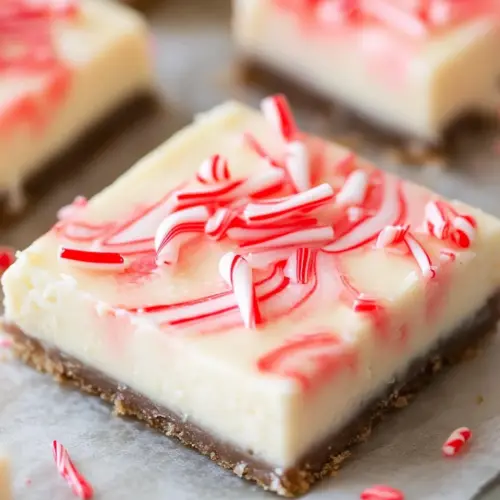
- To decorate, swirl drops of red food coloring with a knife. You may also sprinkle bits of candy cane over the top of the cheesecake.: The tiny drops of red food coloring should remain as bright dots before you swirl, creating striking veins of color when dragged through the surface with a thin knife. The motion is visual, and as you swirl you will notice the batter undulating and the color stretching, forming elegant ribbons. This technique gives visual drama without extra effort. Overworking the surface will blend the color completely, losing the marbled effect, so swirl briefly and deliberately for best results.
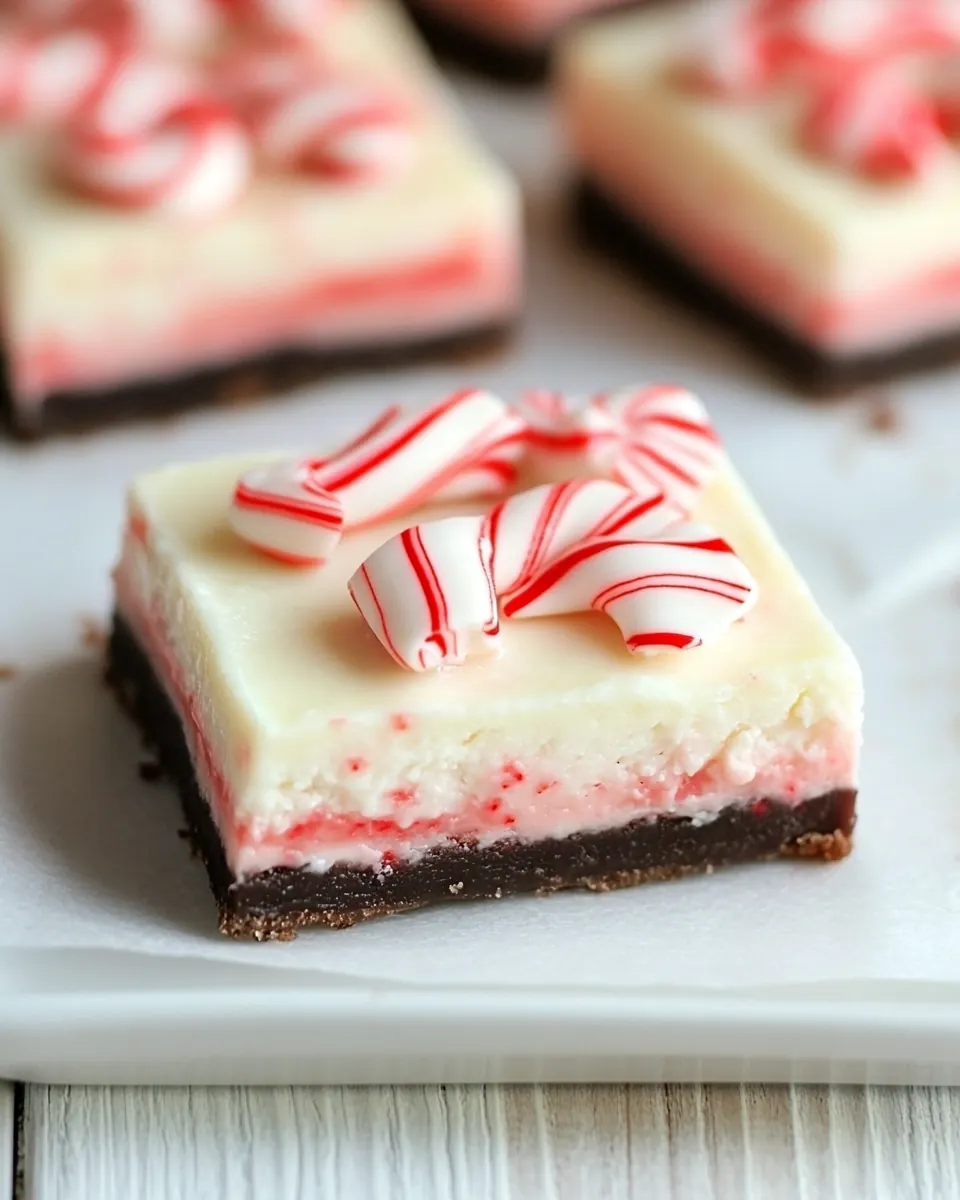
- Chill in the fridge for 1-2 hours.: Once decorated, the top will look festive and textured, with soft pink streaks and sparkling white and red from crushed Candy Canes if used. The crunchy bits provide contrast against the smooth filling and create a satisfying bite. Press any larger shards gently into the surface so they adhere. One pitfall is adding too many candy cane pieces, which can overwhelm the delicate cheesecake texture and make cutting messy, so apply judiciously.
- Use the hanging paper to remove cheesecake from the pan.: As the bars chill, they firm up and the flavors meld, the peppermint aroma settling into the creamy matrix. The fridge quiets the surface and you will notice a firmer edge where the mixture meets the pan. This resting period is essential for clean slices and proper texture; rushing to cut them too soon results in squished pieces that lack structure. If you find the center is still too soft after the time, give it additional 30 minute increments until it holds shape.
- Cut into bars and serve.: Grabbing the overhanging parchment, lift the whole slab steadily from the pan; it should slide out with little resistance and the edges will be clean. This is the satisfying moment where all your care pays off, revealing the smooth underside and decorated top. If the parchment clings, run a thin knife around the edges first, ensuring no sticking. Forcing the slab out can crack the surface, so lift straight up and place on a cutting board for the next step.
- Cut into bars and serve.: When cutting, use a long, sharp knife warmed under hot water and wiped dry for the cleanest edges, slicing in a single smooth motion. The sound of the knife passing through will be quiet with a slight resistance, and the cross section should reveal even color and any marbling you created. Wipe the blade between cuts to maintain tidy squares. A typical error is using a dull knife or sawing back and forth, which can crumble the bars, so a steady single stroke is best.
Substitutions and Tips
Small tweaks can make these bars your own while keeping the integrity of the recipe. Below are practical tips I use in my kitchen to ensure consistent results and easy presentation. Each item begins with a short highlighted phrase for quick scanning.
- Room temperature is key Start with softened cream cheese and butter to avoid lumps and over mixing, which keeps the texture silky.
- Control the mint Add peppermint extract in increments and taste as you go so the peppermint enhances rather than overwhelms the cheesecake.
- For cleaner cuts Warm and dry your knife between slices to achieve smooth, restaurant style squares without tearing the top.
- Decorate with restraint A light sprinkle of crushed Candy Canes provides crunch, but too many will make the bars hard to slice and serve.
- Make ahead advantage These bars keep well refrigerated, so prepare them a day early to free up time on the day of your event.
- Marbling technique Use a thin knife to make shallow swirls for a pretty effect without mixing the color fully into the batter.
How to Serve Peppermint Cheesecake Bars
These bars are versatile for holiday tables and casual gatherings. Below are thoughtful serving ideas that pair well with the cool peppermint profile and creamy texture. Each item highlights practical presentation choices and occasions where these bars shine.
- Holiday dessert platter Arrange on a large tray with a few whole Candy Canes for garnish, placing the squares in an overlapping fan for attractive display at Christmas parties.
- After dinner treat Serve one or two bars with a small spoonful of whipped cream on the side, the light creaminess complements the dense bars without adding heavy flavors.
- Cookie exchange contribution Cut into small bite sized pieces and place in festive cupcake liners, making them easy to share at bake sales or cookie swaps.
- Family gathering favorite Stack a couple of squares on small plates for cozy family dinners where the peppermint note brings a seasonal lift to the menu.
- Storage and make ahead Keep refrigerated in an airtight container for up to four days, or freeze individual squares for up to one month wrapped tightly so they stay fresh and retain texture.
- Seasonal pairing These bars pair well with warm beverages during winter evenings, but avoid serving alongside strongly flavored drinks that could mask the peppermint.
FAQ
Conclusion
Peppermint Cheesecake Bars stand out because they combine a velvety cheesecake texture with a bright, festive peppermint finish in just a few simple steps. This recipe is approachable, quick to assemble, and flexible enough for decoration or make ahead needs, making it a holiday staple I return to every year. Try making a batch before your next gathering and watch how quickly they disappear; they are delightful to serve and even more fun to share with family and friends.
Peppermint Cheesecake Bars
Equipment
- Hand Mixer
- 8x8 pan
- Parchment Paper
- Knife
Ingredients
- 1 1/2 cups butter softened Soften and cream to provide a rich, tender base for both crust and filling, contributing moisture and buttery flavor that helps set the bars when chilled; ensure fully softened to avoid lumps and allow smooth incorporation with sugar and cream cheese.
- 20 oz cream cheese softened Bring a tangy, creamy structure and dense texture to the cheesecake layer, supplying the primary body and slight acidity that balances sweetness; beat until silky to prevent cracks and achieve a velvety mouthfeel.
- 1 1/2 cups sugar Sweeten and help stabilize the cheesecake filling while contributing to smoothness and slight caramelization notes if baked briefly; adjust amount slightly for desired sweetness but maintain enough to support structure and flavor balance.
- 2 1/2 tsp peppermint extract Impart concentrated cool, minty flavor throughout the filling; add gradually and taste to reach a pleasing peppermint intensity without overpowering the creamy base.
- Candy Canes (optional) Provide optional crunchy, festive topping and extra peppermint flavor when crushed and sprinkled over the bars; use sparingly to add texture contrast and visual appeal while keeping bites easy to cut.
- Red food coloring (optional) Add optional color for a holiday look or swirled visual effect in the filling or topping; use gel or liquid sparingly to avoid altering consistency while enhancing presentation.
Instructions
- With a hand mixer, blend all ingredients together until smooth. Add additional peppermint extract as desired.: The moment you start mixing you should notice a creamy, pillowy texture forming as the cream cheese and softened butter come together, and the kitchen will take on a faint peppermint perfume from the peppermint extract . Use moderate speed so air is incorporated gently, which helps the mixture stay dense yet soft. The sound will be a steady low whir rather than a heavy clang, and visually you want a glossy, lump free batter. Why this matters is straightforward, a perfectly smooth base ensures even chilling and a velvet mouthfeel. A common mistake is working with cold cream cheese , which leads to tiny curdled bits, so scrape the bowl and beat until fully homogenous.
- Pour mixture into an 8×8 pan lined with wax or parchment paper (make sure paper is overflowing on the sides, for easy removal).: After tasting, you may choose to heighten the minty note; adding small amounts builds control and keeps the flavor from becoming sharp. The peppermint will become more aromatic as it integrates, filling the room with a clean, cooling scent. Go slow, because the extract can quickly dominate; typically a quarter teaspoon increments is sensible. If you add too much, the filling can taste artificial, so balance is key. If that happens, a little extra sugar or more cream cheese can mellow it out, though that alters texture slightly.
- For red swirls, put 3-5 drops of red food coloring on the top of the cheesecake and swirl using a knife.: As you pour, the batter should flow like thick custard and settle into a smooth surface, with the glossy top catching the light. Lining the pan with overhanging parchment is a small trick that makes unmolding effortless, preventing tearing and keeping edges neat. Press the batter gently to even it out, and tap the pan on the counter to release any trapped air bubbles that could create pockets. If you skip the parchment, the bars will stick, making clean removal difficult, so don’t skip this step.
- To decorate, swirl drops of red food coloring with a knife. You may also sprinkle bits of candy cane over the top of the cheesecake.: The tiny drops of red food coloring should remain as bright dots before you swirl, creating striking veins of color when dragged through the surface with a thin knife. The motion is visual, and as you swirl you will notice the batter undulating and the color stretching, forming elegant ribbons. This technique gives visual drama without extra effort. Overworking the surface will blend the color completely, losing the marbled effect, so swirl briefly and deliberately for best results.
- Chill in the fridge for 1-2 hours.: Once decorated, the top will look festive and textured, with soft pink streaks and sparkling white and red from crushed Candy Canes if used. The crunchy bits provide contrast against the smooth filling and create a satisfying bite. Press any larger shards gently into the surface so they adhere. One pitfall is adding too many candy cane pieces, which can overwhelm the delicate cheesecake texture and make cutting messy, so apply judiciously.
- Use the hanging paper to remove cheesecake from the pan.: As the bars chill, they firm up and the flavors meld, the peppermint aroma settling into the creamy matrix. The fridge quiets the surface and you will notice a firmer edge where the mixture meets the pan. This resting period is essential for clean slices and proper texture; rushing to cut them too soon results in squished pieces that lack structure. If you find the center is still too soft after the time, give it additional 30 minute increments until it holds shape.
- Cut into bars and serve.: Grabbing the overhanging parchment, lift the whole slab steadily from the pan; it should slide out with little resistance and the edges will be clean. This is the satisfying moment where all your care pays off, revealing the smooth underside and decorated top. If the parchment clings, run a thin knife around the edges first, ensuring no sticking. Forcing the slab out can crack the surface, so lift straight up and place on a cutting board for the next step.
- Cut into bars and serve.: When cutting, use a long, sharp knife warmed under hot water and wiped dry for the cleanest edges, slicing in a single smooth motion. The sound of the knife passing through will be quiet with a slight resistance, and the cross section should reveal even color and any marbling you created. Wipe the blade between cuts to maintain tidy squares. A typical error is using a dull knife or sawing back and forth, which can crumble the bars, so a steady single stroke is best.
Notes
- Room temperature is key Start with softened cream cheese and butter to avoid lumps and over mixing, which keeps the texture silky.
- Control the mint Add peppermint extract in increments and taste as you go so the peppermint enhances rather than overwhelms the cheesecake.
- For cleaner cuts Warm and dry your knife between slices to achieve smooth, restaurant style squares without tearing the top.
- Decorate with restraint A light sprinkle of crushed Candy Canes provides crunch, but too many will make the bars hard to slice and serve.
- Make ahead advantage These bars keep well refrigerated, so prepare them a day early to free up time on the day of your event.
- Marbling technique Use a thin knife to make shallow swirls for a pretty effect without mixing the color fully into the batter.