
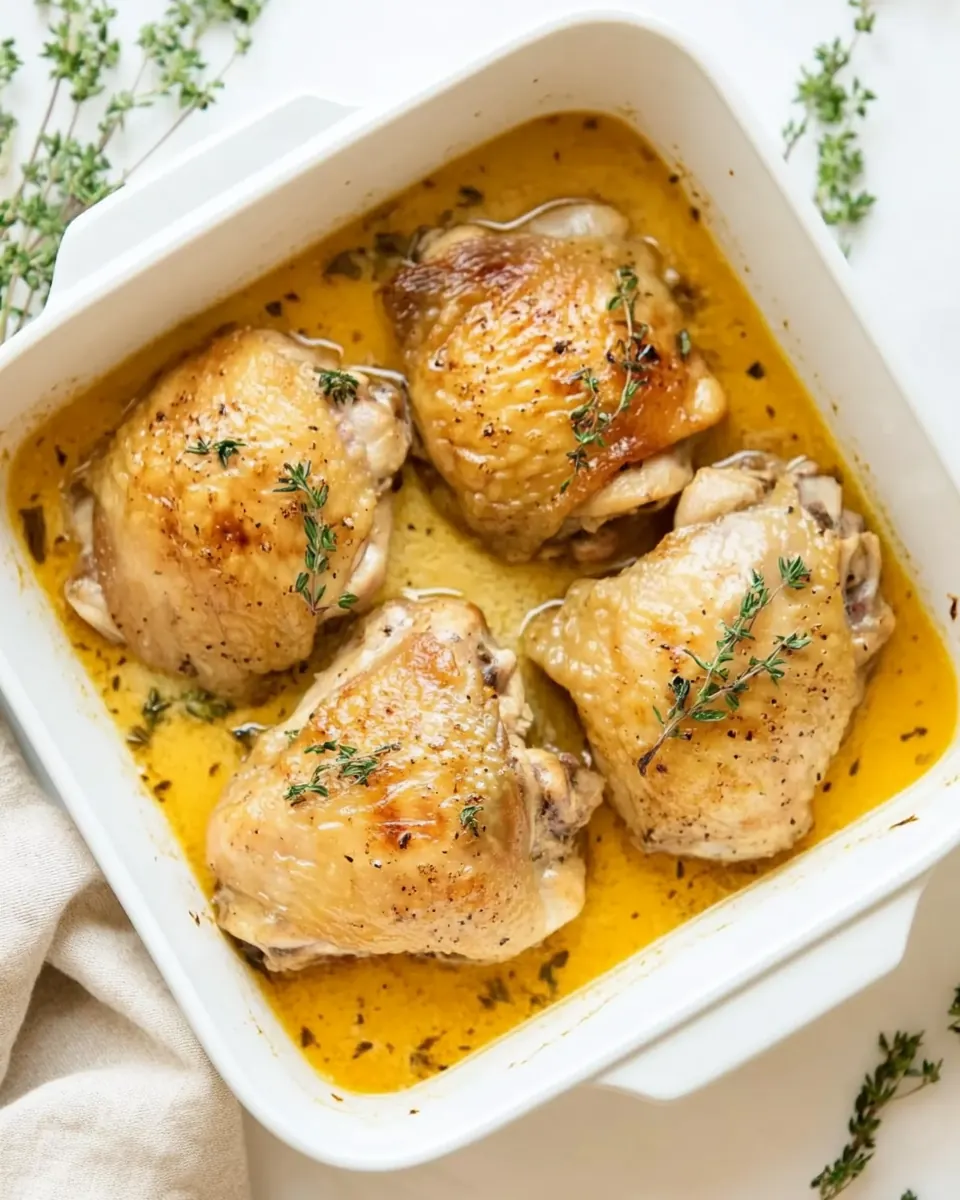
Braised Chicken Thighs
Braised Chicken Thighs is the kind of weeknight dinner I fall back on when I want comfort without fuss. I still remember the first time I slow cooked these thighs for a tired group of friends after a blustery day, and how the kitchen filled with a bright citrus and savory aroma that made everyone pause mid conversation. The combination of browned skin and a glossy, lemony pan sauce felt like the culinary equivalent of a warm blanket.
Over the years I have tweaked small things, like how hard to brown the skin and when to tuck in the herbs, and each change made the dish more forgiving and flavorful. I love that Braised Chicken Thighs is elegant enough to put on a simple dinner table yet practical enough for busy evenings. It gives you crispy edges, tender meat, and a sauce that sings of garlic and thyme.
What keeps me coming back is how adaptable the method is. I often double the sauce for leftovers, because reheated thighs soak up the juices even better than the first day. Friends who usually avoid cooking have told me this recipe made them confident, which is a huge compliment. If you want a recipe that bridges cozy and impressive, Braised Chicken Thighs is reliably satisfying.
Recipe Snapshot
55 mins
10 mins
45 mins
Medium
400 kcal
American
Gluten-Free, Paleo
Dinner
Oven safe skillet, Baking dish, Whisk
The Beauty of This Braised Chicken Thighs
Impressive but approachable
I find Braised Chicken Thighs hits the sweet spot between looking like a fancy dinner and being simple to execute. I can put this on the table on a weeknight and still feel proud of the result. The technique requires basic moves, but they add up to a restaurant quality finish.
Deep, layered flavor
The magic is in combining olive oil browned skin with a bright lemon and herb sauce. I love how the initial sear creates savory notes, then the braise builds a fragrant, silky sauce, so each bite has contrast and depth.
Texture contrast
What stands out for me is the contrast between crisp, golden chicken skin and melt in your mouth meat underneath. The sauce clings to both, giving you both juiciness and a little crisp chew in every bite.
Leftovers get better
I often make a double batch because the flavors deepen in the refrigerator. Reheating gently in the oven keeps the meat tender while the sauce reawakens, so subsequent meals feel just as special.
Minimal, pantry friendly ingredients
With straightforward items like chicken broth, garlic, and a sprig or two of herbs, this recipe is doable any time. I love that I rarely need a special trip to the store to pull it off.
Ingredients You’ll Need for Braised Chicken Thighs
These ingredients are chosen to work in concert, creating balance between savory depth and bright acidity. The focus is on building flavor with simple techniques, where browning and a well seasoned braise produce maximum taste from minimal components. Key players like chicken, garlic, and lemon shape the flavor profile, while chicken broth and a touch of cornstarch round out the sauce.
- 2 tablespoons olive oil: Heat and enrich the pan, providing a medium for browning and carrying flavor throughout the dish. Adds a fruity, slightly bitter background that complements roasted and braised flavors and helps prevent sticking during searing.
- 6 chicken thighs bone-in skin-on: Provide rich, juicy protein with skin for browning and bones for deep savory flavor when braised. Release collagen and gelatin as they cook low and slow, contributing body and mouthfeel to the finished sauce.
- 1 teaspoon fine sea salt: Season early to enhance overall flavor and help proteins retain moisture while cooking; dissolves into liquids for even distribution. Balances savory elements and brings out natural flavors in both the meat and aromatics.
- 1 teaspoon fresh ground black pepper: Season with a pungent, peppery kick that brightens and contrasts rich, fatty components during browning and braising. Cracks or grinds release volatile oils that elevate the dish’s savory profile and add subtle heat.
- 1 small yellow onion diced: Provide a sweet, aromatic base when diced and sautéed, softening to contribute depth and natural sweetness to the braising liquid. Caramelizes slightly with heat, building savory-sweet complexity that supports the chicken.
- 2 cups low sodium chicken broth: Supply a savory cooking liquid that deglazes the pan and gently simmers the chicken, extracting and concentrating flavors. Using low sodium allows control over seasoning and prevents the finished dish from becoming overly salty.
- 2 lemons juiced: Add bright acidity that cuts through richness and helps tenderize the meat when juiced into the braising liquid. Imparts a fresh citrus aroma and balances the dish by lifting flavors and adding brightness.
- 6 garlic cloves peeled and smashed OR minced: Infuse pungent, savory aromatics that mellow with cooking to add depth and complexity; smashed cloves release oils quickly while minced releases more slowly. Contribute both sharpness and sweetness depending on how long they braise.
- 3 sprigs thyme: Introduce earthy, herbaceous notes that release subtle oils during braising, enhancing the savory profile of the sauce. Tie aromatic components together and complement both chicken and citrus with gentle, fragrant undertones.
- 1 sprig rosemary: Contribute a piney, resinous aroma that perfumes the braising liquid and pairs well with thyme and citrus. One sprig adds concentrated herb flavor without overwhelming, releasing its fragrant oils during the simmer.
- 1 tablespoon cornstarch: Thicken the braising liquid when mixed into a slurry and simmered, creating a glossy sauce that clings to the chicken. Provides body and helps concentrate flavors while stabilizing the finished pan sauce.
Step by Step Instructions for Braised Chicken Thighs
This method is straightforward but benefits from attention to sensory cues. I recommend reading the full set of directions before starting so you can time the sear, braise, and sauce finish with confidence.
- Preheat oven to 350°F. Heat the oil in a large oven-safe skillet over medium heat.: As the oven warms you should notice the smell of warm air and a steady hum from the element, which creates an even environment for the braise to finish. Preheating ensures the internal temperature rises predictably once the skillet goes in, giving you consistent doneness. A common mistake is skipping preheat, which can extend cook time and result in uneven texture.
- Season your chicken on both sides with the salt and pepper. Place the chicken skin down into the skillet and cook until the chicken skin browns. Flip the chicken and cook for an additional two minutes. Transfer the chicken to a plate and set aside.: You will see the olive oil shimmer and maybe see faint ripples, and when it is ready a drop of water will sizzle on contact. Heating properly prevents sticking and promotes a crisp, golden skin. If the oil smokes heavily lower the heat to avoid bitter, burnt flavors.
- Add the onion to the skillet and cook until it has softened. Stir in the chicken stock, lemon juice, garlic cloves, thyme and rosemary.: When you season, the salt will slightly moisten the surface and the pepper will create a fragrant coating that browns. Press the seasoning onto the skin gently, then place the thighs skin side down so you hear an immediate sizzle. Rushing the sear leads to pale skin and less flavor development.
- Add the chicken back in, skin side up. Bake for 40 to 45 minutes until the chicken is fall-apart tender. Transfer the chicken to a plate and set aside.: Listen for a steady sizzle and watch the skin transform to deep golden brown with rendered fat pooling at the edges, that smell of roasted fat and Maillard notes is crucial. Browning develops savory complexity that cannot be replicated in the oven alone. Turning too soon prevents a proper crust from forming.
- Whisk the cornstarch into the pan over medium heat. Continue cooking until the sauce has thickened. Serve the chicken with the sauce and enjoy.: After flipping you should notice the underside warming and tightening slightly, and a faint caramel aroma as it gains color. This quick second sear seals juices and adds another layer of texture. If you leave it much longer the skin can overcook and the meat may dry at the edges.
- Transfer the chicken to a plate and set aside: Resting briefly prevents the meat from continuing to cook in the hot pan and lets you clear room for the aromatics. The plate will hold rendered juices, which you can return to the pan if you like. Crowding the plate can trap steam and soften the skin.
- Add the onion to the skillet and cook until it has softened: As the onion sweats it will lose translucency and sweet notes will emerge, filling the kitchen with a gentle, savory scent. Use a wooden spoon to scrape up the browned bits, which are flavor gold. If you brown the onion too quickly without stirring you risk burning it and introducing bitterness.
- Stir in the chicken stock, lemon juice, garlic cloves, thyme and rosemary: When the cold chicken broth and lemon hit the hot pan you will hear a lively hiss and the aroma will brighten, lifting the heavier roasted notes. The herbs will perfume the liquid, and the garlic will begin to soften and release flavor into the braise. Adding all at once integrates flavors, but adding cold liquid incrementally can help control splatter.
- Add the chicken back in, skin side up: Arrange each thigh so the skin faces up, which allows the skin to stay exposed and crisp while the meat bathes in the braising liquid. You will see gentle bubbling at the edges as the liquid simmers around the thighs, and the surface will steam lightly. Nesting the pieces too close can cause uneven cooking, so leave a little space.
- Bake for 40 to 45 minutes until the chicken is fall-apart tender: During the bake you will notice the sauce reducing and thickening, and the aroma will meld into a rich, tangy-scented steam. The meat should pull away from the bone easily and feel tender to the touch. Overcooking can dry the thinner ends, while undercooking will leave the interior too firm.
- Transfer the chicken to a plate and set aside: Letting the cooked thighs rest allows juices to redistribute and keeps the skin from getting soggy immediately. The plate will collect any escaping juices, which you can incorporate back into the sauce. Avoid stacking the pieces, or steam will soften the crisped skin.
- Whisk the cornstarch into the pan over medium heat: Begin by mixing the cornstarch into a small amount of cool liquid to form a slurry, then pour it into the hot pan where you will hear a faint bubbling as the sauce reacts. Stirring continuously prevents lumps and encourages the sauce to take on a glossy sheen that clings to the meat. If you add cornstarch straight to the hot sauce it can clump and create an uneven texture.
- Continue cooking until the sauce has thickened: Watch the sauce reduce to a consistency that coats a spoon, and notice the scent intensify as flavors concentrate. This finishing step transforms the braise into a silky glaze that enhances each bite. If you overreduce, the sauce can become too salty or pasty, so remove from heat when it coats the back of a spoon.
- Serve the chicken with the sauce and enjoy: Plate the thighs, spoon the glossy sauce over them, and enjoy the contrast of crisp skin and tender meat with fragrant, bright notes. The final presentation should look warm and inviting, the sauce pooling slightly under each piece. Serving straight from the skillet keeps the dish warm and communal.
Expert Tips about Braised Chicken Thighs
I keep these tips in mind to make the process smoother and the results more consistent. Small technique changes yield big flavor rewards, and they are easy to adopt whether you are a confident home cook or a beginner.
- Brown the skin thoroughly before braising to develop deep savory flavor and render fat that bastes the meat. Aim for a rich golden brown not a dark burn, and adjust heat if the skin darkens too fast.
- Use low sodium broth so you control the final seasoning as the sauce reduces. Taste near the end and only add salt if needed to avoid an overly salty finish.
- Juice lemons fresh for the brightest acidity; bottled juice lacks fresh citrus oils that lift the sauce. Add the juice with the broth so it mellows while cooking.
- Smashed garlic mellows into sweet undertones while minced garlic gives a sharper presence. Choose based on how prominent you want garlic in the finished sauce.
- Don’t overcrowd the pan when searing, or the thighs will steam instead of browning. Sear in batches if necessary for an even golden crust.
- Finish in the oven for even doneness rather than relying solely on stovetop simmering, which can produce uneven results on thicker cuts.
What to Serve Alongside Braised Chicken Thighs
This dish pairs well with simple, comforting sides that can soak up the sauce. Think of starchy, vegetable, or grain options that let the chicken remain the star. I like to choose one warm side and one fresh element to balance the meal.
- Mashed potatoes, because the creamy texture and butteriness catch the lemony sauce beautifully, creating a comforting contrast with the crisp skin.
- Buttered egg noodles, which provide a neutral, silky bed that lets the sauce shine while offering a quick, weeknight friendly side.
- Roasted seasonal vegetables, such as carrots or Brussels sprouts, complement the herbs and bring a caramelized sweetness that balances the bright lemon.
- Steamed rice is an excellent absorber of sauce and keeps the plate simple and family friendly, perfect for casual dinners or batch cooking.
- Light green salad with a simple vinaigrette can add freshness and acidity, cutting through the richness and rounding out the meal for a balanced plate.
- Storage tip store the thighs and sauce together in an airtight container in the refrigerator for three to four days, and reheat gently in a 350°F oven to maintain texture.
- Occasions this recipe suits weeknight dinners, small gatherings, or a cozy winter meal where hearty, warming flavors are desired.
FAQ
Conclusion
This recipe stands out because it marries crispy, well browned chicken skin with a bright, herb scented sauce that feels both comforting and refined. Try making Braised Chicken Thighs on a cozy evening to enjoy the contrast of textures and the lively lemon garlic flavor. Once you experience the aromatic kitchen and the easy, rewarding steps, you may find yourself reaching for this method whenever you want a dependable, delicious meal that feeds a crowd and reheats beautifully.
Braised Chicken Thighs
Equipment
- Oven-safe skillet
- Baking Dish
- Whisk
Ingredients
- 2 tablespoons olive oil Heat and enrich the pan, providing a medium for browning and carrying flavor throughout the dish. Adds a fruity, slightly bitter background that complements roasted and braised flavors and helps prevent sticking during searing.
- 6 chicken thighs bone-in skin-on Provide rich, juicy protein with skin for browning and bones for deep savory flavor when braised. Release collagen and gelatin as they cook low and slow, contributing body and mouthfeel to the finished sauce.
- 1 teaspoon fine sea salt Season early to enhance overall flavor and help proteins retain moisture while cooking; dissolves into liquids for even distribution. Balances savory elements and brings out natural flavors in both the meat and aromatics.
- 1 teaspoon fresh ground black pepper Season with a pungent, peppery kick that brightens and contrasts rich, fatty components during browning and braising. Cracks or grinds release volatile oils that elevate the dish’s savory profile and add subtle heat.
- 1 small yellow onion diced Provide a sweet, aromatic base when diced and sautéed, softening to contribute depth and natural sweetness to the braising liquid. Caramelizes slightly with heat, building savory-sweet complexity that supports the chicken.
- 2 cups low sodium chicken broth Supply a savory cooking liquid that deglazes the pan and gently simmers the chicken, extracting and concentrating flavors. Using low sodium allows control over seasoning and prevents the finished dish from becoming overly salty.
- 2 lemons juiced Add bright acidity that cuts through richness and helps tenderize the meat when juiced into the braising liquid. Imparts a fresh citrus aroma and balances the dish by lifting flavors and adding brightness.
- 6 garlic cloves peeled and smashed OR minced Infuse pungent, savory aromatics that mellow with cooking to add depth and complexity; smashed cloves release oils quickly while minced releases more slowly. Contribute both sharpness and sweetness depending on how long they braise.
- 3 sprigs thyme Introduce earthy, herbaceous notes that release subtle oils during braising, enhancing the savory profile of the sauce. Tie aromatic components together and complement both chicken and citrus with gentle, fragrant undertones.
- 1 sprig rosemary Contribute a piney, resinous aroma that perfumes the braising liquid and pairs well with thyme and citrus. One sprig adds concentrated herb flavor without overwhelming, releasing its fragrant oils during the simmer.
- 1 tablespoon cornstarch Thicken the braising liquid when mixed into a slurry and simmered, creating a glossy sauce that clings to the chicken. Provides body and helps concentrate flavors while stabilizing the finished pan sauce.
Instructions
- Preheat oven to 350°F. Heat the oil in a large oven-safe skillet over medium heat.: As the oven warms you should notice the smell of warm air and a steady hum from the element, which creates an even environment for the braise to finish. Preheating ensures the internal temperature rises predictably once the skillet goes in, giving you consistent doneness. A common mistake is skipping preheat, which can extend cook time and result in uneven texture.
- Season your chicken on both sides with the salt and pepper. Place the chicken skin down into the skillet and cook until the chicken skin browns. Flip the chicken and cook for an additional two minutes. Transfer the chicken to a plate and set aside.: You will see the olive oil shimmer and maybe see faint ripples, and when it is ready a drop of water will sizzle on contact. Heating properly prevents sticking and promotes a crisp, golden skin. If the oil smokes heavily lower the heat to avoid bitter, burnt flavors.
- Add the onion to the skillet and cook until it has softened. Stir in the chicken stock, lemon juice, garlic cloves, thyme and rosemary.: When you season, the salt will slightly moisten the surface and the pepper will create a fragrant coating that browns. Press the seasoning onto the skin gently, then place the thighs skin side down so you hear an immediate sizzle. Rushing the sear leads to pale skin and less flavor development.
- Add the chicken back in, skin side up. Bake for 40 to 45 minutes until the chicken is fall-apart tender. Transfer the chicken to a plate and set aside.: Listen for a steady sizzle and watch the skin transform to deep golden brown with rendered fat pooling at the edges, that smell of roasted fat and Maillard notes is crucial. Browning develops savory complexity that cannot be replicated in the oven alone. Turning too soon prevents a proper crust from forming.
- Whisk the cornstarch into the pan over medium heat. Continue cooking until the sauce has thickened. Serve the chicken with the sauce and enjoy.: After flipping you should notice the underside warming and tightening slightly, and a faint caramel aroma as it gains color. This quick second sear seals juices and adds another layer of texture. If you leave it much longer the skin can overcook and the meat may dry at the edges.
- Transfer the chicken to a plate and set aside: Resting briefly prevents the meat from continuing to cook in the hot pan and lets you clear room for the aromatics. The plate will hold rendered juices, which you can return to the pan if you like. Crowding the plate can trap steam and soften the skin.
- Add the onion to the skillet and cook until it has softened: As the onion sweats it will lose translucency and sweet notes will emerge, filling the kitchen with a gentle, savory scent. Use a wooden spoon to scrape up the browned bits, which are flavor gold. If you brown the onion too quickly without stirring you risk burning it and introducing bitterness.
- Stir in the chicken stock, lemon juice, garlic cloves, thyme and rosemary: When the cold chicken broth and lemon hit the hot pan you will hear a lively hiss and the aroma will brighten, lifting the heavier roasted notes. The herbs will perfume the liquid, and the garlic will begin to soften and release flavor into the braise. Adding all at once integrates flavors, but adding cold liquid incrementally can help control splatter.
- Add the chicken back in, skin side up: Arrange each thigh so the skin faces up, which allows the skin to stay exposed and crisp while the meat bathes in the braising liquid. You will see gentle bubbling at the edges as the liquid simmers around the thighs, and the surface will steam lightly. Nesting the pieces too close can cause uneven cooking, so leave a little space.
- Bake for 40 to 45 minutes until the chicken is fall-apart tender: During the bake you will notice the sauce reducing and thickening, and the aroma will meld into a rich, tangy-scented steam. The meat should pull away from the bone easily and feel tender to the touch. Overcooking can dry the thinner ends, while undercooking will leave the interior too firm.
- Transfer the chicken to a plate and set aside: Letting the cooked thighs rest allows juices to redistribute and keeps the skin from getting soggy immediately. The plate will collect any escaping juices, which you can incorporate back into the sauce. Avoid stacking the pieces, or steam will soften the crisped skin.
- Whisk the cornstarch into the pan over medium heat: Begin by mixing the cornstarch into a small amount of cool liquid to form a slurry, then pour it into the hot pan where you will hear a faint bubbling as the sauce reacts. Stirring continuously prevents lumps and encourages the sauce to take on a glossy sheen that clings to the meat. If you add cornstarch straight to the hot sauce it can clump and create an uneven texture.
- Continue cooking until the sauce has thickened: Watch the sauce reduce to a consistency that coats a spoon, and notice the scent intensify as flavors concentrate. This finishing step transforms the braise into a silky glaze that enhances each bite. If you overreduce, the sauce can become too salty or pasty, so remove from heat when it coats the back of a spoon.
- Serve the chicken with the sauce and enjoy: Plate the thighs, spoon the glossy sauce over them, and enjoy the contrast of crisp skin and tender meat with fragrant, bright notes. The final presentation should look warm and inviting, the sauce pooling slightly under each piece. Serving straight from the skillet keeps the dish warm and communal.
Notes
- Brown the skin thoroughly before braising to develop deep savory flavor and render fat that bastes the meat. Aim for a rich golden brown not a dark burn, and adjust heat if the skin darkens too fast.
- Use low sodium broth so you control the final seasoning as the sauce reduces. Taste near the end and only add salt if needed to avoid an overly salty finish.
- Juice lemons fresh for the brightest acidity; bottled juice lacks fresh citrus oils that lift the sauce. Add the juice with the broth so it mellows while cooking.
- Smashed garlic mellows into sweet undertones while minced garlic gives a sharper presence. Choose based on how prominent you want garlic in the finished sauce.
- Don’t overcrowd the pan when searing, or the thighs will steam instead of browning. Sear in batches if necessary for an even golden crust.
- Finish in the oven for even doneness rather than relying solely on stovetop simmering, which can produce uneven results on thicker cuts.