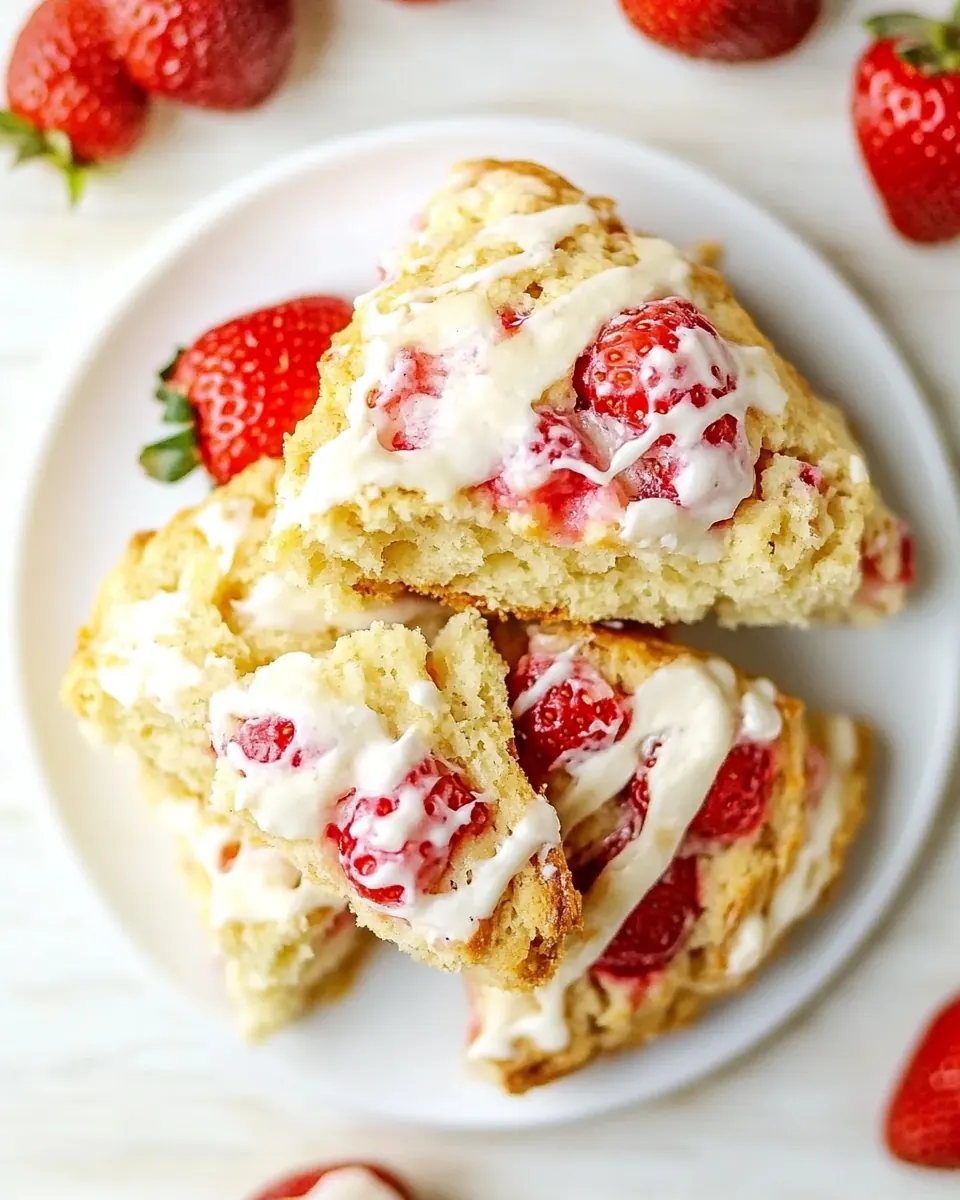
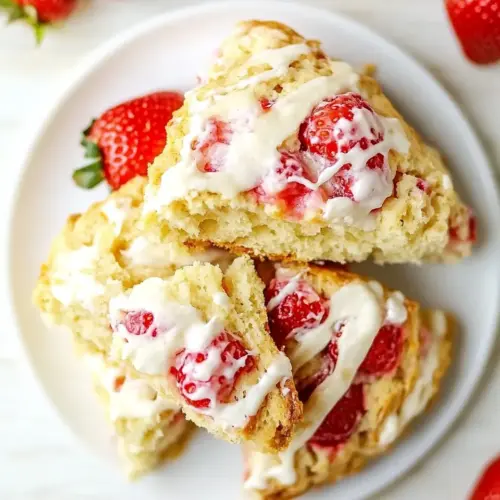
Strawberries and Cream Scones
Strawberries and Cream Scones are the kind of treat I reach for on slow, sunlit mornings when I want something that tastes like a warm memory. The first time I made these I was chasing a childhood flashback of a bakery counter, and the result was tender, slightly crumbly scones dotted with soft bursts of strawberries and finished with a glossy, sweet cream glaze. I remember the way the kitchen smelled, faintly of baked flour and caramelizing sugar, and how the kids argued over the last wedge as if it were treasure.
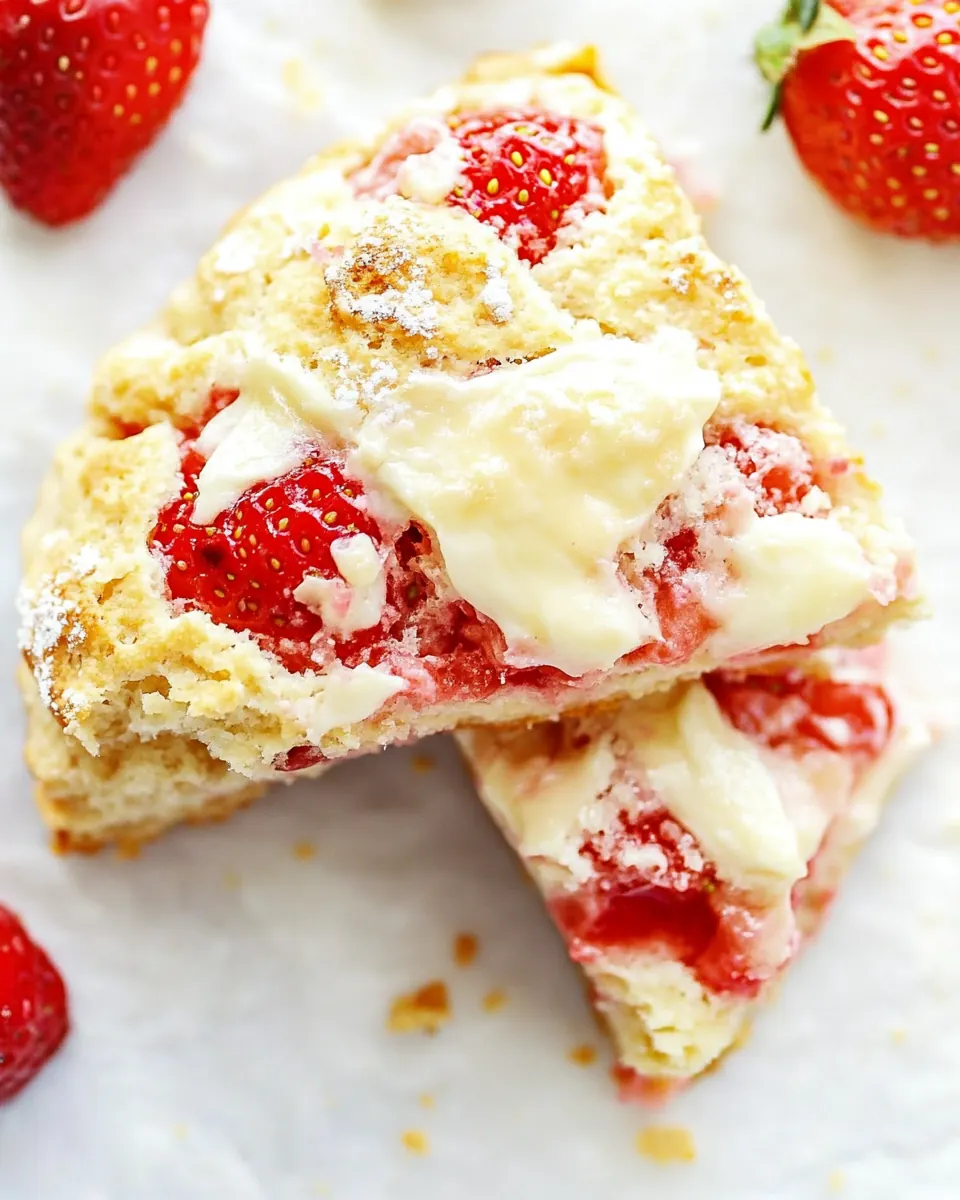
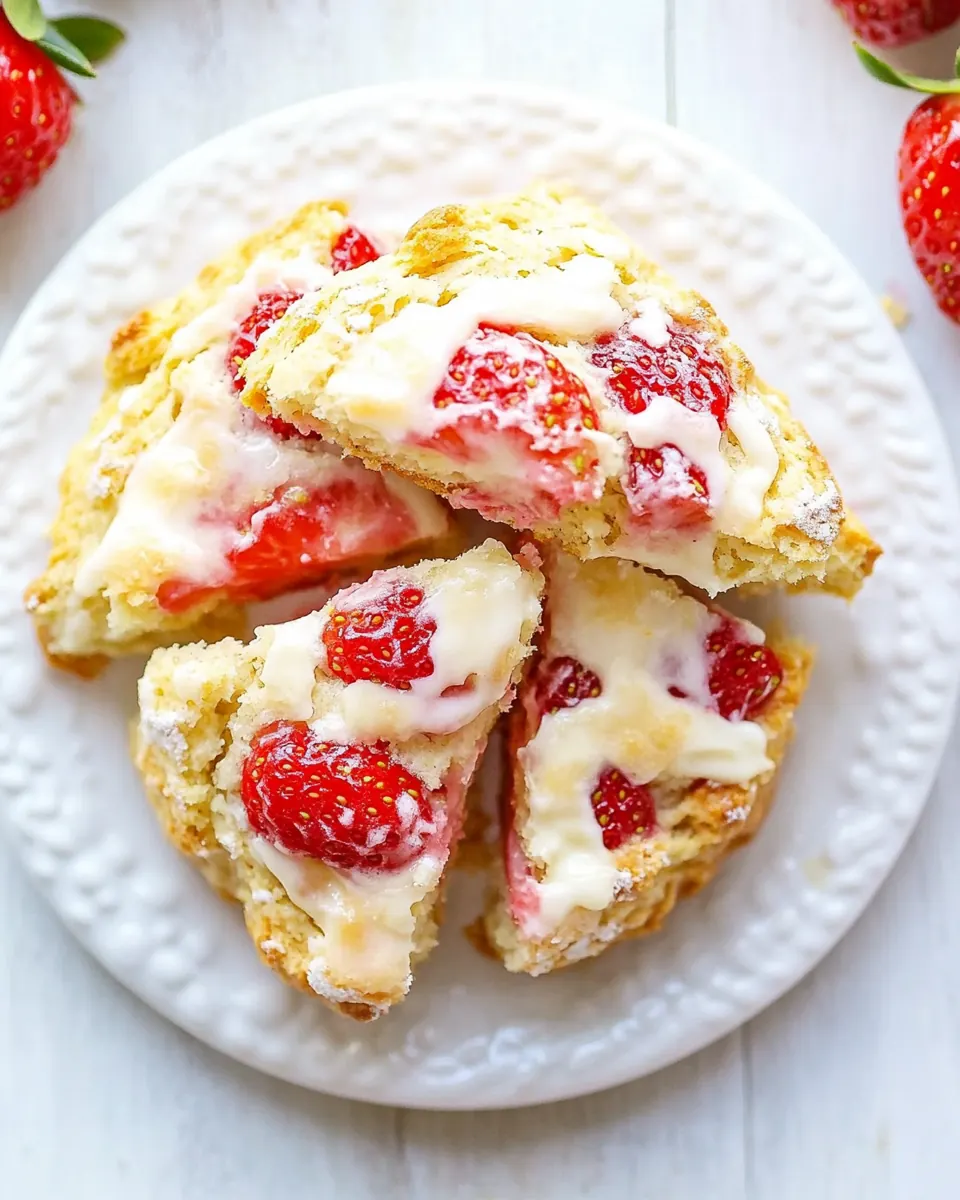
Over the years I have tweaked the balance between flaky texture and gentle richness. Using very cold unsalted butter and minimal handling keeps the interior light, while just enough granulated sugar gives that tender crumb the right sweetness without overpowering the fresh strawberries. I like to quarter the berries so they give tiny, juicy pockets throughout the dough instead of one big wet spot. When life is hectic, these scones are a small act of kindness you can make in under an hour, and they pair perfectly with a slow morning and a steaming mug of coffee.
Recipe Snapshot
30 mins
10 mins
20 mins
Medium
250 kcal
American
Gluten-Free, Low FODMAP
Breakfast
Large bowl, Pastry cutter or two forks, Baking sheet, Parchment paper, Small bowl, Rubber spatula
Why You Need This Strawberries and Cream Scones
Fresh seasonal flavor
I love how Strawberries and Cream Scones highlight seasonal strawberries. When you use ripe berries, the natural sweetness and bright acidity pop against the richer elements, creating a lively balance. I often taste a bite and feel like spring has arrived in my kitchen.
Buttery flakiness
The use of very cold unsalted butter and minimal mixing produces delicate layers. I always remind myself that working quickly and keeping things chilly yields pockets of air that make the scone tender and flakey. It is so satisfying when you break one open and see the layered crumb.
Simple, accessible technique
These scones do not require advanced tools or techniques. I often make them with just a bowl, a fork, and a pastry cutter, and they still come out beautifully. That approachability makes them a reliable weekend project or a last minute treat for guests.
Versatile enjoyment
Whether you serve them with tea, for a casual brunch, or as a sweet snack, the combination of strawberries and a cream glaze feels both special and familiar. I like that they are easy to personalize too if I want to tweak the sugar level or the glaze thickness.
Comfort with a refined touch
These scones strike a nice balance between homey comfort and a slightly refined presentation. The light sprinkle of sugar and a gentle drizzle of the glaze turns simple baked dough into a memorable plate. I often bring a tray to friends and it always disappears fast.
Ingredients Overview for Strawberries and Cream Scones
These ingredients are chosen to create a tender, slightly flaky scone that showcases fresh strawberries. The dry ingredients provide structure, the very cold unsalted butter creates flakiness, and the combination of whole milk, heavy cream, and egg gives a rich but tender crumb. The glaze and finishing sugar add the bright sweet finish that makes these scones feel bakery worthy.
- 2 and 3/4 cups all-purpose flour: Provide the structure and bulk to scones while creating a tender crumb when mixed correctly; use all-purpose flour for balanced protein content that supports rise without toughness. Measure precisely and avoid overmixing to keep scones flaky and light. Sift or whisk flour with leaveners and salt to ensure even distribution throughout the dough.
- 1/2 teaspoons salt: Season the dough lightly to balance sweetness and enhance overall flavor; salt also strengthens gluten slightly, improving texture. Use fine salt to distribute evenly and avoid salty pockets. Adjust precisely if using salted butter elsewhere in the recipe.
- 2 teaspoons baking powder: Leaven the scones by producing gas bubbles that help them rise and become airy; baking powder reacts during baking to give lift. Use fresh baking powder for optimal rise and ensure even mixing with the flour for consistent results. Avoid excessive amounts to prevent a bitter metallic taste.
- 1/2 teaspoon baking soda: Provide additional leavening and react with acidic components to boost rise and tenderness; baking soda helps with browning and texture when paired with acidic ingredients. Measure carefully since too much can leave a soapy aftertaste. Mix thoroughly with dry ingredients to prevent uneven pockets of flavor.
- 1/3 cup granulated sugar: Add sweetness to the dough and contribute to browning and texture during baking; granulated sugar also helps tenderize by interfering with gluten formation. Dissolve slightly when mixed with wet ingredients for an even crumb. Adjust amount to taste but maintain given measurement for recipe balance.
- 1 stick (4 ounces) unsalted butter, VERY cold and cut into tiny pieces: Introduce cold fat that creates flaky layers by coating flour particles and inhibiting gluten formation; very cold, tiny pieces of unsalted butter produce distinct pockets of tenderness when baked. Keep butter chilled to ensure it doesn’t fully incorporate into the dough, preserving flakiness. Use unsalted butter to control overall sodium precisely.
- 1 large egg: Bind the ingredients and contribute moisture, richness, and structure through proteins that set during baking; a large egg adds color and helps crumbs hold together. Beat lightly before adding to encourage even distribution. Room temperature eggs blend more uniformly with other ingredients unless recipe specifies otherwise.
- 1/2 cup whole milk: Provide liquid to hydrate the dough and contribute to tenderness and crumb; whole milk supplies fat and sugars that enhance flavor and browning. Adjust hydration carefully to avoid sticky or dry dough. Use at the specified amount for proper dough consistency.
- 2 tablespoons heavy cream: Add extra richness and tenderness to the dough with higher fat content that improves texture and flavor; heavy cream contributes a subtle richness for better mouthfeel. Incorporate as directed to maintain correct dough moisture. Keep chilled if possible to avoid over-softening the butter.
- 1 cup fresh strawberries, hulled and quartered: Introduce fresh fruit for bursts of juiciness, flavor, and texture contrast; hulled and quartered strawberries distribute evenly without overwhelming the dough. Gently fold in to avoid crushing and releasing too much juice which can make dough soggy. Use ripe but firm berries to maintain shape during baking.
- 1 large egg, beaten: Provide an egg wash that promotes a glossy, golden finish and helps toppings adhere; a beaten large egg creates a shiny crust when brushed on before baking. Mix with a small amount of liquid for easier brushing and even coverage. Apply gently to avoid deflating delicate dough shapes.
- 1 teaspoon water: Thin the egg wash so it spreads smoothly and provides even sheen without clumping; water creates a lightweight wash that helps the beaten egg cover the surface. Use the specified small amount to achieve proper consistency for brushing. Combine just before use to maintain freshness.
- 2 tablespoons sugar, for sprinkling: Create a sweet, crunchy topping that adds texture and sparkle when sprinkled before baking; granulated sugar enhances appearance and adds a satisfying bite. Distribute evenly for consistent caramelization and visual appeal. Use coarse or regular sugar depending on desired crunch.
- 2 tablespoons heavy cream: Enhance gloss and richness on the pastry surface by brushing with a small amount of heavy cream before baking or after egg wash, adding sheen and deeper color. Heavy cream contributes extra fat that aids browning and mouthfeel. Use sparingly to avoid making the surface soggy.
- 3/4 cup confectioners’ sugar: Form a smooth, sweet glaze to drizzle over cooled scones, adding sweetness and a delicate finish; confectioners’ sugar dissolves easily for a silky texture. Whisk with liquid until desired consistency is reached and adjust for thickness as needed. Sift beforehand to prevent lumps in the glaze.
- 1 teaspoon vanilla extract: Infuse the glaze with warm, aromatic flavor and balanced sweetness; vanilla extract enhances overall profile and complements strawberries. Add gradually to avoid overpowering the glaze and ensure even incorporation. Use pure vanilla for best flavor clarity.
- Tiny pinch of salt (1/8 teaspoon or less): Heighten and balance sweetness slightly while enhancing other flavors without being overtly salty; a tiny pinch of salt rounds the glaze and dough flavors. Use sparingly (1/8 teaspoon or less) to prevent detectable saltiness. Dissolve into wet components for even distribution.
How to Cook Strawberries and Cream Scones

These directions will walk you through creating light, tender scones studded with juicy strawberries. Work quickly with cold butter and keep the dough just moist enough to hold together, and you will get beautifully risen, bakery style scones. Read each step so you can follow visual and sensory signals rather than just times.
- Preheat oven to 400° (F). Line a large baking sheet with parchment paper; set aside.: As the oven warms, you will notice a faint heat rising and perhaps the oven elements beginning to glow, which signals a consistent environment for even baking. Preheating is crucial because Strawberries and Cream Scones rely on a hot oven to create that initial steam from the cold butter , producing lift and flaky layers. A mistake here is putting the scones into an oven that is not fully hot, which yields flatter, denser scones. If your oven runs hot or cool, use an oven thermometer to verify the temperature so the scones brown evenly and do not dry out.
- In a large bowl combine flour, salt, baking powder, baking soda, and sugar; mix well to combine.: At this stage you will feel the dry textures shift beneath your fingertips as the flour and leaveners mingle, with the granulated sugar adding a tiny grit that will help crust color. Mixing ensures the leavening agents are evenly distributed so the rise is uniform, and it prevents bitter pockets of unblended baking powder. A common error is skimping on mixing, which can produce uneven pockets of rise. Use a whisk or fork to fluff the dry mix, and look for a homogenous pale mixture before adding the cold butter .
- Cut the butter into small cubes then work it into the mixture (using your fingers, two forks, or a pastry cutter) until it resembles a coarse meal.: As you rub or cut the unsalted butter into the dry ingredients, tiny glints of butter will appear like little beads within the flour, and the texture will change to a coarse, sandy consistency. This is the sensory cue you want because those bits will melt in the oven to create steam pockets, making the scones flaky. Avoid letting the butter soften; it should stay cold and tactile. Overworking here creates a dense dough, so stop once you reach the coarse meal texture.
- In a small bowl whisk together the egg, milk, and cream. Add to flour/butter mixture and use a fork to stir everything together until just moistened.: The wet mix will glisten as you whisk, and when poured into the dry mix it will bind pockets of crumb into a shaggy dough. Using a fork limits overmixing, which preserves tenderness. You should see streaks of dry flour still visible when you stop; this prevents a tough scone. A slip-up is adding too much liquid too fast, which leads to a sticky, unworkable dough. If the dough feels too wet, briefly scatter a little extra flour and fold gently.
- Add strawberries and using a rubber spatula gently fold them into the dough. Don’t worry if some of the berries break up a bit.: When you fold in the quartered strawberries , expect bits of pink juice to streak through the dough, which is fine and adds flavor. Folding gently keeps the berries from completely disintegrating while still distributing them. The reason for the gentle touch is to avoid releasing too much moisture into the dough, which would make the scones dense. A common mistake is stirring aggressively, which turns the dough gummy. Use a flexible spatula and only fold until the berries are evenly spread.
- Empty the loose dough out onto a clean, floured work surface, then shape the dough into an 8-inch circle. You may need to knead the mixture a few times to get it to a workable texture.: When you turn the dough out it will feel slightly shaggy and cool to the touch from the cold butter . Lightly flour the surface and gently press the dough into an 8-inch disk, folding a few times to bring it together. This quick shaping layered technique encourages flakiness by preserving pieces of butter. Avoid heavy kneading which warms the dough and breaks down flakiness. If the dough sticks, dust with a little extra flour but resist adding large amounts.
- Cut the dough into 8 wedges and carefully transfer them to the prepared sheet, placing them 2" apart.: As you slice the disk into wedges you will see clean, sharp edges that help the scones bake evenly and brown on the exposed sides. Transferring them with care preserves shape and prevents squashing the layers. Give them room because they expand slightly as the steam from the cold butter causes lift. A common oversight is crowding the pan, which results in uneven baking and soft sides where they touch. Use a thin spatula to gently move each wedge.
- Lightly brush each scone with the egg wash, then sprinkle the tops with sugar.: Brushing on the beaten egg mixed with water gives the scones a glossy, golden finish and helps the sprinkling sugar adhere. You will notice a slight sheen once brushed, and the sugar will glint on top. The egg wash also aids in browning to create a pleasing contrast between crust and interior. Avoid dousing the tops, which can cause runny wash to pool and lead to uneven baking. A gentle, even brush stroke is all you need.
- Bake for 18 minutes, or until light golden brown.: While baking, enjoy the warm aroma of baked flour and caramelizing sugars. The edges should become lightly golden and the tops set with a slightly crisp exterior. This hot environment creates steam that puffs the scones. A common error is underbaking, leaving them doughy inside, or overbaking, which dries them out. Check for color and a gentle bounce when pressed; if the center yields too much, give them a couple more minutes.
- Allow scones to cool for 10 minutes on the baking sheet. In the meantime you can make your glaze.: Cooling briefly lets the interior set so the scones hold together when you drizzle the glaze. The surface will still be warm, which helps the glaze adhere and form a shiny coating. Resist cutting into them immediately, as the center continues to finish cooking and firms up. A mistake is slicing while piping hot, which can make crumbs and a slightly gummy interior.
- In a small bowl whisk together the heavy cream, confectioners’ sugar, vanilla, and salt. Drizzle over semi-warm scones and serve at once.: The glaze should be smooth and pourable, with a slight sheen. As you whisk the heavy cream into the confectioners' sugar , it will thin and thicken to a satiny consistency that clings to the warm scones. Drizzling over semi-warm scones allows the glaze to set with a delicate shell while some sinks into the crumb for extra sweetness. Too thin a glaze will run right off; too thick and it will look clumpy. Aim for a ribbon like flow when you lift the spoon.
Helpful Notes about Strawberries and Cream Scones
These notes will help you get consistent results and small upgrades that make the scones feel bakery quality. I include strategies for working with berries, adjusting the dough, and finishing touches so you can make these reliably whether you are rushed or lingering over the process.
- Keep everything cold: Chill the unsalted butter and use cold milk and cream to ensure pockets of fat remain intact, which produces a flakey crumb. If the kitchen is warm, briefly return the mixed dough to the fridge before shaping.
- Handle the berries gently: When folding in the strawberries, use a rubber spatula and fold just until incorporated. Over handling releases juice that can make the dough soggy and heavy.
- Test your baking powder: Fresh leaveners are vital for rise. If your baking powder has been in the pantry for a long time, substitute with fresh to avoid flat scones.
- Adjust glaze consistency: If the glaze is too thick, thin with a few drops of heavy cream or milk. If too thin, whisk in a touch more confectioners’ sugar until it coats the spoon in a ribbon.
- Storage tip: Keep leftover scones in an airtight container at room temperature for up to two days. Rewarm gently in a low oven to refresh the crust before serving.
Serving This Strawberries and Cream Scones
These scones make a lovely option for brunch, a spring picnic, or a casual tea. Serve them warm and slightly glazed so they feel freshly made. Pairing ideas and serving tips below cover occasions, sides, and storage considerations to help you present them well.
- Brunch centerpiece: Serve warm scones with a pot of tea or coffee, and offer small bowls of extra heavy cream or jam so guests can customize each wedge.
- Light afternoon tea: Present on a cake stand alongside light finger sandwiches and fresh fruit for a balanced tea spread; the sweet glaze pairs nicely with delicate savory bites.
- Casual dessert: After a simple meal, offer a scone with an extra drizzle of glaze for a small, satisfying dessert that does not require utensils.
- Picnic item: Pack cooled scones in a lined basket with parchment to protect the glaze; they travel well and are a lovely spring or summer picnic treat.
- Storage and reheating: Store in an airtight container for up to two days at room temperature. Rewarm in a 300 degree F oven for 5 to 8 minutes to refresh the crust, and consider adding a light brush of heavy cream for shine after reheating.
FAQ
Conclusion
Strawberries and Cream Scones combine the bright flavor of fresh berries with a tender, buttery crumb and a silky cream glaze, making them a comforting yet refined treat. If you love bakery style pastries but want something simple to make at home, this recipe delivers consistent results with minimal fuss. Give it a try on a weekend morning or for a casual get together; the warm aroma and flaky texture make them hard to resist and easy to share.
Strawberries and Cream Scones
Equipment
- Large Bowl
- Pastry cutter or two forks
- Baking Sheet
- Parchment Paper
- Small Bowl
- Rubber spatula
Ingredients
- 2 and 3/4 cups all-purpose flour Provide the structure and bulk to scones while creating a tender crumb when mixed correctly; use all-purpose flour for balanced protein content that supports rise without toughness. Measure precisely and avoid overmixing to keep scones flaky and light. Sift or whisk flour with leaveners and salt to ensure even distribution throughout the dough.
- 1/2 teaspoons salt Season the dough lightly to balance sweetness and enhance overall flavor; salt also strengthens gluten slightly, improving texture. Use fine salt to distribute evenly and avoid salty pockets. Adjust precisely if using salted butter elsewhere in the recipe.
- 2 teaspoons baking powder Leaven the scones by producing gas bubbles that help them rise and become airy; baking powder reacts during baking to give lift. Use fresh baking powder for optimal rise and ensure even mixing with the flour for consistent results. Avoid excessive amounts to prevent a bitter metallic taste.
- 1/2 teaspoon baking soda Provide additional leavening and react with acidic components to boost rise and tenderness; baking soda helps with browning and texture when paired with acidic ingredients. Measure carefully since too much can leave a soapy aftertaste. Mix thoroughly with dry ingredients to prevent uneven pockets of flavor.
- 1/3 cup granulated sugar Add sweetness to the dough and contribute to browning and texture during baking; granulated sugar also helps tenderize by interfering with gluten formation. Dissolve slightly when mixed with wet ingredients for an even crumb. Adjust amount to taste but maintain given measurement for recipe balance.
- 1 stick (4 ounces) unsalted butter, VERY cold and cut into tiny pieces Introduce cold fat that creates flaky layers by coating flour particles and inhibiting gluten formation; very cold, tiny pieces of unsalted butter produce distinct pockets of tenderness when baked. Keep butter chilled to ensure it doesn’t fully incorporate into the dough, preserving flakiness. Use unsalted butter to control overall sodium precisely.
- 1 large egg Bind the ingredients and contribute moisture, richness, and structure through proteins that set during baking; a large egg adds color and helps crumbs hold together. Beat lightly before adding to encourage even distribution. Room temperature eggs blend more uniformly with other ingredients unless recipe specifies otherwise.
- 1/2 cup whole milk Provide liquid to hydrate the dough and contribute to tenderness and crumb; whole milk supplies fat and sugars that enhance flavor and browning. Adjust hydration carefully to avoid sticky or dry dough. Use at the specified amount for proper dough consistency.
- 2 tablespoons heavy cream Add extra richness and tenderness to the dough with higher fat content that improves texture and flavor; heavy cream contributes a subtle richness for better mouthfeel. Incorporate as directed to maintain correct dough moisture. Keep chilled if possible to avoid over-softening the butter.
- 1 cup fresh strawberries, hulled and quartered Introduce fresh fruit for bursts of juiciness, flavor, and texture contrast; hulled and quartered strawberries distribute evenly without overwhelming the dough. Gently fold in to avoid crushing and releasing too much juice which can make dough soggy. Use ripe but firm berries to maintain shape during baking.
- 1 large egg, beaten Provide an egg wash that promotes a glossy, golden finish and helps toppings adhere; a beaten large egg creates a shiny crust when brushed on before baking. Mix with a small amount of liquid for easier brushing and even coverage. Apply gently to avoid deflating delicate dough shapes.
- 1 teaspoon water Thin the egg wash so it spreads smoothly and provides even sheen without clumping; water creates a lightweight wash that helps the beaten egg cover the surface. Use the specified small amount to achieve proper consistency for brushing. Combine just before use to maintain freshness.
- 2 tablespoons sugar, for sprinkling Create a sweet, crunchy topping that adds texture and sparkle when sprinkled before baking; granulated sugar enhances appearance and adds a satisfying bite. Distribute evenly for consistent caramelization and visual appeal. Use coarse or regular sugar depending on desired crunch.
- 2 tablespoons heavy cream Enhance gloss and richness on the pastry surface by brushing with a small amount of heavy cream before baking or after egg wash, adding sheen and deeper color. Heavy cream contributes extra fat that aids browning and mouthfeel. Use sparingly to avoid making the surface soggy.
- 3/4 cup confectioners’ sugar Form a smooth, sweet glaze to drizzle over cooled scones, adding sweetness and a delicate finish; confectioners’ sugar dissolves easily for a silky texture. Whisk with liquid until desired consistency is reached and adjust for thickness as needed. Sift beforehand to prevent lumps in the glaze.
- 1 teaspoon vanilla extract Infuse the glaze with warm, aromatic flavor and balanced sweetness; vanilla extract enhances overall profile and complements strawberries. Add gradually to avoid overpowering the glaze and ensure even incorporation. Use pure vanilla for best flavor clarity.
- Tiny pinch of salt (1/8 teaspoon or less) Heighten and balance sweetness slightly while enhancing other flavors without being overtly salty; a tiny pinch of salt rounds the glaze and dough flavors. Use sparingly (1/8 teaspoon or less) to prevent detectable saltiness. Dissolve into wet components for even distribution.
Instructions
- Preheat oven to 400° (F). Line a large baking sheet with parchment paper; set aside.: As the oven warms, you will notice a faint heat rising and perhaps the oven elements beginning to glow, which signals a consistent environment for even baking. Preheating is crucial because Strawberries and Cream Scones rely on a hot oven to create that initial steam from the cold butter , producing lift and flaky layers. A mistake here is putting the scones into an oven that is not fully hot, which yields flatter, denser scones. If your oven runs hot or cool, use an oven thermometer to verify the temperature so the scones brown evenly and do not dry out.
- In a large bowl combine flour, salt, baking powder, baking soda, and sugar; mix well to combine.: At this stage you will feel the dry textures shift beneath your fingertips as the flour and leaveners mingle, with the granulated sugar adding a tiny grit that will help crust color. Mixing ensures the leavening agents are evenly distributed so the rise is uniform, and it prevents bitter pockets of unblended baking powder. A common error is skimping on mixing, which can produce uneven pockets of rise. Use a whisk or fork to fluff the dry mix, and look for a homogenous pale mixture before adding the cold butter .
- Cut the butter into small cubes then work it into the mixture (using your fingers, two forks, or a pastry cutter) until it resembles a coarse meal.: As you rub or cut the unsalted butter into the dry ingredients, tiny glints of butter will appear like little beads within the flour, and the texture will change to a coarse, sandy consistency. This is the sensory cue you want because those bits will melt in the oven to create steam pockets, making the scones flaky. Avoid letting the butter soften; it should stay cold and tactile. Overworking here creates a dense dough, so stop once you reach the coarse meal texture.
- In a small bowl whisk together the egg, milk, and cream. Add to flour/butter mixture and use a fork to stir everything together until just moistened.: The wet mix will glisten as you whisk, and when poured into the dry mix it will bind pockets of crumb into a shaggy dough. Using a fork limits overmixing, which preserves tenderness. You should see streaks of dry flour still visible when you stop; this prevents a tough scone. A slip-up is adding too much liquid too fast, which leads to a sticky, unworkable dough. If the dough feels too wet, briefly scatter a little extra flour and fold gently.
- Add strawberries and using a rubber spatula gently fold them into the dough. Don’t worry if some of the berries break up a bit.: When you fold in the quartered strawberries , expect bits of pink juice to streak through the dough, which is fine and adds flavor. Folding gently keeps the berries from completely disintegrating while still distributing them. The reason for the gentle touch is to avoid releasing too much moisture into the dough, which would make the scones dense. A common mistake is stirring aggressively, which turns the dough gummy. Use a flexible spatula and only fold until the berries are evenly spread.
- Empty the loose dough out onto a clean, floured work surface, then shape the dough into an 8-inch circle. You may need to knead the mixture a few times to get it to a workable texture.: When you turn the dough out it will feel slightly shaggy and cool to the touch from the cold butter . Lightly flour the surface and gently press the dough into an 8-inch disk, folding a few times to bring it together. This quick shaping layered technique encourages flakiness by preserving pieces of butter. Avoid heavy kneading which warms the dough and breaks down flakiness. If the dough sticks, dust with a little extra flour but resist adding large amounts.
- Cut the dough into 8 wedges and carefully transfer them to the prepared sheet, placing them 2" apart.: As you slice the disk into wedges you will see clean, sharp edges that help the scones bake evenly and brown on the exposed sides. Transferring them with care preserves shape and prevents squashing the layers. Give them room because they expand slightly as the steam from the cold butter causes lift. A common oversight is crowding the pan, which results in uneven baking and soft sides where they touch. Use a thin spatula to gently move each wedge.
- Lightly brush each scone with the egg wash, then sprinkle the tops with sugar.: Brushing on the beaten egg mixed with water gives the scones a glossy, golden finish and helps the sprinkling sugar adhere. You will notice a slight sheen once brushed, and the sugar will glint on top. The egg wash also aids in browning to create a pleasing contrast between crust and interior. Avoid dousing the tops, which can cause runny wash to pool and lead to uneven baking. A gentle, even brush stroke is all you need.
- Bake for 18 minutes, or until light golden brown.: While baking, enjoy the warm aroma of baked flour and caramelizing sugars. The edges should become lightly golden and the tops set with a slightly crisp exterior. This hot environment creates steam that puffs the scones. A common error is underbaking, leaving them doughy inside, or overbaking, which dries them out. Check for color and a gentle bounce when pressed; if the center yields too much, give them a couple more minutes.
- Allow scones to cool for 10 minutes on the baking sheet. In the meantime you can make your glaze.: Cooling briefly lets the interior set so the scones hold together when you drizzle the glaze. The surface will still be warm, which helps the glaze adhere and form a shiny coating. Resist cutting into them immediately, as the center continues to finish cooking and firms up. A mistake is slicing while piping hot, which can make crumbs and a slightly gummy interior.
- In a small bowl whisk together the heavy cream, confectioners’ sugar, vanilla, and salt. Drizzle over semi-warm scones and serve at once.: The glaze should be smooth and pourable, with a slight sheen. As you whisk the heavy cream into the confectioners' sugar , it will thin and thicken to a satiny consistency that clings to the warm scones. Drizzling over semi-warm scones allows the glaze to set with a delicate shell while some sinks into the crumb for extra sweetness. Too thin a glaze will run right off; too thick and it will look clumpy. Aim for a ribbon like flow when you lift the spoon.
Notes
- Keep everything cold: Chill the unsalted butter and use cold milk and cream to ensure pockets of fat remain intact, which produces a flakey crumb. If the kitchen is warm, briefly return the mixed dough to the fridge before shaping.
- Handle the berries gently: When folding in the strawberries, use a rubber spatula and fold just until incorporated. Over handling releases juice that can make the dough soggy and heavy.
- Test your baking powder: Fresh leaveners are vital for rise. If your baking powder has been in the pantry for a long time, substitute with fresh to avoid flat scones.
- Adjust glaze consistency: If the glaze is too thick, thin with a few drops of heavy cream or milk. If too thin, whisk in a touch more confectioners' sugar until it coats the spoon in a ribbon.
- Storage tip: Keep leftover scones in an airtight container at room temperature for up to two days. Rewarm gently in a low oven to refresh the crust before serving.