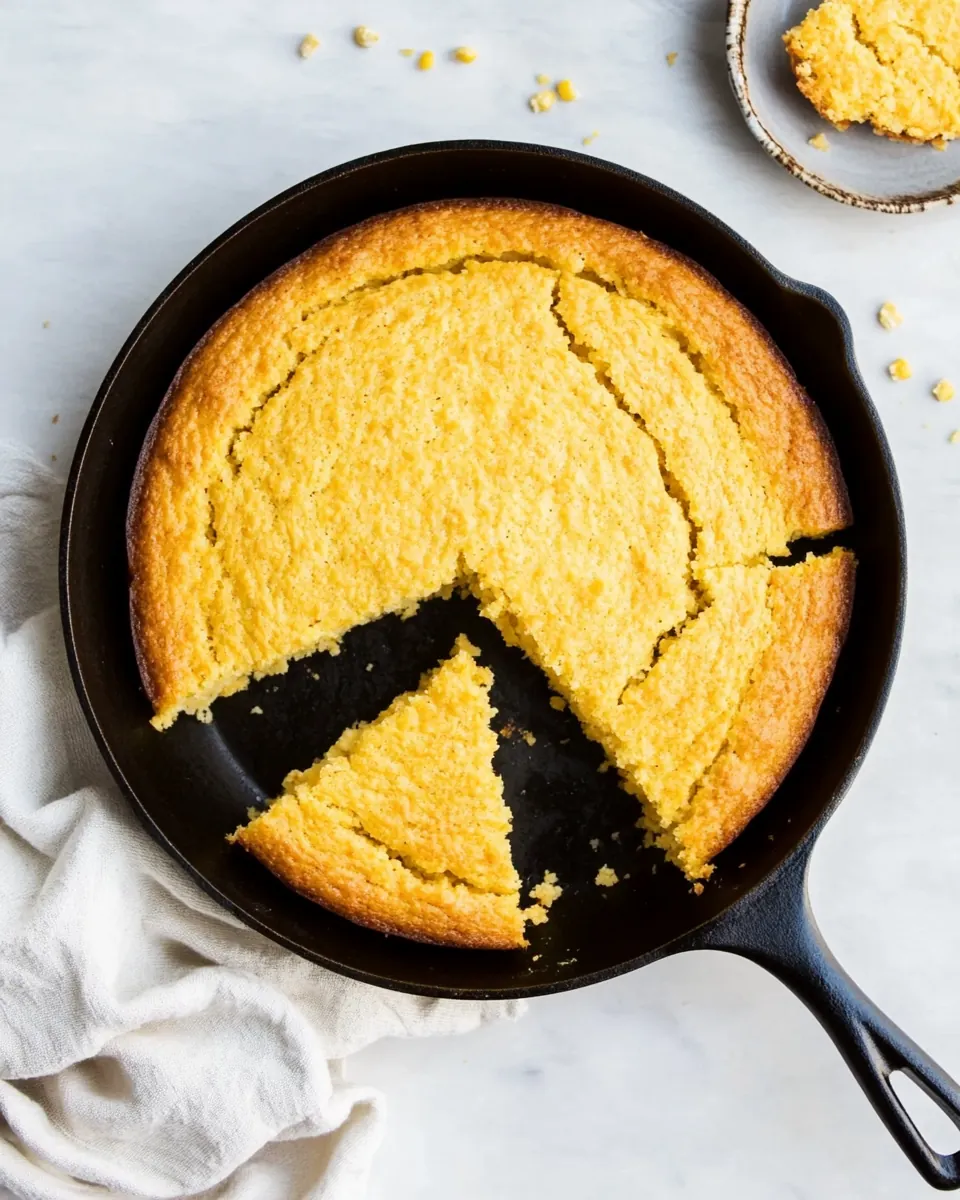
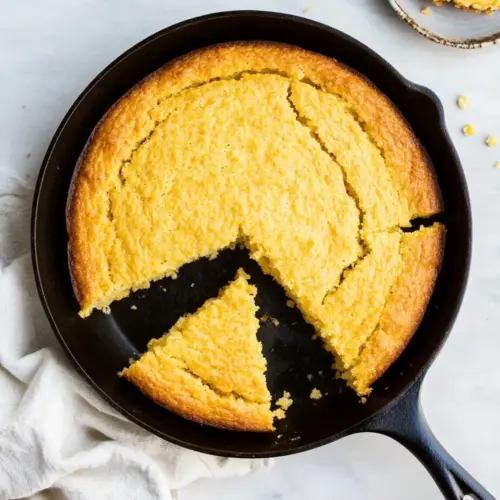
Skillet Cornbread
Skillet Cornbread has been my go to when I want something comforting, a little rustic, and totally forgiving. The very first time I made this, I remember the sound of butter sizzling in the hot cast iron and how the kitchen suddenly felt like home. I was coming back from a long week and needed food that felt honest and straightforward, and this cornbread delivered, warm and slightly sweet from the honey, with a tender crumb that begged for a smear of butter.
Over the years I’ve tweaked tiny things, but I always come back to the same basic approach. There is something quietly satisfying about measuring out cornmeal and flour, whisking the yogurt and eggs, and watching the batter become a sun colored promise. I like that it is flexible enough to be breakfast one day, a side for a stew the next, and an overnight snack later. Friends who visit tend to linger near the skillet, sharing stories as slices disappear.
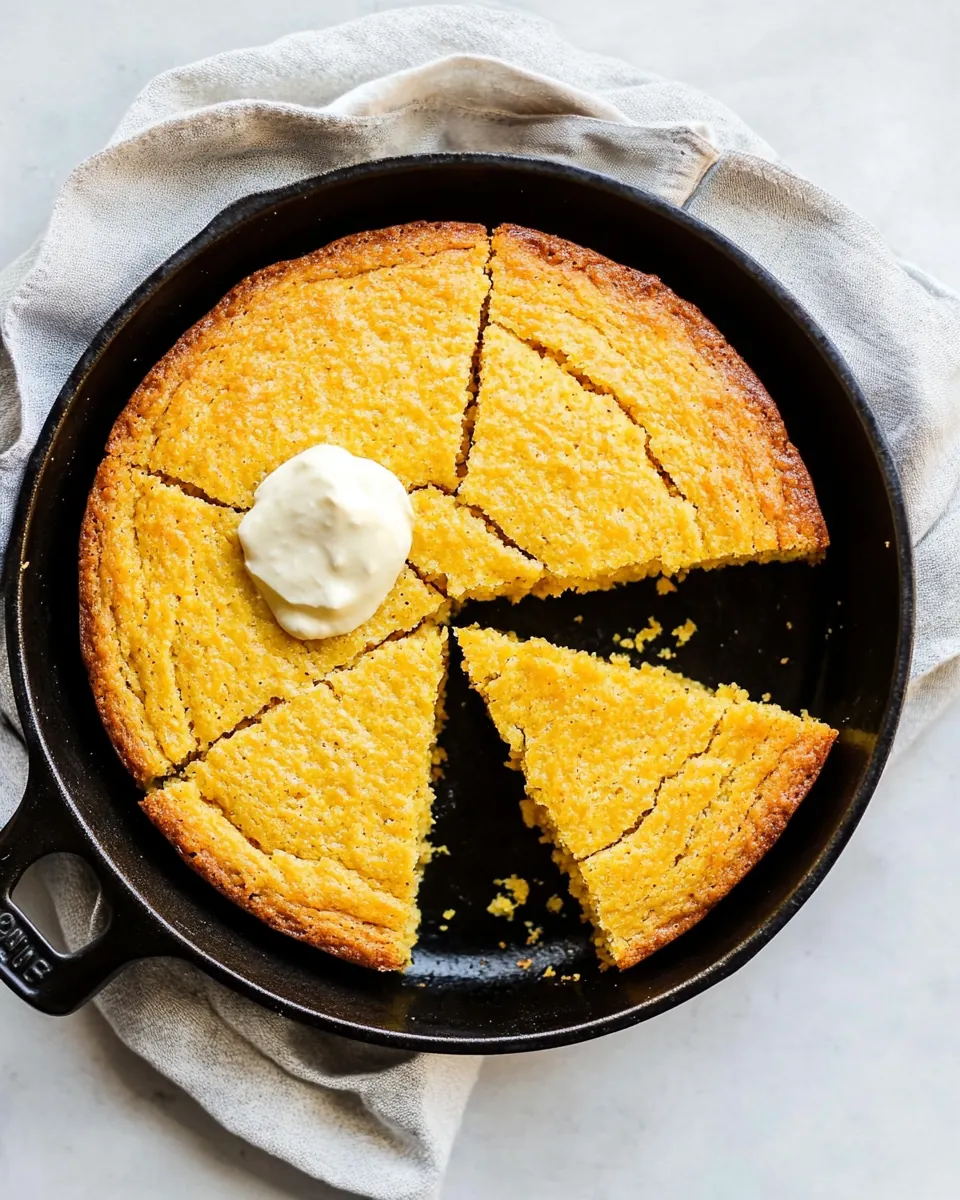
When I serve Skillet Cornbread I try to slow down, let it cool just enough to slice, and drizzle a little honey over each piece. The contrast between the crisp, buttery edges and the soft, moist interior is what keeps me coming back. There are simple rituals tied to this recipe that make it feel special beyond its ingredients, and I hope that same warmth finds your kitchen soon.
Recipe Snapshot
35 mins
15 mins
20 mins
Medium
200 kcal
American
Gluten-Free, Low FODMAP
Side Dishes
10 inch cast iron skillet, Oven, Mixing bowls, Whisk
The Beauty of This Skillet Cornbread
Golden Crisp and Tender Crumb
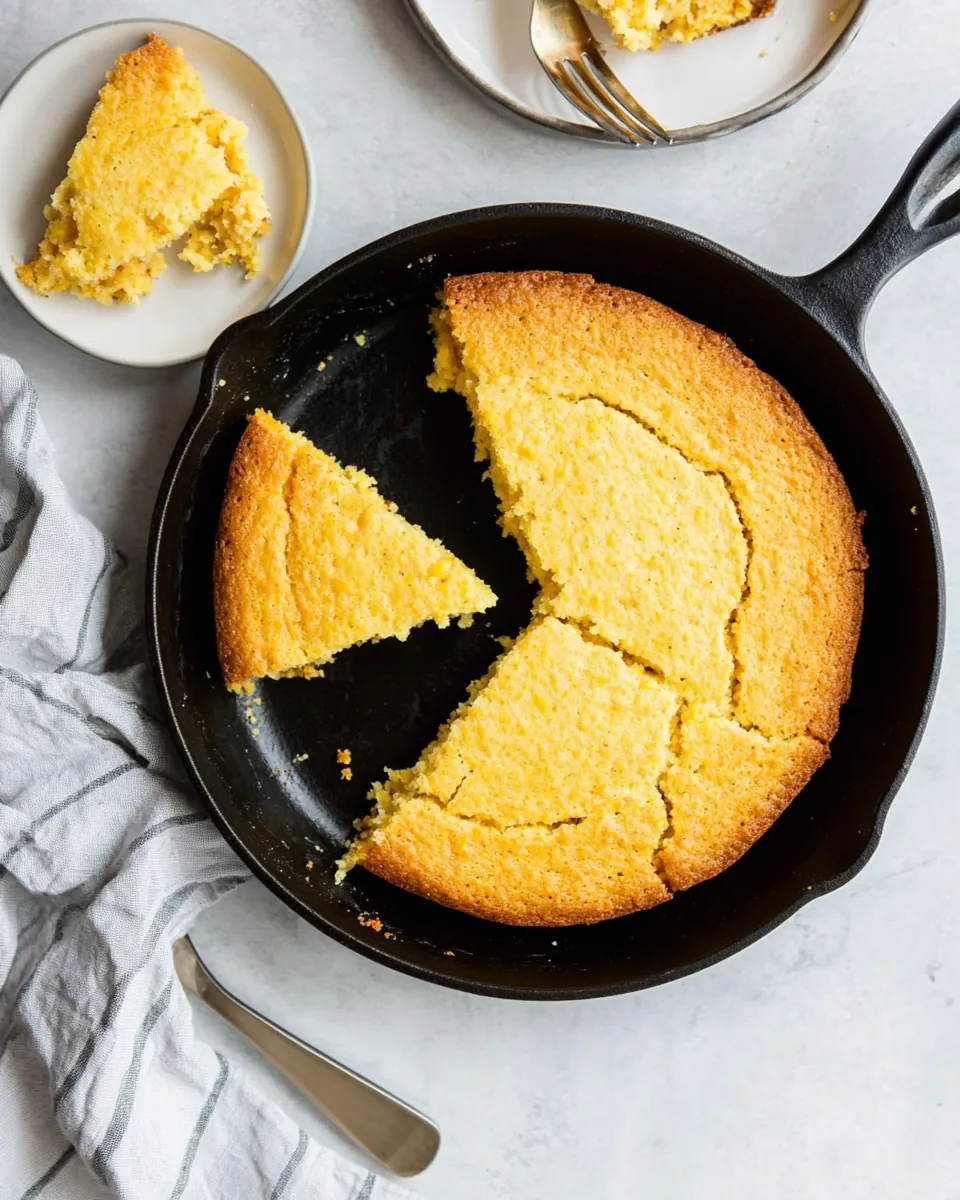
I love how Skillet Cornbread gives you both a crisp, buttery edge and a soft, tender center. The cast iron heats evenly, creating those caramelized edges that flirt with your taste buds. When you break a piece off you get a slight crunch followed by a moist interior, and that contrast is addictive. I often find myself waiting for the first crackle of that crust before I even think about slicing.
Simple, Honest Ingredients
One of the best things about this recipe is how unpretentious the ingredient list is. With staples like cornmeal, all purpose flour, eggs, and butter, you can make a memorable loaf without a specialty run to the store. I appreciate recipes that respect pantry basics, and this one celebrates them. The honey adds a gentle sweetness without competing with the corn flavor.
Quick and Flexible
From mixing to serving, Skillet Cornbread moves quickly. It is one of those reliable recipes I turn to when time is short but I want something that feels homemade. I often rest the batter briefly while the oven and skillet heat up, which is an easy habit to form and improves the final texture. If I need to plan ahead, I will refrigerate the batter overnight, and it still behaves beautifully.
Great for Sharing
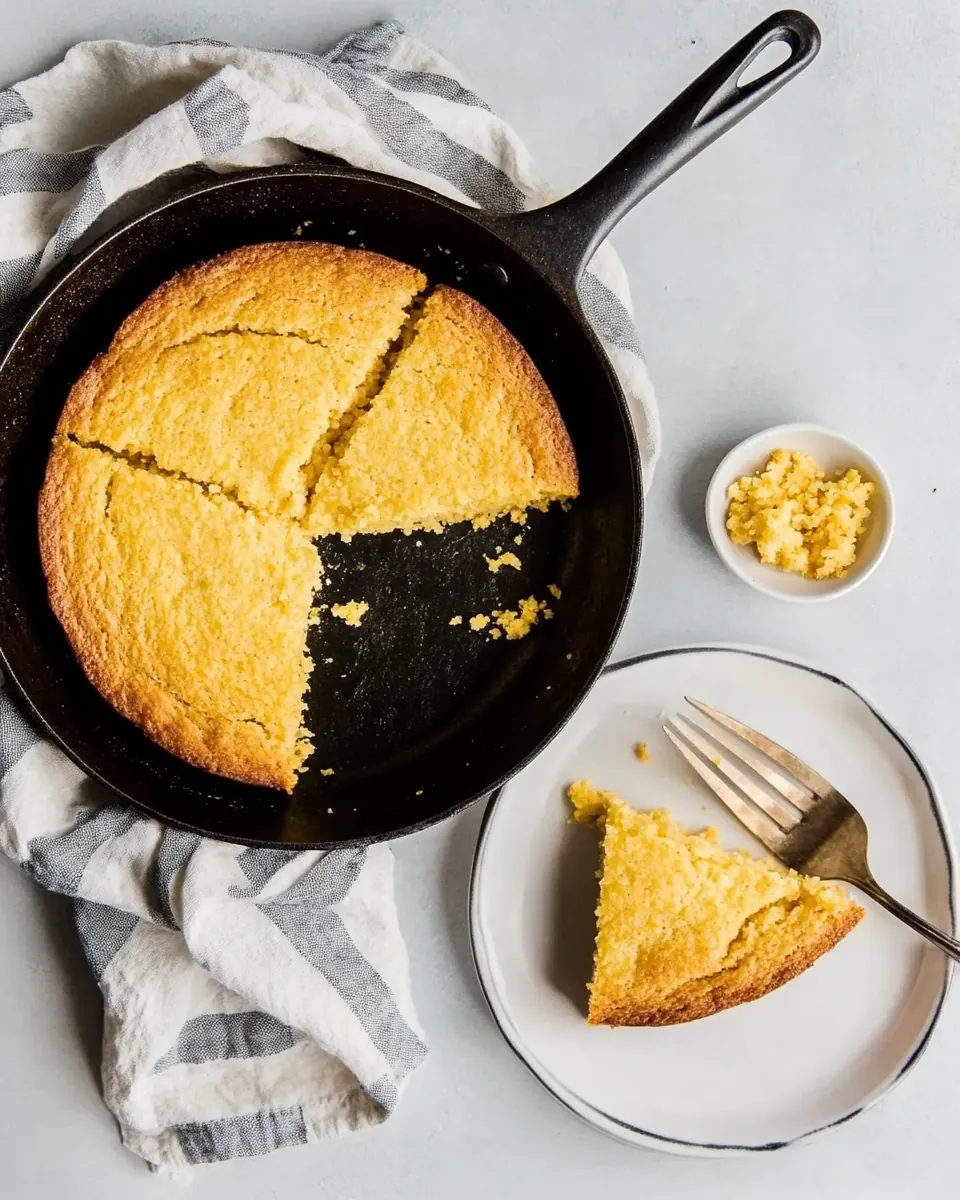
This cornbread is naturally communal, served straight from the skillet. I like the casual, welcoming vibe it creates. Whether it is a family dinner or a friendly potluck, the skillet presentation invites people to help themselves. It also stores well, which means there is often a second round of enjoyment the next day, warmed and spread with a little extra butter and honey.
Comfort Food Cred
Finally, the emotional power of Skillet Cornbread is real. It is the kind of food that calms a busy day, pairs with soups and braises, and encourages conversation. I make it when I want to slow down with a bowl and a book, and I also bring it to gatherings when I want something universally liked. It is humble, honest, and reliably satisfying.
Ingredients Required for Skillet Cornbread
These ingredients play off one another in a straightforward way. The texture relies on the combo of cornmeal for grit and flavor and all purpose flour for structure, while Greek yogurt and milk keep the interior tender. Butter enriches and crisps the edges, and a touch of honey brightens the overall profile. Each component has a clear role in making the final slice both comforting and balanced.
- 8 tablespoons unsalted butter divided: Melted and divided to provide both a skillet coating and a rich, buttery flavor, contributing moisture and a tender crumb to the cornbread. Use part to grease the hot skillet before pouring the batter and reserve some to dot the top for a glossy finish after baking. Adds depth of flavor and helps achieve a crisp, golden crust.
- 1 cup plain Greek yogurt: Thick and tangy, adds moisture and tenderizes the crumb while contributing a subtle acidity that balances the sweetness. Helps create a moist, cake-like texture and reacts with baking soda to give lightness. Also adds protein and a slight chew for a satisfying bite.
- 1/2 cup milk I used 1%; use whole if you have it: Thin and neutral-flavored liquid used to adjust batter consistency for proper pourability and moistness; whole milk will enrich the flavor further. Helps hydrate dry ingredients and contributes to a tender texture. Can be substituted with similar dairy for slight variation in richness.
- 1/4 cup honey: Liquid sweetener that provides gentle sweetness and helps keep the cornbread moist while contributing a subtle floral note. Helps with browning and gives a sticky, glossy finish when brushed on warm bread. Balances the savory elements without overpowering the corn flavor.
- 2 large eggs: Brought to room temperature and beaten to incorporate air and structure, eggs help bind ingredients and set the crumb as the bread bakes. Provide richness and stability to the batter while contributing to leavening when combined with baking powder and soda. Also improves color and mouthfeel.
- 1 1/2 cups medium or coarse ground cornmeal: Coarse or medium–ground base that gives cornbread its signature grainy texture and earthy corn flavor, forming the foundation of the recipe. Absorbs liquids and holds structure, creating a slightly crumbly but tender interior. Choose texture based on preferred mouthfeel.
- 1 cup all-purpose flour: Provides structure and gluten to help the cornbread hold together while balancing the graininess of the cornmeal. Lightens the texture slightly and contributes to a cake-like crumb when combined with the cornmeal. Also helps the batter rise evenly.
- 2 tablespoons granulated sugar: Granulated sweetener used sparingly to enhance overall sweetness and promote browning of the crust. Balances savory and tangy components without making the bread overtly sweet. Dissolves into the batter for uniform flavor.
- 2 1/2 teaspoons baking powder: Chemical leavening agent that produces carbon dioxide to help the batter rise, creating a light and tender crumb. Works quickly when combined with wet ingredients to give lift during baking. Essential for achieving a soft interior.
- 1/2 teaspoon baking soda: Secondary leavening agent that reacts with the yogurt's acidity to provide additional lift and a finer crumb. Helps balance pH and supports the baking powder for a well-risen texture. Use measured amounts to avoid soapy or metallic taste.
- 1 1/4 teaspoons kosher salt: Seasoning that enhances overall flavor and balances sweetness while strengthening gluten formation slightly for structure. Helps define the savory notes and brings out the corn and butter flavors without being overtly salty. Use measured amount for proper savory balance.
- More butter and honey for serving (optional): Optional finishing additions to serve alongside the cornbread for extra richness and sweetness that complement the loaf. Brushing more butter creates a glossy, indulgent crust while honey adds sticky sweetness and flavor contrast. Allow guests to add to taste for personalized servings.
Instructions for Skillet Cornbread
These directions are friendly and approachable, meant to guide you through each tactile moment from melting butter to slicing a warm wedge. Take your time with the skillet heating, because that step builds the texture contrast that makes this recipe sing. Keep a mindful eye on timing and watch for the visual cues the oven gives you.
- Melt the butter in a small bowl and let cool to room temperature.: The aroma of melting butter is rich and nutty, and allowing it to cool slightly prevents the eggs and yogurt from curdling when mixed. You will notice a glossy shimmer as the butter melts, with a faint nutty scent if cooked gently. The reason this matters is that very hot fat can scramble proteins in the wet ingredients, so cooling ensures a smooth batter. A common mistake is using butter that is still too hot, which can cause separation or a grainy texture. If that happens, let the mixture rest a bit longer until it is merely warm to the touch.
- In a medium bowl, whisk together the yogurt, milk, honey, and eggs, until smoothly combined.: As you whisk, the mixture will become silky and slightly aerated, with the honey dissolving and the eggs blending into a uniform pale batter. This smoothness helps with even distribution into the dry mix, so it is worth taking a minute. The whisk will leave faint ribbons that settle quickly, indicating good integration. If you skip adequate whisking, you may end up with streaks of unmixed ingredients, which can create pockets of uneven texture in the final cornbread.
- In a large mixing bowl, combine the cornmeal, flour, sugar, baking powder, baking soda, and salt.: When you stir these dry ingredients you will see the grainy cornmeal and the fine flour come together into a uniform pale mixture. Breaking up lumps now prevents dense spots after baking. The dry aroma is slightly toasty from the cornmeal , and sifting or whisking helps distribute the leavening evenly. A common error is under mixing the dry ingredients, which can cause uneven rising, so give them a thorough stir.
- Pour the wet ingredients into the dry ingredients and stir gently, just until you only have a few streaks of flour remaining. Pour in 7 tablespoons of the butter (reserve the remaining tablespoon for the skillet—you can eyeball it). Fold gently, just until combined. Let the batter rest while you preheat the oven (the resting time will make your cornbread even more tender! You can also refrigerate it overnight at this point; let come to room temperature prior to baking).: At this stage the batter should look rustic and slightly lumpy, not overly worked. The cornmeal will lend a grainy, sun colored texture and the batter will thicken as you fold. Resting allows the dry ingredients to hydrate so the crumb becomes tender and consistent; you will notice the batter mellow and become slightly more cohesive after sitting. If you overmix, gluten development from the flour can make the cornbread tough, so folding just to combine is essential. One slip is stirring until perfectly smooth, which kills the lightness, so avoid that temptation. Refrigerating overnight is handy and can deepen flavor, but be sure to bring it back to room temperature before baking for even oven performance.
- Place a rack in the center of your oven. Place a 10-inch cast iron skillet on the rack and preheat the oven to 425°F with the skillet in it.: Heating the skillet until it is screaming hot is what forms the crisp, caramelized edges that are the hallmark of Skillet Cornbread . You will hear a faint hum as the oven reaches temperature, and the cast iron will radiate retained heat. The very hot pan meets the batter and starts cooking the exterior immediately upon contact, which helps produce that golden crust. A typical misstep is not preheating the skillet, which leads to a pale, soft edge instead of the desired crispness. Use oven mitts and a sturdy surface when handling the heated skillet.
- Very carefully remove the hot skillet from the oven. Reduce oven temperature to 375°F. Coat the bottom and sides of the hot skillet with the remaining 1 tablespoon butter.: The moment you pour melted butter into the hot pan you will see it sizzle and spread, forming a glossy pool that smells fragrant and toasty. Coating the sides helps the batter release and ensures a buttery crust. Reducing the oven temperature prevents over browning while still allowing a thorough bake. One common mistake is splashing cool batter into a too hot skillet and creating steam pockets, so pour steadily and cautiously to avoid spatters.
- Carefully pour the batter into the buttered skillet and transfer the skillet back to the center rack. Bake until the center of the cornbread is firm to the touch and a toothpick inserted in its center comes out clean, 22 to 25 minutes. Let cool 10 or so minutes, then slice and serve right from the skillet with additional butter and honey.: As the batter hits the hot butter , you may hear a soft hiss, and the edges will begin to bubble and brown in the oven. The aroma will intensify, filling your kitchen with a warm, toasty scent that hints at caramelized sugars and roasted corn. Visual cues matter here the top should be golden and slightly domed, and a gentle press in the center should feel set. Removing it too early yields a gummy interior, and leaving it too long risks dryness, so watch for that clean toothpick test. Letting it rest allows the crumb to finish setting, and slicing after a brief cool down gives neat wedges that hold together for serving.
Ways to Customize
The base of this recipe is wonderfully adaptable, and small tweaks can shift the mood without losing the recipe’s soul. Below are practical, tested ideas to personalize your Skillet Cornbread, each with a clear focus and method so you can experiment confidently.
- Swap milk fat for creamier texture: Using whole milk instead of lower fat versions will give the batter a silkier mouthfeel and slightly richer flavor, especially helpful if you prefer a more luxurious crumb.
- Adjust sweetness with honey: Increase or decrease the honey to tune the sweetness level, remembering that more honey also encourages deeper browning on the crust.
- Use Greek yogurt for tang and moisture: The thicker Greek yogurt keeps the interior moist while adding subtle tang, which balances the sweetness and enhances overall depth.
- Choose your cornmeal grind: Medium or coarse cornmeal gives a rustic, satisfying texture, while a finer grind yields a softer, less gritty bite if you prefer that mouthfeel.
- Reserve butter for skillet crisp: Holding back one tablespoon of butter to grease the skillet ensures that instant sizzle and caramelization at contact, producing the signature crisp edge.
- Make ahead and refrigerate: Resting the batter briefly or letting it chill overnight produces a more tender crumb and allows flavor to develop, just bring it to room temperature before baking.
Serving Options for Skillet Cornbread
This cornbread pairs beautifully with a wide range of dishes and occasions. It can act as a hearty side at dinner, a warming breakfast accompaniment, or a simple snack with coffee and conversation. Below are serving ideas and storage tips to keep your slices tasting fresh and inviting.
- With soups and stews: Serve a wedge alongside a bowl of hearty stew or chili, allowing the cornbread to soak up broths and add textural contrast.
- Breakfast spread: Offer slices with softened butter and extra honey, alongside coffee or tea for a cozy morning treat.
- Casual dinners: Present the cornbread straight from the skillet as a rustic accompaniment to roasted vegetables and mains, encouraging family style serving.
- Potlucks and gatherings: The skillet presentation makes this ideal for sharing at potlucks, where warm slices and a small knife invite communal serving.
- Storage in the fridge: Keep leftovers in an airtight container in the refrigerator for up to 4 days to preserve moisture and flavor.
- Freezing slices: Cool completely, wrap slices tightly, and freeze for up to 6 months; thaw overnight in the refrigerator before reheating.
- Reheating: Bring the cornbread to room temperature before serving or reheat in a 350 degree F oven until warm to restore that fresh baked texture.
FAQ
Conclusion
Skillet Cornbread stands out because it balances crisp edges with a tender, moist interior using simple pantry ingredients. You get a rustic loaf that is fast to prepare yet full of comforting flavor, from the toasted cornmeal to the richness of melted butter and the faint sweetness of honey. Give it a try the next time you want a dependable side that feels homemade and inviting. Slice it warm, drizzle with honey, and enjoy the whole room pausing for just a moment as people reach for seconds.
Skillet Cornbread
Equipment
- 10-inch cast iron skillet
- Oven
- Mixing Bowls
- Whisk
Ingredients
- 8 tablespoons unsalted butter divided Melted and divided to provide both a skillet coating and a rich, buttery flavor, contributing moisture and a tender crumb to the cornbread. Use part to grease the hot skillet before pouring the batter and reserve some to dot the top for a glossy finish after baking. Adds depth of flavor and helps achieve a crisp, golden crust.
- 1 cup plain Greek yogurt Thick and tangy, adds moisture and tenderizes the crumb while contributing a subtle acidity that balances the sweetness. Helps create a moist, cake-like texture and reacts with baking soda to give lightness. Also adds protein and a slight chew for a satisfying bite.
- 1/2 cup milk I used 1%; use whole if you have it Thin and neutral-flavored liquid used to adjust batter consistency for proper pourability and moistness; whole milk will enrich the flavor further. Helps hydrate dry ingredients and contributes to a tender texture. Can be substituted with similar dairy for slight variation in richness.
- 1/4 cup honey Liquid sweetener that provides gentle sweetness and helps keep the cornbread moist while contributing a subtle floral note. Helps with browning and gives a sticky, glossy finish when brushed on warm bread. Balances the savory elements without overpowering the corn flavor.
- 2 large eggs Brought to room temperature and beaten to incorporate air and structure, eggs help bind ingredients and set the crumb as the bread bakes. Provide richness and stability to the batter while contributing to leavening when combined with baking powder and soda. Also improves color and mouthfeel.
- 1 1/2 cups medium or coarse ground cornmeal Coarse or medium-ground base that gives cornbread its signature grainy texture and earthy corn flavor, forming the foundation of the recipe. Absorbs liquids and holds structure, creating a slightly crumbly but tender interior. Choose texture based on preferred mouthfeel.
- 1 cup all-purpose flour Provides structure and gluten to help the cornbread hold together while balancing the graininess of the cornmeal. Lightens the texture slightly and contributes to a cake-like crumb when combined with the cornmeal. Also helps the batter rise evenly.
- 2 tablespoons granulated sugar Granulated sweetener used sparingly to enhance overall sweetness and promote browning of the crust. Balances savory and tangy components without making the bread overtly sweet. Dissolves into the batter for uniform flavor.
- 2 1/2 teaspoons baking powder Chemical leavening agent that produces carbon dioxide to help the batter rise, creating a light and tender crumb. Works quickly when combined with wet ingredients to give lift during baking. Essential for achieving a soft interior.
- 1/2 teaspoon baking soda Secondary leavening agent that reacts with the yogurt's acidity to provide additional lift and a finer crumb. Helps balance pH and supports the baking powder for a well-risen texture. Use measured amounts to avoid soapy or metallic taste.
- 1 1/4 teaspoons kosher salt Seasoning that enhances overall flavor and balances sweetness while strengthening gluten formation slightly for structure. Helps define the savory notes and brings out the corn and butter flavors without being overtly salty. Use measured amount for proper savory balance.
- More butter and honey optional for serving Optional finishing additions to serve alongside the cornbread for extra richness and sweetness that complement the loaf. Brushing more butter creates a glossy, indulgent crust while honey adds sticky sweetness and flavor contrast. Allow guests to add to taste for personalized servings.
Instructions
- Melt the butter in a small bowl and let cool to room temperature.: The aroma of melting butter is rich and nutty, and allowing it to cool slightly prevents the eggs and yogurt from curdling when mixed. You will notice a glossy shimmer as the butter melts, with a faint nutty scent if cooked gently. The reason this matters is that very hot fat can scramble proteins in the wet ingredients, so cooling ensures a smooth batter. A common mistake is using butter that is still too hot, which can cause separation or a grainy texture. If that happens, let the mixture rest a bit longer until it is merely warm to the touch.
- In a medium bowl, whisk together the yogurt, milk, honey, and eggs, until smoothly combined.: As you whisk, the mixture will become silky and slightly aerated, with the honey dissolving and the eggs blending into a uniform pale batter. This smoothness helps with even distribution into the dry mix, so it is worth taking a minute. The whisk will leave faint ribbons that settle quickly, indicating good integration. If you skip adequate whisking, you may end up with streaks of unmixed ingredients, which can create pockets of uneven texture in the final cornbread.
- In a large mixing bowl, combine the cornmeal, flour, sugar, baking powder, baking soda, and salt.: When you stir these dry ingredients you will see the grainy cornmeal and the fine flour come together into a uniform pale mixture. Breaking up lumps now prevents dense spots after baking. The dry aroma is slightly toasty from the cornmeal , and sifting or whisking helps distribute the leavening evenly. A common error is under mixing the dry ingredients, which can cause uneven rising, so give them a thorough stir.
- Pour the wet ingredients into the dry ingredients and stir gently, just until you only have a few streaks of flour remaining. Pour in 7 tablespoons of the butter (reserve the remaining tablespoon for the skillet—you can eyeball it). Fold gently, just until combined. Let the batter rest while you preheat the oven (the resting time will make your cornbread even more tender! You can also refrigerate it overnight at this point; let come to room temperature prior to baking).: At this stage the batter should look rustic and slightly lumpy, not overly worked. The cornmeal will lend a grainy, sun colored texture and the batter will thicken as you fold. Resting allows the dry ingredients to hydrate so the crumb becomes tender and consistent; you will notice the batter mellow and become slightly more cohesive after sitting. If you overmix, gluten development from the flour can make the cornbread tough, so folding just to combine is essential. One slip is stirring until perfectly smooth, which kills the lightness, so avoid that temptation. Refrigerating overnight is handy and can deepen flavor, but be sure to bring it back to room temperature before baking for even oven performance.
- Place a rack in the center of your oven. Place a 10-inch cast iron skillet on the rack and preheat the oven to 425°F with the skillet in it.: Heating the skillet until it is screaming hot is what forms the crisp, caramelized edges that are the hallmark of Skillet Cornbread . You will hear a faint hum as the oven reaches temperature, and the cast iron will radiate retained heat. The very hot pan meets the batter and starts cooking the exterior immediately upon contact, which helps produce that golden crust. A typical misstep is not preheating the skillet, which leads to a pale, soft edge instead of the desired crispness. Use oven mitts and a sturdy surface when handling the heated skillet.
- Very carefully remove the hot skillet from the oven. Reduce oven temperature to 375°F. Coat the bottom and sides of the hot skillet with the remaining 1 tablespoon butter.: The moment you pour melted butter into the hot pan you will see it sizzle and spread, forming a glossy pool that smells fragrant and toasty. Coating the sides helps the batter release and ensures a buttery crust. Reducing the oven temperature prevents over browning while still allowing a thorough bake. One common mistake is splashing cool batter into a too hot skillet and creating steam pockets, so pour steadily and cautiously to avoid spatters.
- Carefully pour the batter into the buttered skillet and transfer the skillet back to the center rack. Bake until the center of the cornbread is firm to the touch and a toothpick inserted in its center comes out clean, 22 to 25 minutes. Let cool 10 or so minutes, then slice and serve right from the skillet with additional butter and honey.: As the batter hits the hot butter , you may hear a soft hiss, and the edges will begin to bubble and brown in the oven. The aroma will intensify, filling your kitchen with a warm, toasty scent that hints at caramelized sugars and roasted corn. Visual cues matter here the top should be golden and slightly domed, and a gentle press in the center should feel set. Removing it too early yields a gummy interior, and leaving it too long risks dryness, so watch for that clean toothpick test. Letting it rest allows the crumb to finish setting, and slicing after a brief cool down gives neat wedges that hold together for serving.
Notes
- Swap milk fat for creamier texture: Using whole milk instead of lower fat versions will give the batter a silkier mouthfeel and slightly richer flavor, especially helpful if you prefer a more luxurious crumb.
- Adjust sweetness with honey: Increase or decrease the honey to tune the sweetness level, remembering that more honey also encourages deeper browning on the crust.
- Use Greek yogurt for tang and moisture: The thicker Greek yogurt keeps the interior moist while adding subtle tang, which balances the sweetness and enhances overall depth.
- Choose your cornmeal grind: Medium or coarse cornmeal gives a rustic, satisfying texture, while a finer grind yields a softer, less gritty bite if you prefer that mouthfeel.
- Reserve butter for skillet crisp: Holding back one tablespoon of butter to grease the skillet ensures that instant sizzle and caramelization at contact, producing the signature crisp edge.
- Make ahead and refrigerate: Resting the batter briefly or letting it chill overnight produces a more tender crumb and allows flavor to develop, just bring it to room temperature before baking.