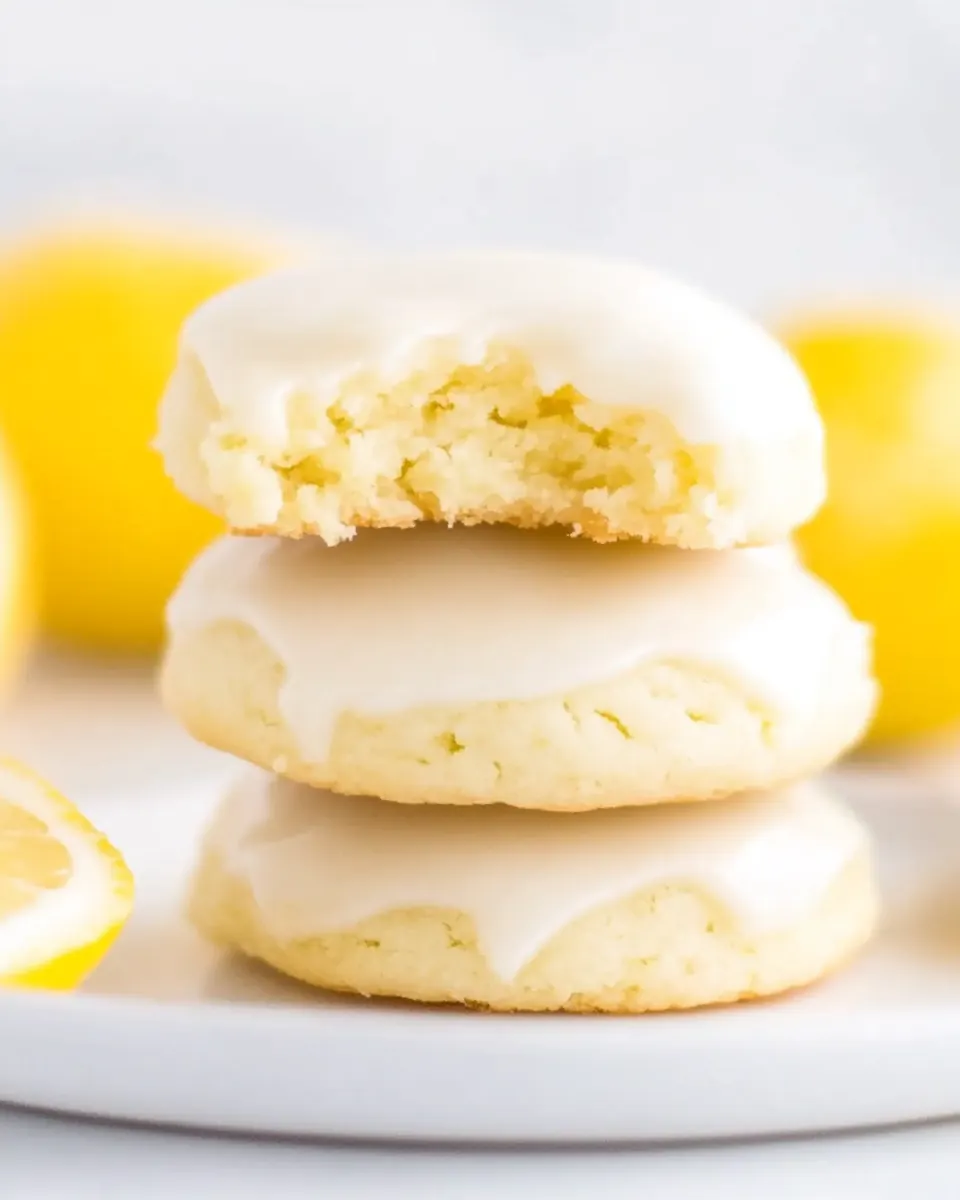
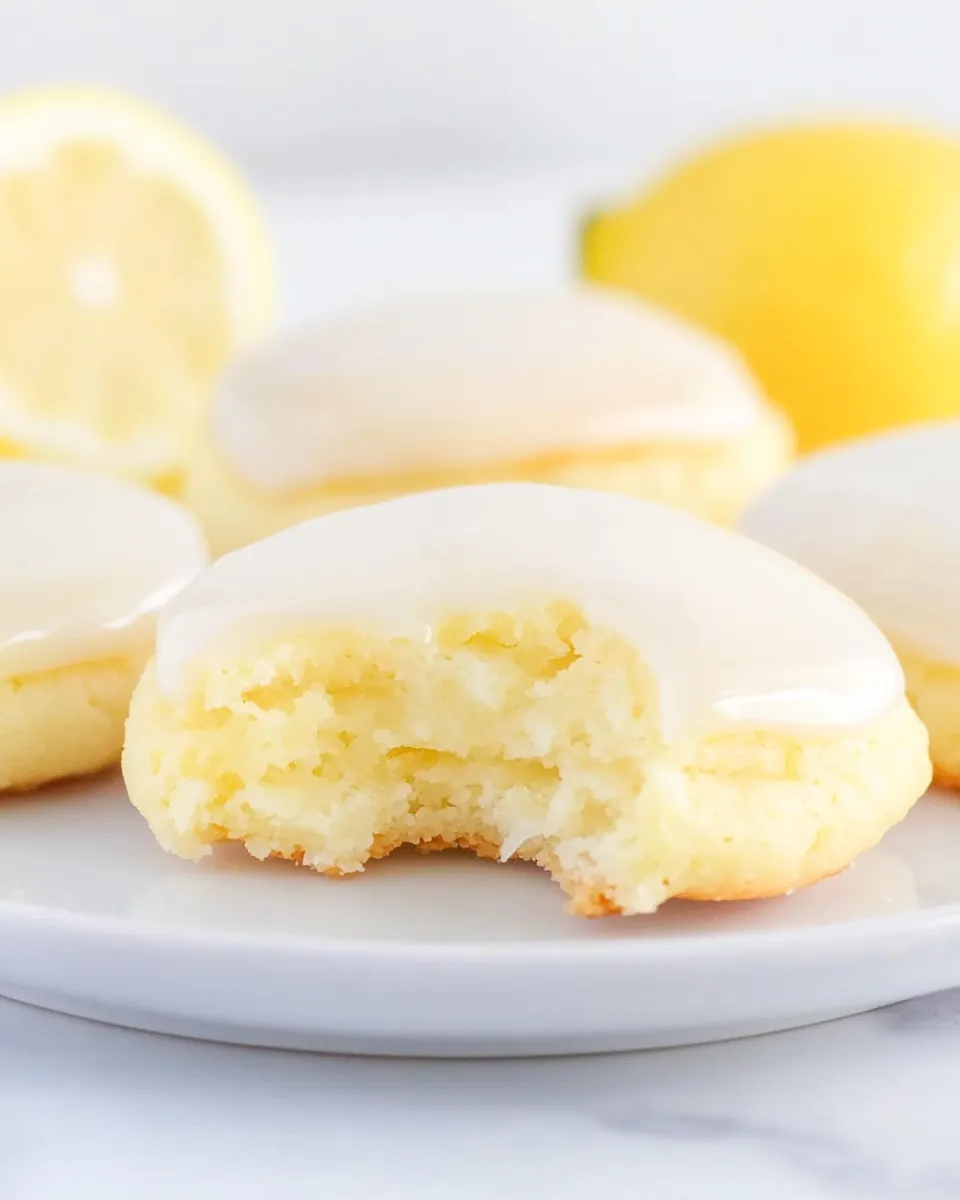
Soft Lemon Cookies
Soft Lemon Cookies have been my go to whenever I want a bright, tender treat that feels both simple and celebratory. I first baked them on a rainy afternoon when I needed something cheerful to bring to a neighbor who had just moved in, and the soft crumb paired with the glossy lemon glaze felt like a tiny welcome note in cookie form.
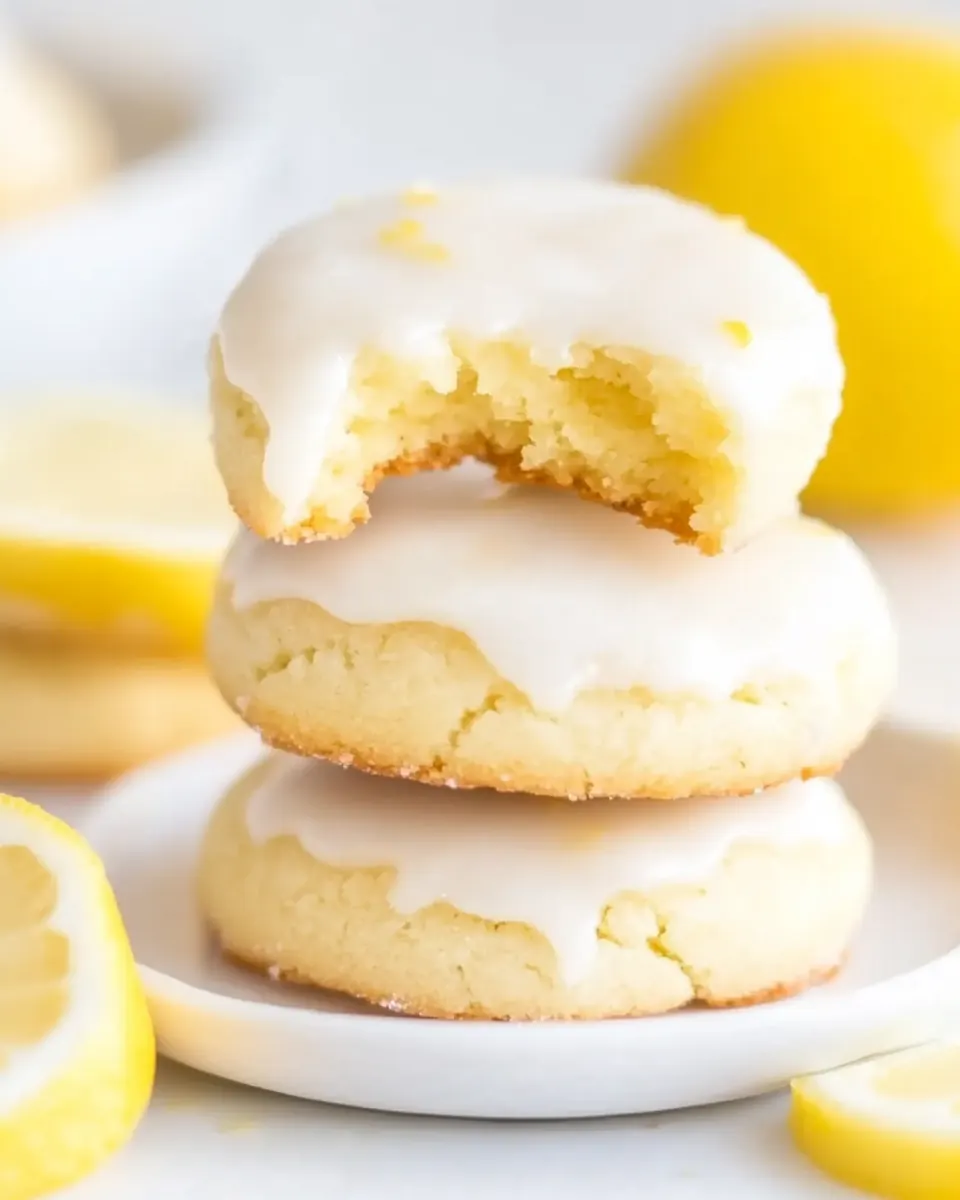
The second time I made these Soft Lemon Cookies, I experimented with chilling the dough a touch longer and watching the edges very closely in the oven. That extra patience turned out to be a small trick that made the centers pillowy while the bottoms took on just a whisper of color, creating the exact texture I wanted. I remember standing at the counter, arms folded, smiling as the citrus scent swept through the kitchen, and thinking that sometimes the simplest combinations are the most memorable.
When friends ask for an easy dessert that still reads as thoughtful, I hand them the recipe for these Soft Lemon Cookies. They are forgiving, fast to make, and the glaze is adaptable if you like it thinner or thicker. Over time I learned a few rhythms that keep the cookies reliably soft, and I love sharing those small habits because they make a big difference. If you enjoy cookies that are delicate rather than crispy, and a glaze that brightens every bite, this recipe will likely become one you reach for again and again.
Recipe Snapshot
36 mins
25 mins
11 mins
Medium
120 kcal
American
Gluten-Free, Low FODMAP
Desserts
Electric mixer, Mixing bowls, Baking sheet, Parchment paper, Wire cookie rack, Medium cookie scoop, Microplane or grater
Why This Soft Lemon Cookies Is a Winner
Light but indulgent texture
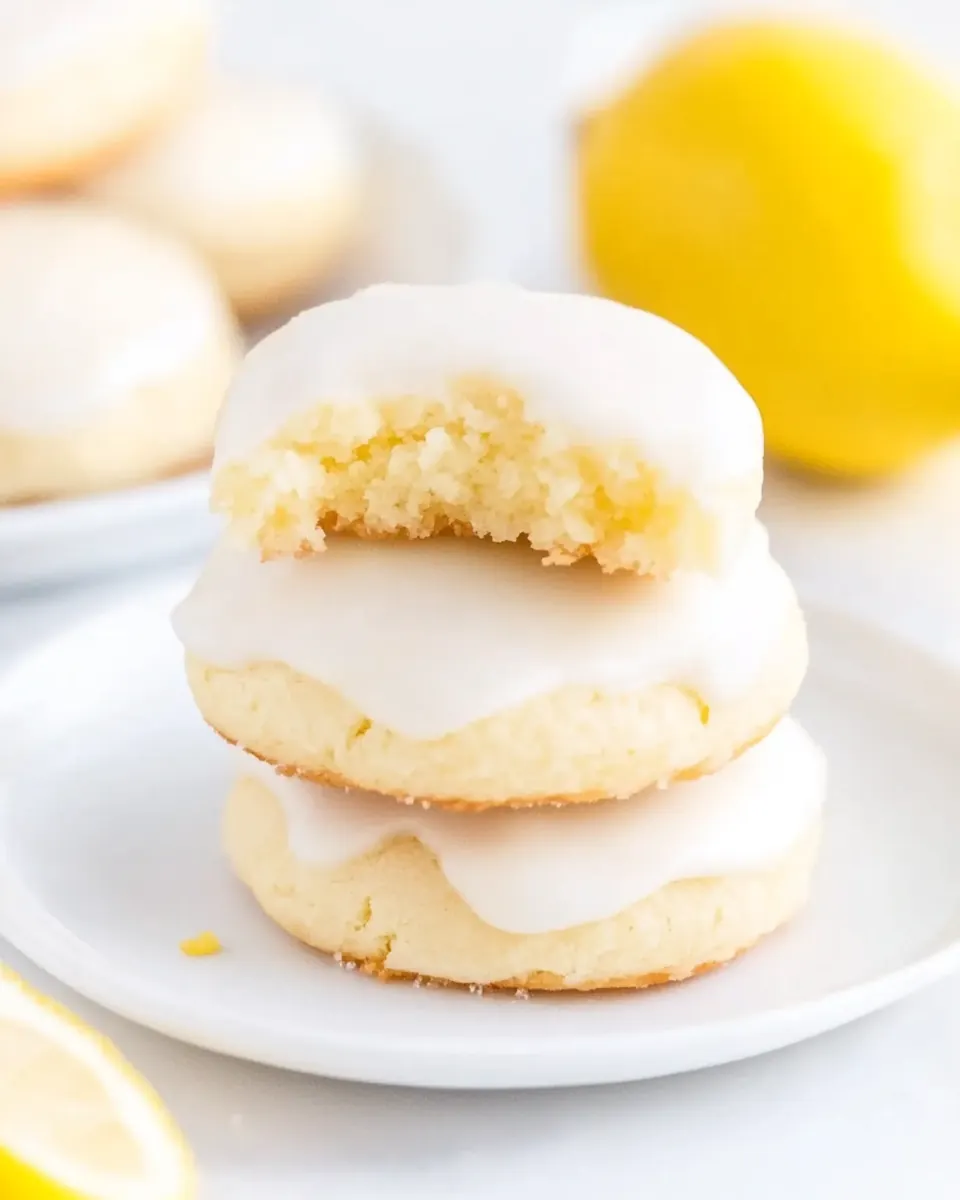
I love how these Soft Lemon Cookies manage to feel both lightweight and indulgent. The dough yields tender centers because of the balance of butter, sugar, and just the right amount of flour. The result is a cookie that almost melts on your tongue, and I often catch myself savoring the crumb after the first bite.
Fresh citrus brightness
We get a genuine lemon presence from both lemon zest and lemon juice, so the flavor is layered rather than one dimensional. I appreciate that the zest adds aromatic oils while the juice brings clean acidity, so every bite has that sunshiny pop without tasting artificial.
Kid friendly and crowd pleasing
These cookies are a reliable choice for gatherings because they are soft enough for little hands and elegant enough for grownups. I have brought them to bake sales and family brunches, and people always comment on the texture and glaze. They travel well when stored properly, which makes them ideal for potlucks.
Flexible and forgiving method
I rarely worry about small timing slips with this recipe. Chilling the dough briefly and watching the oven cues makes it forgiving, and the glaze can be adjusted with a splash more milk if you want it thinner. That flexibility makes it a go to for weekday baking when you do not have rigid timing.
Simple pantry ingredients
What I truly appreciate is how these cookies use accessible staples like butter, sugar, and flour, with lemon giving them an elevated profile. You do not need specialty items to create something that looks and tastes like a bakery treat.
What to Gather for Soft Lemon Cookies
These ingredients are purposeful and straightforward. The recipe leans on classic baking building blocks to create structure, and citrus components deliver aroma and bright flavor. Think of the dry ingredients as the backbone and the wet ingredients as the voice that makes these cookies sing.
- 1 cup butter unsalted: Cream together to provide a rich, tender base for the cookie dough; unsalted butter lets you control overall saltiness. Soften to room temperature before mixing to ensure even incorporation and a smooth texture.
- 1 cup white sugar: Sweeten the dough and help with structure by creating air pockets when creamed with butter; white sugar promotes spreading and browning during baking. Measure accurately to maintain cookie balance and avoid overly thin results.
- 1/4 cup powdered sugar: Lightly dust to add a subtle sweetness and help create a delicate crumb; powdered sugar dissolves quickly for a finer texture. Sift before adding to prevent lumps and ensure a smooth batter.
- 1 large egg: Bind the ingredients and add moisture while contributing to leavening and richness; a large egg helps emulsify fats and liquids. Bring to room temperature for better incorporation and uniform texture in the cookies.
- 2 tablespoons lemon juice (see notes): Brighten flavor and add acidity which enhances overall lemon taste; the juice also contributes moisture to the dough. Add as directed to balance tartness and avoid making the dough too wet.
- 1 tablespoon lemon zest: Infuse concentrated citrus aroma and potent lemon flavor; lemon zest contains essential oils that elevate freshness. Measure carefully and incorporate with the wet ingredients to distribute flavor evenly.
- 3 cups flour: Provide the main structural framework and bulk for the cookies; all-purpose flour supplies gluten that gives shape and chew. Spoon and level when measuring to avoid packing and producing dense cookies.
- 1 teaspoon baking soda: Leaven slightly to create lift and a lighter texture; baking soda reacts with acidic ingredients to produce carbon dioxide. Combine thoroughly with dry ingredients to ensure even rising and avoid metallic pockets.
- 1 teaspoon cream of tartar: Stabilize and enhance leavening by providing additional acidity; cream of tartar helps create a tender crumb and can affect chewiness. Mix well with other dry components to distribute its effect evenly throughout the dough.
- 1/2 teaspoons salt: Season and enhance flavor balance while strengthening gluten slightly; salt elevates sweetness and rounds flavors. Use the specified amount to prevent underseasoned or overly salty results.
- 4 cups powdered sugar: Sweeten and thicken a finishing glaze or icing with a fine, smooth consistency; powdered sugar dissolves readily into liquids for a glossy finish. Sift before mixing and add gradually to control glaze thickness.
- 2 teaspoons lemon zest: Concentrate citrus flavor in the glaze and reinforce lemon notes from the dough; extra lemon zest adds bright, aromatic intensity. Sprinkle or fold into the icing to maintain bursts of fresh lemon in each bite.
- 1 tablespoon lemon juice: Acidify and thin the glaze slightly while adding fresh lemon tang; a small amount of lemon juice balances the powdered sugar’s sweetness. Add sparingly and taste as you go to reach desired glaze consistency and flavor.
- 5 tablespoons milk: Thin and smooth the glaze while adding a touch of dairy richness; milk helps achieve proper pouring consistency for drizzling or dipping. Add incrementally to avoid an overly runny glaze and ensure it sets nicely on the cookies.
How to Cook Soft Lemon Cookies
These instructions will walk you through every rhythm and cue I use to turn basic pantry ingredients into soft, lemon forward cookies. I like to think of baking as a series of small checks for texture and aroma that tell you when to move to the next step. Keep your tools ready and pay attention to sensory signs, and you will have consistent results.
- Place softened butter, white sugar and powdered sugar in a large bowl. With an electric mixer cream together the butter and sugar.: The bowl will smell faintly sweet and you will notice the granular texture of the sugar against the surface of the butter . I use a large glass or metal bowl so the beaters move freely and the ingredients aerate properly. A common mistake is using a bowl that is too small which prevents proper creaming and can leave lumps. If the butter feels greasy rather than pliable, it's too warm, and the mixture will not trap enough air, producing a denser cookie.
- Add one egg, lemon juice and lemon zest to the butter and sugar mixture. Mix together the wet ingredients with an electric mixer until smooth.: At medium speed you will see the mixture lighten and become pale, and there will be a faint whirring sound as air incorporates. Creaming creates tiny air pockets that promote tenderness when baked, so take this step seriously. Over mixing on high can warm the fats, causing a softer than desired dough and more spread in the oven. Stop when the texture is light and slightly fluffy, scraping down the sides so everything is evenly combined.
- In a second large bowl add flour, baking soda, cream of tartar and salt. Mix until blended well.: The wet bowl will give off a fresh citrus scent as you add the egg , lemon juice , and lemon zest . The egg contributes richness while the acid in the lemon juice interacts with leaveners later to refine texture. A common error is adding cold eggs which can firm the butter , making it lumpy; use room temperature eggs when possible. Mix until smooth but do not whip aggressively, you want an even, glossy batter without excess air.
- Pour the dry ingredients into the bowl with the wet ingredients. With an electric mixer blend them together until a dough forms. Place the cookie dough in the refrigerator to chill for 30 minutes.: When you combine these dry elements, you will notice the powdery, slightly chalky scent of flour and the faint metallic edge of baking soda . Sifting or whisking ensures even distribution of leavening and salt so the cookies rise uniformly. A frequent oversight is failing to blend the dry ingredients, which can leave pockets of leavening that create uneven texture or bitter spots. Take a minute to whisk until homogenous.
- Preheat the oven to 350 degrees. Line a baking sheet with parchment paper.: The dry ingredients will look uniform, with no streaks of white flour . Proper blending means the leavening agents will activate evenly in the dough, producing consistent lift and chew. If you detect lumps of cream of tartar or baking soda, sift again; localized concentrations can cause odd flavors or irregular rising in individual cookies.
- Portion the cookie dough with a medium cookie scoop onto the prepared pan. Leave 2-3 inches between each cookie, about 8 cookies per pan.: As the dry mixture folds into the wet, the smell will shift to a richer, dough like aroma. The creeping thickness signals that structure is forming, and you should switch to low speed or use a spatula to avoid overworking gluten. Overmixing here will develop too much gluten, making the cookies tough rather than soft. Stop mixing when the dough just comes together and looks uniform.
- Bake the cookies for 11-12 minutes until they just start to brown on the bottom. Remove the cookies from the oven and place on a wire cookie rack to cool completely, about 5-10 minutes.: The dough should gather into a cohesive mass and feel slightly tacky but not sticky on your fingers. This tactile cue tells you the hydration is right for soft cookies. If it is too sticky refrigerate briefly, if it is dry add a teaspoon of milk at a time. A common pitfall is continuing to mix after the dough forms; excessive mixing warms and loosens the dough leading to excess spread.
- Once the cookies are cool to the touch, place a piece of parchment paper under each wire cookie rack.: Chilling firms the butter and helps the cookies hold their shape, promoting a soft center with slightly set edges. You will notice the dough become less pliable and easier to scoop after chilling. Skipping this step can cause the cookies to spread too thin and bake up flatter, losing the desired pillowy texture.
- In a medium-sized bowl add powdered sugar, lemon zest, lemon juice. Mix well, and then add the milk. Keep mixing until a glaze forms and all the sugar dissolves. You can taste the glaze and add a little more lemon zest if you really love lemon and it's not enough lemon flavor to your taste.: The oven will take a few minutes to stabilize at temperature and you may hear the faint hum of the element cycling on and off. Proper preheating ensures the cookies begin baking immediately at the correct rate, which affects rise and color. Putting cookies into an oven that is not fully hot can make them dense and oilier, so always wait until the oven reaches the set temperature.
- Dip the top of each cookie into the glaze, then place back on the wire rack to dry.: The sheet should be flat and the parchment smooth, creating a non stick base that promotes even browning on the bottom of the cookies. Parchment also helps them release cleanly and keeps the bottoms soft. Avoid greasing the sheet under parchment, which can make bottoms darker than desired.
- Allow the cookies glaze to harden completely, then enjoy!: Scooping gives consistent sizes so baking is uniform. You will hear a soft plop as each dough ball drops on the sheet, and the dough will hold a rounded shape. Leave 2 to 3 inches between each cookie, as they spread slightly. A frequent mistake is making uneven sizes, which leads to some cookies overbaking while others underbake.
- Leave 2-3 inches between each cookie, about 8 cookies per pan: The spacing ensures air circulates and cookies can spread without touching. Counting how many fit per pan helps you plan baking batches. Overcrowding the pan traps steam and produces soggy bottoms, so use multiple pans if needed.
- Bake the cookies for 11-12 minutes until they just start to brown on the bottom: You will see the edges become very slightly set and the bottoms take a light golden tint. The centers should still look a touch pale and soft, because the cookies will continue to set while cooling. A common misstep is waiting for the tops to brown; that will indicate overbaking and a drier cookie. Rely on the bottom color and gentle firmness at the edge.
- Remove the cookies from the oven and place on a wire cookie rack to cool completely, about 5-10 minutes: Transfer them carefully and you will feel the residual warmth releasing. The rack encourages air circulation so the bottoms do not steam and become soggy. Leaving them on the hot pan will keep baking the cookies from below, potentially leading to overbaked, firmer centers.
- Once the cookies are cool to the touch, place a piece of parchment paper under each wire cookie rack: This keeps your counters clean when glazing and catches any drips, making the process neater. The cool touch indicates the internal crumb has set, important so the glaze does not melt into the cookie. Glazing too soon will cause the coating to run and create soggy spots.
- In a medium-sized bowl add powdered sugar, lemon zest, lemon juice: The bowl will fill with a concentrated lemon perfume as you combine these elements, and the powdered sugar will look fluffy before liquid is added. This step forms the flavor backbone of the glaze, marrying sweet and bright notes. If the sugar clumps, sift it first to avoid gritty glaze texture.
- Mix well, and then add the milk: As you stir, the mixture will transform from powdery to glossy, and the sound of mixing becomes smoother. Add the milk slowly to control consistency and stop when the glaze is pourable yet thick enough to coat the back of a spoon. A glaze that is too thin will not set properly, while one too thick will be clumpy and hard to spread.
- Keep mixing until a glaze forms and all the sugar dissolves: The final glaze should be smooth and shiny with no visible granules. Taste and adjust with more lemon zest if you want extra citrus intensity. If the glaze is gritty, it likely needs more mixing or the powdered sugar was not sifted.
- You can taste the glaze and add a little more lemon zest if you really love lemon and it's not enough lemon flavor to your taste: The aroma will jump when you add more zest, and that tiny boost can make the glaze feel fresher and more vibrant. Keep additions small because zest also brings texture and a hint of bitterness if used excessively. Overzesting can overshadow the delicate sugar balance.
- Dip the top of each cookie into the glaze, then place back on the wire rack to dry: The glossy glaze will cling and form a thin shell that sets as it cools. The sound is quiet, and you will see the glaze settle into a smooth coat. If the glaze drips too much, let it thicken a touch before dipping again. Dripping glaze onto counters is messy; using parchment under the rack makes cleanup easy.
- Allow the cookies glaze to harden completely, then enjoy: The hardened glaze will form a slight crust while the cookie underneath stays soft. Let them sit undisturbed until the surface does not stick to your finger, which ensures a neat bite. Eating too early risks smudged frosting and a sticky mouthfeel.
Substitutions and Tips
These tips expand on the notes and provide practical variations and reminders so your batch of Soft Lemon Cookies comes out reliably soft and bright. Each tip starts with a quick bolded phrase for easy scanning followed by details you can apply right away.
- Use fresh lemons: Fresh lemon juice and finely grated lemon zest provide the most vibrant flavor. Bottled juice lacks the aromatic oils present in zest and fresh juice, so when possible zest before juicing to capture every bit of citrus perfume.
- Adjust glaze consistency: Add milk one teaspoon at a time to reach the desired thickness. If the glaze becomes too thin, stir in more powdered sugar in small increments until it thickens. This control helps you coat the cookies without the glaze running off.
- Prevent overbaking: Pull cookies when the bottoms are just starting to show color and the centers still look slightly soft. They will finish cooking as they cool, preserving the soft texture. Overbaking is the most common reason for dry cookies.
- Keep sizes consistent: Use a medium cookie scoop to portion dough so each cookie bakes evenly. Uneven sizes result in some cookies that are underdone while others are overdone, which is avoidable with a single-sized scoop.
- Try chilled dough handling: If the dough becomes too firm after chilling, let it sit at room temperature for a few minutes until scoopable. You want it firm enough to hold shape, but not rock hard.
- Clean zesting technique: Zest only the yellow part of the rind to avoid the bitter white pith. A microplane gives the most uniform, aromatic zest that blends smoothly into dough and glaze.
- Make ahead advice: You can prepare the dough up to 24 hours in advance and keep it chilled in the fridge; this often deepens flavor and makes portioning easier on baking day.
Accompaniments for Soft Lemon Cookies
These cookies are versatile and pair well with light beverages and casual gatherings. Below are serving ideas, storage notes, and occasion suggestions to help you present them beautifully and keep them fresh.
- Casual tea time: Serve the cookies with a pot of hot tea or a simple cup of coffee for a relaxed afternoon treat. The citrus lifts the drink pairing and the soft texture complements warm beverages.
- Brunch or light dessert: Offer the cookies on a brunch spread alongside fruit and yogurt. Their bright flavor makes them suitable as a finishing sweet without overwhelming the meal.
- Gift or bake sale: Arrange cookies in a box with parchment separators, and they travel well for sharing. Use decorative paper and a ribbon to present them as a thoughtful homemade gift.
- Storage for freshness: Keep the cookies in an airtight container at room temperature for up to a week, placing parchment between layers to protect the glaze. For longer storage freeze baked cookies without glaze, then thaw and glace before serving.
- Seasonal pairing: These cookies shine in spring and summer, paired with light seasonal berries or a citrus salad. Their bright profile fits sunny menus and outdoor gatherings.
- Occasion ideas: Use them for baby showers, casual weddings, or Ramadan evenings when a gentle, sweet cookie is appreciated. Their softness makes them easy to enjoy at any table.
FAQ
Conclusion
These Soft Lemon Cookies stand out because they balance fluffy, tender texture with bright citrus flavor, making them a comforting yet lively treat. I encourage you to try them because the method is forgiving, the ingredients are familiar, and small adjustments like chilling the dough or tweaking the glaze deliver reliably excellent results. Whether you bring them to a friend, serve them at brunch, or enjoy them with your afternoon tea, they are an accessible recipe that rewards a little attention to detail and tastes like a thoughtful homemade indulgence.
Soft Lemon Cookies
Equipment
- Electric Mixer
- Mixing Bowls
- Baking Sheet
- Parchment Paper
- Wire cookie rack
- Medium Cookie Scoop
- Microplane or grater
Ingredients
- 1 cup butter unsalted Cream together to provide a rich, tender base for the cookie dough; unsalted butter lets you control overall saltiness. Soften to room temperature before mixing to ensure even incorporation and a smooth texture.
- 1 cup white sugar Sweeten the dough and help with structure by creating air pockets when creamed with butter; white sugar promotes spreading and browning during baking. Measure accurately to maintain cookie balance and avoid overly thin results.
- 1/4 cup powdered sugar Lightly dust to add a subtle sweetness and help create a delicate crumb; powdered sugar dissolves quickly for a finer texture. Sift before adding to prevent lumps and ensure a smooth batter.
- 1 large egg Bind the ingredients and add moisture while contributing to leavening and richness; a large egg helps emulsify fats and liquids. Bring to room temperature for better incorporation and uniform texture in the cookies.
- 2 tablespoons lemon juice (see notes) Brighten flavor and add acidity which enhances overall lemon taste; the juice also contributes moisture to the dough. Add as directed to balance tartness and avoid making the dough too wet.
- 1 tablespoon lemon zest Infuse concentrated citrus aroma and potent lemon flavor; lemon zest contains essential oils that elevate freshness. Measure carefully and incorporate with the wet ingredients to distribute flavor evenly.
- 3 cups flour Provide the main structural framework and bulk for the cookies; all-purpose flour supplies gluten that gives shape and chew. Spoon and level when measuring to avoid packing and producing dense cookies.
- 1 teaspoon baking soda Leaven slightly to create lift and a lighter texture; baking soda reacts with acidic ingredients to produce carbon dioxide. Combine thoroughly with dry ingredients to ensure even rising and avoid metallic pockets.
- 1 teaspoon cream of tartar Stabilize and enhance leavening by providing additional acidity; cream of tartar helps create a tender crumb and can affect chewiness. Mix well with other dry components to distribute its effect evenly throughout the dough.
- 1/2 teaspoons salt Season and enhance flavor balance while strengthening gluten slightly; salt elevates sweetness and rounds flavors. Use the specified amount to prevent underseasoned or overly salty results.
- 4 cups powdered sugar Sweeten and thicken a finishing glaze or icing with a fine, smooth consistency; powdered sugar dissolves readily into liquids for a glossy finish. Sift before mixing and add gradually to control glaze thickness.
- 2 teaspoons lemon zest Concentrate citrus flavor in the glaze and reinforce lemon notes from the dough; extra lemon zest adds bright, aromatic intensity. Sprinkle or fold into the icing to maintain bursts of fresh lemon in each bite.
- 1 tablespoon lemon juice Acidify and thin the glaze slightly while adding fresh lemon tang; a small amount of lemon juice balances the powdered sugar’s sweetness. Add sparingly and taste as you go to reach desired glaze consistency and flavor.
- 5 tablespoons milk Thin and smooth the glaze while adding a touch of dairy richness; milk helps achieve proper pouring consistency for drizzling or dipping. Add incrementally to avoid an overly runny glaze and ensure it sets nicely on the cookies.
Instructions
- Place softened butter, white sugar and powdered sugar in a large bowl. With an electric mixer cream together the butter and sugar.: The bowl will smell faintly sweet and you will notice the granular texture of the sugar against the surface of the butter . I use a large glass or metal bowl so the beaters move freely and the ingredients aerate properly. A common mistake is using a bowl that is too small which prevents proper creaming and can leave lumps. If the butter feels greasy rather than pliable, it's too warm, and the mixture will not trap enough air, producing a denser cookie.
- Add one egg, lemon juice and lemon zest to the butter and sugar mixture. Mix together the wet ingredients with an electric mixer until smooth.: At medium speed you will see the mixture lighten and become pale, and there will be a faint whirring sound as air incorporates. Creaming creates tiny air pockets that promote tenderness when baked, so take this step seriously. Over mixing on high can warm the fats, causing a softer than desired dough and more spread in the oven. Stop when the texture is light and slightly fluffy, scraping down the sides so everything is evenly combined.
- In a second large bowl add flour, baking soda, cream of tartar and salt. Mix until blended well.: The wet bowl will give off a fresh citrus scent as you add the egg , lemon juice , and lemon zest . The egg contributes richness while the acid in the lemon juice interacts with leaveners later to refine texture. A common error is adding cold eggs which can firm the butter , making it lumpy; use room temperature eggs when possible. Mix until smooth but do not whip aggressively, you want an even, glossy batter without excess air.
- Pour the dry ingredients into the bowl with the wet ingredients. With an electric mixer blend them together until a dough forms. Place the cookie dough in the refrigerator to chill for 30 minutes.: When you combine these dry elements, you will notice the powdery, slightly chalky scent of flour and the faint metallic edge of baking soda . Sifting or whisking ensures even distribution of leavening and salt so the cookies rise uniformly. A frequent oversight is failing to blend the dry ingredients, which can leave pockets of leavening that create uneven texture or bitter spots. Take a minute to whisk until homogenous.
- Preheat the oven to 350 degrees. Line a baking sheet with parchment paper.: The dry ingredients will look uniform, with no streaks of white flour . Proper blending means the leavening agents will activate evenly in the dough, producing consistent lift and chew. If you detect lumps of cream of tartar or baking soda, sift again; localized concentrations can cause odd flavors or irregular rising in individual cookies.
- Portion the cookie dough with a medium cookie scoop onto the prepared pan. Leave 2-3 inches between each cookie, about 8 cookies per pan.: As the dry mixture folds into the wet, the smell will shift to a richer, dough like aroma. The creeping thickness signals that structure is forming, and you should switch to low speed or use a spatula to avoid overworking gluten. Overmixing here will develop too much gluten, making the cookies tough rather than soft. Stop mixing when the dough just comes together and looks uniform.
- Bake the cookies for 11-12 minutes until they just start to brown on the bottom. Remove the cookies from the oven and place on a wire cookie rack to cool completely, about 5-10 minutes.: The dough should gather into a cohesive mass and feel slightly tacky but not sticky on your fingers. This tactile cue tells you the hydration is right for soft cookies. If it is too sticky refrigerate briefly, if it is dry add a teaspoon of milk at a time. A common pitfall is continuing to mix after the dough forms; excessive mixing warms and loosens the dough leading to excess spread.
- Once the cookies are cool to the touch, place a piece of parchment paper under each wire cookie rack.: Chilling firms the butter and helps the cookies hold their shape, promoting a soft center with slightly set edges. You will notice the dough become less pliable and easier to scoop after chilling. Skipping this step can cause the cookies to spread too thin and bake up flatter, losing the desired pillowy texture.
- In a medium-sized bowl add powdered sugar, lemon zest, lemon juice. Mix well, and then add the milk. Keep mixing until a glaze forms and all the sugar dissolves. You can taste the glaze and add a little more lemon zest if you really love lemon and it's not enough lemon flavor to your taste.: The oven will take a few minutes to stabilize at temperature and you may hear the faint hum of the element cycling on and off. Proper preheating ensures the cookies begin baking immediately at the correct rate, which affects rise and color. Putting cookies into an oven that is not fully hot can make them dense and oilier, so always wait until the oven reaches the set temperature.
- Dip the top of each cookie into the glaze, then place back on the wire rack to dry.: The sheet should be flat and the parchment smooth, creating a non stick base that promotes even browning on the bottom of the cookies. Parchment also helps them release cleanly and keeps the bottoms soft. Avoid greasing the sheet under parchment, which can make bottoms darker than desired.
- Allow the cookies glaze to harden completely, then enjoy!: Scooping gives consistent sizes so baking is uniform. You will hear a soft plop as each dough ball drops on the sheet, and the dough will hold a rounded shape. Leave 2 to 3 inches between each cookie, as they spread slightly. A frequent mistake is making uneven sizes, which leads to some cookies overbaking while others underbake.
- Leave 2-3 inches between each cookie, about 8 cookies per pan: The spacing ensures air circulates and cookies can spread without touching. Counting how many fit per pan helps you plan baking batches. Overcrowding the pan traps steam and produces soggy bottoms, so use multiple pans if needed.
- Bake the cookies for 11-12 minutes until they just start to brown on the bottom: You will see the edges become very slightly set and the bottoms take a light golden tint. The centers should still look a touch pale and soft, because the cookies will continue to set while cooling. A common misstep is waiting for the tops to brown; that will indicate overbaking and a drier cookie. Rely on the bottom color and gentle firmness at the edge.
- Remove the cookies from the oven and place on a wire cookie rack to cool completely, about 5-10 minutes: Transfer them carefully and you will feel the residual warmth releasing. The rack encourages air circulation so the bottoms do not steam and become soggy. Leaving them on the hot pan will keep baking the cookies from below, potentially leading to overbaked, firmer centers.
- Once the cookies are cool to the touch, place a piece of parchment paper under each wire cookie rack: This keeps your counters clean when glazing and catches any drips, making the process neater. The cool touch indicates the internal crumb has set, important so the glaze does not melt into the cookie. Glazing too soon will cause the coating to run and create soggy spots.
- In a medium-sized bowl add powdered sugar, lemon zest, lemon juice: The bowl will fill with a concentrated lemon perfume as you combine these elements, and the powdered sugar will look fluffy before liquid is added. This step forms the flavor backbone of the glaze, marrying sweet and bright notes. If the sugar clumps, sift it first to avoid gritty glaze texture.
- Mix well, and then add the milk: As you stir, the mixture will transform from powdery to glossy, and the sound of mixing becomes smoother. Add the milk slowly to control consistency and stop when the glaze is pourable yet thick enough to coat the back of a spoon. A glaze that is too thin will not set properly, while one too thick will be clumpy and hard to spread.
- Keep mixing until a glaze forms and all the sugar dissolves: The final glaze should be smooth and shiny with no visible granules. Taste and adjust with more lemon zest if you want extra citrus intensity. If the glaze is gritty, it likely needs more mixing or the powdered sugar was not sifted.
- You can taste the glaze and add a little more lemon zest if you really love lemon and it's not enough lemon flavor to your taste: The aroma will jump when you add more zest, and that tiny boost can make the glaze feel fresher and more vibrant. Keep additions small because zest also brings texture and a hint of bitterness if used excessively. Overzesting can overshadow the delicate sugar balance.
- Dip the top of each cookie into the glaze, then place back on the wire rack to dry: The glossy glaze will cling and form a thin shell that sets as it cools. The sound is quiet, and you will see the glaze settle into a smooth coat. If the glaze drips too much, let it thicken a touch before dipping again. Dripping glaze onto counters is messy; using parchment under the rack makes cleanup easy.
- Allow the cookies glaze to harden completely, then enjoy: The hardened glaze will form a slight crust while the cookie underneath stays soft. Let them sit undisturbed until the surface does not stick to your finger, which ensures a neat bite. Eating too early risks smudged frosting and a sticky mouthfeel.
Notes
- Use fresh lemons: Fresh lemon juice and finely grated lemon zest provide the most vibrant flavor. Bottled juice lacks the aromatic oils present in zest and fresh juice, so when possible zest before juicing to capture every bit of citrus perfume.
- Adjust glaze consistency: Add milk one teaspoon at a time to reach the desired thickness. If the glaze becomes too thin, stir in more powdered sugar in small increments until it thickens. This control helps you coat the cookies without the glaze running off.
- Prevent overbaking: Pull cookies when the bottoms are just starting to show color and the centers still look slightly soft. They will finish cooking as they cool, preserving the soft texture. Overbaking is the most common reason for dry cookies.
- Keep sizes consistent: Use a medium cookie scoop to portion dough so each cookie bakes evenly. Uneven sizes result in some cookies that are underdone while others are overdone, which is avoidable with a single-sized scoop.
- Try chilled dough handling: If the dough becomes too firm after chilling, let it sit at room temperature for a few minutes until scoopable. You want it firm enough to hold shape, but not rock hard.
- Clean zesting technique: Zest only the yellow part of the rind to avoid the bitter white pith. A microplane gives the most uniform, aromatic zest that blends smoothly into dough and glaze.
- Make ahead advice: You can prepare the dough up to 24 hours in advance and keep it chilled in the fridge; this often deepens flavor and makes portioning easier on baking day.